


Fashions come and go, and right now there’s a big trend for eighties-style sci-fi sounds. Thanks to TV shows and films like Stranger Things and It Follows, those haunting, synth-driven soundtracks and songs are in-demand once again.
But getting it right can be a complicated task. How can today’s producers cook up chilling, spaced-out sound without the rare and expensive eighties-era hardware synths that made them famous? Native Instruments have teamed up with Ask.Video to show you how to get those spine-tingling retro sounds using software available in KOMPLETE 12.
For more information about Ask.Video’s KOMPLETE 12 courses, click here.
Laying down an analog monosynth bassline
Nothing beats MONARK when you want to get a classic analogue synth sound. MONARK is a monophonic synth, meaning you can only play one note at a time, making it a solid choice for a bass part. Load an instance of MONARK into your session and call up the Bass >> Submissive preset (patch number 24 in that bank).
The sound is a little dull and doesn’t make much impact, so click the ‘-’ (minus) sign under the Contour dial to make it a ‘+’ (plus) sign. This makes the sound brighter and brings out more of a ‘plucking’ contour. Bring down the master level (at the top right) to about 30% to tame the volume.

Here we’re using Ableton as our DAW so we can use its Arpeggiator to sequence a four-bar Cmin7 chord (C-Eb-G-Bb) into a sequence. Most other DAWs have their own MIDI sequencing effects, or you can program in a sequence yourself based on those four notes.
To create a bit more movement and keep things interesting, try automating the Filter Cutoff to rise and fall slightly over the four bars.

We can improve the bass sound by adding some distortion. Load in KOMPLETE 12’s DIRT effect and call up the Dark Bass preset from the Guitar + Bass bank. This adds just the right amount of grit to the bass to warm it up and help lift it in the mix.

Adding a percussive layer
Let’s add a cinematic percussion part to enhance to the rhythm and vibe of the bass. TRK-01 will help whip up some suitable rhythms. Call up the Ancient Impact preset from the Film Music bank. TRK-01 gives us both a drum and a bass part, but we just want the drums here, so click the speaker icon next to the name BASS to remove the bassline.
The drum part playing on its own is still quite loud, so reduce the master VOL to -7.5. With TRK 01, you don’t have to sequence any MIDI; as long as the transport is running, you will hear the part.

Filling out the mix with a haunting string pad
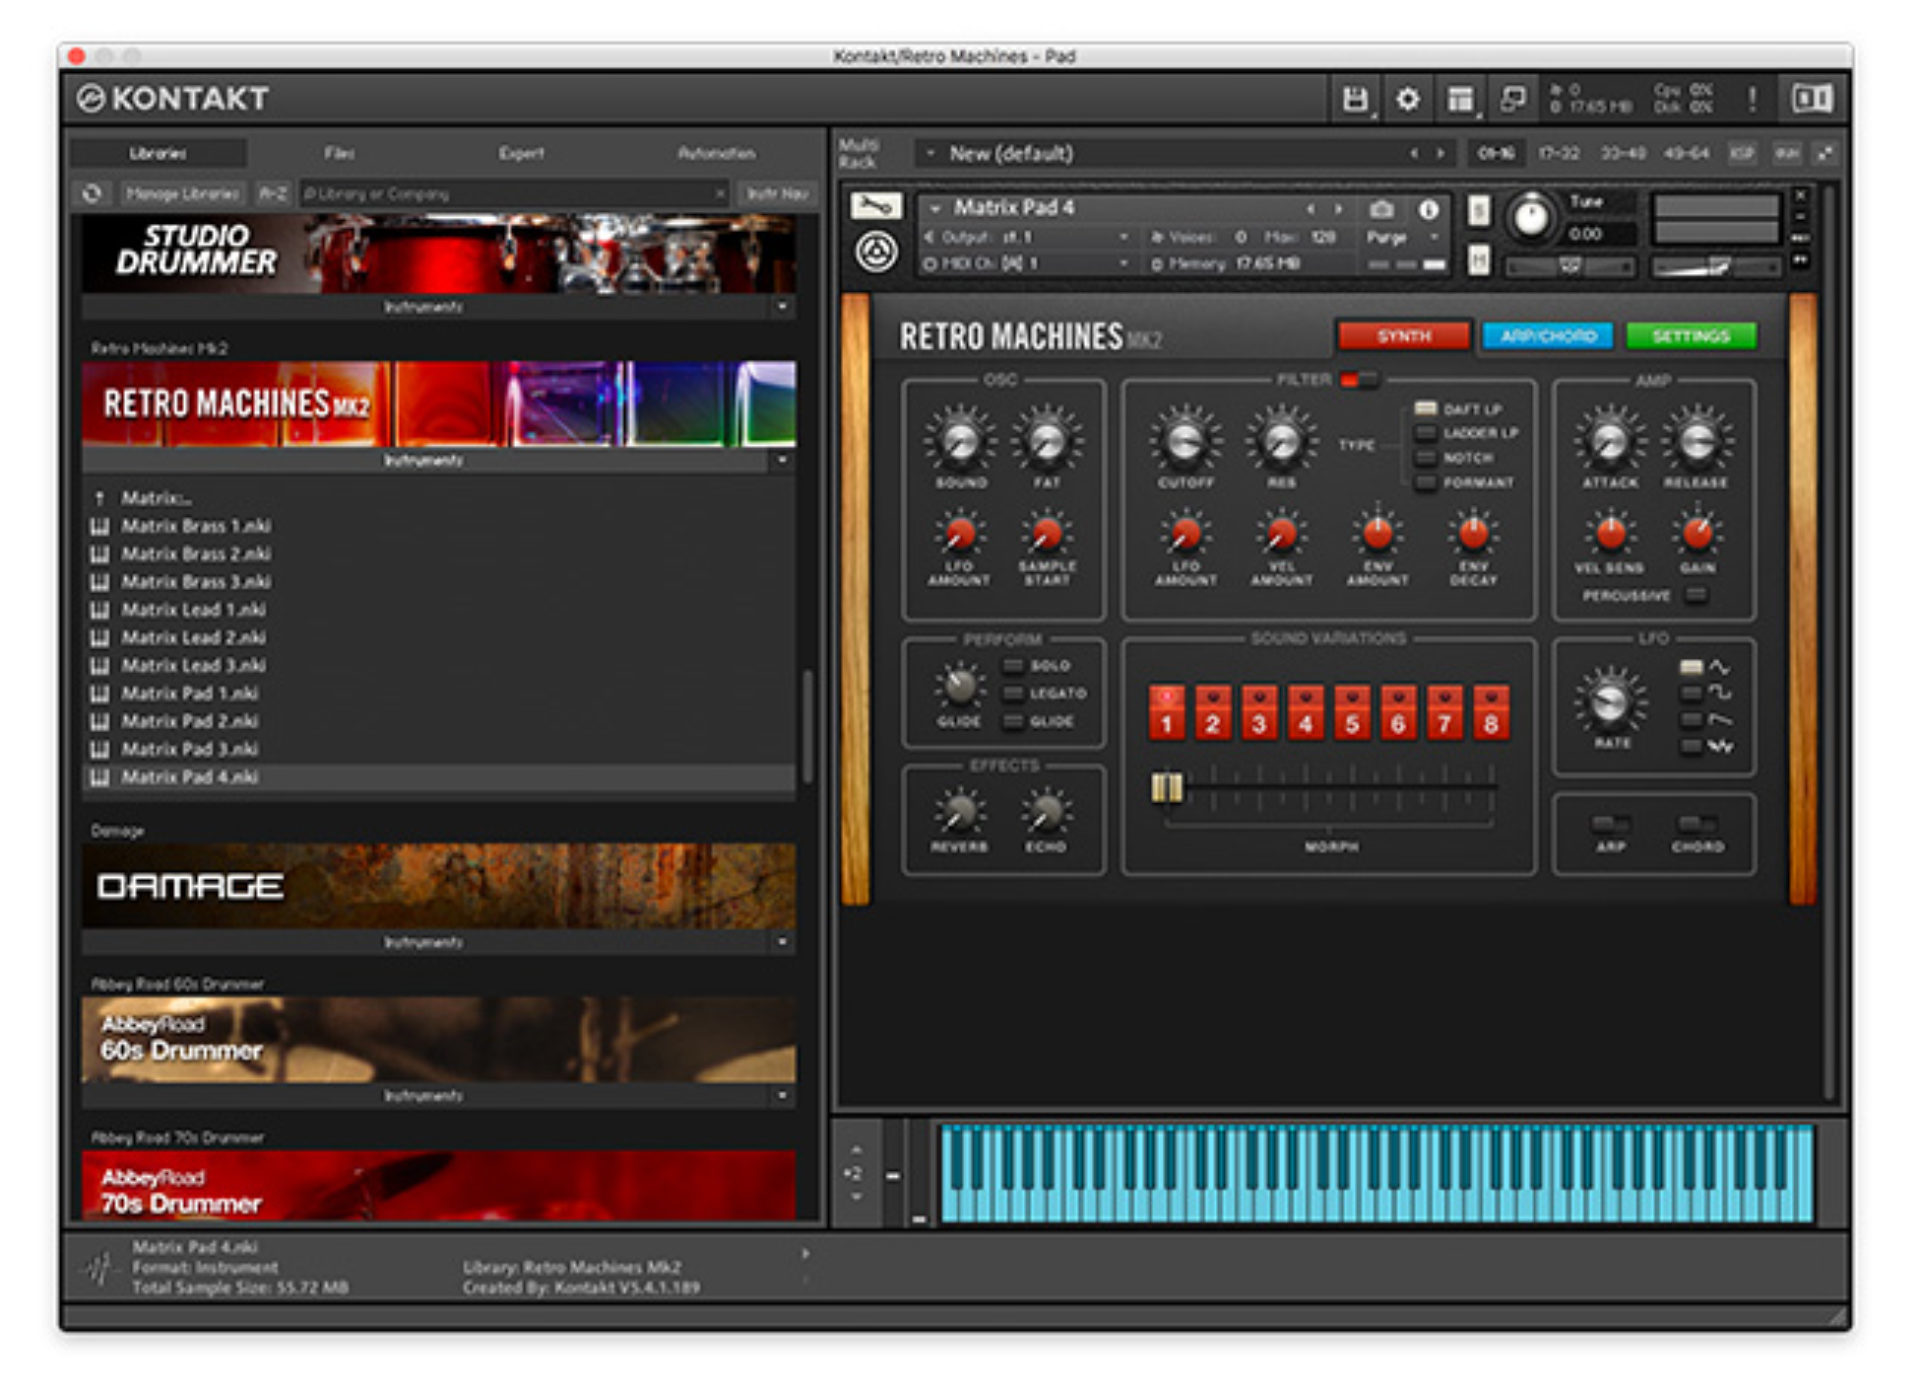
Some of the most sought-after hardware synths from the eighties are known for their polyphonic chordal sounds. We can get some of these classic sounds in software using RETRO MACHINES MK2, which loads into KONTAKT 6. Open the Matrix folder and load in Matrix Pad 4.nki. Reduce the volume down to -4.0.
This sound is still a little cold, and it doesn’t sit so well with the rest of the parts playing alongside it. Let’s give it some more impact and energy using DRIVER, and its Crispy Hats preset. Even though this preset was created for hi-hats, it works well on this pad part.

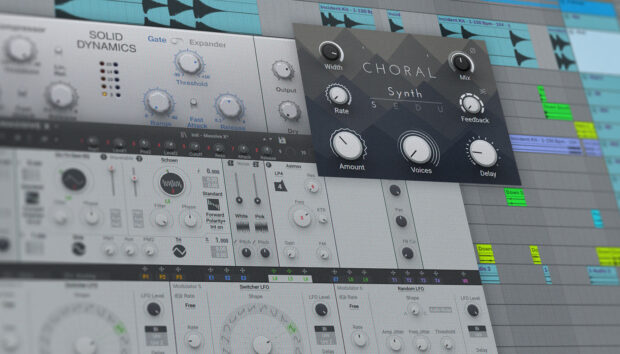
The pad part needs some more movement and tonal complexity, and a chorus would be the perfect effect for this task. KONTAKT’s in-built chorus effect is good, but for a more customizable, dedicated effect, we turn to CHORAL instead. Load in the Classic Chorus II preset to add a nice, slow warble to the sound.

Lastly, it’s time to wash this pad in reverb using the RC 48 effect. This plugin emulates a classic digital reverb unit released in the late eighties, proving that not everything in the eighties was analog! Load up the Small Church preset, from the Classic Halls bank, to add a real sense of space to the pad. Immediately, the sound may be too washed in reverb, so switch to Mix mode, which lets us bring back some of the dry sound, and set the Dry/Wet dial to 50%.

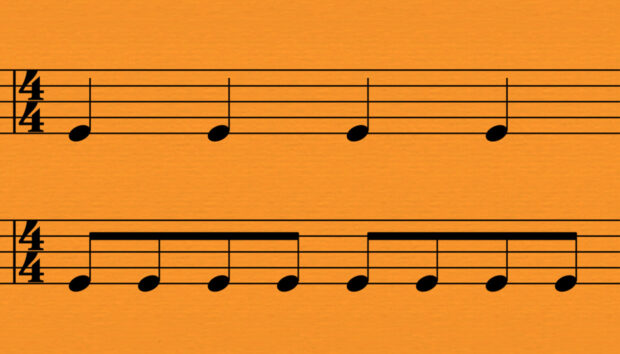
The four-chord pattern shown below works very well over the repeating bass arpeggio, so copy this or add your own pattern.

Developing the loop with more elements
We have a good foundation over which to place a melodic part, but it’s always great to consider layering additional synth parts that either add to the texture or the rhythm. FM8 is a great source of diverse sounds, and it’s based on another 80s synth classic. Copy the String Pad’s MIDI progression onto a track with FM8 loaded. Load in the Attack Loop preset, which you can find by typing the term into the search section of the Browser.

This adds an interesting rhythmic element to the sequence, but the low end of the part is clashing with the other elements of the loop. Head over to the Effects tab in FM8 and turn ON the Shelving EQ. Reduce the low shelf completely to practically remove the bass from FM8’s output. Since this part is also a bit too loud, we can reduce the Volume on the Shelving EQ to 35. You will notice the part is still audible in the mix and no longer gets in the way of the chords or the bass part.

To make this rhythm even more interesting and customized, let’s load in the FLAIR effect. FLAIR is a flanger, but at some extreme settings it can add rhythmic movement to a sound. Load in the Chip Flair preset from the Resonator bank. In isolation you should hear how it affects the existing rhythm.

The lead
We now have a great foundation to add a melody on top of. Usually for film soundtracks, the melody should stay under-the-radar, keeping the focus on the emotional content of the music and the action in the film. A repeating arpeggiated pattern would work best.
For this, we copy the same arpeggiated pattern from the bass part, changing only one note – swapping out the highest Bb for the D immediately above it. If we then move the whole part up by two octaves (ie, transpose it), it will be prevented from clashing with or drowning out the bass. Make sure to place the same bass arpeggiator on this new lead part.

To provide some processing for the sound, we turn to a few REAKTOR BLOCKS. Load in the Blocks ensemble called Monark Micro. It uses some MONARK modules and again gives us that classic analog tonality. Load in the Soft Cream preset. This Reaktor Block ensemble has a reverb module, but it doesn’t give it as spacy a sound as we’d like. Time to tweak the Diffusion & Size parameters to their maximum settings. The sound is not washed out in reverb but at the same time has this nice long tail to it. This is mainly because the Mix is set quite low. The sound remains quite bright, though, so let’s bring down the Cutoff on the Monark Filter to about 10 o’clock.

The sound is a bit heavy on the lows, so using a simple filter or EQ from your DAW, high-pass this lead sound. A setting of about 192Hz and a 24dB/oct slope works quite well. Finally, try automating that filter’s Cutoff to add a bit of subtle movement to the part.

The final loop and final tweaks
You can listen to our version of the final loop above. Aside from minor level adjustments, the balance is quite good, since we’ve been mixing the loop as we go, to an extent. Working this way helps speed up the workflow and also create a clean and balanced mix.
For more information about Ask.Video’s KOMPLETE 12 courses, click here.
Related articles
-
Understanding time signatures in music
Unlock creativity with time signatures in music. Learn what time signatures are, common examples of popular time signatures, and how…
-
Synth pads: how to create atmospheric textures in your music
Learn everything you need to know about synth pads, with a step-by-step guide to creating this crucial electronic sound to…
-
Sub bass: how to add that deep tone to your tracks
What is sub bass? Learn how to make sub bass and how to use sub bass effectively in your productions.
-

How to use tempo in music to create dynamics and shape emotions
Learn what tempo and BPM mean in music, how to calculate the BPM of your song, and how to use…
-

What is EDM music and how to make it
Discover what is EDM music and master how to make EDM with this comprehensive guide, featuring essential production techniques and…
-

Arranging for woodwinds: 5 essential tips for a rich, versatile sound
Knowing how to arrange woodwinds will make you a better composer. Read here to learn 5 essential woodwind arrangement tips.
-

How to make a melodic bass track with emotive and powerful bass lines
Discover what is melodic bass music, its unique sound, and learn how to make melodic bass music with practical tips…
-
5 jazz chord progressions to transform your songwriting
Jazz chord progressions can help make your music more colorful and exciting, no matter what genre you make. Discover five…