


Driving, mysterious, and hypnotic, dark techno is a style of electronic dance music fueled by pounding drums, insistent basslines, and moody FX. In this guide on how to make dark techno, we’ll look at how you can create all these elements and arrange them into a complete track.
What is dark techno music?
Dark techno is a subgenre of electronic dance music, typically involving heavy four-to-the-floor kick drums, highly rhythmic percussion, and chugging one-note bass lines.
What do people mean when they say dark techno?
Moody, sinister vibes have been an important part of techno since its inception, so there are many techno tracks that are dark. However, when people use the term “dark techno” it’s likely they are talking about the contemporary subgenre that includes such artists as Adam Beyer, Charlotte de Witte, and Amelie Lens.
How many beats per minute is dark techno?
Dark techno is generally in the 120-150 BPM range, though it can be much faster depending on the producer.
Jump to these sections:
- Making a beat with one-shots
- Layering loops
- Adding a lead synth
- Creating a bassline
- Making an atmospheric pad
- Sequencing a stab
- Creating a snare roll
- Arrangement
- Mastering
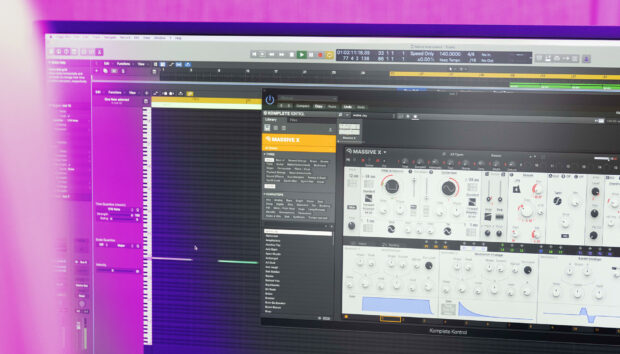
To follow along with this tutorial you’ll need Native Instruments Nacht Play Series instrument and Void Eclipse Expansion, both of which can be used via the free Komplete Kontrol plugin.
1. Making a beat with one-shots
We’ll begin by making a drum beat. Set your DAW’s project tempo to 135 BPM.

On a MIDI track, load up Komplete Kontrol. We’re going to make our drum beat using one-shots from Void Eclipse, so click the One-shot button, then select the Void Eclipse expansion and set the Sound Type to Drums.

Now the list of available samples will just show Void Eclipse’s one-shot drum sounds. Clicking the name of a sound will play it, and this is a good way to find samples that you like. Let’s start with the most important element of any dark techno track, a heavy kick drum. Double-click Kick Technamine to load it up.

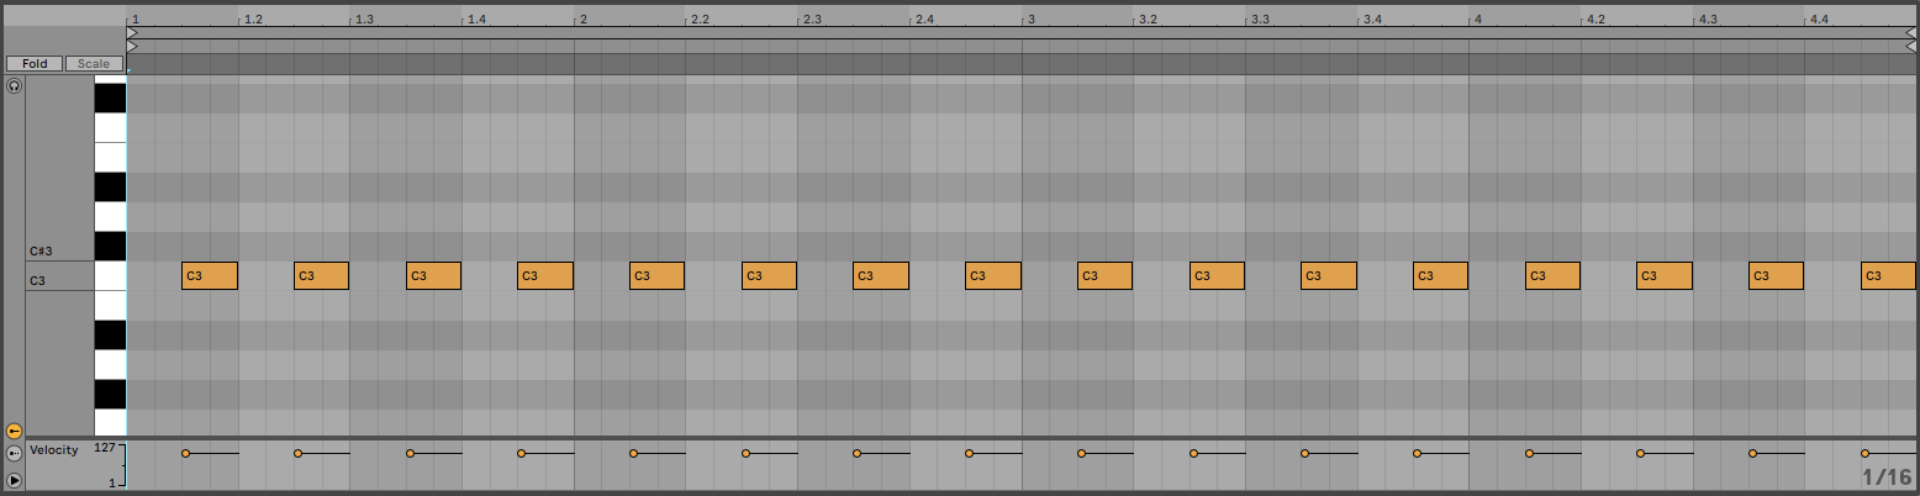
Create a four-bar MIDI clip, and make a sequence that plays C3 on every beat with a velocity of 100. We’ll use this velocity value for everything in this walkthrough.

Turn this track down to -6dB to give us some headroom to add other elements to the mix.

We can build up this drum beat by adding more one-shot elements. Add another MIDI track, add Komplete Kontrol, click the One-shots button and search for ‘OpenHH Doom’ in the text search field. Double-click OpenHH Doom to load it up.

Sequence this instrument to play on every other 8th note.
Now, set this track to -8.5 dB.

Next, we’ll add a closed hat track which we can use to fill out the beat’s top-end. Load up ClosedHH Genial 1 on a new track.

Sequence this to play on the first two 16th notes of each beat.
Set this track to -12 dB.

The final ones-shot element we’ll add is a clap. This time let’s go for Clap Maelstrom.

Sequence this to play on every other beat.

Set this track to -6 dB.

This clap has a loud compressed tail. Let’s tame it a little using Komplete Kontrol’s amplitude envelope functionality. Set the Envelope Type to ADSR, and turn down the Sustain to 0.70.

We now have a solid beat to use as the foundation for our track.
2. Layering loops
Let’s quickly add some top-end interest to our drum with some loops. Add a new MIDI track, and this time in Komplete Kontrol, click the Loops button and search for ‘Ride[136] Fatale’. Double-click the sample to load it.

Sequence this to play for the whole four bars.

Set this track to -11.4 dB.

This is very subtle, but it adds a touch of energy to the beat, and when it comes time to arrange the track we’ll be able to add or remove this element to modulate the track’s energy level.
On a new track load up the Top[140] Vapor loop.

Again sequence this to play for all four bars.

Set this track to -22.2 dB.

Our beat is now packed with energy, and we’re ready to begin adding some musical elements.
3. Adding a lead synth
Let’s use Nacht to add a lead synth sequence. On a new audio track, load up Komplete Kontrol, and this time keep the Instrument option selected and search for ‘Night Watch’. Double-click the Night Watch preset to load it up.

This instrument automatically plays a looped sequence. Getting your synths to sound good alongside your drums pitch-wise is an important part of techno music production, and in this case, the key of G works well. Sequence the preset to play on G1 for the whole four-bar loop.

Set this track to -8 dB.

This sounds okay, but that last note of the sequence is a touch dramatic for the feel we’re going for. Let’s tweak it. In Nacht click the Seq button to bring up the instrument’s sequencer.

In the Pitch step-sequencer, turn down the final note to a minor 2nd. This gives us a more subdued, funkier feel.

That sounds great! Our track is developing a musical identity. Let’s add a bassline next.
4. Creating a bassline
On a new track, load up the Wachstunden preset.

This is also a sequenced instrument, but in this context we want to make a simple, monotone bassline. Turn the sequencer off by clicking the power button next to where it says Seq.

Now let’s give this tone a more sinister feeling by turning the Cutoff down to 30%, and the Reverser up to 21%.

Set this track to -6 dB.

Now sequence the preset to play on the first, fourth and seventh 16th notes on G0. Repeat this pattern out for the whole four-bar sequence.

This bass line adds a hypnotic low-end groove to our track.
5. Making an atmospheric pad
With the main elements of our track in place, it’s time to add some parts that we can use to enhance the arrangement. First let’s add an atmospheric pad. On a new track, load up Komplete Kontrol and this time search for the ‘Velvet Noise’ instrument preset.

This is a sinister pad that will provide an uneasy, futuristic vibe. Set this track to -11 dB.

Sequence the preset to play on G2 for the full four bars.

6. Sequencing a stab
Let’s make a stab sound to add an emphatic punch to the start of our loop. This time, load up the Alptraum preset.

Set this track to -10 dB.

Sequence this to play G0 on the first beat of the first bar.

In context this sounds a touch try, so let’s turn up the preset’s reverb effect. Click the FX button to bring up the FX parameter panel.
Click the Reverb effect, and turn up the Wet knob to 28%.

7. Creating a snare roll
The final element we’re going to add is a snare roll, which will help us make a satisfying arrangement. On a new track, select the One-shot button in Komplete Kontrol and search for the ‘Snare Wrecking’ sample. Double-click the sample to load it.

Set the track to -3 dB.

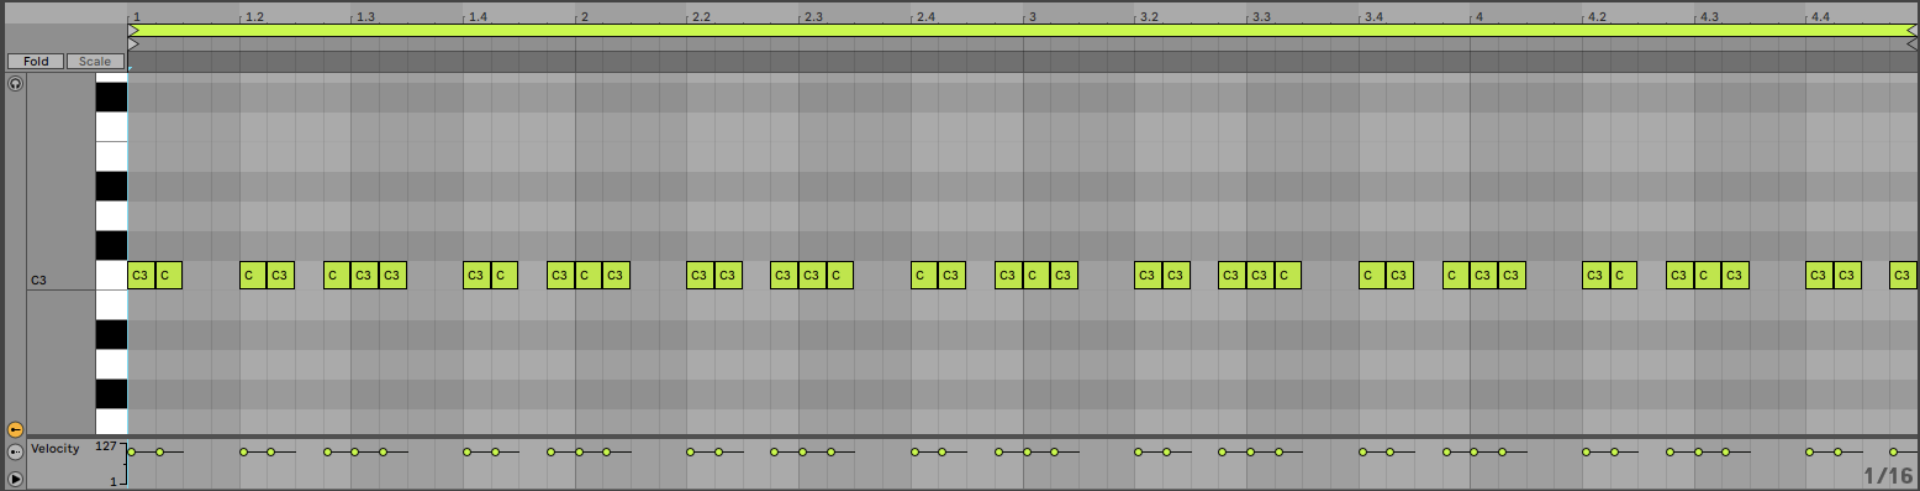
Sequence the snare, copying the 32nd note pattern we’ve used here.

This leads nicely into the stab at the start of the bar, helping enhance the rolling groove.
8. Arrangement
Here’s an example of an arrangement you can use for your track. To keep things progressing, elements are added or removed every eight or sixteen bars. There is a short breakdown at bar 41, where the kick is removed, but the bass remains. This keeps the track’s momentum going rather than providing a break.

Automation is a useful technique in dark techno tracks. Here, we’ve automated the Cutoff macros on the lead and bass and the Reverser effect on the bass to create dynamic movement through certain sections of the track. This helps create and release tension, ensuring the track doesn’t lose energy or become stale.

9. Mastering
Let’s quickly create a master with iZotope Ozone 11. Add the plugin to the project’s master channel and click the Assistant View button.

Ozone 11 will ask you to play back the loudest part of the track. Play back from bar 49, and the plugin will create a custom mastering chain for your project. You can use the Detailed View to make adjustments to this if necessary.

Start making dark techno with Nacht and Void Eclipse
Here we’ve seen how you can make your own dark techno song with Nacht and Void Eclipse. If you’d like to learn more about making electronic music, check out How to make techno and Native Instruments’ range of techno and house expansions.
Related articles
-
Statement from Nick Williams, CEO of Native Instruments
Native Instruments provides an update on its recent restructuring process.
-
How Massive helped Johnny Gorillas shape two creative worlds
Johnny Gorillas shares how mastering Native Instruments Massive shaped his solo work and his work with mono sky, creating consistency…
-
The best sound design plugins from Native Instruments
Discover the best sound design plugins for music, film, and games, including top synths, effects, and creative tools from Native…
-

Taming the monster: behind the soundtrack of K-Pop Demon Hunters
Discover how GRAMMY-nominated engineer Curtis Douglas and producer Lindgren used iZotope Ozone, RX, and Kontakt to craft the high-impact, polished…
-

The best DJ effects: a complete list for beginners and pros
Discover the best DJ effects for every mix, from essential filters and delays to creative tools like the Beatmasher. Learn…
-

Weird by design: HAAi on the limitless potential of Absynth 6
Discover how the Australian artist HAAi uses the new engine in Absynth 6 to create layered atmospheres and immersive soundscapes…
-
$0 to pro studio: your first 5 music production tools that replace $3,000 of gear
In this blog, you’ll learn how to replace hardware gear with VST plugins and get a cheap pro home studio…
-
Noha on groove, texture, and using Guitar Rig to shape emotion
Italian producer Noha explains how Guitar Rig, modulation, and subtle distortion shape his minimal yet emotional sound in “The Place.”…