Podcasting is everywhere. The natural evolution of radio in the streaming age, podcasting has become a ubiquitous medium for sharing stories, discussing topics of interest, connecting with audiences around the world, and developing parasocial relationships with strangers.
If you’re considering starting your own podcast, this guide will walk you through the essential steps for how to make a podcast.
Jump to these sections:
- Planning your podcast
- Podcast equipment and software
- Recording your podcast
- Editing and mixing
- Branding and marketing
- Uploading and distribution
Follow along with this tutorial using VEA, an AI-powered voice recording enhancer that helps you get great-sounding podcast audio in seconds.
1. Planning your podcast
Before diving into any technical aspects of podcast production, you must take a look at the bigger picture. You should define the purpose of your show, select a format, and think about some sort of release schedule.
Here are some questions to help you get going:
- What is the main topic or theme of your podcast?
- How is it different from similar podcasts?
- Who is your target audience
- How are you going to get their attention?
- What kind of show are you producing?
- How long do you want each episode to be?
- How frequently do you plan to release new episodes?
- What’s your backup plan for banking episodes should something happen to mess up your schedule?
These questions are important. After all, there are thousands of shows and hundreds of formats already in existence: two-way interview shows, panel discussions, monologue rants, highly-produced narrative non-fiction, audio drama – you’re spoiled for choice.
Having a clear vision for your podcast will help guide your content creation process and attract the right audience. It will set you up for success.
2. Podcast equipment and software
Anyone with a phone can produce a podcast that sounds like garbage. If you want to offer something that sounds good, you’ll need to invest in a few pieces of equipment.
The microphone
A good microphone is crucial for capturing clear and professional-sounding audio. Some people go with USB mics for ease of convenience. These are acceptable when you’re recording alone in a quiet room. If you’re ranting like a famous comedian, or you’re recording voice-over that will be edited later into a larger piece, a USB microphone might very well work.
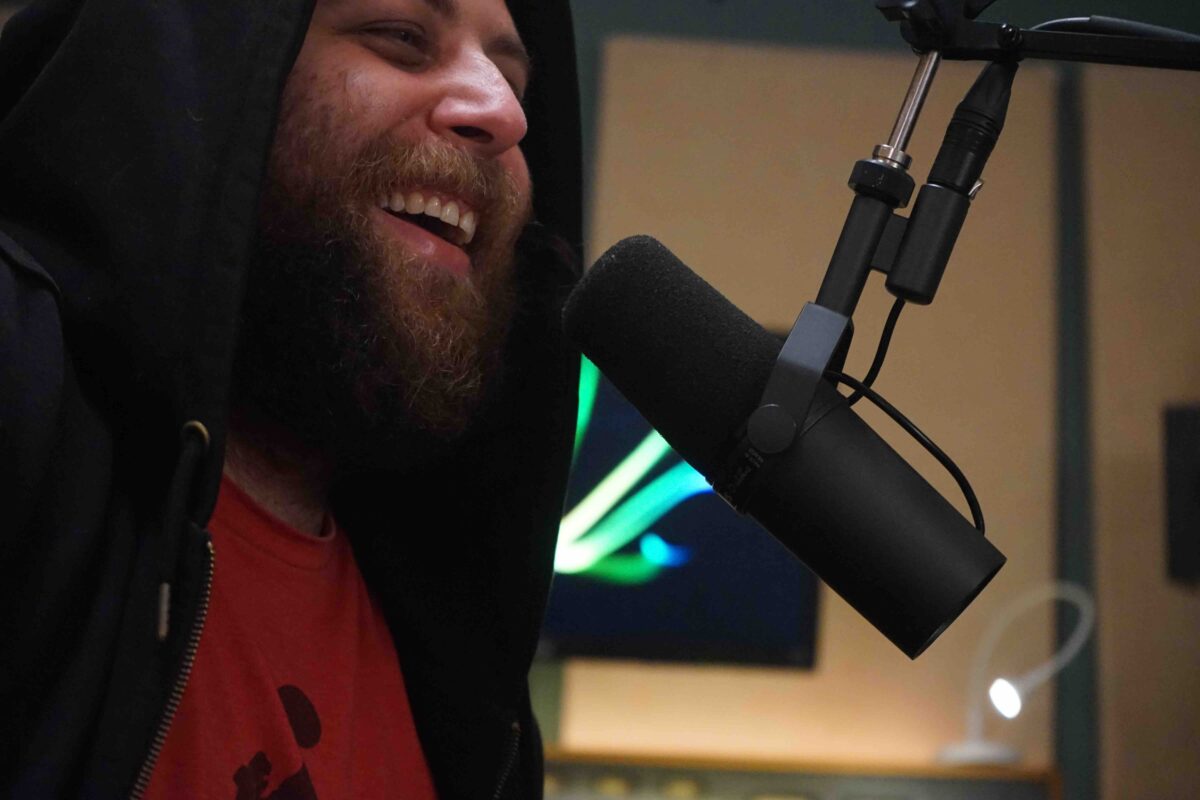
If you’re recording with a group of people, a USB microphone isn’t suitable for your needs. It might not be suitable for solo voiceover work anyway depending on the condition of your room: noisy air conditioners and loud computer fans are a problem for these sensitive microphones. Instead, go with a dynamic microphone like the Shure SM7B instead—it will pair nicely with an audio interface, and be less sensitive to your room’s conditions.
The audio interface
An audio interface acts as a bridge between your microphone and computer, ensuring high-quality analog-to-digital conversion. It also provides additional features such as preamp gain control and headphone monitoring.
If you’re using a USB microphone, you won’t need an audio interface—but you’ll be limited: you won’t be able to have in-person guests on your show, and you’ll need fancy software to record audio with guests over the internet. Consider these options:
Native Instruments Komplete Audio 1
The Komplete Audio 1 by Native Instruments is a stellar entry-level audio interface. It provides a streamlined solution for solo podcasters or musicians, featuring one XLR microphone input with a preamp and phantom power. Additionally, it offers a dedicated 1/4″ input, making it versatile for various recording needs. The ease of use and high-quality audio make it an excellent choice for beginners or those seeking a portable and compact option.
Native Instruments Komplete Audio 2
Building on the foundation of the Komplete Audio 1, the Komplete Audio 2 offers a bit more flexibility. With two combo XLR/1/4″ inputs, you can record two microphones simultaneously, making it perfect for standard two-person podcasts.
Native Instruments Komplete Audio 6
The Komplete Audio 6 steps up the game with more inputs and comprehensive control. Featuring four combo XLR/1/4″ inputs, it caters to podcasters seeking to record larger groups or multiple instruments simultaneously. Additionally, the interface offers multiple headphone outputs, so you and your guest can listen while recording.
Accessories
Along with the microphone, you’ll need a mic stand or boom-arm attachment to keep the mic steady, and often a pop filter for mitigating plosives is a solid investment.
Headphones
A good pair of closed-back over-ear headphones is a must for podcasting. Without headphones, you can’t hear what the audio is going to sound like. It’s as simple as that.
Any audio played back through the computer speaker during the recording will be recorded by the microphone – and trust me, you don’t want that bleed.
This isn’t the case with closed-back headphones, which keep sound from leaking out the ear cups and into the mic.
Headphones become invaluable during editing as well. You’re much more likely to catch an audio error with headphones, and these errors will need fixing because the majority of your listener base will be using headphones.
Common headphones used in podcasting include the Sony MDR 7506 and the Audio Technica ATH-50x. Both are great and relatively inexpensive.
Software
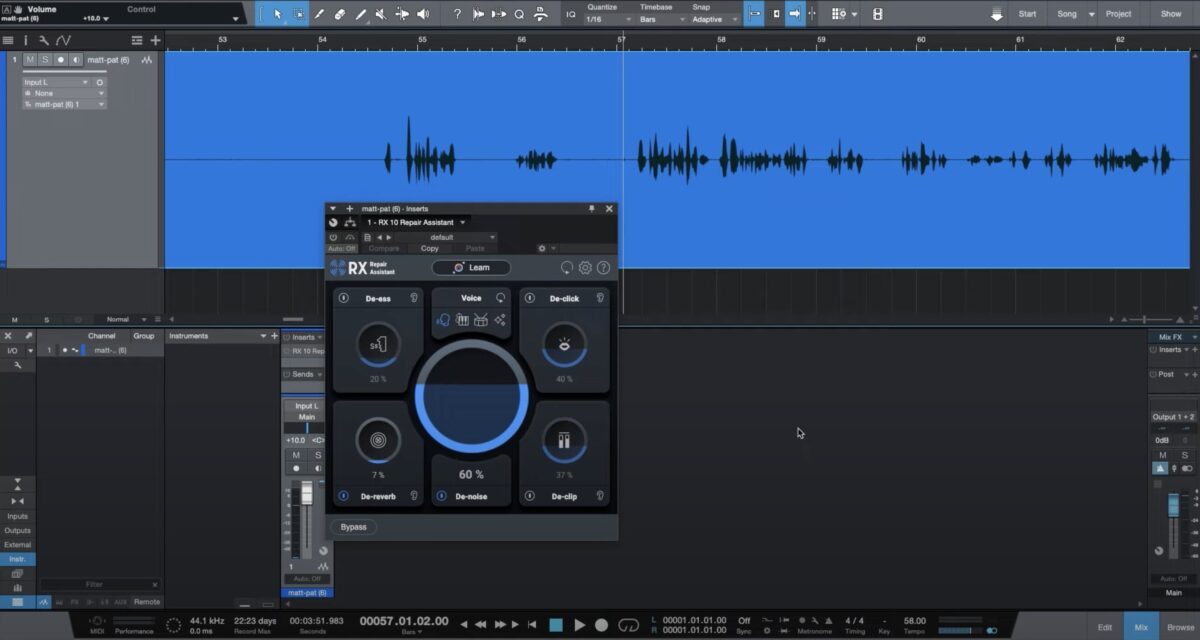
To capture and edit your podcast episodes, you’ll need a DAW – a digital audio workstation. You’ll also want audio tools to help with editing and mixing. These are commonly called “plugins.”
Your DAW
A DAW is a program used to record, edit, mix, and master audio. Consider how heavily you want to get into audio production before choosing a DAW, as every DAW is different.
Audacity is free and lots of beginners use it. However, if you want something both cheap and full-featured, Reaper is a good option.
In the professional world, Pro Tools continues to be an industry standard. If your podcast has a lot of sound design elements, consider Logic Pro X, Studio One, or Cubase.
Plugins
While learning how to produce a podcast, you need plugins within the DAW to EQ, compress, and otherwise manipulate audio to make it sound the best it possibly can. Your DAW will come with a few, but usually the third-party options sound better.
If you’re looking for something quick and easy for mixing your podcast audio, consider iZotope VEA. VEA leverages tech in Nectar, Ozone, and RX to intelligently clean, mix, and level your vocals.
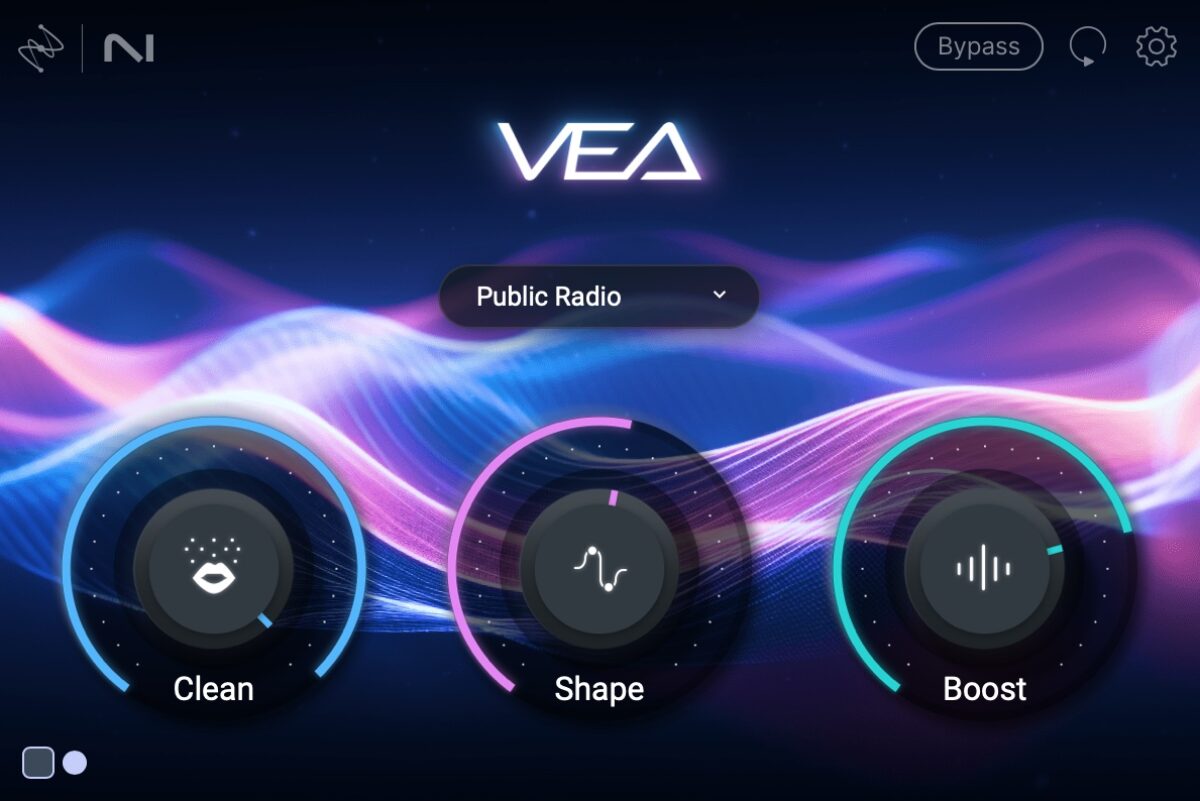
Using VEA on your vocals couldn’t be simpler. Like many tools from iZotope and native instruments, VEA listens to your audio and gently helps guide it to a target curve. You’ll find curves for all sorts of podcast stylings in VEA, such as Public Radio, True Crime, or Garage Pod.
VEA is a powerful tool that can make your voice recordings sound better in seconds:
Content creator and audio engineer De Ana uses VEA with three different types of recording devices. Take a look to see how easy VEA is to use.
3. Recording your podcast
Once you have all the necessary equipment set up, it’s time to start recording your podcast episodes. Here are some tips for a successful recording session:
Find a quiet location with minimal background noise
The room you use for recording will have the biggest impact on the overall sound. It shouldn’t be too small, as reflecting surfaces will bounce sound around. Customary to conventional wisdom, a closet is usually a horrible idea.
The room shouldn’t be too big either, or the recording might feel too lively and reverberant.
The average living room is a good space, with carpeted floors, bookshelves, couches, and other common household pieces of furniture helping to deaden the room a bit. Stay away from windows if you can. Turn all extraneous noise-making devices off if you can (air conditioners, heaters, etc). Get away from fridges, which make a ton of noise as well.
Depending on the type of podcast and your target audience, you can get away with only minimal room treatment. Some of the biggest hits on Patreon are recorded in common living rooms, with mics you’d often find at a comedy show, such as the Shure SM58
Of course, nothing beats a well-treated room. Articles on room treatment abound, such as this one.
Use proper microphone technique to achieve optimal sound quality
Mic placement is an important part of making sure your podcast recording sounds professional. A good rule of thumb is to place your microphone two inches (or four fingers’ width) from your face. Any closer and you’ll incur unwanted plosives or sibilance. Any further away and you’ll likely get too much room noise.
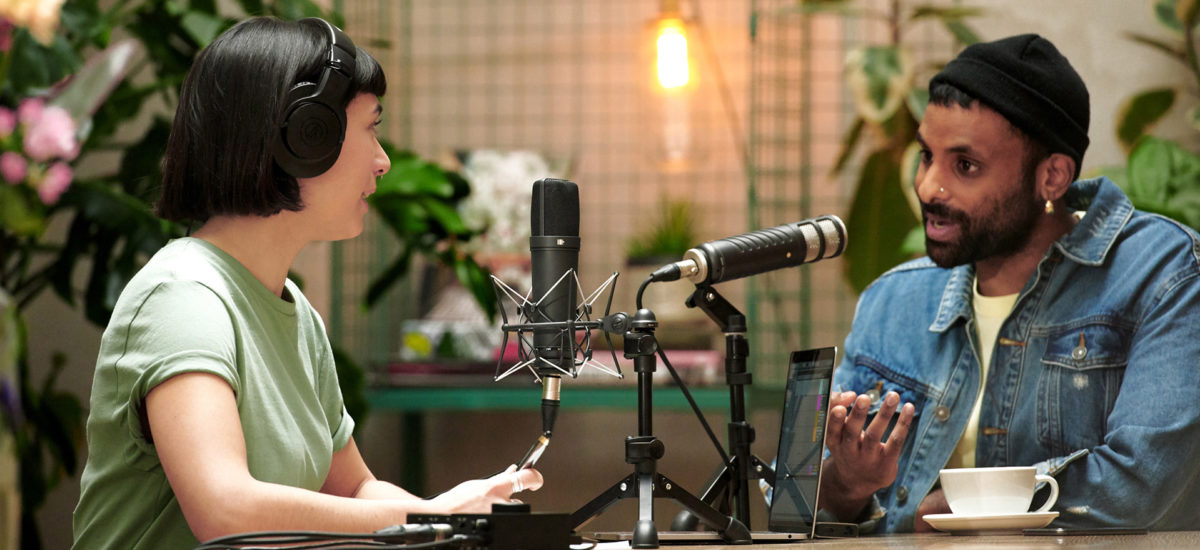
If you’re recording multiple people at once during the podcast, it’s best to select directional dynamic microphones, as they will be less sensitive to bleed. With directional mics, you and a guest can face each other as you would over lunch and expect minimal interference from one mic into another.
Create a comfortable environment for yourself and any guests
Creating an inviting and relaxed atmosphere goes a long way to getting good content out of your guests. Begin by curating a calm space, free from disruptions and background noise. Your choice of location can significantly influence the overall ambiance – opt for a room that strikes a balance between spaciousness and coziness.
4. Editing and mixing
After the recording comes the edit and mixing stage, which is an essential part of the processs. Roughly speaking, this is how it goes:
1. Shape the content
Professional podcasts often go through a phase called the paper cut. This is where recordings are transcribed, edited, and assembled on paper (or in something like a Google Doc) so that the podcast can have a better shape to it.
Once you see everything on paper, you can easily decide which sections to cut, or if one piece in the conversation would work better elsewhere in the episode.
Ignore the paper cut at your own peril. The clarity it provides is paramount.
2. Remove unwanted background noise
If someone is recording in a noisy environment, it is essential to remove unwanted background noise. You can start by using a tool like iZotope VEA to quickly remove background noise, but if there’s still residual noise after using it, iZotope RX is the industry standard tool for this job.
Take this voice recording, for example:
We can open up RX Spectral De-noise, loop that bit of room-tone before he starts speaking, and hit learn.
Then, listening to the audio, we play with our sliders until we get the maximum effect with minimal trade-offs. I’ve arrived at this setting:
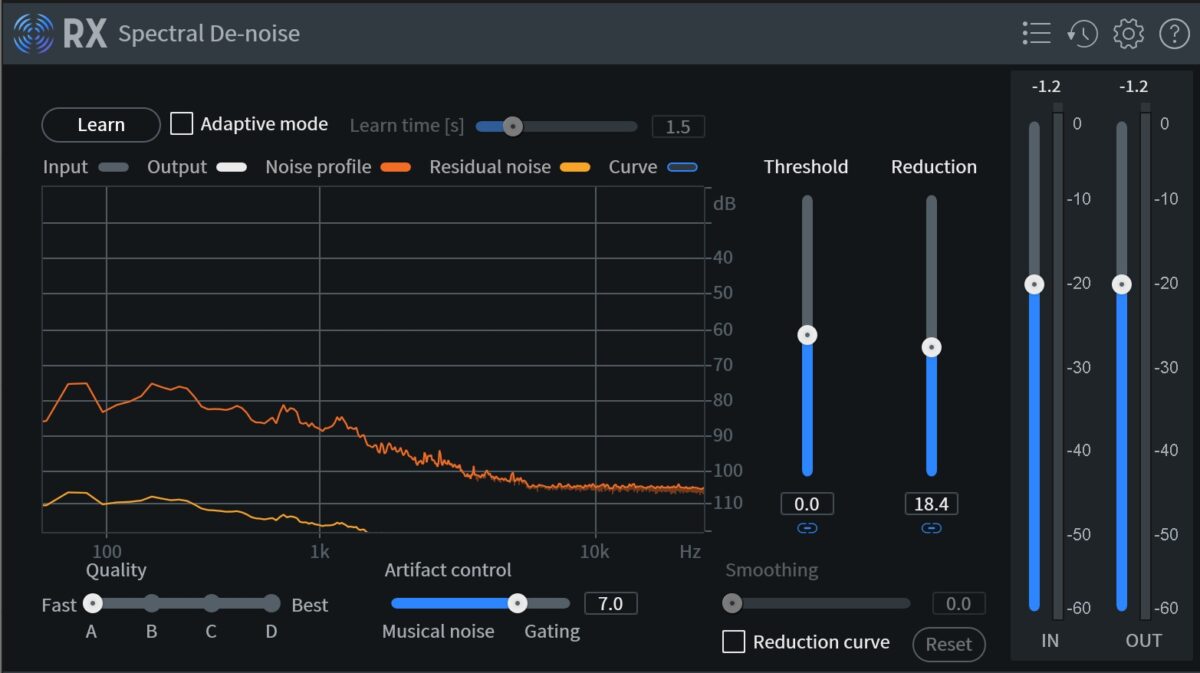
This brings us to the following result:
3. Edit out annoying speaking ticks
People talk in discursive ways that can be very annoying to listeners. So, as naturally as possible, you should edit out verbal ticks that can get in the way of an enjoyable experience.
Let’s hear our speaker from the previous sonic example:
In terms of filler material, there’s a lot we can take out. Observe the edits I made:

Quite a few cuts, as you can see, but we wind up with this:
It’s still very natural. We haven’t lost all the rhythms of speech that make this person unique. We’ve just helped him get to the point a little faster.
4. Enhance the audio using the techniques of mixing
We showed you how easy it is to use VEA earlier in this article. That’s about as simple as it gets for mixing podcast vocals. If we wanted to delve a bit deeper, we can improve this voice recording in a variety of ways.
In the following video I will use the following tools included in iZotope Post Production Suite:
- RX De-Reverb to get out some of the room noise
- Neutron’s transient shaper to get out some more of it
- Neutron’s gate to get out just a little bit more
- Nectar’s de-esser
- EQ with Neutron
- Parallel compression for evenness with Neutron’s compressor
- A tad more compression with a second compressor module in Neutron
For more tips on podcast editing, check out this guide on how to edit a podcast.
5. Add music or sound effects
Sometimes music and sound effects are required, either to shift among segments or to make the proceedings feel more interesting.
Listen, for example, to the opening minutes of any episode of The War On Drugs, which I engineered for iHeartRadio. This is a textbook example of how to draw a listener in with sound effects and music.
You might also need a theme song or outro music. Generally, music selection is done after the edit and is finished.
Meet your loudness target
Podcasts aren’t typically mastered the way music is, but certain things do have to happen. A limiter is usually applied as the final effect on the master channel to keep the mix from clipping. While there is still much debate on whether true-peak limiters are necessary for music mastering, no such debate exists in podcast land: every professional spec sheet asks for true-peak limiting to avoid intersample peaking—a kind of distortion that is quite audible on the naked human voice.
There are no set standards yet for podcasts, but many companies ask for something around -16 LUFS integrated with a -1 dB true-peak output ceiling. Don’t worry if you don’t know what that means, just get a limiter like Ozone 11 or bx_limiter True Peak, set the output to -1, and click any button that says TP or True Peak.
5. Branding and marketing
Creating a strong brand identity for your podcast is essential for attracting listeners and building an audience. Consider these branding elements:
- Design an eye-catching logo or artwork for your podcast that reflects its theme or content. It should be simple and strong enough to comprehend in a small thumbnail image, as that’s what most phones will display.
- Choose a memorable and descriptive name that resonates with your target audience.
- Write a compelling podcast description that communicates what your show is about, and what sets it apart from the competition.
- Establish a consistent tone and style for your episodes to create a recognizable brand voice.
- Encourage listeners to leave 5-star reviews (these really do help in getting the word out there).
Once you have defined your brand identity, it’s time to market your podcast. Here are some strategies to consider:
- Take to social media platforms to promote your episodes and engage with your audience. Make sure you encourage people to give 5-star reviews.
- Reach out to other podcasts to see if you can either collaborate or cross-promote each other’s shows.
- Reach out to relevant blogs, websites, or media outlets to feature your podcast or be a guest on other podcasts. Throw a wide net here and you might catch a few fish.
- Attend podcast conferences and meetups, as these are great places to network.
Remember, building an audience takes time. Don’t get discouraged, and stay dedicated to creating high-quality content and engaging with your listeners.
6. Uploading and distribution
Once your podcast episodes are ready for the world, you need a way to share them effectively. This is where podcast hosting platforms and RSS feeds come in.
RSS stands for Really Simple Syndication, and it’s the bread and butter of podcasting. Think of an RSS feed as a dynamic list that constantly updates new episodes of your favorite shows. The RSS feed will allow listeners to hear the episodes, and provide info like the episode title and episode description.
Podcast hosting platforms exist to propagate RSS feeds to the end-listener’s listening medium of choice. When you upload a new episode to your podcast hosting platform the hosting platform gets the episode to Podcast directories like Apple Podcasts, Spotify, so that your audience can hear their new favorite show. Hosting platforms manage your RSS feed and ensure your episodes reach your audience smoothly. They also offer helpful tools like analytics and ways to make money from your podcast. Let’s explore some popular platforms that do this job well:
- Libsyn (Liberated Syndication): Libsyn is a veteran in the podcast hosting domain. It provides reliable hosting services and efficient distribution of your episodes to various podcast directories. Its comprehensive analytics help you track your podcast’s performance. It does cost money, however.
- Anchor: Anchor is well-regarded for its user-friendly interface and being free to use. It simplifies the podcasting process, making it a great option for beginners and those looking for a straightforward experience.
- Megaphone: Megaphone offers advanced podcast hosting services, focusing on dynamic ad insertion and targeted ad delivery. Megaphone provides robust analytics and monetization options, making it a choice for professional podcasters and networks.
- SoundCloud: SoundCloud is known for music, but it’s also a platform where many podcasts find their home. It offers podcast hosting services with easy sharing options and a community of creators. It’s particularly popular for those aiming to reach a diverse audience.
Each of these platforms comes with its own set of features and benefits. Depending on your specific needs, you can choose the one that aligns best with your podcasting goals.
Start podcasting today
Podcast production and planning can be tough, but by following the steps outlined in this guide, you’ll be well-equipped to produce a professional product. Definitely check out the tools suggested in this article, including VEA, RX, and Post Production Suite.


