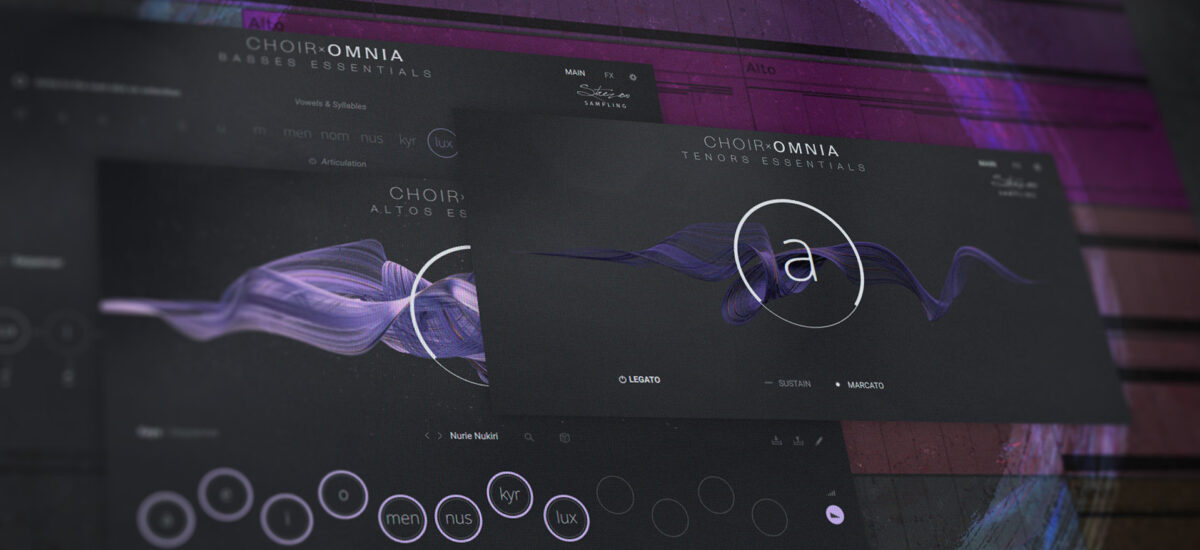
You don’t need to befriend a 60-piece choir to make great choral music. Modern choir VSTs place choral sound at every composer’s fingertips. But it takes skill and care to get your MIDI choir tracks sounding lifelike and compelling. The new Choir: Omnia Essentials is here to make that process easier than ever.
A streamlined version of the beloved Choir: Omnia Kontakt instrument, Omnia Essentials has everything you need to dial in aching melodies, spooky chants, dramatic shouts, and more. Covering the four sections of the choir, from booming basses to celestial sopranos, and offering deep customization, it’s the ideal MIDI choir instrument for film music, electronic tracks, and beyond.
In this article, we’ll walk you through how to use this instrument to craft rich, authentic choir music – and get inspiring results fast.
Jump to these sections:
Follow along with this tutorial using Choir: Omnia Essentials.
How to program evocative MIDI choir using Omnia Essentials
Omnia Essentials gives you everything you need to program a MIDI choir that sounds authentic and lifelike. Over a dozen different syllables can be sung in four different articulations. A streamlined interface and hundreds of evocative presets help you get inspired fast, while the powerful Syllabuilder engine lets you craft unique phrases and chants.
Offering a simpler interface than the original Choir: Omnia, Essentials balances rich sound with ease of use. This makes it versatile and fun to work within a range of contexts. Maybe you need to spin up a film cue on a tight deadline or sprinkle some impactful choir effects into your electronic track without losing momentum. Omnia Essentials excels when the ideas are flowing – without compromising on quality.
Below, we’ll show you how we used this powerful instrument to create an atmospheric, tension-building choir track. We’ll spotlight the instrument’s key features and throw in some general pointers on how to program MIDI choir effectively. When we’re done, you’ll be fully equipped to create your own MIDI choir magic.
1. Create a bass chant
We started our choir track with a strong foundation. By creating a steady, rhythmic chant using the bass section, we set the pace and tone for the whole composition. We used the Omnia Basses Essentials instrument for this.
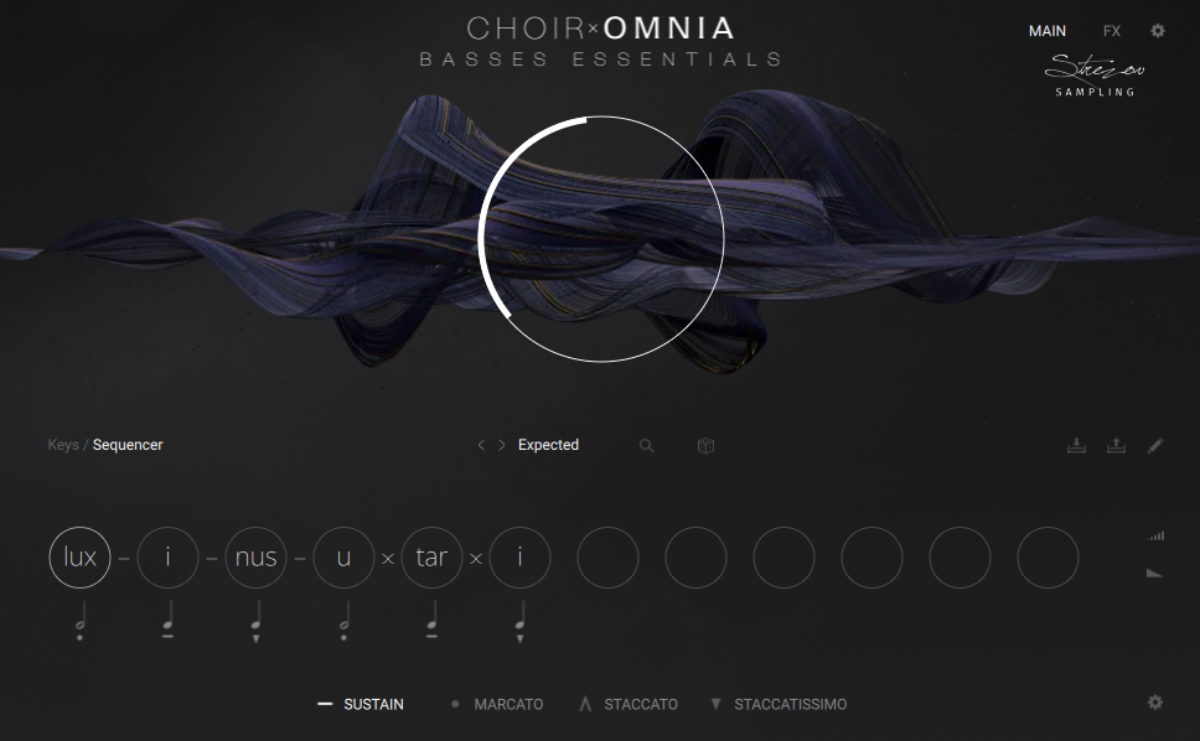
Omnia Essentials instruments offer two modes: Keyswitch and Sequencer. We opened Sequencer mode, which lets us construct a rhythmic chant.
Each Omnia Essentials instrument offers hundreds of pre-set phrases to get the ideas flowing quickly. We browsed through these, filtering by feel and meter, to find one that matched our vision. Just click the phrase name to open the browser. We settled on a preset called Expected.
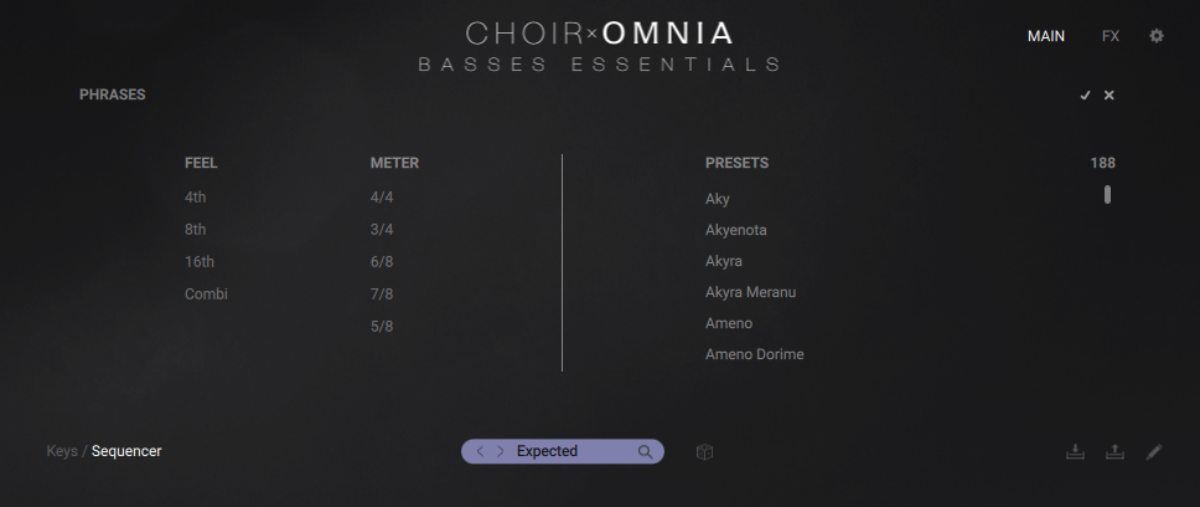
The details of the selected phrase are shown in the slots at the bottom of the interface. We decided to tweak it a little to better suit our needs. We did this by opening the Syllabuilder Editor (click the pencil to the right of the interface).
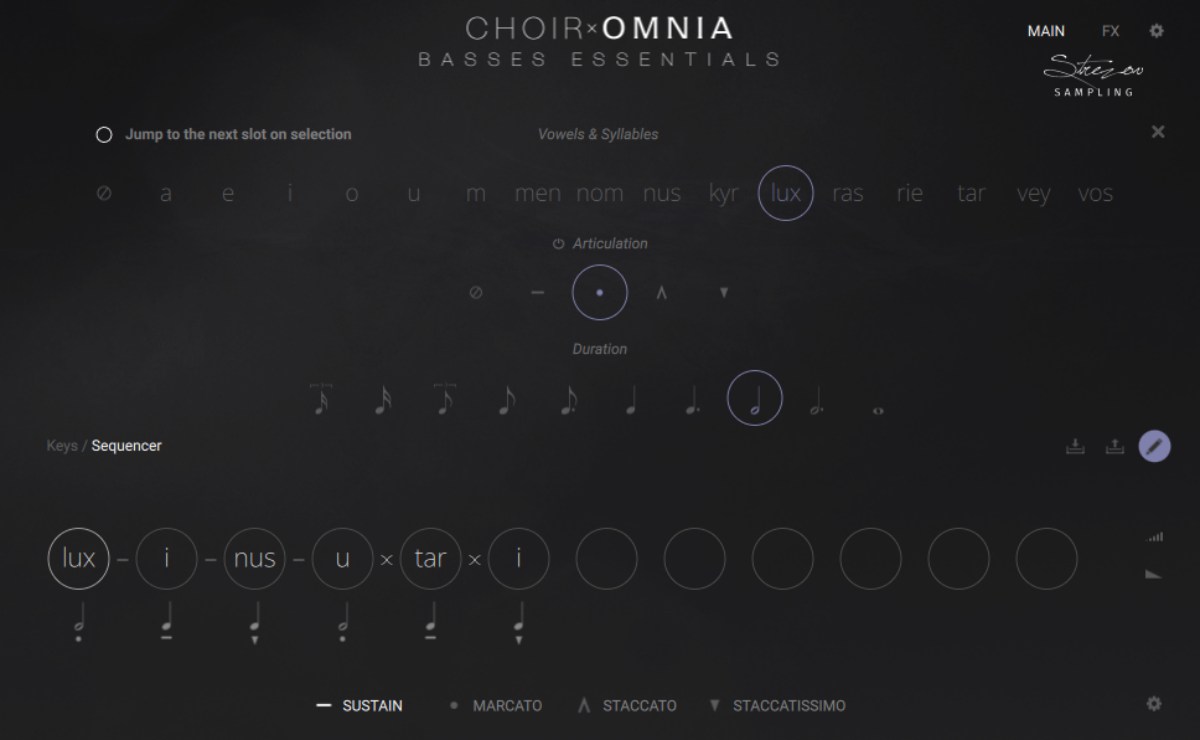
Here you can change the syllables that are being sung, the duration of each syllable, and their articulation – from smooth sustained tones to sharp staccatissimo. We tweaked the rhythm of the phrase by changing the duration of a couple of syllables. To do this, simply click on a syllable and select a new duration in the editor.
Once we had a pattern we liked, we repeatedly played a low note on our MIDI keyboard to loop the phrase. (You could also draw the note directly into the piano roll in your DAW). Here’s how our bass chant sounds.
2. Add ethereal alto pads
Next, we created contrast with our bass chant by adding a high-pad sound. To do this, we loaded up Omnia Altos Essentials in Keyswitch mode.
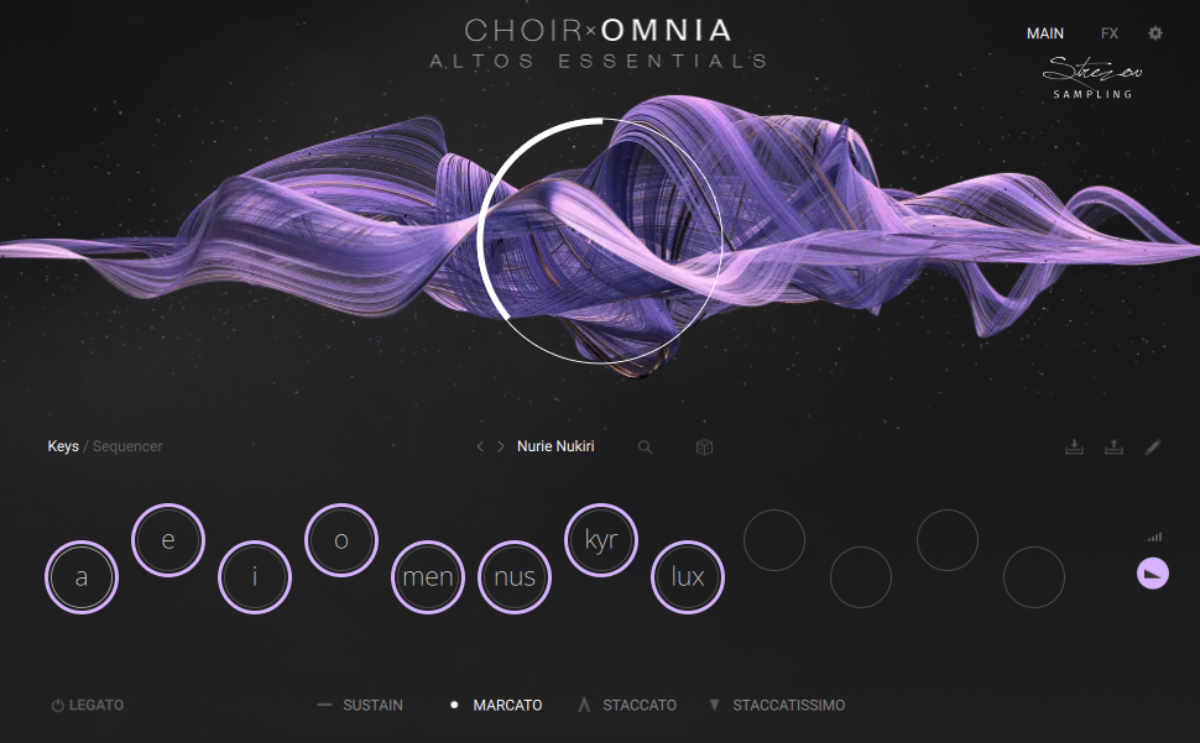
We want our part to feature a range of different syllable sounds, so we opened the editor (with the pencil button again) and dropped a bunch of syllables into the key slots at the bottom of the interface.
Omnia Essentials lets you choose a different articulation for each syllable – this will come in handy later. But this time, we selected one articulation style for the whole part, using the global articulation options at the bottom of the interface. We chose a firm, sustained Marcato articulation.

Now to write the part. Making sure to stay in the key set by our bass part (G), we used our MIDI keyboard to play clusters of slow-changing notes, conjuring a rich, mystical pad.
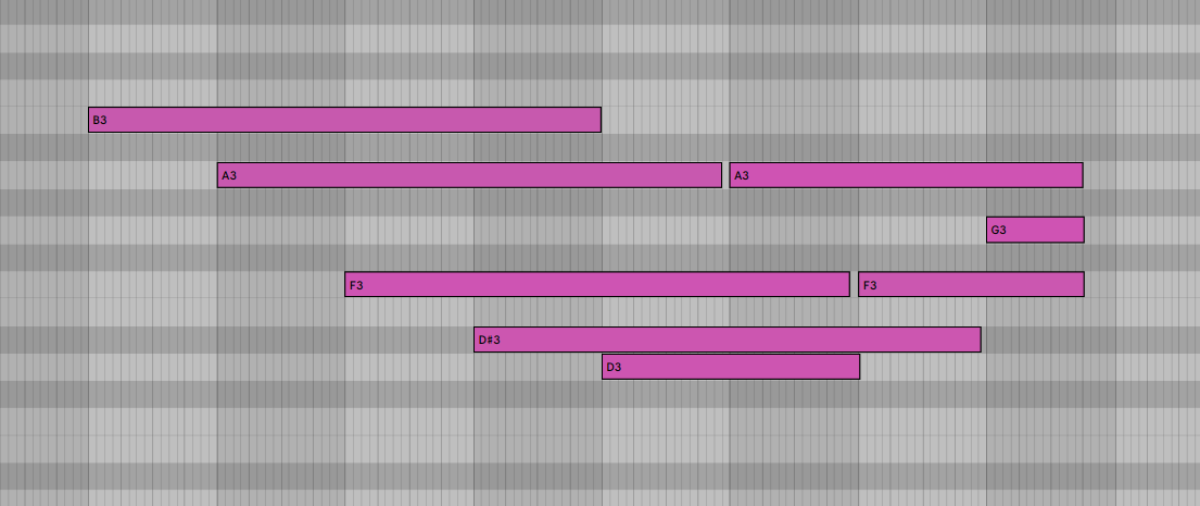
Here’s how it sounds.
Texturally, it’s a little dull. That’s because all of the notes are performed using just one of the syllables we chose – an “a” sound. Keyswitch mode allows us to go further, switching between syllables from note to note to add more sonic interest.
There are two ways to do this. We can either manually click on each keyswitch to change the syllable on the fly. Or, we can send the plug-in MIDI information to tell it when to change a syllable.
You’ll notice a virtual keyboard display at the bottom of the Kontakt interface, with some regions highlighted in different colors.

The colored regions show which sections of our MIDI keyboard (or piano roll) can be used to send commands to Omnia Essentials. The region in blue corresponds to the notes we hear. The other regions allow us to send performance instructions to the instrument. In this case, we’re focusing on the purple zone.
Each note in this zone (which is down in the C-1 octave) corresponds to one of our keyswitches. By “playing” a different purple note, we can tell Omnia Essentials to change the syllable being performed.
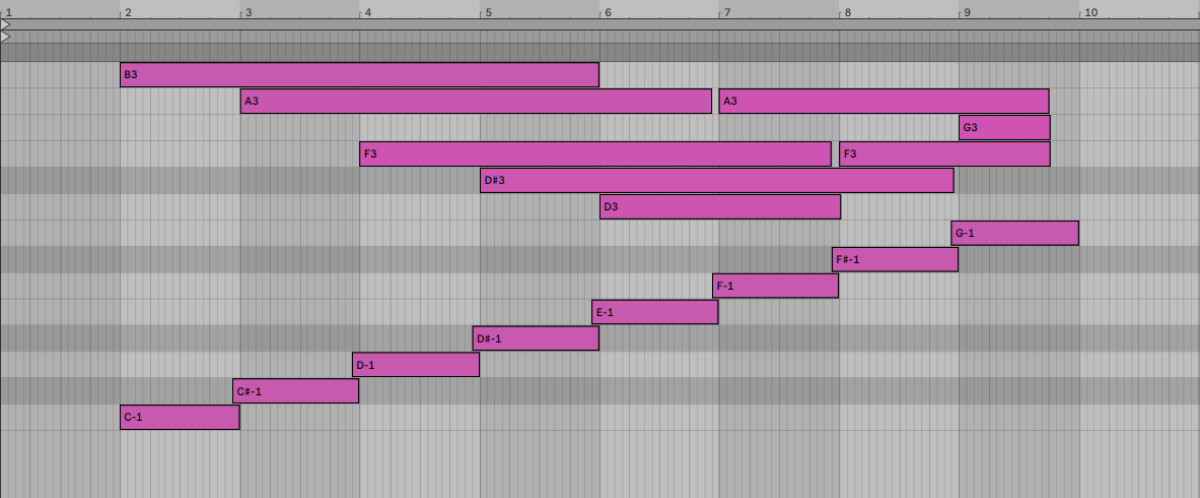
Here’s how our pad sounds with syllable variation added.
3. Raise the energy with sopranos
We want to ratchet up the tension as our choir track progresses. To do this, we added a high rhythmic part that enters partway through. We did this using Omnia Sopranos Essentials.
As with the bass part, we started by creating a rhythmic phrase for our Sopranos to sing. This time, we simply clicked the dice symbol on the interface. This generates a random phrase – perfect for sparking inspiration.
We then tweaked the phrase to match our needs.
To give our rhythmic loop more variation, we split the phrase into two distinct “words.” Syllables in the sequencer get strung together into words when they’re connected by a dash or “x” symbol (the dash keeps each syllable distinct, while the “x” blends them together to create new sound combinations).

When playing back the sequence, holding down a note on the keyboard causes the first word to play back. Pressing another note plays back the next word, and so on. In this way we can split our sequence into multiple parts, triggerable by MIDI note. We split our sequence into two words, each with different syllables, to add variety and interest.

Next, we chose the articulations. We wanted a short, stabbing, rhythmic part, so we mostly used staccato and staccatissimo articulations. We opened the editor and applied these to each syllable in turn, using different articulations on some syllables to add variation to the sound.

Finally, we added dynamics to the part to make it sound lifelike and energetic. We did this by varying the volume of each syllable. The volume editor can be opened by clicking the button on the right hand side of the interface (highlighted blue in the below screenshot). We then tweaked the volumes by clicking and dragging on each syllable.

Here’s how our soprano part sounds.
4. Create a tenor crescendo effect
Finally, we concluded our choir track with a dramatic crescendo using the tenor section.
Omnia Essentials is great for making simple, powerful choir effects like this. As well as providing a fully-featured Kontakt instrument for each choir section, it also offers dedicated instruments for each vowel sound, with a streamlined interface that helps you get results fast. To make our crescendo, we used the “a” syllable in the tenors.
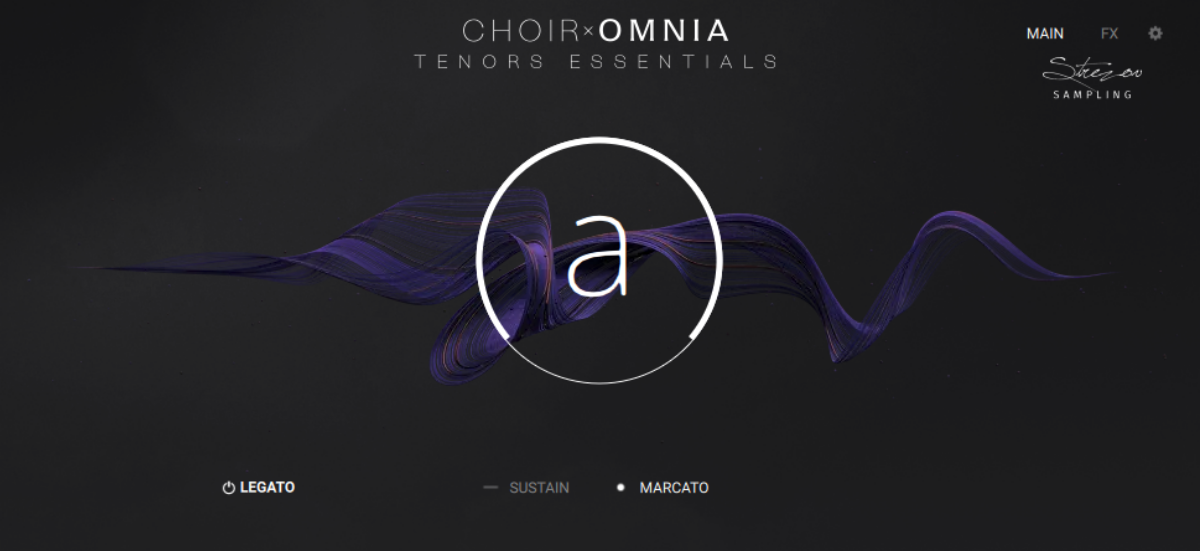
It sounds great right away, meaning we don’t need to spend much time tweaking. Here’s a simple G chord.
We just needed to shape this sound into a crescendo effect. The simple interface makes this quick to do. Simply click and drag on the center of the interface to change the volume of the part, from soft tones to dramatic shouts. You can also control this parameter with the modulation wheel on your MIDI controller.
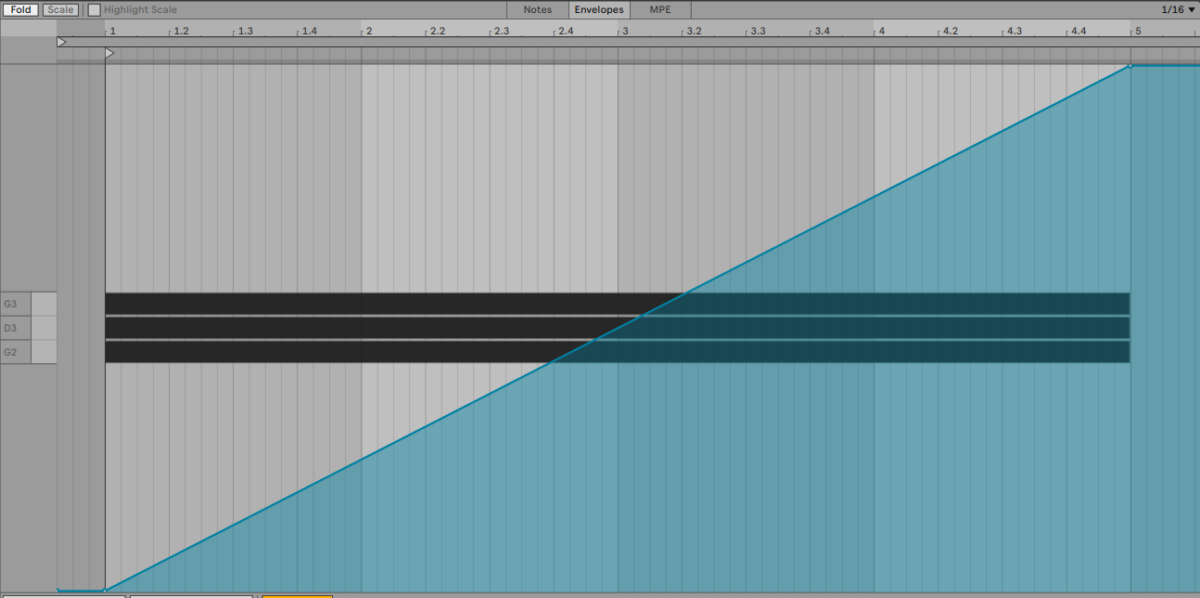
We recorded a slow ramp with our modulation wheel so that the chord gradually goes from soft to loud. Here’s how it sounds.
5. Arrange your track
The final step is to arrange our four choir parts into a compelling piece of music. We did this by looping the parts and distributing them along the timeline in our DAW.

The parts enter one after another, heightening the tension, before concluding with our dramatic tenor crescendo. Here’s how it sounds.
This would work great on its own as a dramatic film cue. Or, you could add beats and other textures for an epic electronic track. Omnia Essentials makes it quick and easy to shape just the choir sounds you need.
Start using Choir: Omnia Essentials
In this article, we’ve shown you how to program MIDI choir that sounds lifelike and compelling using the Omnia Essentials choir VST. Now you know your way around a MIDI choir, it’s time to start shaping your own choral sounds.


