


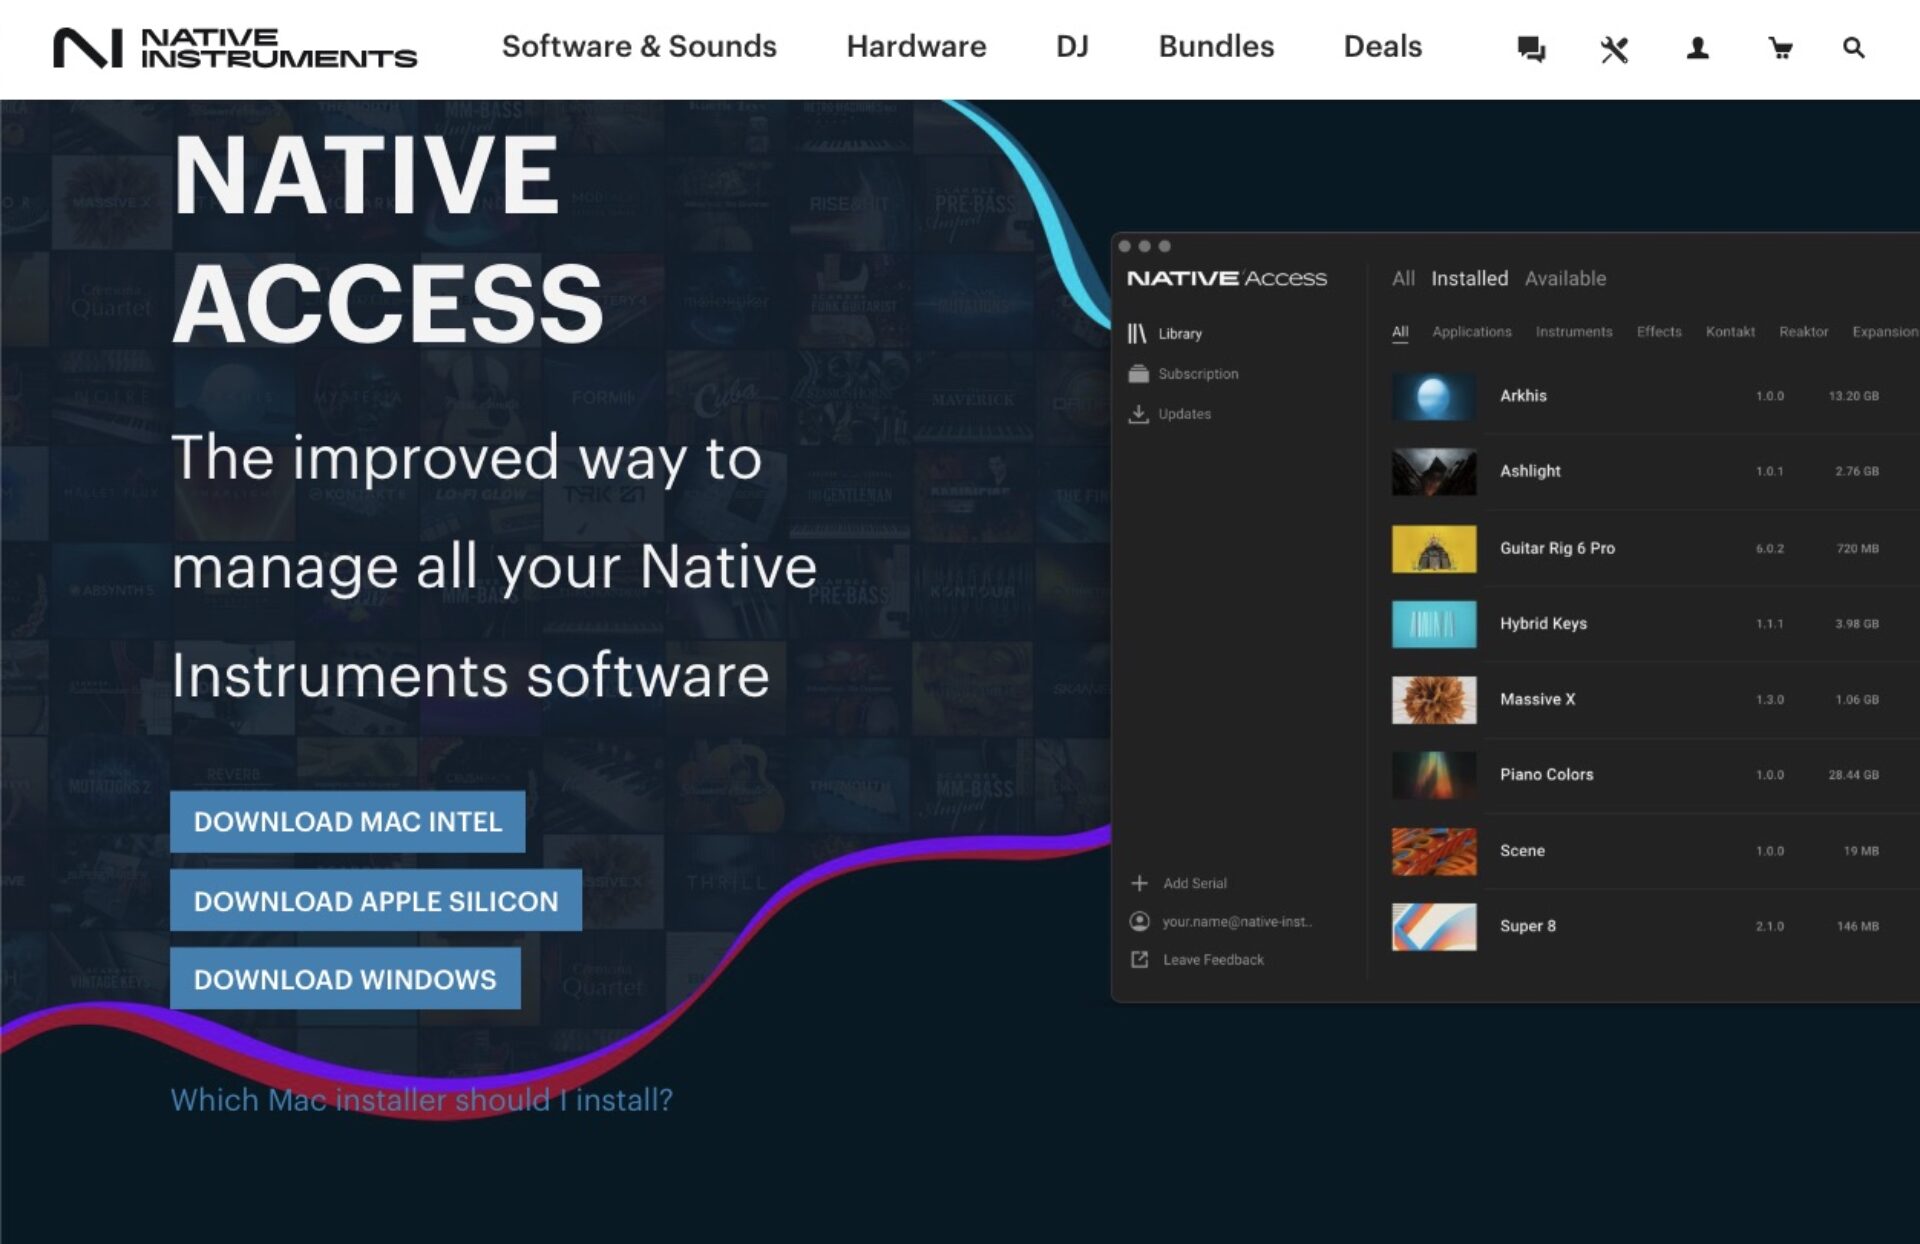
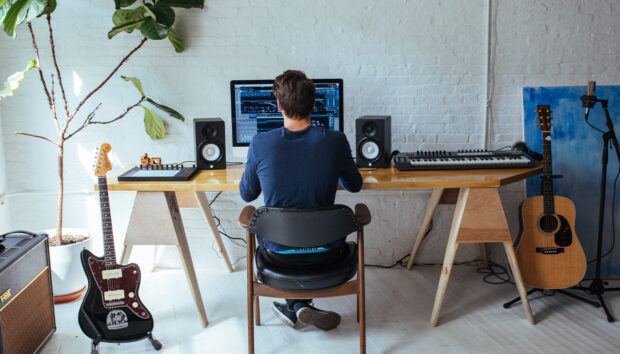
Ever feel like managing all your creative tools is a bit of a juggling act? We’ve got something that makes it a breeze: Native Access. Think of it as your personal assistant for all things Native Instruments and NKS-ready software. This free app is your go-to spot for downloading, installing, activating, updating, and registering everything in one super convenient place. Plus, it’s got a new search feature that helps you quickly find exactly what you’re looking for.
Our goal with Native Access is to simplify your software management so you can spend less time organizing and more time doing what you love – making music! Ready to dive in? This guide will show you everything you need to get started.
Jump to these sections:
- Download Native Access
- Install Native Access
- Create a Native Instruments ID
- Register and install products
- Install free products
- Set install locations
- Install third-party instruments
- Update your software
- Use Native Instruments in Your DAW
- Repairing and relocating libraries
- Subscriptions
Follow along with this tutorial using Native Access.
1. Download Native Access
Start out by visiting the Native Instruments website. Hover over the Support icon in the top right hand corner, and click the Download tab. Alternatively, navigate directly to the downloads page and the Native Access Download and Activation Tool will appear on your screen.
Download the version that matches your operating system, either Mac Intel, Apple Silicon or Windows. Crucially for Mac, choose the correct installer for your processor:Apple Silicon (M1/M2/M3/etc.) For Macs: Download the “Apple Silicon” installer. For Intel-based Macs: Download the “Intel” installer.
To check your Mac’s processor: Go to the Apple menu (top left corner of your screen) > “About This Mac.” The overview will show your chip type.
Once the file is downloaded, locate it in your Downloads folder.
2. Install Native Access
Native Access installation on macOS
- Download:
- Once you’ve selected your processor on the downloads page, the file will download as a .dmg (disk image) file.
- Mount the disk image:
- Locate the downloaded .dmg file (usually in your “Downloads” folder).
- Double-click the .dmg file. This will “mount” it as a virtual drive on your desktop and usually open a Finder window showing its contents.
- Install Native Access:
- In the opened Finder window, you’ll typically see the Native Access application icon and often an “Applications” folder alias.
- Drag and drop: Drag the “Native Access” application icon into your “Applications” folder alias (or directly into your Applications folder in Finder if the alias isn’t present). This copies the application to your system.
- Eject the disk image:
- Once the copy is complete, drag the mounted Native Access disk image icon from your desktop (or Finder sidebar) to the Trash (which will change to an “Eject” symbol) or right-click it and choose “Eject.” This unmounts the virtual drive.
- Launch and log in:
- Go to your “Applications” folder and double-click the “Native Access” icon to open it.
- If prompted, allow the application to make changes or connect to the internet.
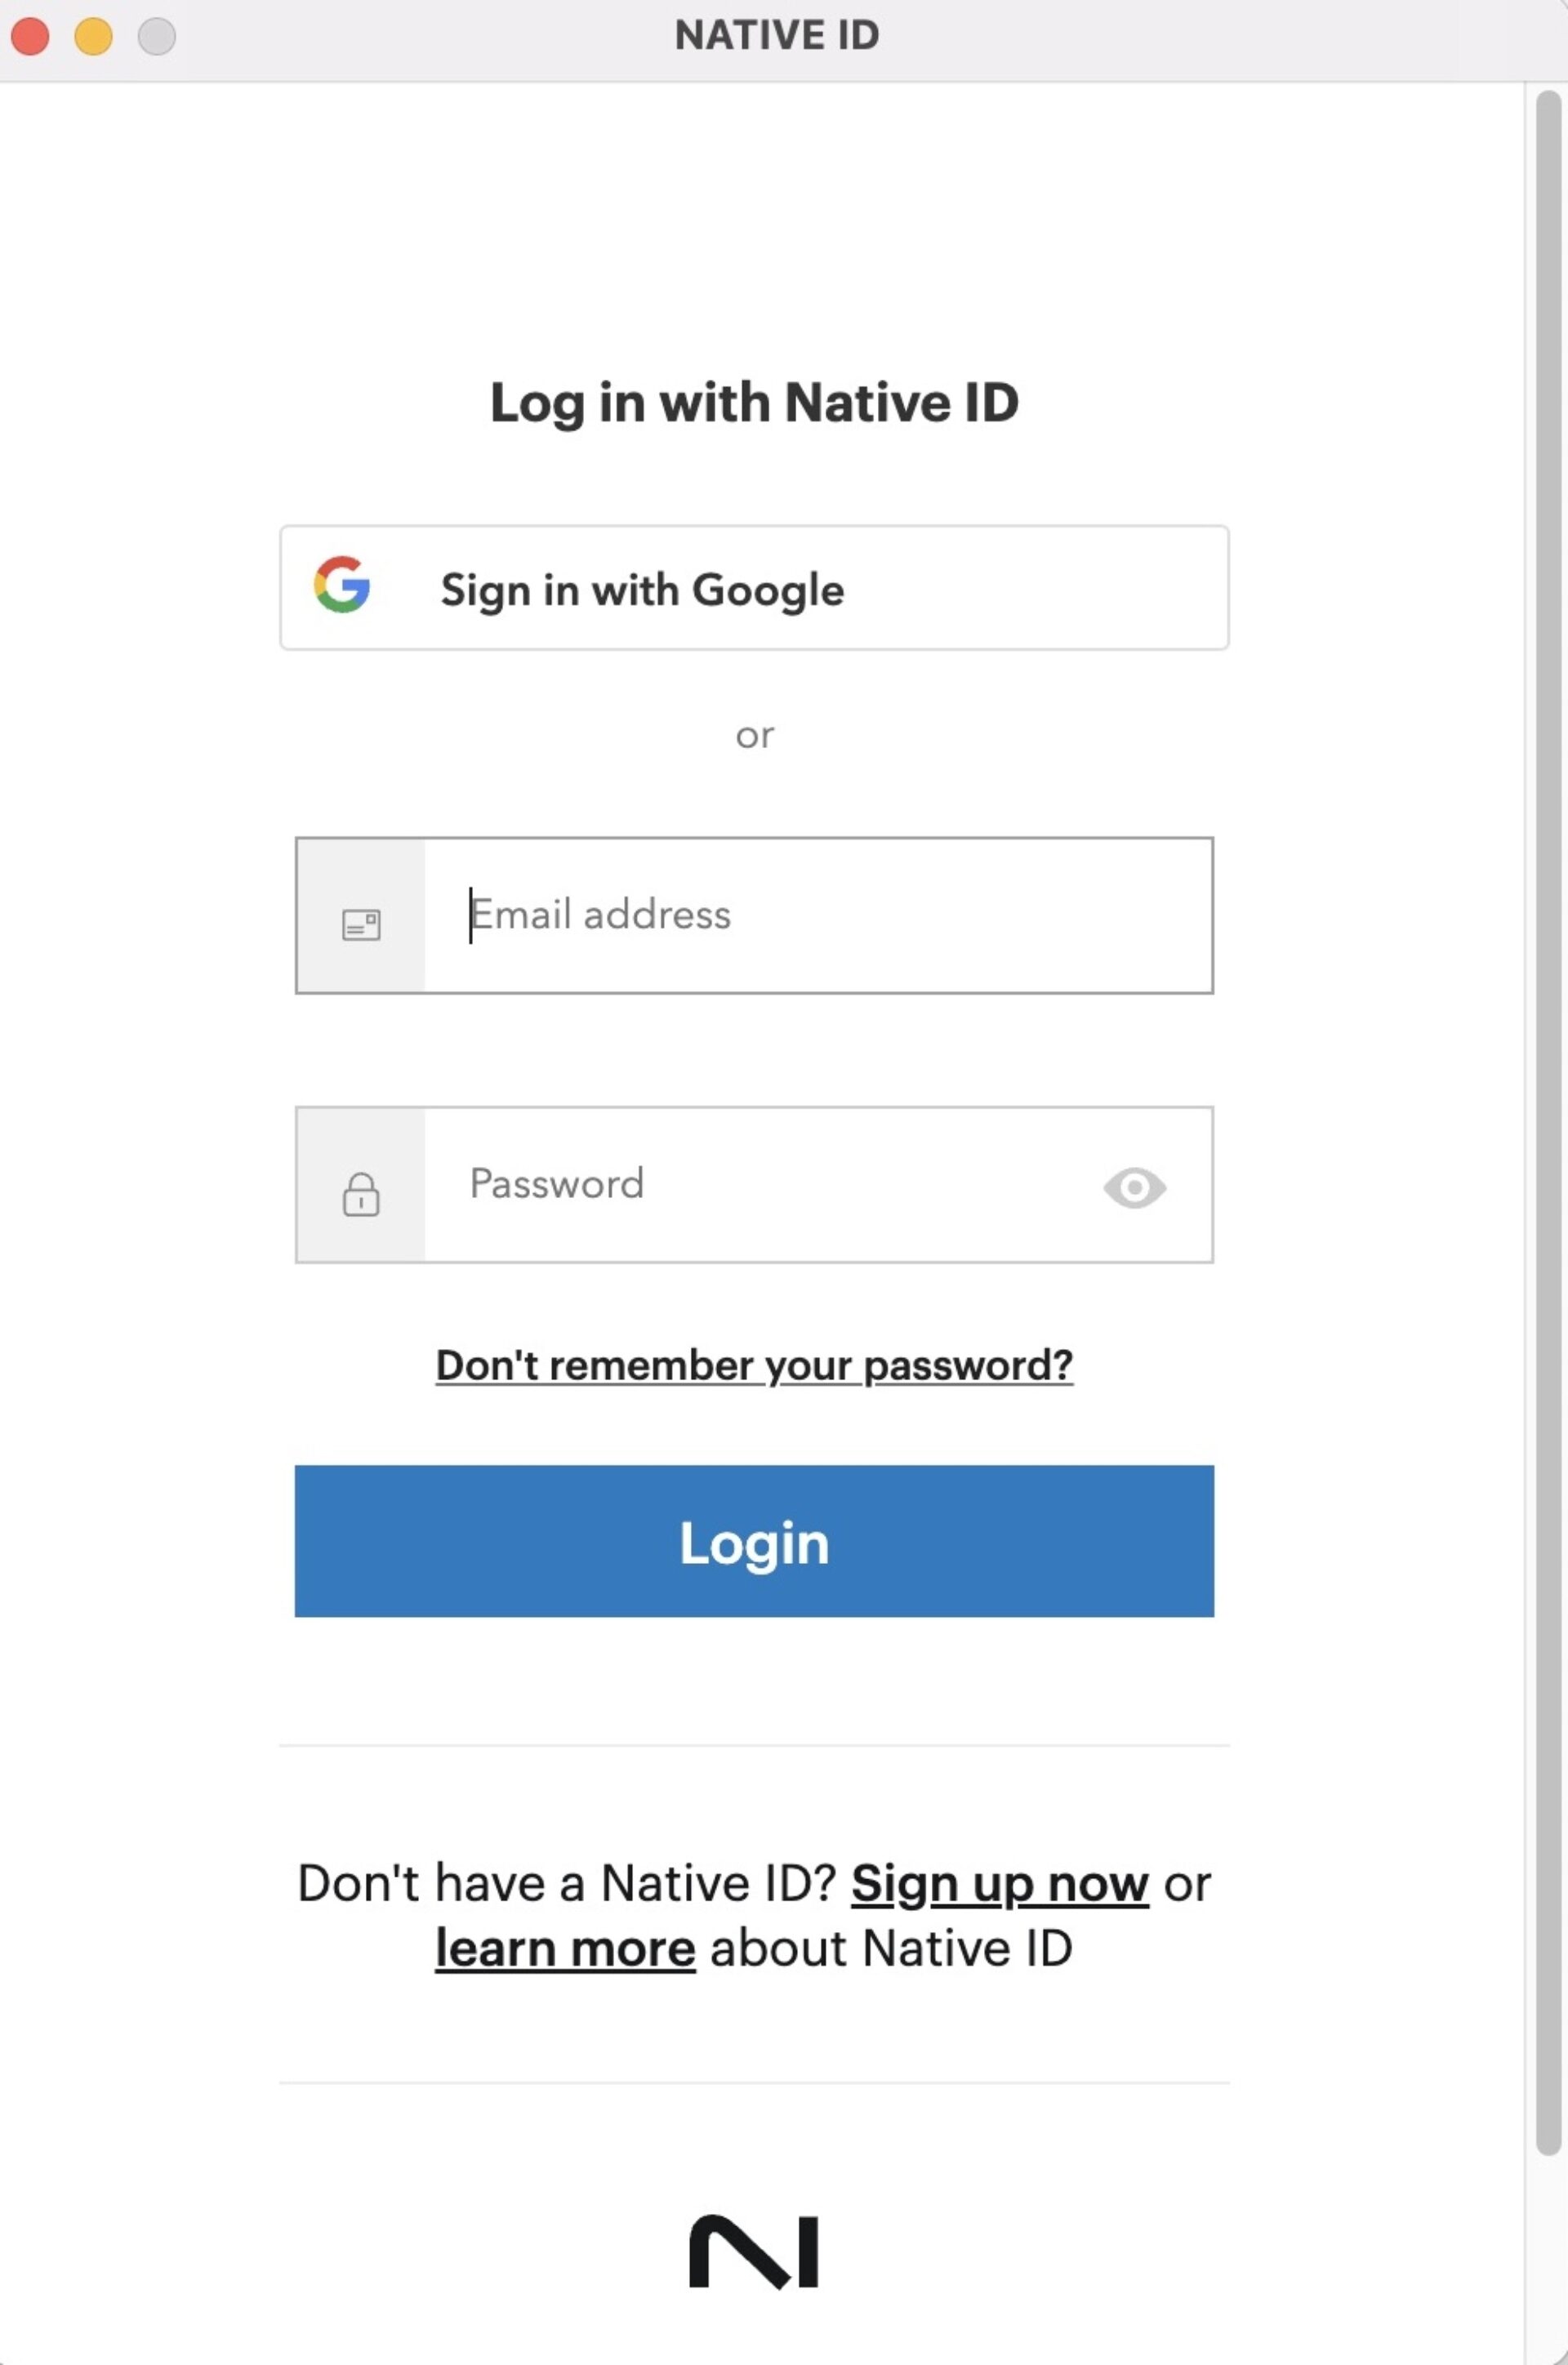
- Log in with your Native ID. If you don’t have one, you can create it.

Native Access installation on Windows
- Download:
- Once your file is downloaded, it will be an .exe (executable) file.
- Run the installer:
- Locate the downloaded .exe file (usually in your “Downloads” folder).
- Double-click the .exe file to start the installer.
- You may see a Windows User Account Control (UAC) prompt asking for permission to run the installer. Click “Yes” to proceed.
- Follow on-screen prompts:
- The Native Access Setup Wizard will appear.
- Welcome screen: Click “Next.”
- License agreement: Read the agreement and click “I Agree” to continue.
- Installation location: You can usually accept the default installation path (e.g., C:\Program Files\Native Instruments\Native Access). If you want to change it, click “Browse” and select a different folder. Click “Install.”
- Installation progress: The installer will copy files to your system.
- Completion: Once finished, click “Finish” or “Close.”
- Launch and log in:
- Native Access will typically create a shortcut on your Desktop and in your Start Menu.
- Double-click the Desktop shortcut or find “Native Access” in your Start Menu and launch it.
- Log in with your Native ID. If you don’t have one, you can create it.
3. Create a Native Instruments ID
Once installed, go ahead and launch Native Access. If you already have a Native Instruments account, or what we call a Native ID, you can enter your email and password and then click “Login.” If you don’t have an account yet, click on “Sign up now.”
Enter your first and last name, a valid email address, password, and check the box to accept the End User Agreement and Terms and Conditions, and then click “Create.”
4. Register and install products
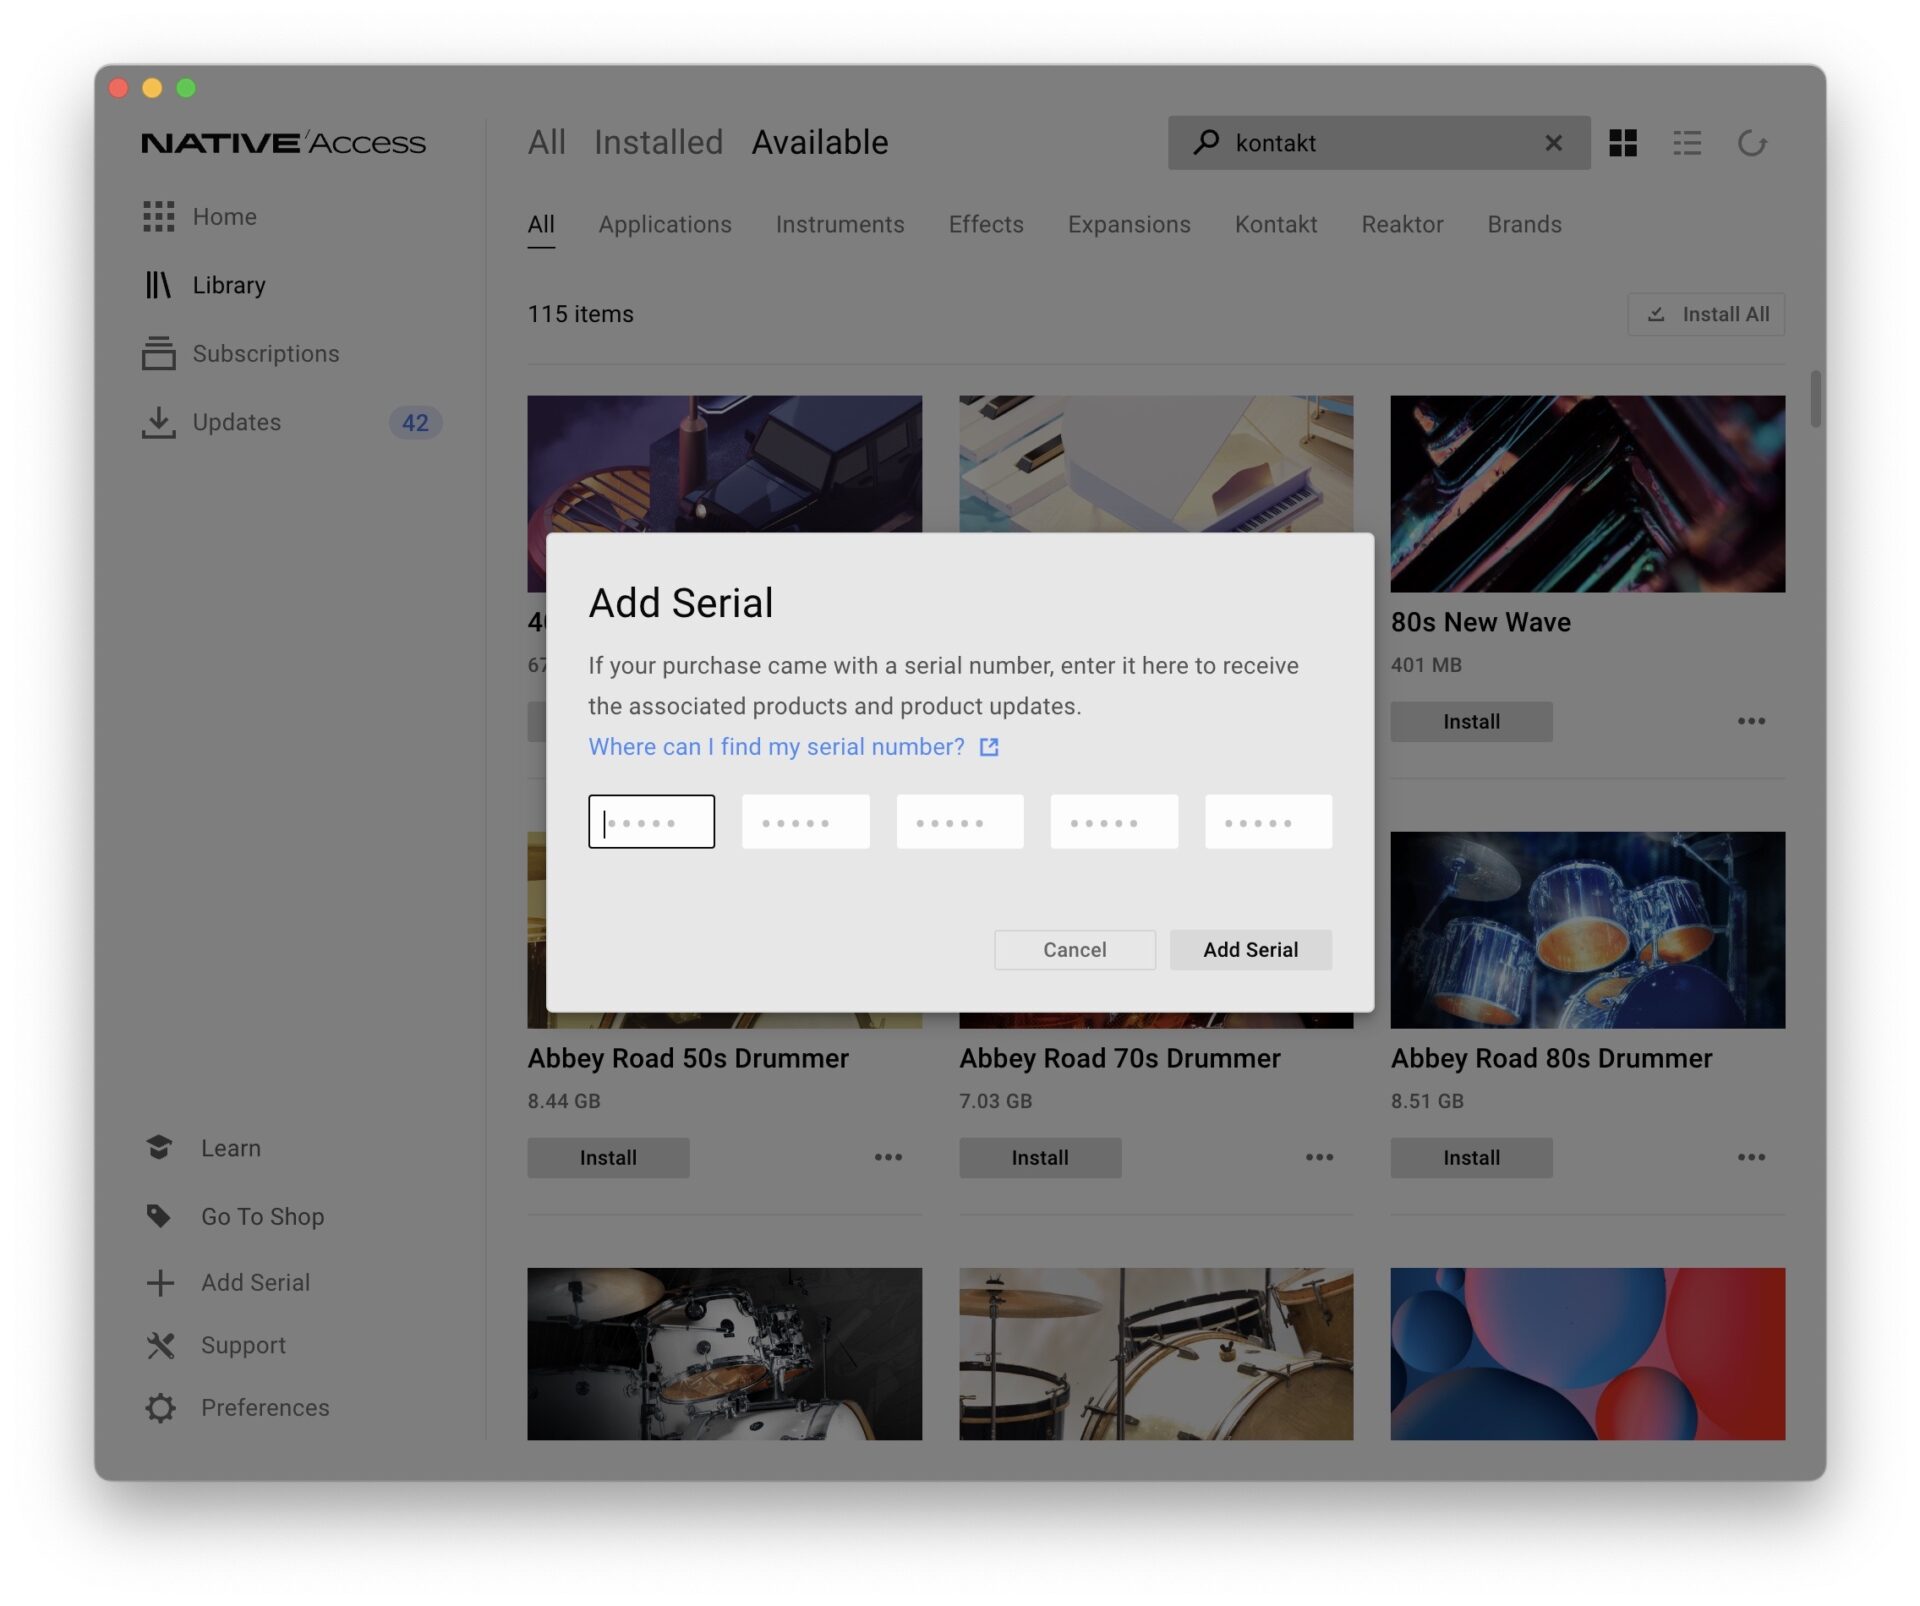
Click Library on the left side of Native Access. At the top of the Library tab is where you change what you’re viewing in the browser. You can choose to see what’s Available to install, what is already Installed, or you can see Everything.
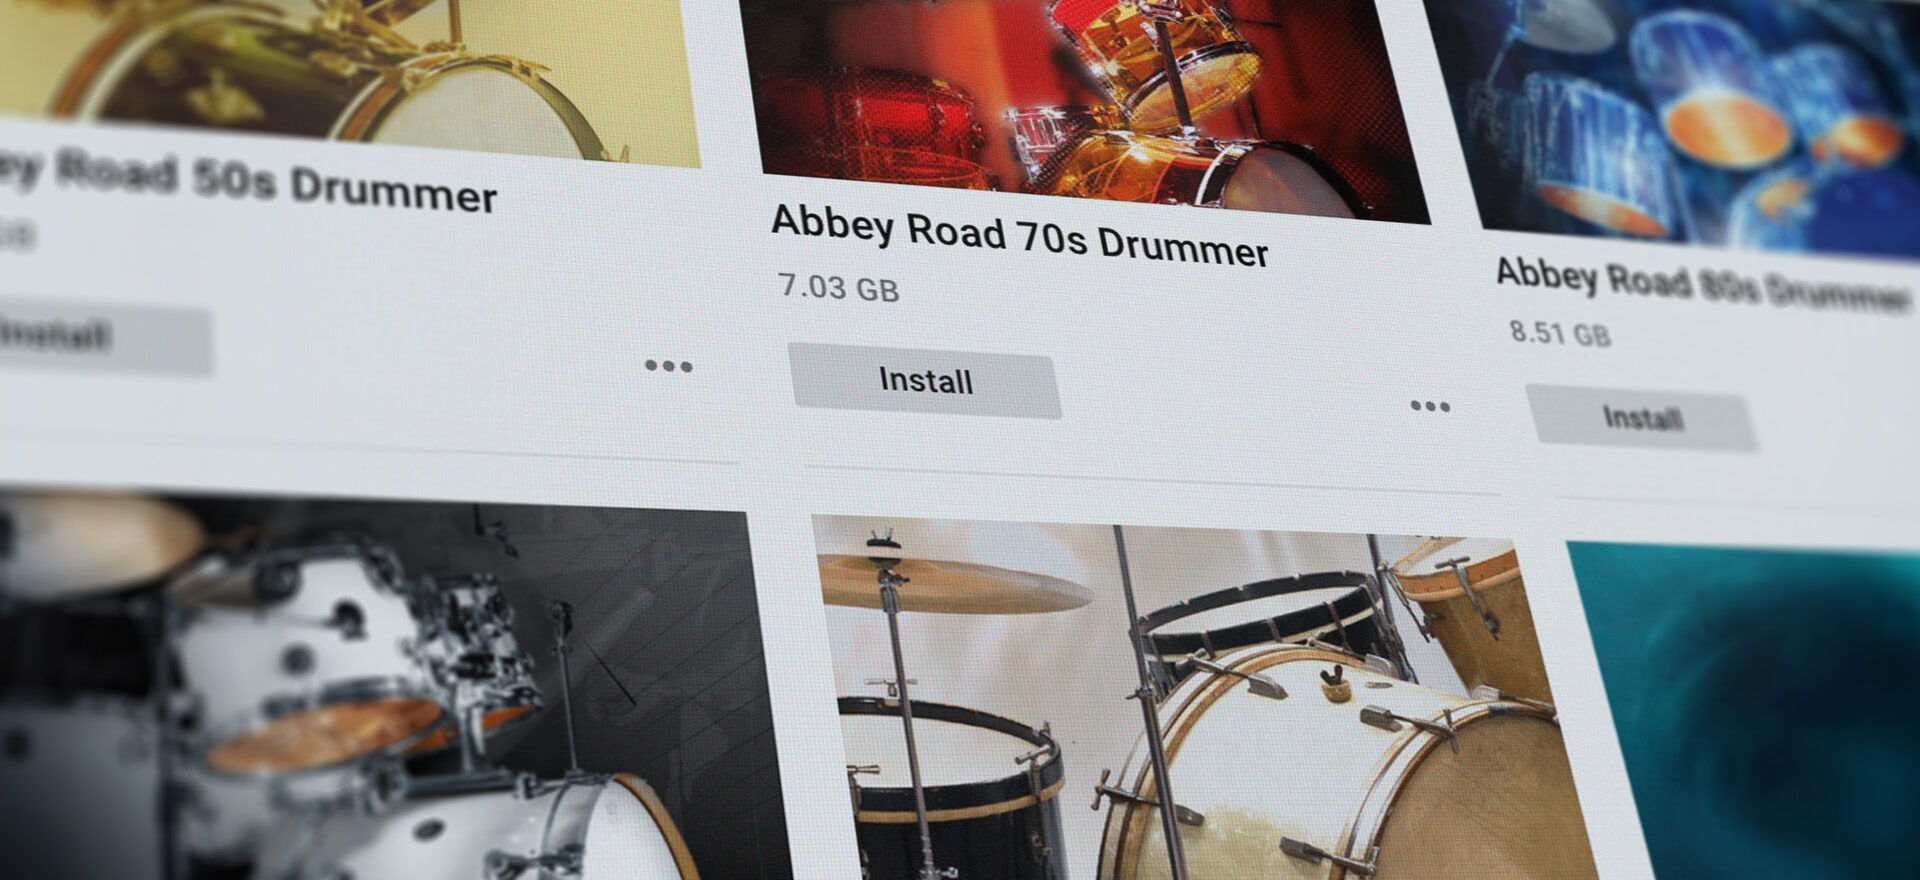
To install instruments, effects and Expansions you purchased, click Available in the Library section, located at the top of Native Access. You’ll see a list of products registered to your account but not yet installed. Click the Install button below the product name, and the software is installed automatically.
If you prefer to view things as a list rather than a grid, you can select that option.

5. Install free products
If you’re starting with free libraries like Kontakt Player, and/or Komplete Start, click Library on the left side of Native Access and then click Available at the top of Native Access. Search for the name of the product and click Install. The software is installed automatically.
6. Set install locations and file management settings
File management is an important area to understand.
The Download location is where the installation file gets downloaded to, and this will be automatically deleted once the installation is complete. In some instances, if your computer doesn’t have enough hard drive space, you can change the download location to an external hard drive.
The Application location is where the applications like Kontakt and the important files will be installed to. This area, we recommend that you don’t change.
The most important area you may want to change is the Content location. Many instruments contain sample libraries, and these libraries are what take up the most space on your computer. You can either leave this section alone and install the libraries directly to your computer by leaving the default location set. If your computer storage is limited, you have the option to install the libraries to an external hard drive. Just keep in mind that you’ll need to have the external hard drive connected to your computer when you want to make music and use the instruments.
7. Install third-party instruments and serial numbers
Native Access isn’t just for Native Instruments products, but it’s also used for things like iZotope, Brainworx, as well as hundreds of instruments created by different companies. Many of the instruments created by other companies can be purchased directly from native-instruments.com by selecting the “Brands” category and either “All,” “Installed,” or “Available.” This list shows you all of the companies and their products.
To install a third-party Kontakt library using Native Access, first download and install the library from its manufacturer, then use Native Access to register and install it. Some libraries don’t require Native Access for installation; you’ll need to add them manually within Kontakt.
Download and install the Library by locating the third-party Kontakt library you want to install on your computer. Carefully follow the installation instructions, which may involve unzipping files and potentially running an installer. Take note of where you installed the library’s main folder. You may need to install the third party library using Native Access.
Open Native Access, and click Add Serial, located in the bottom left hand corner and add in the Serial number provided by the manufacturer.
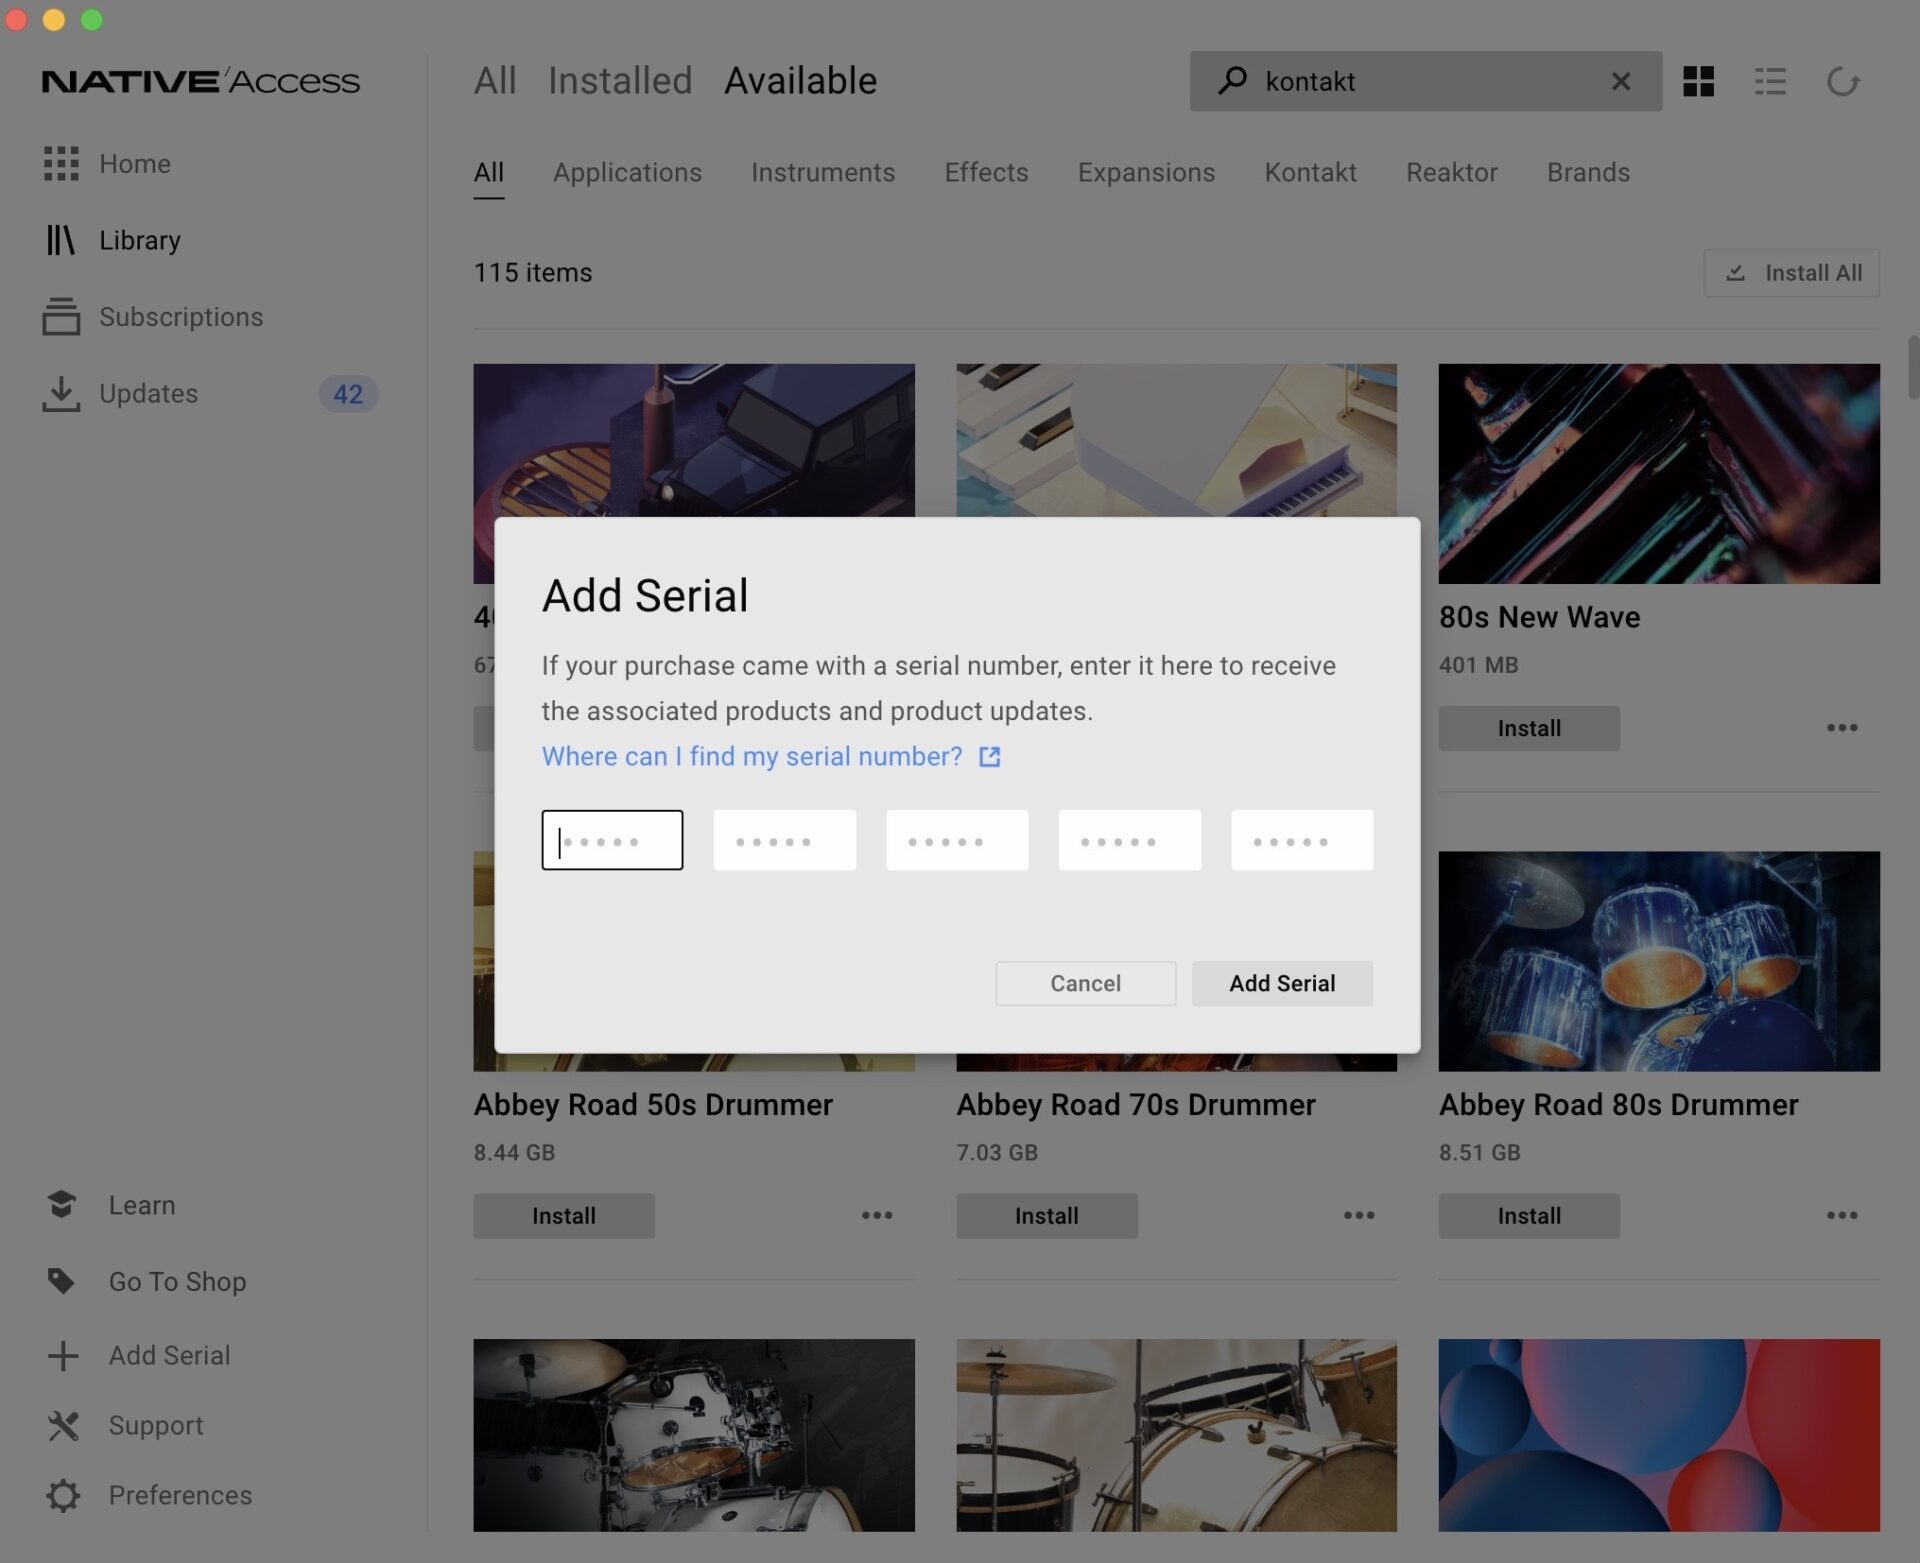
Navigate to the Library section in Native Access, and click Available. If the library requires Native Access for installation, you may see an Install button next to the product name. If you see a Locate button, it means the library needs to be manually added. Click Locate and navigate to the main folder of the library. Once you’ve located the library, Native Access will begin the installation process.
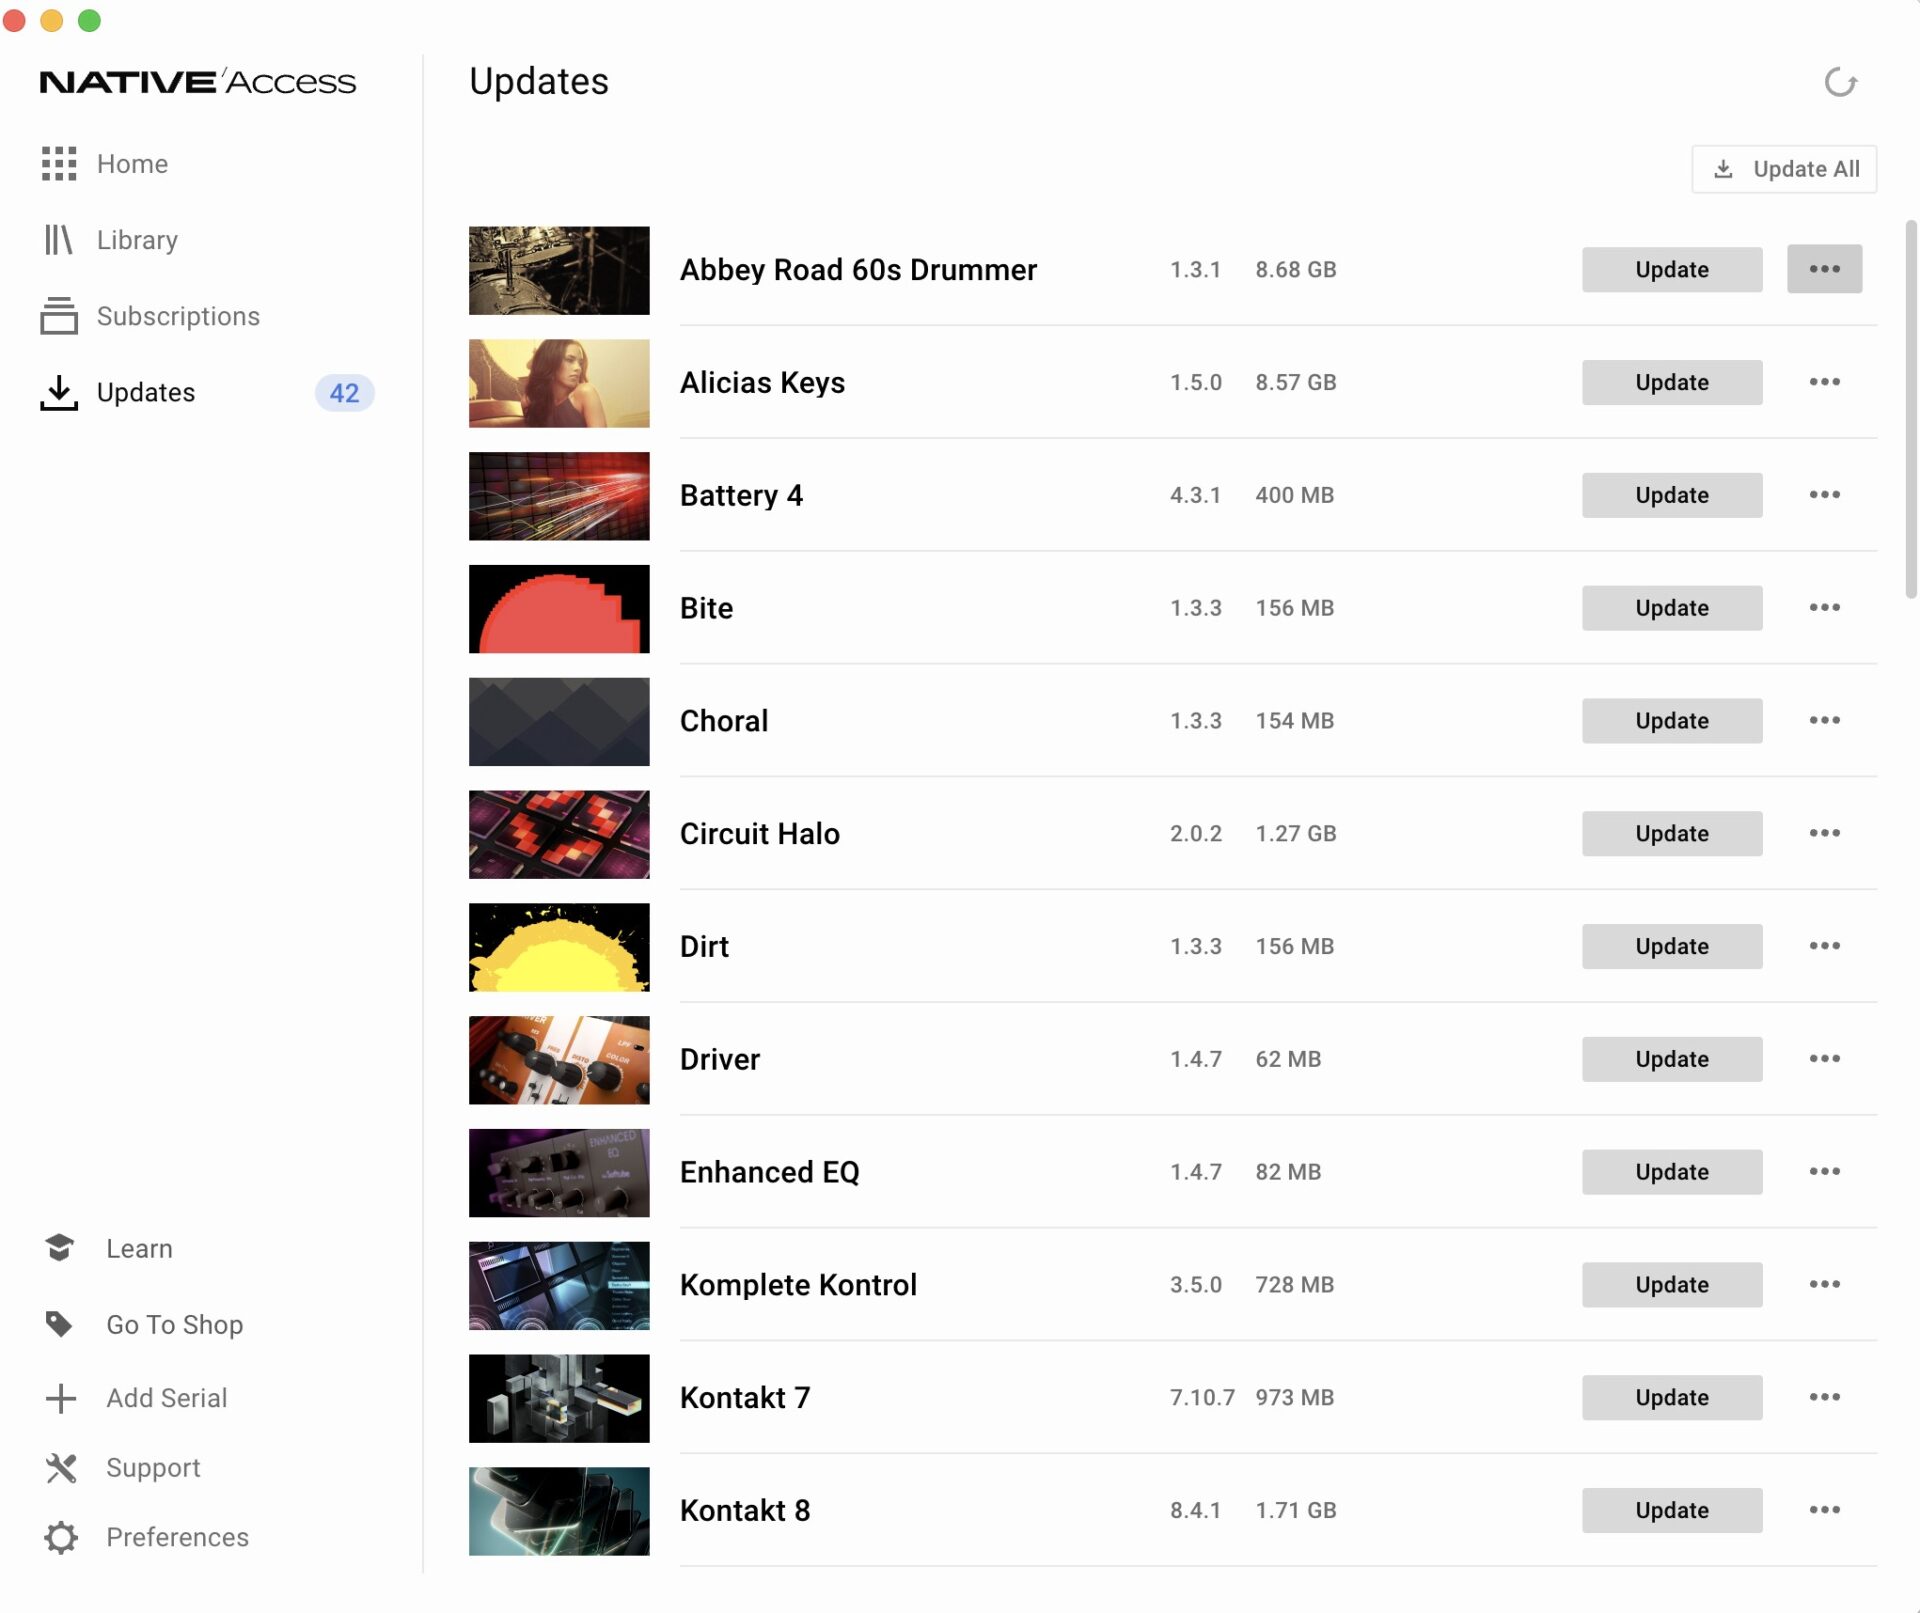
8. Update your software
We regularly update our software by ensuring compatibility with your DAW and operating system. Keep your software up to date by navigating to the Updates tab.
Regular updates ensure compatibility with your DAW and operating system. To update all of your products, click the Update All button at the top right hand side of the software.
9. Use Native Instruments in your DAW
Open Your DAW (Digital Audio Workstation). Compatible DAWs are Ableton Live, Logic Pro, Cubase, Ableton Live, Pro Tools, Studio One, FL Studio, and others.
Have your DAW scan for plugins. The most common plugin format is VST3, and macOS users may also use AU. To load an instrument, create a MIDI track and insert an instrument or effect onto it.
10. Repairing and relocating libraries
Let’s say you installed a handful of instruments on your computer and you’ve recently moved the libraries to an external hard drive to save space. You’ll see when you open up Native Access that the libraries have been moved and will say “Repair.”
You have a few options here:
- First, you can click “Repair” and either reinstall the library or manually point Native Access to the location of that specific library.
- If you have a bunch of libraries that need to be repaired, you can click the “Relocate All” button and point Native Access to where the libraries are installed. Just note that if you point to the external drive and the libraries are in multiple subfolders, Native Access won’t be able to find the libraries.
Uninstalling products
In certain cases, like needing more space on your computer, you may want to uninstall an instrument. Clicking on the instrument brings up the side window where you can select “Uninstall.”
11. Manage subscriptions
The Subscription tab is where you can view your current subscriptions. This area lets you see all of the products that are part of your subscriptions, such as the NI 360 subscription. Products that are part of the subscription are also indicated by “Subscribed” next to the product. If you need to change something about your subscription, go to Native Access’s preferences and under “General,” select “Manage Subscriptions.”
Start producing music
Once Native Access is installed and set up, you’re ready to start producing music using powerful tools trusted by producers around the world. Whether you’re creating dance, pop, cinematic scores or urban music, Native Access will allow you to manage all of the tools you need in one convenient location. Download Native Access, and let the music-making begin!
Related articles
-
Statement from Nick Williams, CEO of Native Instruments
Native Instruments provides an update on its recent restructuring process.
-

How Massive helped Johnny Gorillas shape two creative worlds
Johnny Gorillas shares how mastering Native Instruments Massive shaped his solo work and his work with mono sky, creating consistency…
-
The best sound design plugins from Native Instruments
Discover the best sound design plugins for music, film, and games, including top synths, effects, and creative tools from Native…
-

Taming the monster: behind the soundtrack of K-Pop Demon Hunters
Discover how GRAMMY-nominated engineer Curtis Douglas and producer Lindgren used iZotope Ozone, RX, and Kontakt to craft the high-impact, polished…
-

The best DJ effects: a complete list for beginners and pros
Discover the best DJ effects for every mix, from essential filters and delays to creative tools like the Beatmasher. Learn…
-

Weird by design: HAAi on the limitless potential of Absynth 6
Discover how the Australian artist HAAi uses the new engine in Absynth 6 to create layered atmospheres and immersive soundscapes…
-
$0 to pro studio: your first 5 music production tools that replace $3,000 of gear
In this blog, you’ll learn how to replace hardware gear with VST plugins and get a cheap pro home studio…
-

Noha on groove, texture, and using Guitar Rig to shape emotion
Italian producer Noha explains how Guitar Rig, modulation, and subtle distortion shape his minimal yet emotional sound in “The Place.”…