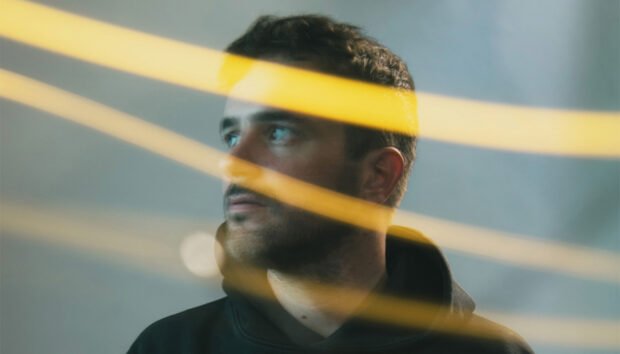
Jeremy McLennan has toured all over the world as a guitarist and drummer in bands like Tamaryn, Hatchie, and Launder. But lately the L.A.-based producer has been finding new ways to marry his shoegaze chops with some of the weirder things that computer software can do. With his solo project Orchin, he dabbles in euphoric influences from ’90s Eurodance and trance, emo sensibilities, and PC Music-style avant-pop, which you can hear on his 2019 record Serene (Terrible Records), which The Fader called “a heady, compulsively listenable Frankenstein’s monster of an album.”
“Living in LA, I do a lot of driving, and that’s where I listen to music most of the time,” Jeremy explains. “I think that influences my music making a lot because I always love things that are floating and in that weird ethereal space – very emotional and out-of-body almost.” Achieving this elusively sublime sound used to mean studying what pedals were used by fuzz-rock greats like Cocteau Twins, My Bloody Valentine, or Jesus & Mary Chain, but these days Orchin’s approach is much more digital and unorthodox. “I definitely spent a lot of time when I was younger trolling through gear blogs and being like ‘What effect are they using?!’ but [those bands] weren’t on gear blogs looking for the right pedal! They just picked up whatever the new cheap thing at their corner-store guitar shop was. A.G. Cook just did an interview where he talks about laptops as the new folk instrument and that’s so on-point for right now. It’s just about embracing the tools in front of you – you don’t need to do what other people did. They were just embracing what they had!”
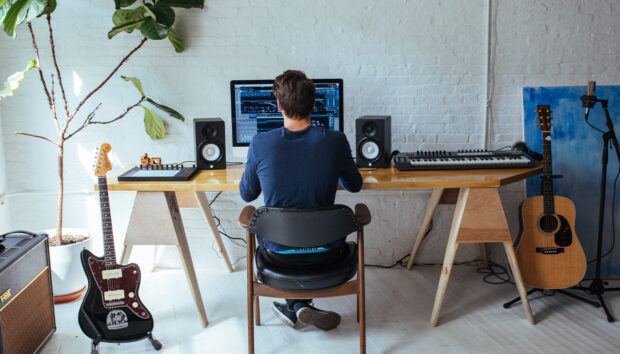
“For my last album, I’d just write the whole song on guitar and go record it,” he explains of his songwriting shift. “For all the newer stuff, I’ve been approaching it from an electronic production standpoint first, making loops and working off those or pulling up a random drum plugin in ProTools, hitting the MIDI keyboard and then quantizing stuff to see if anything cool and random happens. I’ve been trying to approach it like, ‘What if this guitar is like the oscillator of a synthesizer?’ And then my options for processing it are what’s on the face of a synthesizer – filters and LFOs and whatnot. I love creating sounds on the computer that sound like a real guitar, but they aren’t. People associate sounds with instruments and instruments with certain sounds, so there’s a lot of room to just fuck with people and I like playing on these weird auditory hallucinations you can create.”
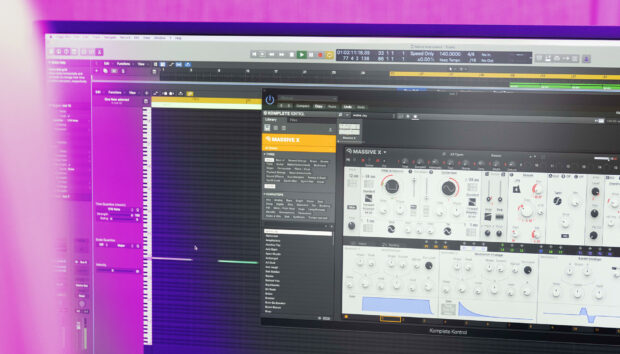
In a recent episode of Real Talk, Jeremy walked us through the stems of his recent release “dRiVe,” a track whose centerpiece is a MIDI guitar line played with Komplete’s MIKRO PRISM, as well as percussion from Kontakt’s Beat Em Down kit and several doses of RAUM reverb. Read on to find out more about how Orchin combines acoustic and digital sounds, his insane parallel compression chains and some killer tips for getting big pop vocals and drums.
Orchin has also been cool enough to give us the stems for the track “dRiVe.” Try your own remix & make sure you tag us in it!

Loop your way in
This song started with this really standard acoustic guitar melody that I looped. When you loop something, there can be this little gap in the audio that gives it a weird kind of jolt, it’s very subtle and subconscious but it jerks your attention back to “This is repeating right now” because all the overtones and harmonics get cut off in a bizarre way. I wanted to try to make it into a super poppy song too. I layered the loop with this other acoustic guitar in Nashville tuning — which is just the top 12 strings of an acoustic — and it sounds super thin and shimmery, which gives it an even more Cocteau Twins vibe. I mic’ed the guitars totally dry, without any effects, and they sounded super box-y and horrible so I added harmonic distortion, EQ and a bunch of parallel processing (compression, spreader) then sent to a nice hall reverb.
Add some squish to your pop
I added this drum beat using the Beat Em Down preset in Kontakt. I was listening to a lot of Backstreet Boys and N*Sync at the time and I wanted them to have that really crunchy, squishy ’90s Max Martin sound. And then I added trap hats, because it’s 2020, you gotta have trap hats [laughs]! The hats are from Kontakt – that’s kind of what I use for all my sampling needs. I sent the drums to one bus and put this lo-fi plug-in to try and make them a little more shitty-sounding then ran them through this Antares THROAT talk box plugin that actually models a human throatAIR Talkbox plugin. I wanted it to be kind of like this one Backstreet Boys song – I thought it was kind of boy band-y to try and beat box, which I’m not good at. Then I put some pretty random automation on the formants, which helped give it more of a human feel. After that I did more parallel processing, including sending it to a buss with all the mids scooped out and the top and low-end boosted, and then just compressing that one a lot and combining it with the regular one. It’s like night and day, in terms of the fidelity.
Humanize your digital drums
When I’m programming drums, the velocities are kind of crazy and all over the place, which I think helps humanize more artificial sounds and sequences. On my grid, not everything is perfectly lined up. You can play with the strength of the quantizing, which helps give it more of an organic feel. I’ll also add a bit of swing to it — not to the point where you can hear that it’s swung — but if a person’s naturally playing drums there’ll be a little bit of swing to it, because no one is a robot. I have these snaps too, which is another good example of combining artificial and organic. I recorded three different tracks of me actually snapping my fingers and then layered them with a sample of 909 claps and just bussed those together with a ton of reverb.
Give your vocals that big pop flavor
I definitely top-lined the vocals, like true pop songwriting. Got my two loops in order, added the vocals and then put Auto Tune on everything, because it sounds sick, not because I can’t sing! All of the lead vocals have a gate on them, probably around 40Hz, just for getting rid of all the random noises in the background. Up until the first chorus, I have all my vocals running through an EQ with a really narrow frequency spectrum, like super filtered, and then I automated that to come off when the chorus hits so the vocals get way bigger and more hi-fi. (I also did with the drums up until the first chorus.) I’ve got like a million sends on here. There’s distortion and a little bit of EQ or a filter – because you don’t need all the crazy high and low-end harmonics when you’re using a distorted thing, you’re just trying to get that warm mid-range — and then compression; first just baseline compression, next a sub mix with lots of compression and then a sub mix with a doubler on it, sending the vocals wide. And then I did this trick where you put a high-pass filter on at like 16000 Hz and then just boost the sound a little above that. You can use any EQ that has a high pass and a high shelf. You have to flip the phase on it though, otherwise it doesn’t work, and then crank the gain a bunch on a compressor (it’s so quiet that you won’t hear it otherwise). I don’t know why it works but it adds so much sheen and shimmer to your vocals – it just goes from sounding like a normal vocal track to a pop record all of a sudden.
Replace the obvious synth with something weirder
I originally had this synth melody thinking it would be a Juno, but then I was like “How many people make a song with an acoustic guitar and a drum machine and a Juno lead?” I wanted to make it weirder so I went preset diving and found this synth sound from the Kontakt instrument Kinetic Treats. I wanted something really percussive and kind of underwater and wet-sounding, in line with the squishy drum sound. I panned that right and sent it to this stock ProTools delay, just a super short delay on the left, like a slap back. Then I did some EQ and compression and added another synth that only comes in at the end of the song, which is basically one note with me moving the pitch wheel around. I wanted something that sounded like an oscillator and that was it.
Make your bass hit harder
The bass part is just whole notes, I wanted to make this song super spacious and feel very spread out and open; I didn’t want to like clog up the low-end by making the bass part too busy. I wanted it to have the force of a synth-bass, but with the feel of a real bass. I wasn’t really getting that with just the bass recorded in by itself, so I put a sine wave with a low-pass filter on it underneath the recording, which added low-end. It still didn’t have that percussive “oomph” you get when the bass and kick really lock together, so I added this sample of a short 808 from Komplete and that just made it hit harder. It’s important to recognize that now, even if you’re not making stuff with electronic elements, it’s going to be played next to stuff that’s got crazy fidelity and crazy low-end. If it doesn’t fit the vibe of the song, don’t do it, obviously, but if you’re trying to make something sound full – even if it’s a really acoustic, organic-sounding thing – it can’t really hurt to throw in a little subtle electronic stuff under there, you know?
Switch up your snare dynamics
I didn’t really do it in ““dRiVe,” but I often change the timbre of the percussive elements over time in my songs. Let’s say I have a snare sample, I’ll put that into Komplete and have it laid out on my MIDI controller. For certain sections, I’ll have the snare be higher pitched and when I want the song to hit a little harder, I’ll put the snare lower. You can do it really subtly and it can make nice dynamic changes between sections – especially if your track is heavily electronic – or you can do it in an extreme way where it sounds ridiculous and sometimes really cool.
Guitars: Make ’em or fake ’em
For the MIDI guitar-type sound, I started with the Light Bell preset inside MikroPrism, [a free Reaktor synthesizer] inside Komplete. The sound I was referencing for it – in general tone and quality – was like soundtrack to The Legend of Zelda: The Ocarina of Time for the N-64. By itself the Light Bell kind of sounds like a guitar, but I did a bunch of stuff to it. I layered it with a MIDI acoustic guitar sound to give it a little bit more body in the low-mids. The sound was very hi-fi before I started processing it, but because I was going for that crunchy videogame sound I sampled it down to 16-bits.
Afterwards, I sent the two MIDI tracks to a bus and I EQ’ed and compressed it a bunch – I’m using like five different compressors on them. The MIDI tracks were summed to an auxiliary sub mix where I used a Waves CLA-2A compressor and R-Comp and a tube screamer plug-in and a very slight Bitcrusher to compress it more and give it some dirt. From that sub mix, I sent those out to another Aux track with an Aphex Vintage Aural Exciter to add more cheap-sounding high-end to it and then sent both of those sub mixes into NI’s RAUM reverb – I put it on this preset called Weird Metal, which sounds really fucked up in the best way. (I also really like the “Airy” mode within RAUM – it’s my go-to for lush, high, shimmery-sounding reverb, like on the snaps in this track.) Finally, I sent the whole thing into a Waves API 2500 Compressor, another R-Comp and then the reverb send went out to a digital drum room.
I wanted the compression to sound like overly compressed acoustic guitar recordings, but I also wanted to take the dynamics out of the guitar so that it sounds fake. You recognize that it’s a guitar but it’s clearly not a guitar. The funny thing is that everyone asks how I got that really cool guitar tone, not knowing it was all played in with MIDI.
Keep up with Orchin’s releases on Bandcamp and follow him on Instagram.
Real Talk, hosted by Vivian Host (@stareyezzz) is every Thursday at 1PM Pacific / 4PM Eastern / 9PM GMT on @nativeinstruments Instagram Live. You can see all the other episodes in the series here.


