


Every producer wants to find ways to improve the sound and quality of their music. That is true for every element of what you’re creating, but it also applies to the finished product. And one of the most common questions about improving your final product is about mastering. What is it, and how can you use the mastering process to make your beat stand out?
Mastering is the final stage of audio production—the process of putting the finishing touches on a song by enhancing the overall sound, creating consistency across the album, and preparing it for distribution.
Learn how to master your beat in this step-by-step guide.
Jump to these sections:
- Prepare your file
- Equalize your frequencies with EQ
- Level your dynamics
- Improve your stereo image
- Maximize your loudness
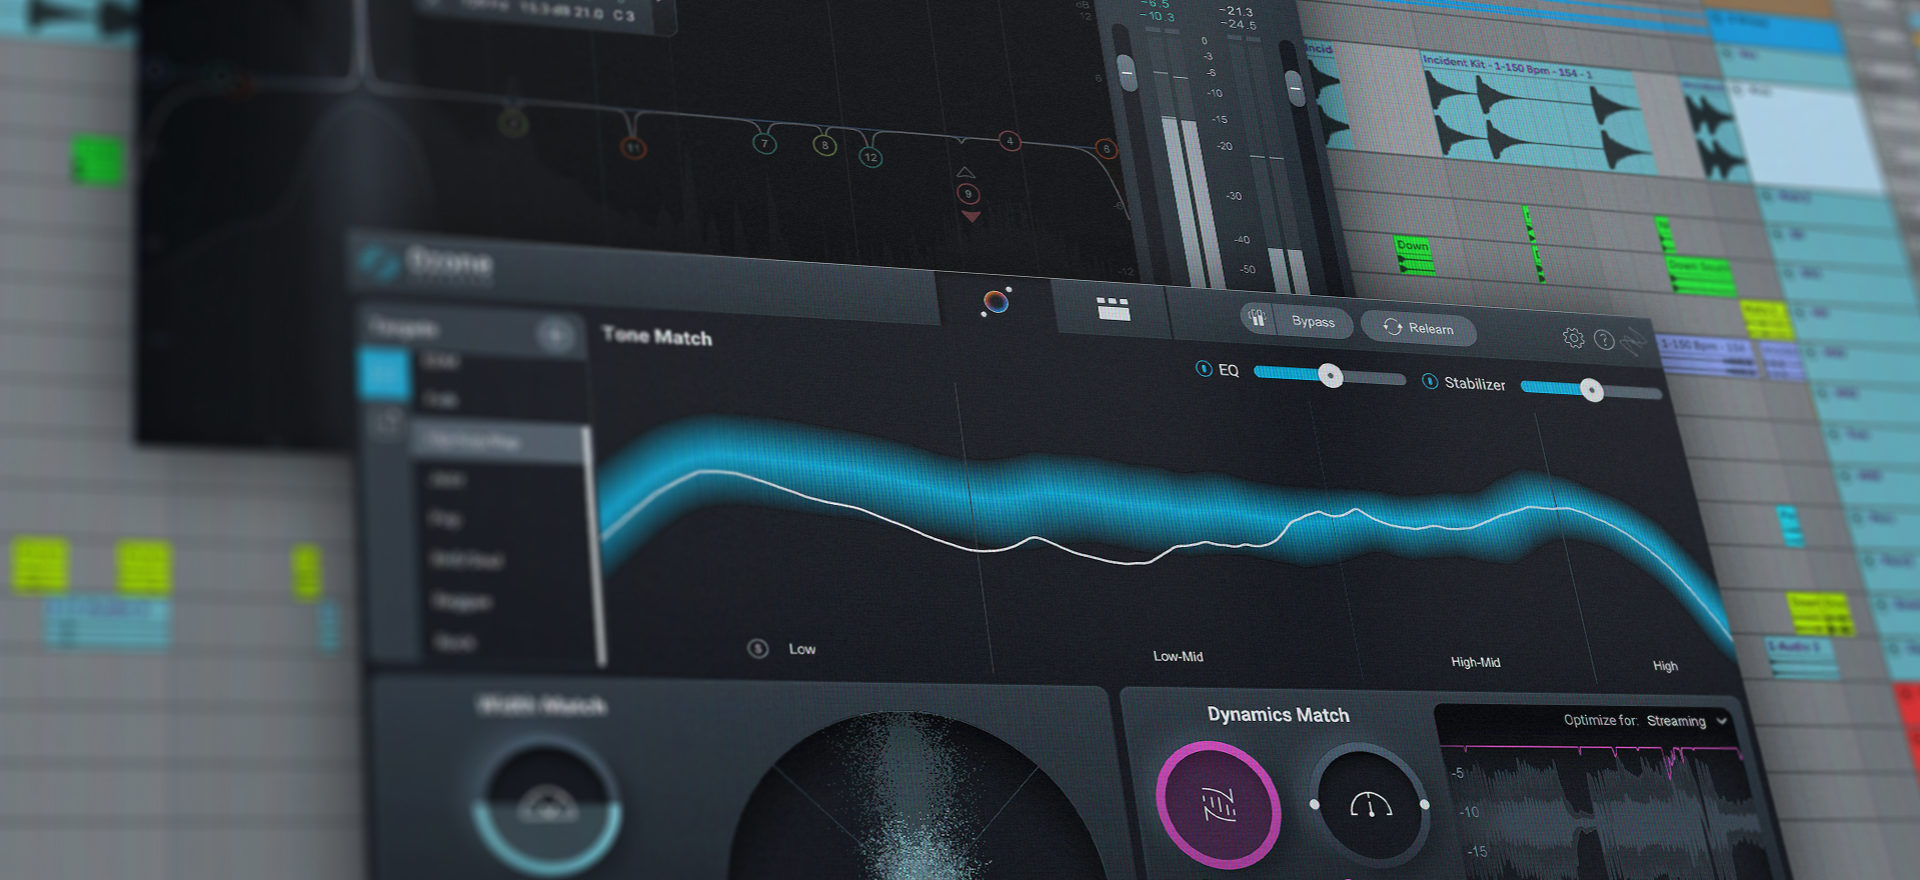
Follow along with this beat mastering tutorial using iZotope Ozone 10 Standard, included in KOMPLETE 14.
A note on critical listening: The most essential tool you’ll be using in this process is the one you rely upon for everything in music is your ears. It’s important to listen closely, because sometimes very small differences in the mastering process can add up to a big change in the final result.
How to Master a Beat
1. Prepare your file
Before we dive into mastering, we need to discuss how to get your track ready so that it’s ready for mastering. We need to make sure you have an optimal file that has the proper amount of headroom and dynamics. You’ll want to output your final mix so that the levels are peaking between -6.0 dB and -3.0 dB. If you’re quieter than -6.0 dB or louder than -3.0 dB, you might not get the full benefit of the processes we’re using. A file that’s too loud will not have the space available to access the frequencies and transients necessary to make real improvements. A file that’s too quiet may not reach the thresholds for the dynamics processing, or might make it harder to perceive the frequencies which need adjustment.
To illustrate how a file should sound, check this beat we made and output in the range of -6.0 to -3.0 dB.
2. Equalize your frequencies with EQ
Equalization is the most necessary part of the basics of mastering. Let’s start with removing any of the harsh resonances that we sometimes find lurking in our mixes.
iZotope has a few EQ plugins that can help us remove harsh resonances, like Ozone’s EQ module or Stabilizer module.
But if you’re new to mastering, some AI-powered assistance might help. iZotope Neutron’s EQ is typically used for mixing, but we can also use it in the mastering stage to EQ our frequencies with a helping hand.
While playing the loudest, or busiest part of your track, hit the “Learn” button in the upper right hand area of the window. This will use the intelligent system to determine which frequencies might need some attention.

Then, you’ll select one of the frequency bands suggested by Neutron. When the dialog box shows, you can use the Solo button (“S”) to highlight and isolate a specific frequency. Increase the “Q” value to somewhere between 20–40. Then, very carefully increase the gain. Be mindful of your speakers or headphones here. Sweep the “Freq” number back and forth until you hear a sound that’s unpleasant and doesn’t belong in your master.
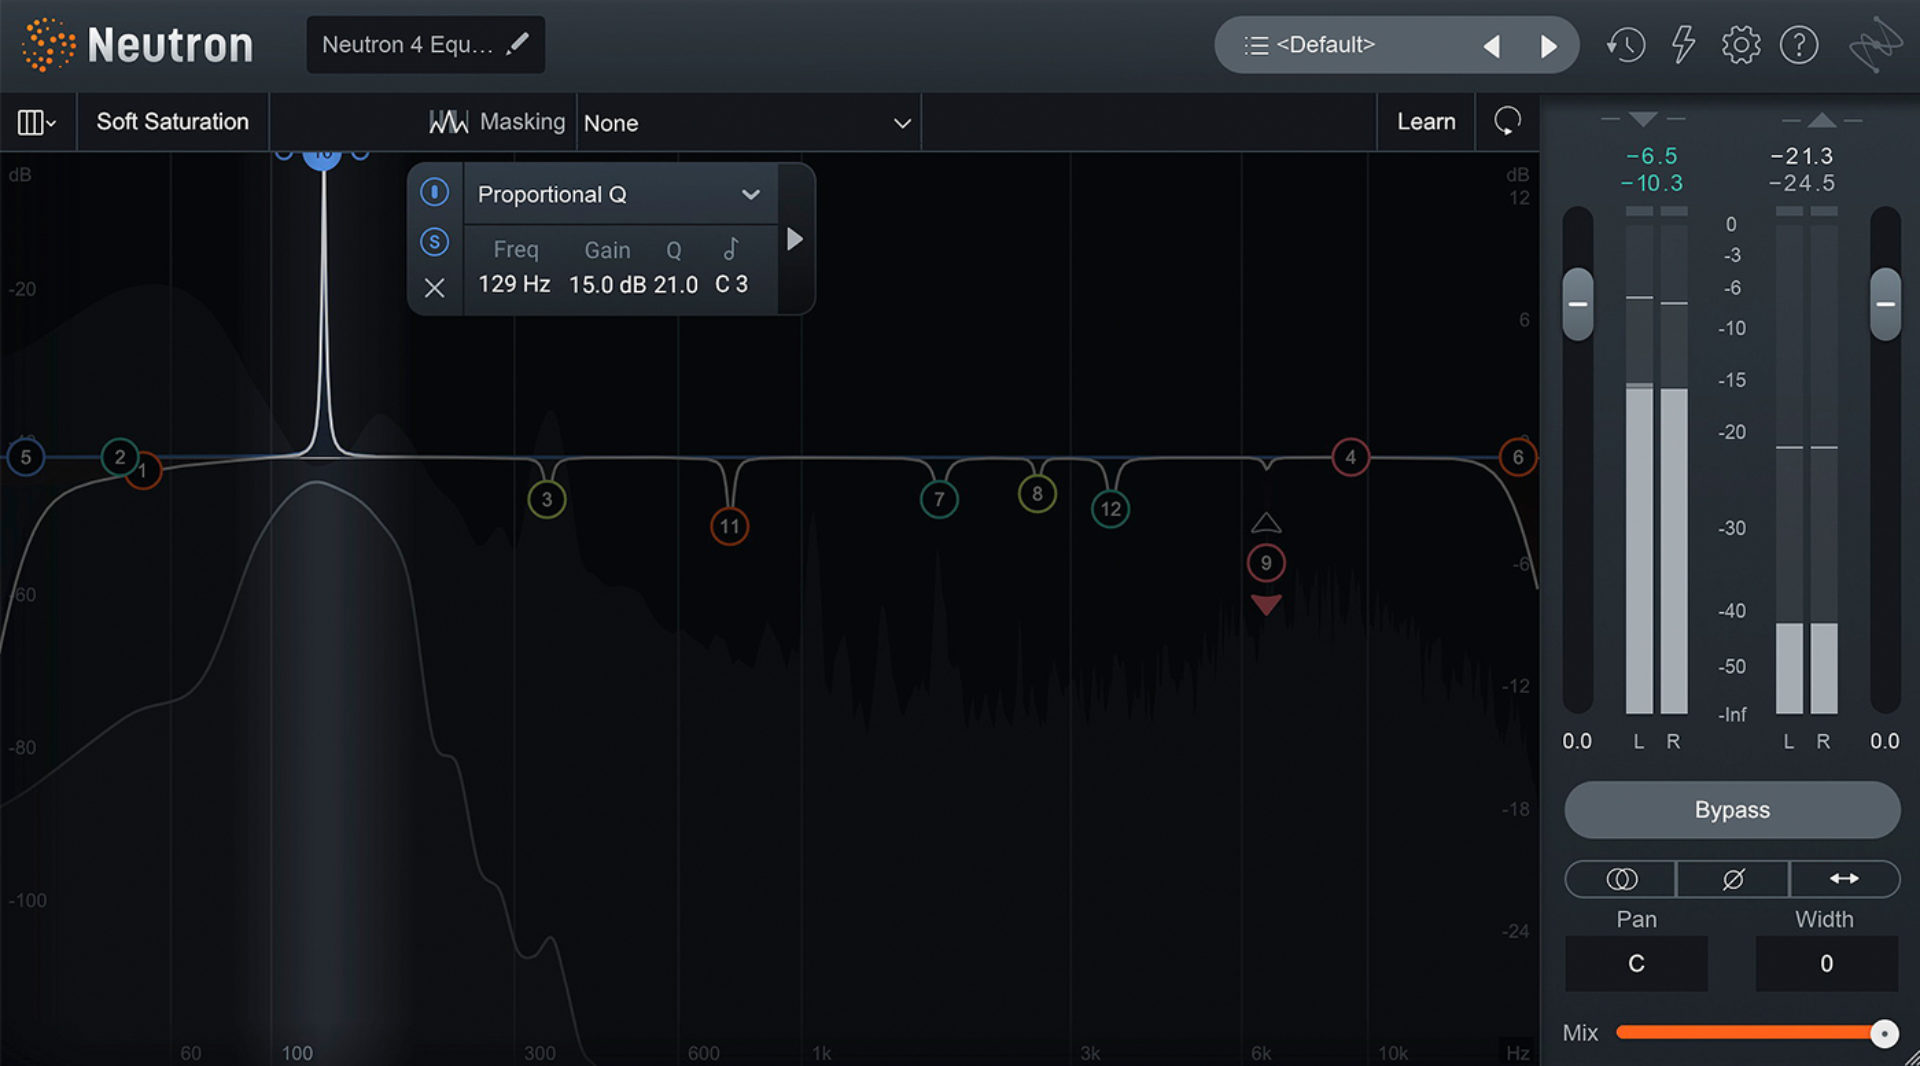
Here’s an example from our beat:
When you’ve found a bad frequency, pull the “Gain” down into the negative range. Start somewhere around -2 to -4 dB, and cut lower if you find it necessary. Repeat this process as many times as you feel needed.
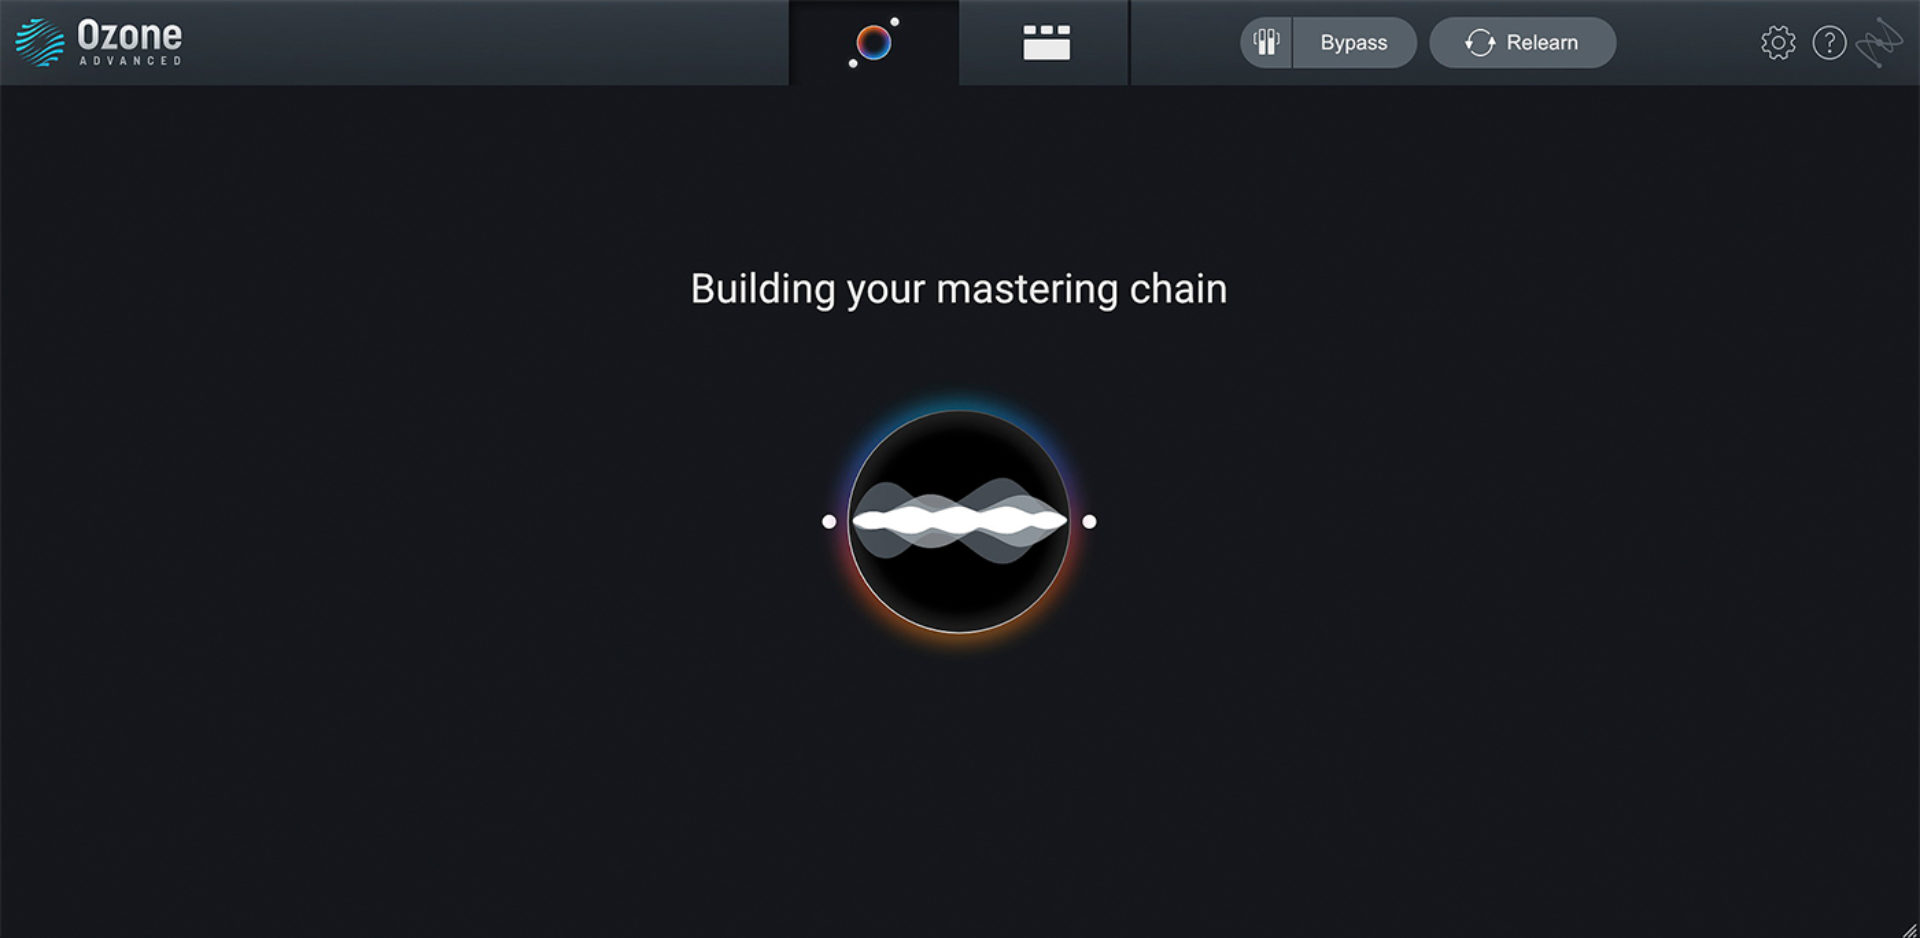
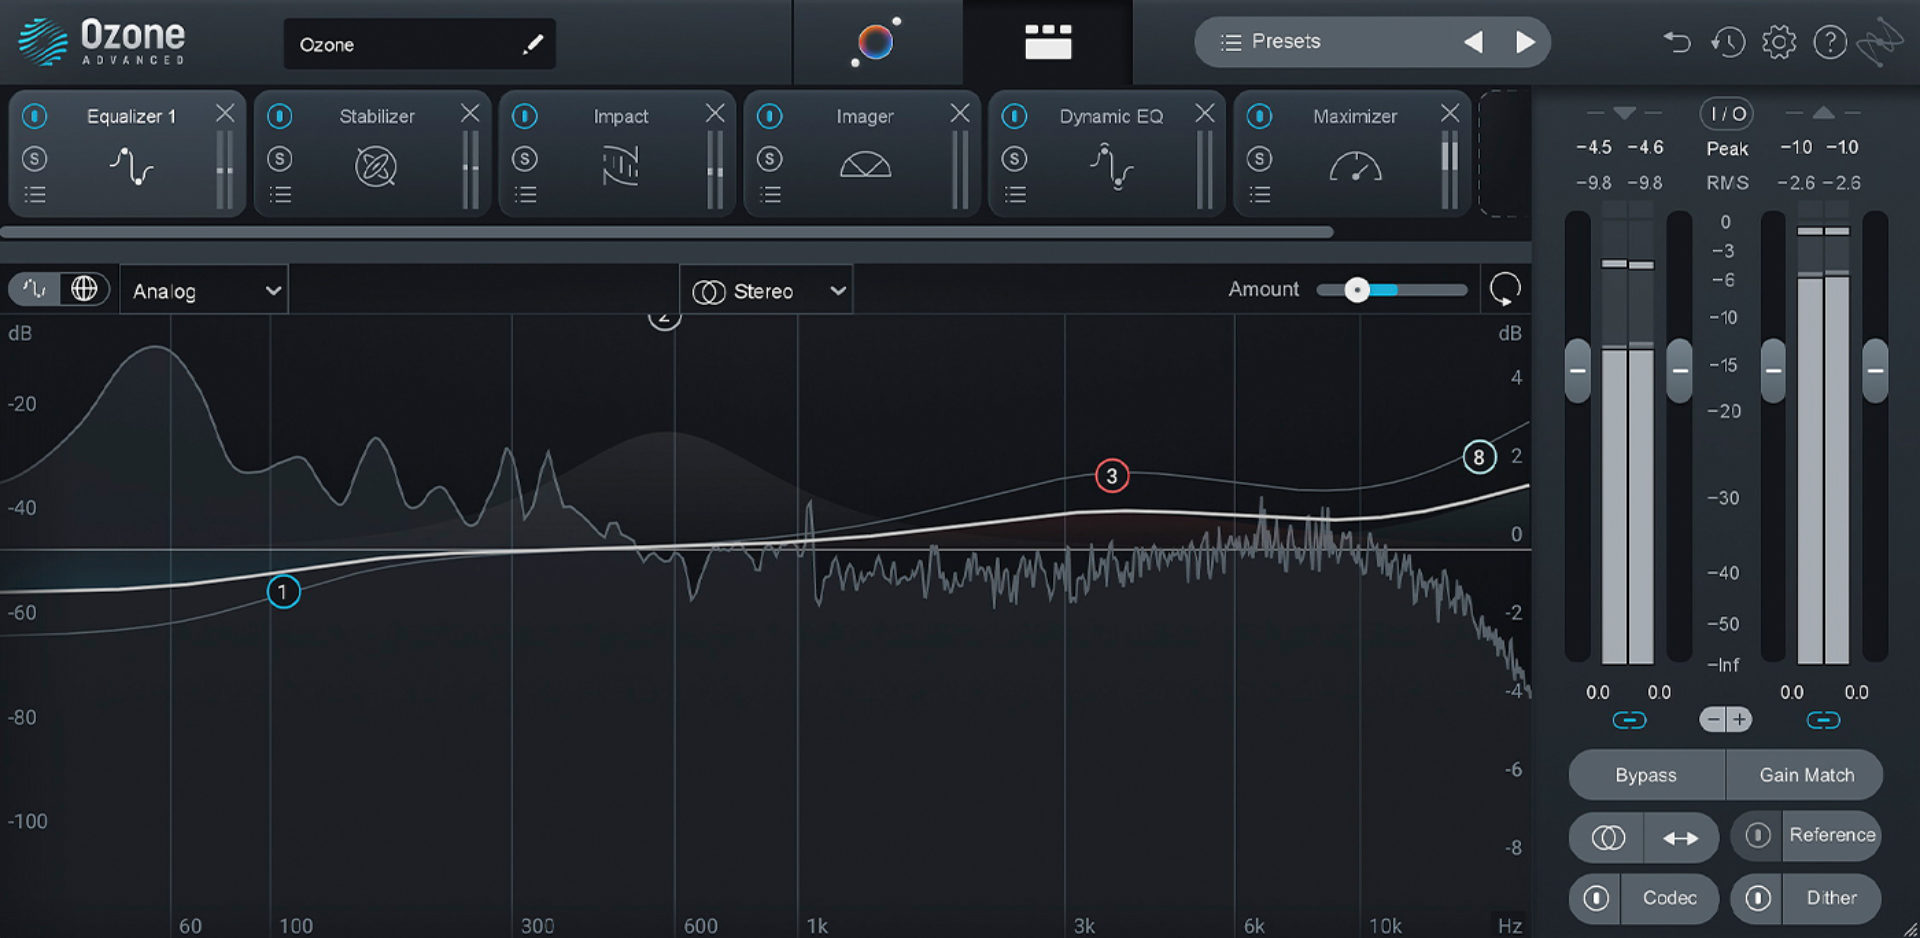
Now we’ve tamed harsh frequencies, we’re going to rely on Ozone 10 Standard to give us a sense of the overall balance of our beat, and use the Master Assistant to tell us any other adjustments needed.
Remaining on the loudest section of your track, click on the Ozone Master Assistant and let it start analyzing the audio. Then you’ll see it working on setting up a mastering chain tailored to your track’s needs.
You may need to correct some of Ozone’s analysis of your music. For example, Ozone thought this track was EDM, but I like the settings it gives under hip hop, so I’m going with that. In the lower right, you’ll see that Ozone is using Dynamics Match to optimize for either “Streaming” or for DJ sets. Our track is more likely to fit for a streaming context, so we’ll keep that setting there.
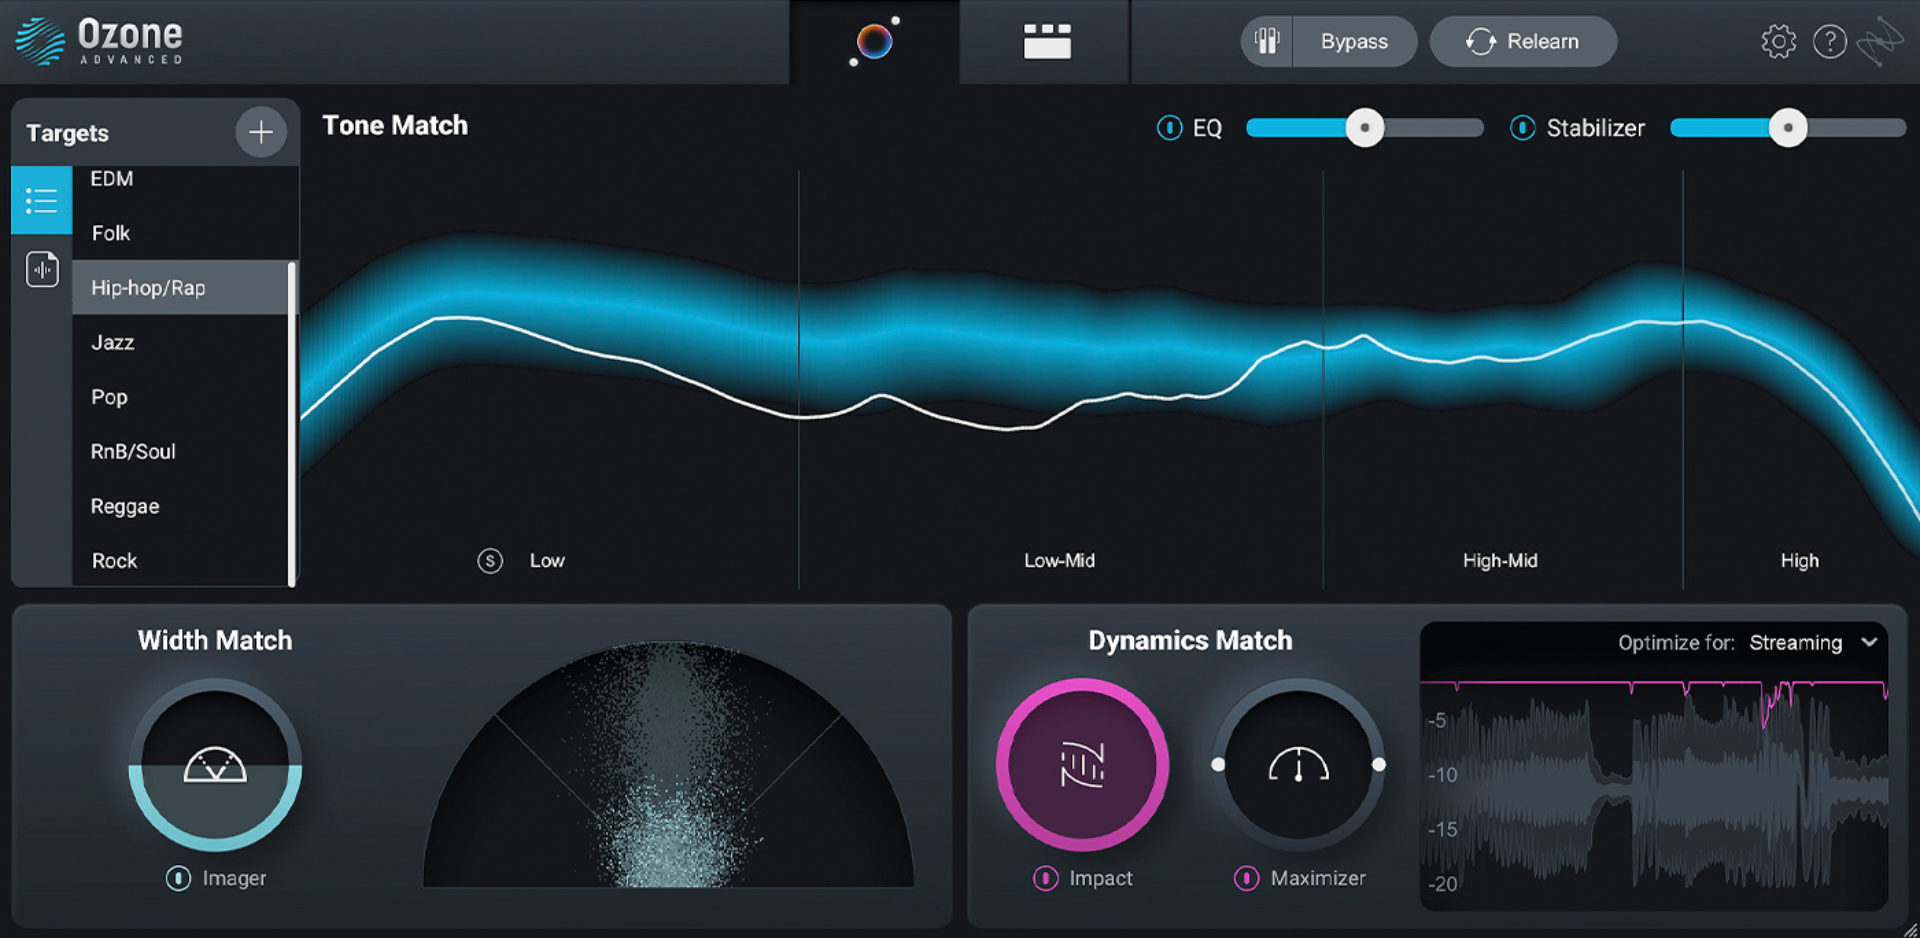
We want to get a little more in-depth here, so let’s switch to the parameter window and look at some of the inner workings. You’ll see the Equalizer Module on the far left, and let’s continue equalizing from here. We can see that Ozone noticed our track needed a bit less bass, and a bit more high end. Since we’ve already notched out the annoying resonances with Neutron, we see a nice broad set of minor adjustments in the EQ profile.
Now we’re going to move on to getting a better handle on our audio dynamics.
3. Level your dynamics
As we move from left to right across the modules in Ozone, we’ll see the Stabilizer module. This adjusts certain frequencies and transients dynamically. You’ll see that the bands are moving in different directions at times when the track needs it, and they’ll level out specific bands to balance and shape the track. A great way to isolate the difference this module makes is to select the “Delta” feature in the upper right. This shows you only what’s being changed.

Next we’ll go on to the Impact Module. Here we’ll see how compression can tighten up and increase the power of certain transients and frequencies.

Once we’re happy with how this sounds, it’s time to look at the stereo image of our track.
4. Improve your stereo image
Stereo imaging is the process of creating width, depth, and the perception of locality in your mix. When we want our beat to sound wide and immersive, we have to make sure it’s using all of the advantages that stereo signals can give. This means a tight, powerful center image, and a nice wide stereo field.
This is where the Ozone Imager comes to work. When we click on the Imager module, we’ll see that it is looking at the stereo width of our track across four frequency bands. We also want to pay attention to the semi-circular Vectorscope diagram that shows where all the frequencies are hitting in the stereo field. A good master will be narrow in the low end, and gradually widen at the top end.
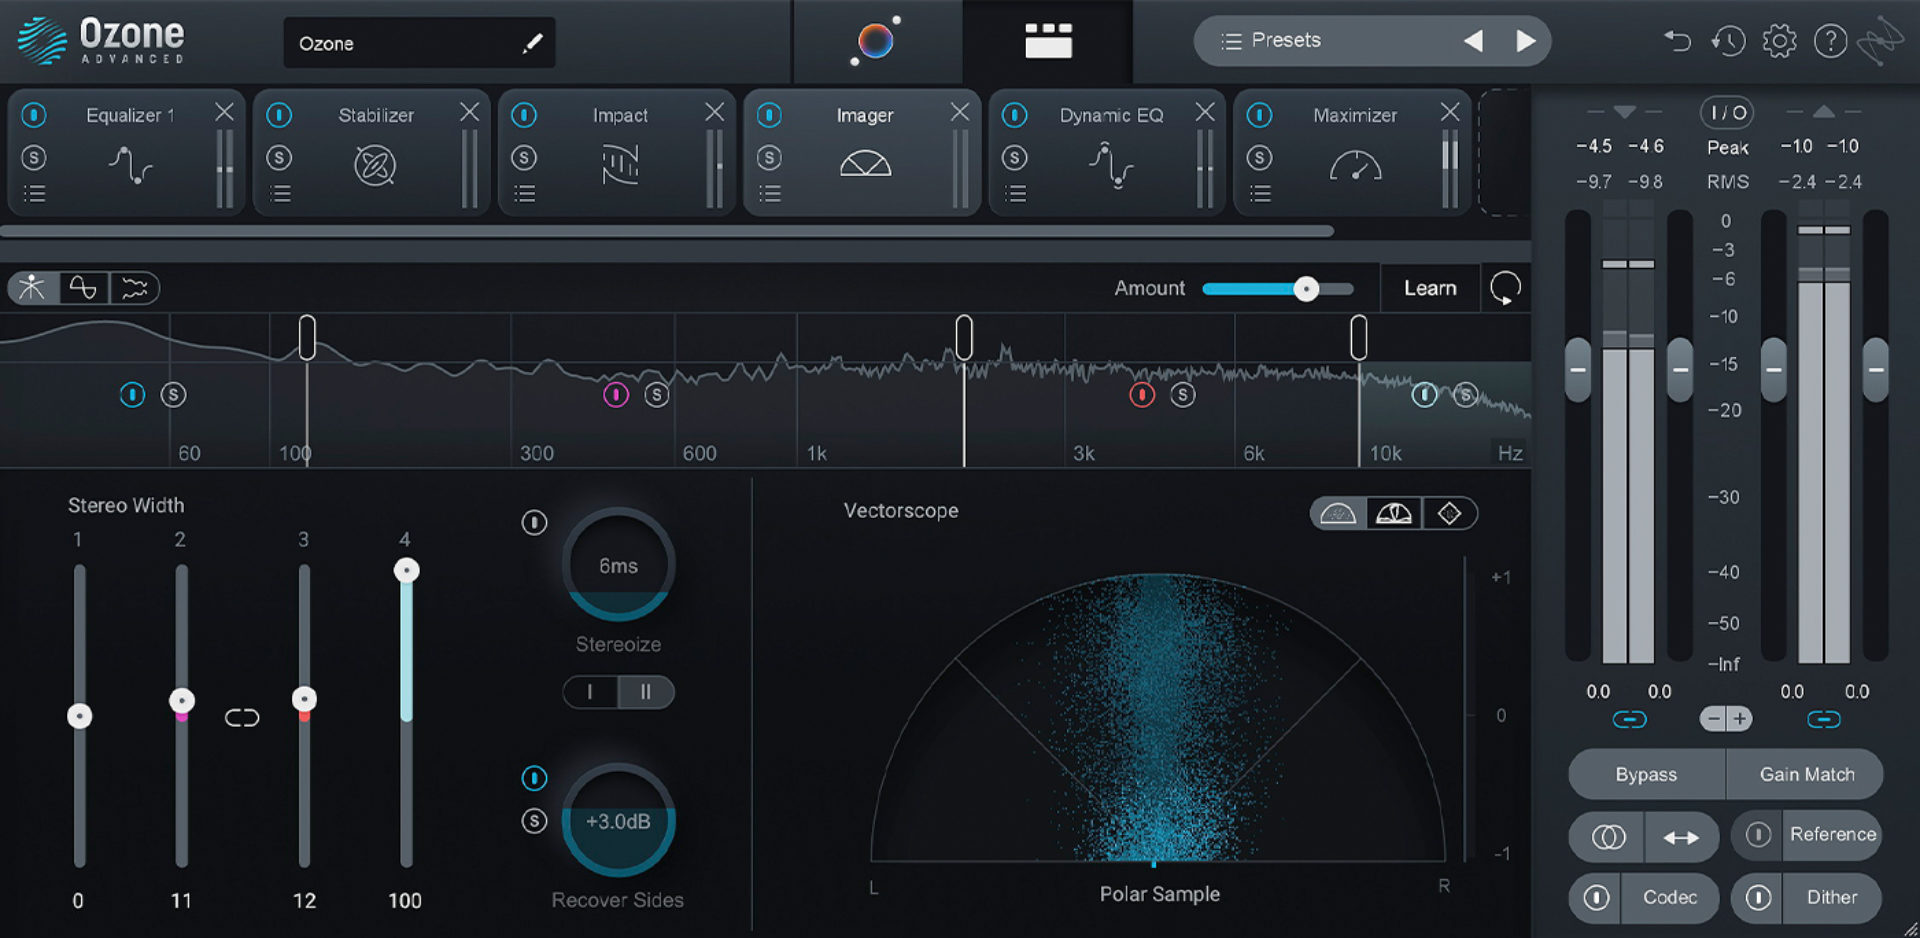
Take some time to adjust the different bands using the stereo width sliders in the bottom right. You’ll see how they impact the stereo field of your mix. Mastering engineers typically focus the low end of bands 1 and 2 to be very narrow, and bands 3 and 4 to be wider in the higher end.
Now we’re ready to put the finishing touches on this master.
5. Maximize your loudness
We’re about to get to the really fun part of the mastering process, but first we want to do one final check to make sure any troublesome frequencies stay contained. This is where the Ozone Master Assistant helps by putting the Dynamic EQ towards the end of our chain.
You’ll see how this module is briefly ducking and subtracting specific frequencies as the track plays. It’s making sure that nothing jumps out too far, or upsets the balance of our mix on its way to the Maximizer.

And now we come to the final step in our mastering chain—the Ozone Maximizer. This is where your track will be brought up to the loudness level we told the Master Assistant. Since we selected it to optimize for “Streaming” we see that the Maximizer is leveling our mix to be loud enough to work for that context, and taming any transients which might pop out too far.

This is the step where our track sounds like a finished piece of music. It’s also where all the previous decisions reveal themselves, and the lights come up on our stage. If something doesn’t sound right here, we can trace our steps backwards and find it earlier in our process.
Here’s how our beat turned out after using Neutron and Ozone’s Master Assistant to polish and finalize it.
Start mastering your beats
Now that you know the steps for mastering your own beats, it’s time to get started! Get your copy of KOMPLETE 14 that comes with Ozone 10 Standard to start mastering your beats, and check out other mastering resources like the iZotope series Are You Listening? To learn more about the practice of mastering audio.
Related articles
-

Inside the evolution of orchestral sampling: an interview with ProjectSAM
Discover how ProjectSAM’s Lineage Series uses NKS and smart features to change orchestral sampling. Plus, save on instruments in our…
-

How New Constellations turn emotion into sound with Massive X
Go inside the studio with New Constellations. Learn how they use Native Instruments gear, happy accidents, and lifelong friendship to…
-

Citizen Kain on building emotion and space with Replika
Citizen Kain explains how Replika helped shape the rhythm, tension, and emotion behind his debut Eversun Records single “Moments.”…
-

The organic precision behind Calcou’s Anjuna release featuring Reaktor
Calcou shares how Reaktor, Monark, and Super 8 shaped the creative balance and live energy behind their new duo EP,…
-

14 NKS instruments that will change the way you create music
Discover 14 NKS instruments to freshen up your workflow. From lo-fi tape synths to cinematic strings, shop the Native Instruments…
-

Parallelle on crafting living basslines with Reaktor and TRK-01
Parallelle share how Reaktor and TRK-01 shape the bass and warmth in 11th Avenue, balancing analog depth with modern control.
-

Where will your sound lead you? Explore the Native Instruments Summer Sale
Save 30% on instruments, effects, and sounds in our Summer Sale. Find the tools to keep your tracks moving and…
-

How Mr. Bill builds sonic worlds in Massive X
Mr. Bill explains how Massive X and instinctive sound design shaped the storytelling process behind his new downtempo album, Mr.