A dance-centric evolution of soul, funk and R&B music, disco became hugely popular in the 1970s thanks to its danceable beats, energetic, often syncopated bass lines, and expressive, uplifting musical elements. While disco’s popularity declined in the mainstream during the late 1970s and 1980s, the spirit of disco lives on in music styles such as house and hip-hop, which would often sample or be stylistically influenced by the genre.
In this guide we’ll show you how to make a disco song in the classic fashion, complete with funky guitar licks, a pumping bass line, and soulful chords.
Jump to these sections:
To follow along with this tutorial you should have Kontakt 8 or Kontakt 8 Player with the Disco & Funk Expansion, Studio Drummer, Electric Keys – Phoenix, Scarbee Rickenbacker Bass and Soul Sessions Instruments, Ozone Elements, and Raum. These are included in Komplete 15 Select Band Edition, Komplete 15 Standard, Komplete 15 Ultimate and Komplete 15 Collector’s Editions. Raum is available for free as part of Komplete Start.
What is the structure of a disco song?
Disco songs usually follow a traditional verse-chorus structure. They often begin with an intro before introducing the groove, which is followed by verses and a catchy chorus. Later in the song a bridge or instrumental breakdown adds variation. Repetitive hooks and groove are central to maintaining an energetic feel throughout, and disco songs will usually end with a danceable, extended outro.
What makes a song a disco song?
A disco song is characterized by a steady four-on-the-floor beat, syncopated bass, and use of instrumentation such as strings, horns, and electric keyboards. Their tempo is upbeat, designed for dancing, with a repetitive, groove-oriented rhythm. Disco emphasizes lush orchestration, catchy melodies, and soulful vocals.
How to write a disco song
1. Starting with samples
Let’s get a headstart on this project by using a string loop from the Disco & Funk Leap Expansion. Create a new MIDI track, then add Kontakt and select the Leap category. Click the Disco & Funk Expansion, and double-click the Leapadelic Kit preset in the list on the right-hand side of the interface.
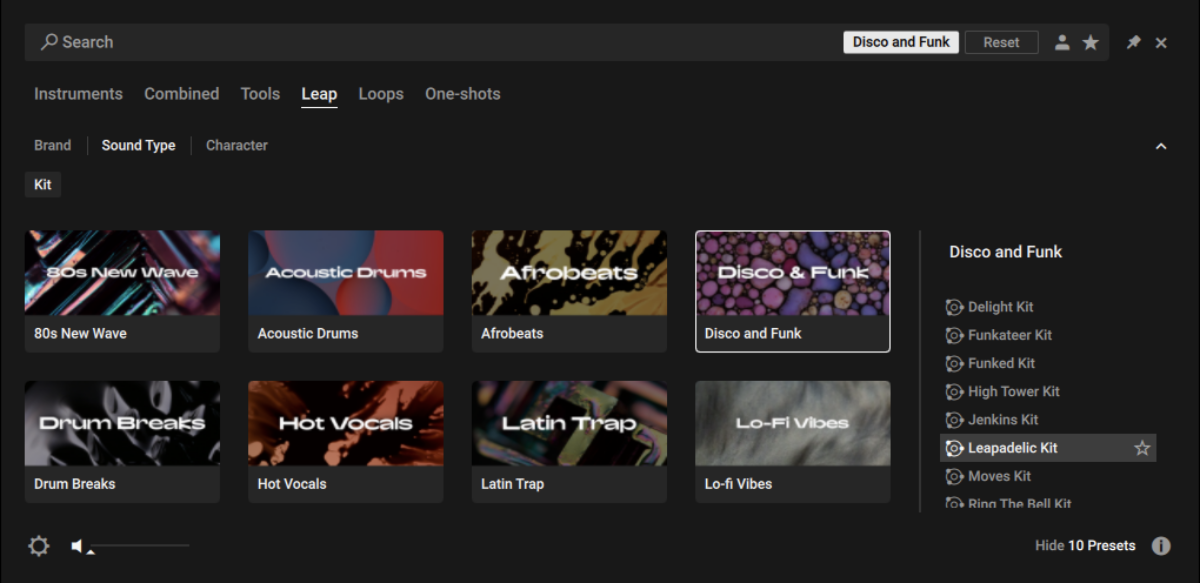
This kit features a string loop that can be triggered with C4, and this is going to provide the inspiration for our project. Create an eight-bar MIDI clip, and sequence a note to play C4 for the full eight bars, using a velocity of 100. We’ll use velocity values of 100 for everything in this project unless otherwise specified.
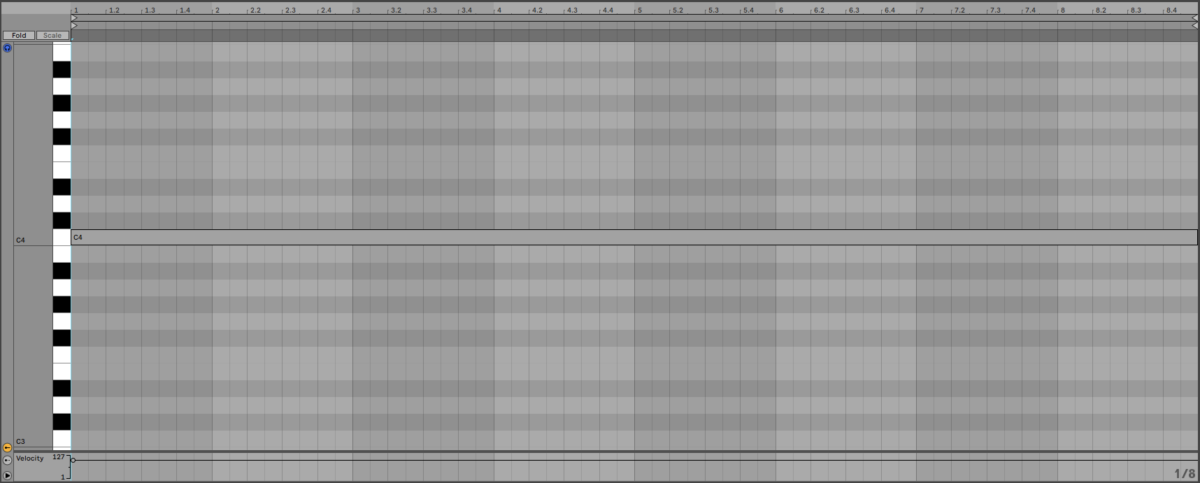
Kontakt automatically warps the loop to fit the project tempo. Let’s bring our project tempo down a touch so that it’s closer to the loop’s original, which is 100 BPM. Set the project BPM to 115 BPM.

As well as strings, it would be great to get a funky disco guitar lick in this project. Add another MIDI track, and again load Kontakt, selecting the Leapadelic Kit from the Disco & Soul Leap Expansion. Create an eight-bar clip and sequence two F3 notes that play for four bars each. This plays an appropriately funky guitar lick.
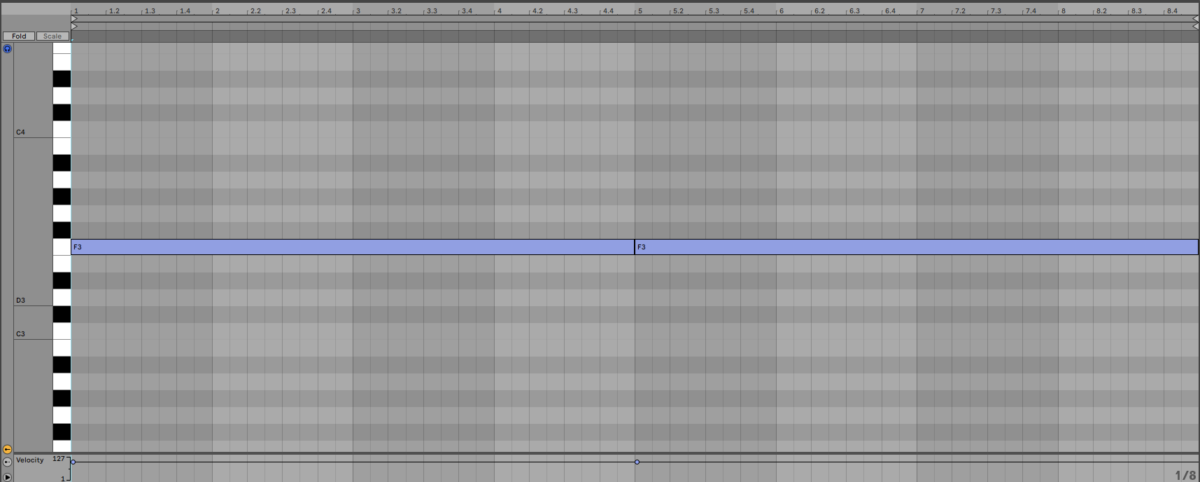
These elements give us a strong musical foundation for our track. Next, we’ll start to compose some of our own parts.
2. Building a drum beat
Add Kontakt on a new MIDI track, and this time select the Studio Drummer instrument, and double-click the Session Funk preset.

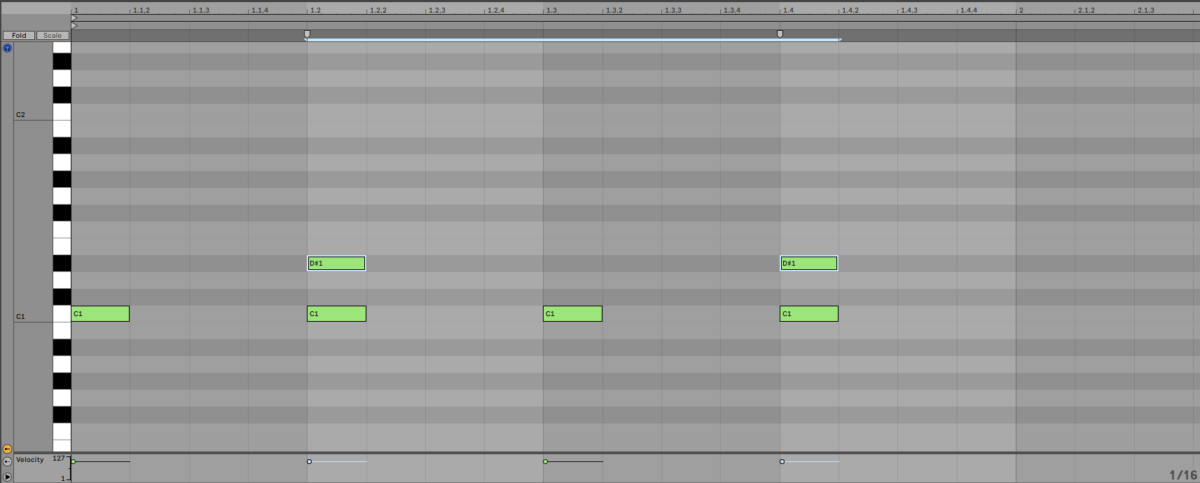
We’re going to use this kit to build an incessant disco beat. Create an eight-bar clip, and add C1 kick drums on each beat of the first bar.
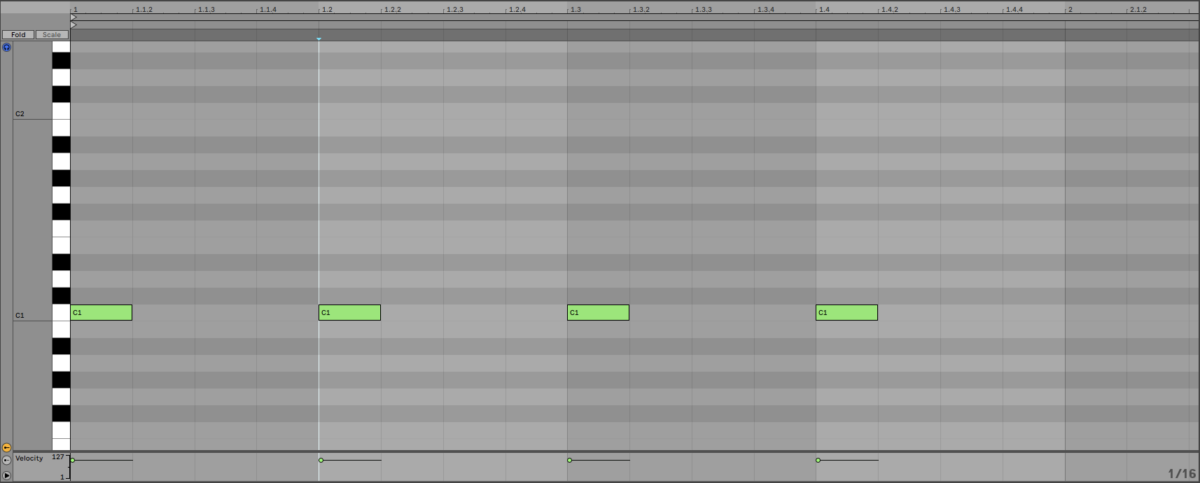
Now add D#1 snares on the second and fourth beat.
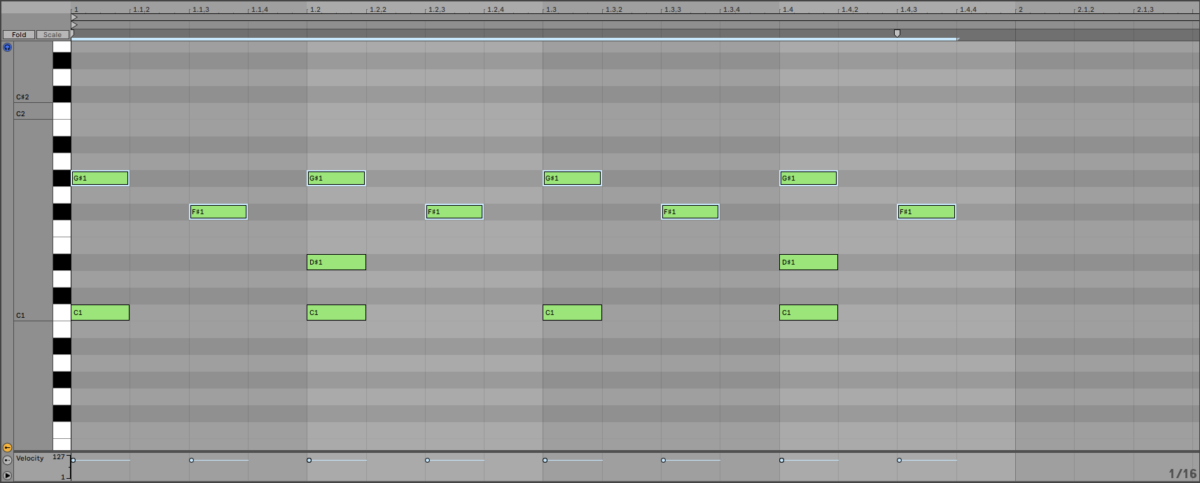
Next add G#1 closed hats on each beat, and F#1 open hats between the beats.
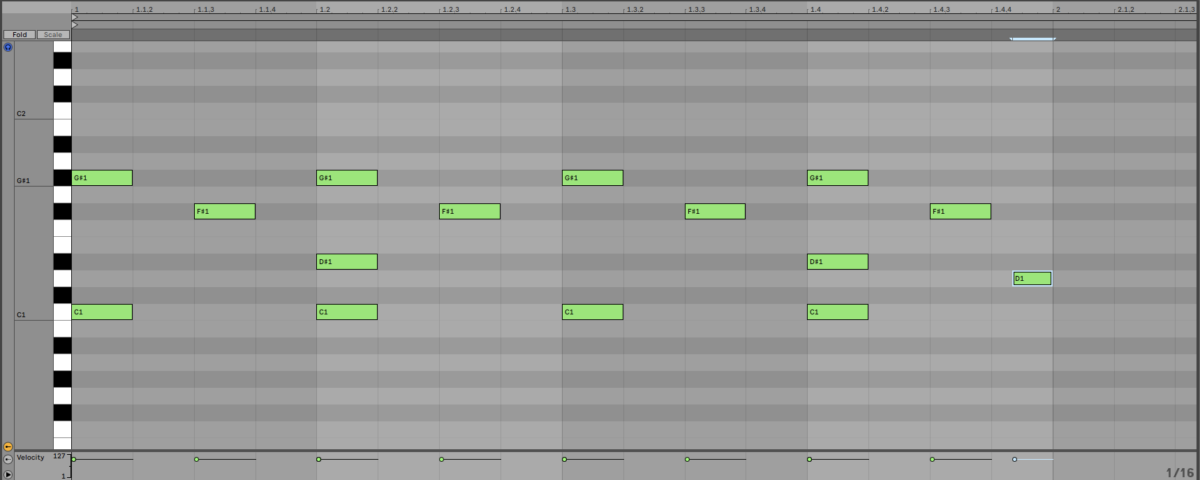
For the final drum sound, add a D1 snare just after the last 16th note to give us a funky, swung feel.
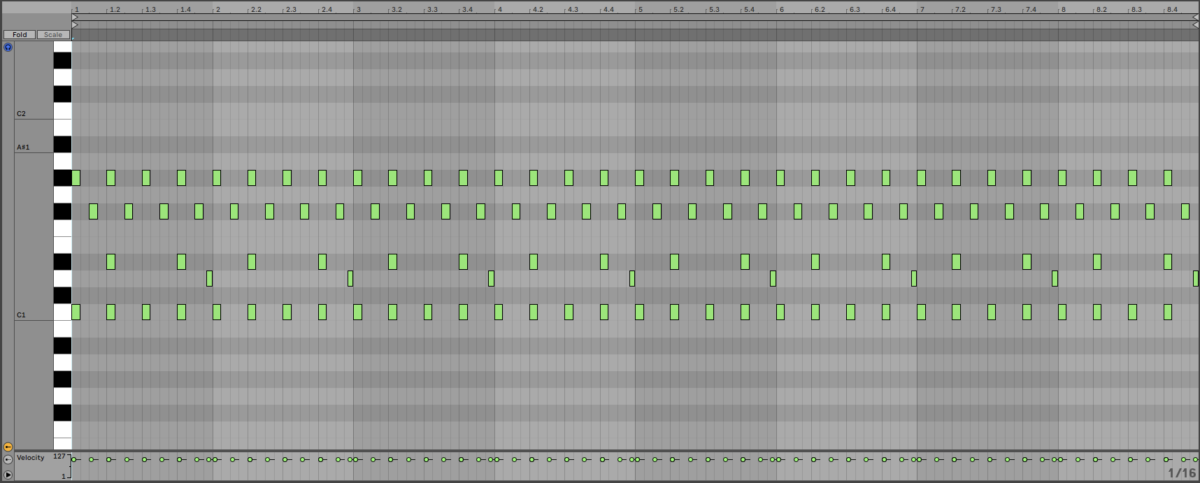
Duplicate the drums out for the rest of the eight-bar clip.
3. Adding keys
Currently our song is sounding great, but the string loop is a little full-on to have repeating constantly. So, let’s mute it and work on creating a sustainable groove.

Add another MIDI track and this time in Kontakt select Electric Keys – Phoenix, and double-click the default Electric Keys Phoenix instrument.
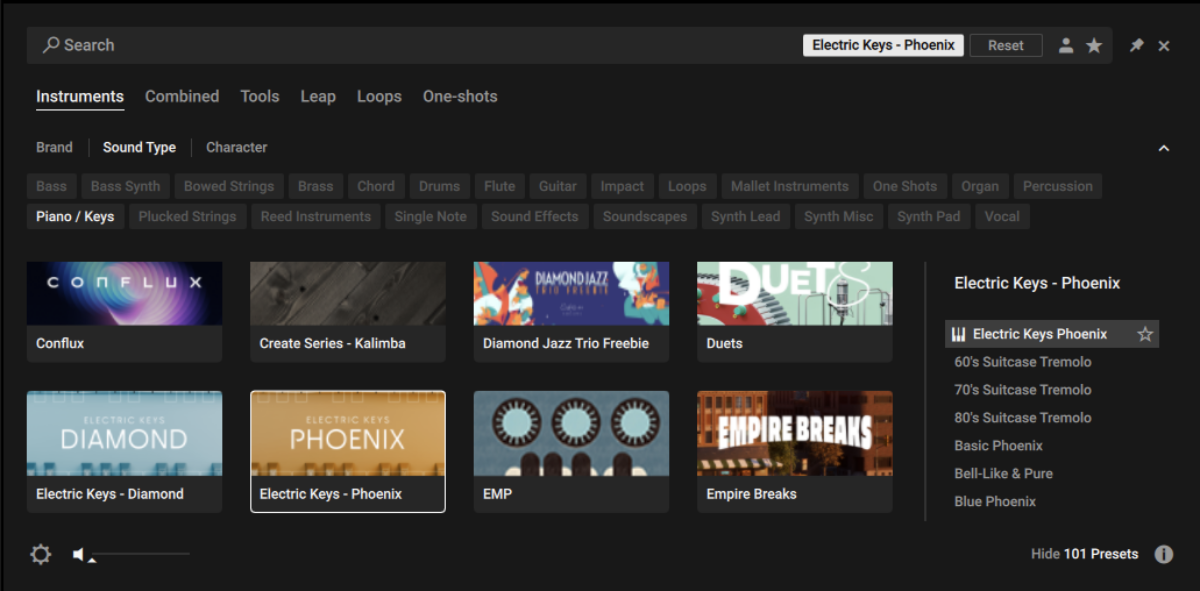
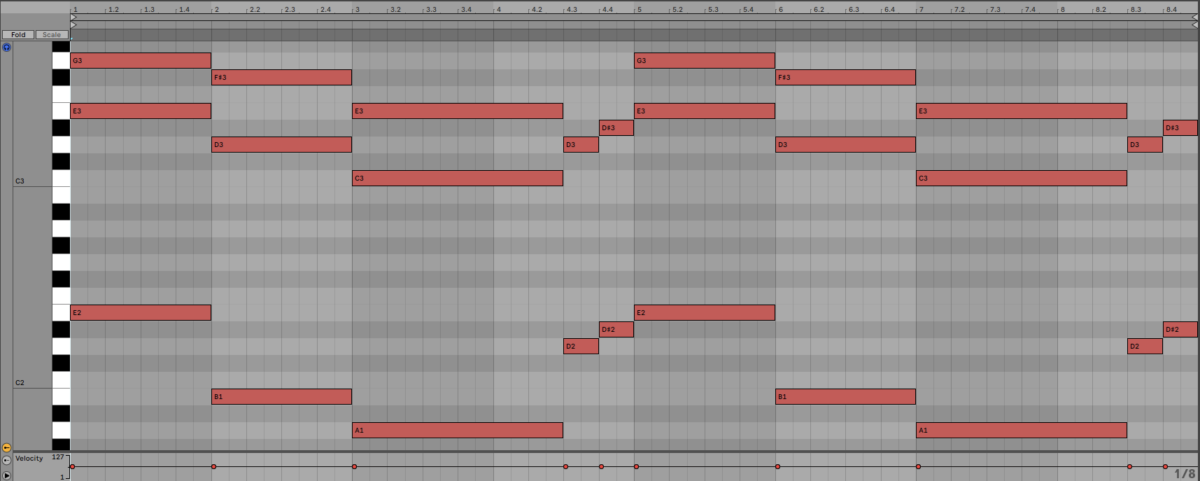
We’re going to use this to create a pared-back version of the string chords. We’re going to use chords without the fifth, and with an extra note in the bass to get a strong, simplified sound.
Copy the part we’ve used here, which plays E minor, D major with a B in the bass, C major with an A in the bass, followed by D and D# on octaves. We’re using velocity values of 66 for this to get a smoother sound.

Duplicate this so that it plays for eight bars.
4. Disco bass
To give our track that energetic feel we’re going to use a classic octave-skipping disco bass line.
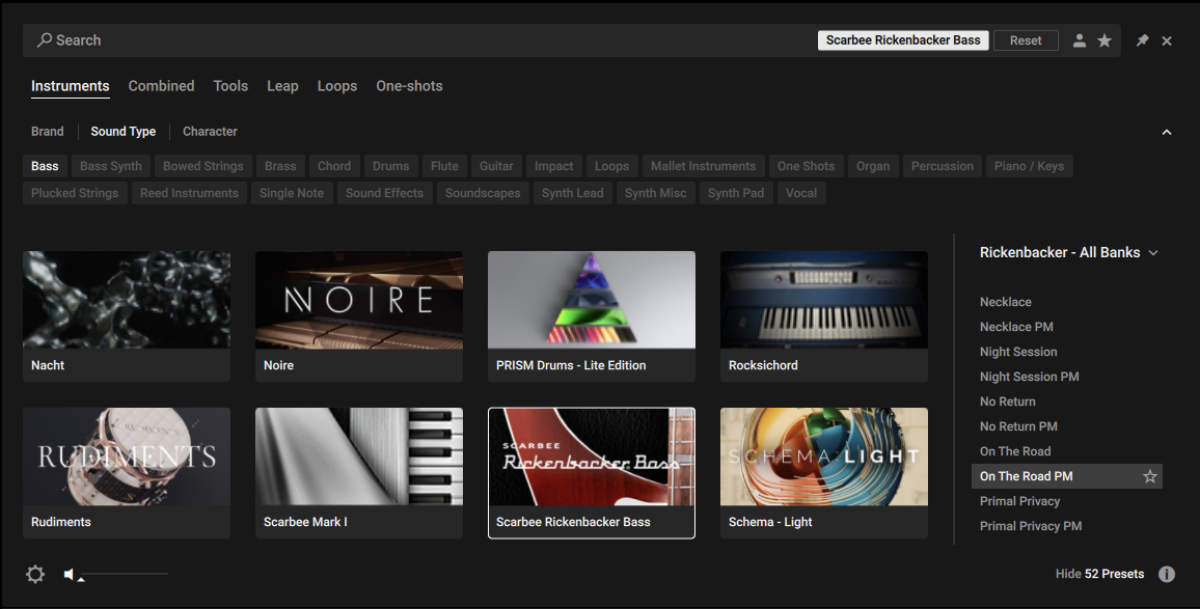
Add a new MIDI track, load Kontakt, select Scarbee Rickenbacker Bass, and double-click the On The Road PM preset.
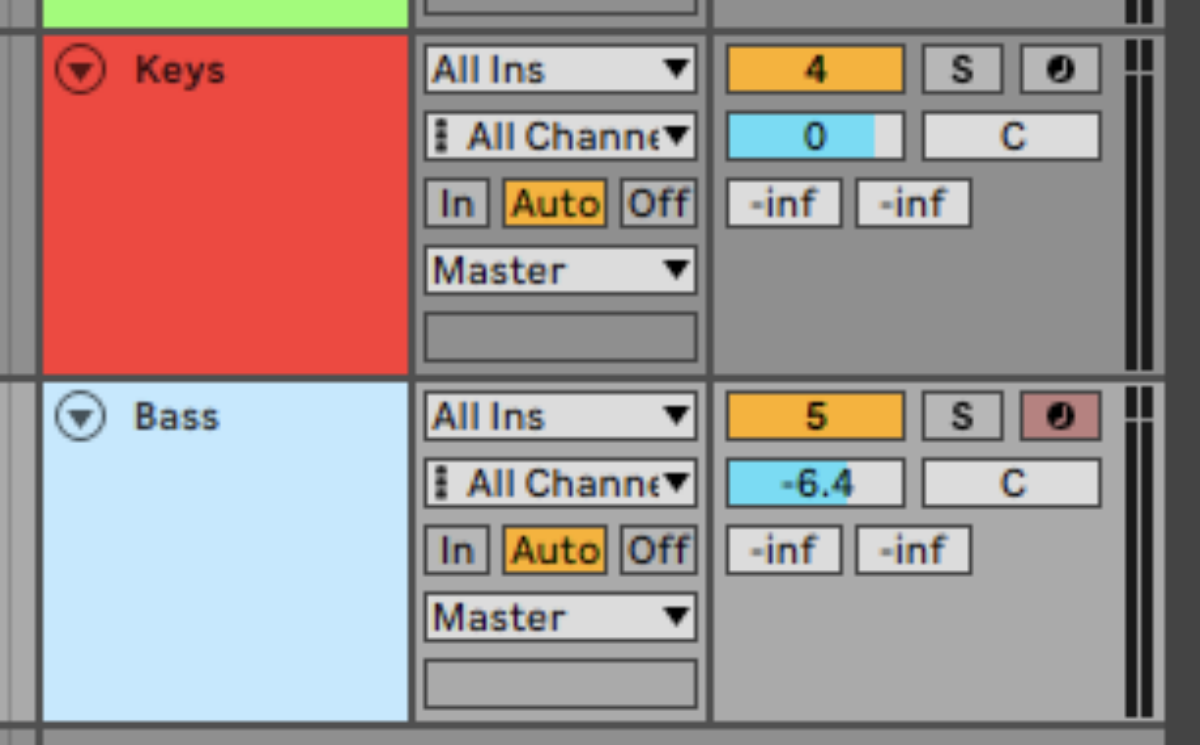
Set this track to -6.4 dB to balance it with the other elements.
Copy this bass line which plays E, B, and A, with low notes on the beat, and notes an octave up between the beats. We’ll use velocity values of 127 for this.

Duplicate this part to play for all eight bars.
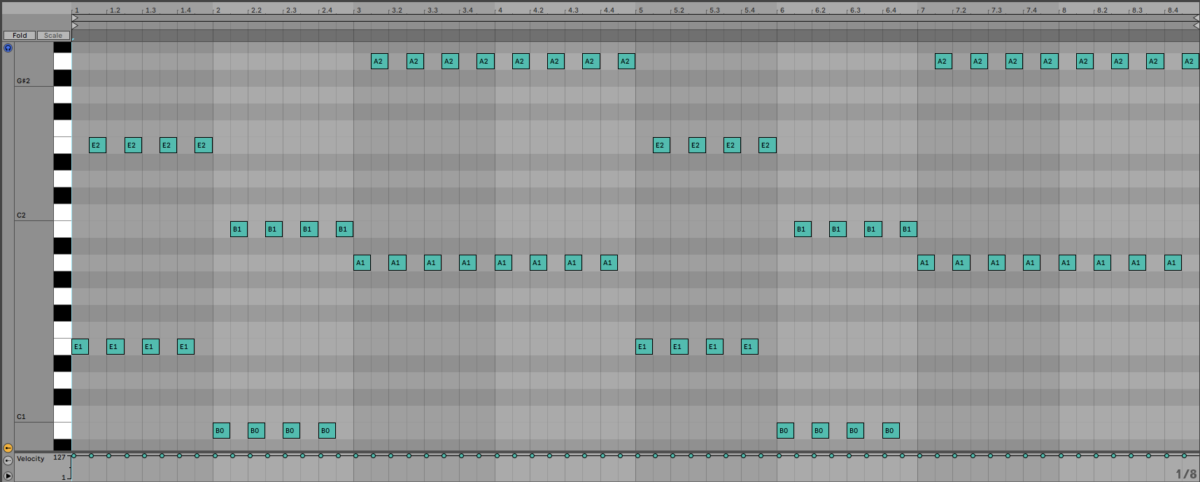
We now have a musical idea that we can use for a verse. Let’s add another element to build that into a pre-chorus
5. Creating a pre-chorus
Duplicate out the verse to give us sixteen bars total, with bars 1-9 being the chorus, and 9-16 being the pre-chorus.

Add another Kontakt track, this time selecting the Soul Sessions Expansion and the Candy Slaps plucked guitar preset.

Set this track to -7.4 dB.
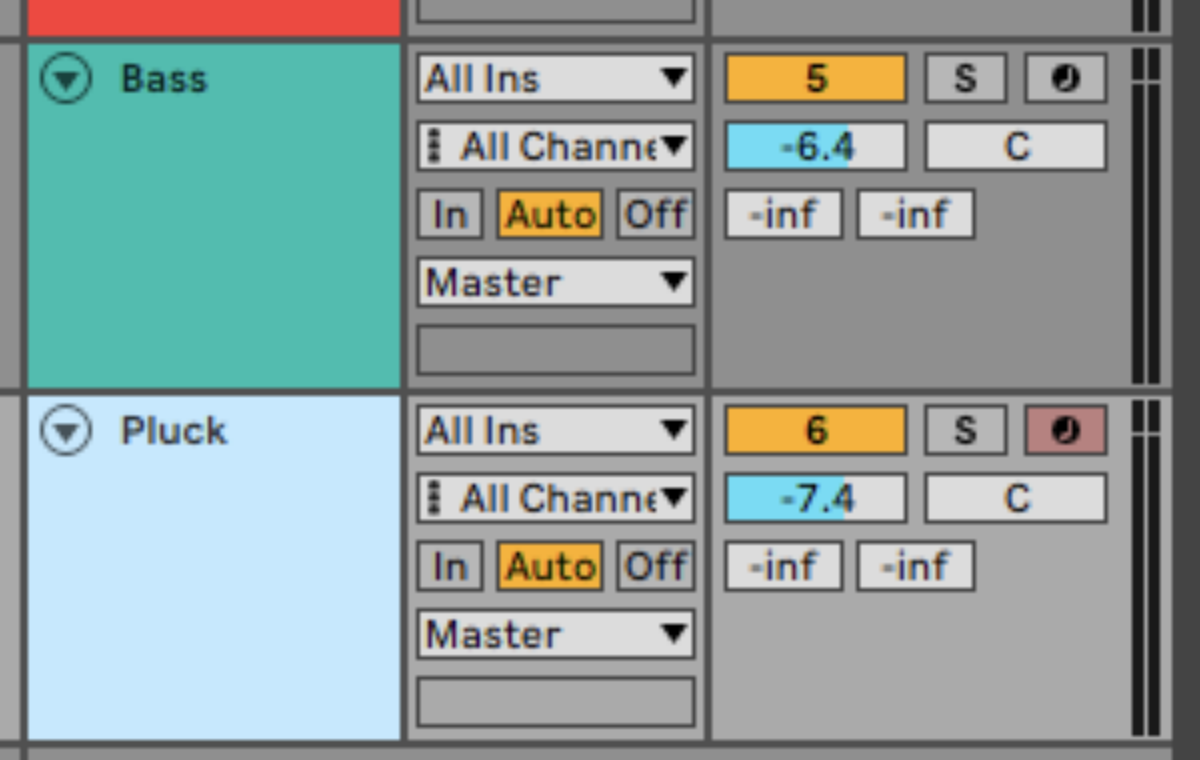
Copy the MIDI part we’ve used here, which follows the bass notes of the electric piano chords.
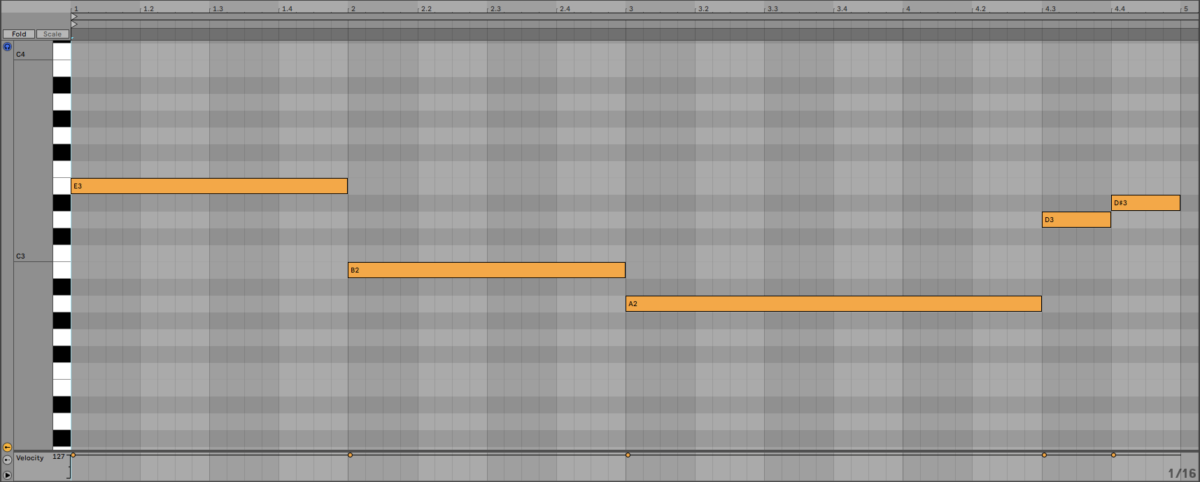
Duplicate this out to eight bars.
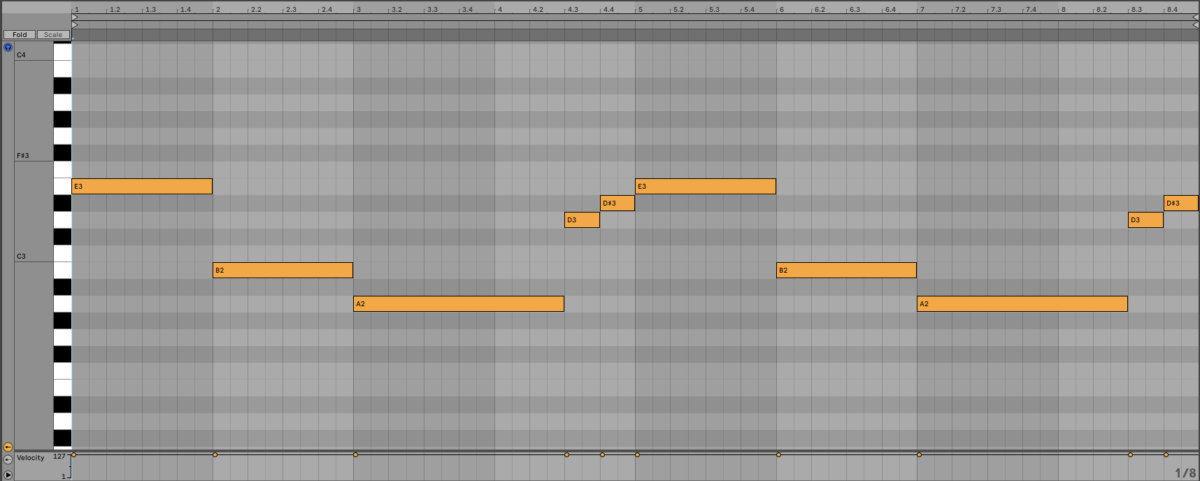
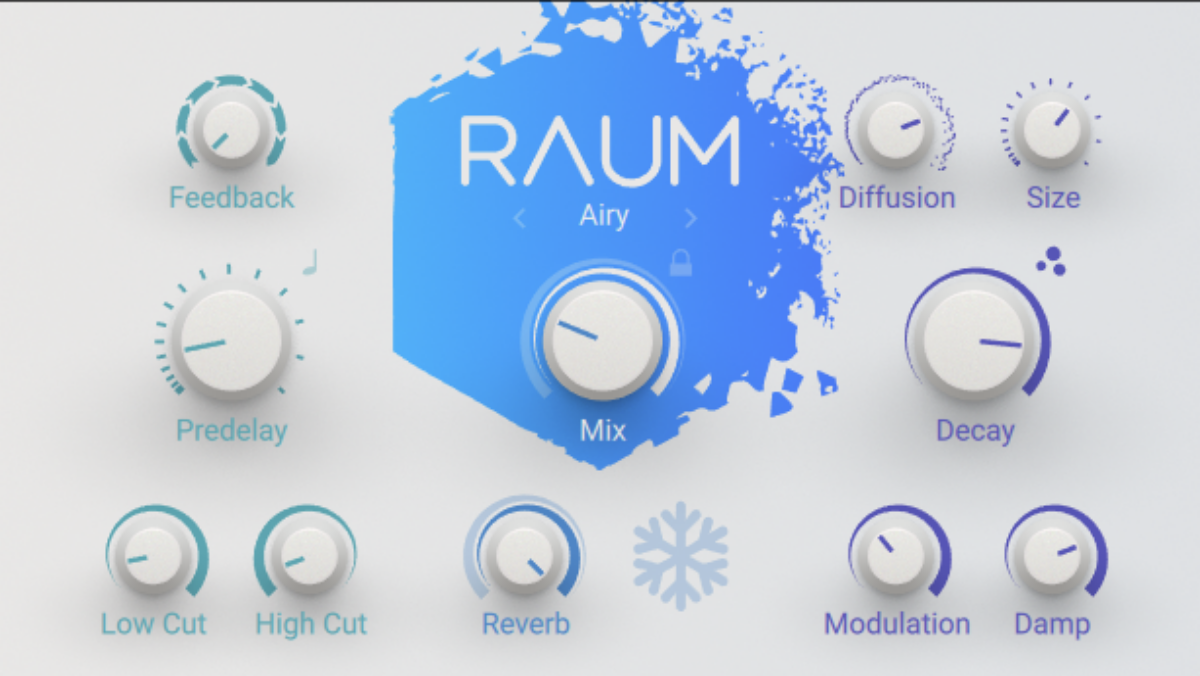
Let’s bring this part out with a touch of reverb. Add Raum to the track, and select the Factory Presets > Large > Orbital preset. Set the Mix to 25%.
Now we have a verse and pre-chorus, we need a chorus. Let’s make that next.
6. Switching things up for the chorus
For our chorus we want to change the energy of the track to keep things interesting, and we’ll achieve this by adding another instrument, and switching up the existing parts.
First, duplicate the pre-chorus out to give us a chorus that plays bars 17-25.

Edit the guitar loop so that it repeats every bar.

Change the keys to play E minor, G major and A major, again with no fifths. This two bar sequence repeats for the full eight bars.
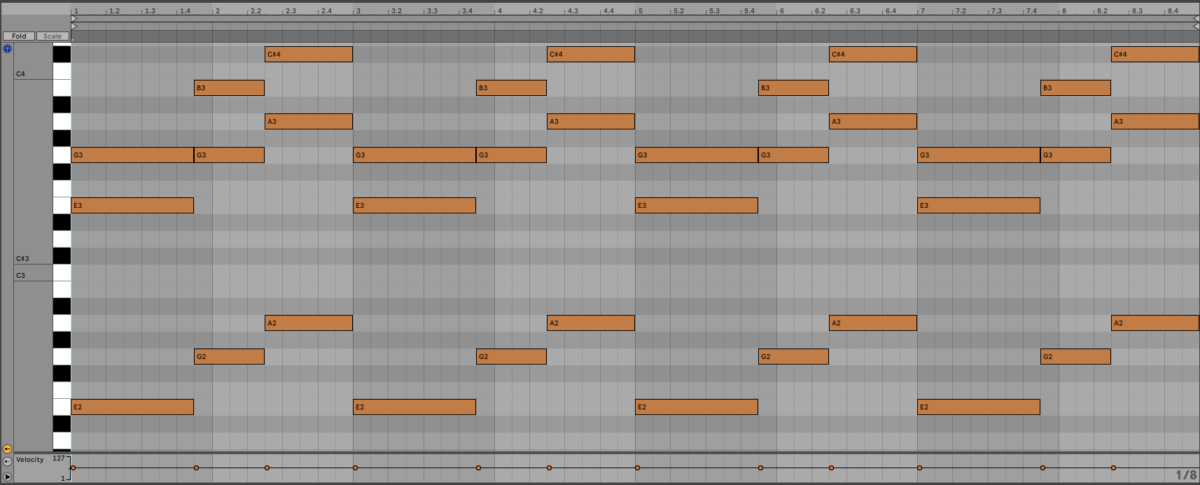
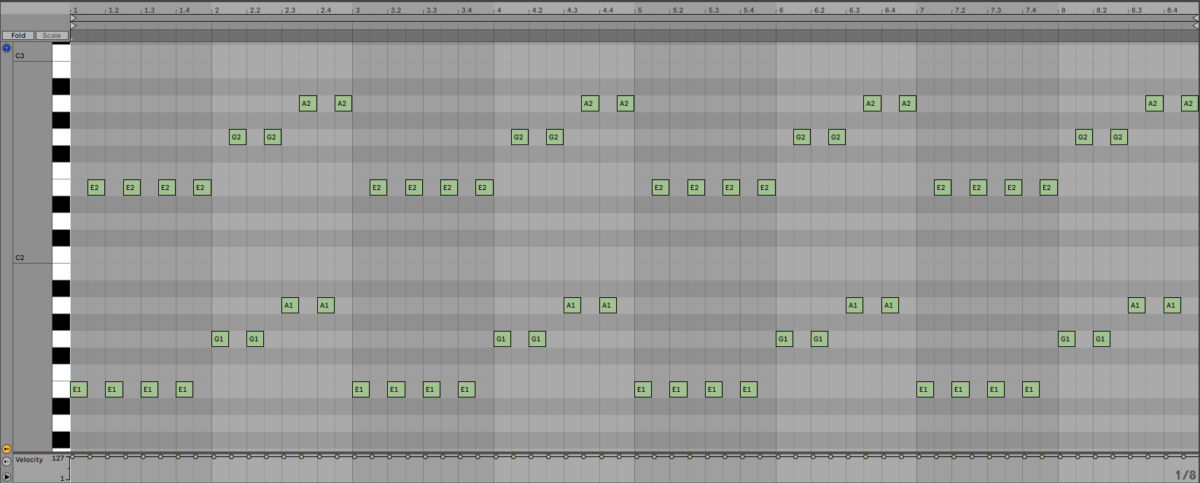
Have the bass guitar follow the bass notes of the keys.
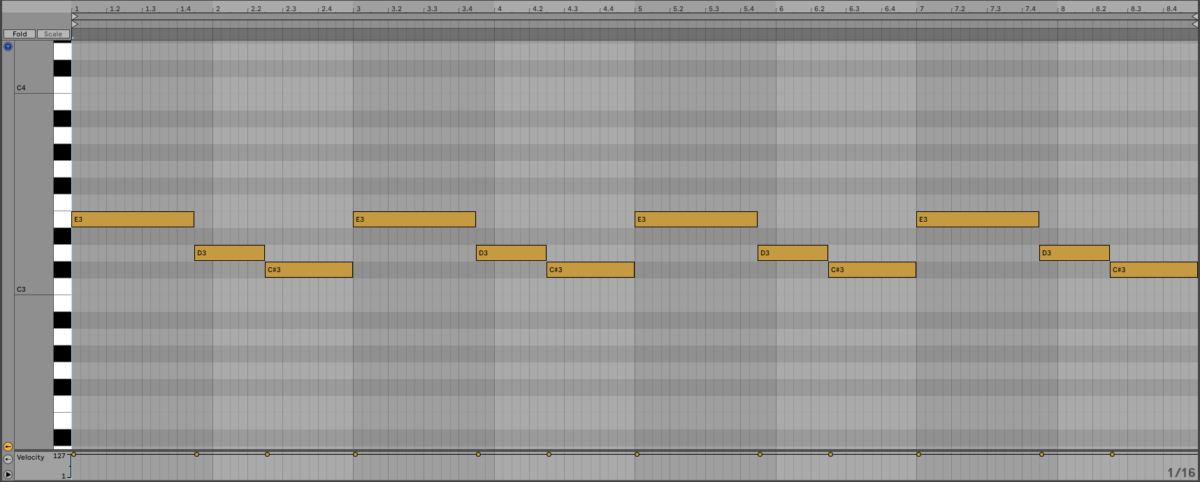
Change the plucked guitar to play E3, D3, and C#3.
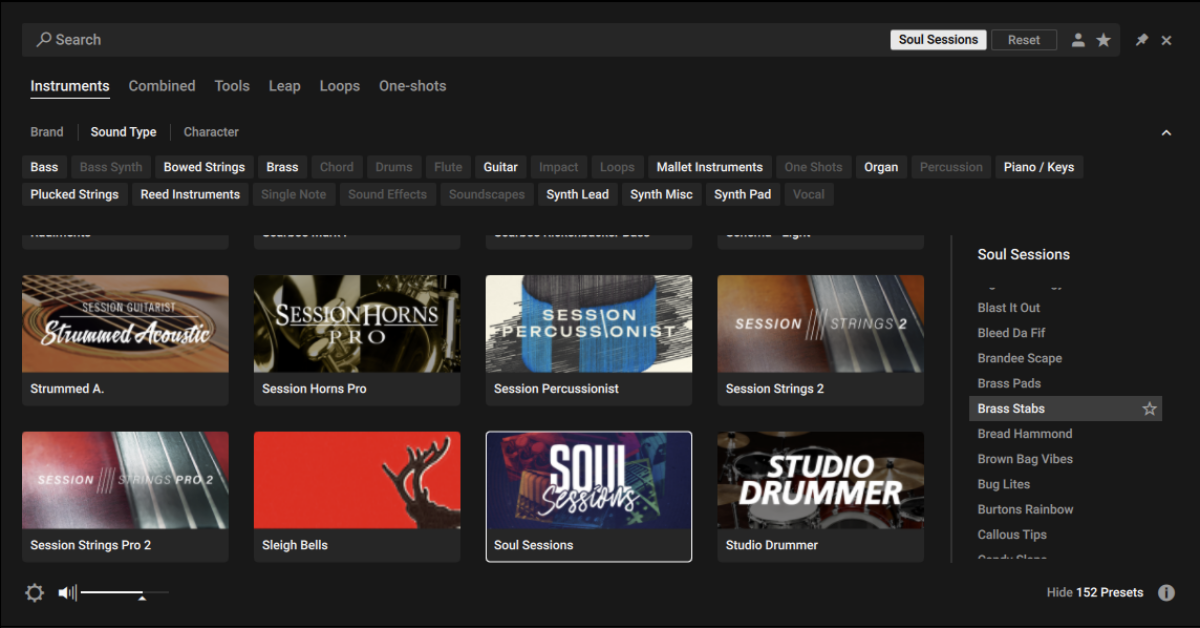
Now add another Kontakt track, and this time load Soul Sessions and the Brass Stabs preset.
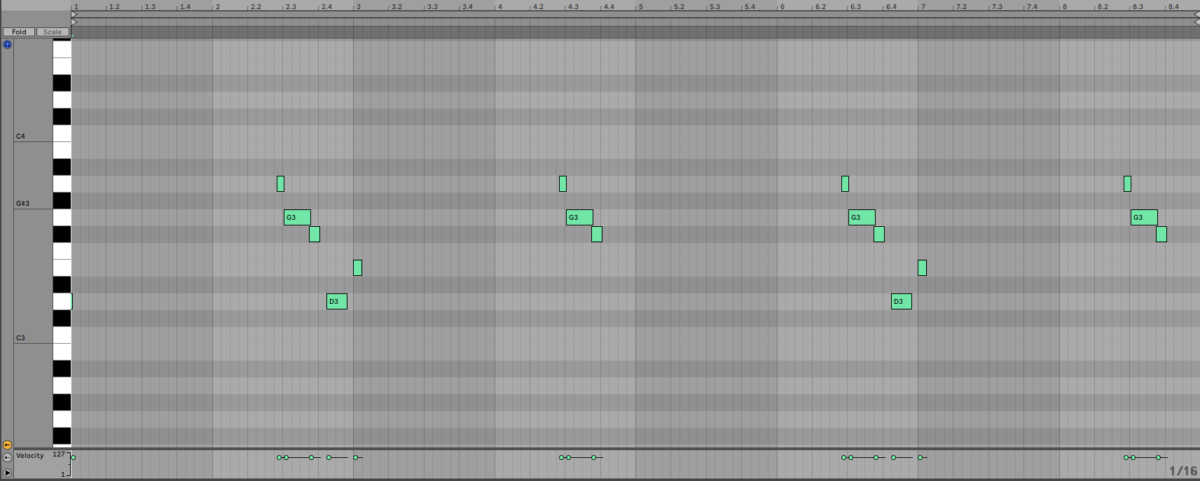
Copy the pattern we’ve used here, which plays A3, G3, F#3, D3, E3, then A3, G3, F#3, repeating on the second four bars.
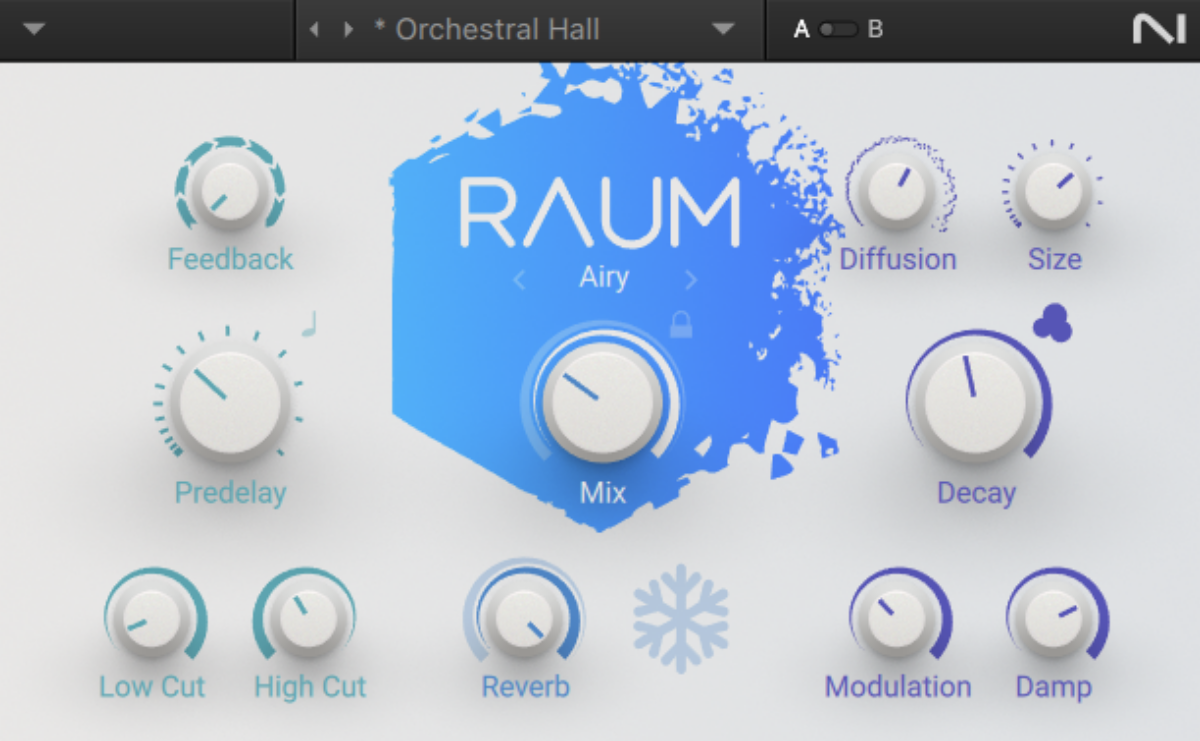
Add Raum to the track, and load the Factory Presets > Large > Orchestral Hall preset. Set the Mix to 30%.
This extra instrument helps elevate our chorus. Now we only need to create one more section before we make our track: a bridge.
7. Taking it to the bridge
Duplicate out the drum and bass parts to give us a bridge on bars 25-33.
Edit the bass line to play E for three bars, then D and D#, giving us a classic disco bridge feel.

Now we have all the sections of our song, it’s time to make an arrangement.
8. The arrangement
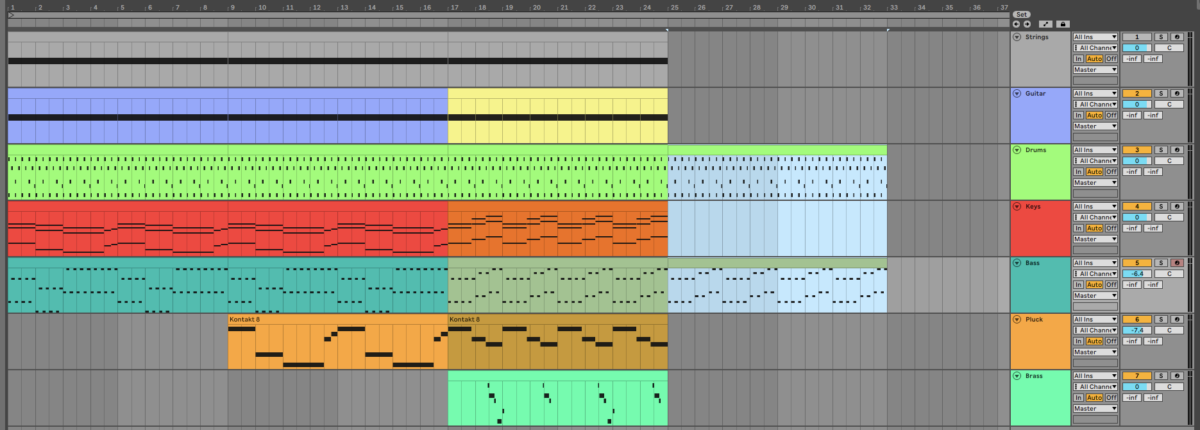
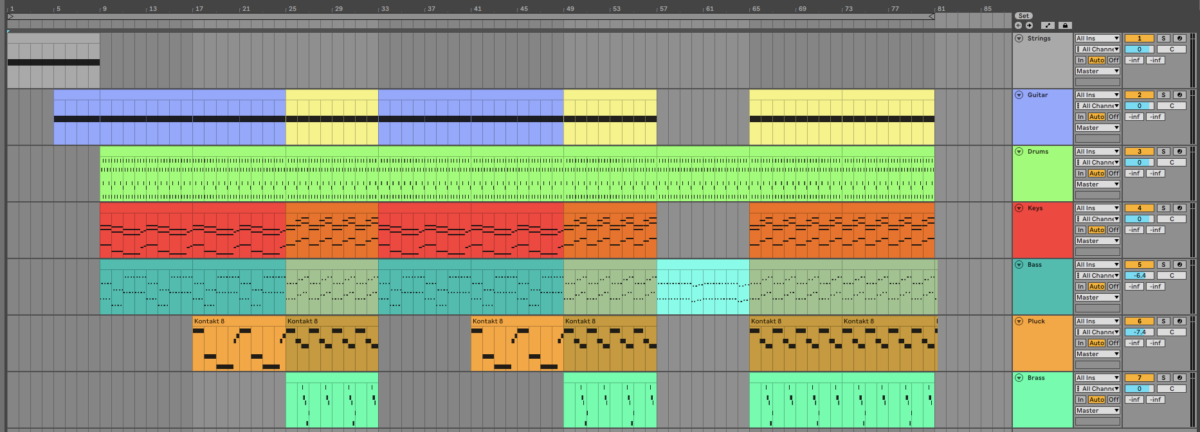
Copy the arrangement we’ve used here. Note that the strings track is now unmuted, and the string play in the intro, with the guitar loop coming in on bar five. The song then follows a traditional verse, pre-chorus, chorus structure, with a bridge at bar 57, followed by a final 16-bar chorus.
Now let’s make a quick master, and we’re done!
9. The master
We can use Ozone Elements to automatically master our track. Add Ozone Elements to the project’s master track, and the plugin will ask you to play the project back from the loudest part. Click Start Listening, and play the project back from the first chorus at bar 25, where the maximum number of parts are playing. Bear in mind that when Ozone Elements has finished analyzing the project, its volume level will be boosted significantly.
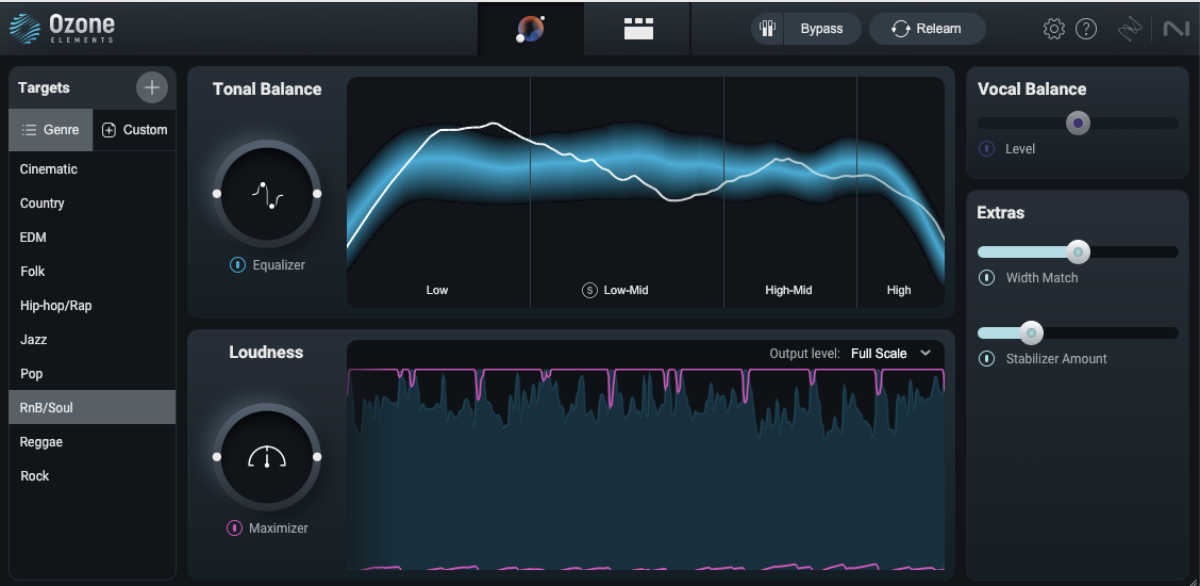
Ozone Elements will create a bespoke mastering chain. You can change the style of music the mastering chain targets if necessary. Select RnB/Soul for our disco project.
Start making disco with Komplete 15 Select Band Edition
Here we’ve seen how you can make a disco song with Komplete 15 Select Band Edition’s Disco & Funk Expansion, Studio Drummer, Electric Keys – Phoenix, Scarbee Rickenbacker Bass, Soul Sessions, Ozone Elements, and Raum.
If you’d like to read more check out How to make future funk music and Hip hop production: how to make a soulful, expressive hip hop track.


