


Future funk is a niche genre of electronic music that came into existence in the early 2010s, and takes heavy inspiration from vintage funk and disco. Much future funk features samples of vintage funk, disco and city pop tracks, chopped up and re-pitched to create new musical ideas, much like a more uptempo version of vaporwave.
In this tutorial, we’ll explore some examples of future funk and learn more about the genre before diving into a step-by-step tutorial on how to make future funk music yourself that sounds like this:
Jump to these sections:
In this tutorial we’re going to use Native Instruments Battery 4, Komplete Kontrol, Kontakt 7 and Massive X plus the Electric Vice expansion along with iZotope Ozone 11 to create a future funk track from scratch.
What is future funk music?
Future funk is a vibrant genre that blends elements of funk, disco, and electronic music, creating a nostalgic yet modern sound. It typically involves sampling and reimagining retro tracks from the ’70s and ’80s, infusing them with upbeat rhythms, funky basslines, and chopped vocals.
Future funk has become a distinct genre in its own right, with artists creating their own original future funk compositions. Several artists have made significant contributions to the future funk genre. Some well-known future funk artists include Yung Bae, Macross 82-99, Desired, マクロスMACROSS 82-99, Saint Pepsi (now Skylar Spence), and Flamingosis, among others.
How to make a future funk track
Creating future funk music allows you to blend nostalgia with innovation, tapping into retro sounds while infusing them with modern beats. Let’s take a look at how to create a future funk track from scratch.
1. Make a drum beat
We’ll begin with a project tempo of 120 BPM, which will likely be your audio editing software’s default tempo.

To make a drum beat we’ll use Komplete Kontrol. Load up Komplete Kontrol on a MIDI track, and enter “ball blaser” into Komplete Kontrol’s text search field. Double-click the kit that appears in the search results below.
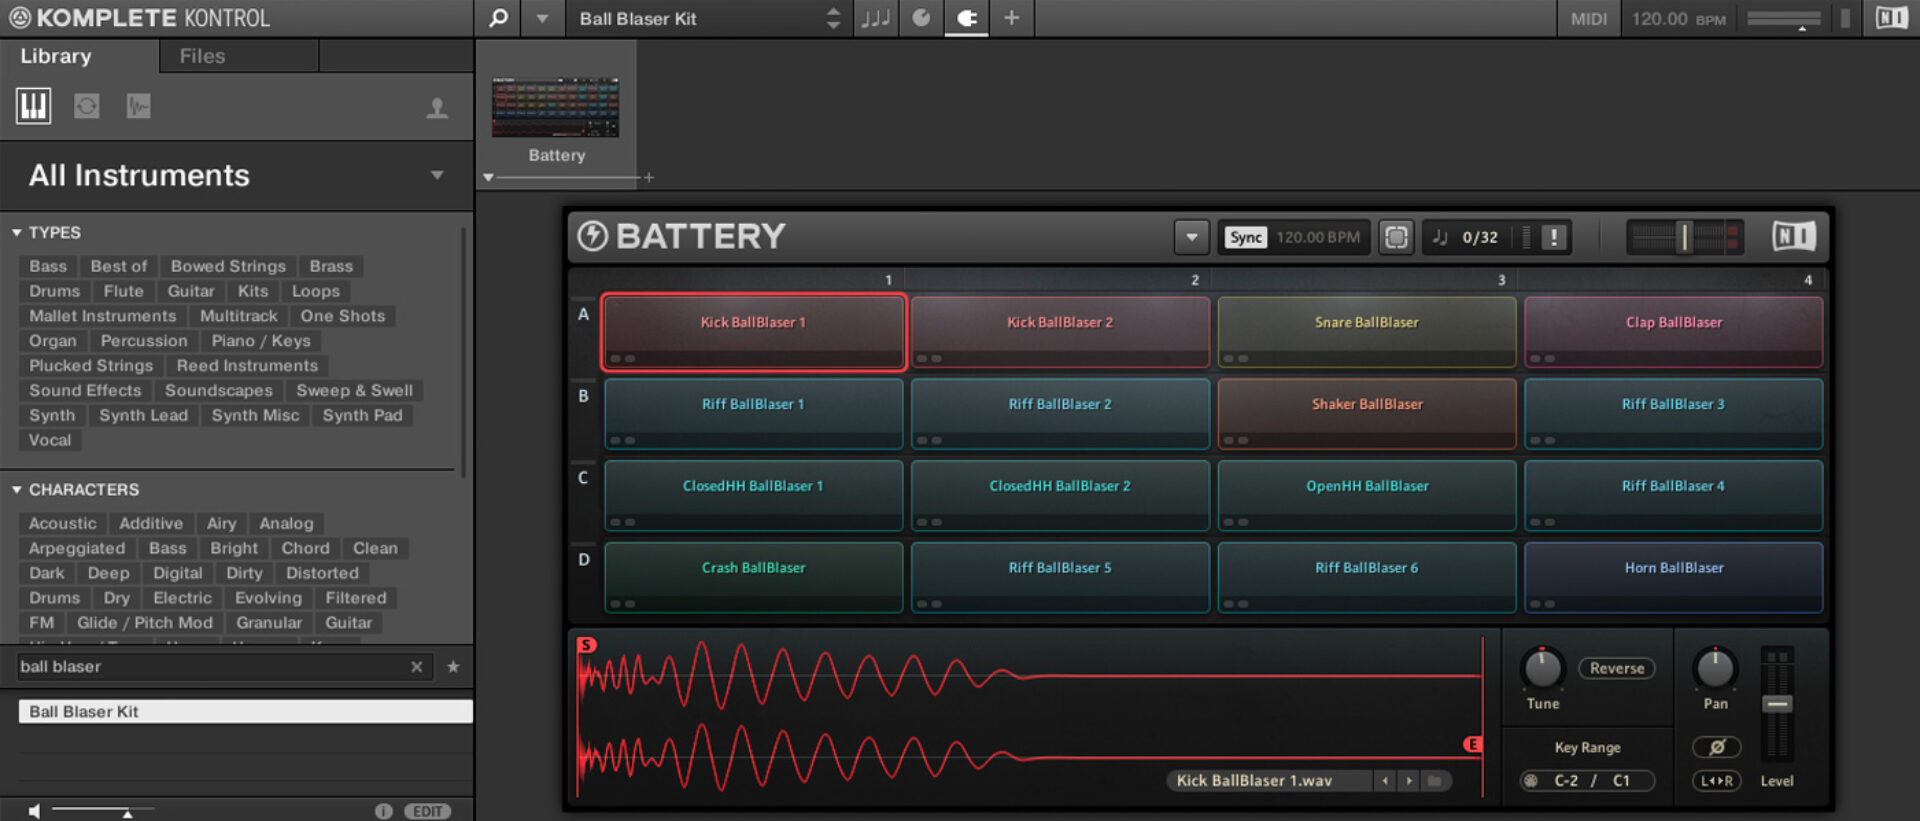
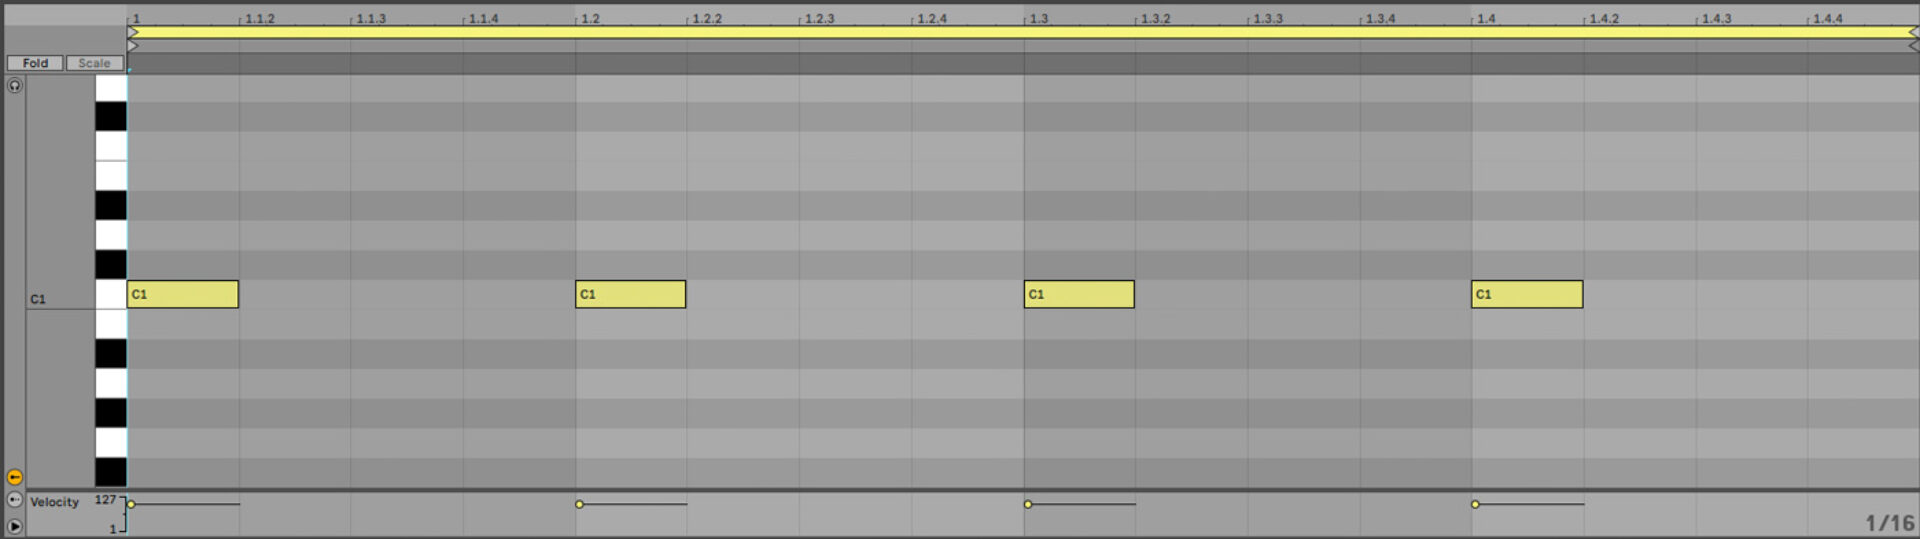
First we’re going to program a kick drum on its own track, so that we can use it as a sidechain compression trigger later. Program a C1 kick on each beat of a bar. We’ll use Velocity values of 100 for everything in this walkthrough unless otherwise specified.
Now add another MIDI track, put Komplete Kontrol on it, and again load up the Ball Blaser Kit. This time sequence D1 snares on the second and fourth beats of the bar, with A1 closed high hats between each beat.

Now loop both these MIDI clips out for four bars.

2. Create a chord progression
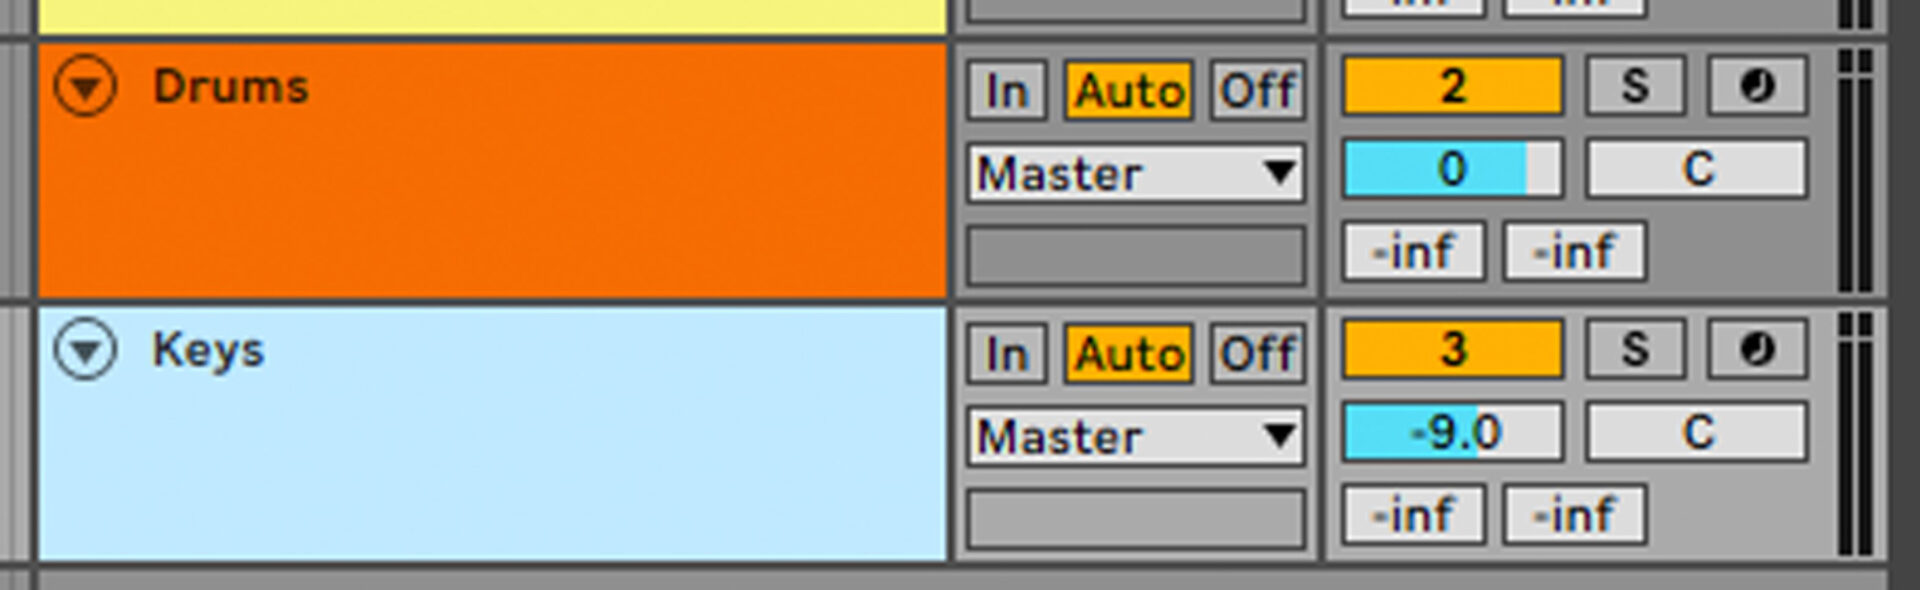
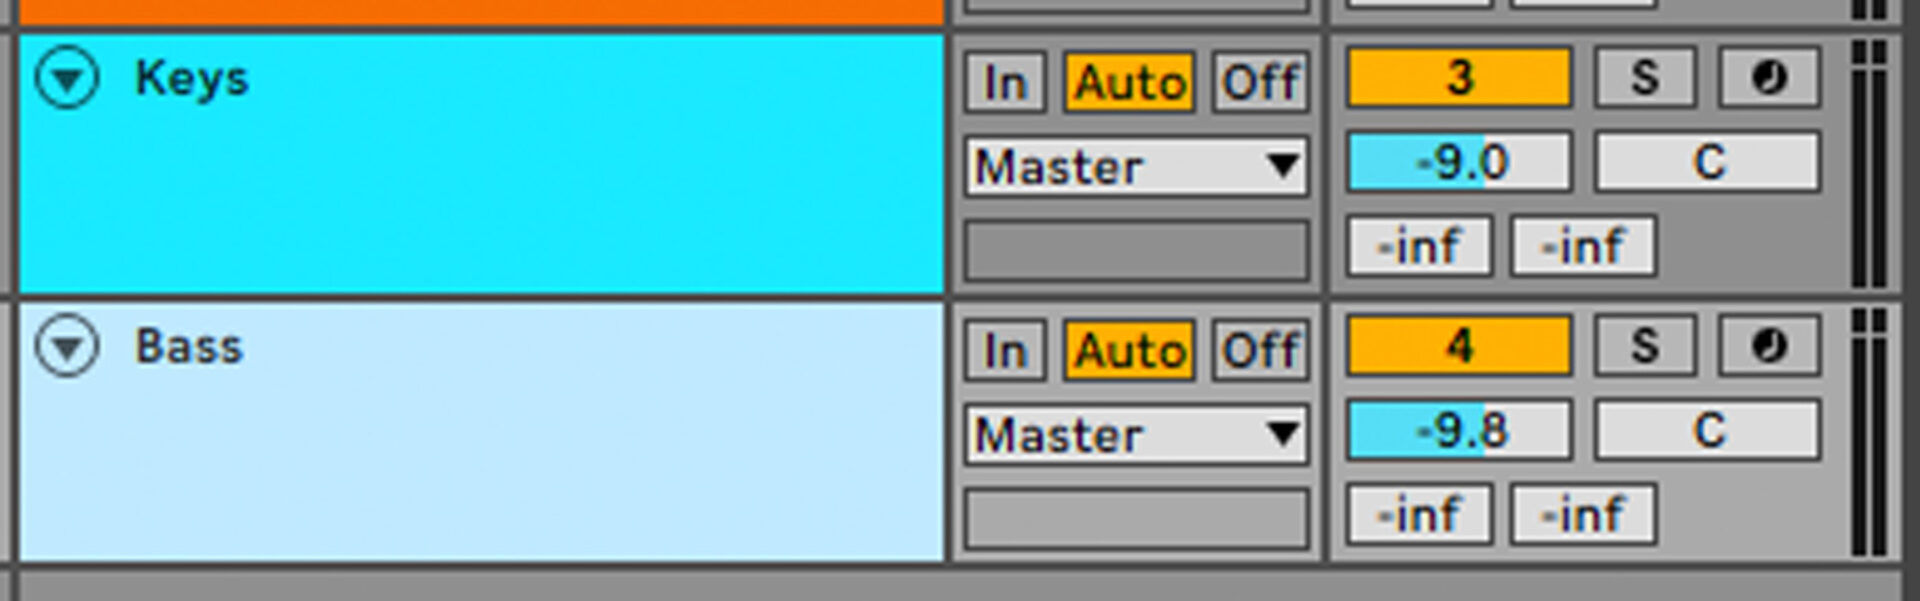
For our chord progression we’ve going to use a piano patch. Add Kontakt 7 on a new MIDI track, and in the Kontakt Factory Library open the Orchestral > 6- Keyboard Instruments folder and double-click the Concert Grand patch to load it up.

Set this track to -9 dB to balance it with the other elements.
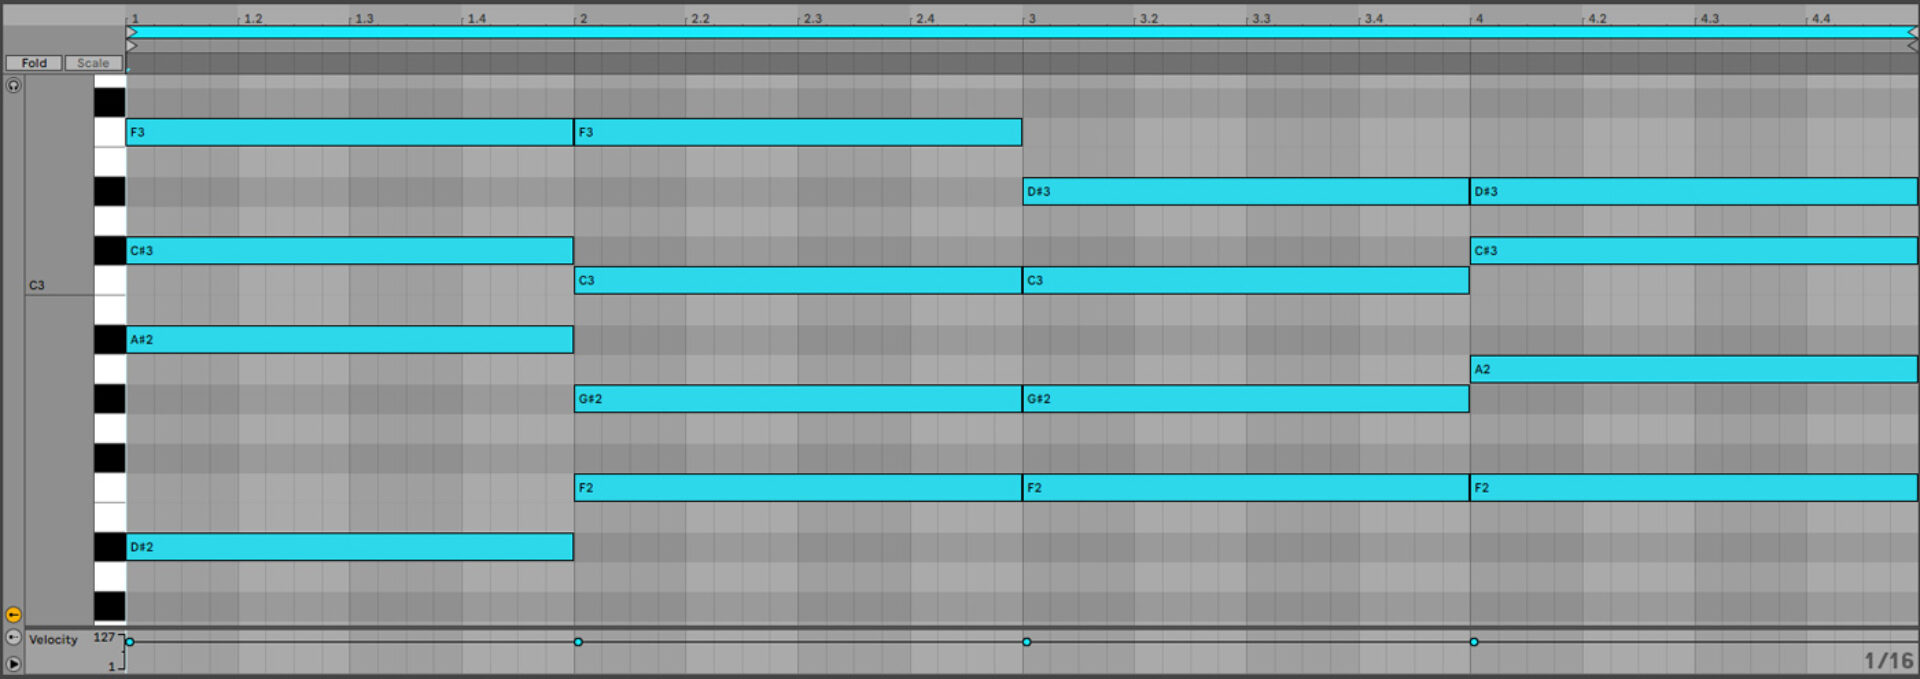
Copy the chord progression we’ve used here. This uses jazzy chords to get that city pop feel, specifically a D# sus2, F minor, F minor 7 and F7#5.
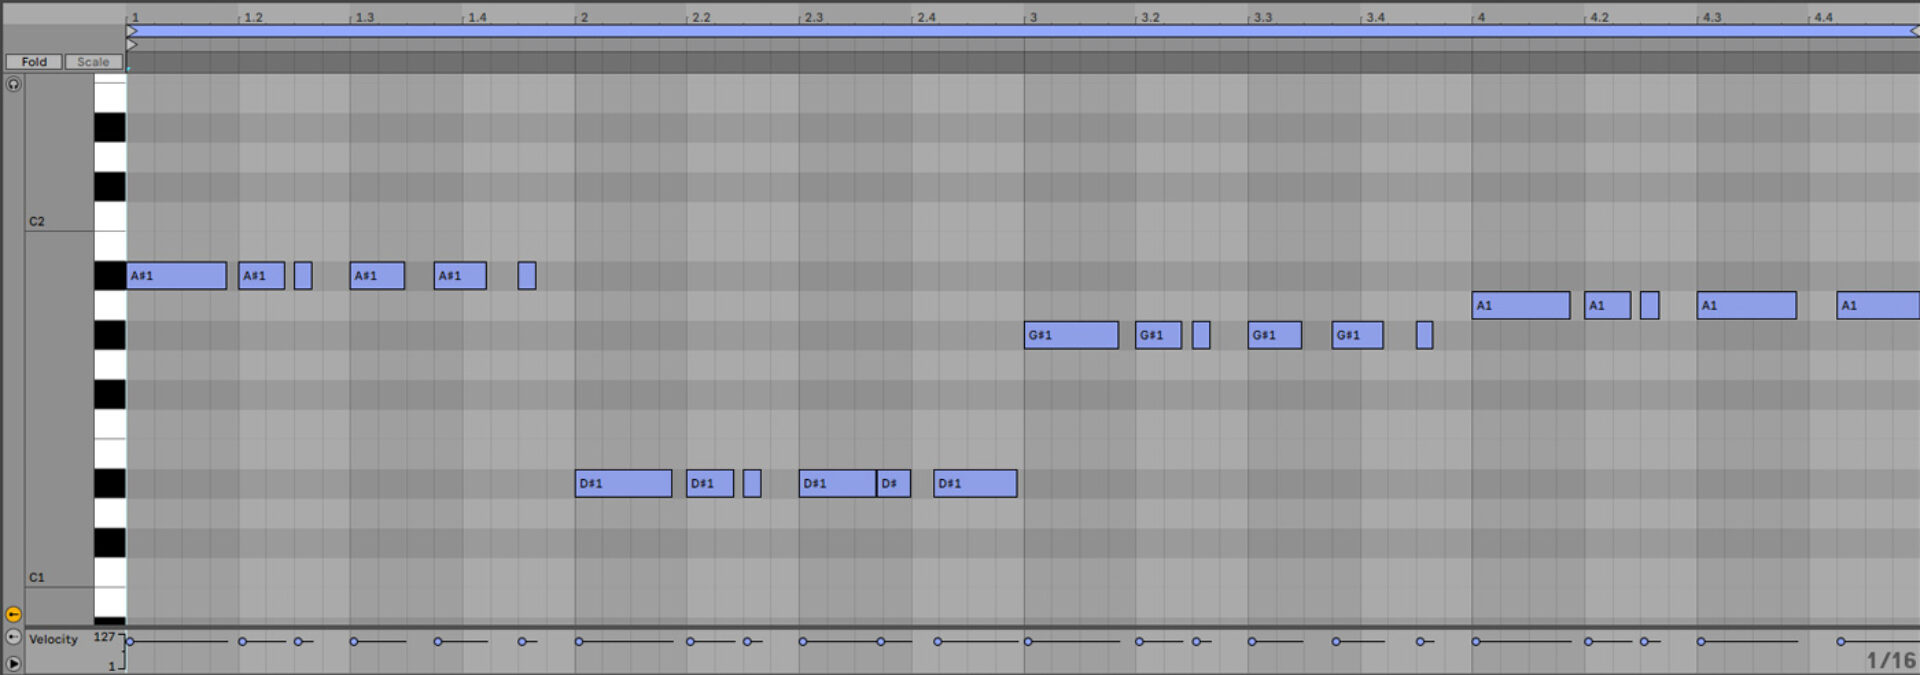
3. Add a bass line
Add a new MIDI track, and load up an instance of Massive X on it. Open its browser, and enter ‘bassic’ into the text search field. Double-click the Bassic preset to load it up.
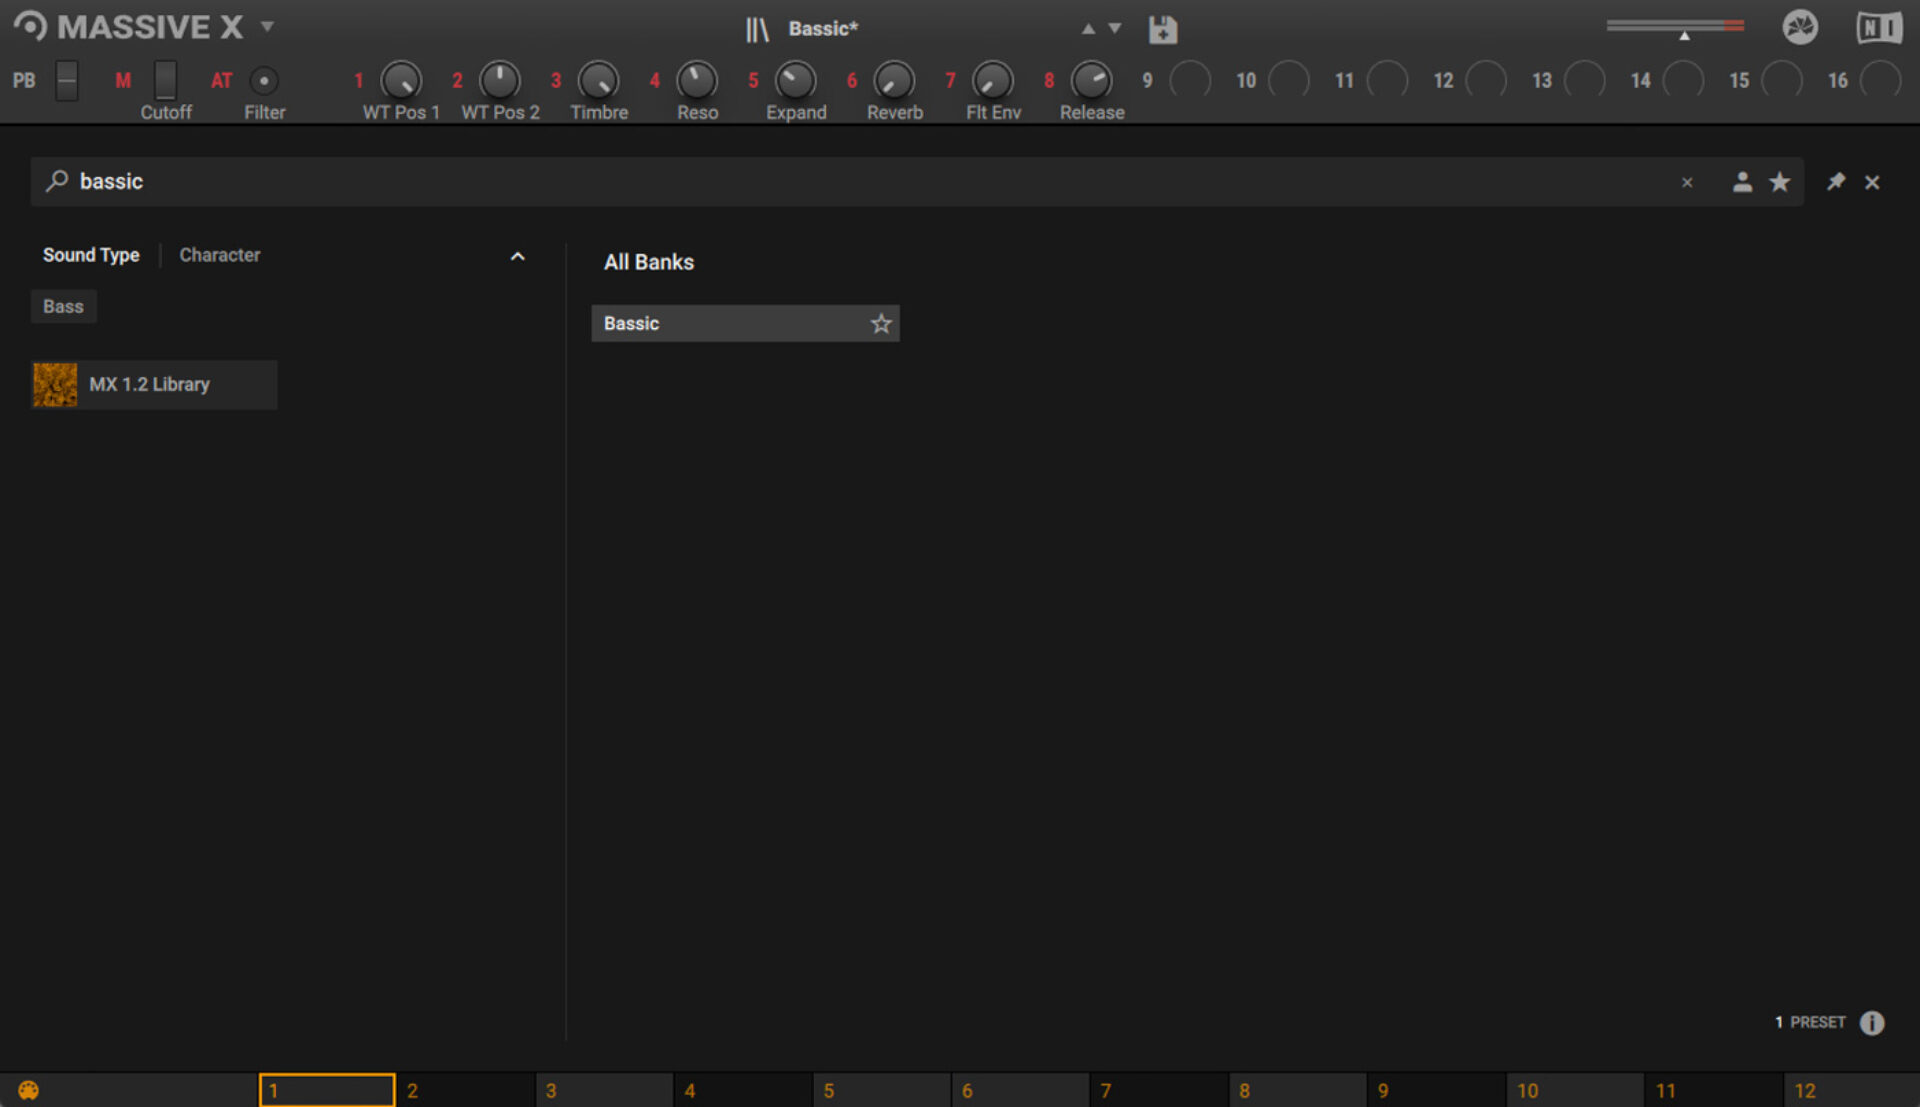
Set this track to -9.8 dB to balance it with the other elements.
Copy the bass line we’ve used here, which plays A#1, D#1, G#1 and A1.
4. Make a lead line
We’ll use Massive X to make this track’s lead line too. Add a new instrument track, load up Massive X on it, and this time in the browser search for ‘analogica’. Double-click the Analogica preset to load it up.

Set this track to -15.1 dB to balance it with the other elements.

Copy the lead line we’ve used here. This plays A#2, G#2, and A2.

Let’s layer this with another patch to give it a richer sound. Add another MIDI track with an instance of MASSIVE X, and this time load up the Bassic patch again. Duplicate the lead line MIDI over from the Analogica track, and set the new Bassic track to -3.6 dB.

5. Add a string section
Let’s add some more organic tones in the form of a couple of string parts. First, load up Kontakt 7 on a new MIDI track, and this time open the Orchestral > VSL Strings folder. Double-click the String Ensemble Preset to load it up.

Set the instrument’s Articulation to Staccato.

Set this track to -7.9 dB to balance it with the other elements.

Copy the stacked three-octave pattern we’ve used here, which creates a call-and-response dynamic with the piano chords.

Now let’s add another string part that we can use to flesh out the arrangement later. Add another Kontakt 7 on a MIDI track, and again load up the String Ensemble preset. This time we’ll leave the Articulation on Sustain.

Set this track to -13.4 dB to balance it.

Copy the pattern we’ve used here, which again stacks the strings on three octaves to get a fuller sound.

6. Funk things up with guitar
We now have a quite full-sounding mix, but let’s add some more rhythmic and harmonic interest with a funky guitar part. On a new MIDI track, add another instance of Kontakt 7, and in the Kontakt Factory Library open the Band > Bass folder, and double-click the Funk Bass instrument to load it up.

Set this track to -8.9 dB.

We’re going to use this sound played on a relatively high octave to give us a mid-range tone that won’t interfere with our existing synth bass line. Copy the MIDI pattern we’ve used here, which follows the lead line, but with some extra notes that add harmonic interest.

7. Add transitional effects
To help make our arrangement sound slick, let’s add some sound effects. Add another MIDI track, add an instance of Massive X, and this time load up the Super Swell preset.

Set this track to -6 dB.

Sequence this to play A#3 on the third beat of the bar.

Now add an instance of Komplete Kontrol on a new MIDI track, and click the One-shots button so that only one-shot samples are displayed.

Now enter ‘Crash Fiesty’ into the text search field.

Drag the Crash Fiesty one-shot onto an audio track, positioning it on the first beat of the first bar.

Set this track to -13.2 dB.

8. Use sidechain compression
To get a big, pumping sound, we’re going to sidechain all the non-drum elements to the kick drum. Add the keys, bass, leads, strings, guitar, and effects to a group track, also known as sidechain compression.

Now add a compressor effect to the group track, and set the sidechain input to the kick drum track. We’re using a Threshold of -9 dB here.

9. Arrange your track
Here’s the arrangement we’ve used.

This arrangement starts with the beat, gradually adding elements every four bars until bar 17, where the bass and staccato strings come in to create a drop.
The track crescendos on bar 25 where the sustained string comes in. After this the elements are stripped back to create a sense of progression until the end of the track.
10. Master your track
Add iZotope Ozone 11 to the master track, and click the Assistant View button.

Ozone 11 will ask you to play back the loudest part of the track. Play back from bar 25, and the plugin will create a custom mastering chain for your project. Change the Target to EDM for a bigger, heavier sound that works well for future funk.

And here is what our mastered future funk track sounds like.
Start making future funk
Here we’ve seen how you can make your own future funk track from scratch. If you’d like to read more, check out our guides on how to make future bass, important drum patterns, MIDI bass lines, and future funk talkbox vocals.
For instruments, effects and expansions you might find useful, be sure to take a look at the Electric Vice expansion plus Battery 4, Komplete Start, Kontakt 7, Massive X and iZotope Ozone 11.
Related articles
-

Inside the evolution of orchestral sampling: an interview with ProjectSAM
Discover how ProjectSAM’s Lineage Series uses NKS and smart features to change orchestral sampling. Plus, save on instruments in our…
-

How New Constellations turn emotion into sound with Massive X
Go inside the studio with New Constellations. Learn how they use Native Instruments gear, happy accidents, and lifelong friendship to…
-

Citizen Kain on building emotion and space with Replika
Citizen Kain explains how Replika helped shape the rhythm, tension, and emotion behind his debut Eversun Records single “Moments.”…
-

The organic precision behind Calcou’s Anjuna release featuring Reaktor
Calcou shares how Reaktor, Monark, and Super 8 shaped the creative balance and live energy behind their new duo EP,…
-

14 NKS instruments that will change the way you create music
Discover 14 NKS instruments to freshen up your workflow. From lo-fi tape synths to cinematic strings, shop the Native Instruments…
-

Parallelle on crafting living basslines with Reaktor and TRK-01
Parallelle share how Reaktor and TRK-01 shape the bass and warmth in 11th Avenue, balancing analog depth with modern control.
-

Where will your sound lead you? Explore the Native Instruments Summer Sale
Save 30% on instruments, effects, and sounds in our Summer Sale. Find the tools to keep your tracks moving and…
-

How Mr. Bill builds sonic worlds in Massive X
Mr. Bill explains how Massive X and instinctive sound design shaped the storytelling process behind his new downtempo album, Mr.