Find out how to get that warm, analog sound with your productions by using some straightforward EQing, compression, and effects techniques. Originally published on The Loop Loft, we want to share with you this great guide on experimentation and production, so that you can start getting that more human sound with your work. What does it really mean, when people talk about adding warmth to a synth? Does it relate to frequency, a certain presence, a fullness of tone? Warmth is one of the most difficult terms to articulate because it can mean so many different things to different people.
For the sake of this conversation, let’s define warmth as the feeling you get when a sound draws you in, invites you into a space and makes you feel warm. When adding warmth to a track, the aim is to make it feel analog, real, and uniquely human. Writing and producing music, we mostly use soft synths. The affordability, portability, and flexibility make soft synths super useful. Despite the love for hardware synths and modules we often reach for something “in the box” to move quickly and keep the creativity flowing, working to create new and interesting sounds.
The synth
Let’s start with a simple pad sound. Feel free to pull up a synth pad or string preset in your favorite DAW. Or, if you’re a bit more adventurous, you can build your own synth with, let’s say, two oscillators (a sine and a saw that are polyphonic, for instance) followed by a filter. The goal here is to have a basic sound that you like, but that you know could use some character to make it really stand out. Check out below to see some select techniques for doing just that – adding warmth and vibe to a sound by using readily available plug-ins.
Here is a synth pad, totally dry, for you to hear as an example.
EQ
A good place to start with plug-ins is the EQ. The beauty here is that you can really impact the sound of your synth by doing a simple low cut, a high boost or some combination of the two. Sometimes the synth you are working with has a great sounding filter of its own but isn’t capable to get the kind of detail that you get with a fully sweepable, multiband parametric EQ with an adjustable Q. Another great thing to do with an EQ is to set fairly steep high or low pass filters and experiment with what you can refer to as “bandwidth limiting,” or limiting the frequencies in which the synth is working. If you roll off everything below 300hz, for example, you will have a much different sound than one that includes all of the sonic information below 300hz. Sometimes the opposite is necessary to make your synth feel warmer and maybe less bright or harsh. Try taking away everything above 1 or 2k and listen to what’s left. When applying EQ, it makes sense to start with extreme moves that will noticeably shape the sound so that you can really get a sense of what’s useful. Making small moves is great when you’re mixing an already dialed in sound but when you’re creating the sound from the beginning.
In the example below, everything below 174hz has been rolled off, and a 1.3 dB dip has been added with a Q of 2.0 at 380hz and a 4 dB dip with a Q of 1.7 at 740hz. Notice how the sound is thinner in the low end but also smoother overall.
Compression
Another great way to shape your soft synth sound and add warmth is by the creative use of compression. Since we’re using a pad in this case there will be few transients and dynamics to control. It is more like using compression as a tonal tool. As with the use of EQ, start with extreme settings to get a sense of what is possible. Try setting your ratio to 12:1 or even 20:1 and crank your threshold down to minus 20 or 30 dB and listen to what your synth sounds like. It probably sounds a lot more intense and gritty than it did before. When working with pads it sometimes makes sense to have 5-10 dB of reduction happening constantly. This use of compression will not only change the dynamics of your sound but it will alter the tone altogether. Keep your EQ engaged and experiment with the interplay between your EQ and your compressor. Put the EQ before the compressor, so that it compresses the new sound that was created with the EQ. This isn’t a hard and fast rule by any means, so also try swapping them and listen to the results. If you have a multiband compressor, experiment with that in this spot as well.
In this example, you will hear the intensity brought on by the compressor, which is set with a ratio of 20:1 with constant gain reduction of 16 dB. Notice the slight pumping sound on the longer sustained chords – if this sound is part of a larger production, this slight rhythmic variation may add some nice movement to the arrangement.
Distortion/Saturation
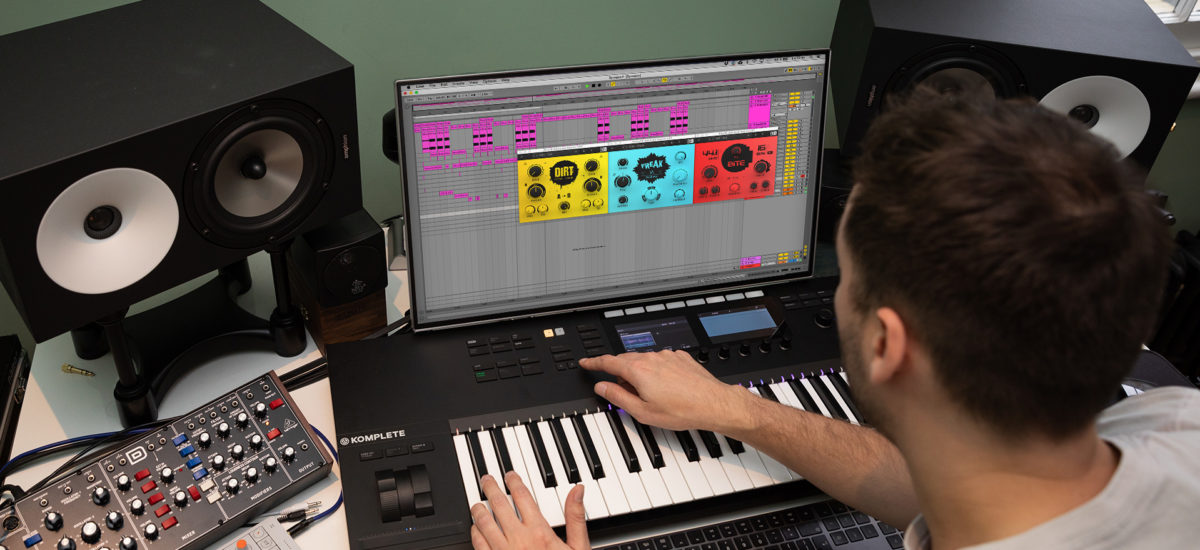
The next step is to add some form of distortion, overdrive or saturation. Sometimes this is the first thing to insert and at times, may be the only thing to use, especially if DSP is a concern. Many synths actually have a distortion circuit built into them, which is handy if you want to hear what adding some more harmonic color to your synth will sound like. Unlike the EQ and compression techniques, you might want to use distortion and saturation more sparingly, as a little goes a long way. If you’re looking to add a ton of dirt or grit to your sound, go crazy here, but if you’re just looking to add a bit of warmth, try using small amounts of distortion first. Listen for how your sound is becoming more saturated and complex harmonically. DIRT from Native Instruments’ CRUSH PACK for instance, is a versatile plug-in, abound with character. The analog-modeled VST offers three distinct colours over two channels, meaning its possible to create and blend a broad spectrum of distorted tones.
In this example, there is some drive, crunch and a little bit of low-end added, backed with a distortion plug-in. Once again, the change is subtle but noticeable. Since all of the frequencies below 174hz with my EQ are removed, the low end that is being generated by the distortion plug-in has more of a white noise quality to it, as it is being created somewhat artificially.
Bit reduction
Another simple but mighty way to add some much-needed vibe to your synth sound is by using bit reduction. If you are working on a modern DAW, your sample rate and bit depth are probably at least 44.1khz and 16 bits and may be as high as 192khz and 32 bits. This resolution, while offering incredible clarity and detail, can at times lead sounds to feel a bit sterile and cold. A bit reduction plug-in can take the resolution of your audio down to 8 bits, for instance, this will add grit and noise to your signal. For example, BITE from CRUSH PACK is a bitcrusher and sample rate reducer that offers the sought after sound of early digital samplers.
Below you will hear just a touch of bit reduction added. There’s a lot happening in the plug-in that is creating some really cool high overtones, but we want just a tiny bit of that sound, so the mix knob is set at 5%.
Chorus and pitch shifting
A final go-to when looking to add warmth is either a chorus or pitch shifting plug-in. A subtle shift in the pitch or timing of my synth can make a huge difference in terms of vibe and character. Again, many hardware and software synths have a chorus effect built into them, so feel free to start there. Using a plug-in version you can put it anywhere in the signal chain. Having chorus inserted after the tape saturation plug-in, for instance, will sound very different than having it inserted before saturation. Since chorus is essentially creating a double of the sound that is slightly delayed and pitched up or down, a doubler or pitch plug-in can be great in this application.
Use a chorus or pitch plug-in that has a mix knob so that you can keep as much of the original sound intact as you want and just add the amount of effect that feels right to you.
In this final example, there is a little bit of chorus added to the existing sound. You’ll notice that the pad is a bit wider and sounds a bit thinner. Adding chorus can often help sweeten your sound, especially if the distortion or bit reduction plug-in has added grit or overtones that you want to smooth out.
This article was originally published by Loop Loft which you can read here.


