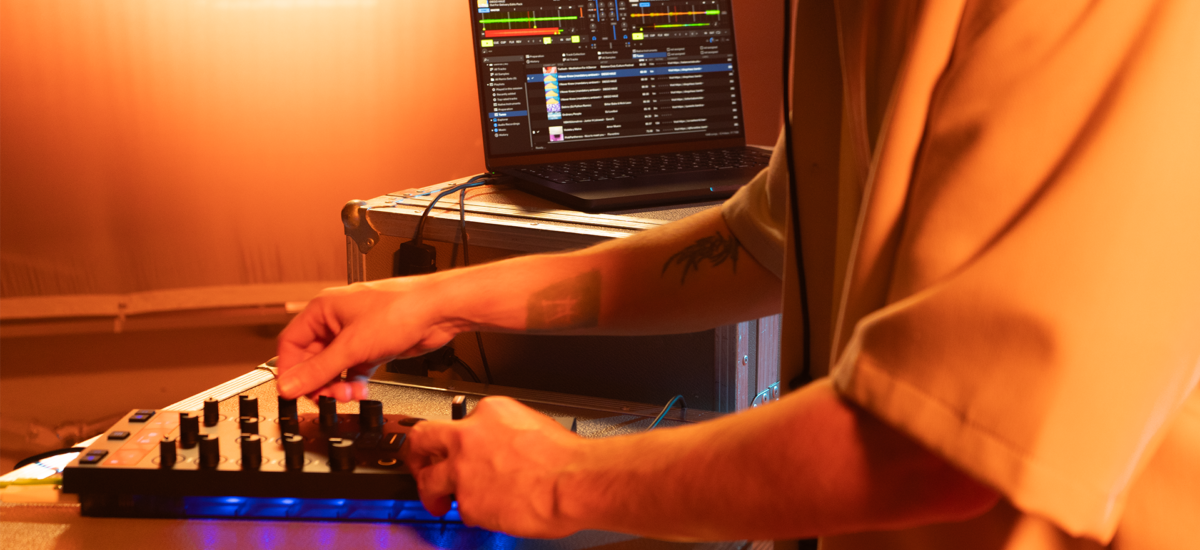
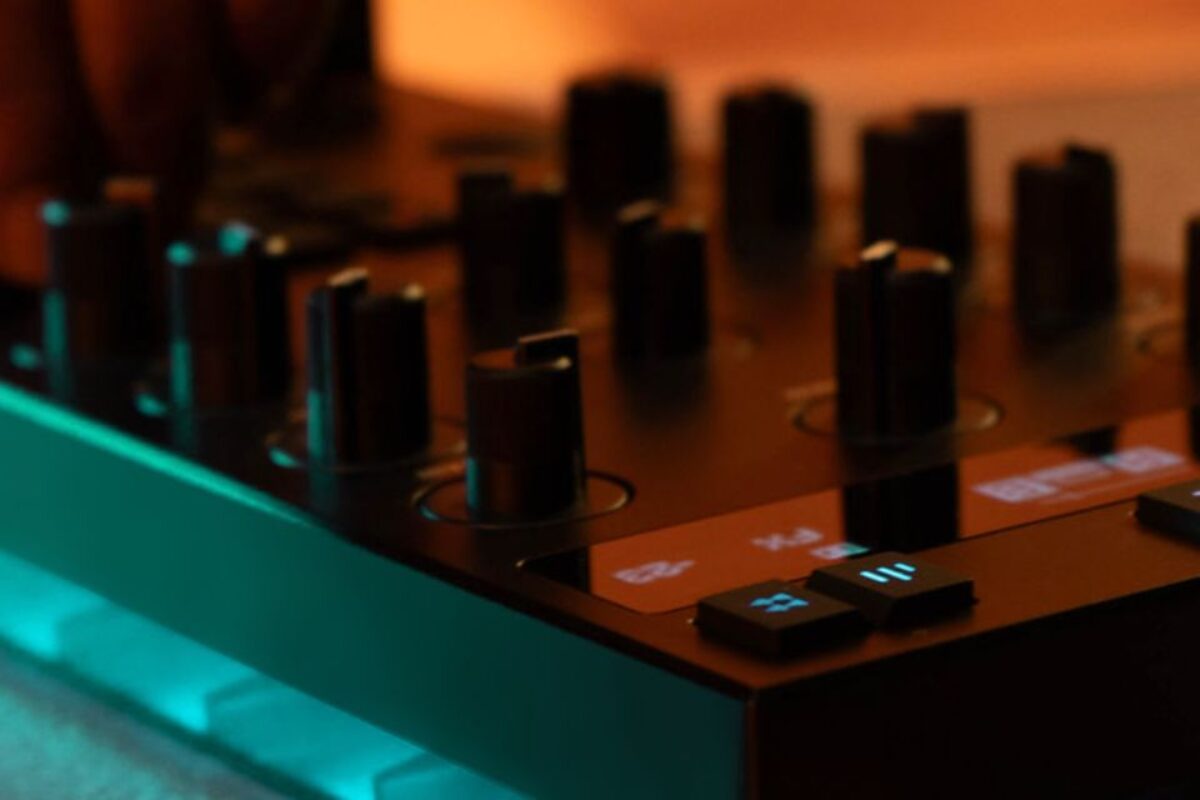
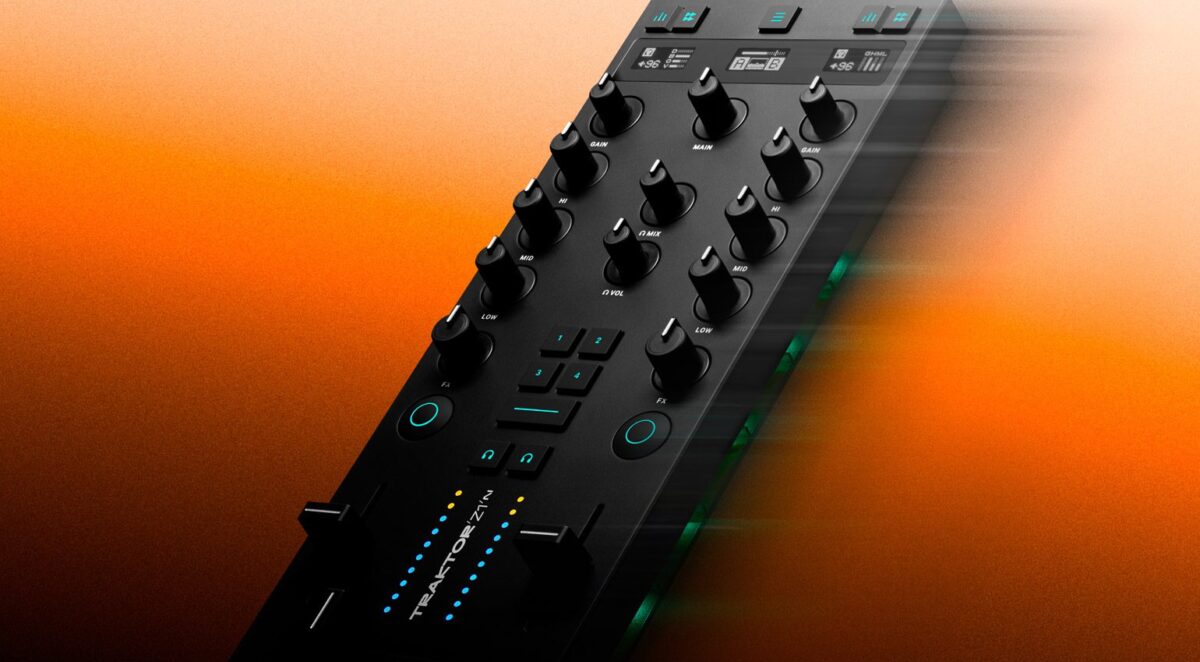
The Traktor Z1 MK2 is a fully integrated, portable mixer controller and audio interface. Using the Z1 MK2 allows DJs to play both audio tracks and Traktor Stems interchangeably, and DJ in any location. The Z1 MK2 comes pre-mapped for Traktor and allows users to change EQ, add effects and pre-listen to (cue) your tracks. It features an on screen display, coloured buttons and customizable ambient lights on the bottom of the controller. The Z1 MK2 is an inspiring controller for playing with Traktor Pro 4, and offers flexible control of Traktor’s functions in a small footprint.
This versatile controller features a high quality 24 bit, 96 kHZ audio interface, a ⅛” audio output, and RCA outputs to connect to a soundsystem or mixer and a USB connector. In this blog, you’ll learn how to DJ with the Z1 MK2 and Traktor Pro 4, and how to use the Z1 MK2 in your DJ setup.
Jump to these sections:
- Set up the Z1 MK2
- How to use the Z1 MK2 with Traktor Pro 4
- EQ and Gain
- Channel Faders and Crossfader
- Mixer FX Section
- Cue your Tracks
- Mixing with Stems
- Light guide
- Rear panel
- How to use the Z1 MK2 in a DJ setup
- DJ set preparation
- Mixing setup
- Combining controllers: Z1 MK2 and X1 MK3 DJ setup
- Z1 MK2 and two X1 MK3’s
- Using the Z1 MK2 as a MIDI Controller
- Start DJing with the Traktor Z1 MK2
Follow along with this tutorial using Traktor Z1 MK2.
Set up the Traktor Z1 MK2
The Traktor Z1 MK2 is a portable and professional DJ controller. Before we dive in, you’ll need to install Traktor Pro 4, version 4.1.0 or above. Plug the Z1 MK2 into your laptop using a USB cable, and open up Traktor. For more detailed set up instructions, refer to our setup guide.
The Traktor Z1 MK2 is a portable and professional DJ controller. Before we dive in, you’ll need to install Traktor Pro 4, version 4.1.0 or above. Plug the Z1 MK2 into your laptop using a USB cable, and open up Traktor. For more detailed set up instructions, refer to our setup guide.
How to use the Z1 MK2 with Traktor Pro 4
The Z1 MK2 is a two-channel mixer controller, and includes all the basic controls you need to start mixing with Traktor Pro 4.
At the top middle of the unit, the ☰ button gives you access to Decks C and D so advanced users can mix with four channels.
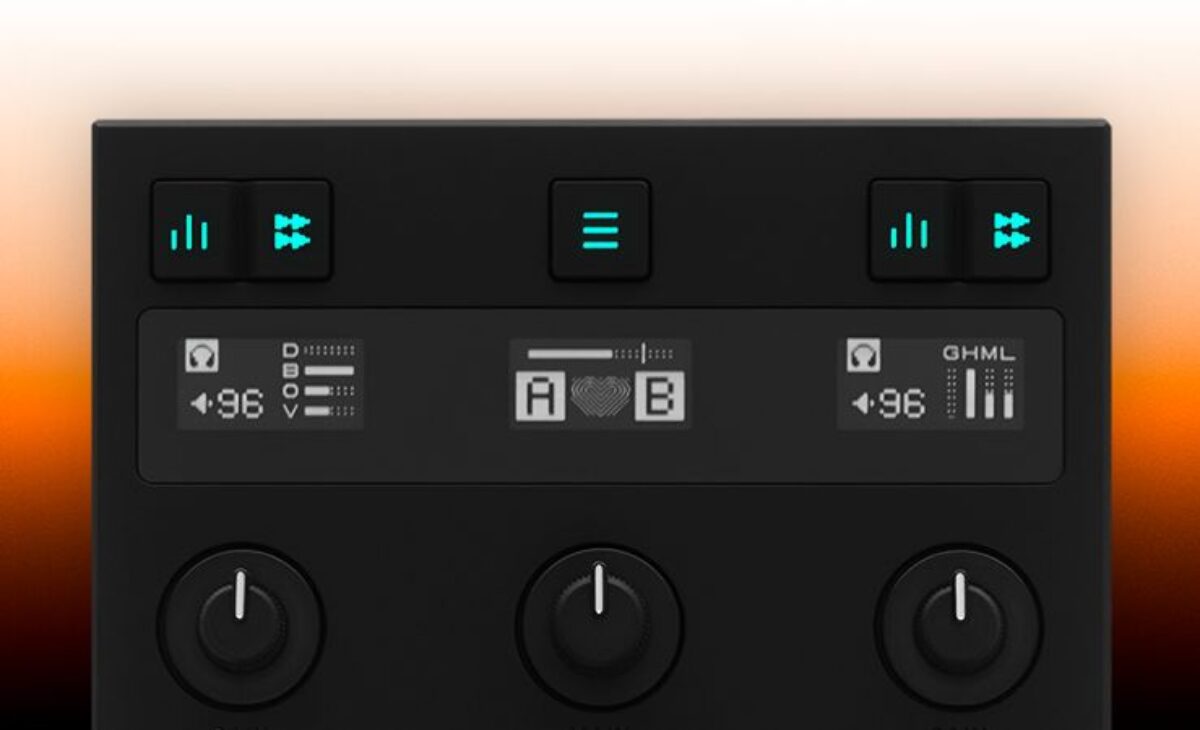
In a two deck configuration, the left side of the controller controls the features of Deck A, while the right side of the controller controls the features of Deck B.
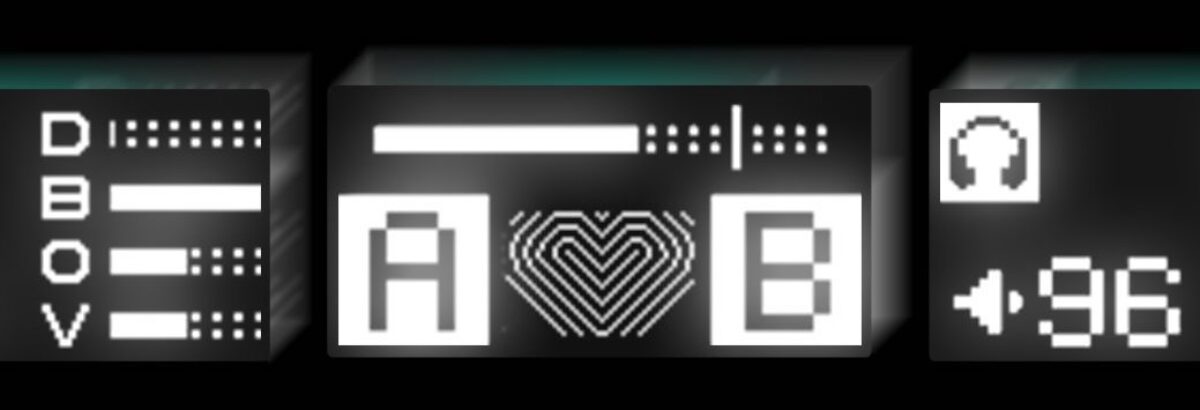
The display screen shows information that’s important for mixing, including EQ and stem parameters, mixer FX selection and the master output meter.
EQ and Gain
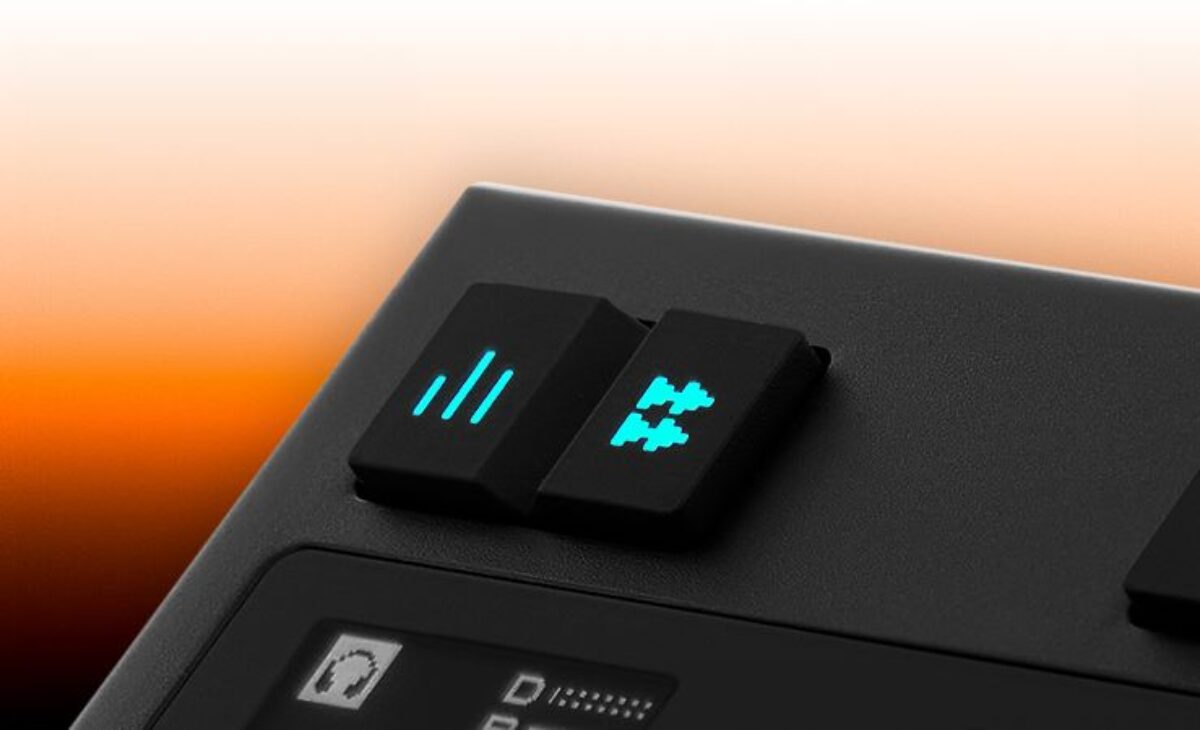
In the top middle of the controller is the Main volume knob that adjusts the volume of the Z1’s main output (located on the Z1’s rear panel). On each side of the Z1 MK2, you’ll find a Gain knob, a three band EQ, FX knob and a Mixer FX On button. At the top of the Z1 there are two buttons that represent EQ and Stem mode.
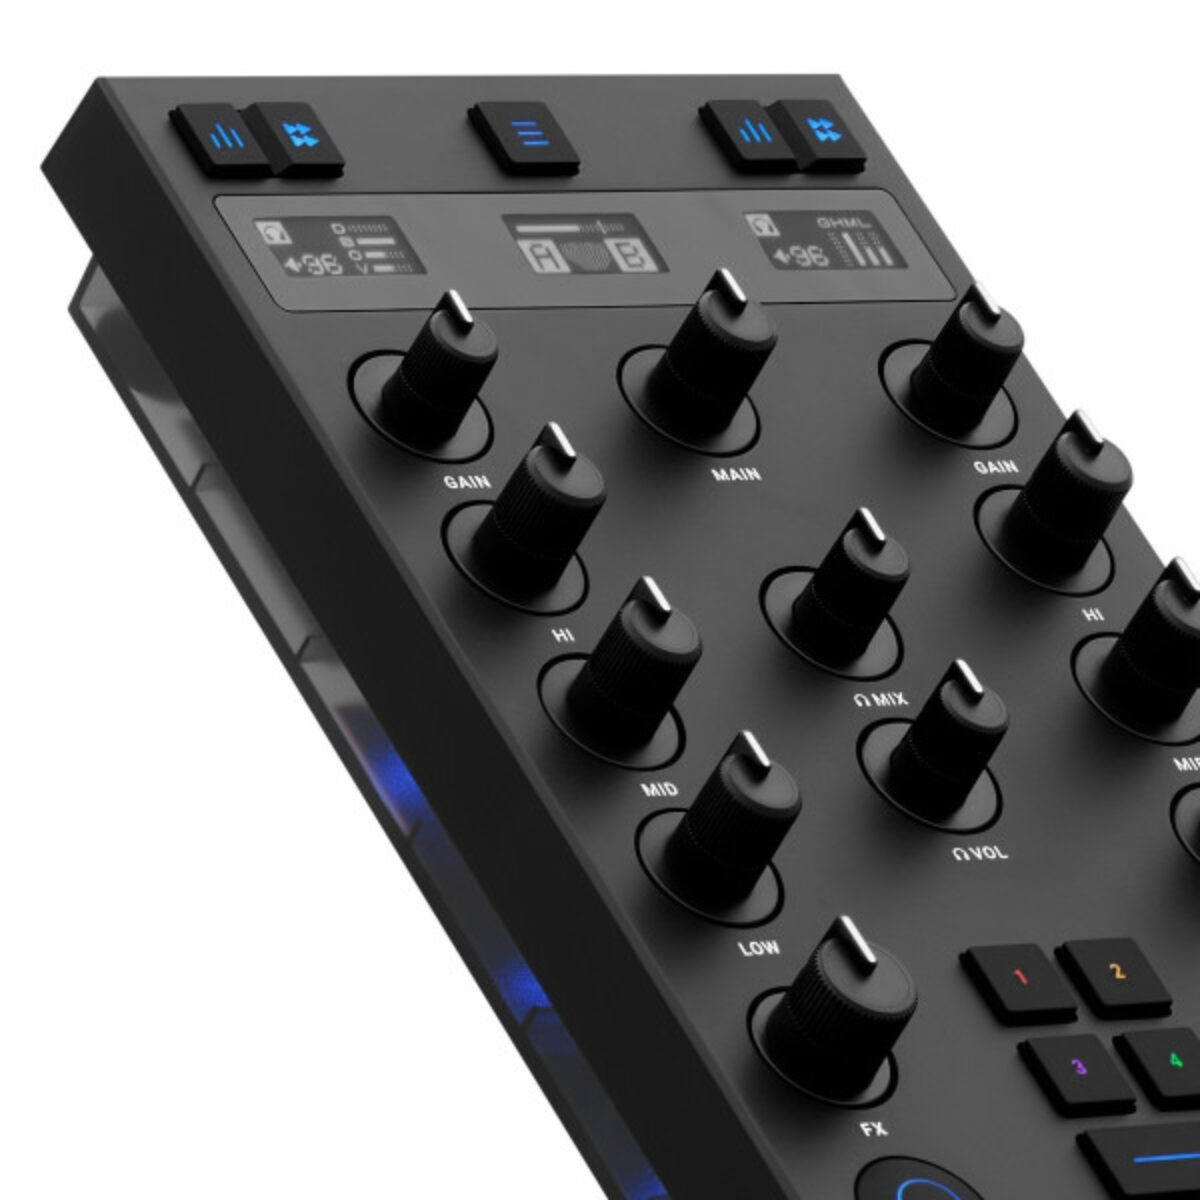
At the top of the Z1 there are two buttons that represent EQ and Stem mode. In EQ mode, the Z1 MK2 gives you control of Traktor’s three band EQ. In Stems mode, the Gain and EQ control the volume of each of the Stems. Press the EQ Mode button to use the three band EQ, and Gain.

The Gain knob adjusts the overall gain of the corresponding Deck in Traktor. Auto-Gain mode can be used as an alternative gain mode. In Traktor, press the button next to the Gain to activate Auto-Gain level viewing mode. When Auto-Gain is on, the knob shows the Auto-Gain that’s stored in the Traktor song file during analysis.
The three band EQ section can be used to sculpt the sound of the low, mid and high frequencies of a track playing in the Deck. The low EQ can cut or boost the low of a track, including kick drums, bass and sub bass. The Mid EQ cuts or boosts the mid range of a track, including vocals and most instrumentation. The High EQ adds or subtracts a ‘brightness’ from a track, and the Hi EQ cuts or boosts the high frequencies, which include hi-hats, rides, cymbals or snares and the top end of synths and pads.
The EQ section can be customized in Traktor and set to different EQ types. Each type has its own sound, giving you more control in your mixes.
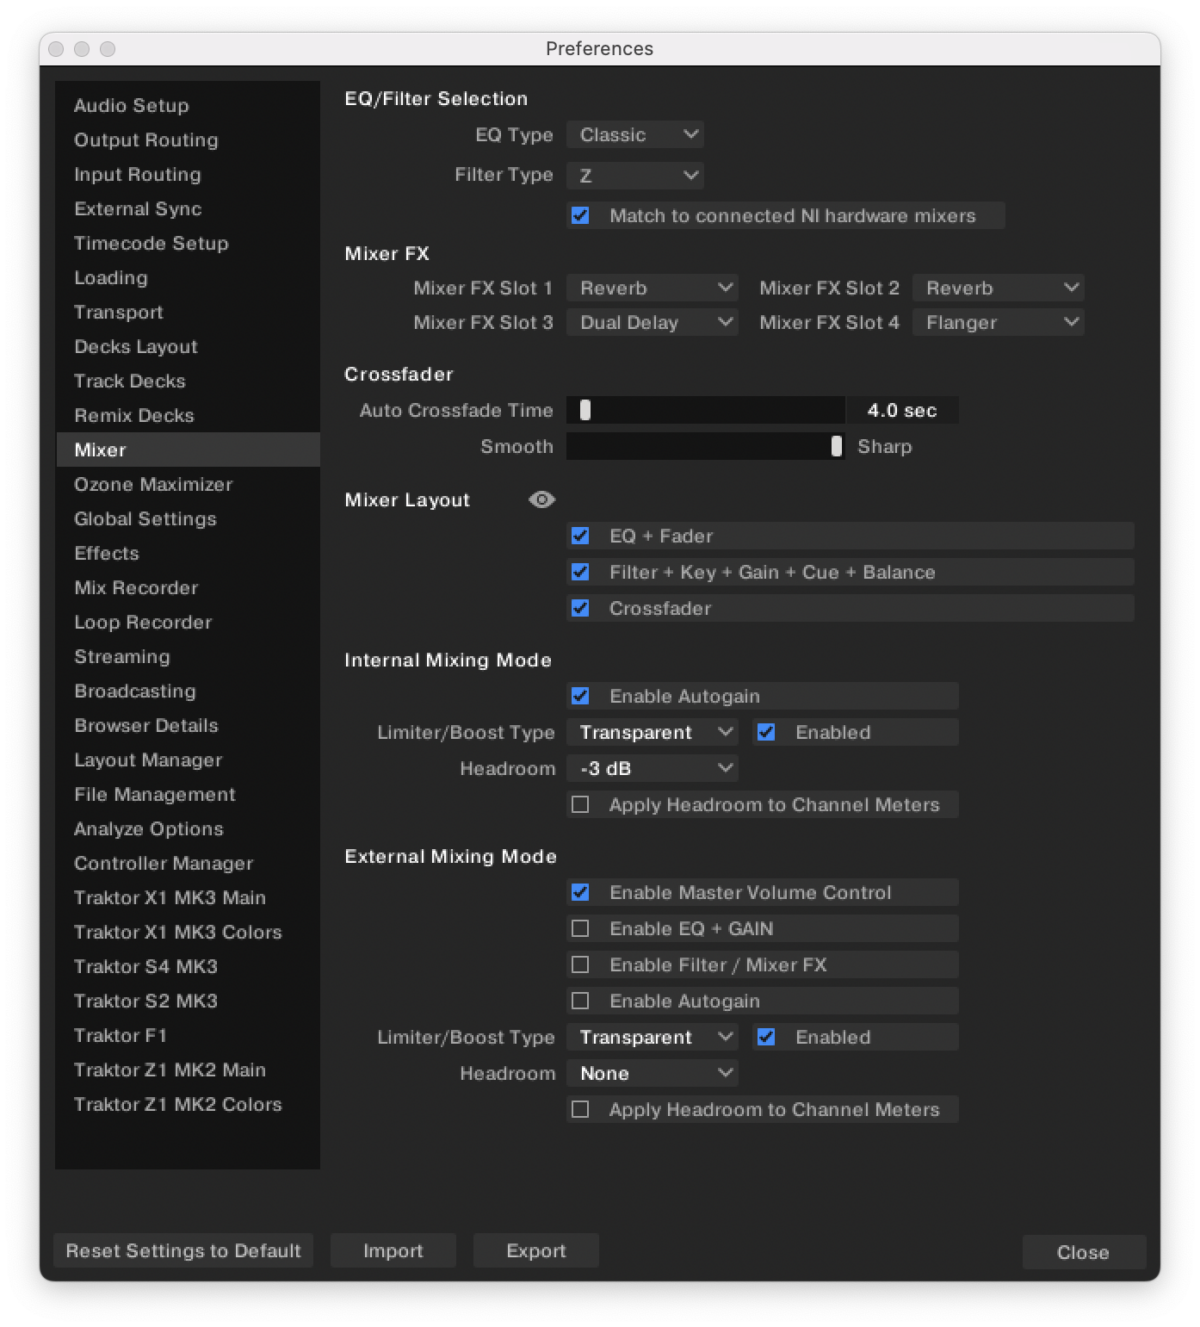
To select an EQ setting, open Traktor’s Preferences, navigate to the Mixer section. In the EQ/Filter Section, select the EQ type from one of six types, including Classic, P600, NUO, XONE, Z ISO and P800. For more information, refer to our guide.
Channel Faders and Crossfader
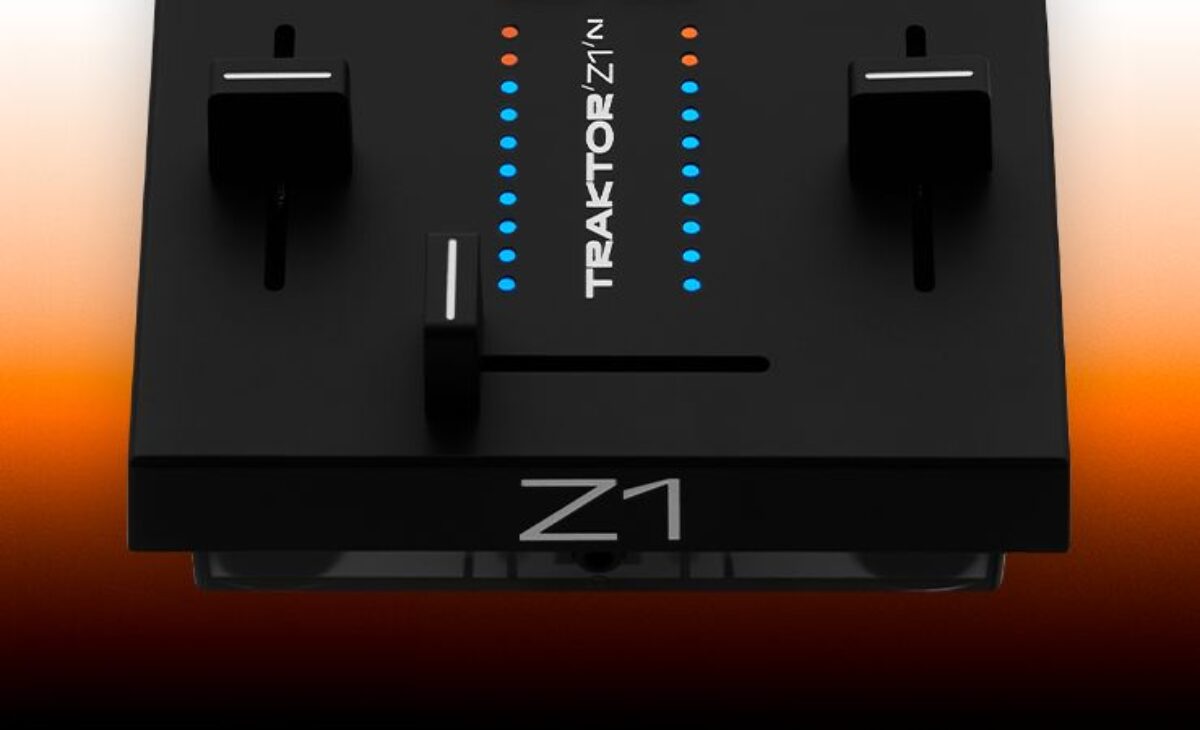
Each side of the controller features a channel fader to control the volume of the Deck, and can be used to smoothly mix in tracks. VU meters are located right next to the channel faders, and display the individual decks pre-fader output. There’s a Cue button for pre-listening to your track above the VU meter and the front of the controller features an ⅛” input for headphones.
At the bottom of the controller is a crossfader that allows you to mix between Deck A, and Deck B. The crossfader’s curve can be set from Smooth to Sharp in Traktor’s Preferences in the Mixer section. Using the crossfader with a sharp curve will be useful for DJs who want to cut quickly from one Deck to the other, while a smooth curve allows tracks to blend using the crossfader.
Mixer FX Section
The Mixer FX section of the Z1 MK2 features four Traktor effects and a larger button for Traktor’s Filter. Using the Mixer FX sections, you can quickly apply effects to tracks to add a unique flair to your mix. By default, the effects you can immediately use are Reverb, Delay, Noise, and Time Gator. To apply an effect to a Deck, select one of the FX buttons, and push down on the round Mixer FX knob. To turn the effect off, push down on the Mixer FX button again. To return to the Filter, simply press down on the large horizontal Filter button.
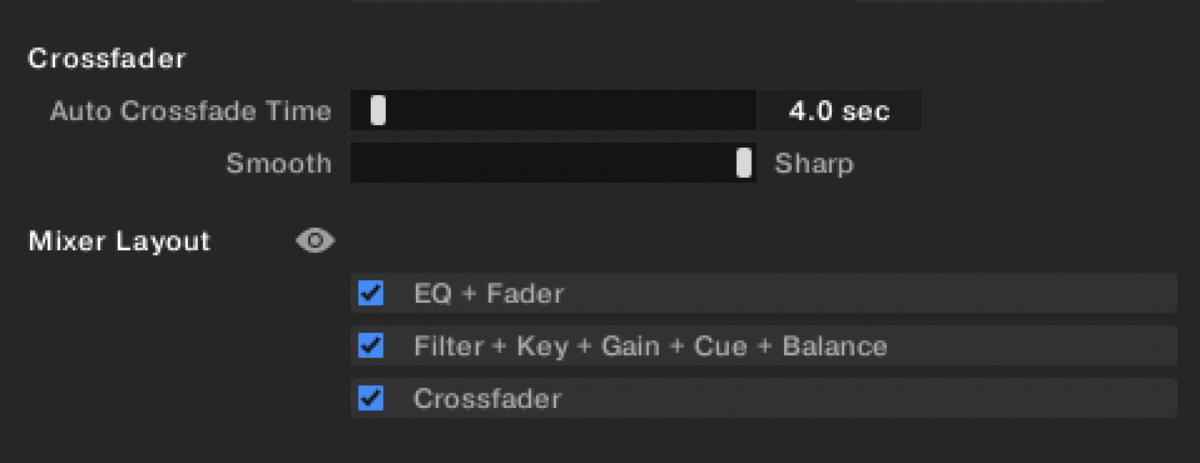
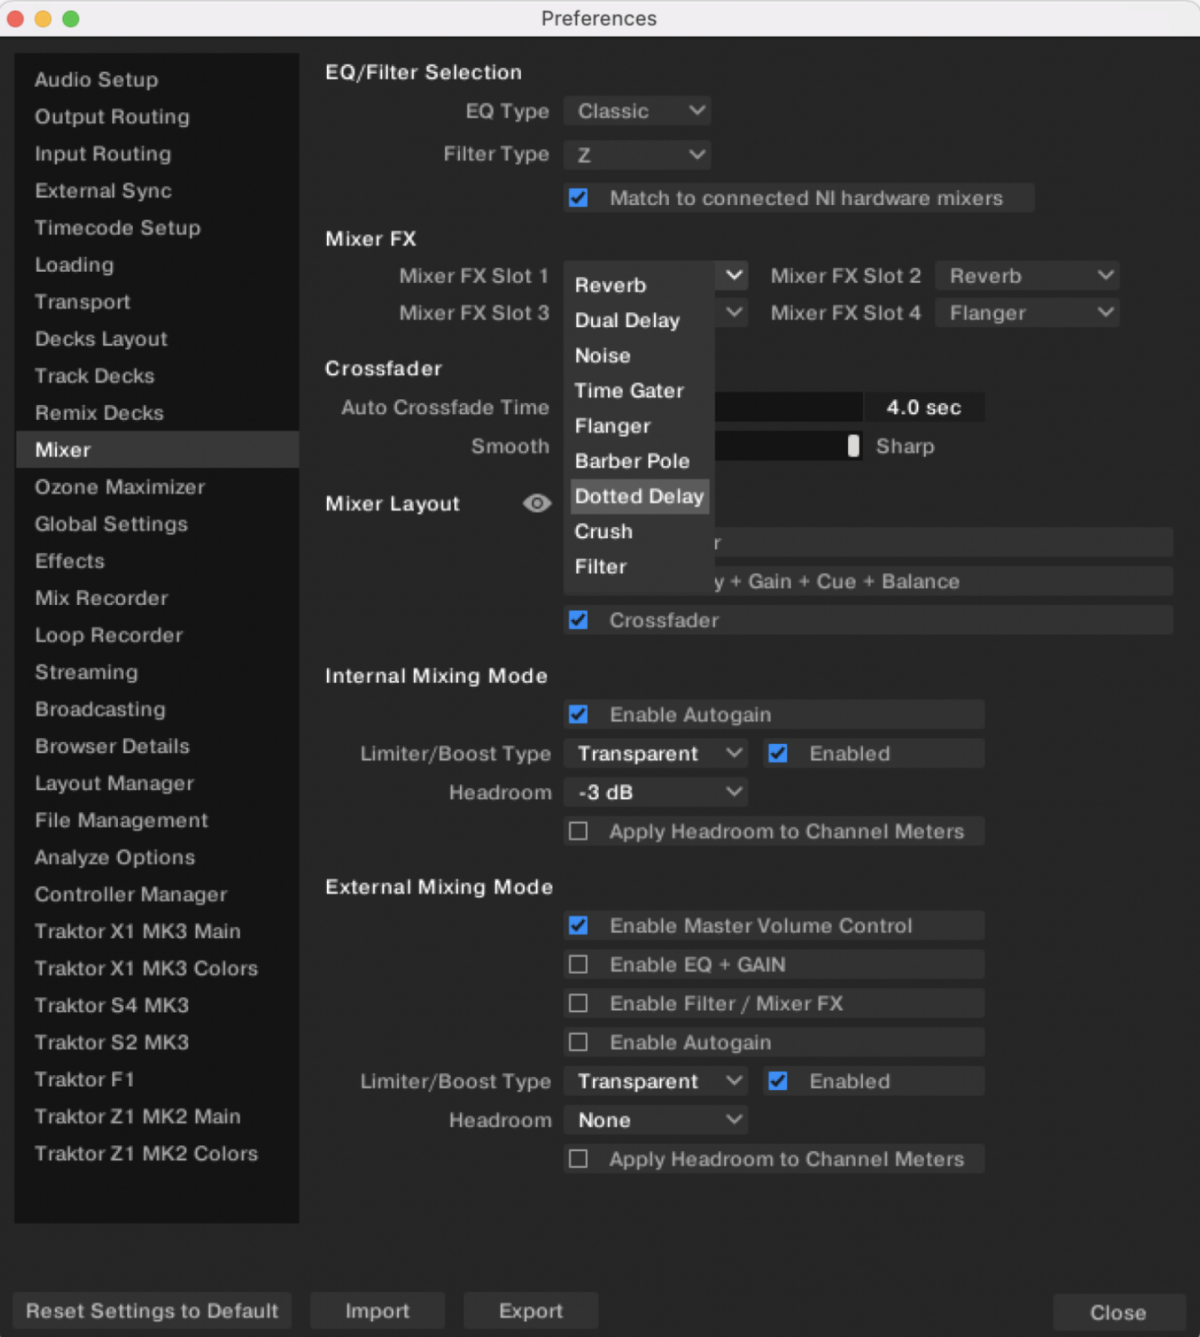
If you wish to use more effects from Traktor, each Mixer FX slot can be customized with one of Traktor’s eight effects. These include Reverb, Dual Delay, Noise, Time Gater, Flanger, Barber Pole, Dotted Delay, Crush and Filter.
To customize the Mixer FX, open Traktor’s Preferences and navigate to the Mixer section. In the Mixer FX section, select your desired effect for each Mixer FX Slot. You’ll love the sound of Traktor’s effects, and the Z1 allows you to quickly add FX for the finishing touch on your mixes.
In the Mixer FX section, there is an FX knob that controls a set of various mixer effects. Turn the knob clockwise to apply more of the effect. In the 12 o’clock (neutral) position the knob has no effect on the sound.
The round Mixer FX button below the EQ section can be used to turn the effects on or off. This button can be customized in Traktor’s Preferences and set to a selection of functions, including Play, Sync, Cue and more.
Cue your Tracks
The Z1 MK2 makes it easy to pre-listen to your tracks for a set using the two Headphone cue buttons below the FX section and can be used in combination with the headphone Volume and headphone Mix controls in the middle of the unit. To listen to a track in a Deck, start off by making sure the headphone Volume is set to a fairly low level to avoid playing your music too loudly in the headphones.
If you want to listen to one track at a time, play the track in a Deck, and press the corresponding Headphone cue button. Turn the headphone Mix knob all the way to the far left. To hear the track that’s playing in the second Deck, play a track in the Deck and turn up the headphone Mix knob. You’ll hear a blend of both tracks together.
For more on this topic, check out our blog on how to set cue points.
Mixing with Stems
One of the unique features of the Z1 MK2 is it offers DJs the ability to mix with Stems in Traktor Pro 4. To use Stems mode, press the Stems button at the top of the controller. In Stems mode, the Gain Knob controls the Drums Stem, the Hi Knob controls the Bass Stem, the Mid Knob controls the ther Stem and the Low Knob controls the Vocal Stem.
When any of the knobs are turned counterclockwise, the stem volume lowers, and when the knobs are turned counterclockwise, the corresponding stem volume is raised. Both audio and stem tracks can be mixed together; meaning an audio track on one Deck can be played, while a Stem can be played on the second Deck.
For more on this topic, check out our blog on how to mix with stems.
Light Guide
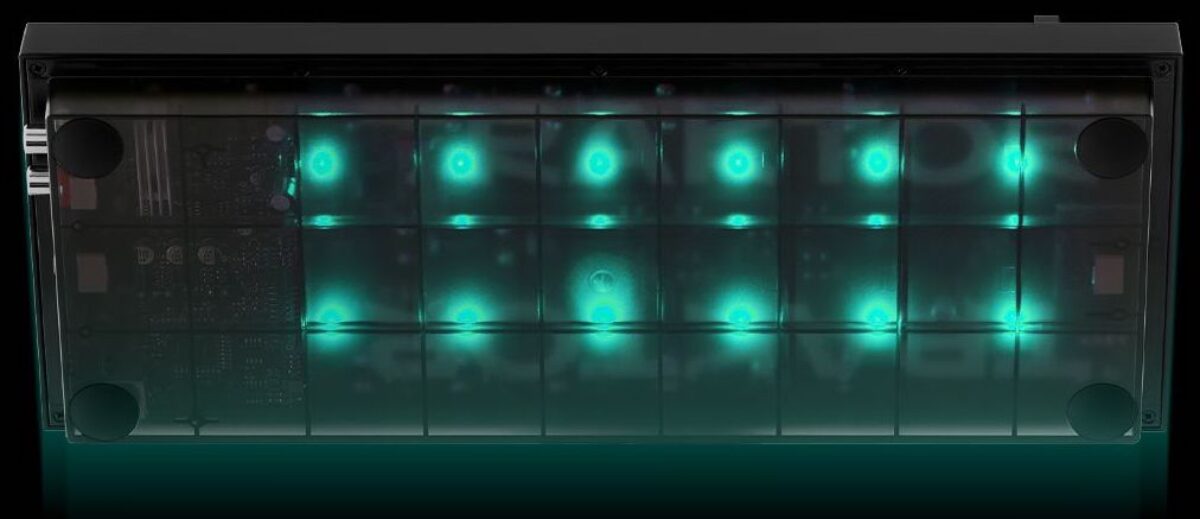
There’s a lighting system on the bottom of the Z1 that notifies you about important information, like when a track is looped or about to end and can be customized to make it your own! Aside from being functional, the lights look great in a club or dark environment.
Rear Panel
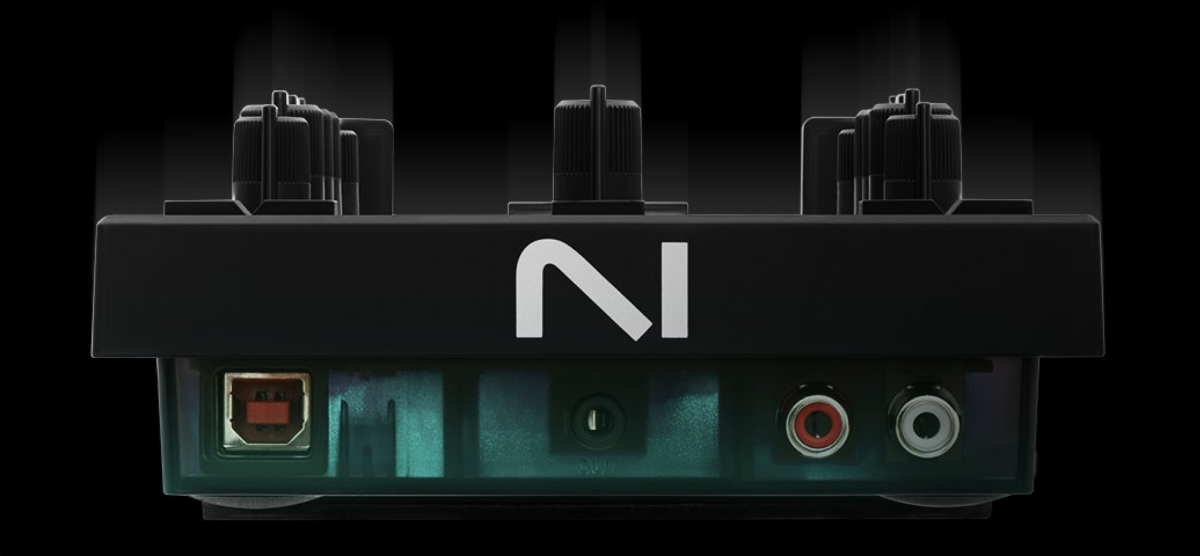
The Z1 MK2 features a high quality 24 bit, 96 kHZ audio interface, a ⅛” audio output, RCA outputs to connect to a soundsystem or mixer and a USB connector.
How to use the Z1 MK2 in a DJ setup
The Z1 MK2 is a flexible controller, and there are many ways it can be easily incorporated into a DJ setup. Whether you’re looking to play tracks at a gig, prep your sets, or pair the Z1 together with other Traktor controllers, you’ll find that the Z1 MK2 will fit right into your DJing workflow.
DJ set preparation
The Z1 allows you to easily prepare sets, and gives you controls over EQs, filters, track levels and effects. Using the Z1 MK2 with Traktor and a pair of headphones is a great way to test out mixes at home or while you’re on the go.
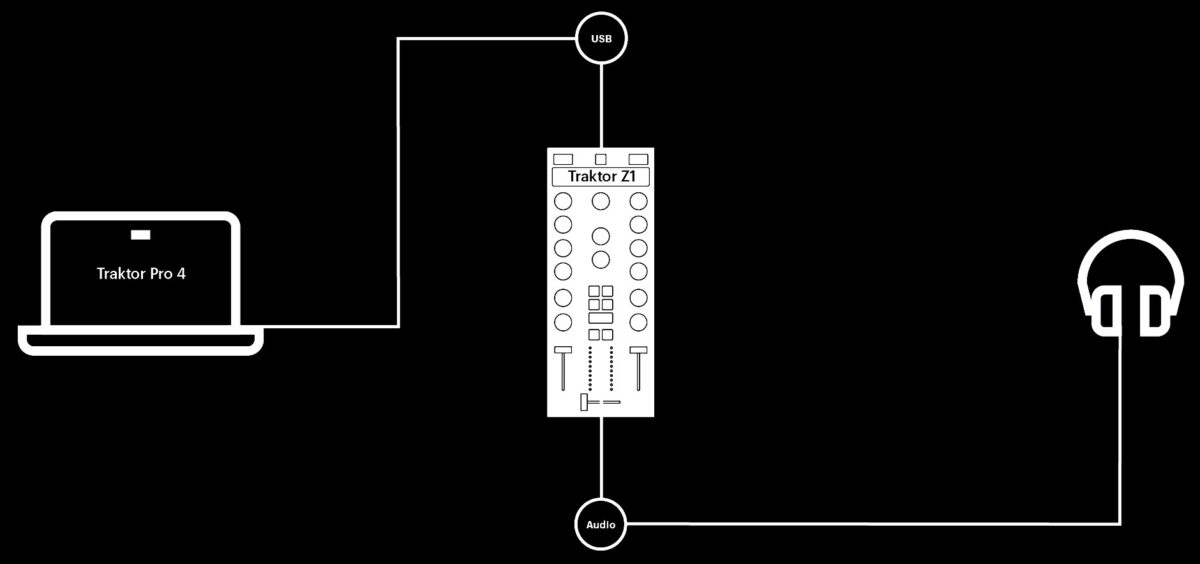
To prep your sets, connect the Z1 to your laptop with Traktor Pro 4 with a USB cable, and plug your headphones into the Z1. The Z1 fits easily into a backpack or carry-on, and can be taken with you on the road so you can prep and test drive your DJ sets.
Mixing setup
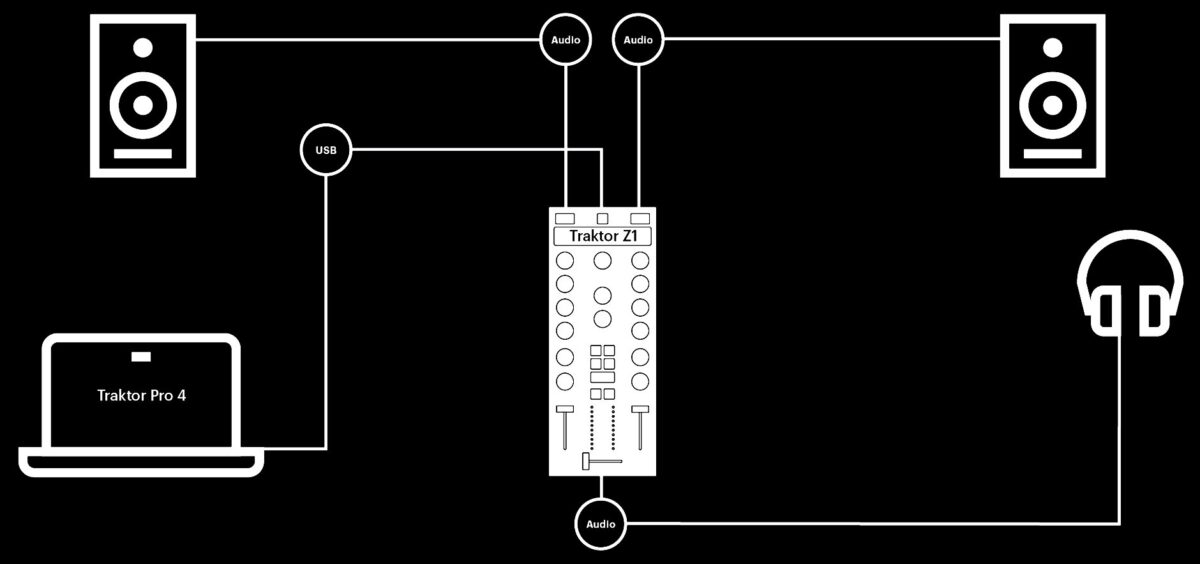
The Z1 MK2 is a fully professional and portable Traktor mixer. Use the Z1 to mix anywhere by connecting each of the RCA outputs on the rear panel to a powered speaker. Connect the Z1 to your laptop with a USB cable, and plug your headphones into the Z1. Whether you’re performing in a club or practising sets at home, the Z1 will inspire you to blend together great mixes.
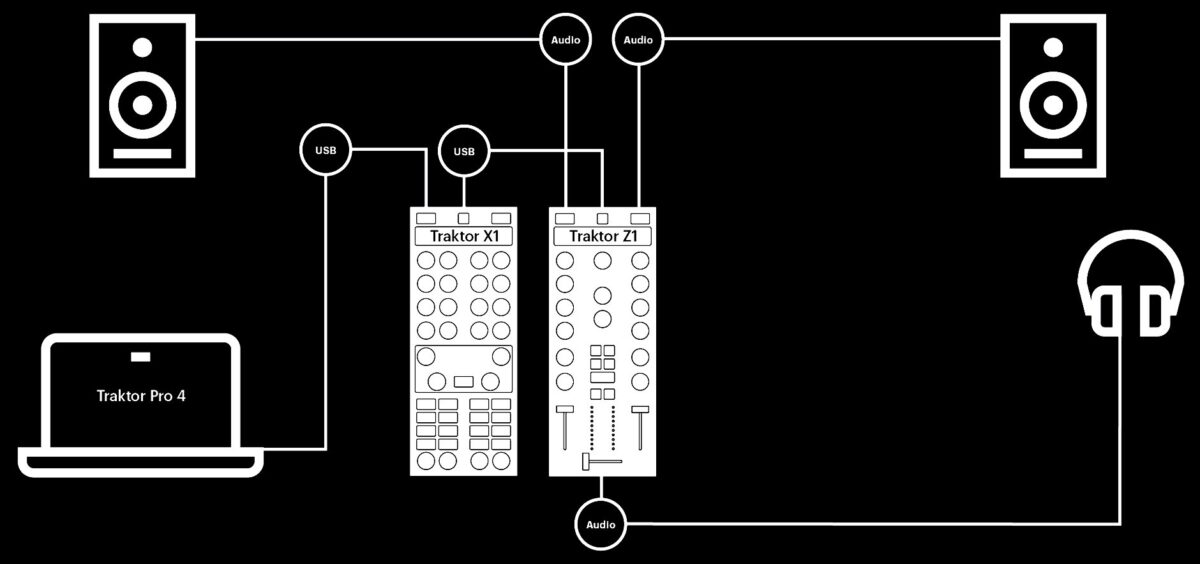
Combining controllers: Z1 MK2 and X1 MK3 DJ setup
The Z1 MK2 and the X1 MK3 can be paired together for greater control of Traktor’s features and effects. The combination of these two controllers is a futuristic DJ setup that gives you precise control of Traktor’s features. Combine the Z1 MK2 and X1 MK2 for seamless mixing and advanced effects with precise cueing, looping and track navigation. To use this setup, connect the Z1 MK2 via USB to the X1 MK3. Connect the Traktor X1 MK3 to a laptop via USB. Connect the RCA outputs on the rear panel to a pair of powered speakers and connect headphones to the Z1.
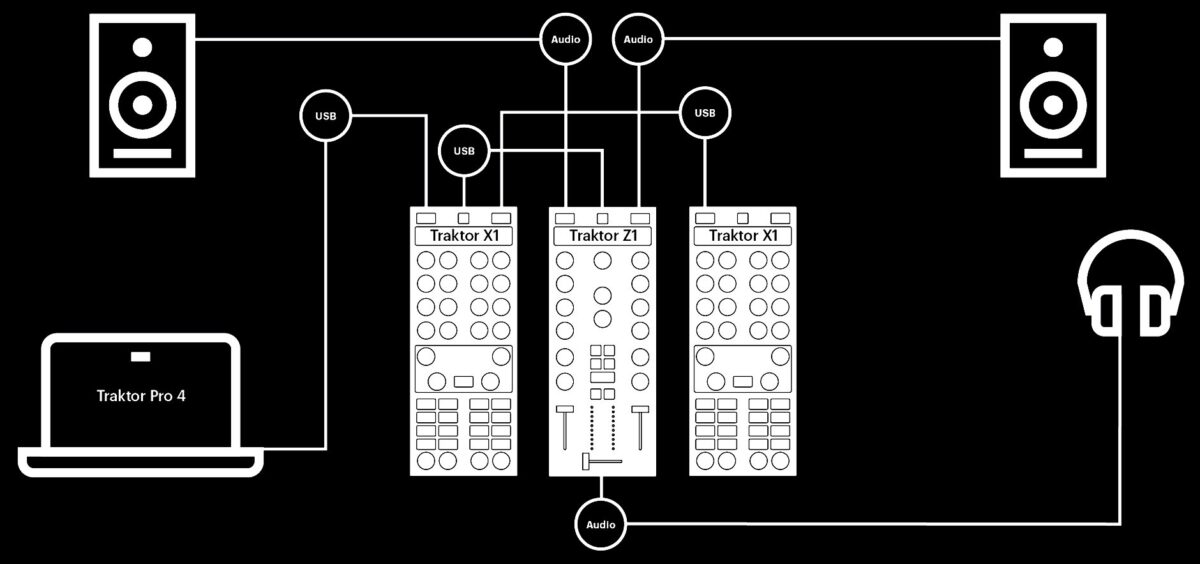
Z1 MK2 and two X1 MK3s
Combine one Z1 MK2 with two X1 MK3 controllers for full control over Traktor’s four decks. In this setup, the Z1 is used for mixing, while the X1s offer detailed control over individual deck cueing and effects. Use the same setup guide as in the previous example, with the addition of an additional USB connection from the second X1 MK3 to the first X1 MK3.
Using the Z1 MK2 as a MIDI Controller
The Traktor Z1 MK2 can be used as a MIDI controller with third-party software, like Ableton and other digital DJing and software programs. 1. Press the — button (located below the four effect buttons) together with the ☰ to switch to MIDI mode, and press the — button together with the ☰ again to switch back to Traktor mode.
Start DJing with the Traktor Z1 MK2
Now that you’ve learned how the Z1 MK2 can be used to DJ with Traktor, it’s time to get busy prepping sets and DJing with this new controller! Pick up a Z1 MK2 today and start mixing your best sets yet. Whether your goal is to mix live, stream more sets, or build a modular DJ set with the X1 MK3, the Z1 is a sleek and portable controller that will help you to achieve your DJing goals. You’ll love the minimal look and feel of the Z1 MK2, and its compact size makes it easy to bring on the road. If you’re looking for a flexible, modern mixing controller with great sound quality, you’ve found the one. Get the Z1 MK2 today to start mixing whenever and wherever you want.


