


In this blog, we’re going to discuss how to take control of your music library with Traktor Pro 4 at the center of your system. Boost your playlist searches, tidy up your metadata, and quickly fix your beatgrids for more accurate mixing.
Knowing your music and understanding how to get the most out of your library will help you excel at DJing even under the toughest live conditions. That’s not to say you can’t have lots of music in your library, but it needs to be efficient.
The further down the path of chaos you travel, the harder it is to change course, which is why the best time for Traktor Pro 4 library management is right now. Here are some useful tips and tools that can help you keep your library efficient and easy to search.
Jump to these sections:
- Understanding the Traktor Pro 4 library management workflow
- Where to find music
- Adding new music
- Finding the root keys of your tracks
- Reviewing tracks and adding personalized metadata
- Importing music into your Traktor Pro 4 library
- Beatgridding your tracks for accurate playback
- Preparing for a set
- Optimizing your Traktor MX2 workflow
- Making your music portable
- Tips for maintaining a clean Traktor library
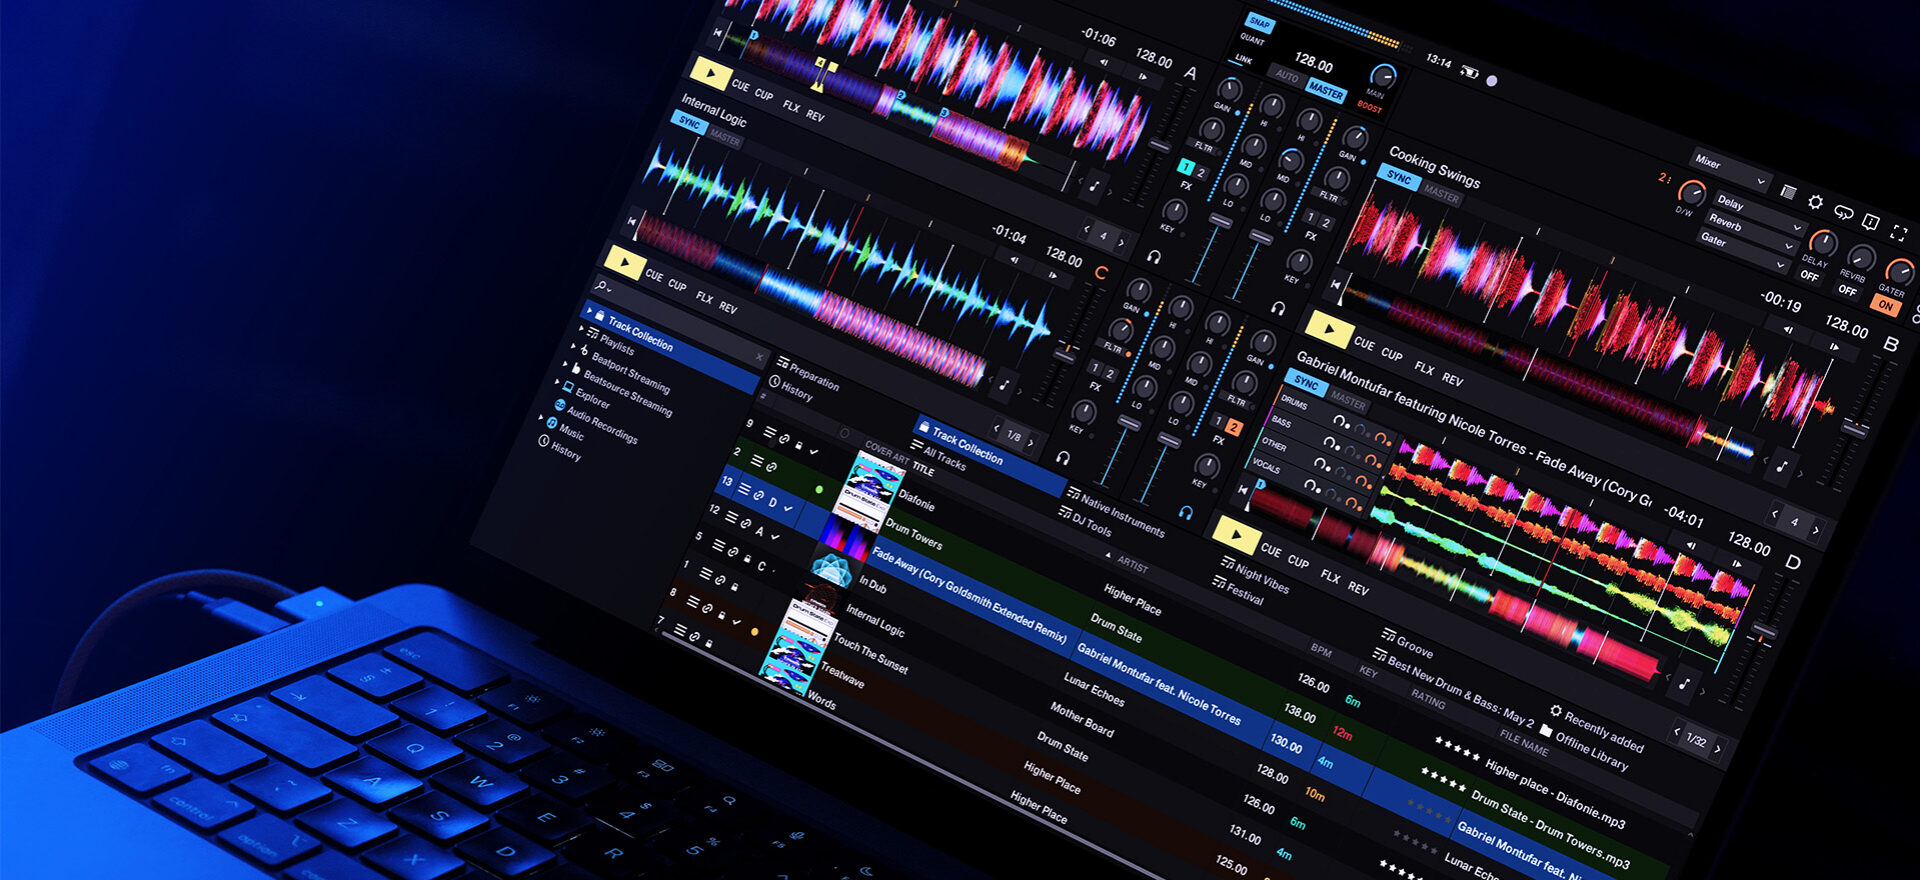
Unlock the full potential of your mix with the industry-leading precision, advanced stem separation, and legendary flexibility of Traktor Pro 4.
Understanding the Traktor Pro 4 library management workflow
A big part of library management is not only knowing where your tracks are and how to search for them, but building in the routine of maintaining them all. If you start organizing your music, it should become a well-oiled machine that will become more efficient over time.
Customize the UI layout
The first thing to look at is your user interface workflow. It’s worth creating a separate UI layout for your beatgridding and library management. This means you’ll have instant access to all the features that will help you.

- The first step is to save the new layout in the Layout Manager tab by duplicating your current layout and renaming the new duplicate
- Remove everything that isn’t necessary, such as disabling Show Global Section, which can be found in the Global Settings tab
- Now get rid of the mixer channels and equalizers, crossfader, and tempo fader in the Mixer tab
- Then, set the interface to single deck or two decks, make sure the deck advanced panels are displayed, both in the Decks Layout tab
Now you’re good to go.
Note that having two decks can be handy, so you can have a track analyzing in deck B while you beatgrid in deck A.
On top of that, it’s good to have a keyboard key mapped to show/hide the browsers, such as the spacebar. There are also dedicated Traktor mapping files (.TSI format) online for library prep workflow.
Structuring your library system
Maintaining similar basic folder and playlist structures will help with navigating your music, and a clear folder structure is at the heart of DJ music library organization. Where it will differ, however, is when working on set preparation: keeping a separate folder of prep playlists, dated and labeled with the event name, helps you keep a list to start from (as detailed further down).
One of the easiest ways to keep up with new music in your collection is to maintain a yearly folder structure, with sub-folders that suit your musical style (like genre, BPM, or energy), along with a folder for incoming new music:
+[Year]
+[Year]
+[Year]
+[Year]
+[Year]
-[Year]
[_NEW TRACKS]
[GENRE/BPM/ENERGY]
[GENRE/BPM/ENERGY]
[GENRE/BPM/ENERGY]
[GENRE/BPM/ENERGY]
[GENRE/BPM/ENERGY]
Each year folder will store all the music you’ve bought within that year, rather than the year of release. This is an important distinction because, unless a piece of music is important to you, there is no association with some random date, potentially in the distant past, rather than the year you purchased the music.
Organizing folders and playlists
At the start of every year, take a moment to ponder the previous year’s music, while creating a new folder and Traktor Pro 4 playlist. This is about giving some time to think about all the music added over the last 12 months. This can help you to appreciate the change in trends and your own tastes.

Using smartlists to automate your library
You can automate your playlists using smartlists, which use filter conditions to populate the list on the fly. In Traktor Pro 4, the filter conditions allow you to drill down further than the metadata, with access to file paths, media source, file availability, and even the content type. As you add music to your collection, it will also update your smartlists if they meet the filter conditions.
Advanced smartlist setups for faster preparation
This is one of the more advanced Traktor collection tips.
If you use your computer’s file system to organize your music, the file path condition can be a powerful way to filter your tracks.
Using the _NEW folder as your prep folder, set up a list of new and unsorted tracks waiting to be processed. As you add new tracks, the list will update. Having this smartlist is also a great reference point when you’re in a mix and want to find your latest tracks.
Alternatively, you can create a smartlist of recently added tracks with a date cutoff, however many weeks or months ago you might consider new.
You can set a smartlist to watch your collection for tracks that aren’t locked or analyzed, giving you a current list of what needs your attention. Locking your track after you finish beatgridding then reminds you and the software that the track is done and ready to be played.

As you build your collection, you will come across tracks you need to remember for one reason or another. Whether it’s a certain epic moment, or a great kick, or even just a stone cold classic track you can never recall the name of. If there are tracks you want to keep a list of, use a common element to filter them, such as adding a “REMEMBER” tag to your comments or a color tag.

As long as you keep your library well managed, smartlists can be a near-limitless way of sorting and ordering your music in a way that works for you. And this is the most critical part of this workflow.
Smartlists make it easy to auto-populate folders – including a Traktor Stems Smart Playlist for performance tracks.
Setting up your first smartlist
You create a smartlist pretty much the same way you would a normal playlist, except with the added step of selecting the conditions to filter the list with. What conditions are available in the drop-down list will depend on the type. Some examples are shown below.
- contains
- does not contain
- is
- is not
- starts with
- ends with
To create a new smartlist, right-click on the Playlists node in the collection tree and choose Create Smartlist. A new Smartlist window will pop up where you can add a name for the list and choose the conditions to filter. At the bottom of the window is a counter showing how many tracks will be in the list when it’s created.

Customizing your sorting columns for better navigation
Your playlist window has a row of metadata columns along the top, which can change the sorting order of your track list. The default way your track list window displays these offers plenty of information to help you, but it can be customized to show the information you prefer by right-clicking and selecting and deselecting the columns. You can also drag a column to reposition it.

Having the metadata displayed means you’re ready to browse your tracks.
Using search filters to refine your results
Once the system is in place, the search bar will become an even more powerful tool. With just a few words typed in, you’ll be able to filter your entire collection or individual playlists, using a tagging system tailored to your music. Keep in mind, when searching within a playlist, the results will be limited to the playlists only. When hitting Enter after the search term is typed in, the search will be expanded to the whole collection.

You can also narrow down to a specific metadata field when searching by clicking on the magnifying glass to reveal a dropdown menu displaying the available search fields.

Where to find music
This is a whole other topic to discuss, and it comes up often when starting. It’s important to remember that discovering new music as a DJ is arguably a more important part of the job than any other. DJs throughout history have embraced a culture of immersing themselves in music and wading through hours of listening to find a hidden gem or the perfect pairing of tracks.
The cliché of “know your music” extends beyond just what’s in your library. It’s also about understanding the trends in your favorite genres, and the music that influences you outside those genres.

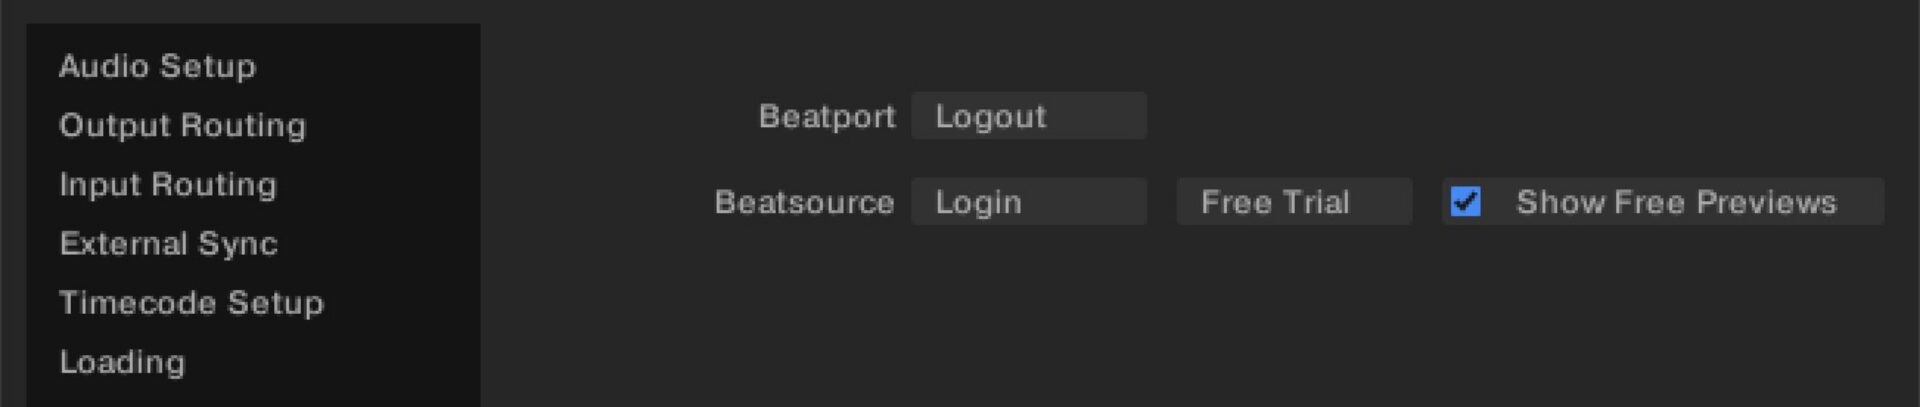
To access Beatport or Beatsource Streaming, first ensure you have at least the Advanced subscription. Navigate to the Streaming tab in Preferences, and click Login. You will be taken to the website via your browser, where you can add your username and password.
With the massive library that Beatport and Beatsource offer, you can do more than just play tracks. Use the extensive library for crate digging, exploring the related tracks, testing them in mixes, and adding them to a crate for when you’re ready to purchase.
Remember that, as attractive as a massive library online might be, it’s going to be overwhelming and could stunt your choices. This is one of those cases where curating your music will actually free you to be more creative in your mixing.
Keep crate digging notes to track your discoveries
As you’re spending time throughout the day or week finding new music, take notes to save music you want to add to your collection. It can also help to add some extra notes about where you found the track or what inspired you to add it.

Adding new music
Whether you’re trawling SoundCloud for free downloads, buying from established labels and artists on Beatport, or hitting the indies on Bandcamp, the start of your journey to expanding your Traktor Pro 4 library will be pretty much the same.

Once you’ve downloaded your new tracks, add them to the _NEW folder, after moving any existing content to their respective genre/BPM/energy folder. This ensures your latest tracks are all in one place and easy to review.
Finding the root keys of your tracks
Traktor Pro 4’s built-in key analysis will present the musical key in either Open Key (4m/1d etc.) or Musical (C/Ebm). There’s no need for extra software, as the key will be determined during the track analysis. If you’re used to the Camelot system (8A/2B), there are other options such as Mixed In Key or KeyFinder.

Reviewing tracks and adding personalized metadata
Next up, either throw your new tracks into an empty iTunes/Music playlist or use the Traktor Pro 4 Cruise Mode, and hit play. This gives you a chance to listen to your tracks in full, check your ID3 info, and give yourself some reminders about the music.

As you work your way through the list, make sure the track name, artist, and genre are filled out. Use the comments tag to fill in any hints about the track.
Some questions to ask yourself about the track:
- Any vocals?
- Male or female?
- Is the track hard, laid back, or percussive?
- Any audio samples that you’ll remember?
Whatever helps to nudge your memory.
If you’re classifying by genre, keep in mind that it needs to be what works for you, not necessarily what was decided by the webstore or the labels (it’s often the labels that decide what genre category the track appears in).
Think about where you feel it will fit. If you mainly play progressive house and techno, but you’re adding a melodic deep house track, it will probably go in a progressive house set rather than a techno one. This is why keeping a separate genre tag in your comments will help you classify your music.
Importing music into your Traktor Pro 4 library
There are several ways to add music to your collection:
- Using the Explorer node of the Traktor Pro 4 library browser
- By dragging and dropping using the Finder/File Explorer window
- Right-clicking on the Track Collection node and choosing Import Music Folders or Import another Collection

In both cases, you can just drag the tracks or folders to your main collection or the current year playlist. You can also clear your playlist and drag the entire year’s folder back in to ensure everything in the playlist is the most up-to-date. It will also mean all your newest tracks, held in the _NEW folder, will be at the top of the list.
Managing stems and other audio media
Sometimes, you’ll need to add other types of audio to your collection. For example, any time you create a new stem audio file, it will replace the music track. You might also be building a remix deck or even using the remix deck step sequencer.
You can set the type of file in the browser by right-clicking it and choosing from the context menu. This way, you can use Stems in Traktor Pro 4 with your existing tracks.

Beatgridding your tracks for accurate playback
Even though Traktor Pro 4’s Beatgrid analysis usually gets it right, you should build the process of Beatgridding into your routine.
No music analysis is perfect, and you should trust your ears first. The most important thing is to ensure your tracks have consistent grids throughout your collection. This is especially important if you tend to use sync, but it can also alter how Traktor Pro 4’s effects work.

Traktor Pro 4 has a flexible Beatgrid system that allows you to match the grid points to the beat of tracks that don’t have a consistent tempo. Sometimes, a track might be ripped from vinyl, with wow and flutter recorded, or it might feature a live drummer, like in vintage disco or rock music.

If you want to find out more about fixing tracks with drifting BPMs, you can read up further on the Traktor Pro 4 Forum.
Preparing for a set
It’s important to remember that a DJ’s job extends beyond a jukebox or music player. A tidy music library is as much a part of your preparation for a gig as crafting a crate or playlist for the event. Keep things loose, and you can remain flexible while you’re playing.

In the days leading up to your gig, start adding a few tracks to a playlist that you’d like to play. Alternatively, create a playlist for your gig in your Gig prep folder.
Right-click the playlist and click Select as Preparation List. This way, your Preparation List is more flexible, and you will prepare directly for that gig.
Usually, between half a dozen to a dozen tracks should be enough, and once the set starts to flow, you probably won’t even get through all of those. If you aim to have your opening track and a couple more that you know you will play, you can fill a whole set around the rest of the playlist.
Optimizing your Traktor MX2 workflow
If you have the new Traktor MX2 controller, there are dedicated, easily accessed built-in controls for your playlist favorites and the track preview player. These can, of course, also be mapped to any other class-compliant MIDI controller.

Playlist favorites
Holding down the FAV button lets you scroll through the favorites bar at the top of the browser, giving you instant access to your important playlists.
Preparation list
Your Preparation List can be quickly added to as you dig through your music collection using the star button above the Traktor MX2 browser encoder. These tracks will then show in the special playlist marked with a plus symbol on top of the playlist icon.
Preview
When using internal mixing mode, you can preview the track currently selected in the track list window using the preview play button. This, along with the preparation list button, helps you quickly create a set list as you work through your music.
Making your music portable
Traktor Pro 4 music collections, playlists, and smartlists can be exported to a portable Traktor Pro 4 .NML format, as well as the .M3U playlist file standard. When exporting, the music files themselves can also be copied over, ready to be played elsewhere.
To export a playlist:
- Right-click on it and choose Export Playlist as nml/m3u
- Choose a playlist title, save destination, format, and whether to include the music files.

You can also export your smartlists the same way. To export your whole collection, right-click on Track Collection, choose Export the Collection, and follow the same steps.
Tips for maintaining a clean Traktor library
There are plenty of underutilized tools in Traktor Pro 4 to help prepare and manage your library. It’s worth exploring the manual to get to know what can be done. Here are a few suggestions.
Start as you mean to go on. The way you organize and categorize your music will evolve as your collection grows and your tastes change, but the priority should always be ensuring everything is where you expect it, and no information is missing. Schedule time regularly to sort through new tracks and get to know new music.
Color-code your tracks. Track color coding can help you sort your music by adding colored highlights within your playlists.

Remember your history. Traktor Pro 4 saves all your past sets to dated playlist files, which you can access via the Archive section of the Explorer node.

Check consistency. Remember to scan your collection regularly, to make sure all your tracks are analyzed, and to relocate or remove any missing tracks.
Keyboard for gridding. Speed up your preparation routine even more with a custom keyboard gridding mapping.
Playlist search and sorting. Quickly drill down to the music you need by searching individual playlists and sorting key, tempo, or any other metadata column you find relevant.
Playlist favorites. Gain quick access to important folders or playlists by adding them to the Playlists Favorites bar at the top of the browser.

Name your cue points. You can rename your cue point labels in the CUE advanced panel by selecting the cue point and double-clicking the name in the middle of the panel.

Load and loop points. Adding a load point where you want to start your track playing helps speed up your cueing process. Loop points allow you to quickly jump into a loop and serve as a visual clue of a good place to start a loop. You can set up a loop point at the start or end of shorter tracks to give you more time to mix in, as well as extra time at the end.
Metadata is your friend. Use the text fields to save information useful to you, personally.
Don’t be afraid to cull your library. Just because you bought a track back in 2010, it doesn’t mean you still need it. Every couple of years, it’s worth listening through your whole collection, double-checking the metadata, and being ruthless about what to keep and what to get rid of. You don’t even have to delete anything. Simply moving it from your collection folder and updating your Traktor Pro 4 library will make it easier to find what you need.
Manage your Traktor library today
Traktor Pro 4 library management is an ongoing practice, but once your system is in place, it quickly becomes second nature. As you refine your routine, you’ll spend less time searching and more time mixing, selecting, and enjoying the creative side of DJing.
Head into Traktor to organize your library and get ahead of your next set.
Related articles
-

Behind the synth: A. G. Cook on stacked sawtooths and the creation of Super*Saw
Explore the extremes of stacked sawtooth waves with Super*Saw, a new synthesizer co-created with A. G. Cook. Learn how to…
-

Inside the evolution of orchestral sampling: an interview with ProjectSAM
Discover how ProjectSAM’s Lineage Series uses NKS and smart features to change orchestral sampling. Plus, save on instruments in our…
-

How New Constellations turn emotion into sound with Massive X
Go inside the studio with New Constellations. Learn how they use Native Instruments gear, happy accidents, and lifelong friendship to…
-

Citizen Kain on building emotion and space with Replika
Citizen Kain explains how Replika helped shape the rhythm, tension, and emotion behind his debut Eversun Records single “Moments.”…
-

The organic precision behind Calcou’s Anjuna release featuring Reaktor
Calcou shares how Reaktor, Monark, and Super 8 shaped the creative balance and live energy behind their new duo EP,…
-

14 NKS instruments that will change the way you create music
Discover 14 NKS instruments to freshen up your workflow. From lo-fi tape synths to cinematic strings, shop the Native Instruments…
-

Parallelle on crafting living basslines with Reaktor and TRK-01
Parallelle share how Reaktor and TRK-01 shape the bass and warmth in 11th Avenue, balancing analog depth with modern control.
-

Where will your sound lead you? Explore the Native Instruments Summer Sale
Save 30% on instruments, effects, and sounds in our Summer Sale. Find the tools to keep your tracks moving and…