KOMPLETE 14 SELECT is the ideal way to get into making music, and includes a wide variety of instruments, effects, and presets that will help you make polished productions right away. In this tutorial we’ll show you how to make your first complete song from scratch step-by-step using some of the sounds included with KOMPLETE 14 SELECT. We’re going to use Ableton Live as our audio editing software for this tutorial (a free trial version of which is available), but you can use whatever DAW you like to follow along. We’ll also use iZotope Ozone 10 for some simple mastering.
Jump to these sections:
How to make a song with KOMPLETE 14 Select:
- Make a drum beat
- Create a verse
- Make a pre-chorus
- Compose a chorus
- Develop the chorus
- Build a bridge
- Arrange your track
- Master your song
Follow along with KOMPLETE 14 Select, a powerful music production suite with powerful synths, high-impact drums, studio-grade effects, and an array of shapeable sounds to get you creating professional-sounding music.
How to make a song with KOMPLETE 14 SELECT
1. Make a drum beat
The first element we’re going to make is a simple drum beat that will give us something to compose our chords around. We’ll stick with Live’s default project tempo of 120 BPM (this is the same for practically all DAWs), and you can begin by adding KOMPLETE KONTROL to a MIDI track.
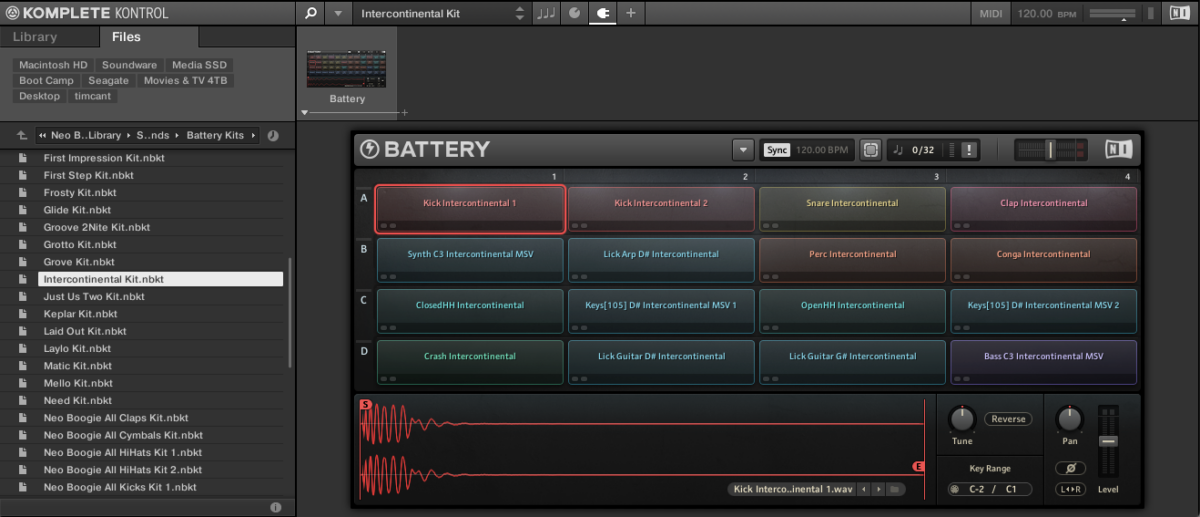
In KOMPLETE KONTROL’s Files tab, navigate your way to where the NEO BOOGIE folder is located.
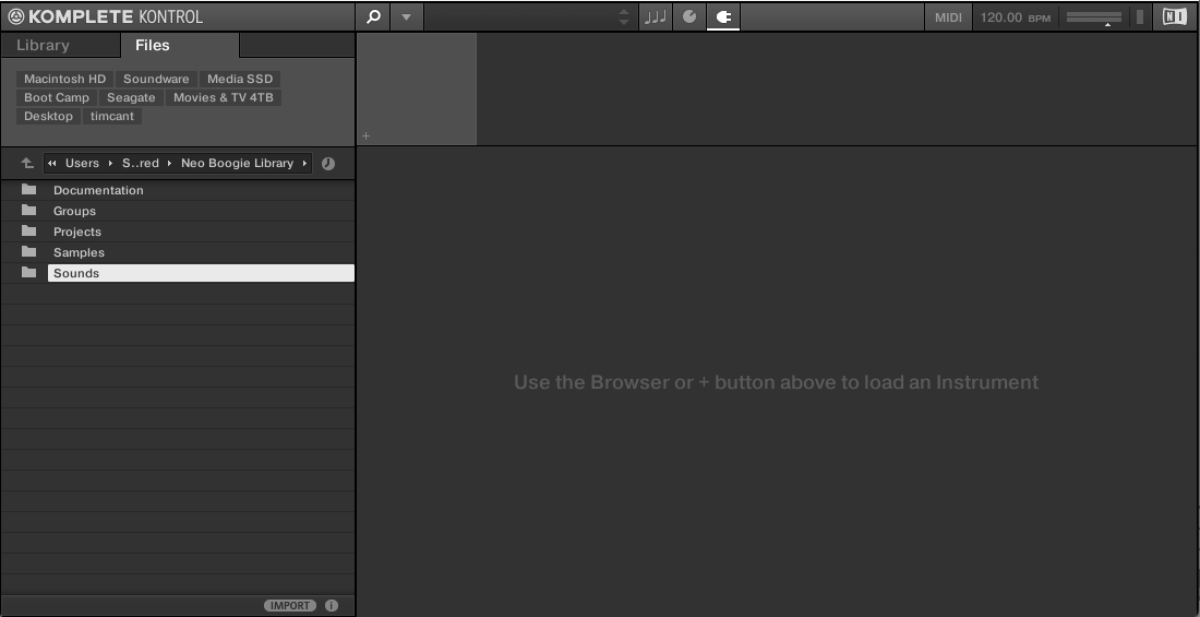
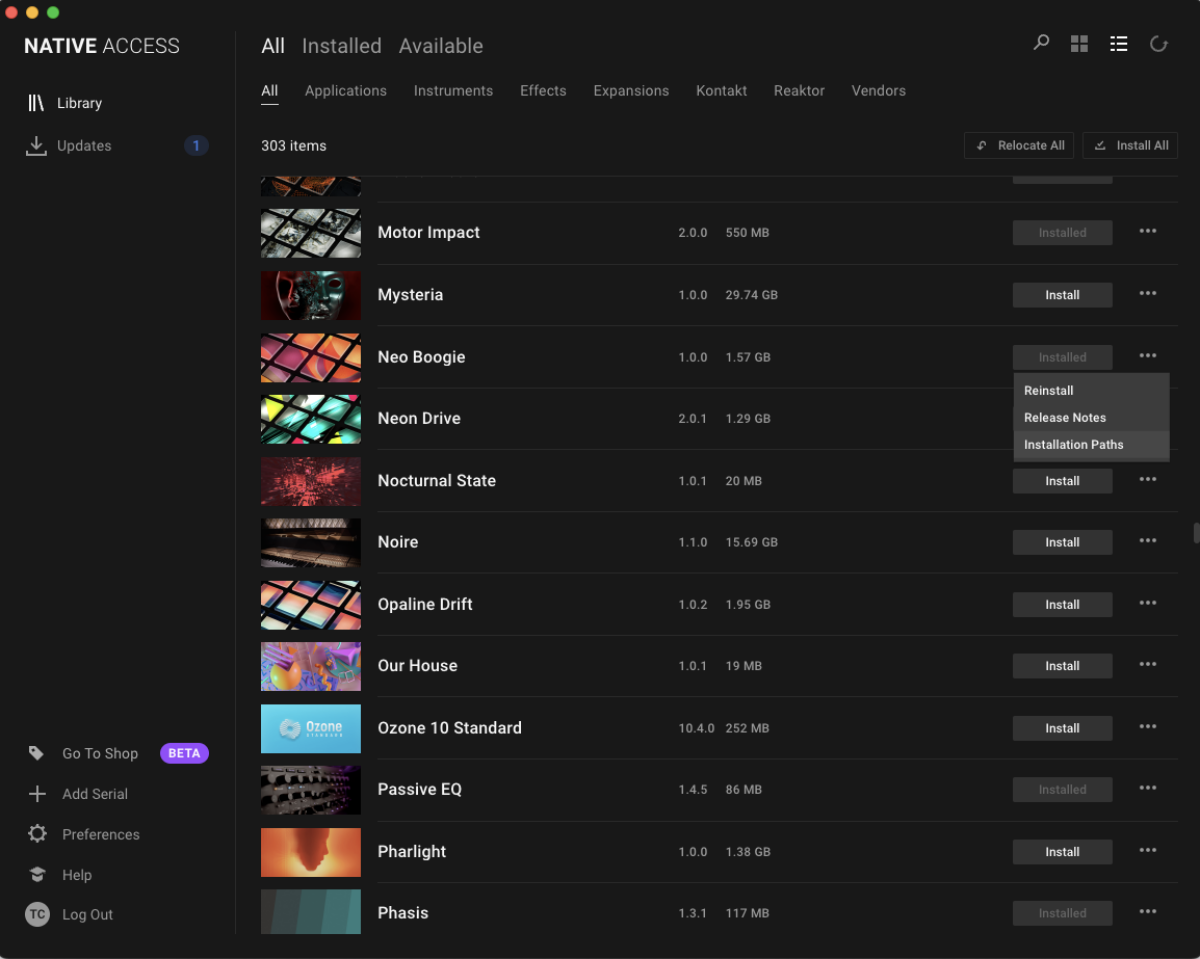
If you’re not sure where to find the expansion, load up Native Access, select Neo Boogie Days in the list of installed products, then click its ellipsis button and select the Installation Paths option. This will display the folder where NEO BOOGIE is located.
Open the Sounds > Battery Kits folder, then double-click Intercontinental Kit to load it up.
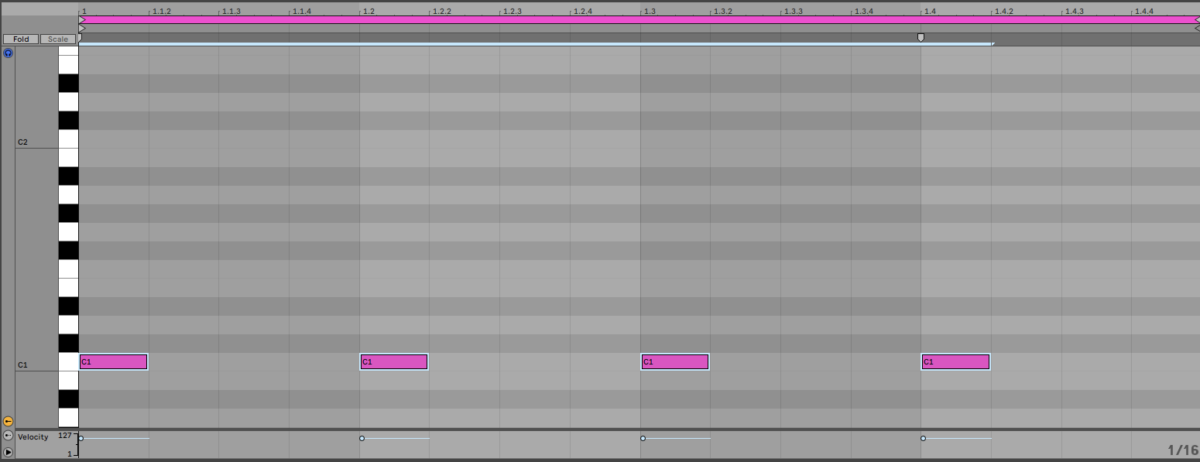
Sequence C1 kick drums on each beat of the bar. We’re going to use velocity values of 100 for everything in this tutorial unless otherwise specified.
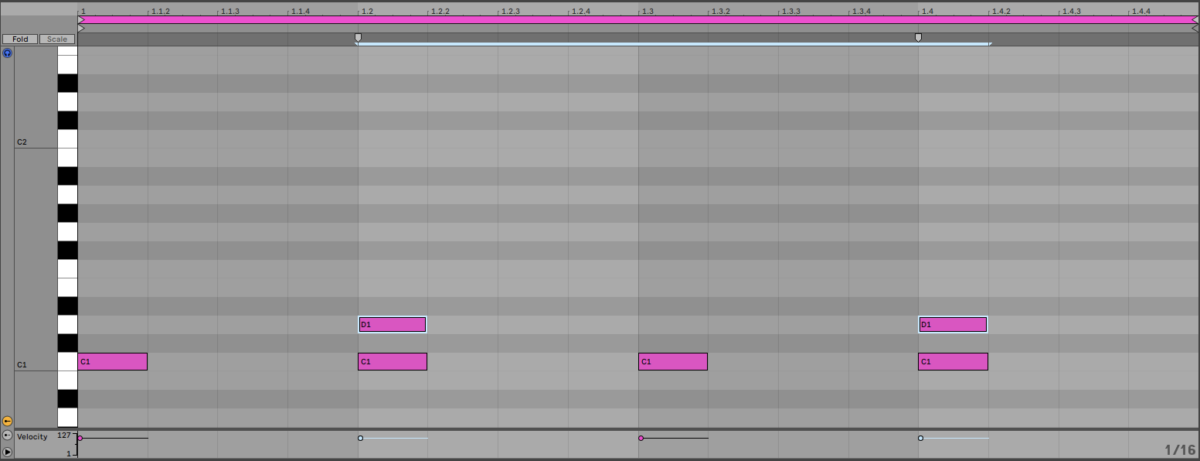
Next add D1 snares on the second and fourth beats.
Then add G#1 closed hats between each beat.
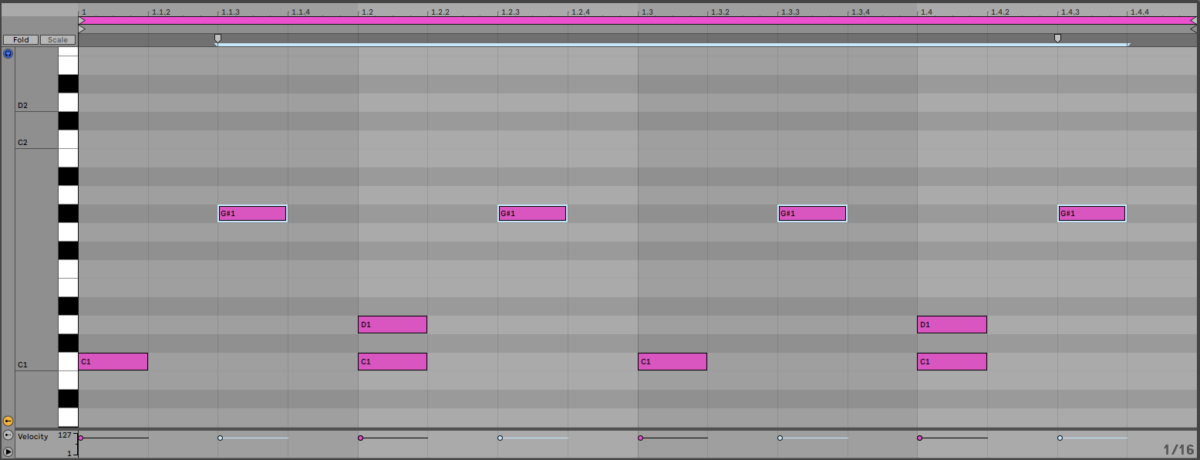
Now loop this clip out for four bars.

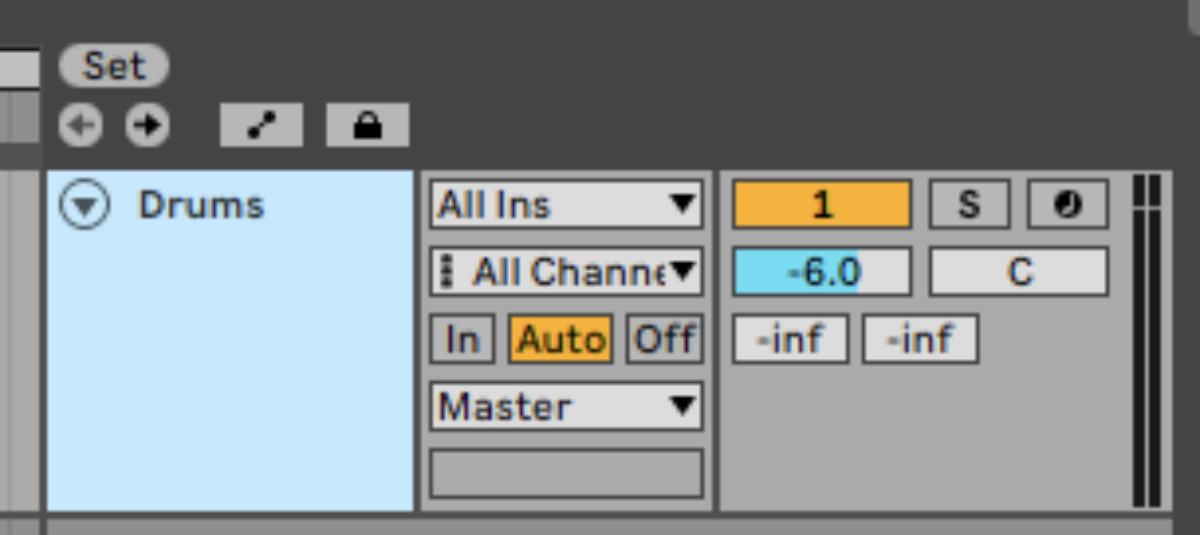
Set this track to -6 dB to give us headroom in the mix to add more elements.
2. Create a verse
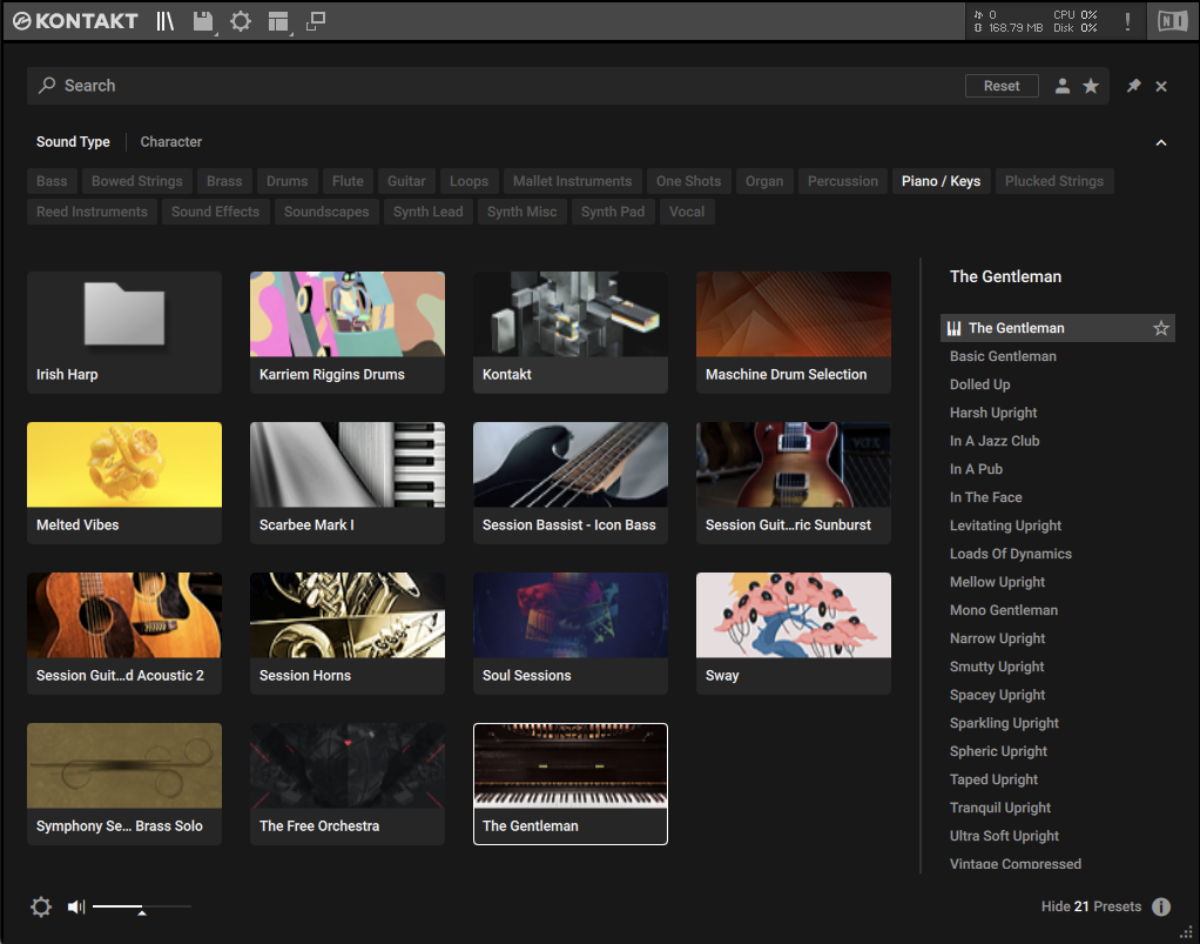
Add KONTAKT 7 to a new MIDI track and load up THE GENTLEMAN.
Set this track to -6 dB to balance it with the drum beat.
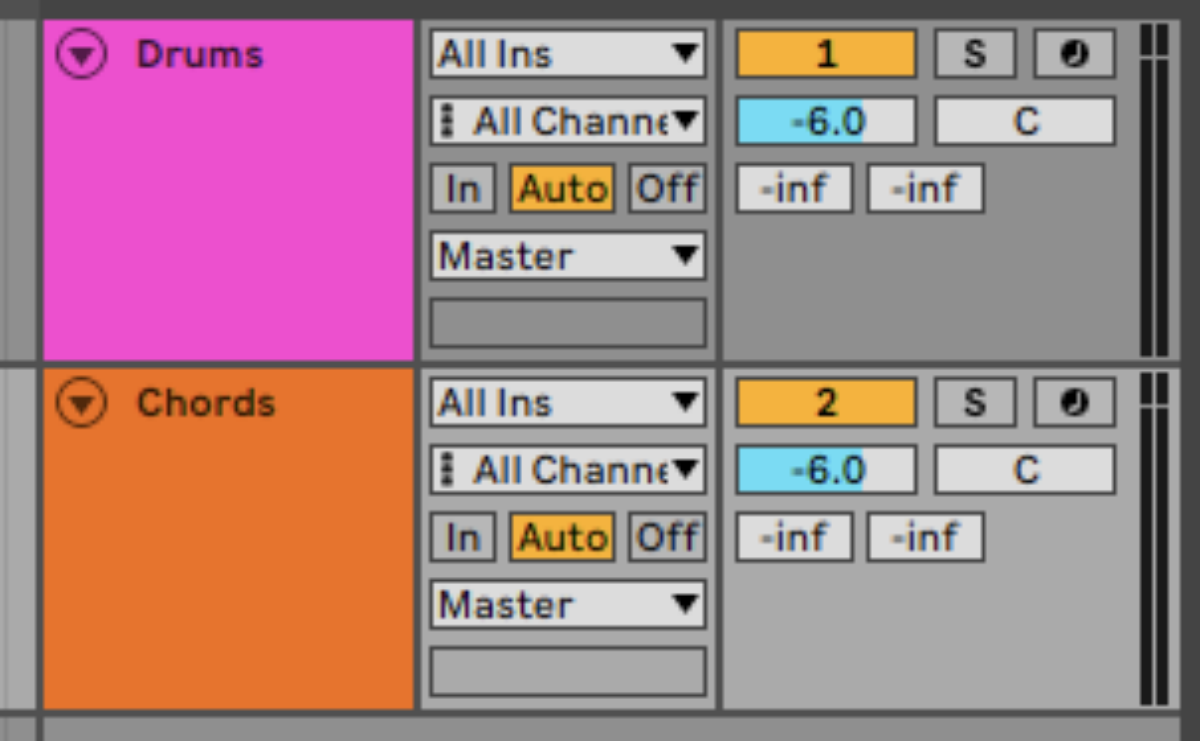
Our song is going to be made up of three main building blocks, the verse, chorus, and bridge. Let’s start by composing a chord progression for the verse. We’re going to use a progression that plays A major, F# minor, G major and A major with a velocity of 127.
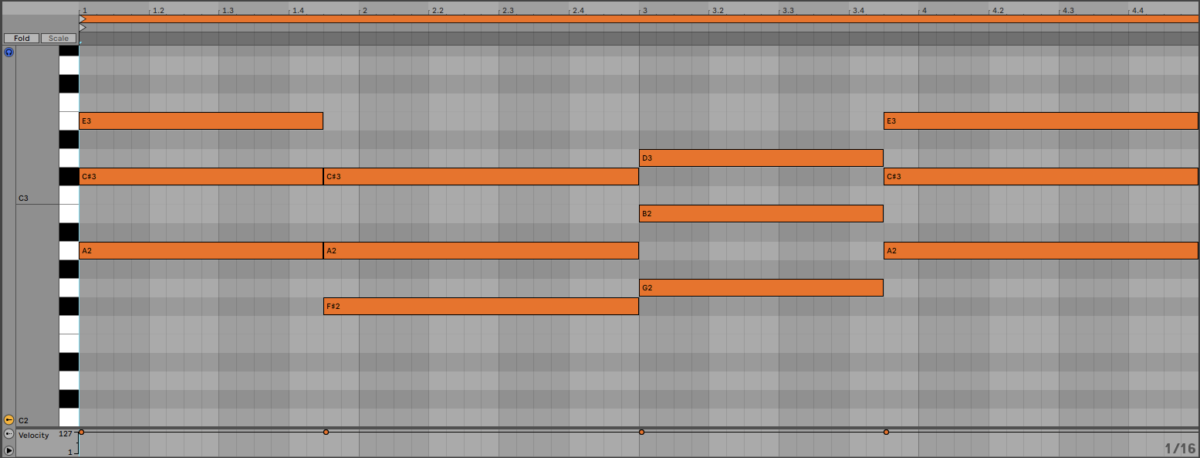
This chord progression is satisfying because it has a mix of weak and strong harmonic motion, shared tones between chords, and a mix of major and minor chords.
It’s worth noting that, despite not starting or ending on D major, these chords are all from the key of D major. We’ll come back to this later when we compose the chorus and bridge.
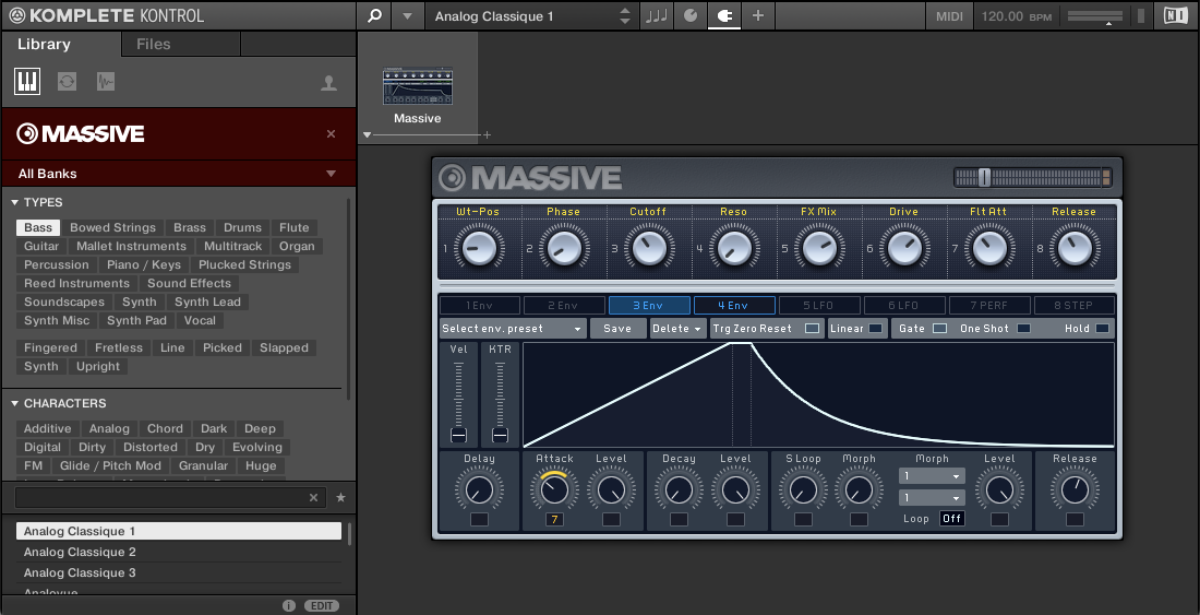
Before we move on from the verse, let’s add some more elements. The next element we’ll make is a bass line. Add a new MIDI track and load KOMPLETE KONTROL up on it. Click the arrow where it says All Instruments, then double-click Massive in the Synthesizers section. This filters the available presets and shows us only the ones that are for MASSIVE.
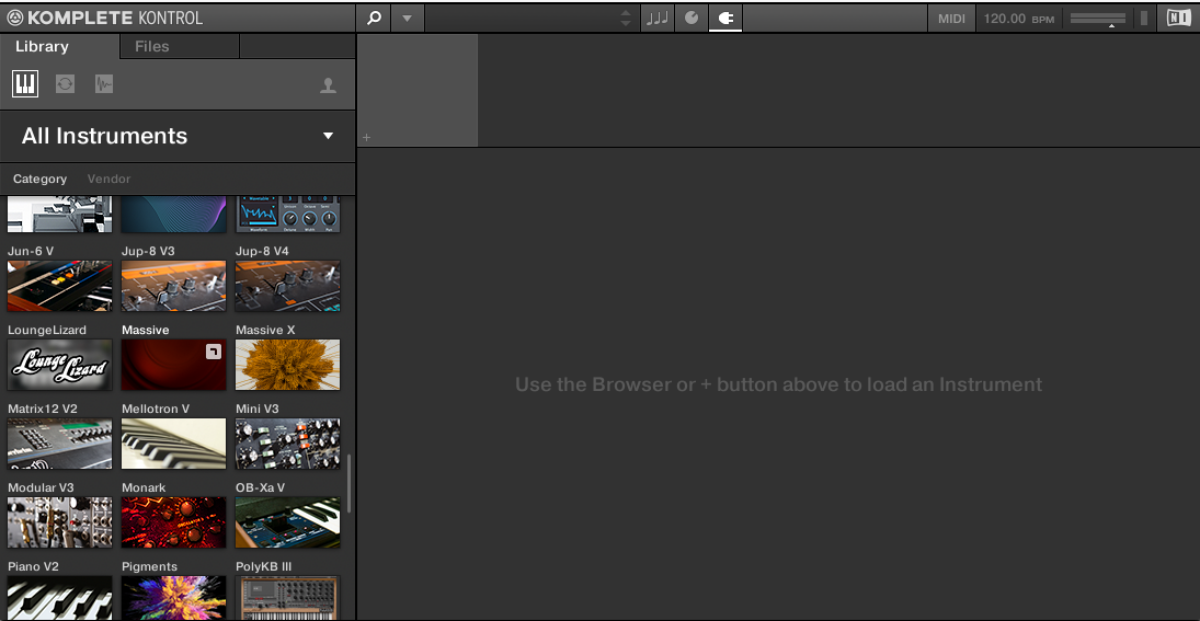
Next set the Types filter to bass. Now the list of presets will only show us bass sounds for MASSIVE.
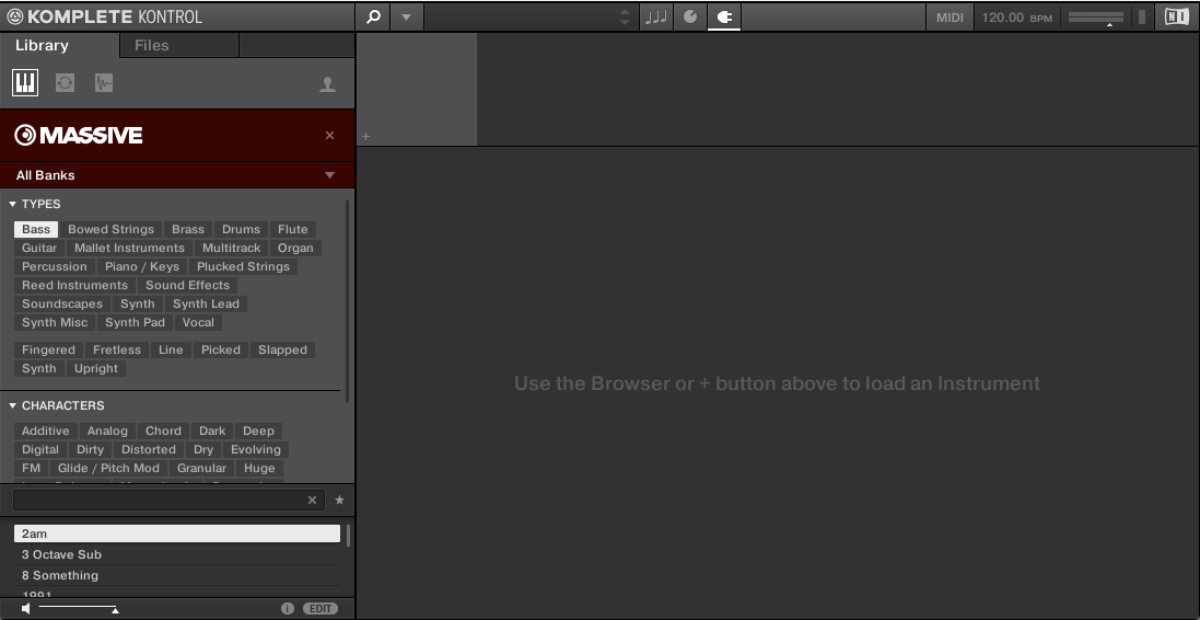
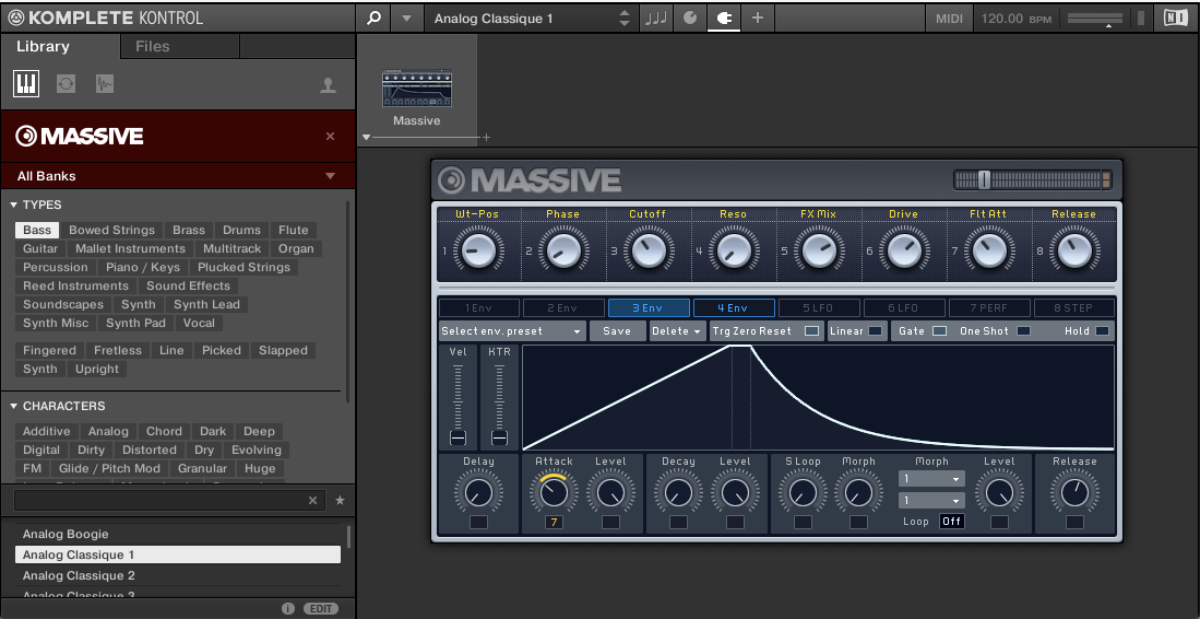
Set the Cutoff Macro to around 11 o’clock to dull the sound a touch.
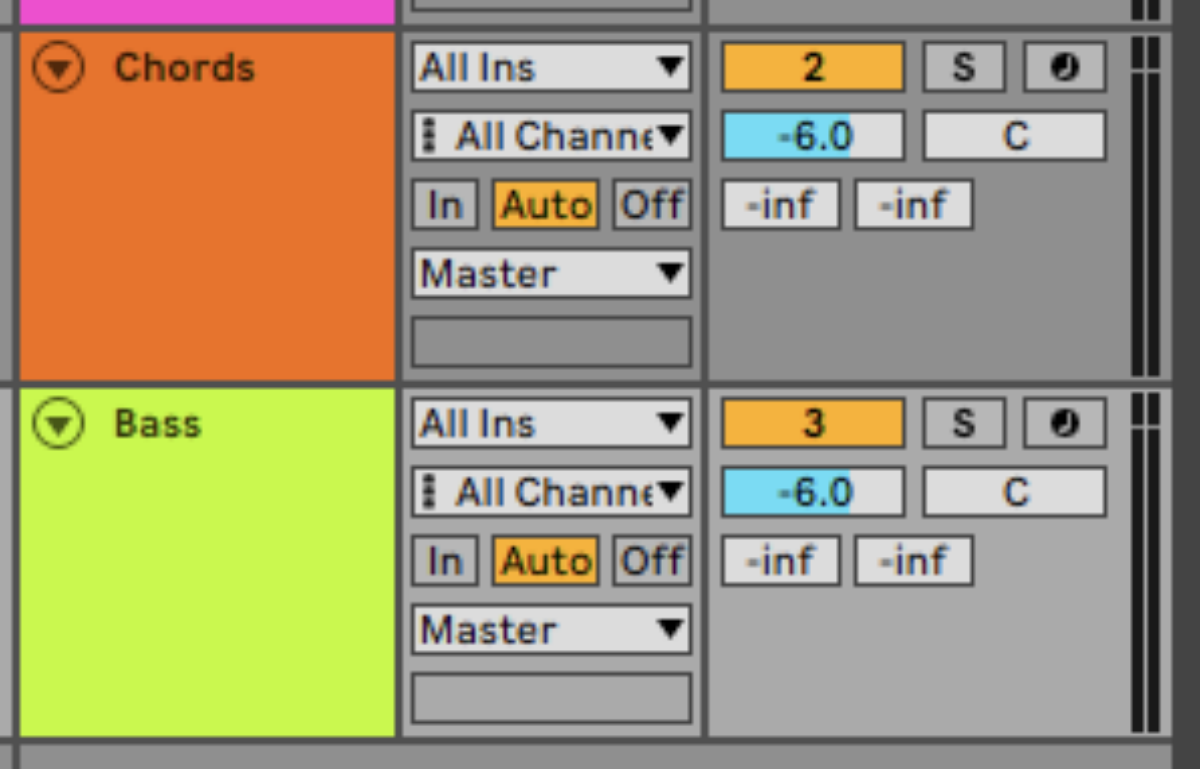
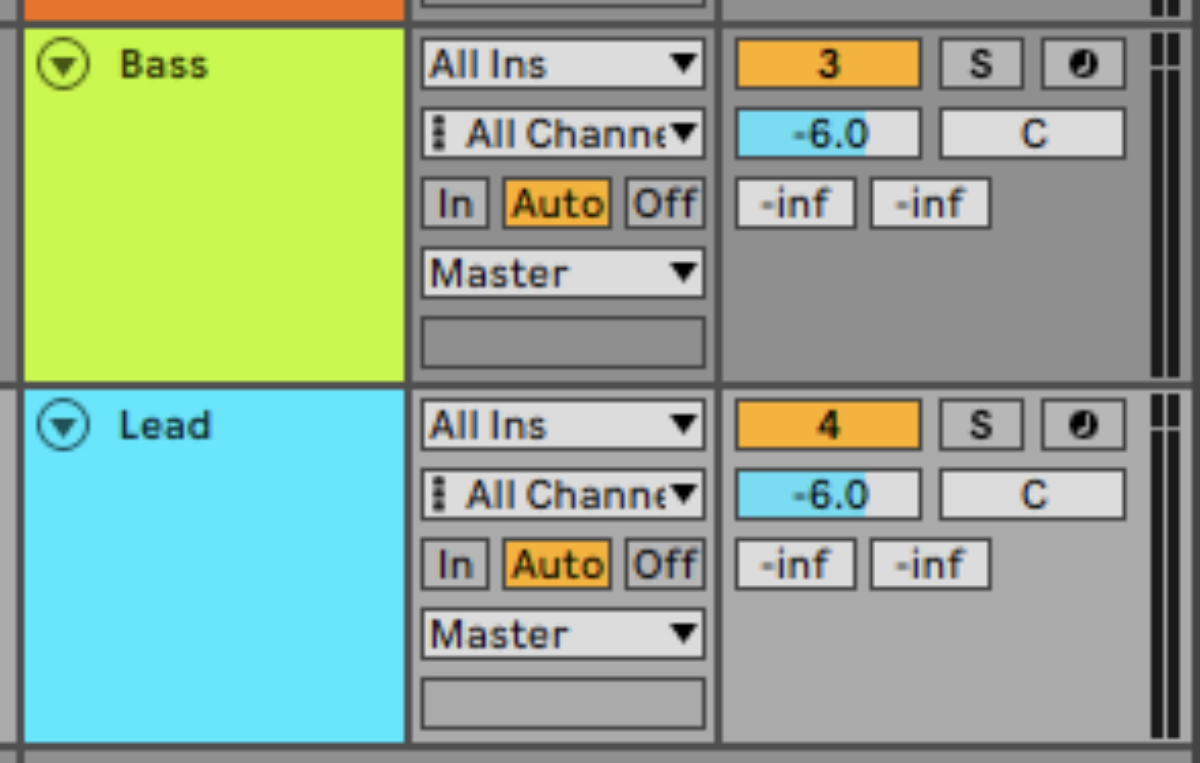
Set this track to -6 dB to balance it with the other elements.
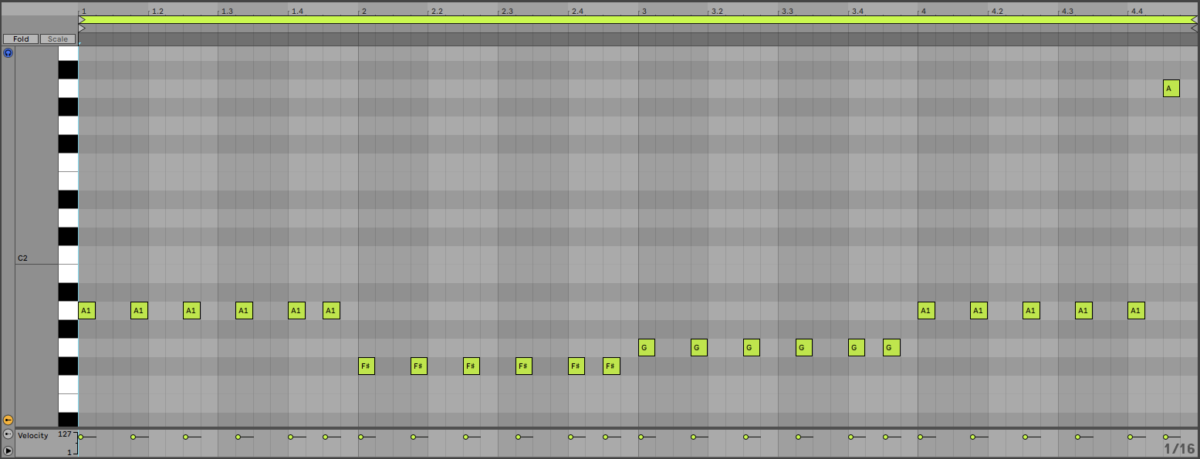
Here’s a bass line that follows the roots notes of the chords, with an octave jump at the end of keep things interesting.
Now let’s add a simple lead line. Add another MIDI track and this time add KONTAKT 7. Load up the SOUL SESSIONS instrument.
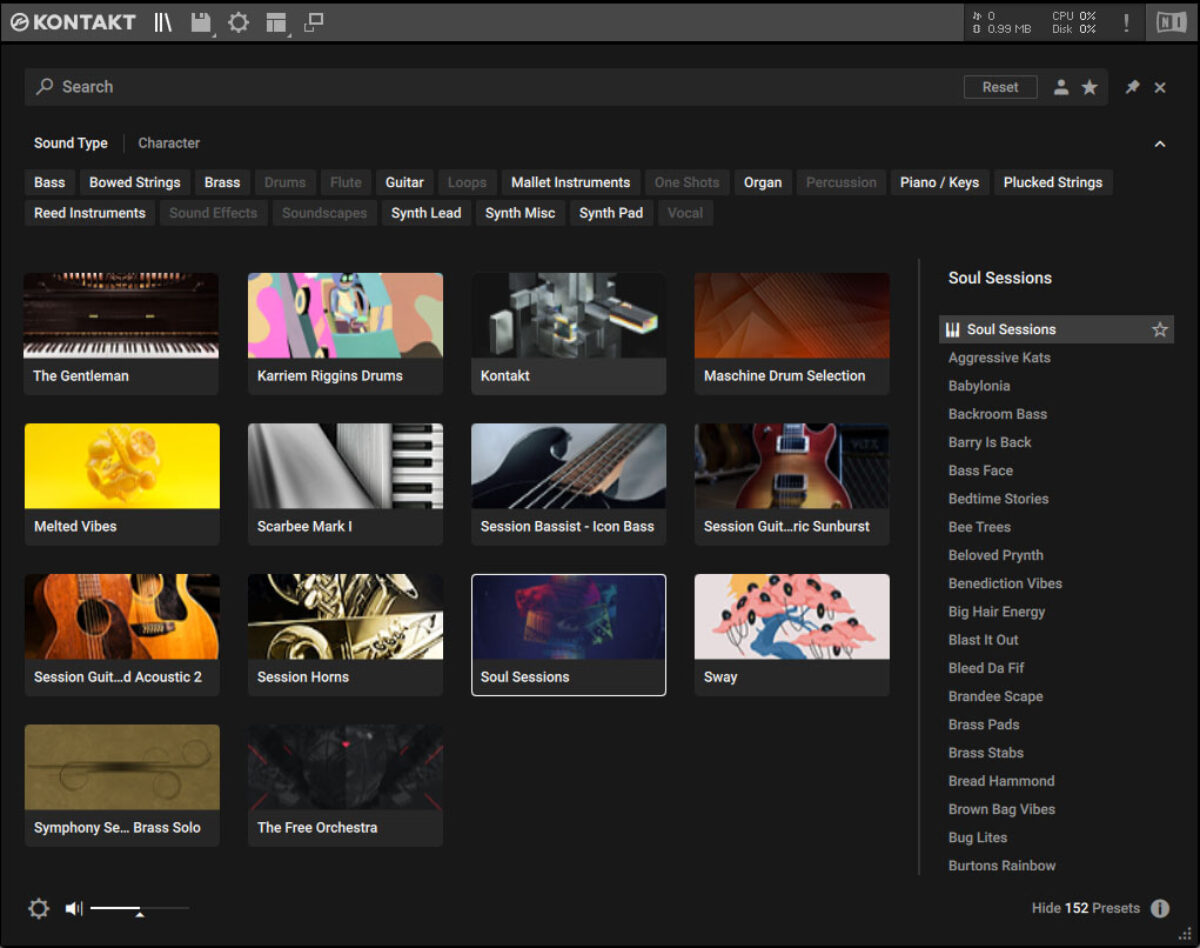
In SOUL SESSIONS click the arrow next to the preset name then select the Mallets > Luz Del Sol Vibes preset.
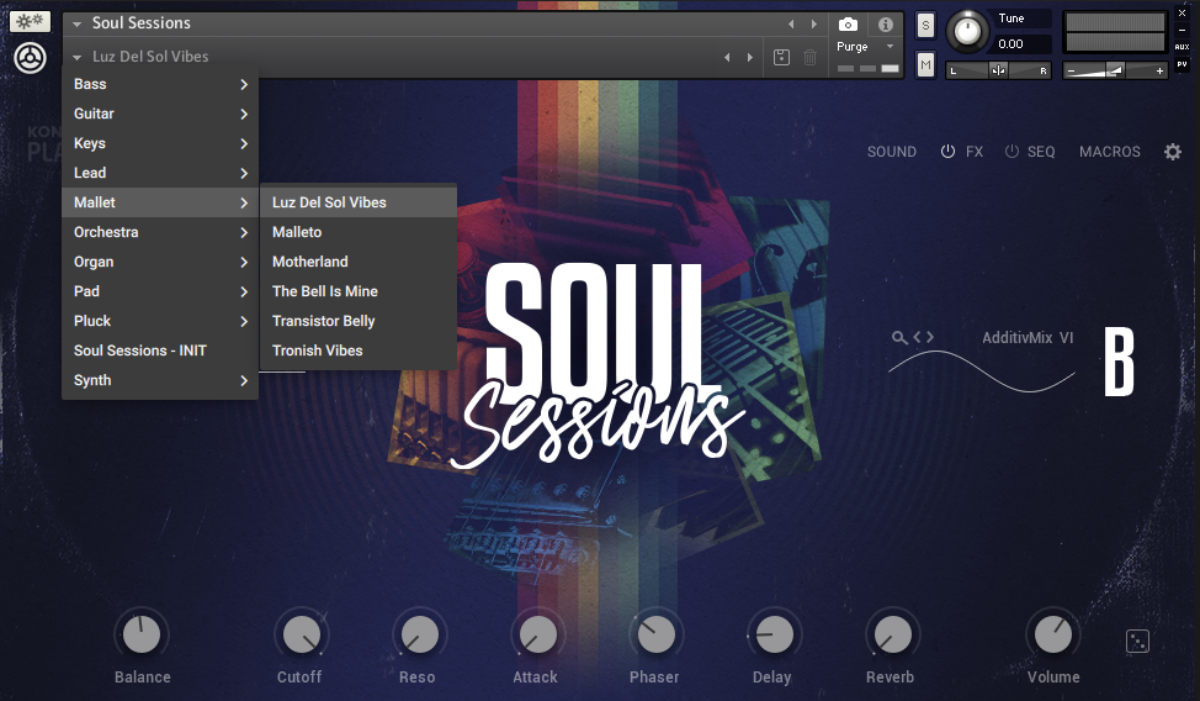
Set this track to -6 dB to balance it with the other elements.
Here’s a simple lead line that just plays A4 and B4.

That’s all we need for our verse. Before we make a chorus, let’s create a pre-chorus, which for this song is just going to be a copy of the verse with a more developed lead line.
3. Make a pre-chorus
Duplicate out the verse.

We’re going to use a different lead line for this section, so delete the existing lead and use this instead:
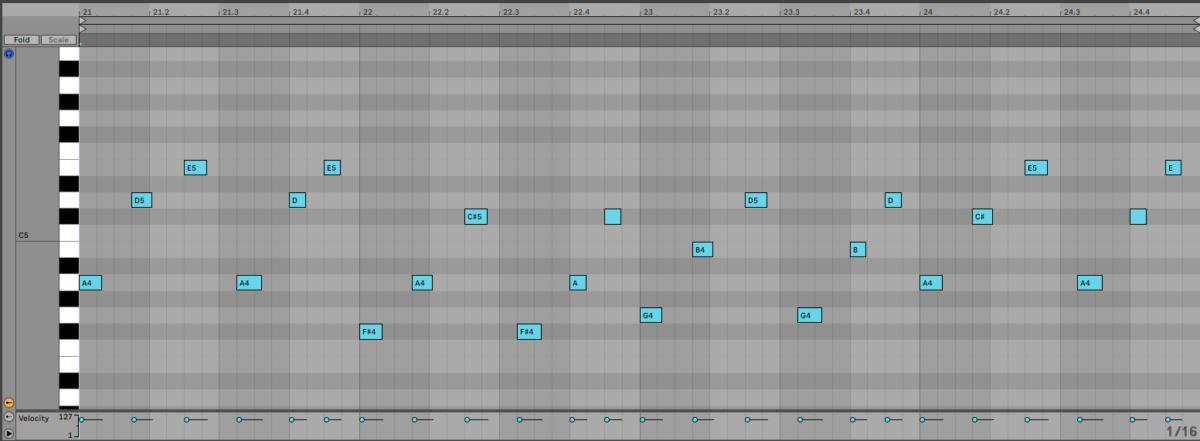
This lead line brings up the anticipation level between the verse and the chorus, which we’ll create next.
4. Compose a chorus
Duplicate just the drums out to give us a foundation for the chorus.

On the chords track, use this chord progression:
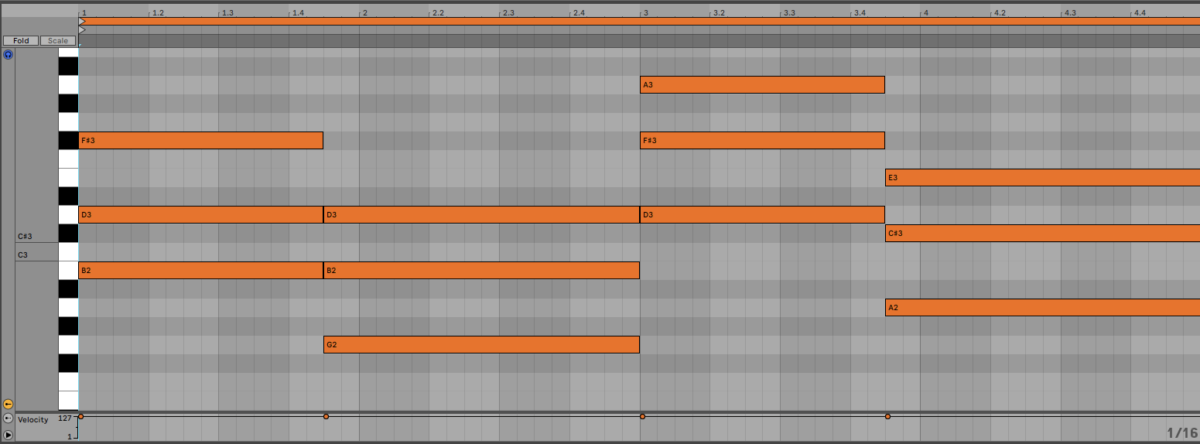
These chords play B minor, G major, D major, and A major.
This chorus progression has a strong resolution since it ends on the V chord of D major, which is A major. This is a dominant chord that leads smoothly back into the verse progression, which also begins with A major.
Now let’s add a bass line to fit these chords.
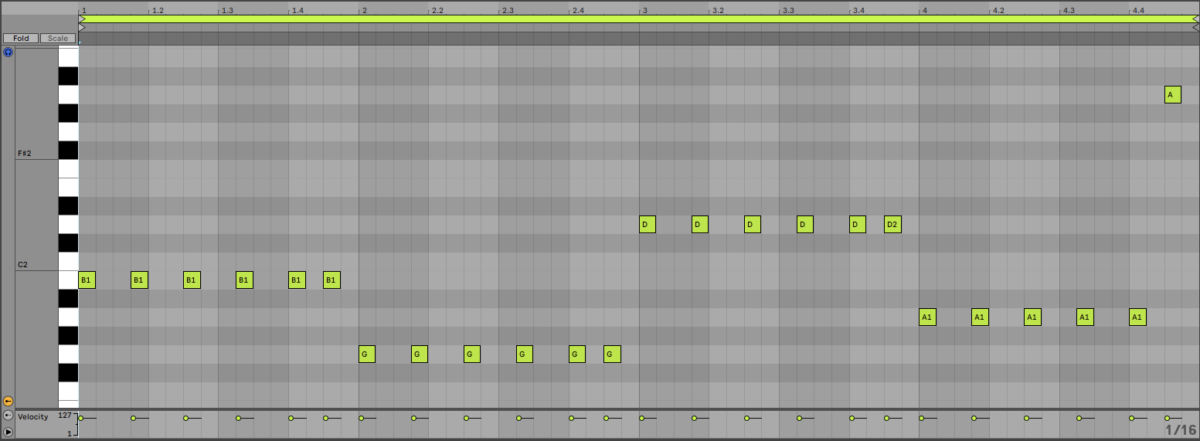
Again, the bass line follows the root of the chords, with another octave jump at the end, just like the verse and pre-chorus.
Now let’s make a lead line for the chorus.
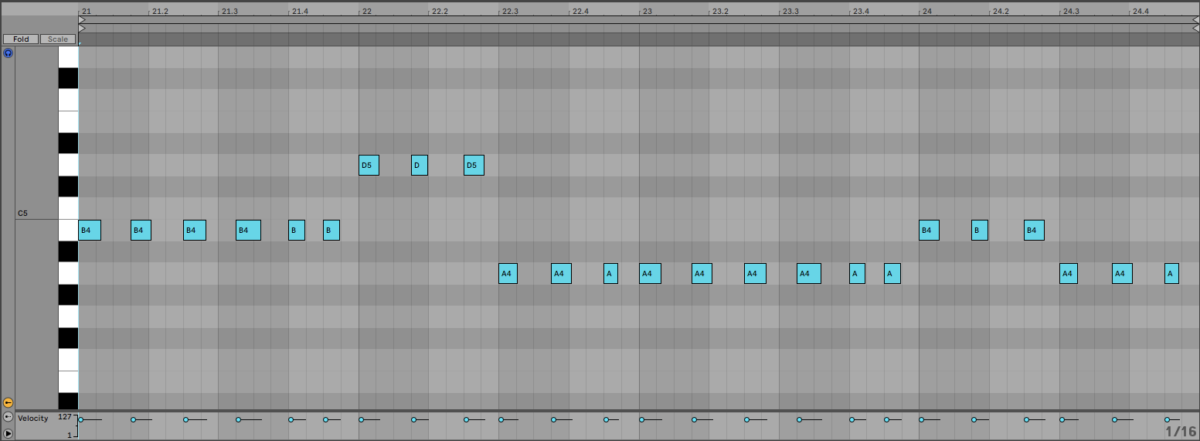
This simple, three note lead line harmonizes with the chorus and gives us a bittersweet feeling.
6. Develop the chorus
Let’s develop the chorus with a counter-melody. Duplicate the chorus out.

Add another MIDI track, and add another instance of KONTAKT 7. Load the SOUL SESSIONS instrument again, and this time select the Lead > Caterpillar Feet preset.
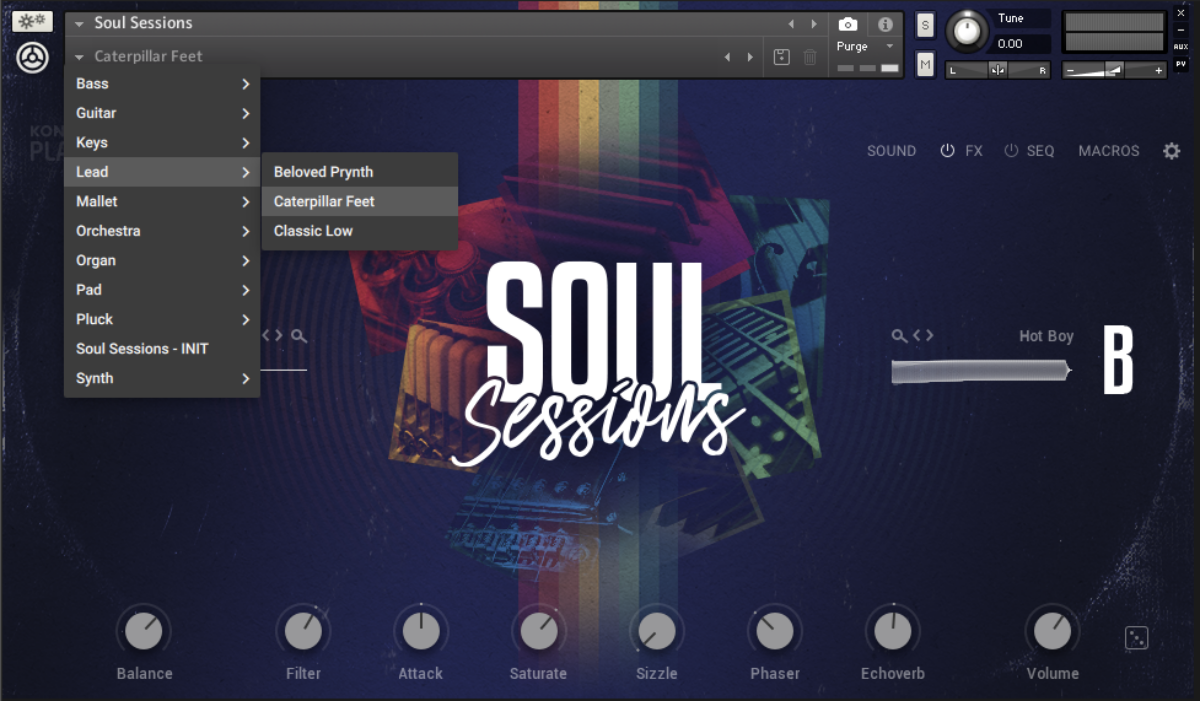
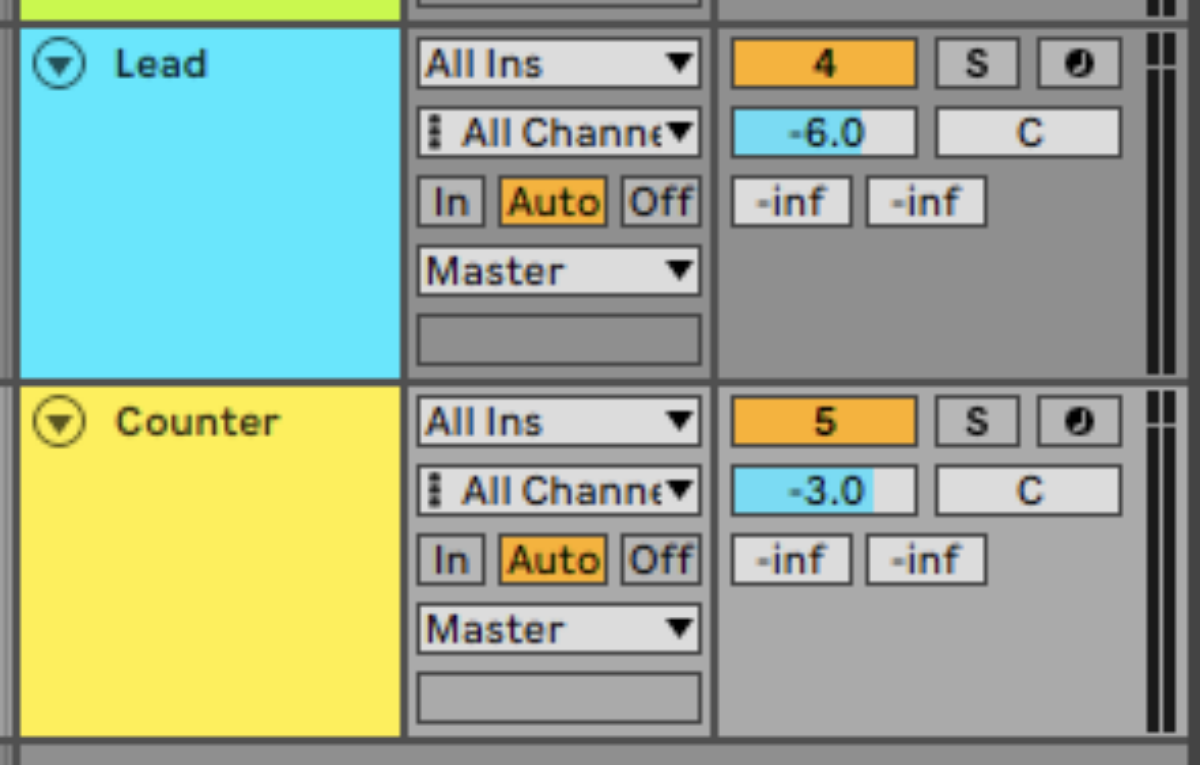
Set this track to -3 dB.
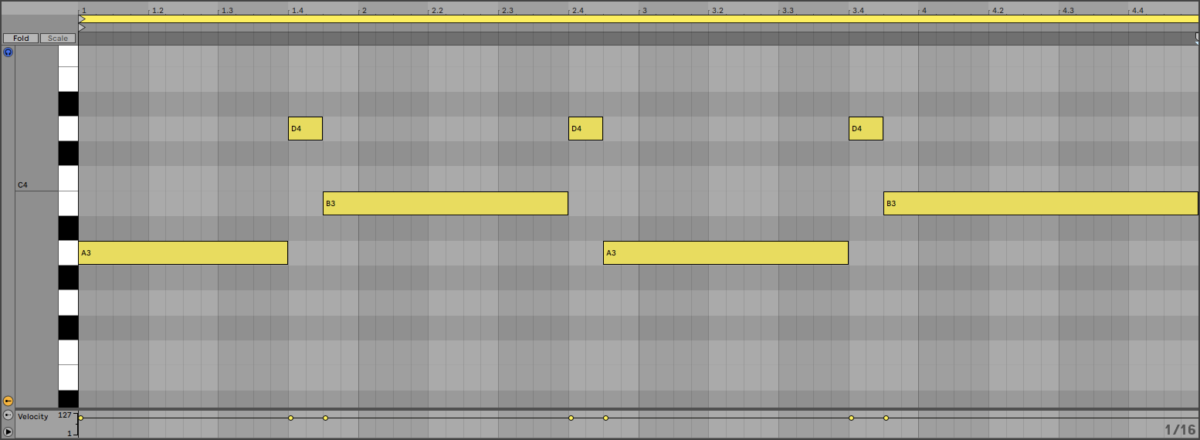
Copy the counter-melody we’ve used here. This contrasts rhythmically and melodically with the main lead, giving us a more involved feel.
6. Build a bridge
Now let’s make a bridge that will provide variation later in the song. Duplicate out the drums once again to give us a foundation to work from.

We’ll use this chord progression for the bridge:
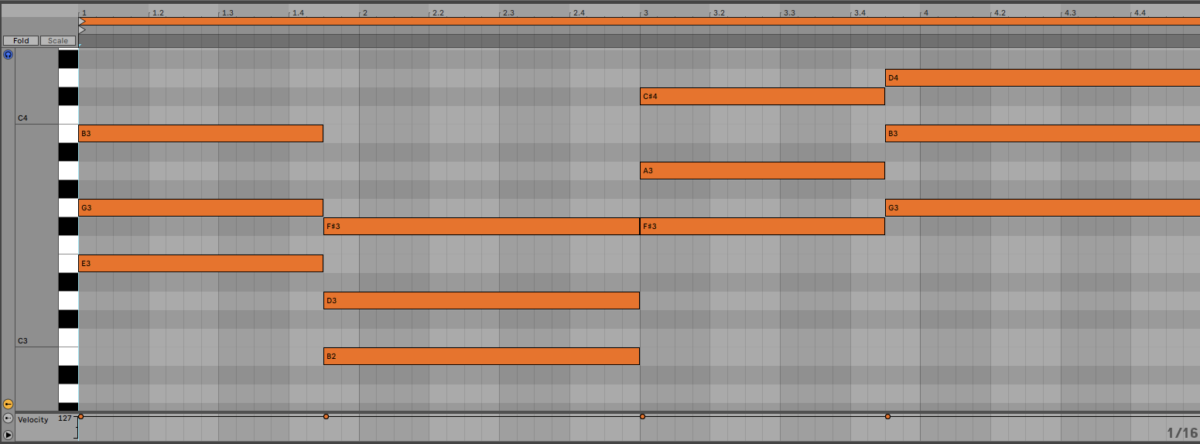
This progression plays E minor, B minor, F# minor and G major, giving us a change of feel with predominantly minor chords, but keeping everything in D major so nothing sounds too radical.
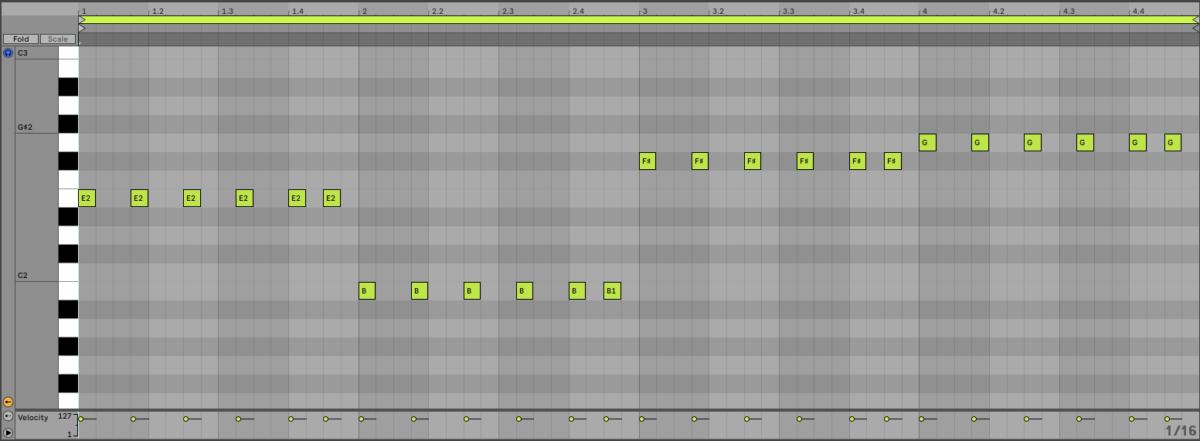
Here’s a bass line for the bridge. This follows the root notes of the chords, but there’s no octave jumping note this time, which helps the bridge sound different to the verse and chorus.
We’re not going to use a lead line for the bridge, another factor that helps differentiate it from the verse and chorus.
Let’s also add a sound effect sample. In KOMPLETE KONTROL open NEO BOOGIE’s Samples > One Shots > SFX folder, and drag SFX C3 Cullinan MSV.wav onto an audio track.
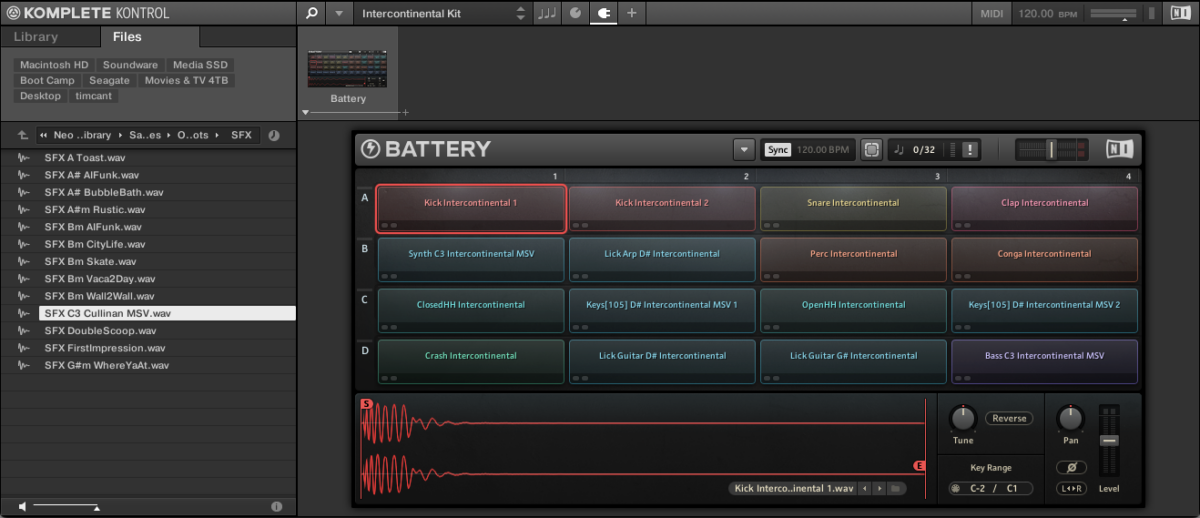
Position the sound effect on the last bar of the bridge.
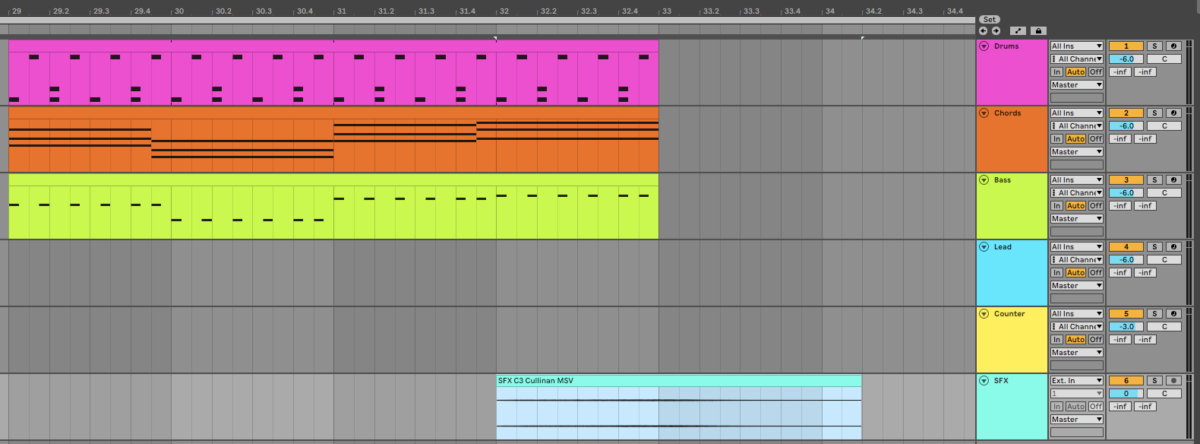
This sound effect will come in useful when we arrange the track.
7. Arrange your track
Here’s our arrangement.

The arrangement begins with an intro (yellow) comprising the drums, and bass line from the verse. This plays for eight bars, and is followed by the verse proper (green), which also plays for eight bars.
After the verse comes the pre chorus (red), which plays for eight bars too. Then comes the chorus (orange), which plays for sixteen bars, with the counter-melody coming in halfway through.
The verse, pre-chorus, chorus pattern then repeats, and is followed by an eight-bar bridge (blue). Another chorus rounds the song off.
8. Master your track
To make our song sound louder and fuller let’s perform some simple mastering. Add iZotope Ozone 10 to your master track and run the AI-powered Master Assistant to give yourself a good baseline for a mastered sound.
I made sure the Ozone Maximizer Threshold is set to -7 dB. This reduces the dynamic range of our song and pumps up its volume, making it sound more professionally produced.
Here’s what our mastered track sounds like.
Start making music today with KOMPLETE 14 SELECT
Here we’ve seen how you can make your own song from scratch with KOMPLETE 14 SELECT. If you’d like to learn more check out how to create your own music from start to finish as well as our music production guide.
For more information on KOMPLETE 14 SELECT take a look at Bundles: KOMPLETE 14 SELECT, What’s new in KOMPLETE 14 and KOMPLETE 14 In Action.


