The best cinematic experiences transport us somewhere else. How can a two-dimensional screen immerse us in three-dimensional worlds? To find out the answer, we need to consider a further dimension in film: sound. Whether it’s the hum of a cityscape or the blast of an explosion, the thud of an impact or a suspense-building riser, sound effects help make films feel real. We might not notice them, but without these crucial sounds a film would feel as flat as the screen it’s shown on.
In this article, we’ll dive deep into the art of creating sound in film. We’ll look at six of the most popular sound effects, from suspenseful drones to fantastical spellcasting sounds, explaining what they are and breaking down how they’re made. When we’re done, you’ll have a detailed insight into how film sound effects are created. You might even feel inspired to create sound effects yourself.
Jump to these sections:
- How are sound effects created?
- How to generate sound effects
- How to create 6 popular sound effects
- Start making sound effects for film
Follow along with this tutorial using Komplete Start.
How are sound effects created?
Sound effects are created using a range of techniques including sound recording, synthesis, and sound processing. Sound designers work closely with filmmakers to identify what sound effects are required for a film. They then capture or create the audio needed to make the effects, shape the effects using music software, and add the completed effects to the film.
All kinds of sound effects might be required for a film, from the smallest detail (a creaking door or swishing curtain) to the most dramatic explosion. Some of these sound effects relate to action happening on screen, while others – such as impacts and risers – exist outside the “world” of the film alongside the musical soundtrack.
How do people make sound effects?
Sound designers make sound effects using a combination of synthesizers, recorded sounds or samples, and sound shaping with audio effects and other tools. Some sound designers may record audio on the set of the film or in their own studios, while many get sounds from professional sample libraries or create sound effects from scratch using synthesizers. However a sound designer gets their audio, they’ll then need to shape it into the final effect using editing, arranging, and audio effects such as EQ and distortion.
How to generate sound effects
You can generate sound effects using tools that are easy to get hold of – you don’t need to be a professional sound designer to make great sound effects.
You could start by recording your own sounds using a microphone and audio recorder. If you don’t have this equipment, sound libraries offer a wealth of great sounds for creating sound effects. Professional sound libraries charge a subscription, but there are also free libraries such as Freesound and Free Sounds Library.
Native Instruments also offers thousands of pro-grade samples, from evocative atmospheres to cutting edge sound design and orchestral instruments. Explore cinematic sound libraries from Native instruments.
You might even want to create your own sounds from scratch using a synthesizer.
Once you have your sounds, they need to be shaped into sound effects. For this, you’ll need music software such as a DAW and audio effects like EQ, reverb, and distortion.
Komplete Start gives you seven audio effects perfect for creating sound effects, as well as samples, synthesizers, Kontakt instruments, and more – and it’s completely free. It’s a great place to start on your sound effects journey.
With a box of audio tools at your disposal, you’ll be able to start shaping your sounds into convincing effects. We’ll look at exactly how to do this in the examples below.
How to create 6 popular sound effects
1. Impact
In modern film, Impacts – or hits – are used like punctuation marks. These dramatic booms and clanks can emphasize shocks, climaxes, and transitions on screen. You’ll find them in action and horror movies, and they’re all over Hollywood trailers.
The trick to creating an impact effect is layering. One percussion sound on its own might be a pretty boring hit, but four or five complementary samples can make for a complex impact with weight, personality and drama. Here’s how to do it.
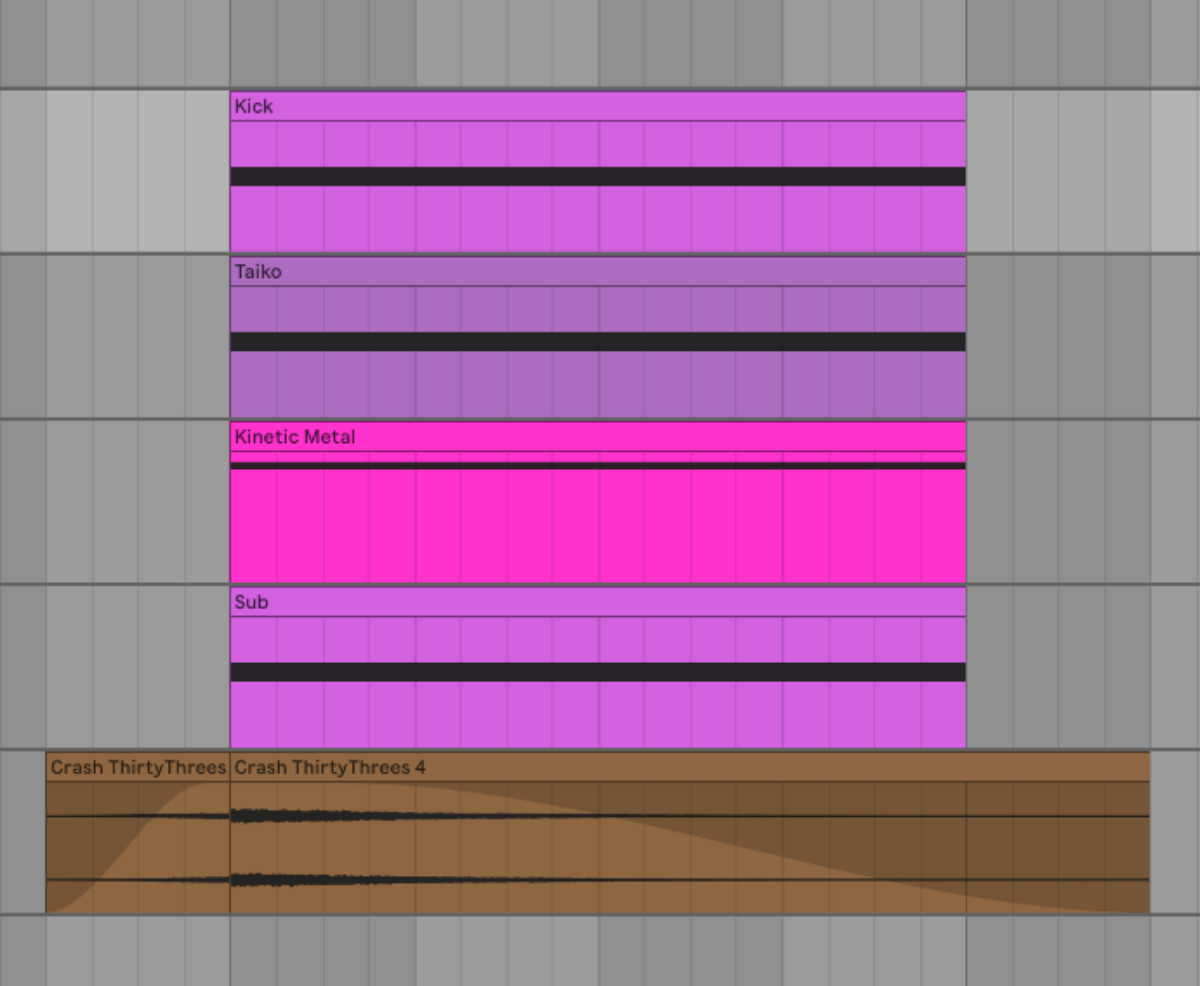
Start your impact with a kick drum sample that has plenty of boomy lower frequencies. We found one in Battery, Native Instruments’ cutting-edge drum sampler. We used EQ to remove higher frequencies from the sound – we want to keep the upper frequency range clear for other sample layers. We then added reverb to make the impact extra atmospheric. For this we used Raum, a versatile reverb plug-in which is great for sound design.
Next, we layered more percussion samples on top of the kick. Look for samples with a personality that matches the on-screen action. Anything from authentic orchestral hits to twisted sound design could work. If you’re not sure where to find samples, explore cinematic Kontakt libraries from Native Instruments. For our impact, we used sounds from the Action Strikes and Kinetic Metal instruments.
When building your impact, try to make each sample fulfill a different role in the sound. We used a dramatic Taiko drum to fill out the midrange, a metallic clang for higher frequency attack, and a sub bass swoop to boost the low end. Finally, we added a cymbal sample for extra shimmer. We reversed part of the cymbal decay and added it just before the hit, to create a micro-buildup that heightens the impact’s effect.
In this audio example, you hear each of the sample layers in turn, followed by the full impact in all its glory.
2. Riser
A riser is a long, swooping texture that ascends in pitch, building suspense and excitement. Risers are used in chase and fight scenes, suspenseful moments, and high-octane trailers. Risers and impacts are natural partners: when a riser ends and the anticipated moment arrives, it’s often marked by an impact.
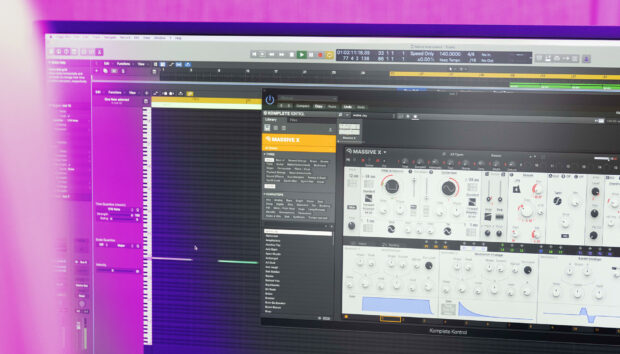
Here’s how to make a riser effect using a software synthesizer. We created our Riser using Massive X, a powerful wavetable synth with extensive features for making cinematic sound effects.
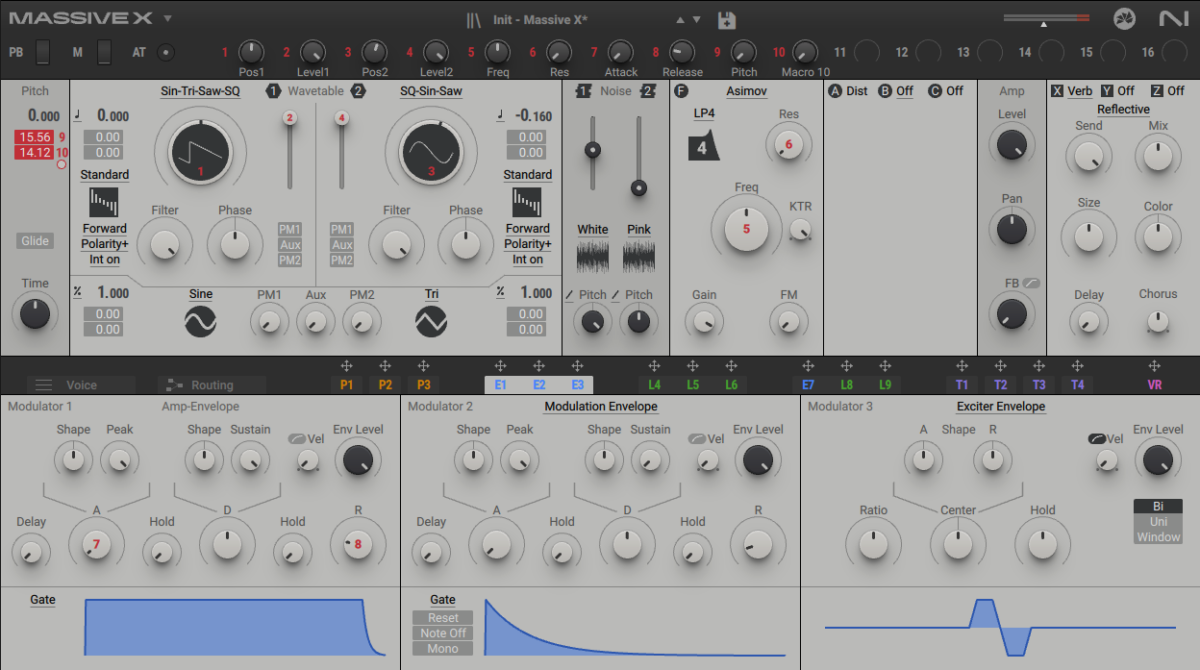
Start by making a long note with your synth. Make sure to shape a nice rich timbre using the synth oscillators. To do this, try combining multiple oscillators with different waveforms and then detuning them a few cents for a deep, complex timbre.
Now we need our riser to, well, rise. We can do this by automating some synth parameters in our DAW – making them change over time. First, we automated the synthesizer pitch to rise slowly from low to high over the course of the note. We then automated the filter cutoff to rise in the same way, so that the sound starts muffled and ends up piercingly bright.
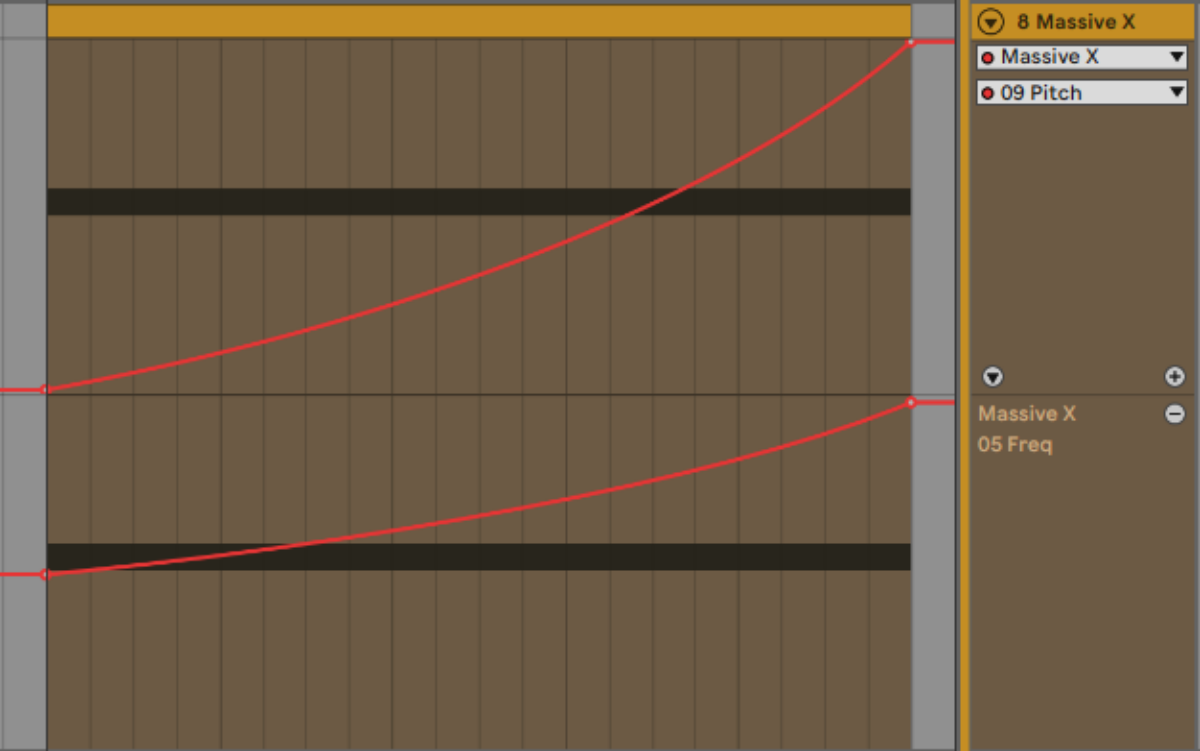
Now let’s add movement to the riser to make it more interesting. We can do this by modulating parameters inside the synth. Try using an LFO to modulate the amplitude (volume) or pitch of the synth tone. To heighten the tension, these modulations should get faster as the riser ascends – for example, by automating the LFO rate so that it gets faster as the pitch rises.
Now let’s add effects. Distortion will make the synth sound more aggressive and lively. We used Dirt, a juicy analog-style distortion plug-in. Reverb will make the riser sound more epic – we used Raum again.
Finally, we can thicken things up with extra layers. We made a copy of our riser synth patch and pitched it up an octave. Combining this higher part with the original synth makes for a fuller sound. We also added a reverse cymbal at the end of the riser to accentuate the climax moment. Here’s how it sounds.
3. Drone
Drones might be the unsung heroes of sound in film. These simple tones are often so subtle that you don’t notice them. But a brooding drone can be a powerful way to set a scene, conjure atmosphere, and build suspense.
Drones make particularly effective use of bass frequencies. Cinemas and many home viewing systems are equipped with subwoofers, and putting them to work with deep bass frequencies can turn a passive viewing experience into a visceral encounter that engages your whole body.
Here’s how to create an evocative, bass heavy drone effect to add a sense of awe and dread to a sci-fi movie or historical epic.
We’ll make our drone by combining simple synthesis with an evocative sample layer. Let’s start with Massive X again. As with our riser, we first created a long, sustained note. Make sure it sits firmly in the bass range to get those subwoofers working.
Now let’s shape the timbre. Combining multiple detuned oscillators with different waveforms will create a rich drone with depth and dimension.
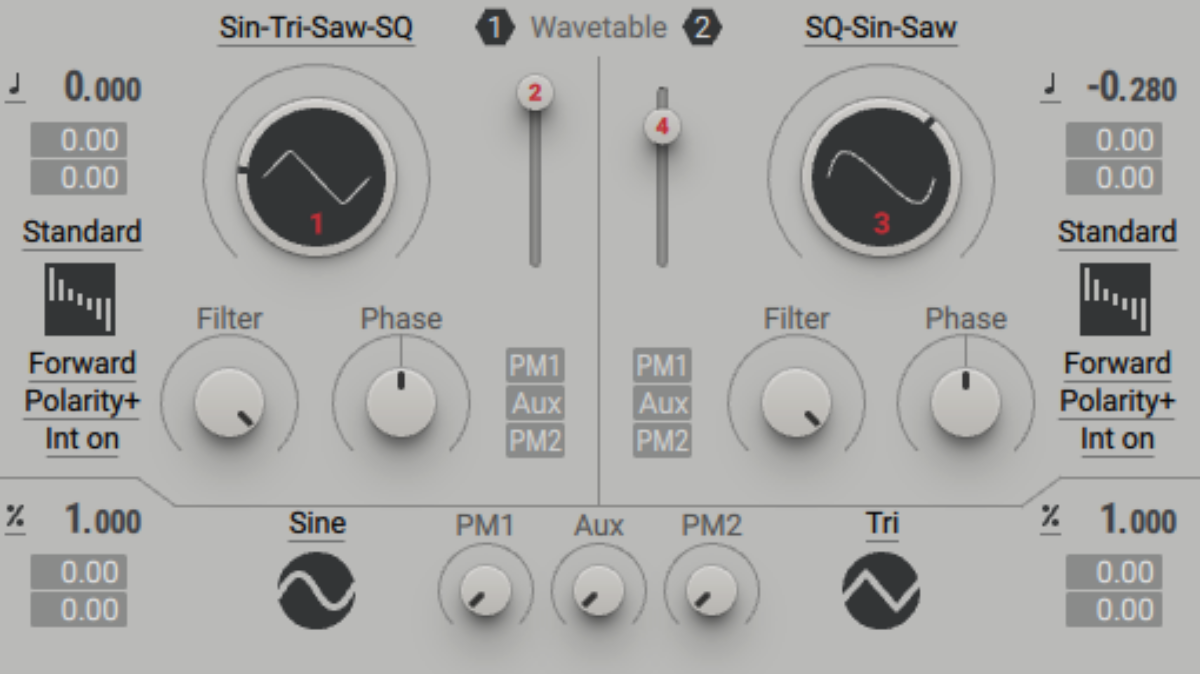
We don’t want too sharp high frequencies in the sound, so we used the synthesizer’s low pass filter to remove them. Then we added effects. Distortion adds richness and power, while reverb gives our drone an epic dimension.
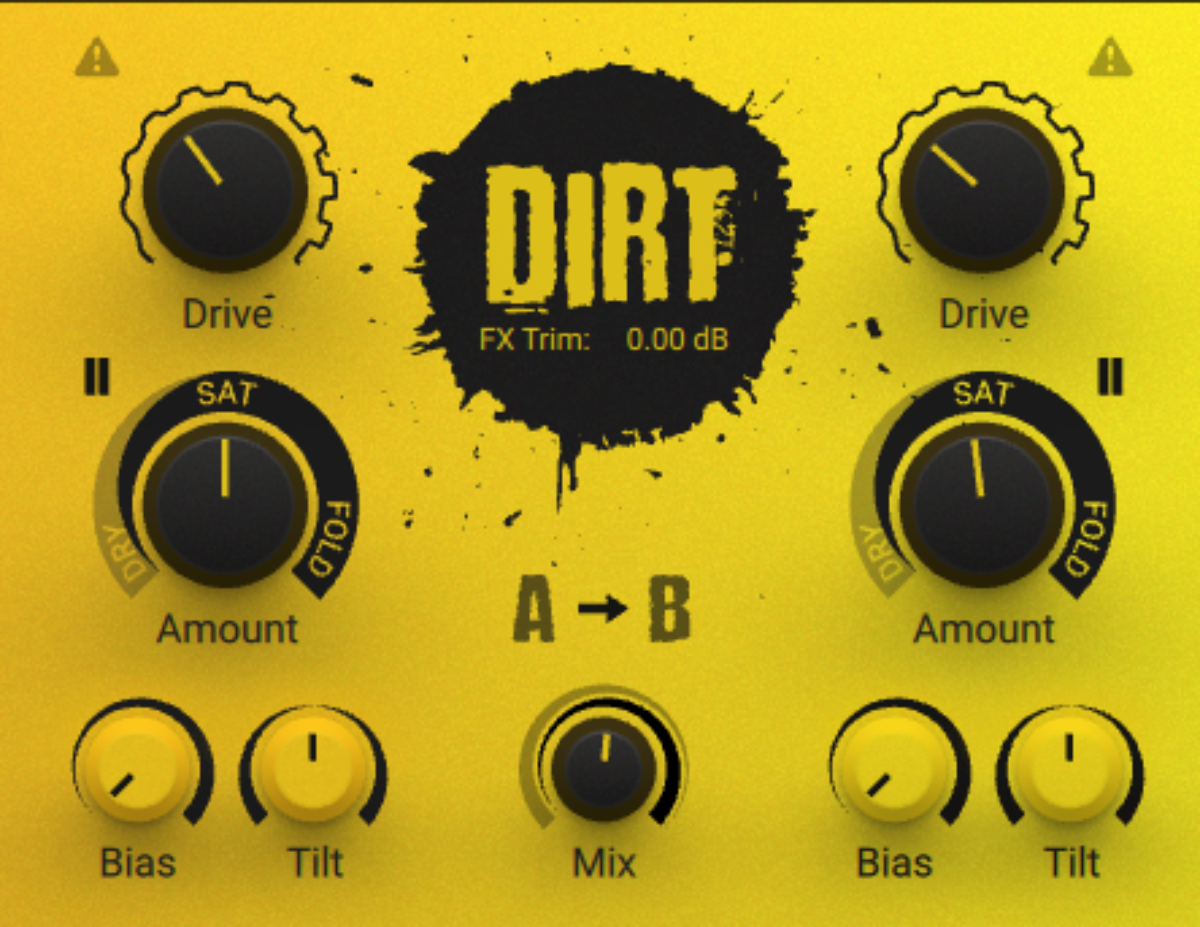
This synth layer on its own is already a pretty good drone.
We can go one step further by adding a “real world” sample layer. This will give the sound more personality, and create an atmosphere that suits the visuals we’re working with. We layered in a sample of Mongolian throat singing, pitched down six semitones to give it a spooky depth.
Here’s how the two layers sound together.
4. Braaam
The braaam is a pretty new sound in film, but it’s an important one. Pioneered by Hans Zimmer in movies like Inception, this deep, blasting brass sound can now be heard across Hollywood. It’s a powerful sound effect, creating a sense of awe and intensity that can elevate the on-screen action. Here’s how to make one.
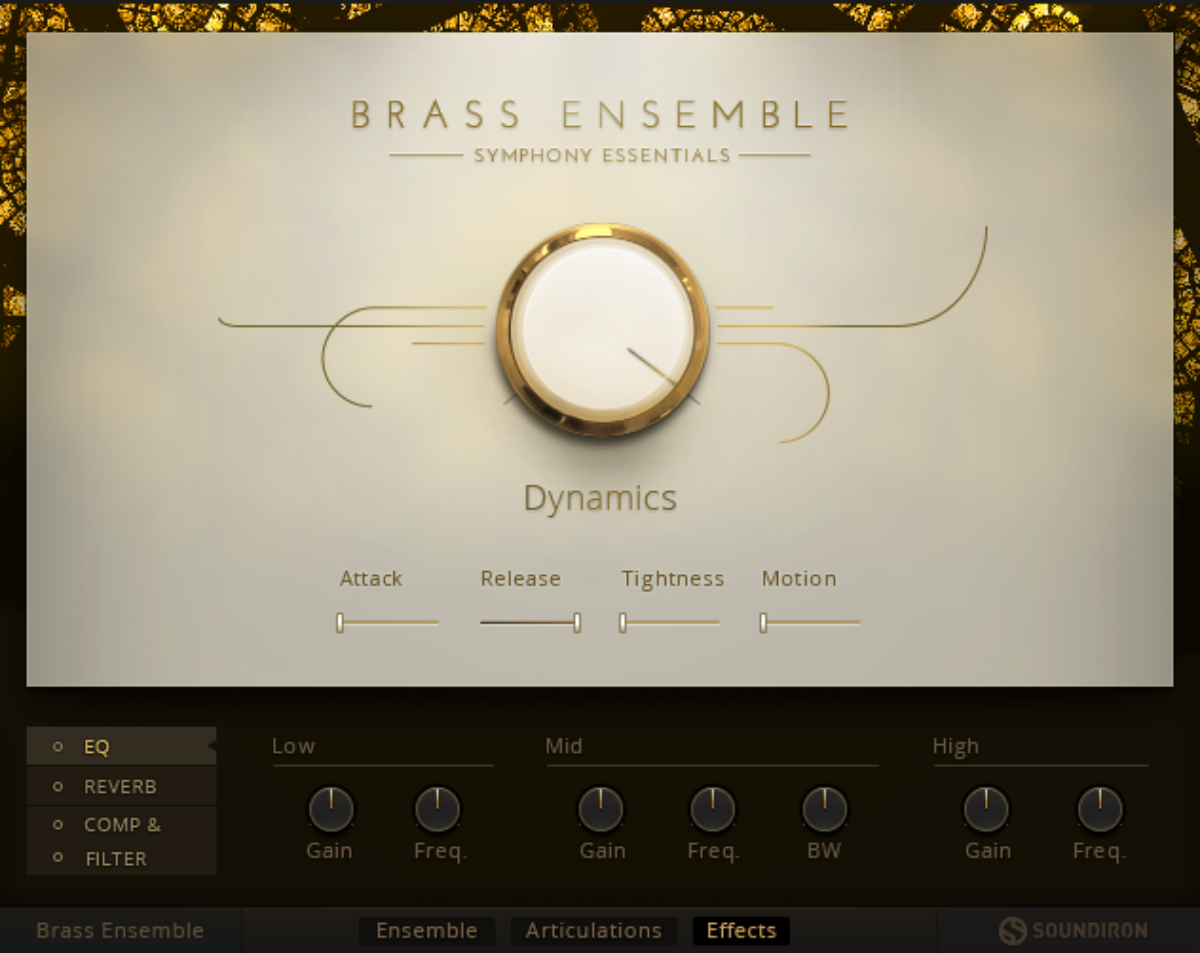
A braaam is made from multiple low-pitched brass samples layered together. The better quality your brass sounds, the better-sounding your braaam can be. For great brass sounds, check out professional-grade libraries from Native Instruments such as Session Horns Pro, Valves, and Symphony Essentials Brass.
We started with a solo Tuba from Session Horns Pro, played at maximum velocity for an intense effect. We combined this with a rich ensemble sound from Symphony Essentials Brass. Each brass part should play the same note (we chose a low D), but at different octaves to create a thick, full-spectrum sound.
A braaam should hit with force: we want it to shock the viewer. So consider adding a percussive hit to the start of your braaam to sharpen its attack. We used a kick drum from Battery with the higher frequencies removed using EQ.
Now for effects. Adding distortion to your horns will ramp up the aggression. We used Dirt for this. Don’t be afraid to dial in extreme settings. A braaam should sound intense – this is no time for subtlety!
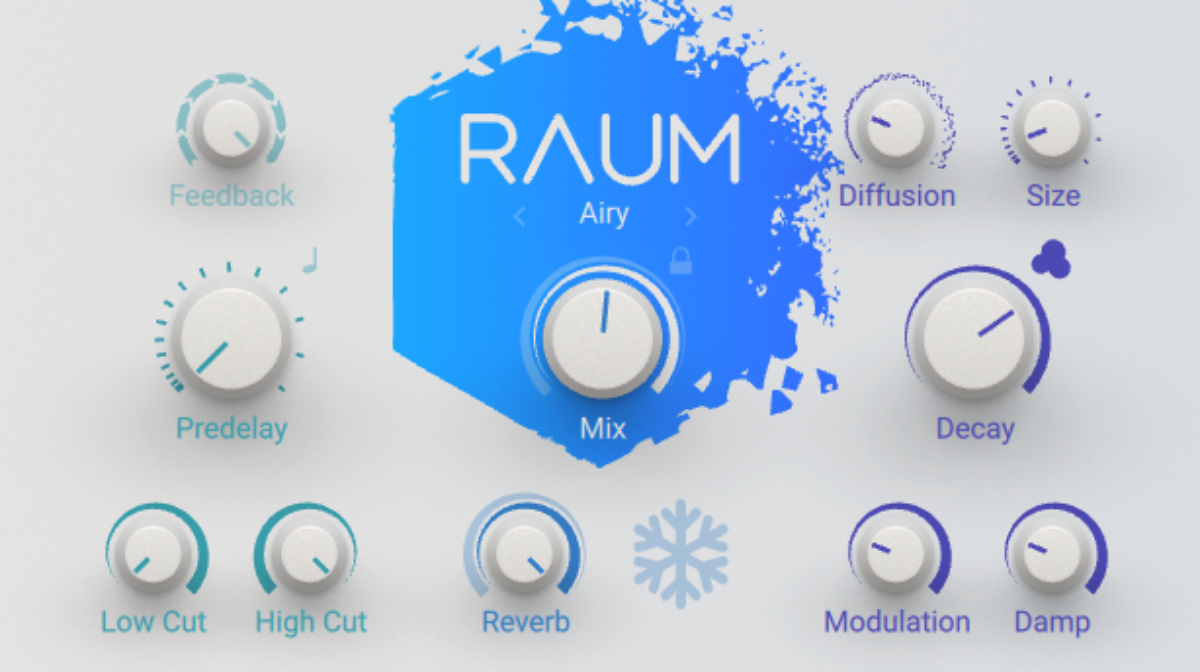
Adding reverb will create a sense of cinematic scale. We used Raum, with the Decay time turned up high.
Finally, a downward pitch bend at the end of the braaam will give it a sinister edge – great for horror or dark sci-fi. If you have a MIDI controller, use your pitch wheel to apply this bend to your horn parts.
Here’s how the finished braaam sounds.
5. Ambient Sound FX
Sound in film isn’t all about dramatic impacts, risers, and braaams. A sound designer creates many subtle sound effects that lend realism to the viewing experience. Think of quiet birdsong in a park scene, distant rumbling thunder when a storm is approaching, or traffic sounds heard from an apartment. These sounds might go unnoticed, but without them a scene would feel lifeless and unconvincing.
Sound designers layer up many sounds to create lifelike ambient FX. Here’s how to do it. In our example, we created the sound of a control room in a factory or research facility: imagine a complex machines, blinking lights, and white coated engineers hard at work.
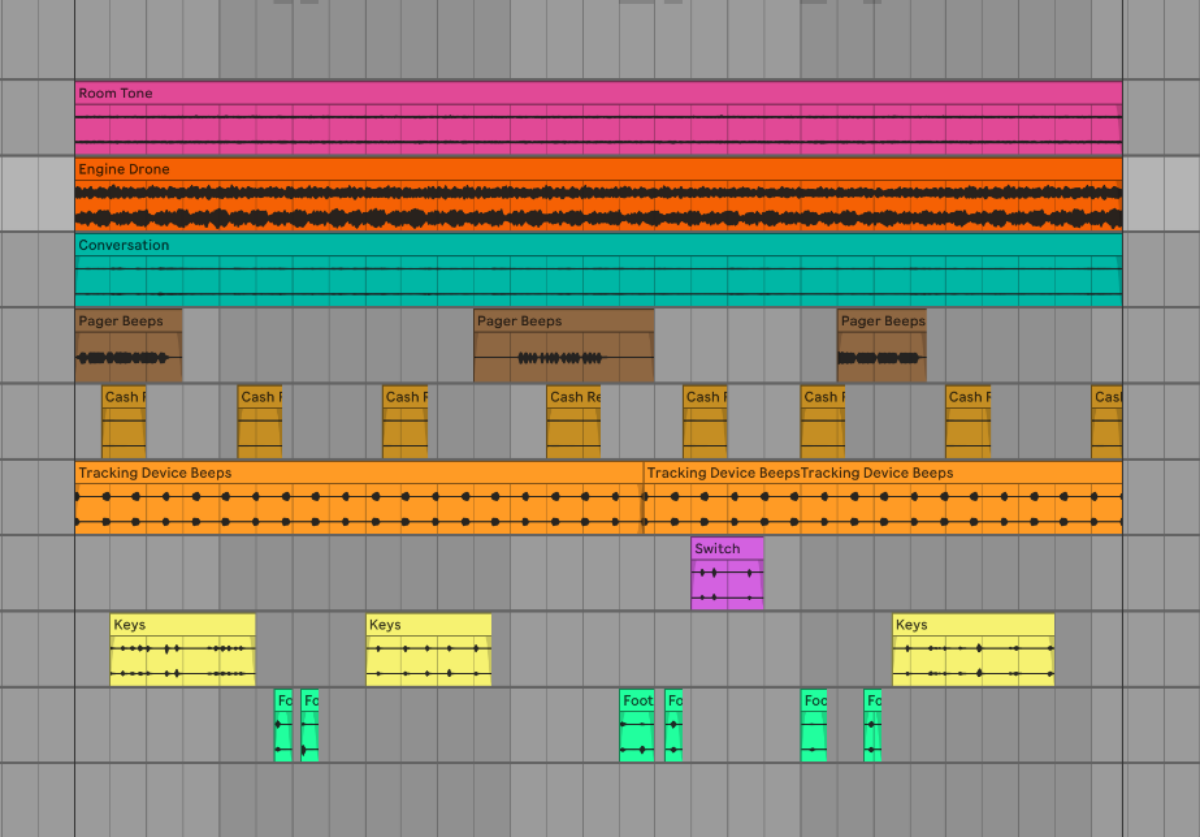
Before getting started, we watched the scene we’re adding sound to and noted down every sound needed. Don’t just pay attention to the action on screen: try to imagine what might be happening in the surrounding environment. The more sonic information you can add, the more convincing the scene will feel.
Our list included the beeps and clicks of the machine consoles; the tap-tap of typing; switches being flicked; and the engineers’ muffled conversation and footsteps.
Don’t forget to add room tone. Almost every space has its own distinctive background noise. The viewer will tune this out, but without it the scene will feel strange. We added an air conditioner hum, plus a low drone for the running machines.
Now we need to source samples for each of our layers. Some sound designers record their own sounds, but many use professional sample libraries. Try a free one like Freesound or Free Sounds Library. Download a few samples for each of the layers in your list. The longer they are, the better.
Now it’s time to arrange these samples into a convincing soundscape. Drop them into a DAW and move them around until the distribution of sounds feels realistic. Don’t be afraid to leave space. In our example, there are just a couple of footsteps as the engineers are mostly standing still at their workstations.
Next, we mixed the layers using some basic techniques. First we adjusted the volume (some layers can be very quiet!) We then panned elements to reflect the layout of the scene. Since there are consoles right around the room, some beeps are panned to the left and some to the right. We also used EQ to remove high frequencies from the conversation samples so that it sounds distant and muffled, leaving plenty of room for the dialogue track.
Here’s how it sounds.
6. Fantastical FX
Sometimes a film calls for a sound effect that doesn’t exist in real life. It could be the blast of a laser gun, the roar of a supernatural monster, or a dramatic swirling spell. A sound designer will need to imagine what this fantastical element might sound like and then use their technical skills to create it.
For this task, sound designers might use a combination of real-world sounds, synthesis, and processing with effects. Sometimes creating a fantastical sound effect takes huge amounts of work and ingenuity. But it doesn’t always have to be complicated. Often, the fantastical sounds we hear in movies are made by layering simple “real life” sounds. We can demonstrate this by creating the sound effect for a fireball spell.
To start with, we need access to a sample library – a free library like Freesound will do. As with our Ambient FX example, we started by watching the scene and making a list of sounds that we think could work for our fireball.
Try to break the effect down into components: there might be a build-up to the spell, then a sharp whoosh when it’s cast, then a crackling tail-off as it melts through the surrounding scenery.
After building our list, we collected the following samples:
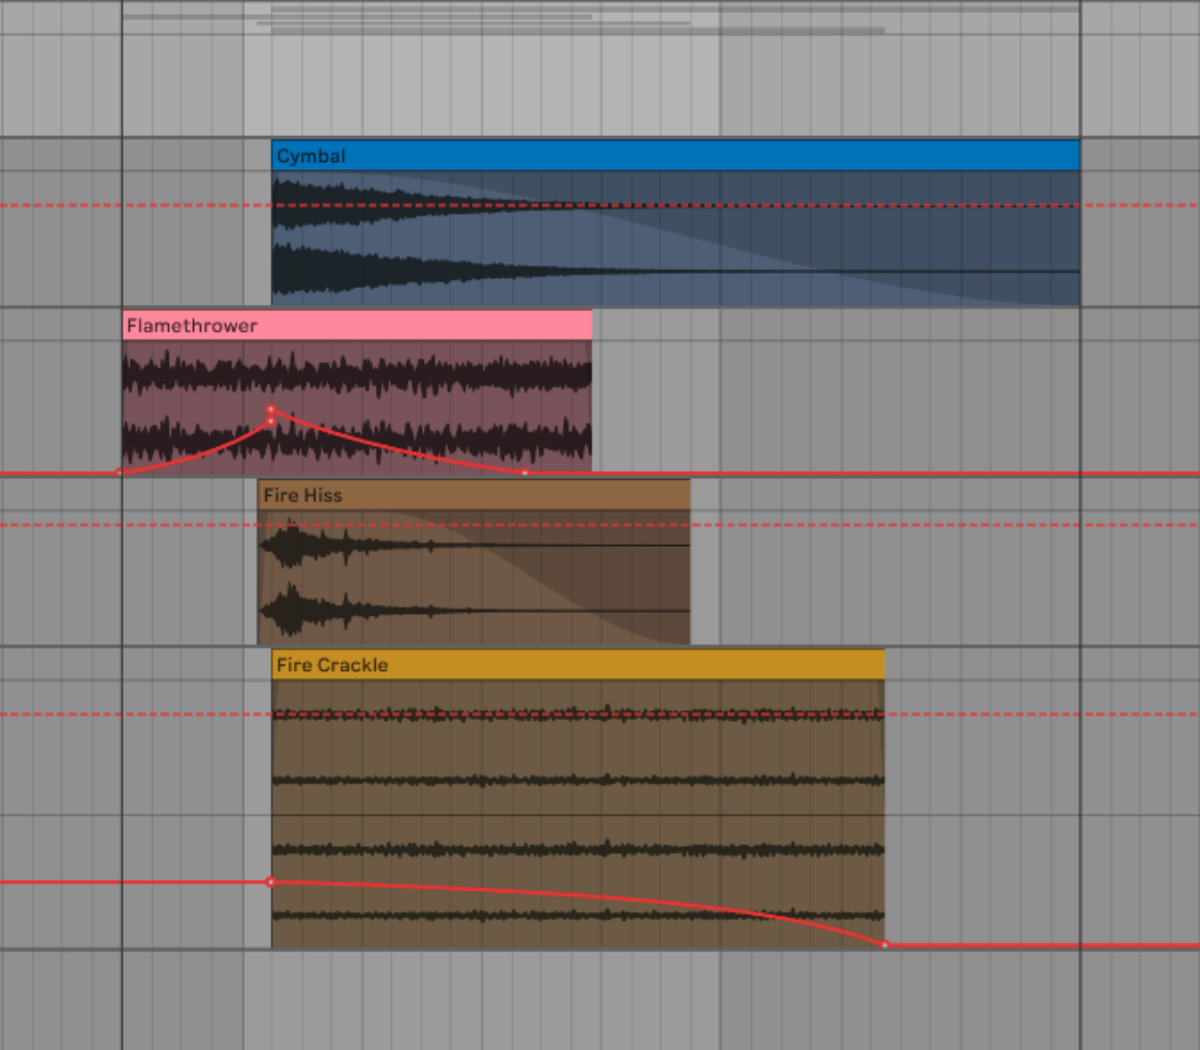
- A flamethrower
- A crackling fire
- The hissing sound of a fire being extinguished
- A sparkly cymbal for an extra magic touch
Next, we dropped the sounds into a DAW and arranged them to match the visuals of the spell. The flamethrower sound comes first, providing the buildup and the main body of the sound. The hissing sound adds presence when the spell hits, and the cymbal and crackling fire provide the tail-off.
These samples might sound a little lifeless as is. We can use envelopes to add dynamism to the effect. To make our flamethrower sound whoosh, we applied an amplitude envelope so that it fades in and out.
Next we added effects. Some distortion on the flamethrower sound gives it extra bite, and a touch of chorus (using Choral) gives it an otherworldly, magical vibe. We then added reverb across the sounds (with Raum) to match the space in which the scene is set.
Here’s how it sounds.
Start making sound effects for film
In this article, we’ve taken an in-depth look at creating sound in film. We explored the tools and techniques used by sound designers and offered a step-by-step guide to creating 6 popular sound effects. Now you know how to make these iconic sounds, it’s time to create sound effects your own way.
Komplete Start is a great place to begin your sound effects journey. Offering 7 instruments, 7 effects, samples, and more, it gives you everything you need to start shaping cinematic sound – and it’s completely free.


