For many beginners, the task of writing, producing, mixing and mastering a song can seem overwhelming. Thankfully by breaking this job down into manageable tasks it becomes less intimidating, and feels more achievable.
In this guide to making a complete song from scratch we’ll look at how to make a song using nothing more than your DAW and Native Instruments 360 Essentials, a convenient entry-level subscription that features everything you need to make music.
Jump to these sections:
- Creating a concept
- Making a verse
- Making a pre-chorus
- Composing a chorus
- Building a bridge
- Making an arrangement
- Mixing
- Mastering
- Start producing your own songs with 360 Essentials
You can try 360 Essentials for free, but if you’re already the owner of some Native Instrument products you can follow along providing you have Komplete Kontrol, Empire Breaks, Massive X, Battery 4, Session Guitarist Strummed Acoustic, Session Strings 2, Raum and Replika XT.
How to produce a song start to finish
There are many ways to create a complete piece of music. A common approach would be to begin by picking an idea, theme or mood, then compose chords, beats, melodies and lyrics.
Next the song needs to be arranged, after which you’ll likely want to make some tweaks to the mix. Finally the song can be mastered, using tools such as Ozone 11 Elements.
How to mix a song from start to finish
One common way to mix a song from start to finish is to first balance the levels of your tracks, so that nothing is too loud or too quiet. Next, effects such as EQ, dynamics processing, delay and reverb can be applied to ensure that each element sounds its best.
Some producers prefer to mix as they go rather than after the arrangement has been completed, and some like to reference against professional tracks to ensure that their mix sounds comparable.
How can I produce my own song?
Everything you need to produce your own song is included in Native Instruments 360 Essentials, including instruments, effects, and mixing and mastering tools. By following this tutorial you’ll be able to produce your first song, and this should give you the confidence and inspiration to make many more.
How to create a song from start to finish
1. Creating a concept
Many musicians start their projects by simply noodling with whatever instruments they have to hand, but let’s take a more organized approach.
Currently, crossover country tracks are popular, so let’s make a laid-back country/hip-hop hybrid. By making this decision we already know that our track’s tempo should probably be in the 80-100 BPM range, and that we’ll need a guitar instrument, a drum kit and a bass sound at the very least. Session Guitarist Strummed Acoustic, Empire Breaks and Massive X are all included in 360 Essentials, so we can use those to make the foundation of our track, then add other elements when we have a better idea of the track’s vibe.
Now, let’s begin making our track. Set the project tempo to 85 BPM.

2. Making a verse
We’ll start by composing a verse, which we can then build into a pre-chorus, and adapt into a chorus.
Let’s make some drums so that we have a rhythm to compose with. On a MIDI track, load up Komplete Kontrol, select the Empire Breaks library, and double-click Leisure Kit to load it up.

Set this track to -6 dB to give us headroom to add more elements to the mix.

First we’ll sequence some hats. Place F#1 closed hats on the first three 16th notes of a MIDI clip, followed by a G1 closed hat. We’ll use velocity values of 100 for everything in this project. Now, duplicate this three times so that it plays for a full bar.

Now add D1 rim shots on the second and fourth beats of the bar, with C1 kicks on the first, second and sixth 8th notes. This gives us a kick and snare pattern that works with the hi-hats.

Duplicate this pattern out so that it plays for four bars.

Now we have a drum beat, let’s make something musical to go with it. On a new track, again load Komplete Kontrol, and this time select the Session Guitarist Strummed Acoustic library, and double-click the Lemongrass preset. Again, set this track to -6 dB.
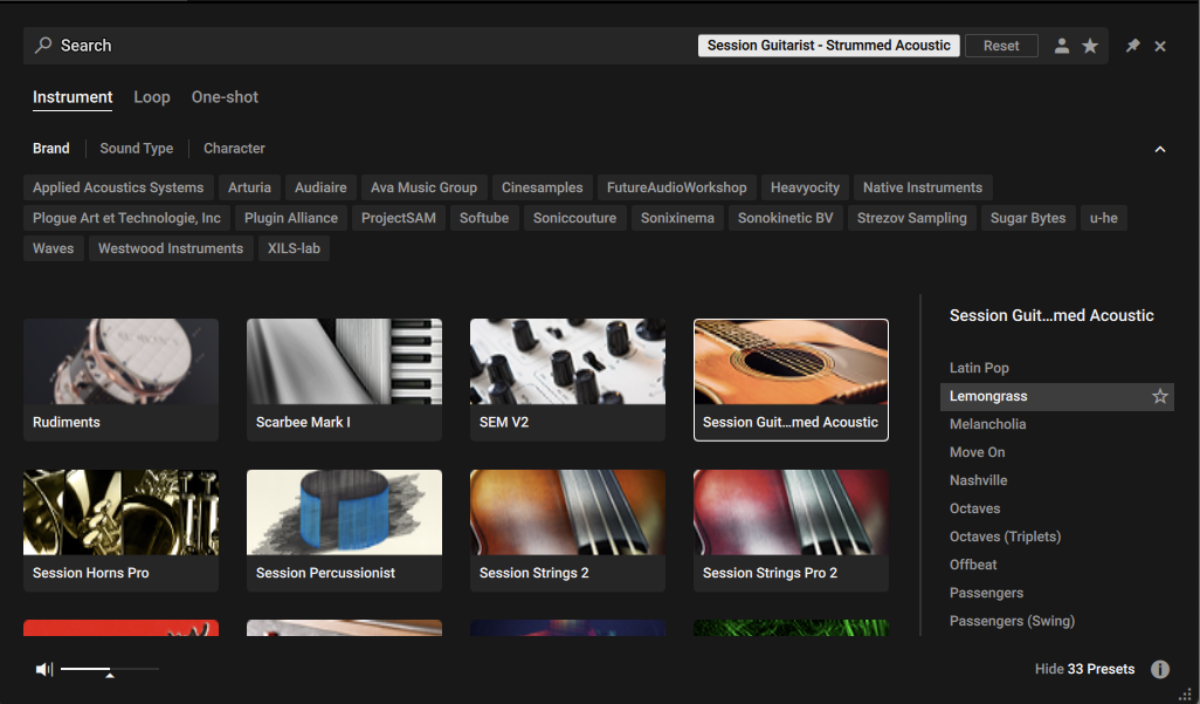
Sequence a four-bar clip that plays C3, A#2, A#2, and F2. Session Guitarist Strummed Acoustic will automatically play chords for us, giving our song a musical foundation right away.

We want this pattern to stop playing as soon as our MIDI note stops, so select the Playback tab and set Latch Mode to Stop Instantly.

So far we have our drum kit and guitar, all we need to complete our verse is a bass. Load up Massive X on a new MIDI track, open the Browse, select the Bass tag, and double-click the Essential Eight preset to load it. Set this track to -6 dB.

Copy this bass line that follows the root note of the chords.

That’s our verse! Next let’s add a pre-chorus
3. Making a pre-chorus
Our pre-chorus is going to be very similar to our verse, but with some extra added elements to help build-up to the chorus. Duplicate the four-bar verse out to give us the foundation of our pre-chorus

First let’s build the energy with some strings. On a new MIDI track, open Komplete Kontrol, select the Session Strings 2 library, and double-click the Sessions Strings preset to load it up. Set this track to -6 dB.
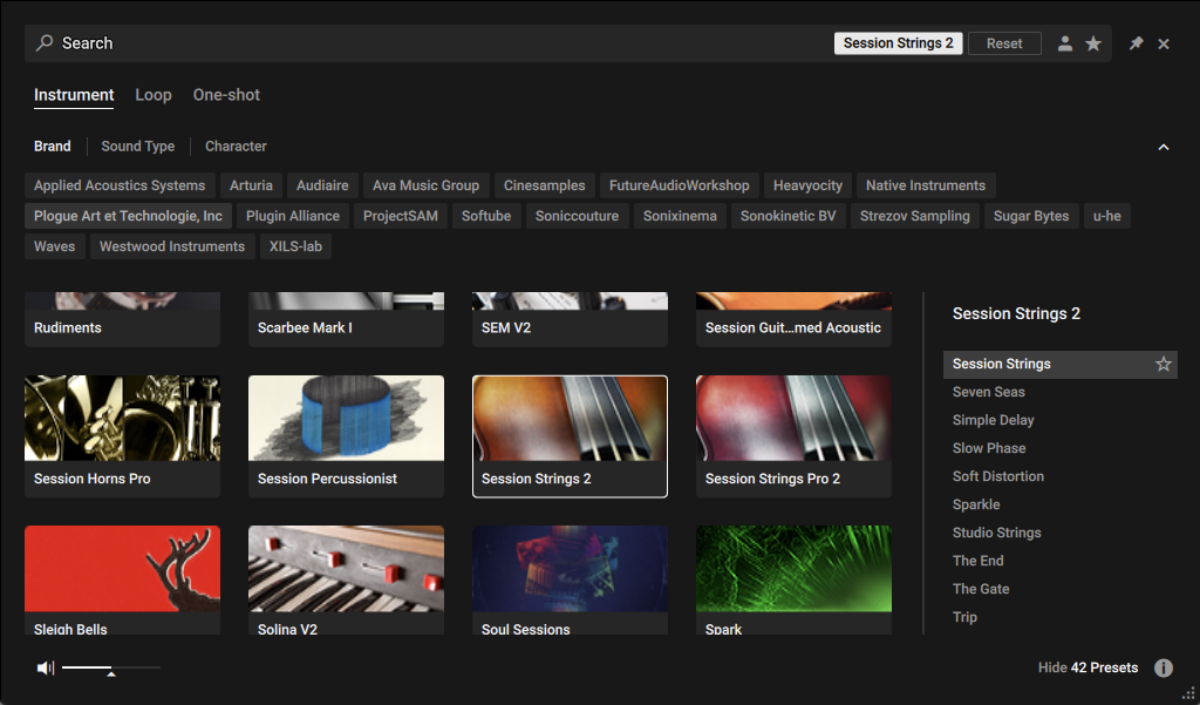
Change the Mode from Velocity Switch to Rhythm Animator.

In Rhythm Animator mode, the strings will automatically play authentic rhythm patterns, giving us a convincing acoustic string sound very quickly. Duplicate the guitar MIDI clip onto the Session Strings 2 MIDI track, and the strings will follow the root notes of the chords.

Now let’s add some elements that will help lead into the chorus. On a new MIDI track, load up Battery 4, and double-click the 808 Multiple Kit to load it up. Set this track to -6 dB.

Sequence a short D3 snare roll to play on the final two beats of the pre-chorus.

Let’s add a sound effect as well. On a new track load up Massive X, and this time in the browser click the Sound Effects tag and double-click the Future Gun preset to load it up. Set this track to -6 dB.
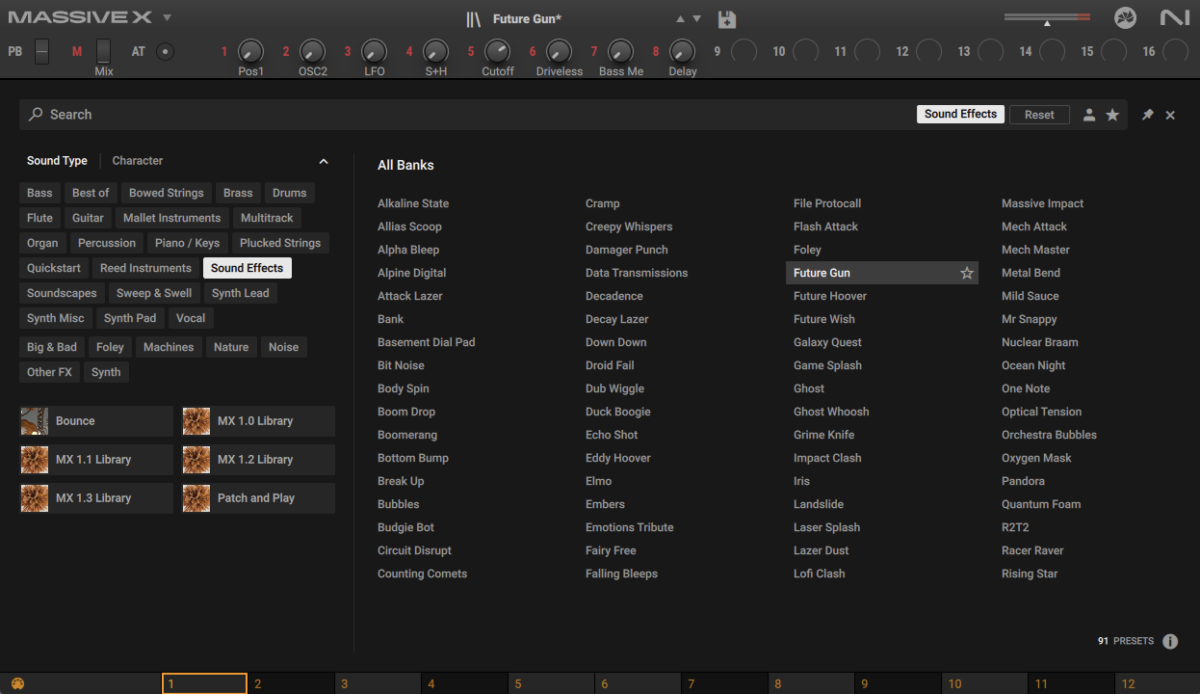
Sequence this to play on the final beat of the pre-chorus.

4. Composing a chorus
Duplicate out the verse and pre-chorus. This new section is going to be our chorus.

Our chorus will be eight bars long, and we’ll change the music up from the verse. As such we’re going to make all-new guitar, bass and string parts, so delete those from the chorus now.

Copy this guitar part, which plays C3, D#3, G3 and F3, to make a new guitar part for the chorus.

Copy this bass part which plays C2, D#2, G1, and F1.

Finally copy this string part which plays C3, A#3, G3, and A#3.

Duplicate these clips so that they play for the whole eight-bar chorus.

Let’s add another element to add an extra touch of energy to the second half of the chorus with a lead synth. On a new MIDI track load up Massive X, bring up the browser, select the Piano / Keys tag. Double-click the Fancy preset to load it up, and set this track to -6 dB.
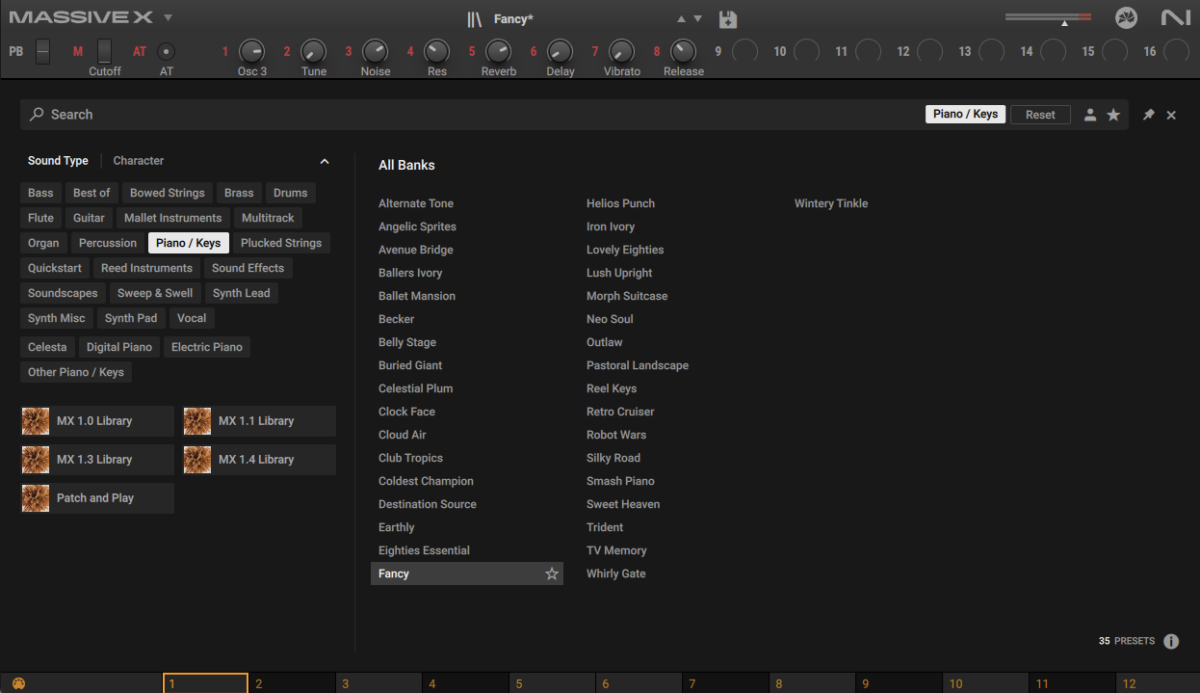
Copy this pattern for the final four bars of the chorus. This plays C4, D#4, F4, then C4, D#4, and C4.

5. Building a bridge
Now we have a verse, a pre-chorus, and a chorus, but to make a really compelling arrangement we need a bridge. Duplicate the chorus out, and delete the guitar, bass, string and lead parts.
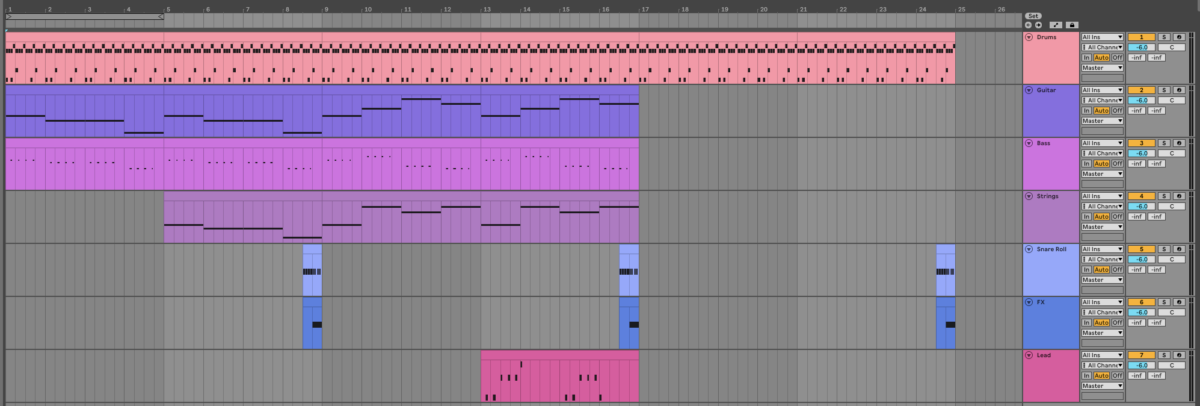
Let’s make our bridge as simple as possible. This means that it’s very flexible if you want to, say, add a rapped rather than sung vocal over it. First, let’s have an eight-bar string part that just plays C3.

Now add an eight-bar bass part that just plays C2.

Now we have all the sections we need to make a full arrangement.
6. Making an arrangement
Here’s a straightforward arrangement you can copy.

This arrangement starts with the verse and pre-chorus minus the bass line, which drops when we get into the first chorus on bar 9.
This first chorus is then followed by the first verse proper on bar 17, then another chorus on bar 25, and a second full verse on bar 33.
After the second full verse we have a bridge on bar 41. This is followed by a final chorus on bar 49.
Of course, you can arrange the song how you like, and make it longer or shorter if you want to add a certain amount of lyrics.
Our song is sounding pretty good, but let’s do some mixing to get it sounding as polished as possible.
7. Mixing
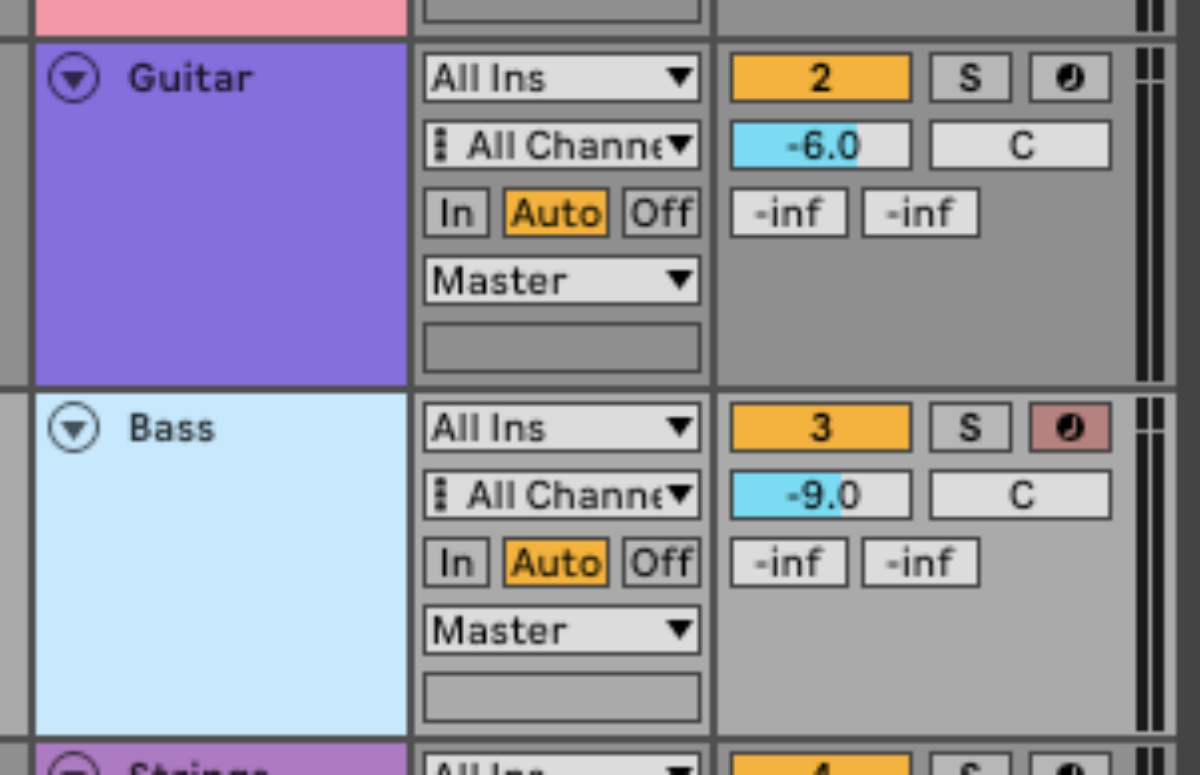
Let’s begin by balancing our mix. There’s only one thing we need to adjust in this example: the bass is pretty loud. So, let’s adjust its level from -6 dB to -9 dB.
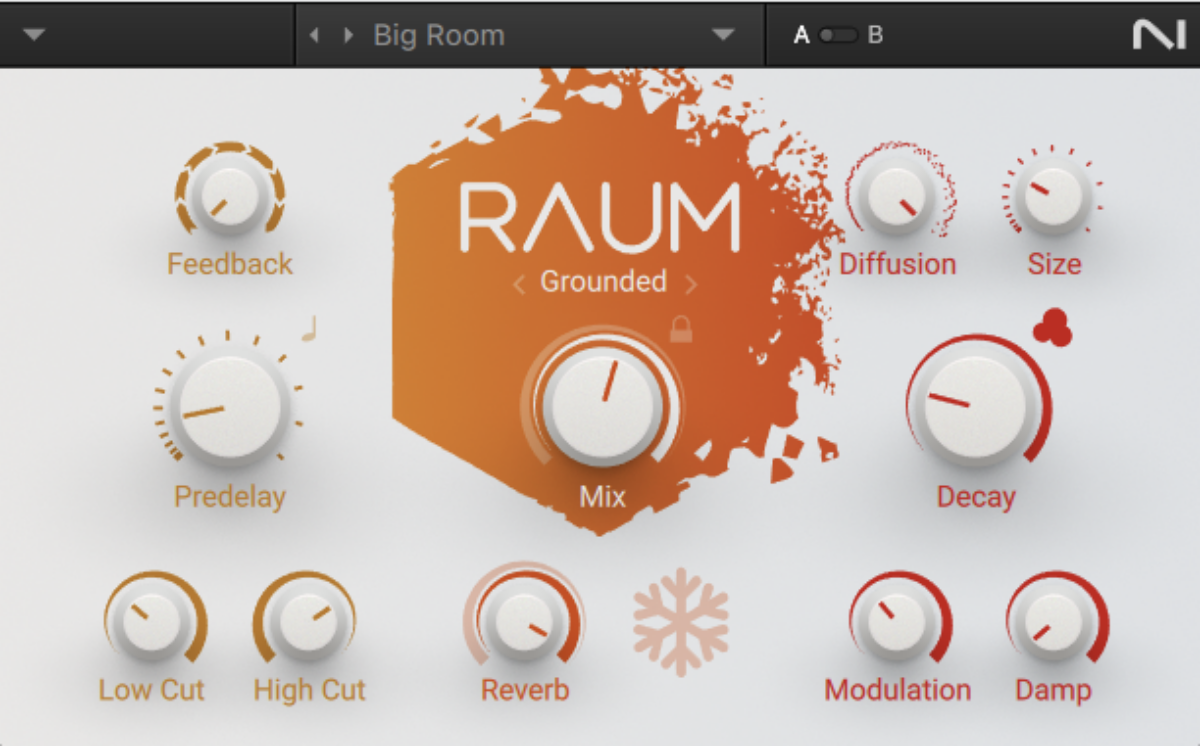
Currently a lot of things are sitting in the center of the mix, and we could get a more expansive sound by moving them into the sides of the mix. One way to do this is by using reverb. Add Raum reverb to the guitar track, and load up the Factory Presets > Medium > Big Room preset. Set the Mix to 56%.
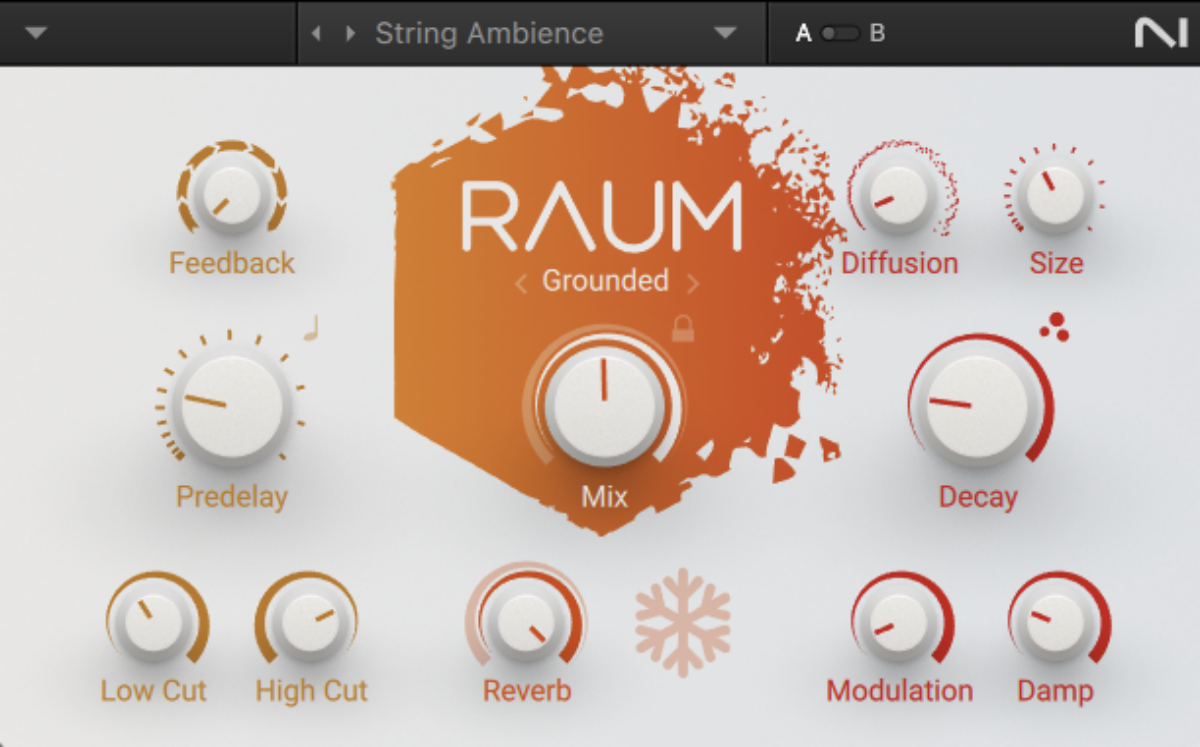
Let’s add some ambience to the string part too. On the string track, add another instance of Raum, and this time load up the Factory Presets > Small > String Ambience preset. This adds a subtle touch of reverb that makes the string sounds more organic and natural.
Currently our sound effect is a little on the dry side. Let’s add some reverb to spruce it up a bit. Add Replika XT to the sound effect track, and load up the Classics > Analogue Dual preset.
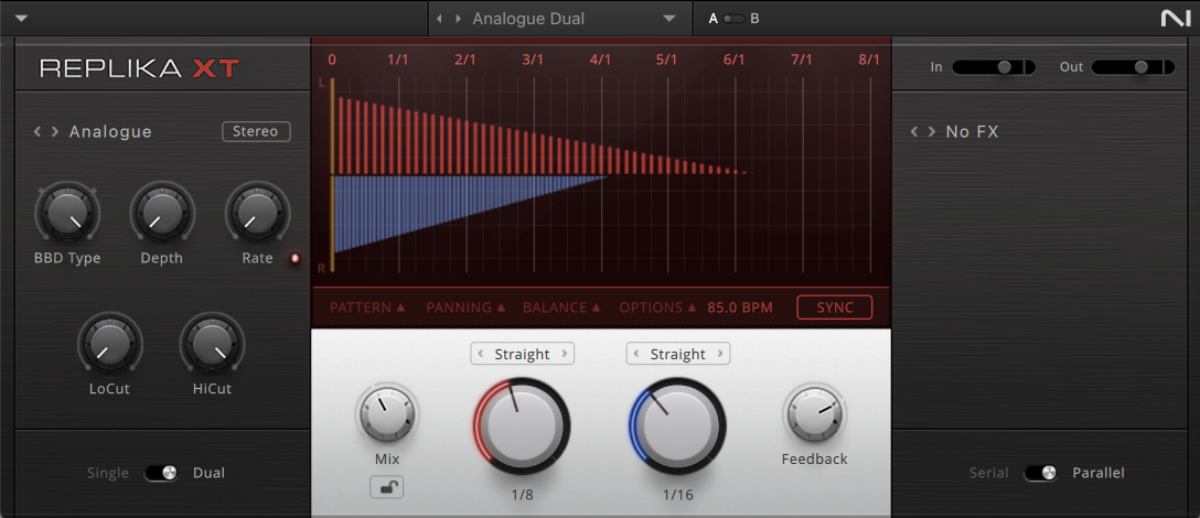
This makes the sound effect sound more exciting, and also helps it segue smoothly into the next section.
Now our song is sounding more polished, and it’s ready for mastering.
8. Mastering
Mastering is easy with Ozone 11 Elements. Simply add the plugin to your master track, then click the big “Start Listening” button, and play back the loudest section of the track. In this case we’ll play back from bar 13, as this is when the most elements are playing.

Note, Ozone 11 Elements will boost your song’s volume level when it’s done listening, so you might want to turn down your speakers!
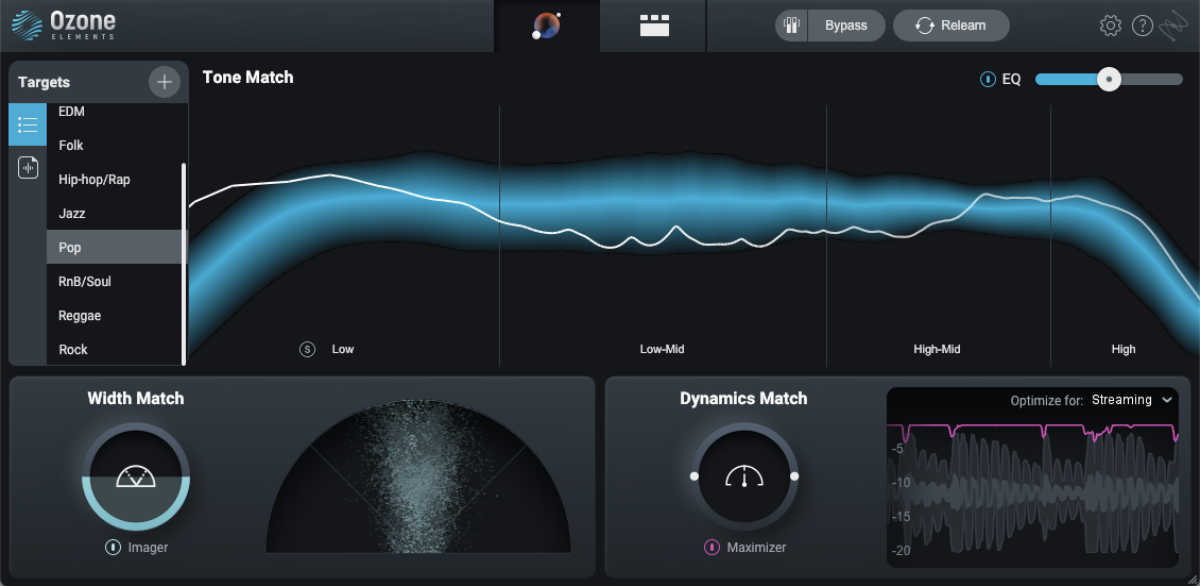
Once Ozone 11 Elements has finished analyzing your song, it will automatically create a mastering chain for you, and pick a genre target. Here it’s targeting Pop for this mix, which is ideal, so we don’t need to change it.
Start producing your own songs with 360 Essentials
Here we’ve shown you how to make a song from scratch with 360 Essentials. If you’d like to learn more about the specific instruments and effects we used, check out Komplete Kontrol, Empire Breaks, Massive X, Battery 4, Session Guitarist Strummed Acoustic, Session Strings 2, Raum and Replika XT.


