


Arpeggiator: It’s a fancy word for a simple and fast-to-use music production tool. Put simply, arpeggiators turn chords into sequences of notes. This basic task can be put to all manner of creative uses. From finding quick inspiration to fleshing out arrangements, adding movement to parts and spicing up melodies, arpeggiators are a handy tool at many stages of the production process.
But what is an arpeggiator exactly, and how does it work? In this article, we’ll show you how to use an arpeggiator, demonstrating the creative potential of arpeggiation. Sure, you can stick to mashing a few notes and seeing what comes out. But once you’re through with this article, you’ll know how to tweak your arpeggiator to get elegant, musical results every time that can sound like this:
Jump to these sections:
- What is an arpeggio?
- What is an arpeggiator?
- What is the difference between sequencer and arpeggiator?
- Arpeggiator parameters
- How to use arpeggiators
Follow along with this tutorial using VOCAL COLORS, a new Play Series instrument with immersive vocal soundscapes and expressive modulation controls.
What is an arpeggio?
An arpeggio is a way of breaking up a chord into separate notes that are played one after the other. The term comes from the European classical tradition, where composers would use arpeggios to voice chords on monophonic instruments (instruments that can only play one note). For example: Because it’s monophonic, a flute can’t give you all of the notes in a C major chord at once. But by playing C, E, and G notes in succession, it can outline the chord as an arpeggio.
Here’s what a C major chord sounds like with all the notes played at once, followed by a C major arpeggio. Hear how the notes are transformed from a static chord into a rhythmic pattern.
What is an arpeggiator?
An arpeggiator is a tool used in electronic music production to generate arpeggios. You give the arpeggiator a chord, and it generates a repeating sequence based on the notes in the chord. The user typically gets control over various aspects of the arpeggio, including the speed of the notes and what order they are played in.
With an arpeggiator, a few random keys pressed on your MIDI keyboard can be transformed into complex patterns and textures. This makes arpeggiators handy for sparking inspiration. They are also great for adding movement to a static part, or embellishing an arrangement with extra layers.
Arpeggiators are built into many hardware and software synthesizers. Some DAWs offer an arpeggiator as a separate plug-in. Arpeggiators are also a handy feature of KONTAKT, Native Instruments’ platform for sampled instruments.
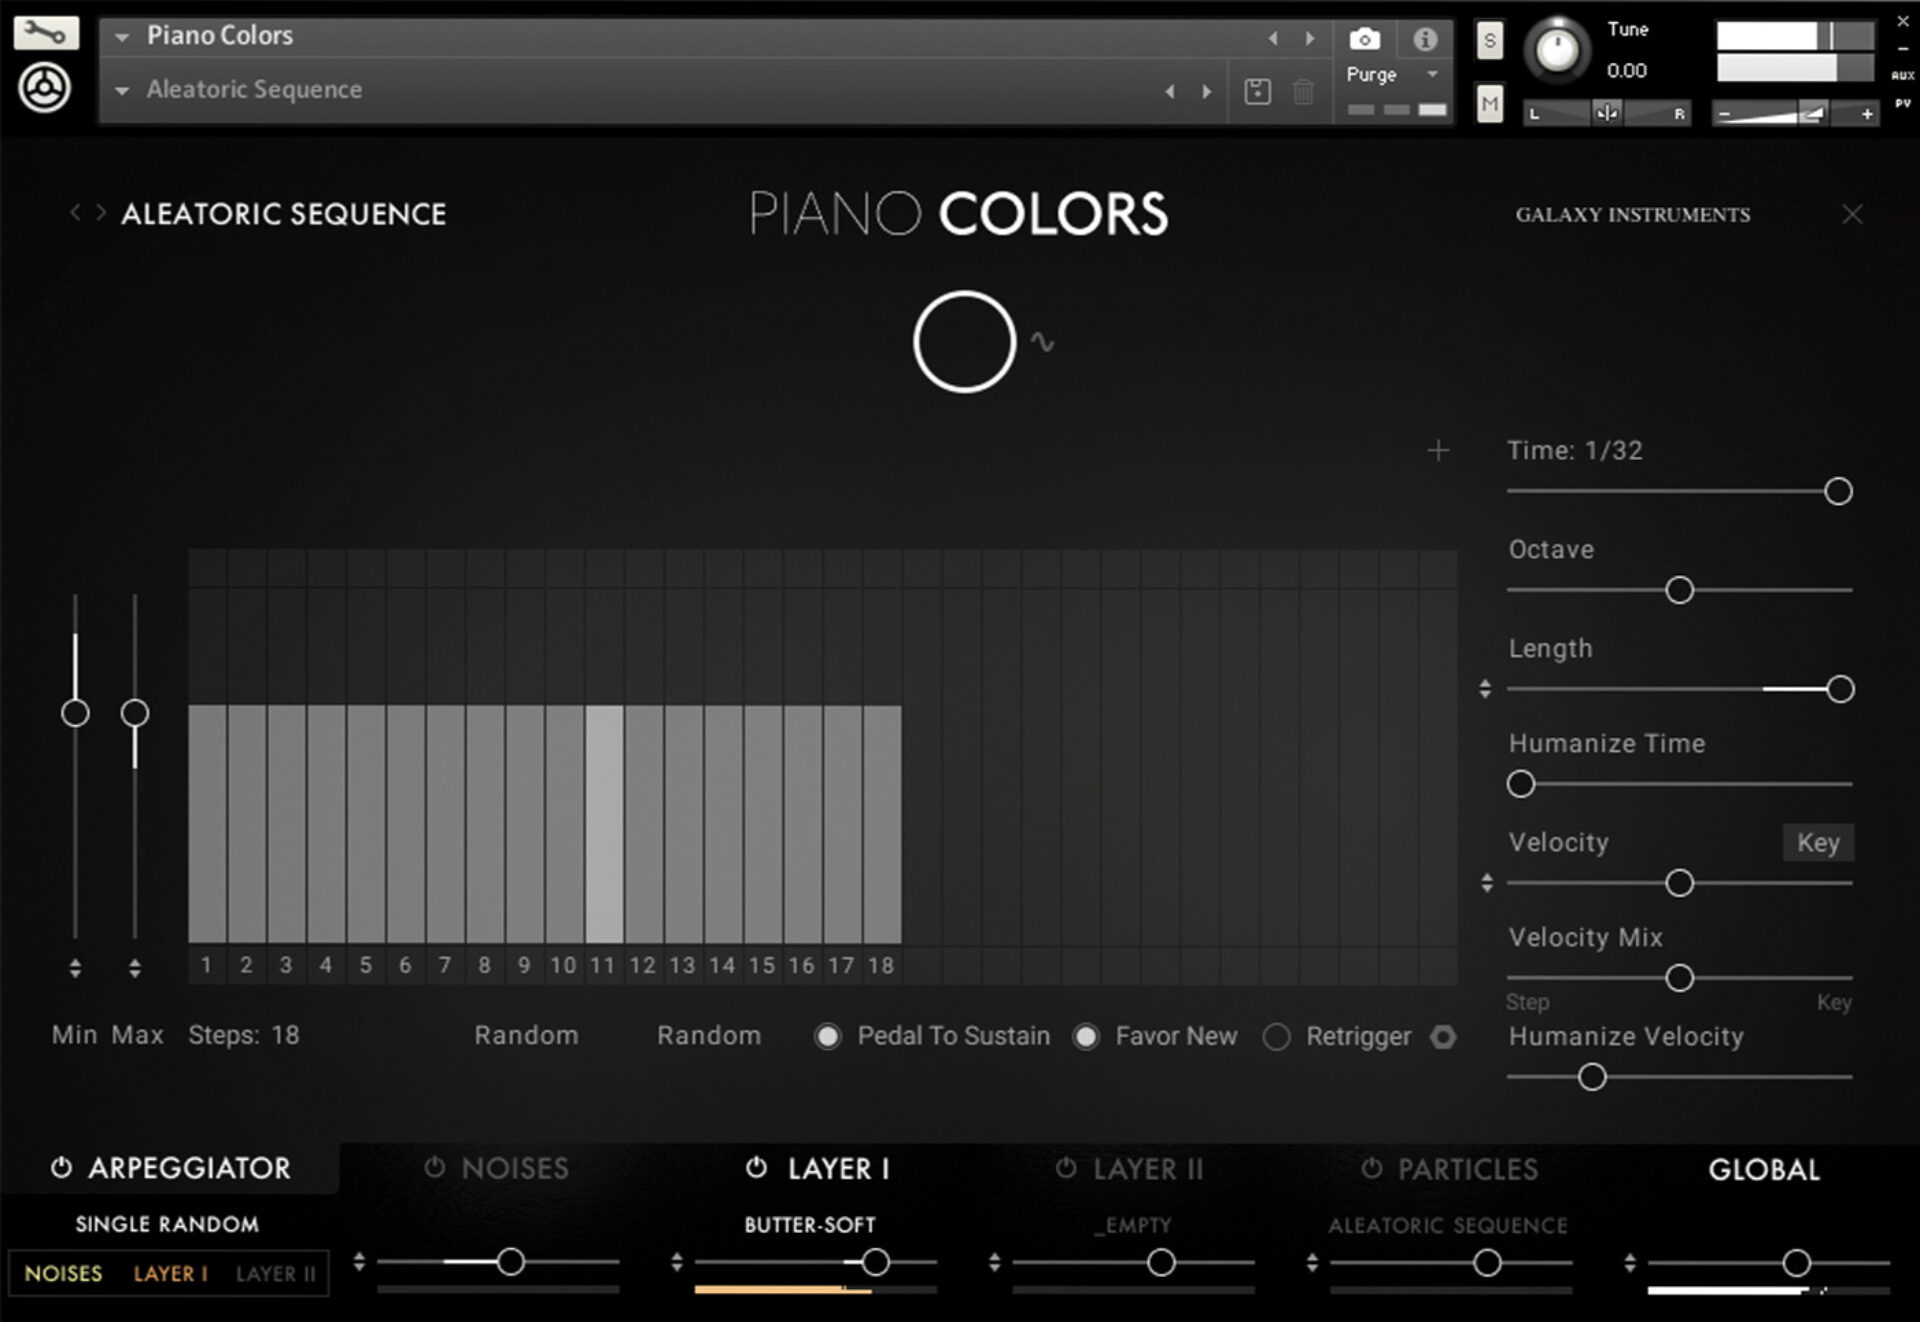
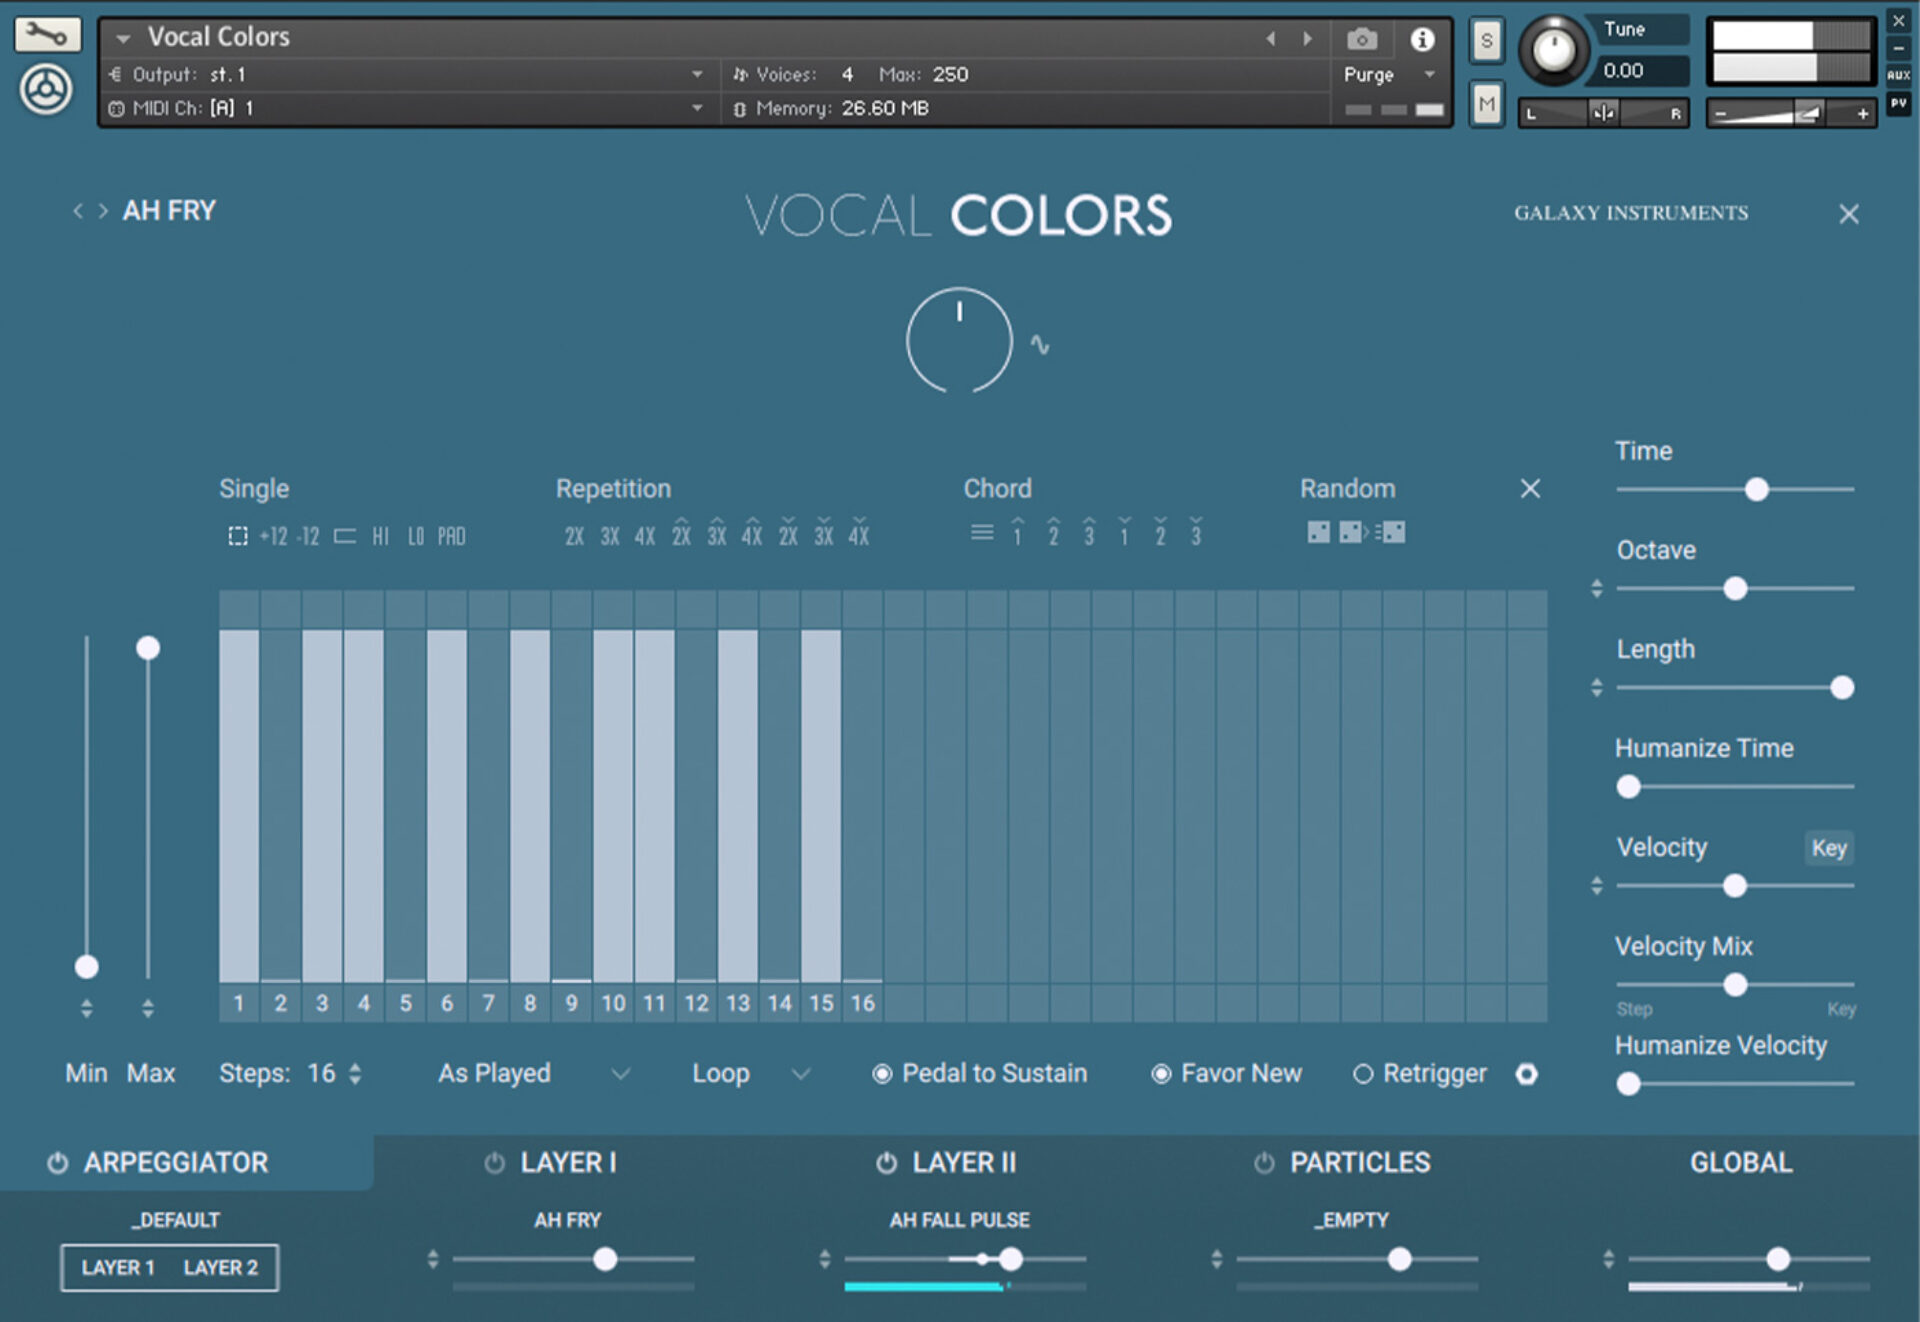
In the example above, we demonstrated an arpeggio with VOCAL COLORS, a sample-based instrument for KONTAKT that uses the human voice as a source for instant and expressive sound design. VOCAL COLORS features a fully featured arpeggiator that allows you to get maximum creativity out of the instrument’s powerful sound engine.
What does an arpeggiator do?
An arpeggiator listens to an input chord and outputs it as a series of individual notes. The speed, rhythm, and order of the notes is controlled by the user.
Sophisticated arpeggiators, like the one found in VOCAL COLORS, give the user many parameters to play with, allowing you to turn a simple chord into a complex, expressive sequence of notes. But watch out: an arpeggiator is not the same thing as a sequencer, though the two are often confused.

What is the difference between sequencer and arpeggiator?
A sequencer is a fully-featured tool for programming sequences of notes and other musical information, whereas an arpeggiator is focussed on just one task: generating arpeggios. In a sequencer, the user typically manually inputs all of the notes to be played, dictating their precise order and rhythm. In an arpeggiator, the user just supplies a “chord”–several notes played simultaneously–and the arpeggiator automatically generates patterns out of these notes.
Sequencers can be used for more sophisticated programming, creating longer and more complex melodies, chords, rhythms–or entire songs. Sequencers are often the centerpoint of music production setups, particularly hardware-based setups. Arpeggiators, on the other hand, excel at one thing. If it’s arpeggios you want, an arpeggiator will give you one quicker and more intuitively than most sequencers.
Arpeggiator parameters
Whether integrated into hardware or software synthesizers or available as a standalone plug-in, arpeggiators come in many shapes and sizes. But they tend to feature a few key parameters. By getting familiar with these parameters, you’ll be able to generate musical arpeggios no matter which tool you’re using. Let’s take a look at some of the most important ones.
Rate
Rate or Time controls how fast the arpeggiator generates notes. This can be expressed in milliseconds or hertz, but more often it is set in relation to the track’s tempo, and expressed in notes (½ notes, ¼ notes, and so on). The shorter the note, the faster the arpeggio runs. Faster arpeggios have a shimmering, energetic feel, while slower ones can be used to fill a few gaps in an already busy arrangement.
In this example, you’ll hear a shimmering 1/32 note arpeggio first, followed by a slow, measured ¼ note arpeggio.
Pattern
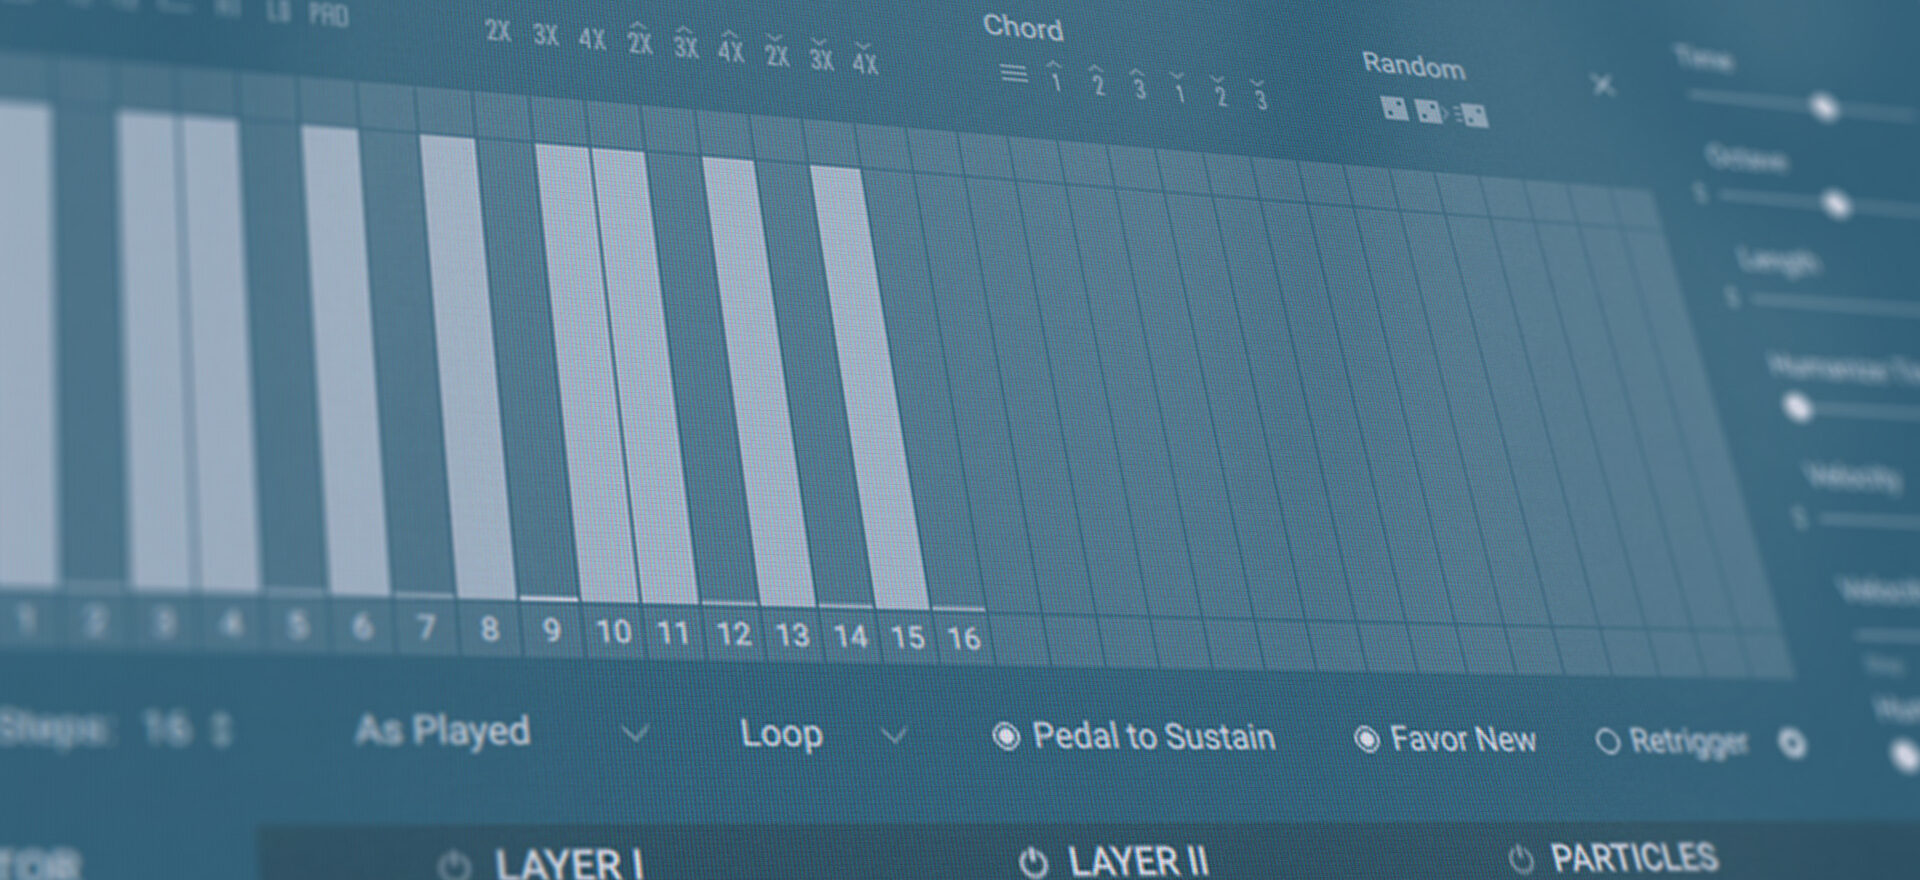
Pattern controls the order in which the arpeggiator plays back the notes it is given. Remember, an arpeggiator’s note input is typically a chord: a collection of three or more notes. These notes could be played back from lowest to highest pitch (or highest to lowest); in the order in which they were delivered to the arpeggiator; or in a random order. These options are usually offered in a drop-down menu.
Sophisticated arpeggiators, such as the one found in VOCAL COLORS, offer even more patterns to choose from. The pattern you choose can completely change the character of your arpeggio. Make sure you choose one that fits the rhythm and feel of your track.
In this example, you’ll first hear the notes played from lowest to highest pitch, then in a random order; finally, the arpeggiator is set to a more exotic pattern offered in VOCAL COLORS: “Broken Up & Down.”
Octave/Range
Octave or Range controls how many octaves the arpeggio covers. If it’s set at 0, the arpeggiator plays back only the pitches it is given. If it’s set at +1, the arpeggiator will play back these pitches plus the same pitches an octave above, creating a more expansive arpeggio. Most arpeggiators allow you to set the number of octaves and whether they are above or below the pitch of the input notes. Use the Octave parameter to turn a simple input into a complex arpeggio that can give width and richness to a track.
In this example, Octave is set to 0 the first time around, then +2 the second time, to create an expansive, two-octave arpeggio.
How to use arpeggiators
An arpeggiator is a simple tool, but it comes in handy at many points in the music-making process. It’s best at playing a supporting role: embellishing existing parts, supporting them with extra rhythms or countermelodies, or adding additional layers to an arrangement.
We’ve sketched out a song here. It’s a solid idea, but it could use a little spice. Let’s use an arpeggiator to take it to the next level.
1. Chord progressions
The piano chords were made using PIANO COLORS–another installment in the COLORS series, designed for instant and inspiring sound design. They do a solid job of providing harmonic support to the vocal, but they’re a bit basic. We can layer in an arpeggiated version of the same chords to get more interest and movement in our part.

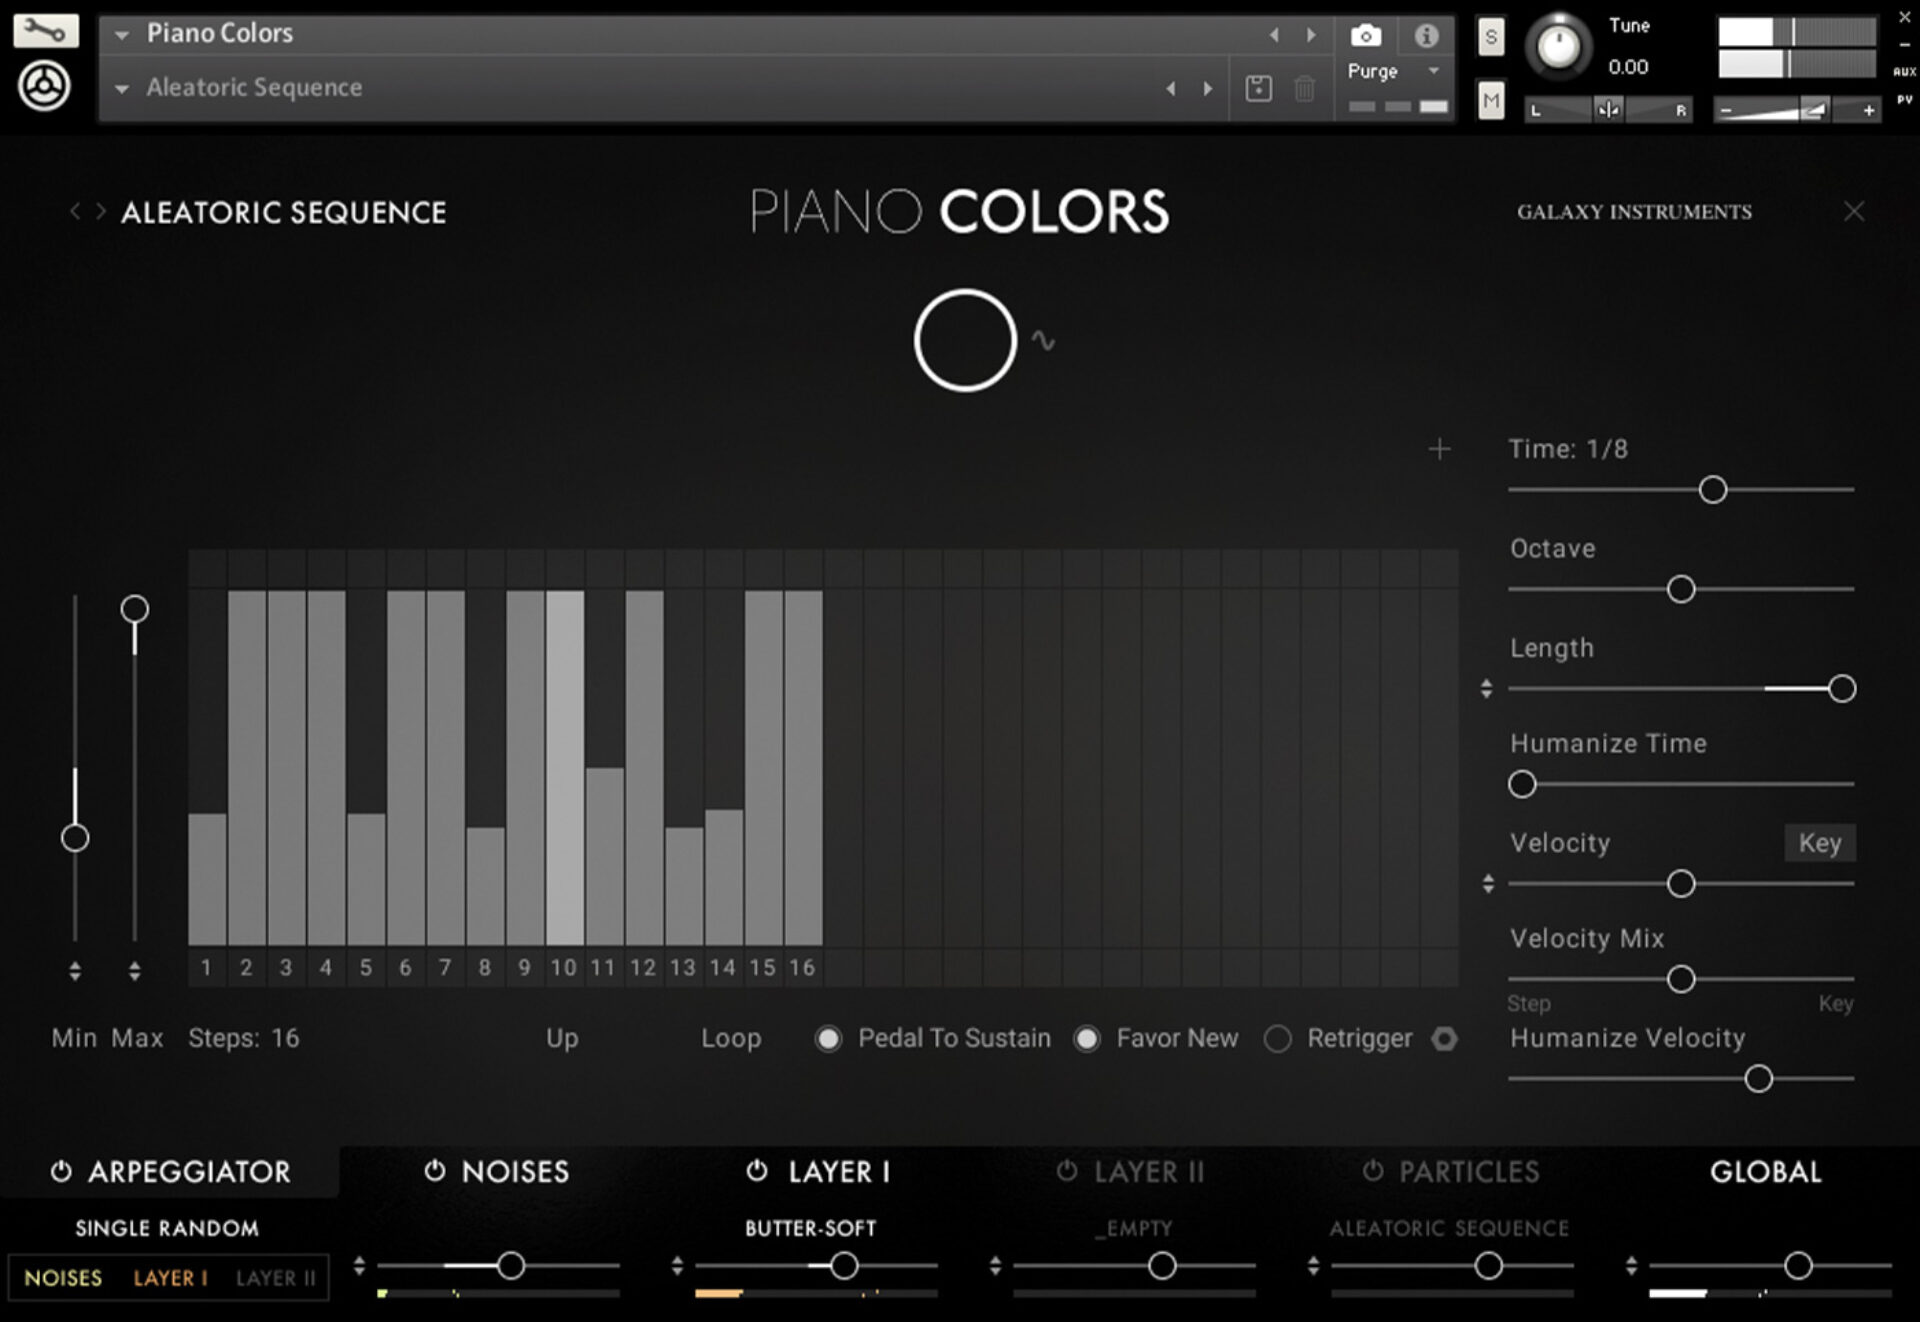
First we duplicated the original piano chords channel, to create an identical copy. By switching on the arpeggiator in PIANO COLORS, this copied version instantly adds some movement. Play around with the Arpeggiator Rate and Pattern to get something that feels right for the track. We went for a 1/8th note rate and a simple “Up” pattern (lowest pitch to highest).
The bright piano sound sounds a little too intense as an arp. Let’s find a more muted sound in PIANO COLORS’ library. We went for “E-bow short” (the sound of piano strings being vibrated by an E-bow).
We can then layer our new arpeggio back in with the original chords, for a more dynamic, lifelike part. We also bumped the new arpeggio up an octave so it sits comfortably above the original chords. Here’s how it sounds.
2. Add textures
We can add depth to our track with some background texture. Here, an arpeggiator can be used to turn a simple melodic line into a shimmering detail layer.
First, we wrote a countermelody that sits comfortably behind the vocal and other key parts of the track. The simpler the better! We’ve used PIANO COLORS again, choosing a clear, resonant sound that floats above the rest of the mix.
Now for the arpeggiator magic. Unusually, our input here isn’t a chord (3 or more notes), but just one note at a time. By setting the Arpeggiator rate very high (1/32) we can cause this one note to vibrate and shimmer. Combined with an Octave setting of +1 (meaning the note leaps up and down the octave), the result is ethereal and striking.
3. Additional percussion elements
Our drum section is lacking interest right now. We can fill in some of the gaps by adding an arpeggiated layer with a percussive quality.
With its deep library of piano samples, PIANO COLORS offers some good options here. We’ve gone for “Drum Stick”–the sound of the piano strings being struck by a drumstick. The arpeggiator is set at 1/8 rate, and the input chord is a simple A minor (the key of the track).
We can use some of PIANO COLORS’ extra features to further finesse this part. First let’s turn up “Humanize Velocity” so that the velocity of each hit is a little random, creating a lifelike feel.
Let’s go one further with the Step Editor, which allows you to control the velocity of different notes in the arpeggio. By reducing the velocity when important drums like the kick and the snare hit, we can keep space for those elements while filling in the gaps around them.
Here’s the final part on its own, followed by how it sounds with the drums.
4. Add background vocals
Finally, let’s reinforce our lead vocal with some ear-catching backing vocals from VOCAL COLORS. Once again, an arpeggiator will be very useful here.
We have quite a lot going on in our track now, so let’s not add a totally new set of notes. Instead, we can reuse the MIDI from our chords as the basis for the backing vocals. We used the Step Editor to add some interest by ducking the velocity of some of the notes, creating a syncopated feel.
Finally, we picked a sound from VOCAL COLORS’ library of pristine vocal samples. We went for “Ah Fall Pulse,” which adds a beautiful falling phrase every few notes.
Let’s hear how all our additions sound together. The sketch version comes first, followed by the final version with the arpeggiated extras. The track is sounding much richer now–all thanks to our trusty arpeggiator.
Start using arpeggiators in music production
In this article we’ve taken an in-depth look at arpeggiators. We’ve explained how this production tool works, examined its key parameters, and demonstrated how you can use an arpeggiator to spice up your tracks.
Now it’s time to start using arpeggiators in your own productions. VOCAL COLORS is a great place to begin. This rich, intuitive sample instrument allows you to create gorgeous musical textures in no time–and the fully-featured arpeggiator offers many opportunities to get creative.
Related articles
-

Inside the evolution of orchestral sampling: an interview with ProjectSAM
Discover how ProjectSAM’s Lineage Series uses NKS and smart features to change orchestral sampling. Plus, save on instruments in our…
-

How New Constellations turn emotion into sound with Massive X
Go inside the studio with New Constellations. Learn how they use Native Instruments gear, happy accidents, and lifelong friendship to…
-

Citizen Kain on building emotion and space with Replika
Citizen Kain explains how Replika helped shape the rhythm, tension, and emotion behind his debut Eversun Records single “Moments.”…
-

The organic precision behind Calcou’s Anjuna release featuring Reaktor
Calcou shares how Reaktor, Monark, and Super 8 shaped the creative balance and live energy behind their new duo EP,…
-

14 NKS instruments that will change the way you create music
Discover 14 NKS instruments to freshen up your workflow. From lo-fi tape synths to cinematic strings, shop the Native Instruments…
-

Parallelle on crafting living basslines with Reaktor and TRK-01
Parallelle share how Reaktor and TRK-01 shape the bass and warmth in 11th Avenue, balancing analog depth with modern control.
-

Where will your sound lead you? Explore the Native Instruments Summer Sale
Save 30% on instruments, effects, and sounds in our Summer Sale. Find the tools to keep your tracks moving and…
-

How Mr. Bill builds sonic worlds in Massive X
Mr. Bill explains how Massive X and instinctive sound design shaped the storytelling process behind his new downtempo album, Mr.