


Expressive, evolving, and rhythmically dynamic sounds are the speciality of Circular, a polyphonic sequencer from Native Instruments for Kontakt and the free Kontakt Player that make it easy to create unique, sophisticated soundscapes.
Featuring 255 presets and over 160 experimental sound sources, Circular caters to those looking for exciting new sounds quickly, and those looking for a more involved experience will discover an unimaginable array of sound design possibilities under the hood.
Jump to these sections:
- What is Circular?
- How to turn a chord progressions into a rhythmic soundscape
- Increase expression with polyphonic aftertouch
- Create your own patch
In this tutorial we’ll show you how to find the right preset for your project with Circular’s easy-to-use browser, then tweak patches using its powerful sequencer section. To follow along with this guide you’ll need Circular which runs in both Kontakt and the free Kontakt Player.
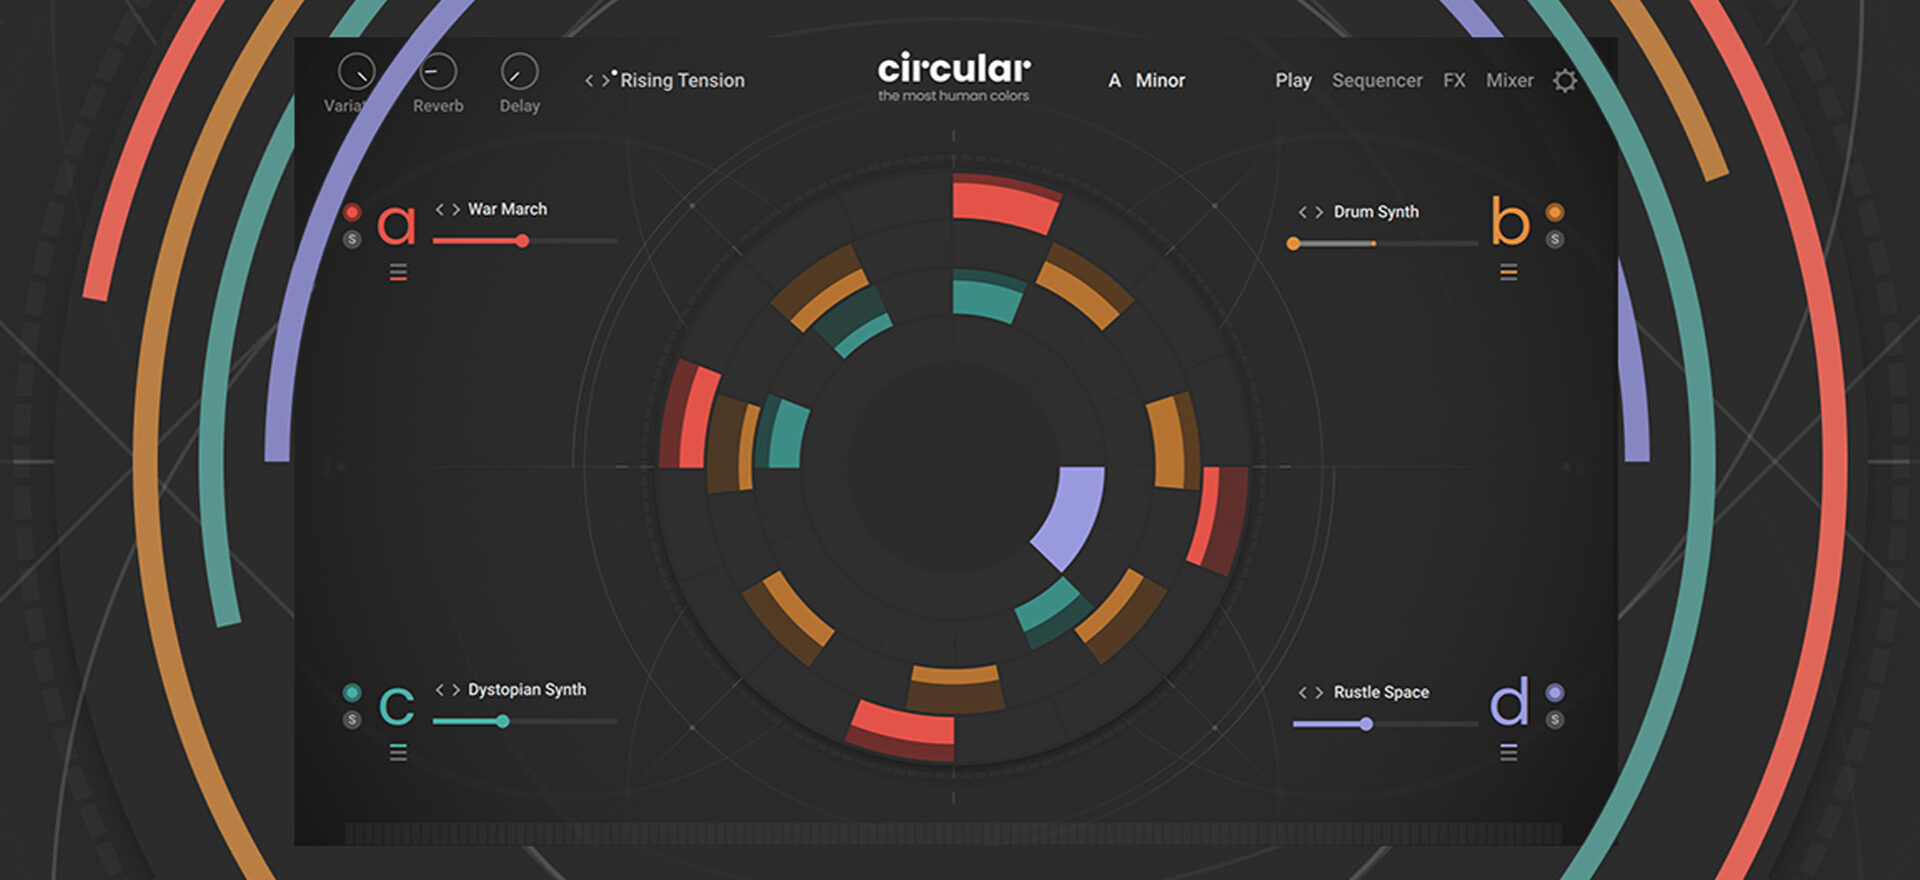
What is Circular, and how does it create dynamic sequences?
Circular is a polyphonic sequencer with four independently modulated layers with real-time step controls. Each layer has a step-sequencer with three lanes; Sound Lane, Parameter Lane and Step Duration.
The Sound Lane is where the step’s sound source is chosen for each step from a palette of over 100 experimental sources.
The Parameter Lane where velocity, note probability, note pitch, note length and up to three step FX can be applied. The step FX available include arpeggiator, grain, gate and unison, amongst other effects.
The Step Duration controls where the length of each step and the length of each sequence can be defined. This ability to control both step length and sequence duration mean it’s possible to create both polyrhythmic and polymetric patterns.
Circular also has the ability to control sound design parameters for each note, which along with assignable polyphonic aftertouch modulation makes it a flexible tool for creating expressive and dynamic sound sequences.
How to turn a chord progressions into a rhythmic soundscape
Let’s start by looking at a simple use case for Circular: using it to bring a chord progression to life with a preset sound.
First, load up Kontakt, select Circular, and double-click the Circular instrument in the list of presets on the right of the interface.

To bring up Circular’s preset browser, click the patch name, set to Rising Tension by default, at the top of the interface.

In the browser we can select multiple tags to narrow down the list of available presets, making it easier to find the perfect sound.
Showcase is selected by default. Let’s also select Synth, Complex and Delicate too. This narrows our search down to a single result, so double-click the remaining preset name, Capsules, to load it up.

At the top of Circular’s interface you’ll see it says A Minor, which is the instrument’s current scale setting. We can change this by clicking it. Set the key to C and the mode to Major.

Now we’ve set the scale to C Major, and any notes that we play that aren’t in the scale will automatically be snapped to it.
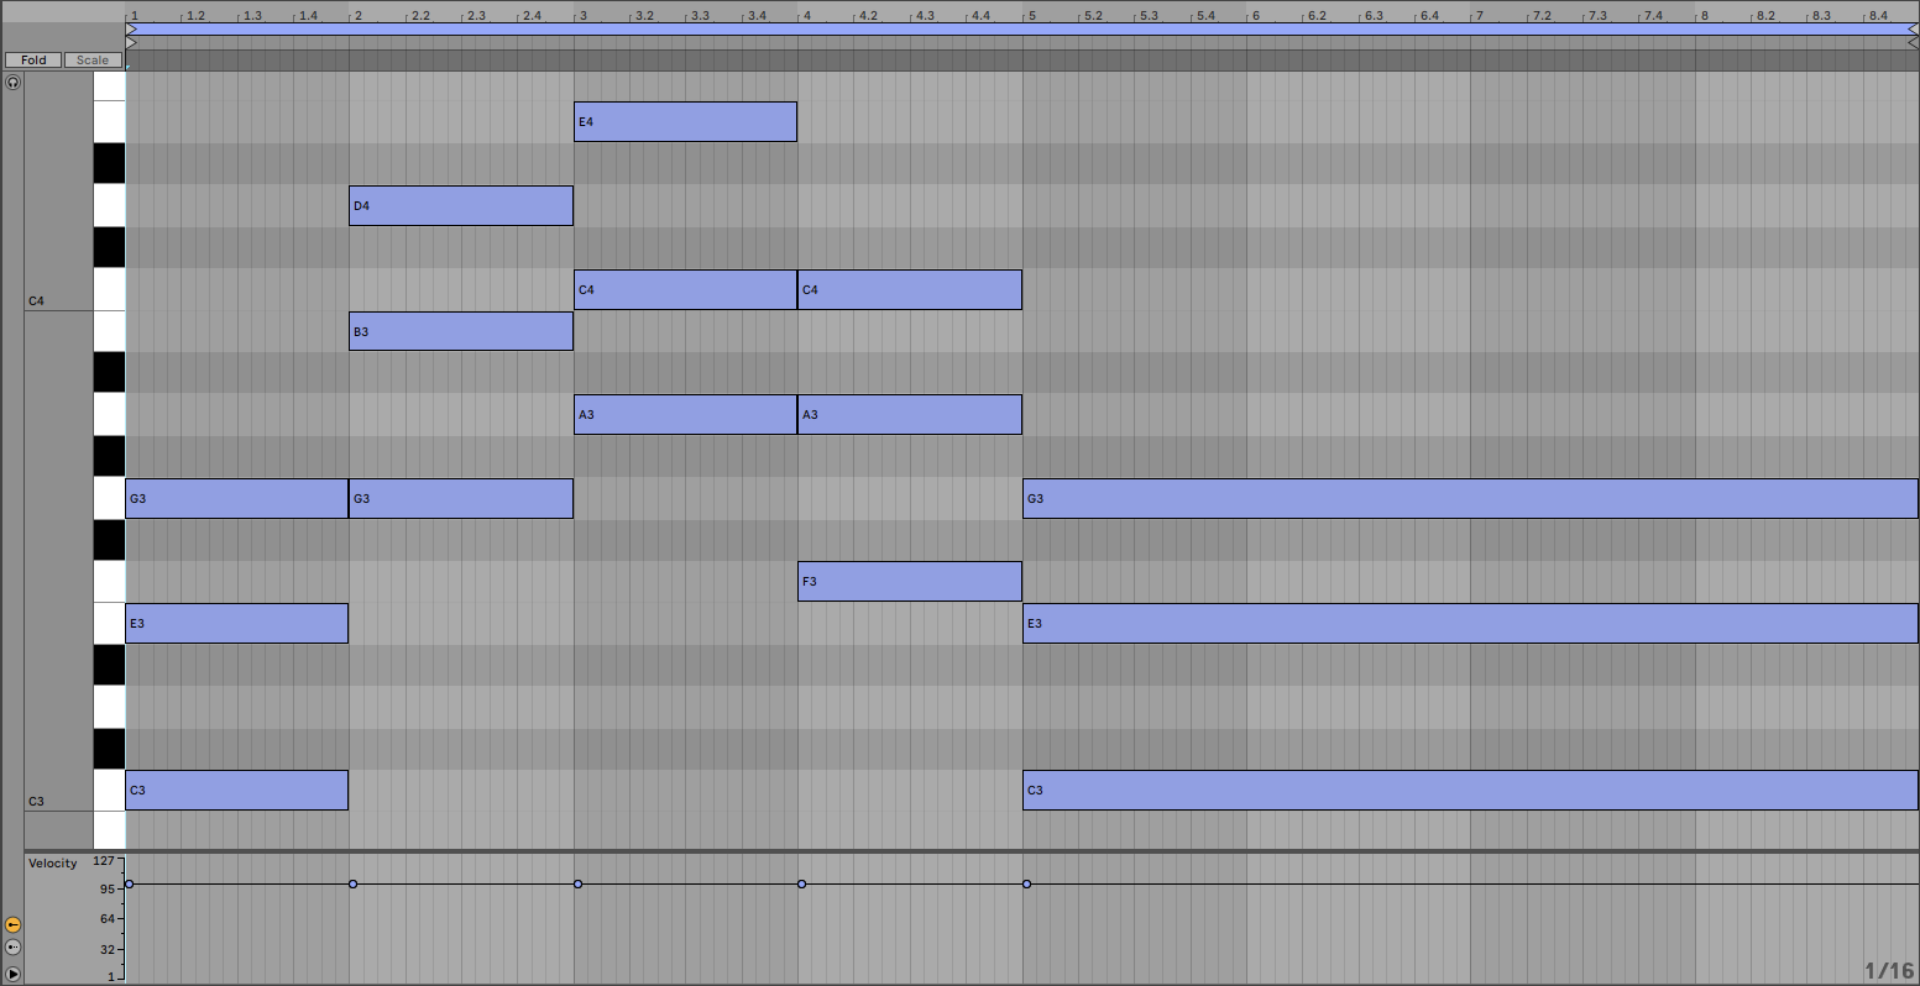
Let’s use the Capsules preset to play a chord progression. Copy the chord progression we’ve sequenced here which plays Cmaj, Gmaj, Amin, Fmaj, and Cmaj.
Increase expression with polyphonic aftertouch
To get the most out of Circular it’s recommended to play it with a MIDI controller that supports polyphonic aftertouch such as Native Instruments’ Kontrol S-Series. Circular presets can use the polyphonic aftertouch controller values for each note to affect various parameters, making for a more expressive playing experience.
Using this functionality is as simple as using aftertouch when recording your MIDI parts in, but if you don’t have a MIDI controller with polyphonic aftertouch capability you can still add polyphonic aftertouch as long as your DAW supports it.
Here’s an example of a C major chord playing the Capsule preset with polyphonic aftertouch.

You can view and edit the amount of aftertouch modulation in the Mod Assign panel at the bottom right-hand corner of the Sequencer page. This can be viewed by clicking the word Sequencer at the top right-hand corner of the interface.

You can see the polyphonic aftertouch level in real time by clicking the Modulate button at the bottom left-hand corner of the interface. The current polyphonic aftertouch level is visible in the Shaper panel.

Let’s learn more about the Sequencer page by creating our own patch.
Create your own patch
In the browser, deselect any active tags and double-click the Lo Life preset to load it up.

Open the Sequencer page and you’ll see that only two of the four layers are currently active. Click the coloured power button on the second layer to deactivate it.

Now the only part of the preset active is the first layer, and we can see that the sequencer mode below the Big Pad layer is set to No Sequencing. This means only the first step of the sequencer is used.
In the Sound Lane we can see that this step is set to the Bowed Texture B sound source, and in the Parameter Lane we can see that the Unison 4 and Gater Level 50% Step FX are active on this step.

Change the sequencer setting by clicking on it, and select Poly: Quant to first.

Now when we play the patch back, we can see and hear the sequencer has been activated. You’ll notice that the first step of the sequence sounds different to the rest, because it uses a different sound source and has step FX on it.
Click the second step to select it, and click the Sound button at the bottom left-hand corner of the interface to bring up the sound selection page.

In the Sound Preset panel, you can choose a new sound for this step. Click where it says Felt Upright, and select Electra Strings instead.

Now when you play a note, you’ll hear Electra Strings play after Bowed Texture B.
Currently this layer loops after 8 steps. Click bar at the top of the Step Lane panel, and turn the Loop End Parameter down to 4. The Parameter Lane is set to Link to Sound Lane, so this sets both to four steps.

Set the third step to Artificial Pluck and the fourth step to Soft Waves.

On the third step, click one of the Step FX slots and select Gater > Gater Filter 1/16th.

Playing the note with aftertouch will allow this effect on the Artificial Pluck step to be heard clearly.
Now let’s try adding polymeter. Reactivate the second layer, change No Sequencing to Poly: Quant to First, set the Sound Lane Loop End to 3, and change the Parameter Main playback mode to Link to Sound Lane.
So, now the first and second layer have a loop length of 4 steps and the loop length of 3 steps, and the differing values give us a polymetric effect.
Start using Circular in your music today
Ready to infuse your music with the unique sonic possibilities of Circular? Start exploring its presets, experimenting with tweaks, and unleashing expressive performances with polyphonic aftertouch. Don’t stop there – delve deeper into music production with our articles on sequencers, MIDI generators, and granular synthesis.
Related articles
-
An update from Nick Williams, CEO of Native Instruments
I want to share a direct update on the restructuring process underway here at Native Instruments. Business continues as usual…
-

NI producer spotlight: Women’s History Month 2026
Discover more than 30 women and nonbinary producers – including WondaGurl, Arca, and Tems – who are defining the modern…
-
Learn how Andre Samuel and Daylight kept Mon Rovîa’s Bloodline sounding natural and clean
Learn how production duo Daylight and Andre Samuel used iZotope RX and Native Instruments tools to capture the organic soul…
-

5 of the best vocal plugins for modern music production
Unlock the power of the human voice. Explore five distinct vocal plugins designed to bring emotion and character to every…
-
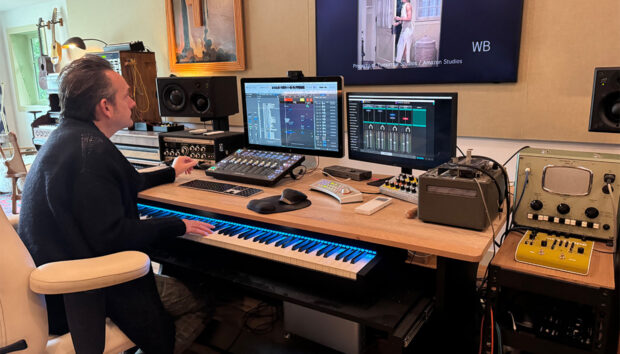
Speed, melody, and instinct: Will Bates on composing for streaming with Kontakt
Will Bates explains how Noire and Kontakt helped him score 'The Better Sister' with speed, emotion, and precision for Prime…
-

Best drum synths for electronic music
Discover the best drum synth VST plugins for electronic music. From professional sound design in Massive X to creative layering…
-
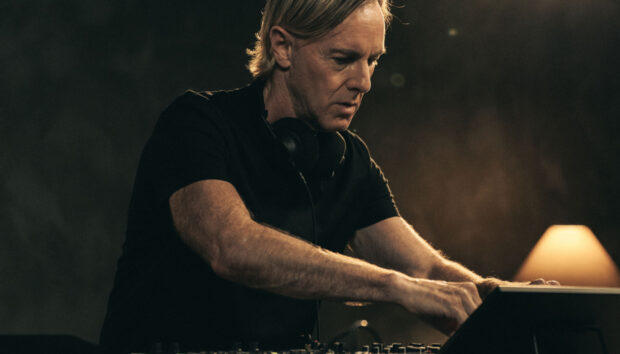
Richie Hawtin: deconstructing the dancefloor with Traktor
Go behind the scenes with Richie Hawtin to see how he uses Traktor, analog mixing, and live sequencing to create…
-

How Nova Wolf finds humanity in loudness with Ozone
Nova Wolf explains how iZotope Ozone helped him master Nomad Tapes: Africa with warmth, emotion, and cohesion, balancing intensity with…