


Granular synthesis is everywhere these days. Ethereal granular effects define the sound of modern film and video game scores, and help electronic musicians push the boundaries of their genres. Granular processing underpins the time-stretching tools found in DAWs and samplers, and it’s crucial to digital DJing. But this unusual synthesis method is often poorly understood.
So what is granular synthesis exactly? And how can you use it in your own music? In this article, we’ll go deep on granular synthesis. We’ll explore the technology and history behind granular synths, and explain their key parameters and use cases. Then we’ll show you how to use granular synthesis in your own music. Read on and you’ll soon be turning humble samples into swirling, futuristic soundscapes.
Jump to these sections:
- What is granular synthesis?
- The history of granular synthesis
- Why use a granular synthesizer?
- Common granular synthesizer parameters
- How to use granular synthesis
Follow along with the STRAYLIGHT granular synthesizer from Native Instruments.
What is granular synthesis?
Granular synthesis is a form of synthesis based on a process called granulation. Granulation involves breaking down an audio sample into tiny segments of audio called “grains,” typically between 1 and 100 milliseconds in length. A granular synth allows the user to manipulate these grains, transforming the original sample in weird and wonderful ways.
Granulation has numerous uses in modern audio processing. When you timestretch a sample in your DAW, or change a song’s playback speed without altering its pitch in DJ software like TRAKTOR, you are probably using granulation. Granular synthesis foregrounds the creative possibilities of granulation, allowing you to transform familiar samples into out-of-this-world soundscapes and effects.
Granular synthesis vs. conventional synthesis
To understand a little better how this works, let’s compare granular synthesis to more conventional forms of synthesis. The likes of subtractive, additive, and FM synthesis start with an oscillator that generates a waveform (like a sine or sawtooth wave). By contrast, granular synthesis works with existing audio material.
Some granular effects might process a live signal, slicing incoming audio into grains before playing it back. But many granular synths require you to load samples into them in advance: a recorded piano note, perhaps, or the sound of church bells.
How does this sample form the basis for synthesis? First, the granular synth breaks down the sound into numerous tiny snippets, or grains. In a simple form of granular synthesis, when you play a note, the synth will play back one of these grains, looping it hundreds or thousands of times per second. In place of a sine or sawtooth wave, this tiny chunk of audio effectively becomes a waveform: the building block of the sound you hear.
Granular vs. wavetable synthesis
In this regard, granular synthesis is a form of sample-based synthesis, much like wavetable synthesis. But they’re not exactly the same.
A wavetable synth gives you a fixed “table” or set of sampled waveforms to choose form. Beyond this, your control over the building blocks of the sound are fairly limited. Granular synthesis offers many more possibilities.
Our example above, where a single grain is played back on its own, is rare. More often, a playhead will be moving through the source sample, playing back different grains over time. On top of that, it’s possible to play multiple grains at once, play them at different speeds and volumes, and change many other parameters—all on the fly.
This makes your average granular synth a powerful sound sculpting tool that can do things a humble wavetable synth can only dream of.
The history of granular synthesis
Granular synthesis is considered a latecomer to the synthesis game, but its roots go back decades. The theory was laid out in the 1940s by physicists like Dennis Gabor, who suggested that sound could be broken down into tiny building blocks. The idea was taken up by the Greek composer Iannis Xenakis, who was making music out of grains of sound by the late 1950s.
However, granular synthesis was not well suited to pre-digital technologies. Xenakis worked by slicing magnetic tape into tiny pieces and rearranging it. It could take him weeks to finish a composition.
In the 1970s, the composer Curtis Roads attended a seminar by Xenakis and tried to implement his idea on a computer. (Roads went on to write the bible of granular synthesis, Microsound). In the ‘80s, Barry Truax worked out a way to implement granular synthesis in real time.
The intense processor demands of granular synthesis kept it a niche pursuit until well into the ‘90s and 2000s. Accessible tools like Max/MSP and Native Instruments’ REAKTOR sparked new interest in the method. In the new century, granular synthesis has taken its seat at the synthesis table, with a host of popular granular synths shaping developments in sound design, electronic music, and film scoring. Granular synthesis is now a unique and important type of synth VST that you can use in your productions.
Why use a granular synthesizer?
As we’ve seen, granular synthesis is a peculiar beast. It works differently to most other kinds of synthesis, and produces very particular results. So why—and when—should you use it?
There are a few situations where granular synthesis really excels. Let’s take a look at some of them.
Create ambient textures
Delicate atmospheres and drones are crucial to modern music-making, from underscoring for films and games to ambient electronic music. Making these otherworldly textures can take a lot of sample manipulation and processing. But with granular synthesis, we can transform a simple sample into an ambient drone with the twist of a few dials.
In this example, hear how a pizzicato (plucked) cello sample is transformed into a rich ambient texture using granular synthesis.
Glitchy sounds
Granular synthesis is great for smooth textures, but it’s equally good at chaotic, glitchy sounds. By boosting “jitter” settings (which introduce randomness into the synth’s behavior) and playing with parameters on the fly, a conventional sound can be turned into a cloud of buzzing grains—perfect for sci-fi sonics and avant-garde electronica.
Evolving pads
Movement is the key to expressive sound design. When sounds develop over time, we tend to hear them as being “more alive.” Granular synthesis is well suited to this. By changing the behavior of grains in real time, we can radically transform sounds in a smooth, musical way.
In this example, the ambient texture from earlier has been turned into a flickering, evolving pad.
Unique digital sounds
The distinctive nature of granular synthesis means it can do things that are tricky or impossible by other means. Modern granular synthesis is a technology of the digital age, and it can produce futuristic and uncanny sounds. Much contemporary audio wouldn’t be the same without it.
In this example, grain pitch is manipulated to create an unusual glissando-like effect.
Common granular synthesizer parameters
Now you know what it is and what it’s for, let’s take a detailed look at your granular synth.
There are many plug-ins out there that use granulation. Their controls and capabilities can vary widely, so it’s worth exploring the specific tool you’re using. But a few controls are present in most granular synths.

Grain size
Grain size controls the length of the individual grains being produced. This is sometimes called grain length or duration. Shorter lengths result in a chopped-up, fragmented sound. Longer grains will start to overlap with one another, for a smoother effect.
Number of grains
This is the rate at which grains are played. Sometimes this is called grain rate, density, or distance. In STRAYLIGHT it’s called grain interval. At a high number of grains, your synth will spit out clouds of overlapping material. Fewer grains will lead to a sporadic and stuttering sound.
Sample start and end boundaries
This defines the part of your sample that the granular synth should process. Perhaps you want to isolate one piano note in a performance, or focus on a single sound in a field recording. If you set the start and end boundaries (or, in STRAYLIGHT, the min and max knobs) around this area, the granular synth will only produce grains from this part of the sample. This can also be called grain position or range.
Envelope
The grain envelope sets the fades at the start and end of each grain played. (This is sometimes called grain shape or “smoothing.”) Imagine each grain is a single sample being played back, or a single region of audio in your DAW. With short envelopes, playback of the grain will start and stop abruptly. With the envelope setting turned up, the grain will fade smoothly in and out. Smoother envelopes create a creamy, consistent sound. Turn the envelope down for a choppy effect.
Pitch
Pitch, or transposition, sets the pitch of each grain relative to the original pitch of the sample. For instance, a pitch of +12 semitones will cause the grain to play back an octave higher than the original sample. Experiment with very high or low pitch settings for unreal effects.
LFO
As with many synths, granular synthesizers offer additional modulation tools to add movement to your sounds. One such modulator is an LFO, or low frequency oscillator. An LFO outputs a signal that undulates between high and low (or positive and negative) values. By assigning the LFO to a parameter in your synth (like grain size, for example), you can cause this parameter to change its value over time. Modulators such as LFOs are essential for creating lifelike sounds.
Jitter
Jitter, or randomness, controls the amount by which a certain parameter deviates around a central value. For example, you might have pitch set to +12 semitones. If jitter is turned up, then each grain will deviate a random amount above or below +12. The higher the jitter setting, the greater the deviation.
Granular synthesizers offer jitter controls for various parameters. For example, in STRAYLIGHT, there is a jitter knob to control playback position, and a detune knob determining pitch jitter. Jitter is at the heart of many trademark granular effects. Use it to turn stable sounds into agitated clouds of grains.
How to use granular synthesis
Now that you know granular synthesis inside and out, it’s time to start making your own granular sounds. Let’s take a look at some basic approaches for creating granular synth patches.
Working in STRAYLIGHT, we’ll revisit some of the granular synthesis examples listed above, offering a step-by-step guide to creating ambient textures, glitchy sounds, and evolving pads.
Ambient textures
Here’s how to make a smooth ambient texture using granular synthesis.

Let’s work from a blank slate. Find the INIT patch in the preset finder under “Utilities.”
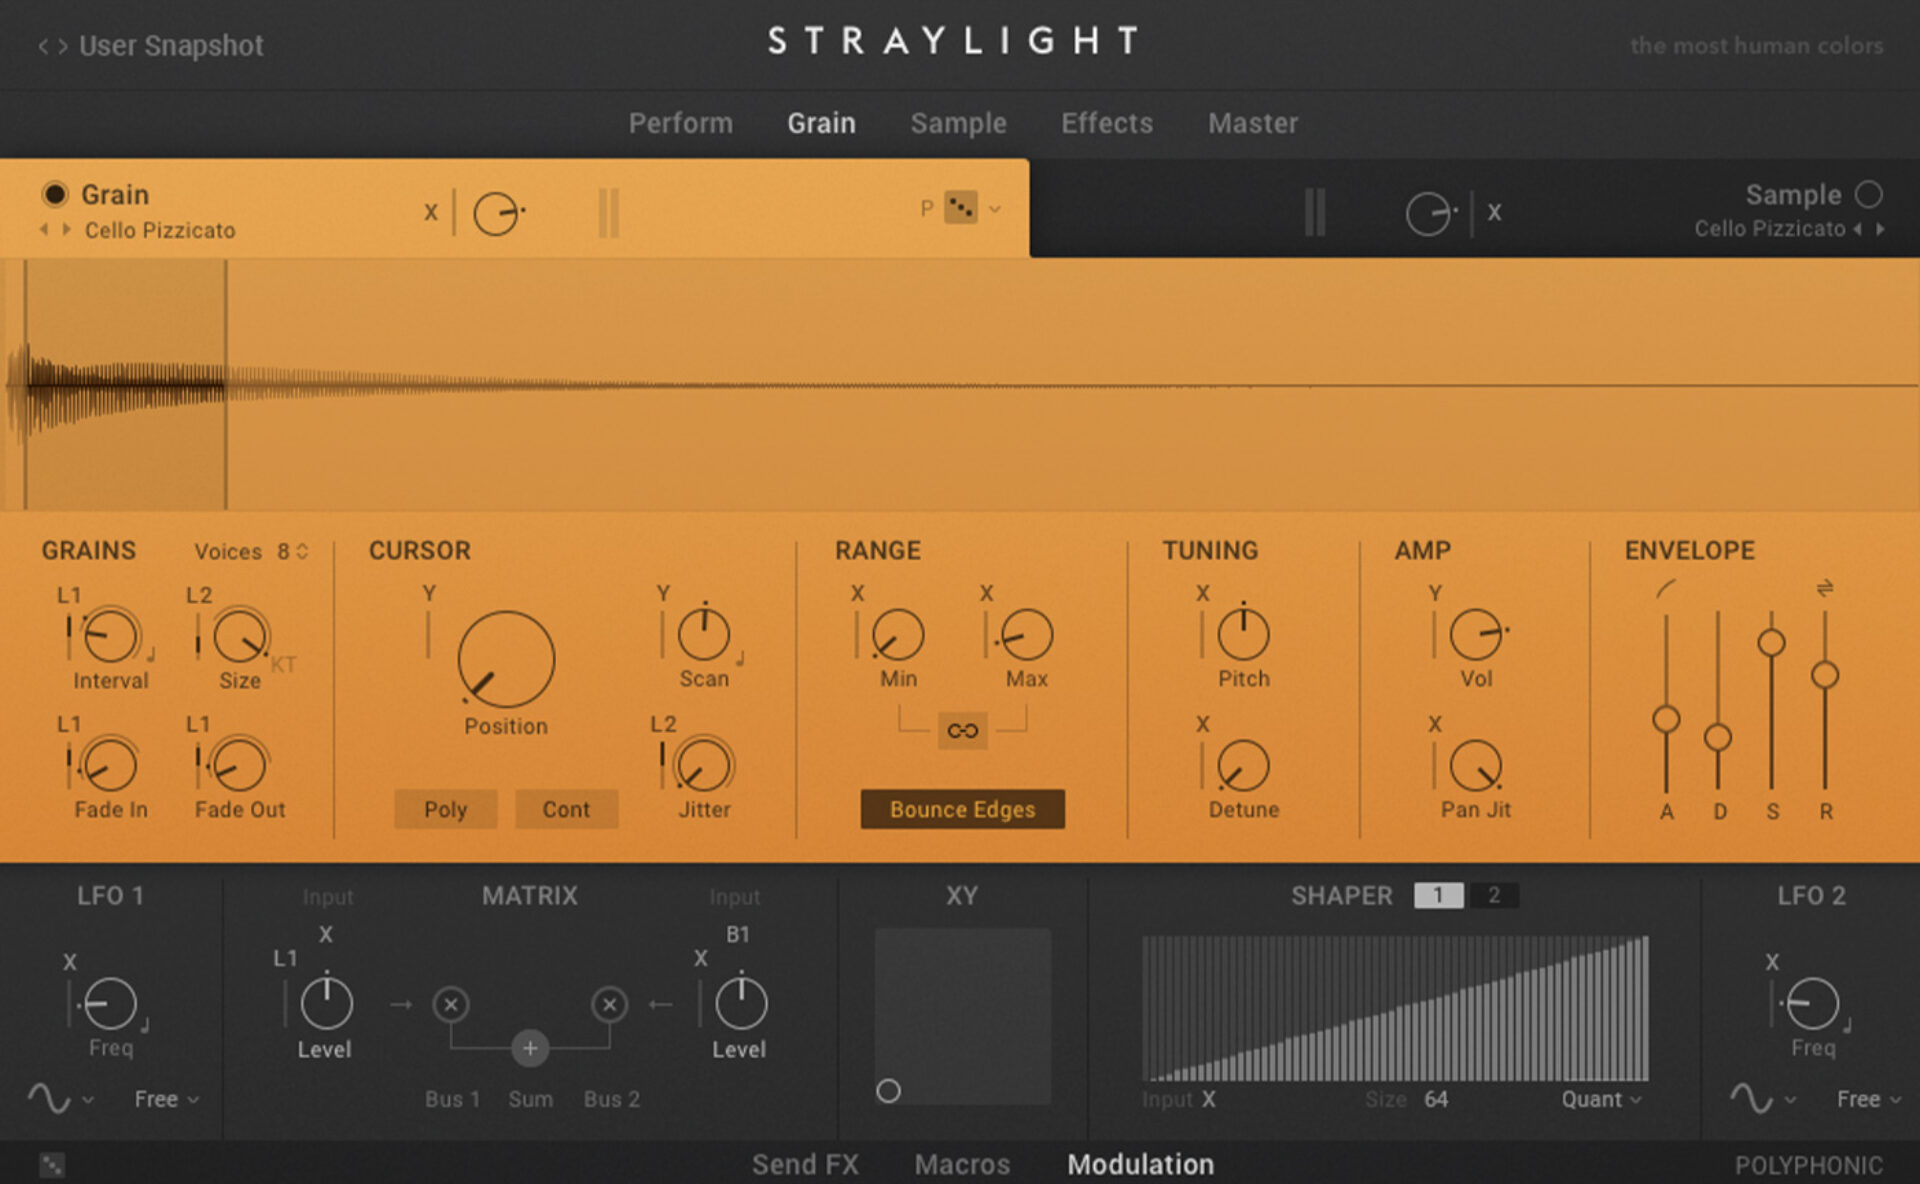
Choose a simple sample with a rich, inviting quality. We’ve gone for a pizzicato (plucked) cello note.
We don’t want any silence in our sound, so use the sample range controls to isolate the main body of the sound. Adjust the min and max knobs to capture the loudest part of the waveform. With “bounce edges” switched on, the playhead will rebound back when it reaches the end of this range, creating the impression of sustain.
Now set the grain envelope (fade in and fade out). A medium setting should keep things smooth.
Turn grain size up to around 600ms and the grain interval down to around 40ms. A large grain size and a high grain density (or low interval) will cause the grains to overlap, creating a diffuse texture.
In the cursor section, turn up the jitter knob halfway. This causes the playhead to jump around the sample with each grain, further obscuring the contours of the original sample.
Now adjust the synth’s amplitude envelope. We want to create a pad-like sound, so go for a slow attack and release, and maximum sustain.
Here’s how it sounds.
Glitchy sounds
Here’s how to use extreme granular synthesis to create angular, glitchy effects.
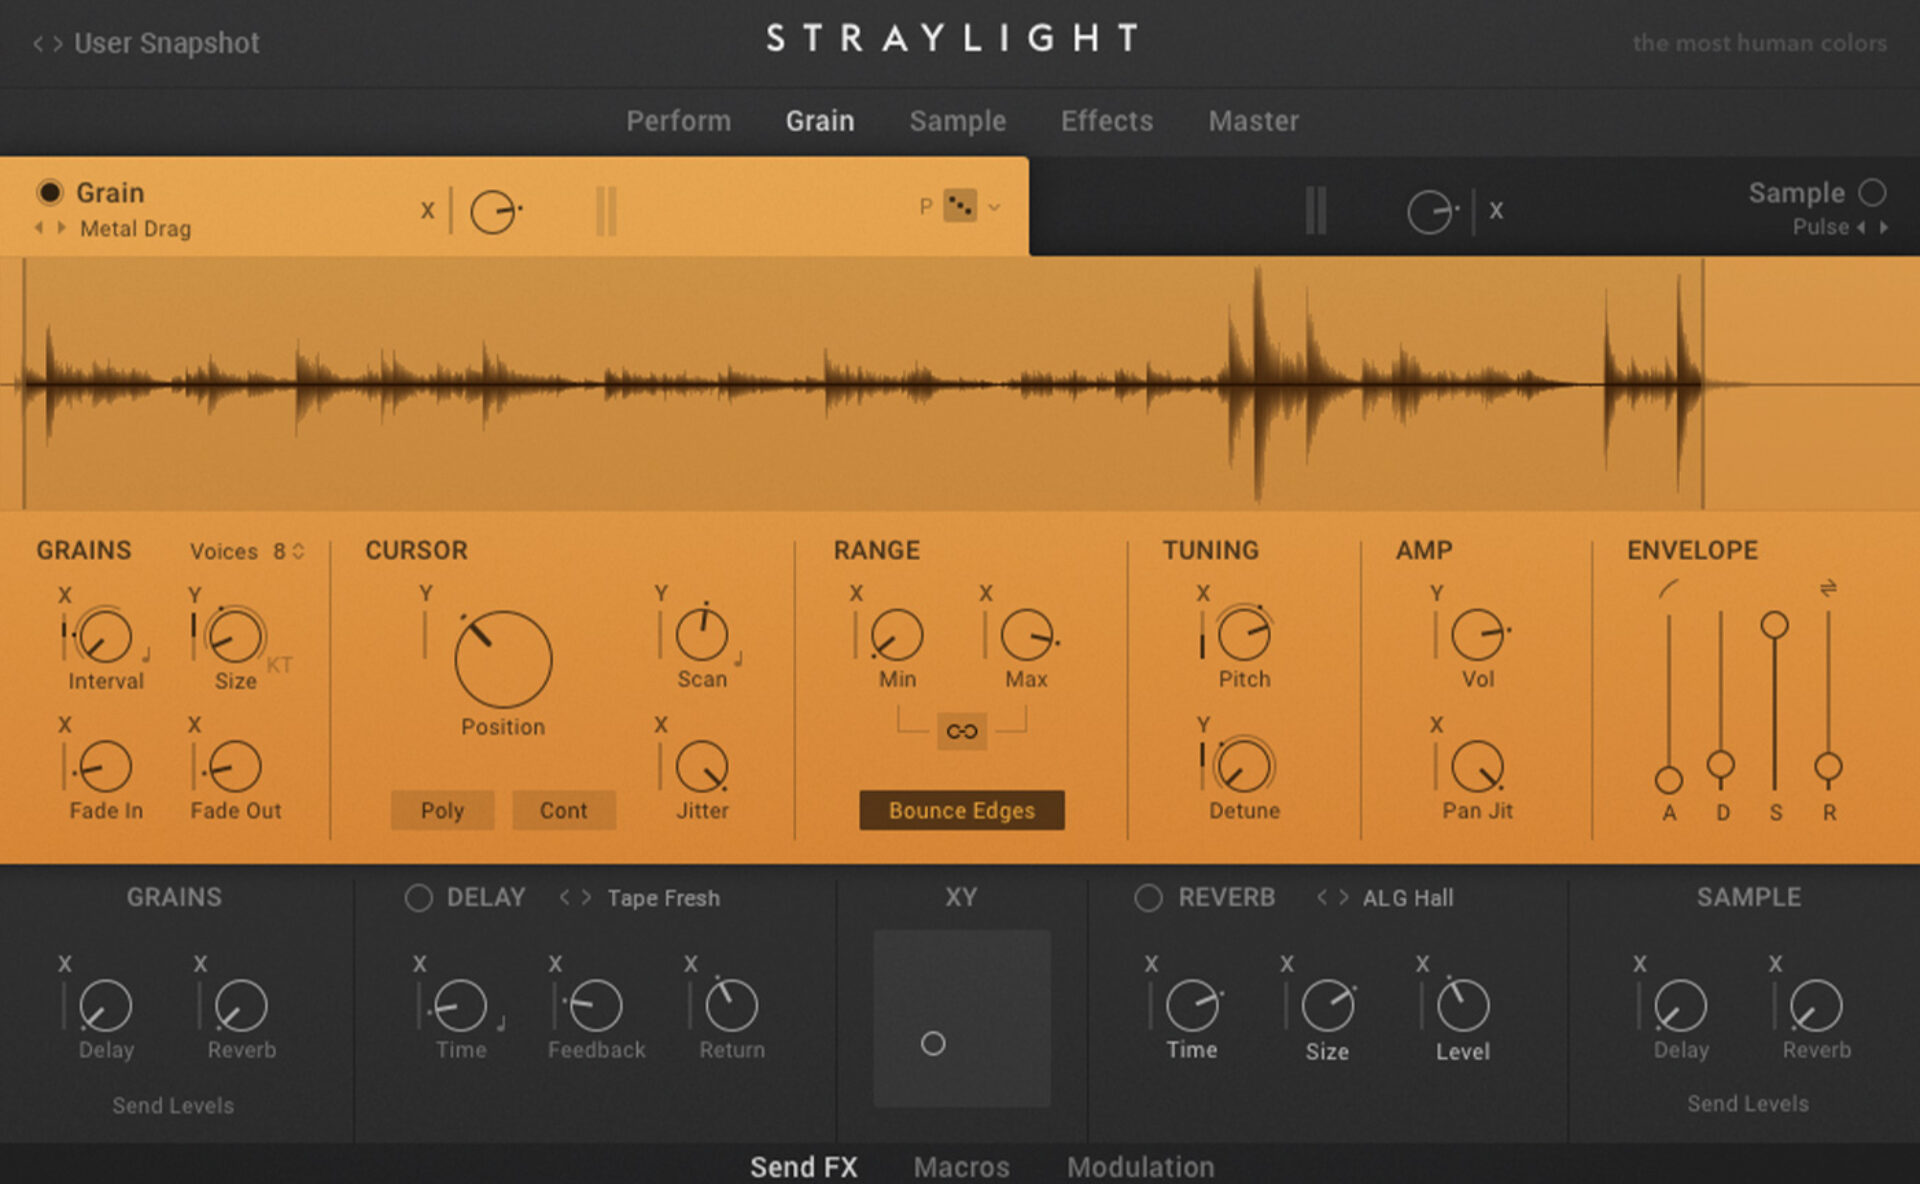
Start with a fairly chaotic sample, without a consistent pitch or texture. We’ve gone for “Metal Drag,” from the STRAYLIGHT sample library.
This time, don’t touch the sample range (min and max) knobs. We want to process the whole sample.
Our grain settings should be anything but smooth. A low envelope setting (turning the fade in and fade out knobs to the left) and small grain size will create an angular effect.
Let’s accentuate the chaos by causing the playhead to jump around the sample. In the Cursor section, turn up the jitter to maximum.
Now we need movement in our sound. Let’s assign some parameters to Straylight’s XY control pad so that they can be tweaked live during playback.
First, assign grain interval to the X axis of the pad. Click on the letter to the top left of the grain interval knob and select “X XY Pad.” Then, in the vertical column below, drag upwards to extend the modulation range.
Do the same for grain size, but with the Y axis of the pad.
Let’s do the same assignments for grain tuning. Assign the pitch knob to the X axis of the pad, and the detune knob to the Y axis. Play around with the modulation range (by dragging up or down on the column to the left to the knob) until you have something that feels fun and dynamic.
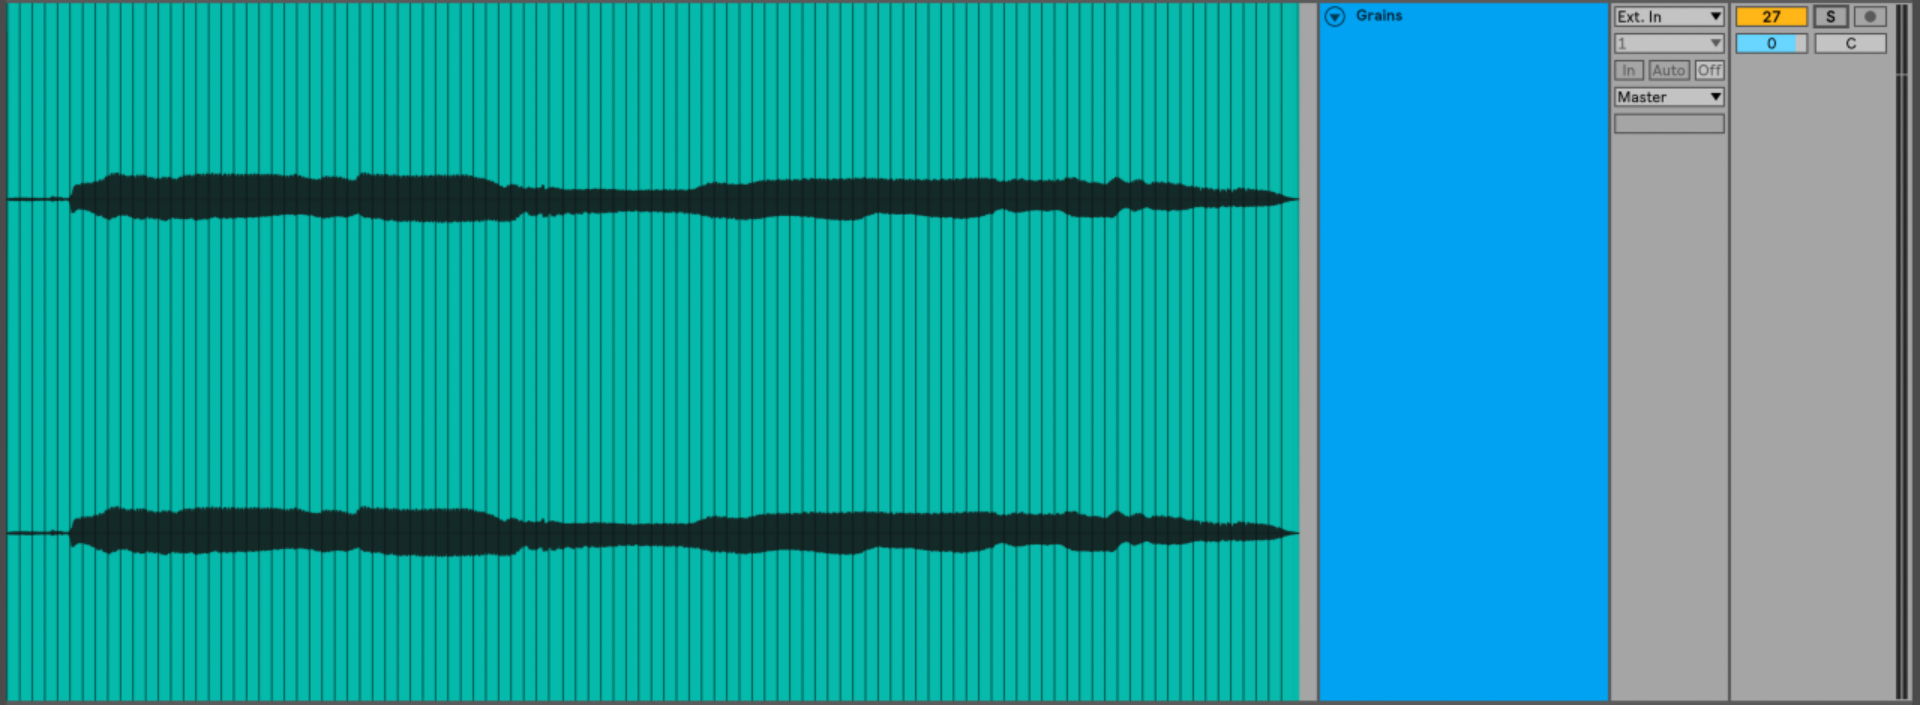
Finally, route STRAYLIGHT into another channel so that you can record its output. Hit record and scrub around the XY control pad to find interesting sounds.
Here’s how it sounds.
Evolving pads
Let’s turn our ambient texture from earlier into a dynamic, evolving pad. Here’s how.
Start using granular synthesis in your music
In this article, we’ve gone deep on granular synthesis. We looked at the technology behind it, explored its history, and examined the parameters found in your granular synth. Then we demonstrated some creative granular synthesis approaches. Now it’s time to start making your own granular sounds.
STRAYLIGHT is a powerful granular instrument for cinematic and ambient sounds. Use it to give your music a bold, futuristic twist.
Related articles
-

Where will your sound lead you? Explore the Native Instruments Summer Sale
Save 30% on instruments, effects, and sounds in our Summer Sale. Find the tools to keep your tracks moving and…
-

How Mr. Bill builds sonic worlds in Massive X
Mr. Bill explains how Massive X and instinctive sound design shaped the storytelling process behind his new downtempo album, Mr.
-

How Father Funk builds low-end energy with Kontakt instruments
Father Funk breaks down how bass instruments in Kontakt power the low-end muscle and live feel behind his new record,…
-

Nick Hook and Sascha Bühren on the art of the professional workflow
Discover how industry veterans Nick Hook and Sascha Bühren master the art of organized chaos using Komplete 26.
-

St. Mary on translating emotion into production with Kontakt and Guitar Rig
St. Mary breaks down the production of her debut EP Amen, using Kontakt and Guitar Rig to balance chaos, emotion,…
-

Malibu Babie and Shy Boogs on high impact production
Discover how hitmakers Malibu Babie and Shy Boogs use Komplete 26 to push production boundaries. Learn their secrets for high-impact…
-

An announcement from Nick Williams, CEO of Native Instruments
To our friends, artists, partners, collaborators, and community: After three months of hard work, and three months of extraordinary loyalty…
-

Beyond the grid: building sonic worlds with Ex.sses, Hezen, and Ikävä Pii
Discover how Ex.sses, Hezen, and Ikävä Pii use Komplete 26 to turn the DAW into a canvas. Learn their secrets…