


Drum and bass is a fast-paced style of dance music that evolved out of the UK hardcore rave scene in the early 90s filled with energy and an intensity that is still produced today. In this guide, we’ll explore what drum and bass music is, its origins, and how to make drum and bass music step-by-step using some of the best production tools available. Learn how to craft intricate drum patterns, deep and powerful bass lines, and signature drum and bass sounds that can sound like this:
Jump to these sections:
- What is drum and bass music?
- What defines drum and bass?
- Is drum and bass EDM?
- How to create drum and bass music
In this walkthrough we’re going to use Native Instruments Komplete Kontrol, Battery 4, Massive, Massive X, Monark, Raum and Replika XT plus the new Rolling Tides Expansion along with iZotope Ozone to create a drum and bass track from scratch.
What is drum and bass music?
Drum and bass (often abbreviated as D&B or DnB) is a genre of electronic music that originated in the United Kingdom during the early 1990s. Early drum and bass, also known as jungle, revolved around sped up breakbeats, heavy bass lines, and atmospheric samples.
As drum and bass developed, producers began using programmed one-shots drums alongside or instead of jungle breakbeats, and incorporating more synthesized elements.
In the 21st century, drum and bass continued to evolve and develop new subgenres. Popular styles include the abrasive jump-up, technically complex neurofunk, and soul-inspired liquid funk.
What defines drum and bass?
Drum and bass is a dynamic genre of electronic music, characterized by its rapid tempo, typically ranging between 160 and 170 BPMs. This genre prominently features sped-up funk and hip-hop breakbeats, although it also embraces the incorporation of synthesized one-shot drum sounds in lieu of, or alongside traditional breaks.
The musical influences that inform drum and bass are diverse, drawing inspiration from genres such as funk, soul, jazz, reggae, dub, techno, hardcore rave, metal and hip-hop amongst others.
Is drum and bass EDM?
Drum and bass is undoubtedly a style of “electronic dance music,” but the term “EDM” has connotations of being synthetic and aggressive with a commercial sensibility.
While this is true of many drum and bass subgenres, there are many styles that are “deeper” and more thoughtful. These include atmospheric drum and bass, autonomic drum and bass, and liquid funk.
How to make drum and bass music
Now that we have an understanding of what drum and bass music is, let’s dive into how to create drum and bass music.
1. Create a drum beat
Start by setting your audio editing software’s project tempo to 174 BPM.

Load up Komplete Kontrol on a new MIDI track, and click the Loops button.
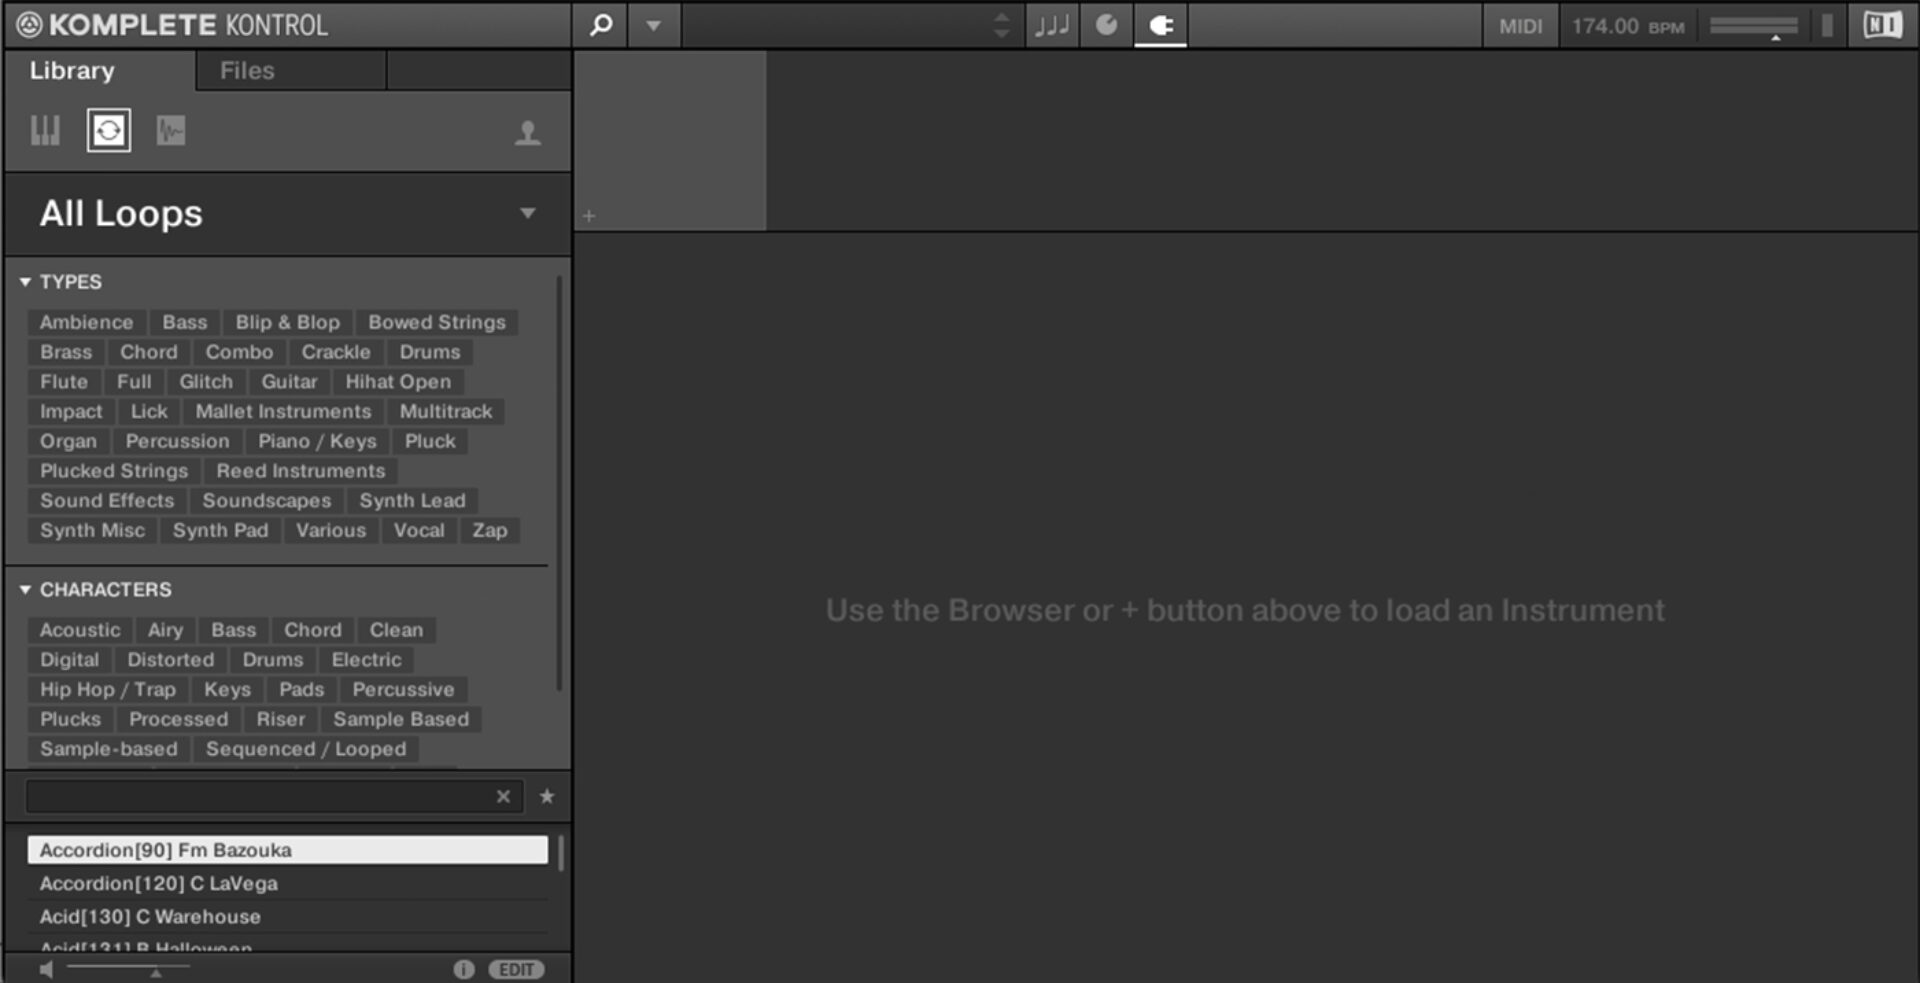
In the text search field, search for “jazzysouls”. If you have the Rolling Tides expansion installed, Break[174] JazzySouls will appear in the search results. Double-click the loop to load it up.
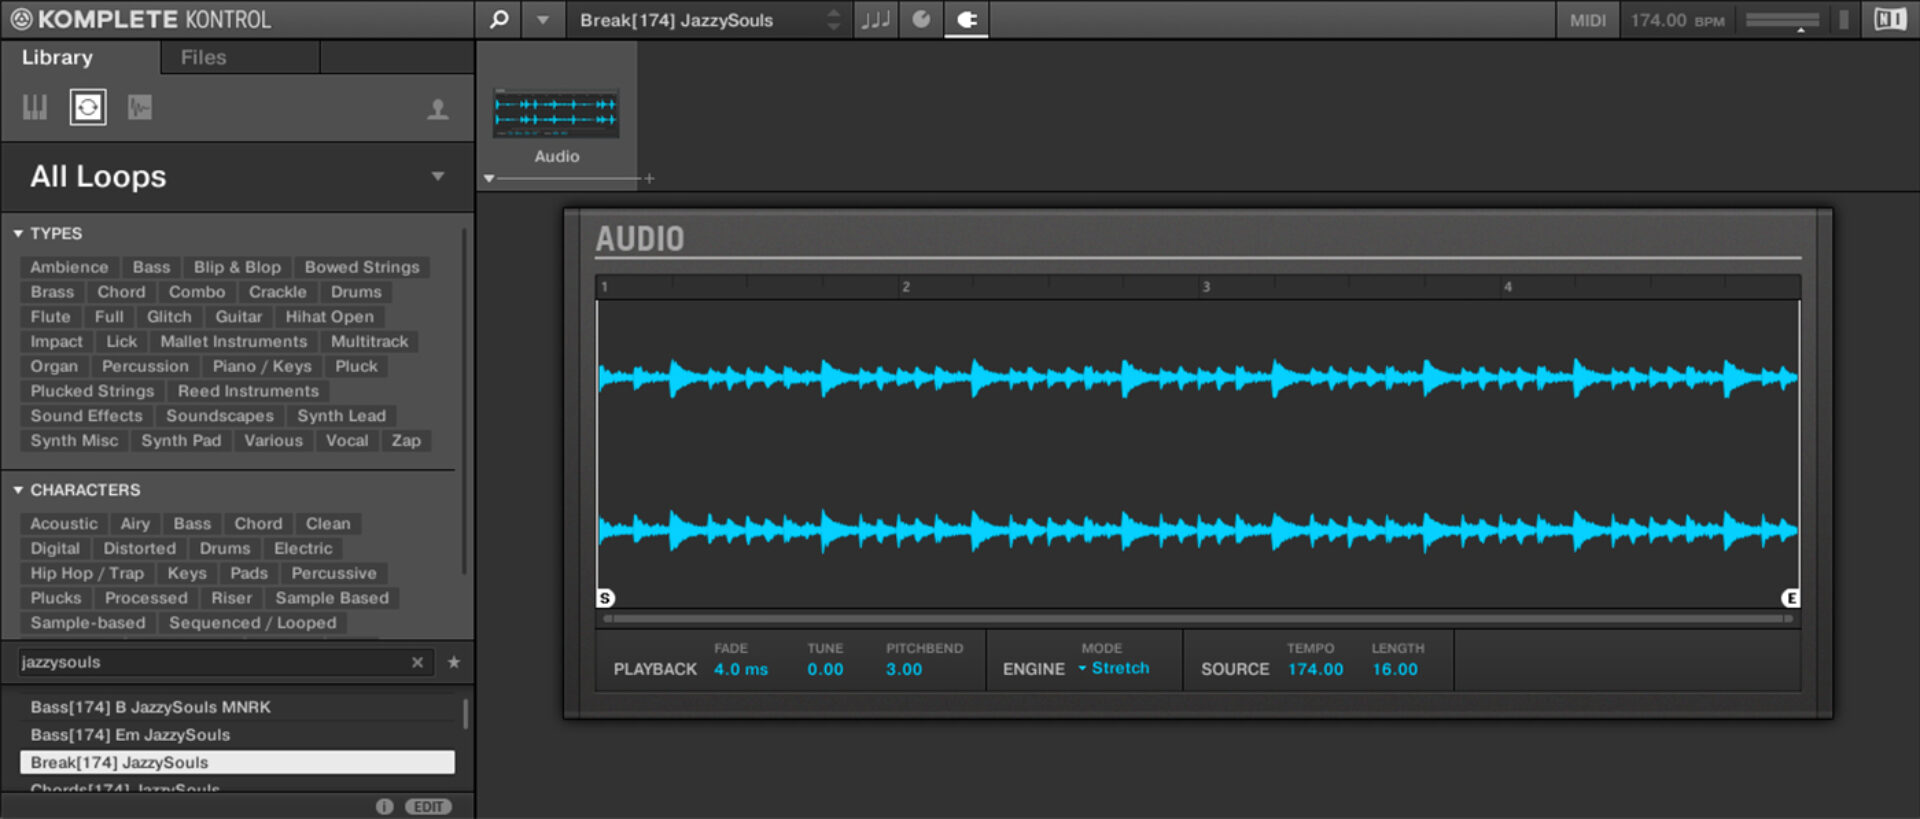
Sequence this loop to play a C3 note for four bars.

This breakbeat loop gives us that classic jungle feel, but to get a contemporary drum and bass sound we need to beef it up with some one-shots.
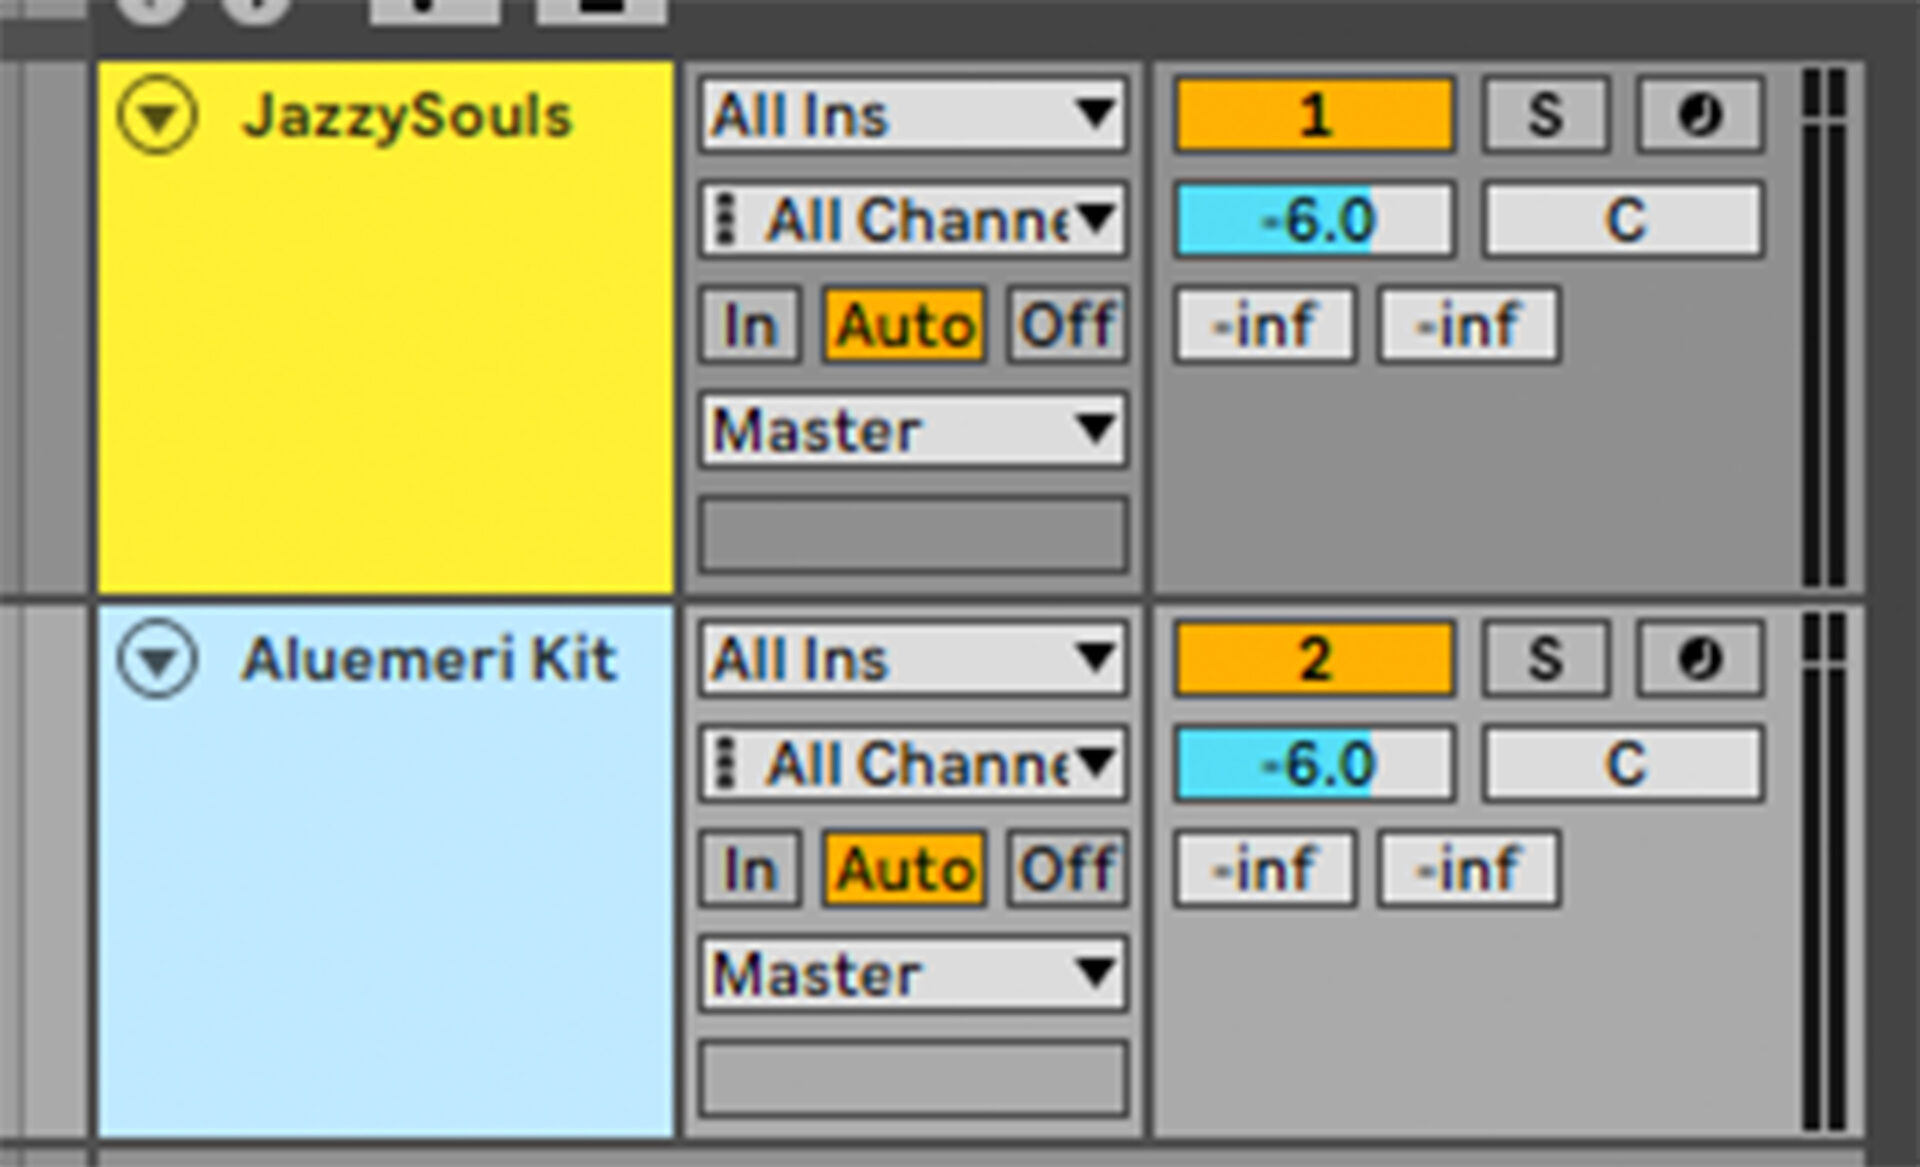
Before we add the one-shots, turn the JazzySouls track down to -6 dB to give us more headroom in the mix to add other elements.

Add another Komplete Kontrol track, and this time search for Aluemeri. Double-click the Aluemeri Kit to load it up.

Set this track to -6 dB too.
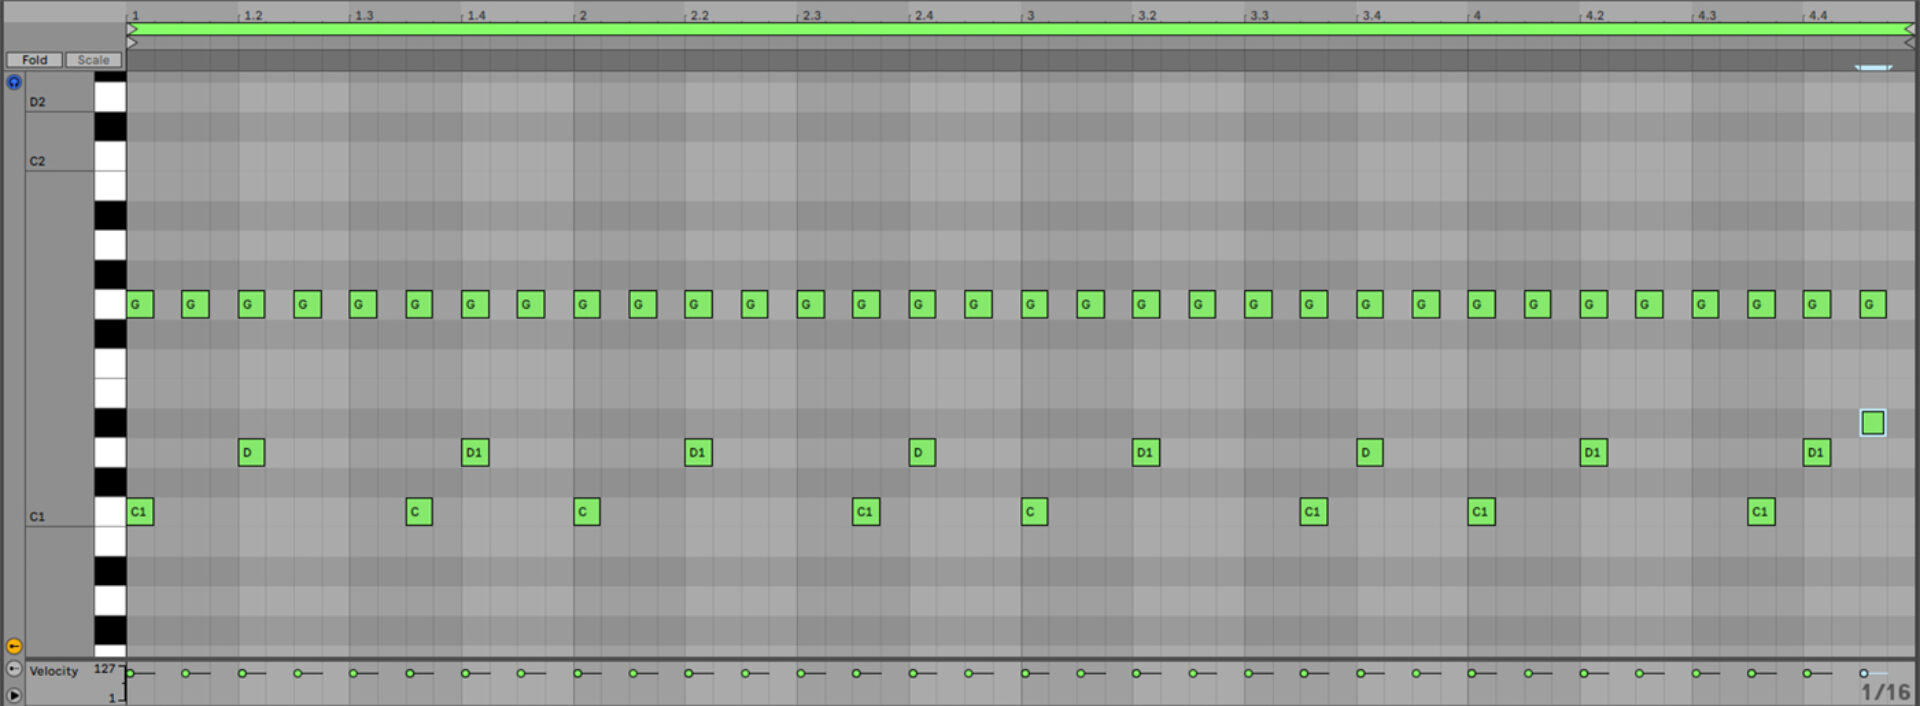
We’re now going to program a drum beat with this kit to beef up our track’s drums. First, sequence D1 snares on the second and fourth beat of a bar. We’re going to use velocity values of 100 for everything in this tutorial.

Now add C1 kicks on the first and sixth 8th notes.
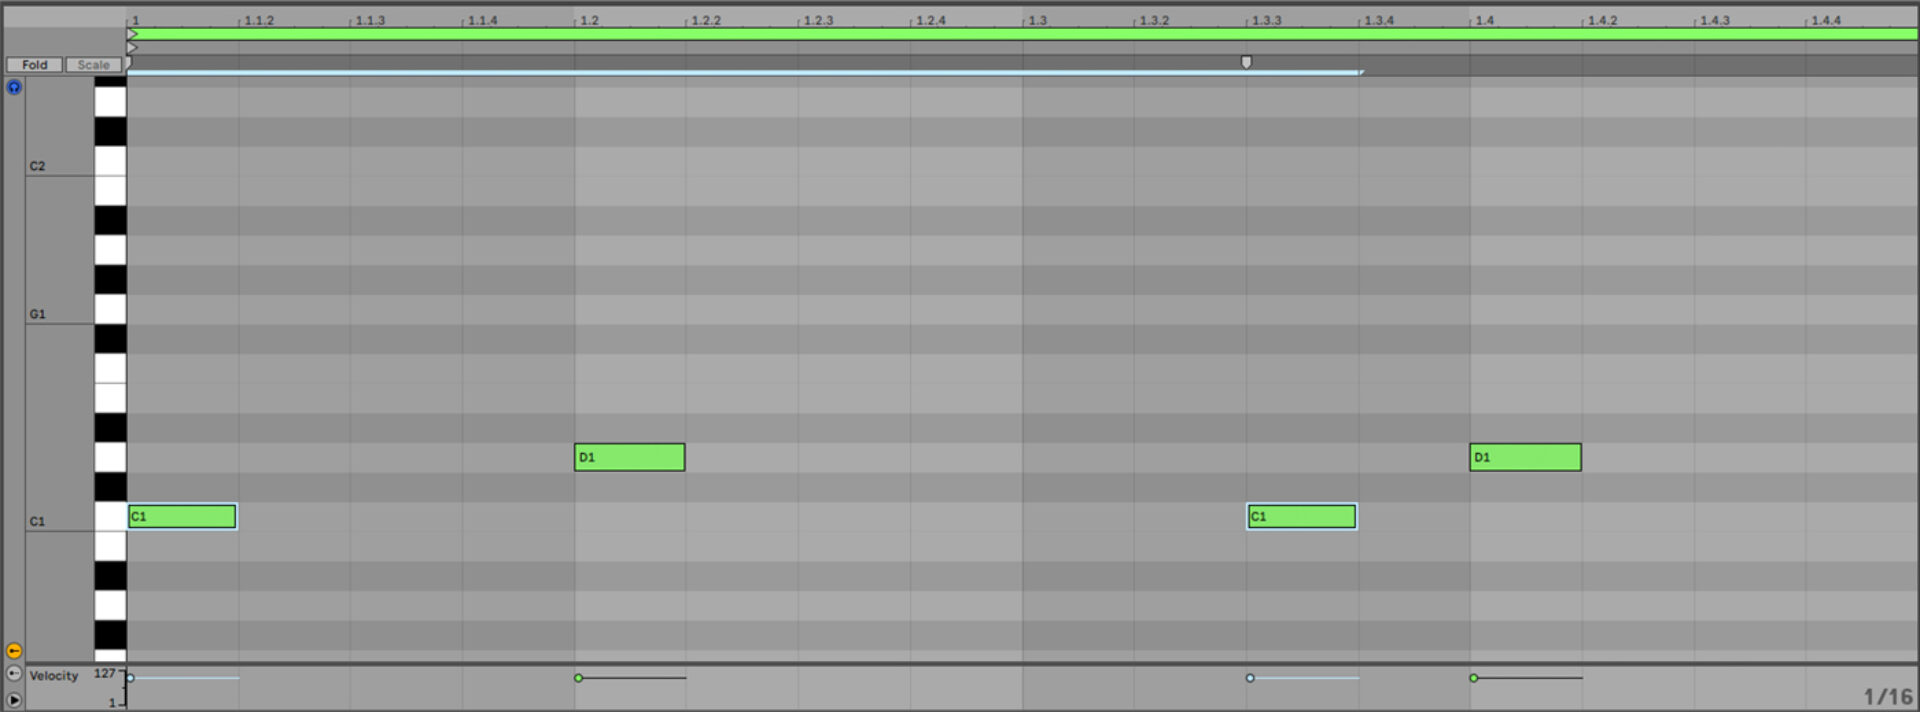
Now add G1 shuffles on every 8th note.

Duplicate this bar out for four bars, and add a D#1 snare on the final 8th note.
When we play the Aluemri Kit along with the JazzySoul breakbeat, they work well together because we’ve chosen sounds that sit together nicely in the mix, and we’ve programmed a pattern that complements the break.
2. Craft a musical idea
Let’s find a sound that will give us a musical foundation for our track. Add another Komplete Kontrol track, and this time click the triangle next to where it says All Instruments.

Click Massive in the Synthesizers section.

Now click where it says All Banks and select Rolling Tides from the list.

You can click each of the available presets to load them up. Trying out a variety of sounds is a great way to get inspiration when looking for something to complement a drum part. We’re going to use the Seven Teen preset for this track, so click it to load it up.

Set this track to -7.6 dB.

Copy the MIDI part we’ve used here.

The LFO modulation in this preset doesn’t work particularly well in this context, so let’s adjust it. Click the 6 LFO button to bring up the LFO’s parameters.


Let’s thin this sound out a touch to make more room in the mix for the all-important beats and bass. First, add a filter set to high-pass mode with a cutoff frequency of 200 Hz.

Add Raum after the filter, and select the Factory Presets > Creative > Cosmic Paranoia preset. Turn the Mix down to 20%.

3. Write a bass line
Let’s use the powerful Massive X to provide some bass line inspiration. Load the instrument up onto a new MIDI track, then click the patch name to open the browser, and click the Bass tag. Double-click the Butterherz preset to load it up.

Set this track to -13.7 dB.

Copy the two-bar bass line MIDI we’ve used here, and loop it out for four bars.

This all works together musically, but the Butterherz bass patch doesn’t have that heavy sustained low-end that makes a drum and bass track sound weighty. Let’s remedy that by layering it with a sine sub-style sound.
Before we add that, let’s take the low-end out of the Butterherz patch with a high-pass filter set to 250 Hz.

Now add another MIDI track with Komplete Kontrol on it, and this time search for “touchdown.” Double-click the Touchdown preset to load it up.

Set this track to -6 dB.

Duplicate the MIDI over from the Butterherz track. This weighty sub bass combined with the punchy, high-passed Butterherz synth gives us a composite bass sound that’s both defined and heavy.

4. Add more synths
Let’s flesh out this musical idea with some more synth parts. Create a new MIDI track, load Komplete Kontrol onto it, and click the One-Shots button.

Enter “forsby” into the text search field, and double-click the Chord Cm Forsby one-shot to load it up.

Set this track to -5.3 dB.

Copy the MIDI we’ve used here.

This simple, two-note part helps give the track some extra energy, but it sounds a little dry. Add Replika XT to the track, and set it to the Classics > Classic Ping Pong preset.

Let’s add another synth sound. Add another MIDI track with an instance of Komplete Kontrol on it, and again click the One-Shots button. This time search for “lumi,” and double-click the Pluck C Lumi preset to load it.

Set this track to -6.4 dB.

Copy the MIDI we’ve used here.

Again, this sound adds extra energy and develops the atmosphere of the track.
5. Create FX, fills and atmospheric sounds
We have the main elements of our track at this point, but before we make an arrangement let’s add some extra sounds that will enhance the vibe of the track, and help us create a more compelling arrangement.
Duplicate out the four-bar sketch we have to sixteen bars.

Add another MIDI track with Komplete Kontrol, and this time select One-Shots and search for “crash generator.” Load up the Crash Generator one-shot.

Set this track to -7 dB.

Sequence this one-shot to play at the start of the sixteen-bar sequence.

Add another track and this time load up the DrumFill Forsby one-shot.

Set this track to -10.5 dB.

Sequence this to play on the sixth 8th note of the last bar.

Add another track and load up the Voc Hakaniemi one-shot

Set this track to -7.4 dB

Sequence this sample to play on the second beat of the fifth and thirteenth bars.

On another track, load up the Voc Napz one-shot.

Set this track to -8 dB

Sequence this sample to play on the first beat of the eighth and sixteenth bars.

Let’s add a tension string which we can use during a breakdown. On a new track, load up the String F Intelligence MSV one-shot.

Set this track to -17.8 dB.

Sequence this sound to play every two bars.

Add an instance of Raum to the track, and set it to Factory Presets > Large > Arcadia Dream Hall.

Finally, let’s add a riser which will help us transition between sections of the track. On a new track load up the Riser Aquarian one-shot.

Set this track to -2.5 dB.

Sequence this to play at the start of bar 13

Now we have everything we need to make a satisfying arrangement.
6. Arrange your track
Here’s an arrangement we can use for this track.

We start with a DJ-friendly intro which builds up to a breakdown on bar 33 that introduces the LFO lead. The beats and bass then drop on bar 49, with more musical elements added in each 16-bar section. On bar 97 the LFO lead drops out and the track begins to wind down to the bassless outro on bar 113.
7. Master your track
Mastering music gives your song a loud, clear, professional sound. This can be done with Ozone included in Komplete 14. Add Ozone to the master track, and click the Assistant View button.

Ozone will ask you to play back the loudest part of the track. Play back from bar 81, and the plugin will create a custom mastering chain for your project. You can view and edit this chain by switching back to the Detailed View.

Start making drum and bass music
Here we’ve seen how you can make your own drum and bass track from scratch with pulsing beats and heavy bass lines. If you’d like to learn more about music production, check out our comprehensive production guides including music production 101, electronic music, and drum patterns.
For instruments, effects and expansions you might find useful, be sure to take a look at the new Rolling Tides expansion as well as Komplete Start, Battery 4, Massive, Massive X, Monark, Raum, Replika XT and iZotope Ozone.
Related articles
-

Behind the synth: A. G. Cook on stacked sawtooths and the creation of Super*Saw
Explore the extremes of stacked sawtooth waves with Super*Saw, a new synthesizer co-created with A. G. Cook. Learn how to…
-

Inside the evolution of orchestral sampling: an interview with ProjectSAM
Discover how ProjectSAM’s Lineage Series uses NKS and smart features to change orchestral sampling. Plus, save on instruments in our…
-

How New Constellations turn emotion into sound with Massive X
Go inside the studio with New Constellations. Learn how they use Native Instruments gear, happy accidents, and lifelong friendship to…
-

Citizen Kain on building emotion and space with Replika
Citizen Kain explains how Replika helped shape the rhythm, tension, and emotion behind his debut Eversun Records single “Moments.”…
-

The organic precision behind Calcou’s Anjuna release featuring Reaktor
Calcou shares how Reaktor, Monark, and Super 8 shaped the creative balance and live energy behind their new duo EP,…
-

14 NKS instruments that will change the way you create music
Discover 14 NKS instruments to freshen up your workflow. From lo-fi tape synths to cinematic strings, shop the Native Instruments…
-

Parallelle on crafting living basslines with Reaktor and TRK-01
Parallelle share how Reaktor and TRK-01 shape the bass and warmth in 11th Avenue, balancing analog depth with modern control.
-

Where will your sound lead you? Explore the Native Instruments Summer Sale
Save 30% on instruments, effects, and sounds in our Summer Sale. Find the tools to keep your tracks moving and…