Just received your brand new Traktor MX2 and not sure where to go from here? New to the world of DJing, and excited to get mixing? Fear not, getting started is easy. Mastering the art of the ones and twos… not so much. The following words will guide you through setting up your new controller, understanding how it’s connected, what else you’ll need, and playing your first tracks.
The Traktor MX2 is the perfect introduction to the fundamentals of selecting, cueing, and blending music, with scope to expand your skills and explore more expert techniques such as using stem files, scratching, or harmonic mixing.
Jump to these sections:
What’s in the box?
The most obvious item in the box will be the Traktor MX2 USB controller, which features:
- A completely refreshed design language in line with the Z1 MK2 and X1 MK3
- Larger and higher resolution jog wheels
- High quality Native Instruments build
- Advanced features such as Flux Loops, Stem and Pattern Player controls, and Deck FX Units
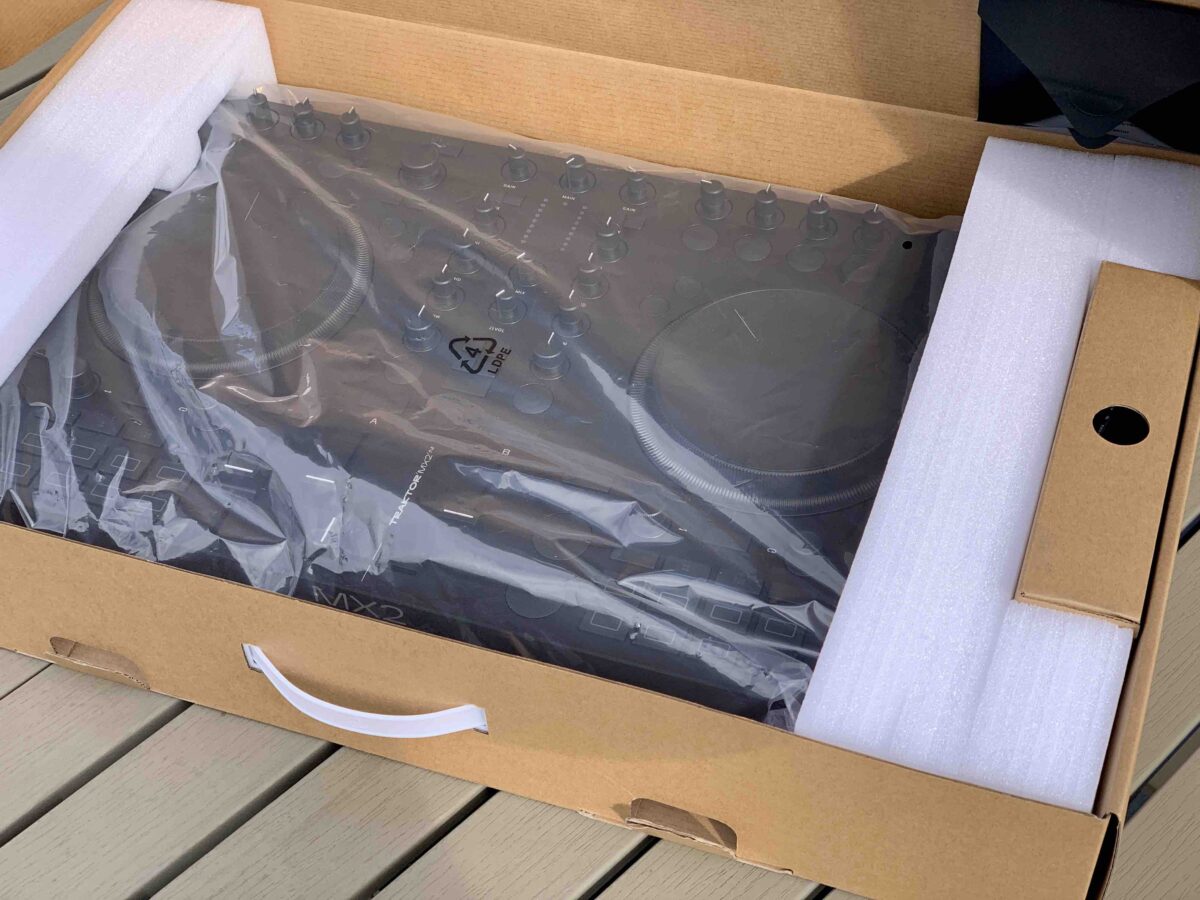
Along with your Traktor MX2, the box includes a power adapter you’ll need to use with the controller, a USB-C to USB-C cable for plugging into your laptop, and the hardware serial number to download the full version of Traktor Pro 4.
What else do you need?
While the main tools for a DJ are the mixing controls offered by the Traktor MX2, there are a few other bits a DJ should own. You’ll need:
- A way to play music out to the room
- A way to hear tracks you’ve got cued up ready to play
- Cables to connect it all

This means that at the very least, you’ll need a laptop with Traktor Pro 4 installed, some headphones, and wired speakers to plug into the controller via RCA connection. Visit the Native Instruments knowledgebase page for more information about Traktor Pro 4’s minimum requirements.
Why wired speakers?
Wired speakers are important because a wireless connection will introduce latency into the audio signal, which makes mixing inaccurate. There’s also often the added issue of Bluetooth or WiFi speakers using digital signal processing (DSP) to boost the sound, which is further latency in the audio. These are also reasons why you should aim to use wired headphones for cue monitoring.
Many DJs opt for small desktop powered studio monitors that provide accurate sound when pointed at you. Alternatively, any stereo hifi will be more than up for the job. If you’re really desperate, desktop computer speakers will work in a pinch, but might struggle to really give you the fuller sound you need to hear your mixing.
Similarly with headphones, any will do as long as they are wired with a 3.5mm (1/8”) or 6.35mm (3/4”) jack. Most DJs use on-ear or over-ear headphones that can isolate the ear from outside sounds, but in-ear monitors (IEMs) or even earbuds will do the trick.
Connecting your DJ gear
Once you have everything you require, your gear will need to be connected up so the controller, software, and speakers all work together. Before you plug anything in, find the envelope stuck to the inside lid of the product box and take the cards out of it. You should have one with the hardware serial, and instructions to get Traktor Pro 4 installed, including the link to download the Native Access software manager.

Once you have Traktor Pro 4 installed, you can start plugging everything in.
- Find a space to set up your gear, and make sure there’s room for the speakers, your Windows or macOS computer, and your Traktor MX2. You’ll also need a power socket for your computer and the controller.
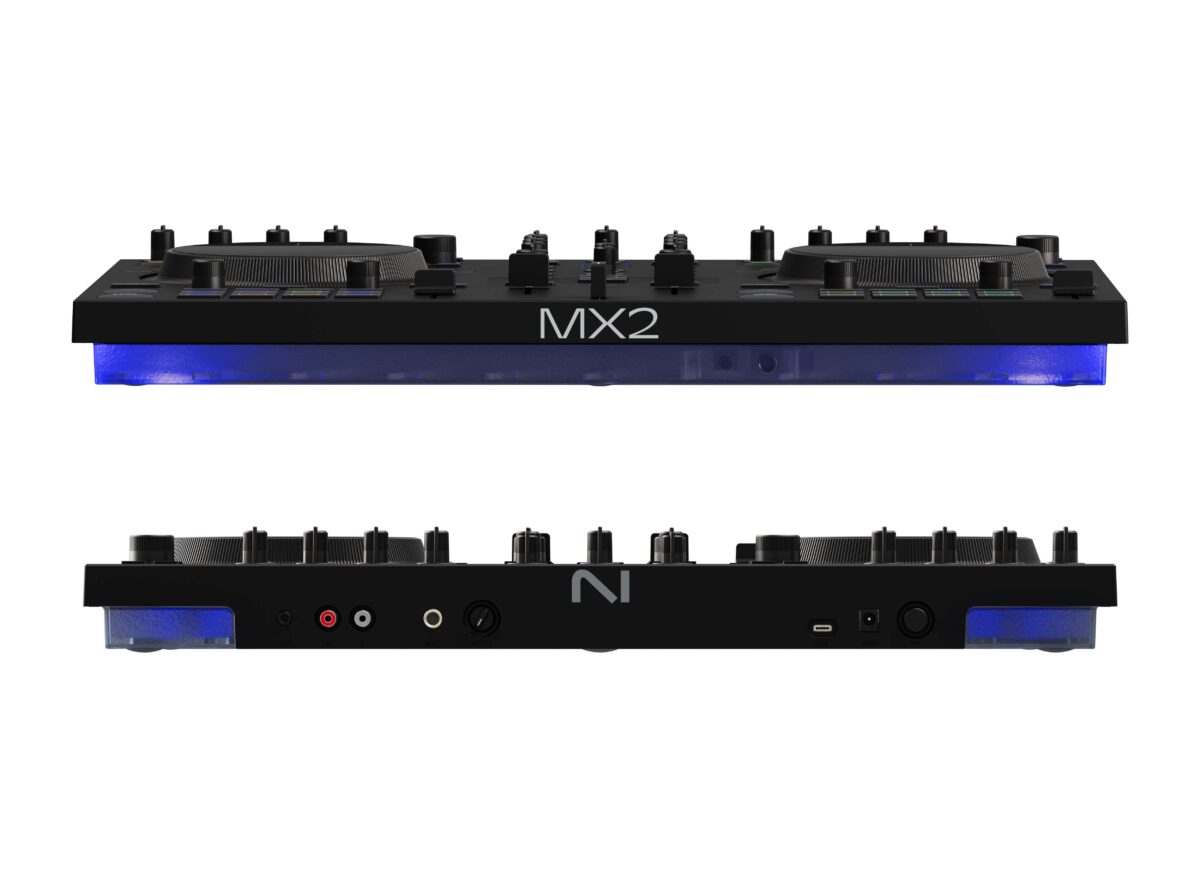
- Lay the controller down and check that the power switch on the back left is not pressed in. Plug the power supply into the socket, and then plug the barrel connector into the controller next to the power switch. Next, find the USB-C cable that’s included in the box and plug it from the rear of the controller to your computer. You’ll need to make sure your computer either has a USB-C port, or that you have an adapter or USB-C to USB-A cable.
- Once the controller and computer are plugged in, connect your speakers to the controller via the stereo RCA sockets on the back of the unit, then plug your headphones into the front 3.5mm or 6.35mm jack.
- Launch Traktor Pro 4, then once that’s fully loaded, power on the Traktor MX2. While the order you do this shouldn’t matter, some setups can be picky and need you to launch Traktor either before or after your controller is connected.
Checking your Traktor settings
While the Traktor MX2 is fully plug-and-play with Traktor Pro 4, it’s good practice to check your audio settings and make sure the controls work before you start mixing.
1. The first step is to click the little cog icon at the top right of the Traktor window to open the Preferences window. These are all your settings to customize Traktor, and at a later time it’s worth just exploring what is there, but for now it’s the Audio Setup and Output Routing sections.

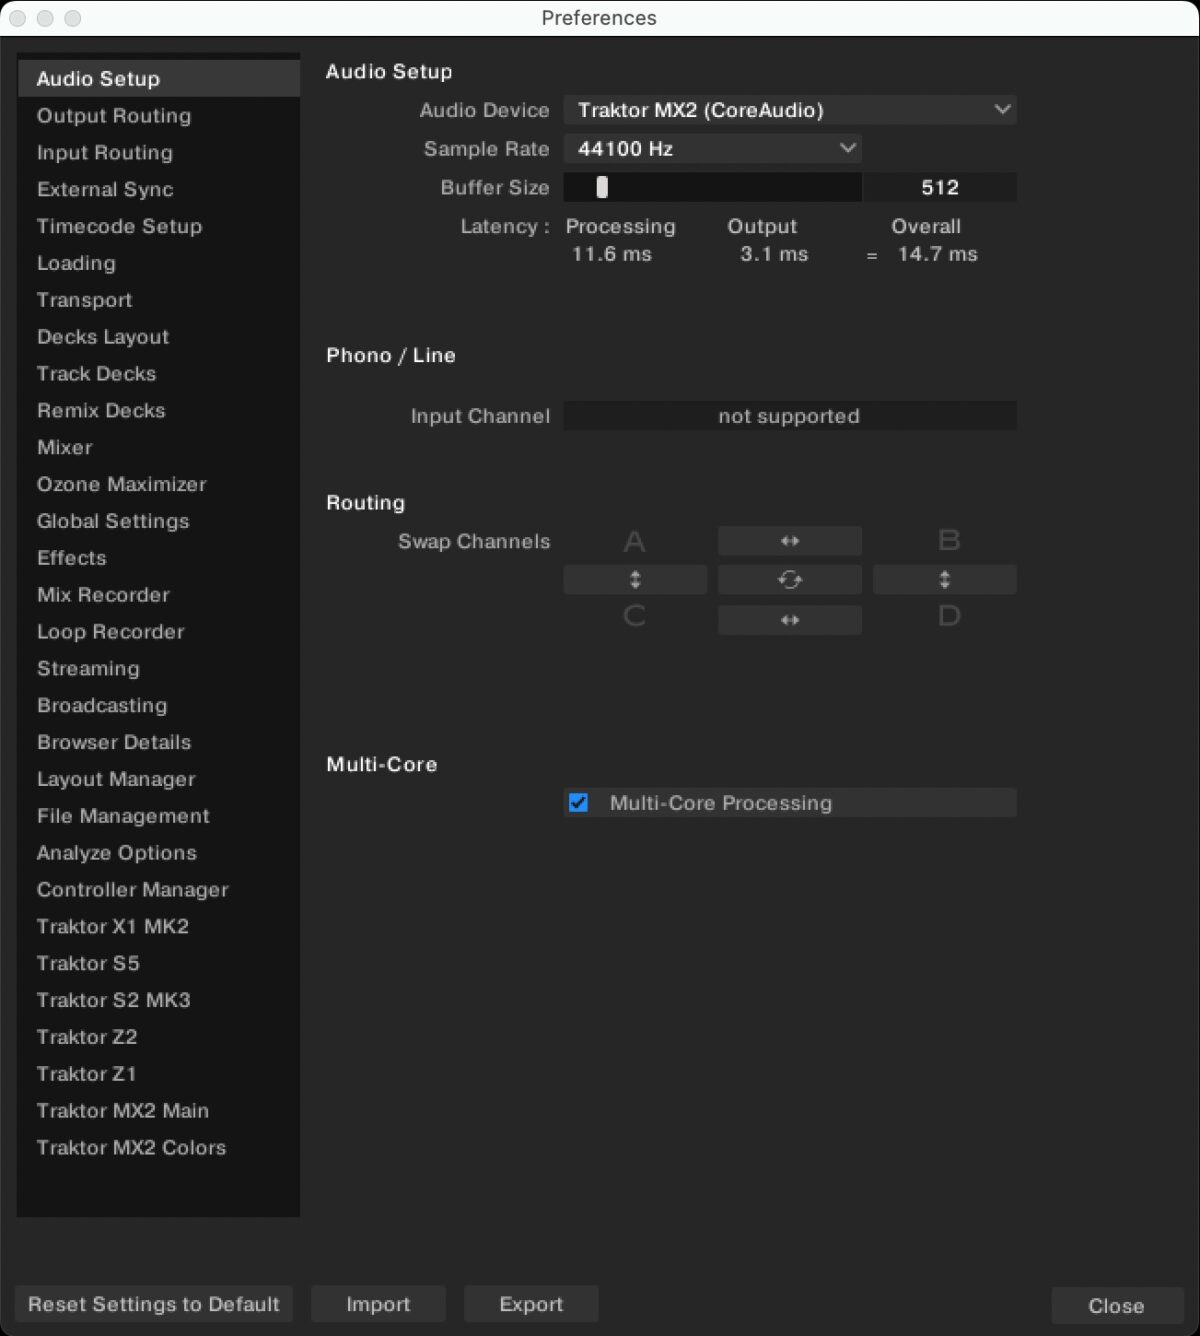
2. Within the Audio Setup settings, ensure that the Audio Device is set to the new controller, using CoreAudio on macOS, and ASIO on Windows.
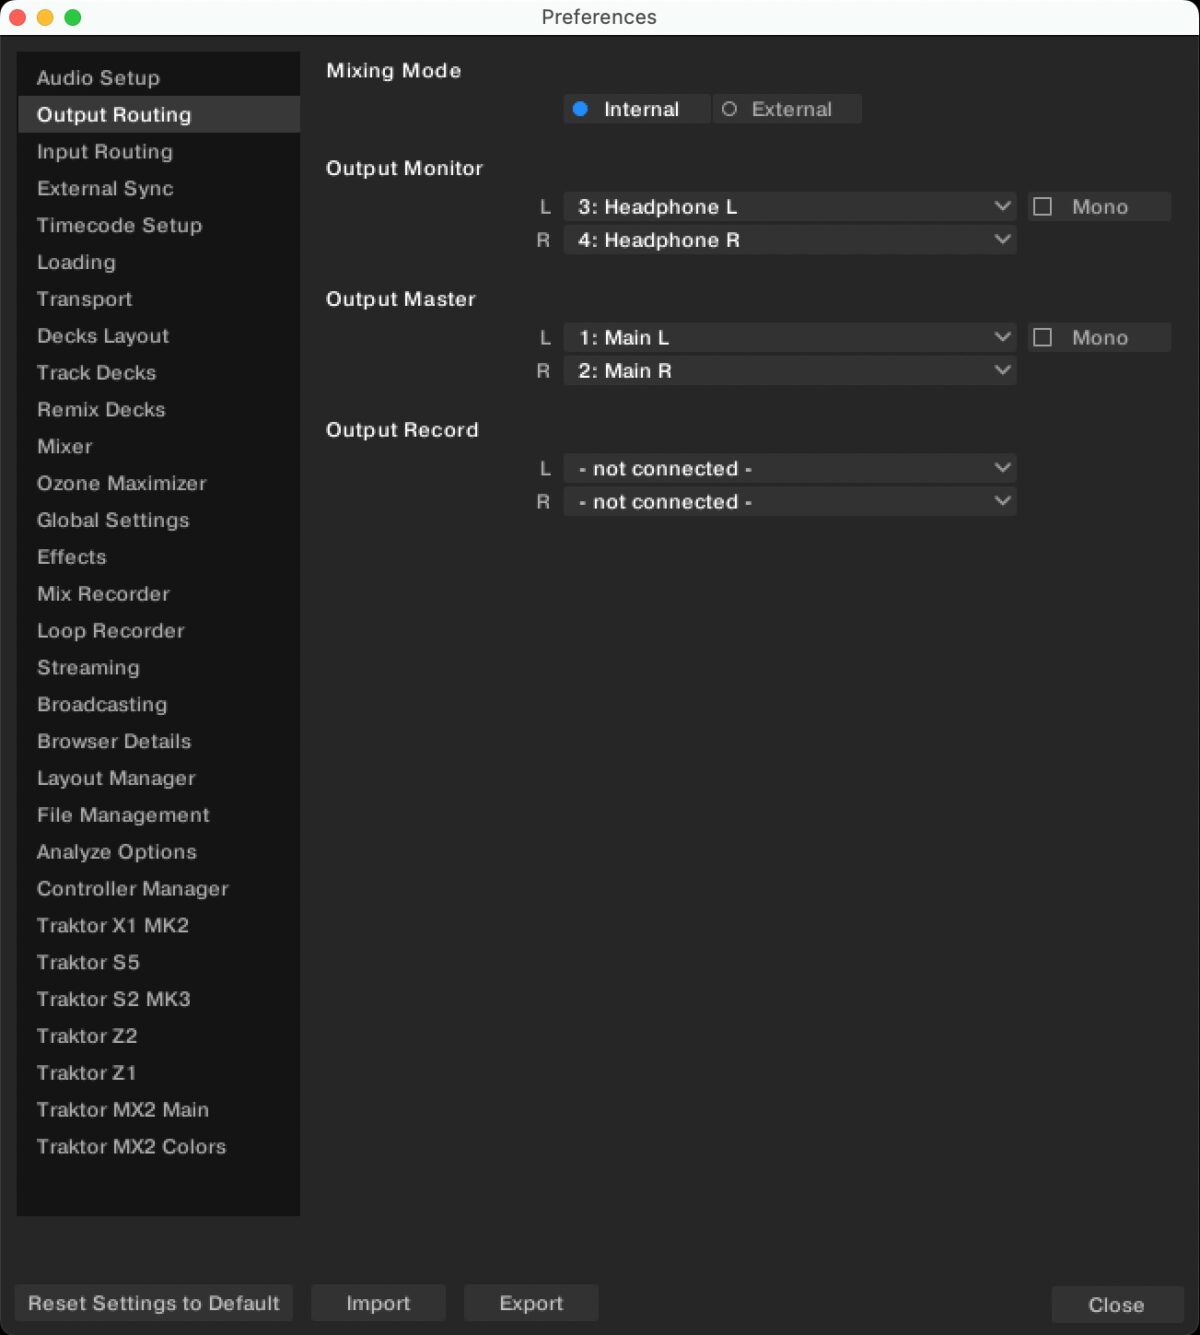
3. Next, switch to the Output Routing settings and check that the Mixing Mode is set to Internal (External Mixing is meant for DJ mixers and audio interfaces with outputs for each deck), the Output Monitor set to 3: Headphone L / 4: Headphone R, and the Output Master is set to 1: Main L / 2: Main R, and that Mono is disabled for both.
4. With these confirmed, close the Preferences menu and test the controls on your Traktor MX2. Whenever you use a button, encoder, fader, or jog wheel, the MIDI Indicator icon (furthest left at the top middle of the screen) will turn orange.
At this point, it’s also worth changing a couple of quality of life settings.
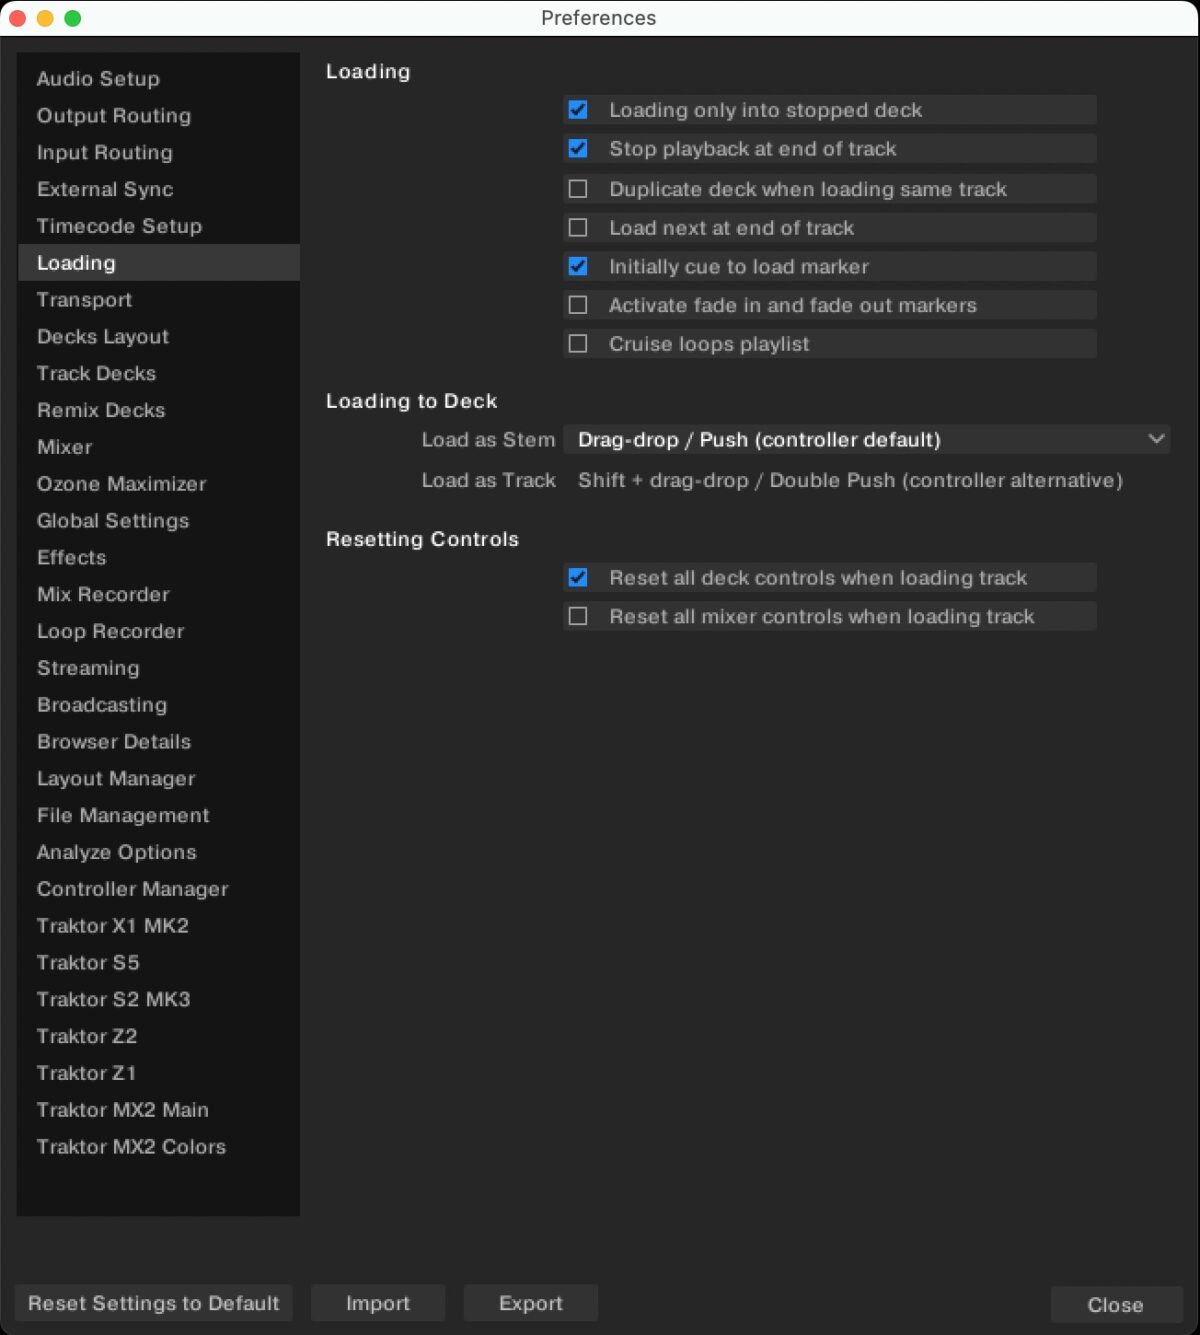
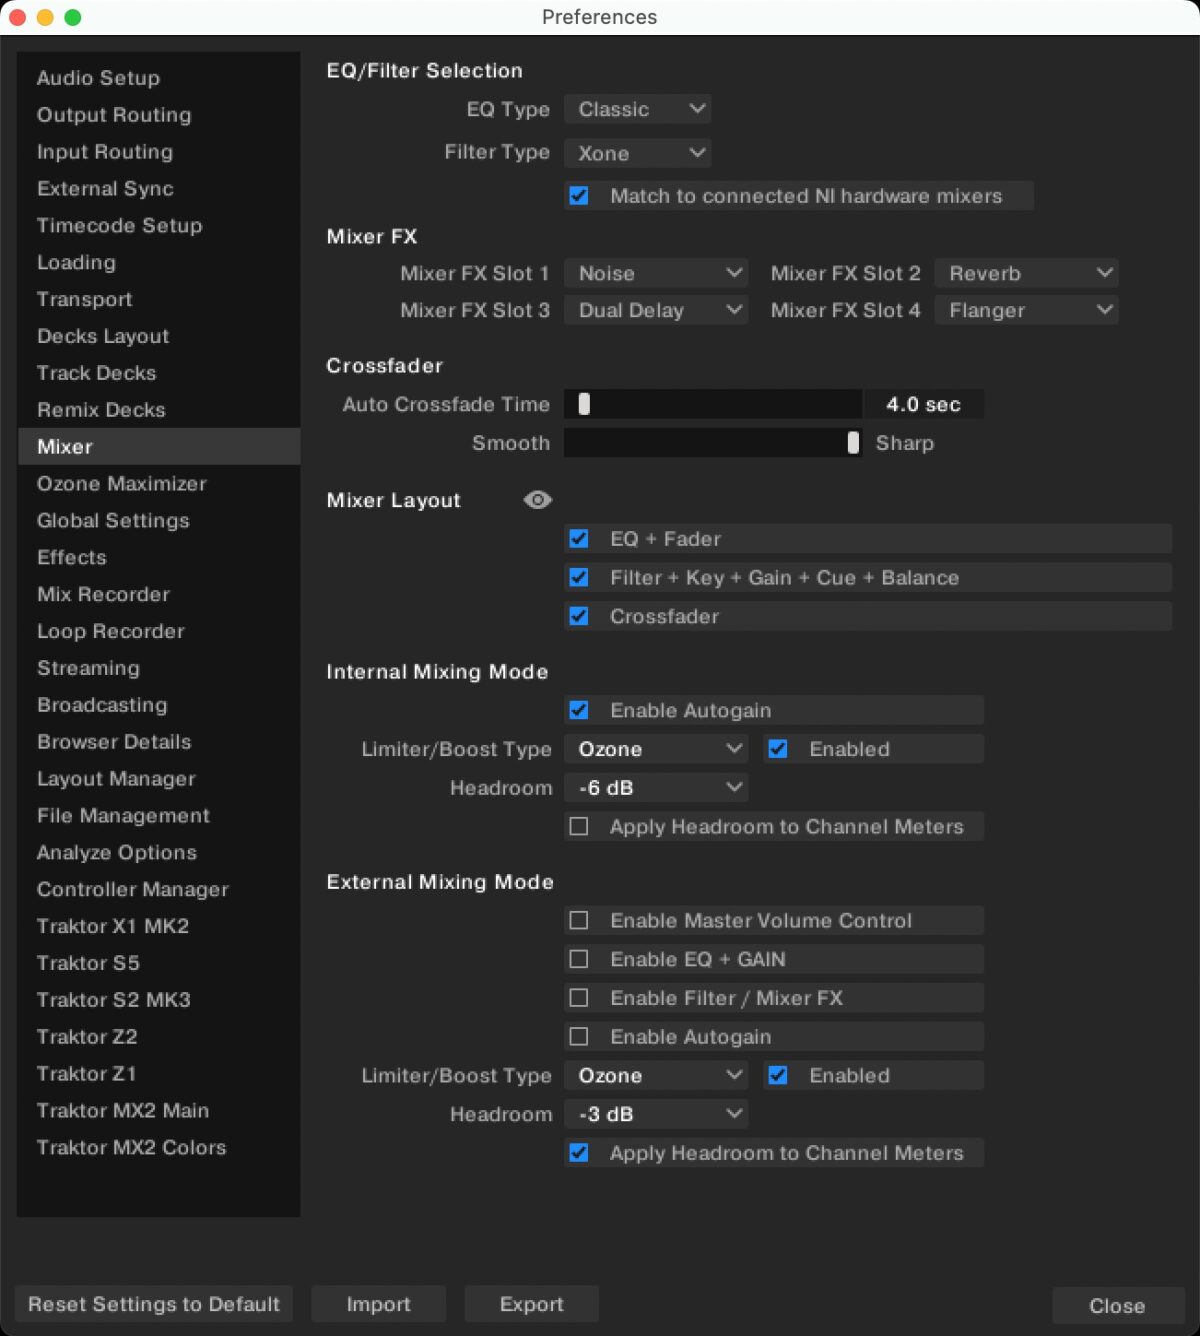
The first is to make sure you can’t load a track into a deck that’s currently playing. It cannot be understated how much of a saving grace this will be when (not if) you accidentally try to load a new track into the wrong deck. This setting can be found in the Loading section of the Preferences. Make sure the toggle setting Loading only into stopped deck is ticked.
The second setting is to decide whether to enable autogain when loading tracks into decks. This will mean Traktor analyzes the music and decides how loud the track will play when the channel fader is at maximum. The alternative is to manually set this using the channel Gain encoders at the top of the mixer section.
There are advantages and disadvantages to doing it manually or automatically, but go to the Mixer section of the Preferences, and in Internal Mixing Mode toggle the Enable Autogain to turn it on or off. It’s worth noting that club equipment doesn’t tend to have this feature, so learning how to use your channel gains is a good skill to have.
Now you’re all set up ready to annoy your neighbors!
Navigating your music library
Arguably the most important tool in a DJs box is their music collection. This is where all DJs plan their sets, choose their tracks during their sets, and edit playlists and track metadata, and an efficient library within DJ software makes a DJs life much easier.
Unless you’ve been a keen collector of tunes over the years, you might find your library is a bit sparse of music. Don’t rush to fill it up… it’s important to slowly curate your collection over time so that it reflects your tastes and you know what you have. This is still true if you choose the streaming route: the temptation will be to just add every single track you find, but you’ll quickly get overwhelmed and it will be counterintuitive when you’re mixing.
Your iTunes/Music library and local files
If you’ve got an existing collection of music in Apple’s Music (formerly iTunes), you can easily import that into Traktor Pro 4’s library. Alternatively, you can play tracks from the Music node directly, but this will restrict your editing ability, whereas tracks imported into the main Traktor library can have metadata edited from the browser, and be organized into playlists and smartlists.
To import from Music to the Traktor library, find the Music node in the collection tree and expand it. From here, you can choose a playlist to import by bringing up the right click context menu and selecting Import To Collection or Import To Playlist.
Starting your Beatport or Beatsource streaming library
When you purchase your new Traktor MX2, you’ll get two free months of Beatport or Beatsource.
To log into your Beatport or Beatsource streaming account, open up the Preferences, and find the Streaming section. From here, choose which service to log into, and it’ll open a webpage in your browser to log in with the username and password of the active account.
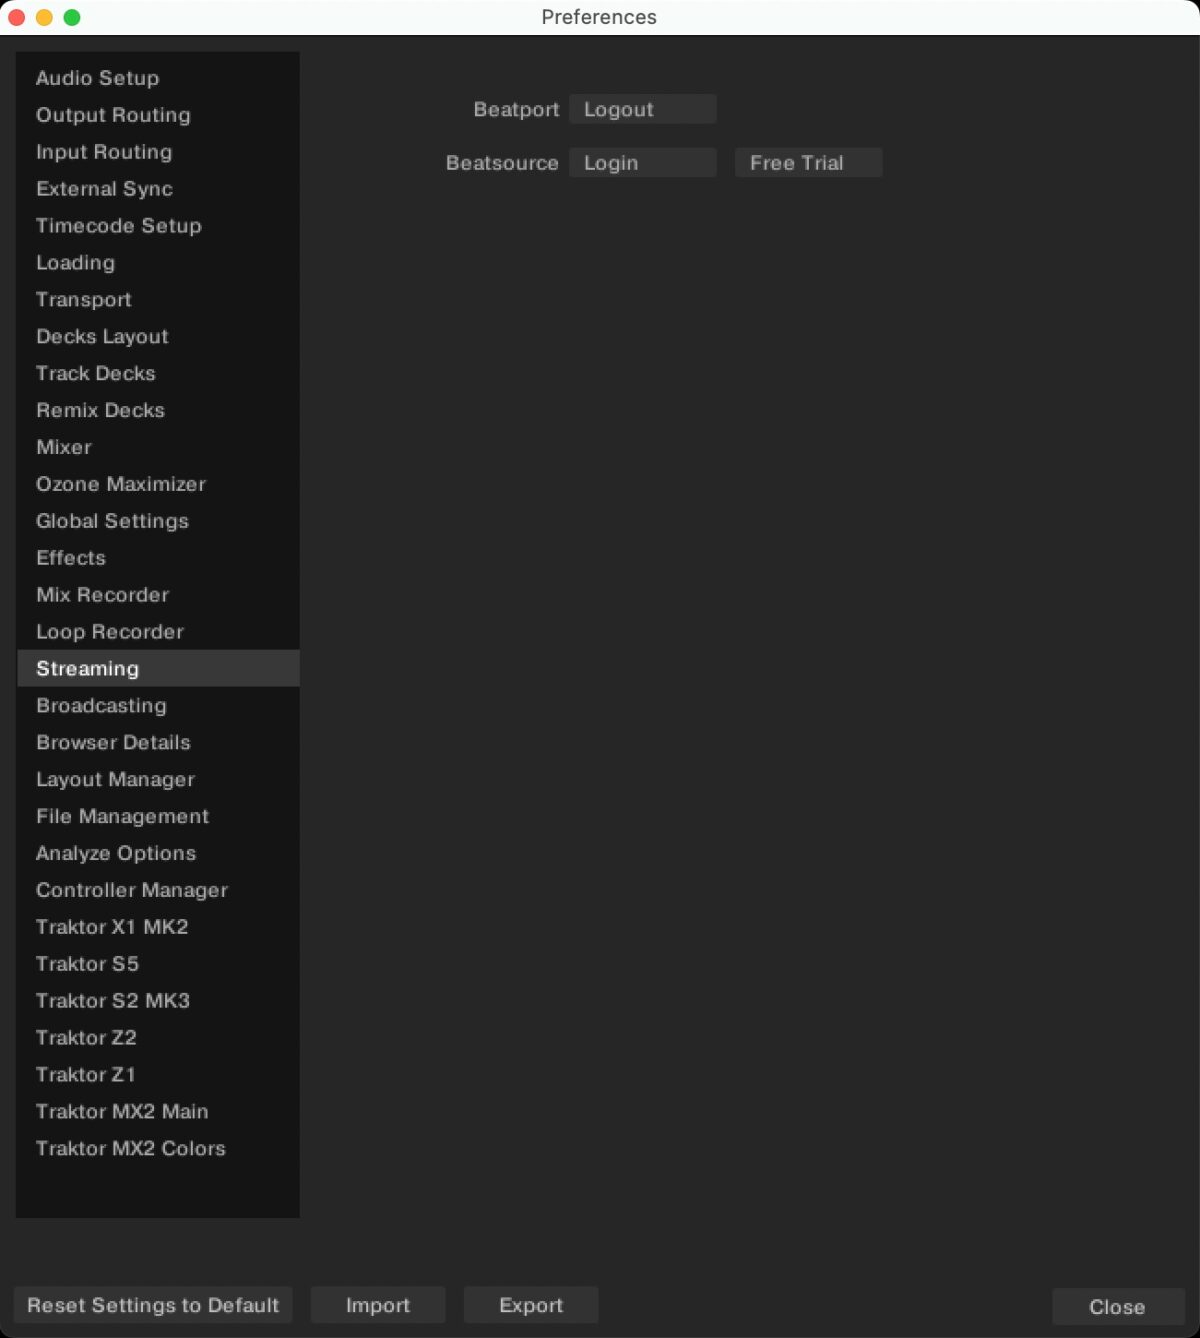
After this, a new node in the music library will be available to expand, with option to Search, and browse Curated Playlists, Genres, your own playlists (My Playlists), the Top 100 for each genre, and all the tracks in your cached Offline Library.
Loading and playing a track
Each deck has controls for quickly browsing, previewing and loading tracks into the respective decks. These can be found at the top right of the deck area, next to the effects controls.
Scroll your tracks
The large browser encoder scrolls up and down the currently displayed playlist. Use the browser scroll encoder on deck A to highlight the first track you want to play. When your chosen track is highlighted, pressing down the encoder will load the track into that deck.
You can also scroll through the library collection tree panel by holding down the deck SHIFT button while scrolling. Pressing SHIFT and the browser encoder expands or collapses folders in the collection tree.
Listen with preview player
If you want to listen to your tracks in your headphones when both decks are already loaded and running, the built-in preview player will play the currently highlighted track in your monitor headphones independently of the deck CUE buttons.
To start the preview player, press the play button below the browser encoder. You can jump around the track by clicking the preview player waveform at whatever point you want to hear. Press the play button again to stop the audio.
You can then hit the round PLAY button on the deck to start the music.
Basic mixer controls
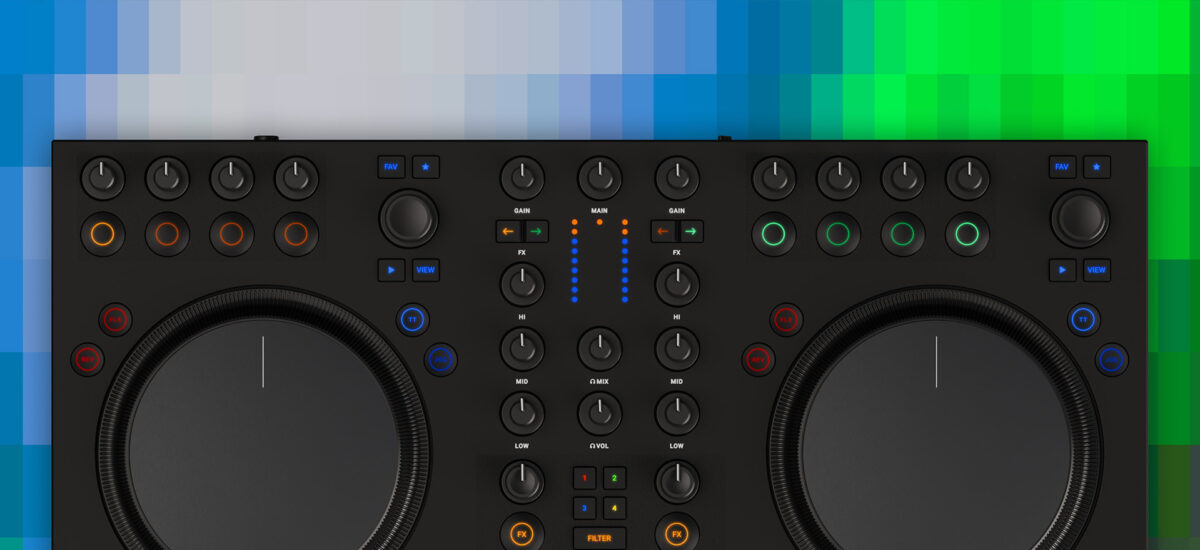
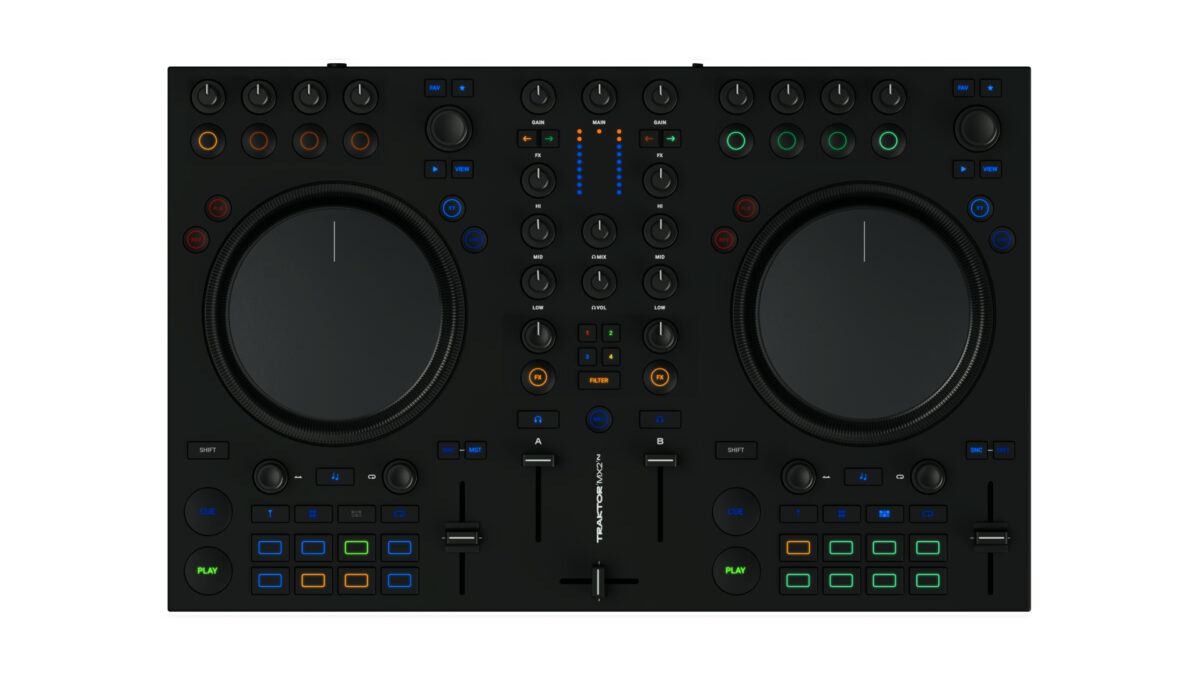
The Traktor MX2 is a two channel controller with a large, high resolution jog wheel for each deck, a two channel mixer section with channel faders, EQs, DJ filters with assignable Mixer FX, and a crossfader. There’s also headphone cue routing buttons, and volume / cue mix control. You can also keep track of how loud the music on each channel is using the LED level meters. At the top of the mixer section is the global volume encoder, which controls how loud the overall output is.
Make sure to avoid going into the red!
Let’s play a track
Move the crossfader to the left and make sure both channel faders are up all the way, then press play at the start of the track on deck A. You’ll hear the music coming out of the speakers. When you move the crossfader to the right, the audio will start to fade out. Any track playing on deck B can now be heard. The crossfader is the simplest way to fade between two tracks.
Your first blend
If you want to learn more generally about how to DJ or getting started with Traktor, the Native Instruments blog has plenty of resources, from a guide to beatmatching to some inspiration for spicing up your mix transitions. But to get you started, this is a very quick run down to learn the basics.
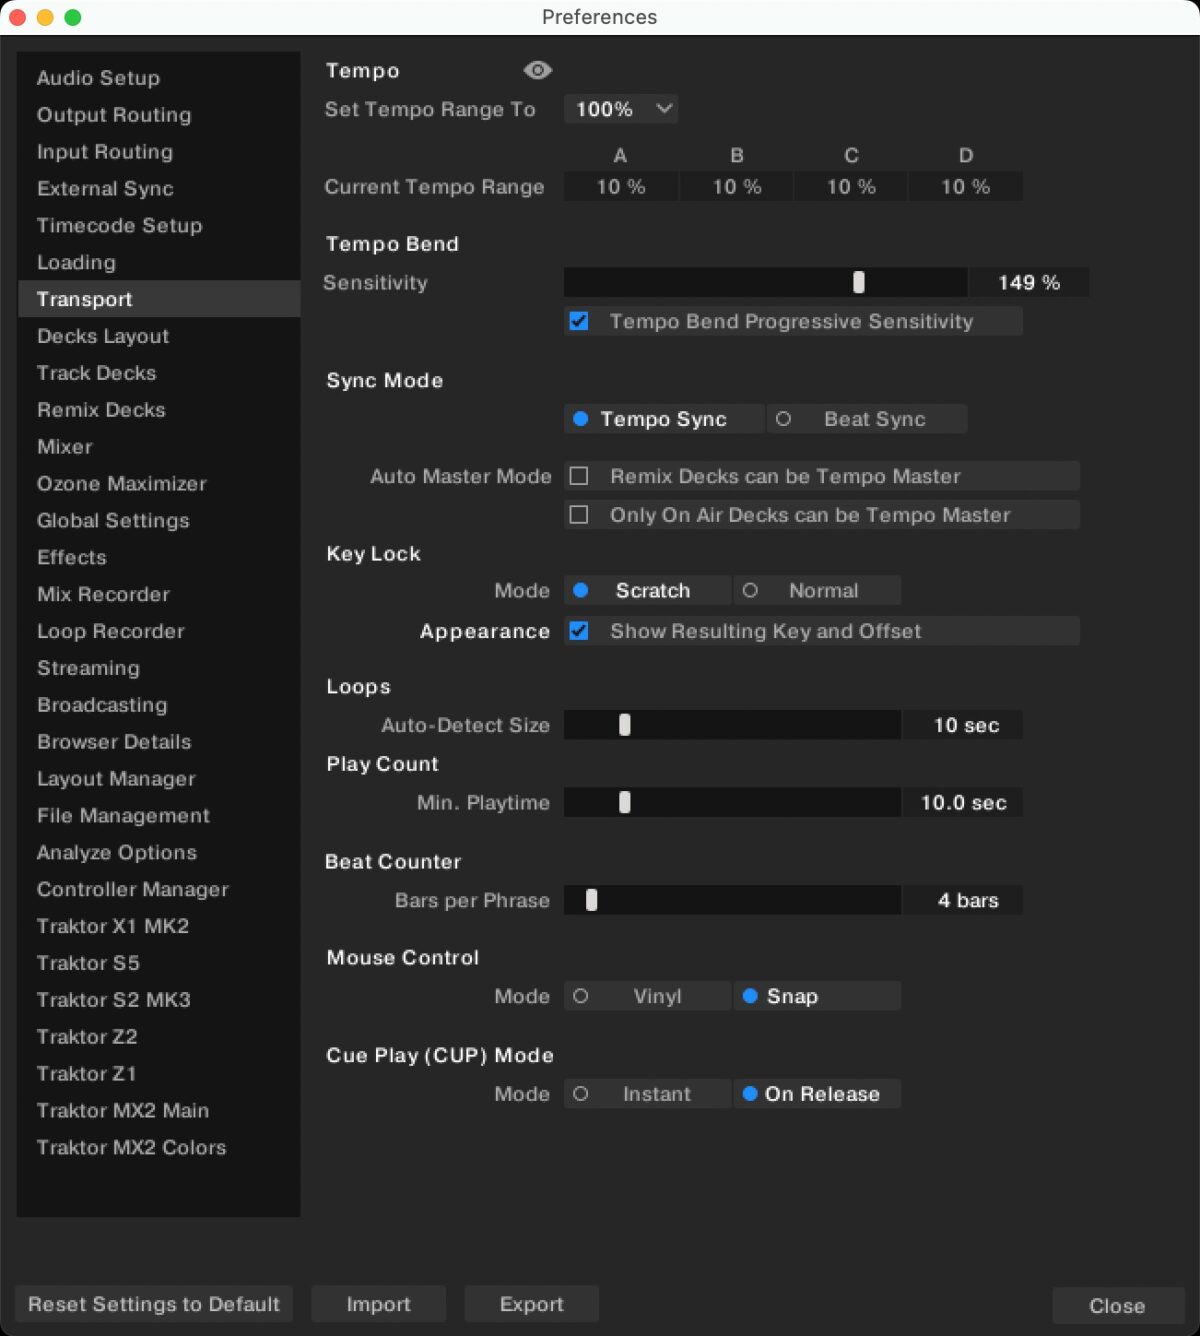
- In the Preferences, find the Transport section and make sure Sync Mode is set to Tempo Sync. This ensures your first blend will be perfectly aligned when the SYNC buttons on your Traktor MX2 are active
- Once a track is loaded on deck A, ensure the channel fader is up all the way and press PLAY to start the music. Turn on the SYNC button on both decks, then load your second track into deck B. Find the start of track B and play it when track A is at the start of a phrase.
- The two tracks will match their BPMs, but you might need to use your headphones to hear if the new track is out of time with deck A. First, activate the CUE button for the right mixer channel, then turn the cue VOL up until you can hear the track. Now, use the edge of the deck B jog wheel to nudge the beat into time with the first track.
Using effects
There are two types of effects you can use with the MX2, the FX Unit at the top of each deck, and the Mixer FX, which use the mixer channel filter encoder.
Mixer FX
The Mixer FX are an enhancement to the ubiquitous channel low pass and high pass filter. You can quickly toggle through four effects, designed to add drama and build-up to your sets, using the buttons labeled 1–4 in the middle of the mixer. Turning the Mixer FX encoder left or right will change the effect behaviour, as well as applying an increase in effect.

Choose from nine different effects via the Mixer section of the Preferences. If you need to quickly switch back to the channel filter, press the FILTER button below the Mixer FX select buttons.
FX Units
The FX Units offer a lot more effects, with over 30 to choose from, and a lot more control over the effects, particularly in Single mode, where the four rotary encoders alter a different parameter of the effect. Both FX Units can be routed to either deck using the FX assign buttons above the channel EQs.

To switch between single and group FX Units, hold SHIFT and press the leftmost button of the FX Unit. This will scroll forward through the Group, Single, and Pattern Player mode for that FX Unit. You can change the active effect on the fly by holding SHIFT and using the middle two buttons.
Additional features
From here, you can start constructing your sets, adding to your music library, and expand your knowledge. Whether you’re buying tracks from the likes of Bandcamp, or using the Beatport / Beatsource streaming services, start adding tracks to Traktor Pro 4 playlists and preparing future sets.
You can also extend your abilities by using the built-in Pattern Players and Stem decks. These are quickly accessed from the row of buttons about the hotcue pads on both decks, and take your sets to the next level of skill.
Traktor Pro 4 also integrates the Ozone Maximizer plugin, which helps boost your audio and reduce distortion when there’s lots going on. When BOOST is active in the Traktor Pro 4 interface, your audio signal will cope much better if you’ve got multiple decks running, along with pattern players. It also helps with older tracks that weren’t mastered with modern techniques.
Stem decks
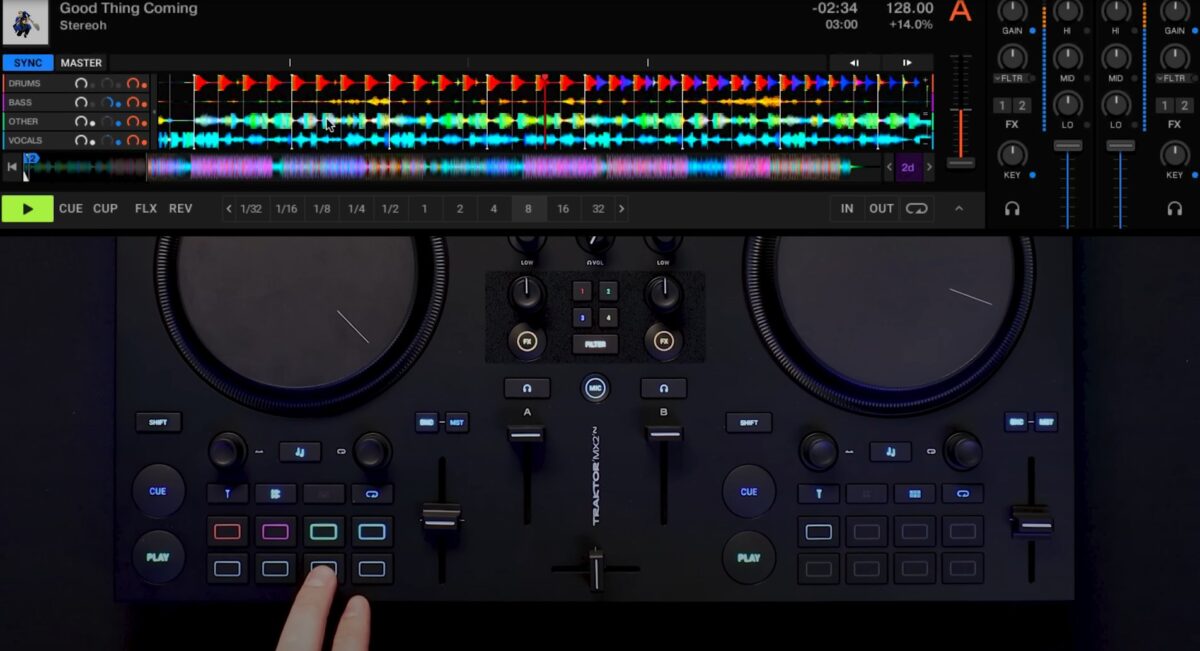
The stem deck mode allows you to play four separated audio tracks for each music file you’ve previously analyzed. When you load a track that has been analyzed into a deck, it will display four waveforms on-screen, with VOLUME, FX SEND, and FILTER controls.
Pressing the Stem button above the hotcue pads switches the pads to Stem mode, giving you mute / unmute control for each stem along the top row, and holding the lower pad down lets you use the move encoder (left side) to change the volume, and the loop encoder (right side) to change the filter.
Pattern Player
Another part of the FX Units is the Pattern Player, a way of layering looped beat patterns over your music. You can switch to the Pattern Player using the SHIFT functions on your FX Units (see the FX Units section, above), then activate the Pattern mode on the hotcue pads using the Pattern button.
NOTE: You’ll need to have the Pattern Player active to use Pattern mode on the hotcues.
When active, you can switch between the first eight and last eight steps in the pattern, and press a hotcue pad to turn the step on or off. When the pattern is looping, the playhead will light up the steps as it goes. If you want to turn all steps off, hold SHIFT and press the Pattern button.
If you want to start or stop the pattern player, control the volume, or scroll through the default patterns, use the FX Unit controls at the top of the deck as you would with the chained or single FX.
Flux Loops
The Flux Loop pad mode creates instant loops when a pad is held down, starting at 1/32 beat all the way through to 2 beats. While active, the deck continues to play and the music will be at that point when you let go.
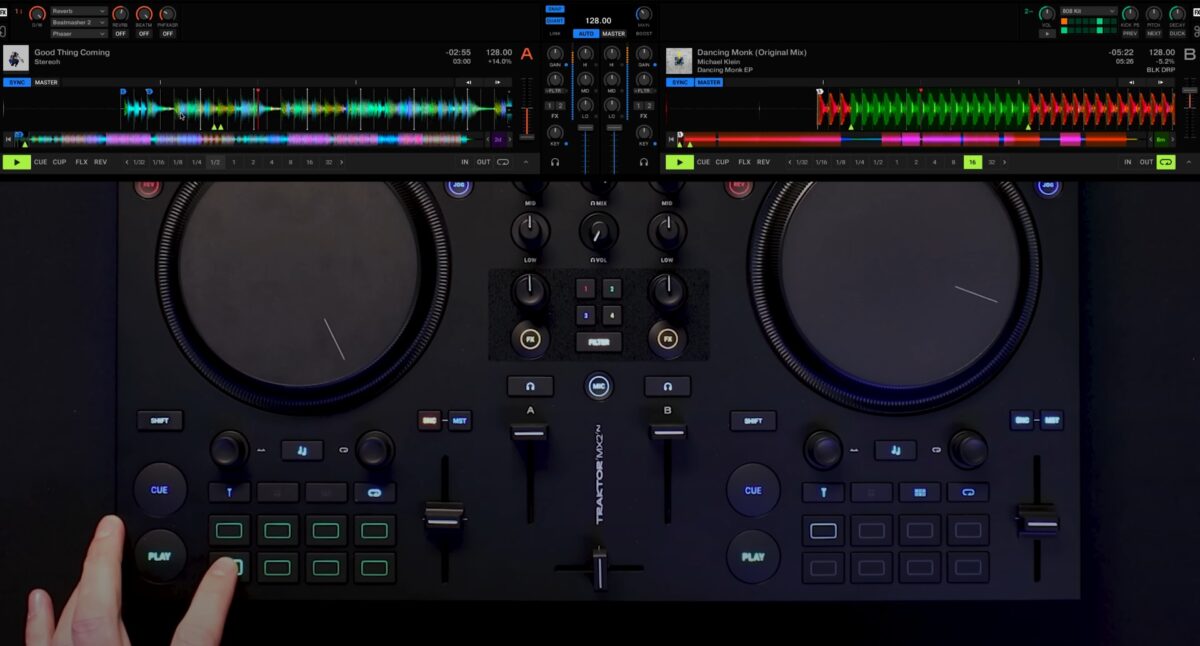
Flux Loops are a great way to build tension and add syncopation to your sets, if used sparingly.
Ozone Maximizer
To get the Ozone Maximizer set up, first open the Preferences, go to the Mixer section, and enable the Limiter / Boost Type, then switch to Ozone in the drop-down. Next, change the Headroom to -6 dB, to reduce the overall output. Now switch to the Ozone Maximizer section and set Boost to 6.0 dB to regain that lost headroom, and the Preset to Smooth to keep your kicks punchy.
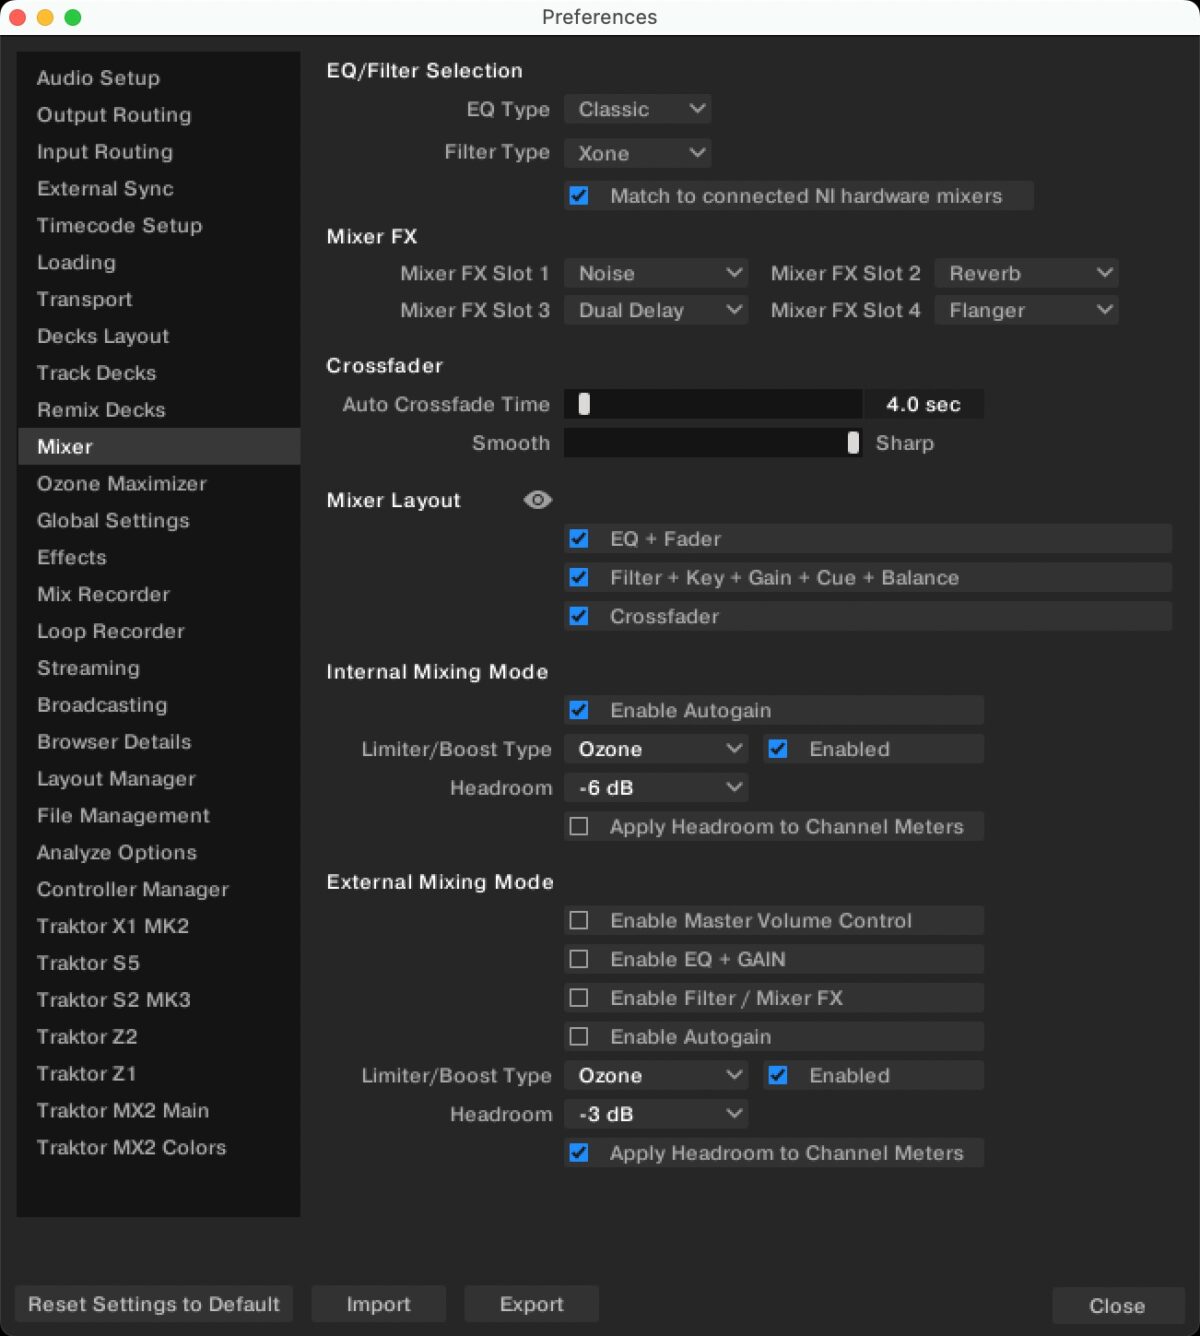
These settings will give your master output a wider but natural sound, with fuller audio. You can test this by playing your music to your speakers and turning the BOOST on or off at the middle top of your Traktor Pro 4 interface
Extra DJ tips
That’s the basics, but DJing is a skill that’s easy to learn, but hard to master. The discipline melds the science of music theory with the art of playing to a crowd. If you want to explore further, here’s some simple tips from an old veteran.
1. Read the Traktor MX2 manual
While contrary to many people’s instincts, it’s always worth reading the manual from start to finish to learn some of the intricacies of your new gear.
2. Use the LEDs
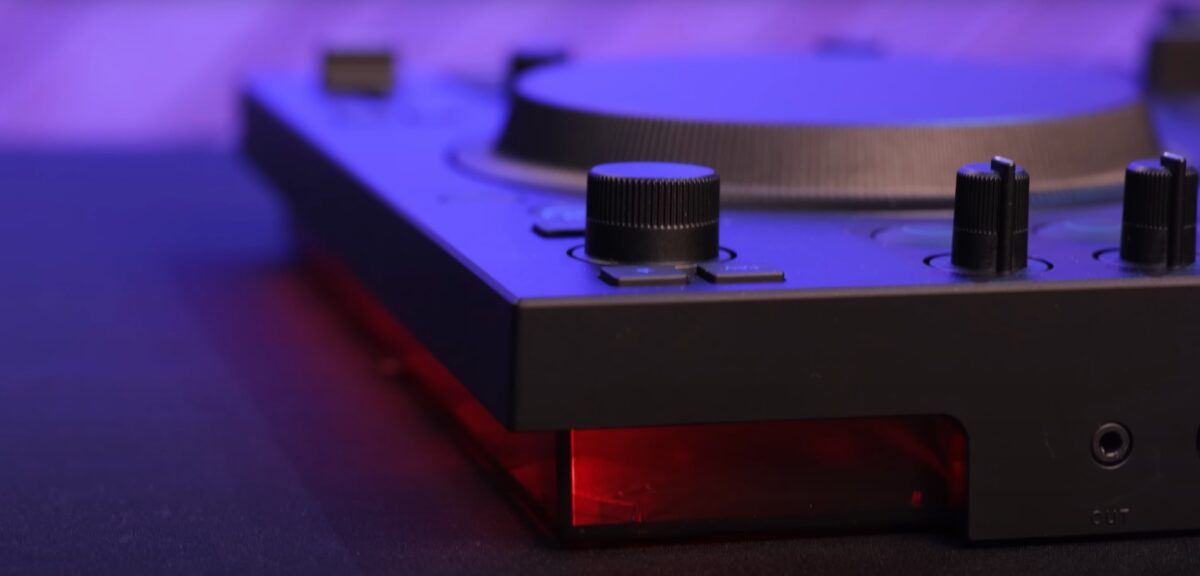
While the lights on the bottom of the Traktor MX2 can be customized (there’s a rainbow mode!), the LEDs on the bottom of the controller will also give you some visual feedback into the deck activity. When a track is near the end, the lights on the respective side will flash red as a warning. An active loop will be a steady green, and if your tracks lose sync, it will glow a steady red.
3. Record your sets
One of the biggest tips for new DJs is to record your mixes and listen back to them. You need to get used to hearing yourself mix, and gain the confidence to enjoy hearing it.
4. Learn to love your mistakes
Mixing by hand will inherently introduce mistakes, but offer a more natural sound for the listener. The imperfections are what makes creativity unique.
5. Don’t be hung up on genre
You love techno, yes, but the temptation to keep your music choices tight will limit your ability, your knowledge, and job opportunities (should that be your journey). DJs are music selectors first and foremost. We serve new and old tracks so the crowd can dance. A wider music library means you can keep them guessing and cheering.
6. Keep your music library in order
As your music collection grows, it can become unwieldy and intimidating. Regularly maintaining your track library helps keep your workflow efficient, and means you better know what you have available. This also means ensuring your beatgrids are consistent throughout your library.
Have fun!
Now you’re all set up, you have a strong foundation on which to build your passion. The Traktor MX2 has everything for both the beginner DJ and those that want to extend their mixing experience. You should be ready to create your first set using your Beatport or Beatsource streaming account, and build up your library of music.


