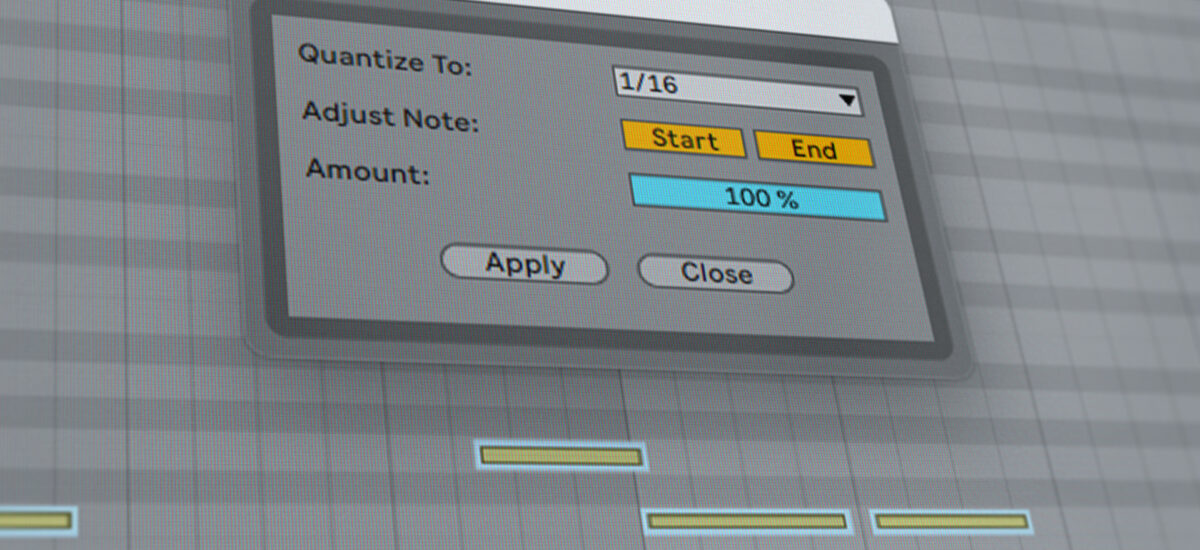
Quantization makes music production go faster. It fixes timing issues and gives you tight grooves with just a few clicks of the mouse. But quantizing can easily be misused in electronic music, resulting in disjointed rhythms or robotic, lifeless beats.
So what is quantization in music exactly, and how should it be used? In this article, we’ll explain how to quantize from the ground up, looking at key quantization parameters and issues to consider when quantizing. We’ll also show you how to quantize MIDI in your DAW, with audio examples. When we’re done, you’ll be tightening up your grooves like a pro.
Jump to these sections:
- What is quantization in music?
- What is the purpose of quantizing?
- What is quantization for in MIDI?
- How quantization works in music
- When should you quantize your music?
- How to quantize MIDI in a DAW
Follow along with KOMPLETE 14, the ultimate production toolkit including sounds, instruments, synths, and more to perfect your sound.
What is quantization in music?
Quantization is a feature in DAWs that makes notes and sounds conform to a rhythmic grid. Quantization can be used to correct the timing of live performances or tidy up rhythmic mistakes in MIDI sequences (and sometimes audio too). It can bring rhythmic precision to your tracks and speed up the production process. It can be used in creative ways, to generate interesting grooves and rhythms.
To understand how quantization in a DAW works, we first need to understand tempo. Most music has a regular pulse or beat. This is its tempo, often expressed in beats per minute (BPM). In digital music production, the tempo of your track is set in your DAW project. The timeline of the DAW is then subdivided into units of time that correspond to this tempo, showing you where your sounds should be placed.
For example: If you’re making a house track at 120 BPM your DAW will subdivide the project timeline into a series of regular bars containing four beats, with each beat corresponding to 0.5 seconds of time. These subdivisions are displayed as a “grid”—a series of lines across the timeline showing you where the bars and beats are.
Humans aren’t machines. Our sense of timing is not exact, and when we try to play “in time” we’re often a little (or a lot) early or late. In electronic production, this can become a problem when you’re playing MIDI notes into your DAW via a MIDI keyboard, MASCHINE or other interface. A similar problem might arise when you’ve drawn in notes with the mouse, but you were in a hurry and didn’t position them quite right.
These timing issues—a difference between the song’s “grid,” as determined by its tempo, and where the notes actually fall—can make things sound messy. What to do? You could go through the MIDI notes and manually drag them into the right position, but that might take a while.
The other option is quantization.
Quantization automatically adjusts groups of notes to bring them in line with the grid. Quantizing quickly brings a performance or sequence in time with the rest of your track.
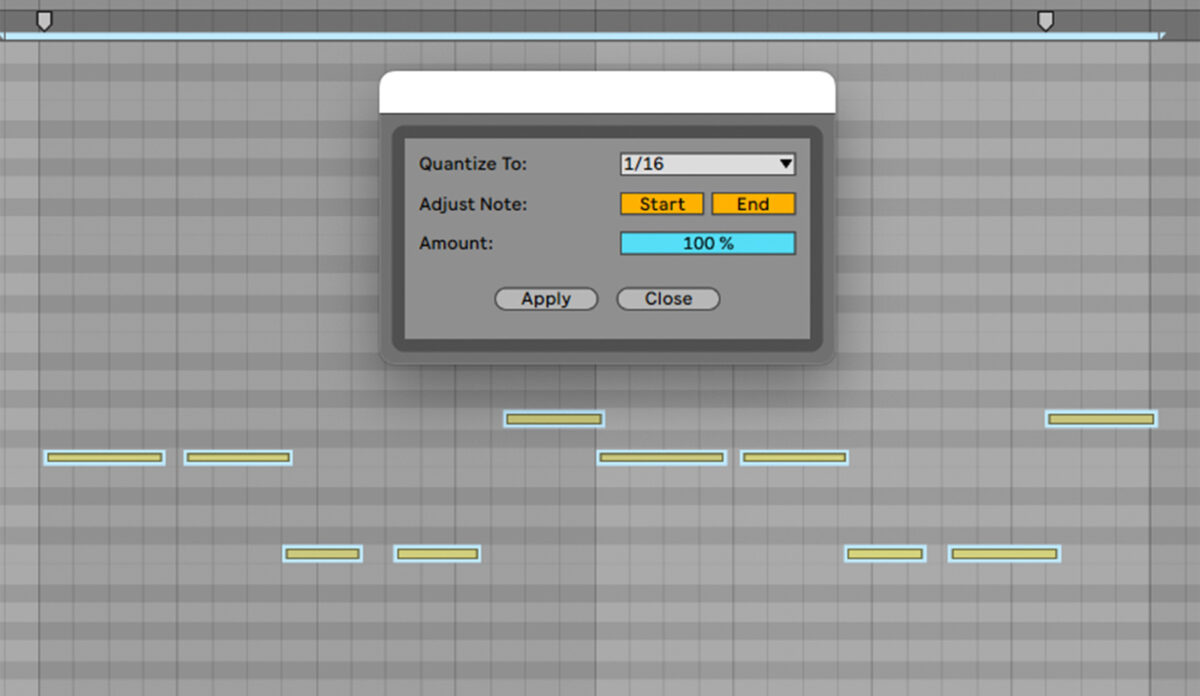
Here’s what unquantized music sounds like compared to quantized music.
What is the purpose of quantizing?
Quantizing corrects timing mistakes in MIDI notes or audio, bringing out-of-time notes in line with the grid in your DAW. This can be great for fixing rhythmic errors and making your grooves perfectly precise.
However, sometimes a little bit of human imperfection sounds good. Clever use of quantizing will enable you to keep some of this feel while fixing the most out-of-time notes in a performance or sequence. Some producers also use quantizing in more imaginative ways, manipulating quantization settings to create unexpected grooves.
What is quantization for in MIDI?
Quantization is used in MIDI to correct notes that are out of time with a track’s rhythmic grid. Because it works automatically on multiple notes at once, quantizing can be used to quickly tidy up a longer phrase or entire captured performance.
Quantization isn’t only applied in MIDI. Many modern DAWs offer quantization functions for audio using sophisticated time-stretching algorithms. But MIDI quantization remains the dominant method, and it’s the one we’ll focus on in this article.
How quantization works in music
Quantization is a powerful tool, but it’s easy to misuse. Different musical contexts call for different types and amounts of quantization. Getting to grips with some basic quantization parameters will help you to quantize correctly whatever the situation.
1. Quantize resolution
Quantize resolution controls how fine the quantization is. If your track’s tempo is 120 BPM, the grid could be set at a number of different resolutions. It might move out-of-time notes to the nearest 1/4 note (of which there are four in a bar), 8th note (eight in a bar), or—if you want to be really detailed—16th note (16 in a bar). At higher resolutions, more detailed rhythms can be preserved by the quantization.
As a rule, quantize resolution should be set to the length of the shortest beat in your sequence. If you have 16th notes in your melody and try to quantize them with an 8th note resolution, those notes will be shifted to the nearest 8th note, messing up the rhythm. If the quantize resolution is too fine, on the other hand, out-of-time notes might not be completely fixed. So make sure to get resolution right before you quantize.
2. Note division
Note division controls how many notes each beat is divided into when quantizing. In much of popular music, beats are divided into multiples of 2: There are two 8th notes in a 1/4 note, two 16th notes in an 8th note, and so on. But in some cases rhythms are divided into threes, sometimes called triplets.
If your music features triplet rhythms, you will need to alter your quantize settings to match—otherwise the quantization will cause unwanted rhythmic changes. In many quantization tools, triplet divisions are represented by a “T” (so a triplet 8th note division is displayed as “1/8T”).
3. Strength/amount
Strength or Amount controls how much the quantization acts on out-of-time notes. At 100% Strength, quantization will move any wrong notes all the way to the nearest grid position. At 50% strength, out-of-time notes will only be moved halfway towards the nearest grid position.
Why is this useful? A bit of imperfection can sound good to the human ear. Sometimes the mathematical perfection of quantization can ruin the groove or feel of a performance. Adjusting Strength allows you to fix the worst timing mistakes without making an entire clip robotically perfect.
The right Strength is different in every situation. Try a few settings and use your ears to decide what works.
4. Swing
Swing twists the rhythmic grid to create a distinctive “shuffling” feel. This is achieved by adjusting each pair of notes so that one is slightly longer and the other shorter. Swing is an important rhythmic characteristic in genres such as jazz. Adding a little swing to your tracks can give them a bouncy, energetic feel, softening the robotic precision of totally quantized rhythms.
Many DAWs and other music tools allow you to program in Swing by percentage, much like Strength/Amount. Higher settings will be very audible; lower settings will add a subtle “tug” to the groove that can be pleasing to the ear.
5. Note start and end
Some tools allow you to choose whether quantization affects a note’s start, its end, or both. So far we’ve mostly been talking about quantizing a note’s start (the very first moment when the note is played, the drum is hit, or the sample is triggered). But it can be handy to quantize a note’s end too. Use this to control unruly note tails that might overlap in fast sequences.
6. Exclude within
“Exclude within” tells the quantize tool to ignore notes that are only a little out of time, while fixing more extreme errors. This is another way of applying quantization without losing a performance’s human feel. The “exclude within” value is often expressed in a percentage. For example, “exclude within 10%” means that notes that are within 10% of the nearest grid point won’t be quantized; notes more than 10% away from a grid point will be dragged onto the grid.
Use this parameter alongside Strength and Swing to apply gentle, musical quantization.
When should you quantize your music?
Quantization is an important part of music production, but it can easily harm as much as help. Getting your quantize settings wrong can garble up your rhythms, while quantizing too much leads to stiff, robotic music that lacks personality.
Here are some things to consider when deciding whether to quantize—and by how much.
Genre
Some genres lend themselves more naturally to quantization than others. A techno track might sound great with everything snapped tightly to the grid. Your disco masterpiece, on the other hand, will lose its charm if you iron out all the rhythmic kinks. Always keep genre and stylistic reference points in mind when deciding whether to quantize. If the music you are inspired by sounds loose and “live,” then quantization might not be the way forward.
The instrument’s role
Quantization should be applied differently to different instruments. Core rhythm section instruments like bass and drums generally need to be pretty tight, otherwise the whole track sounds messy. Topline instruments and supporting parts can afford to be looser. It can sound good to have different rhythmic feels rubbing against each other in a track, so don’t feel you have to apply the same quantization settings to every instrument in your project.
How it sounds
Quantization is primarily used to fix mistakes. That means it should only be deployed when there’s a mistake to be fixed. Your ear is the best guide here. You might see a couple of off-grid notes on your piano roll, but if they don’t sound “wrong” to you then don’t quantize them. Those subtle mistakes might even add something to your groove.
When you do quantize, listen again after it’s applied. Has the part lost something now that it’s snapped to the grid? Then remove the quantization—or consider reducing the Strength.
Be creative
Music production tools are made to be broken. Quantizing “badly” can lead to surprising results. Why not apply some extreme settings and see what jumbled-up rhythms come out? Sometimes, quantization can be a route to inspiration.
How to quantize MIDI in a DAW
Now you know how quantization works, let’s look at an example of quantizing MIDI in a DAW. We’ll be demonstrating quantization in Ableton Live. Here’s the deep house loop that we showed earlier. It was made using TIMELESS GLOW, a Native Instruments Expansion that is included in KOMPLETE 14 that puts a modern spin on classic Chicago house.
It sounds promising, but there are timing issues that should be fixed before we go further. Some of the parts were played in by hand on a MIDI keyboard and they need to be tidied up. The groove would also benefit from more rhythmic interest. Let’s address these issues using quantization.
1. Fixing timing
The most glaring issue is that the clap is out of time. This crucial rhythmic element often hits a little early or late, making the loop feel messy. We can see the issue by taking a closer look at the piano roll. Quantization will fix this.
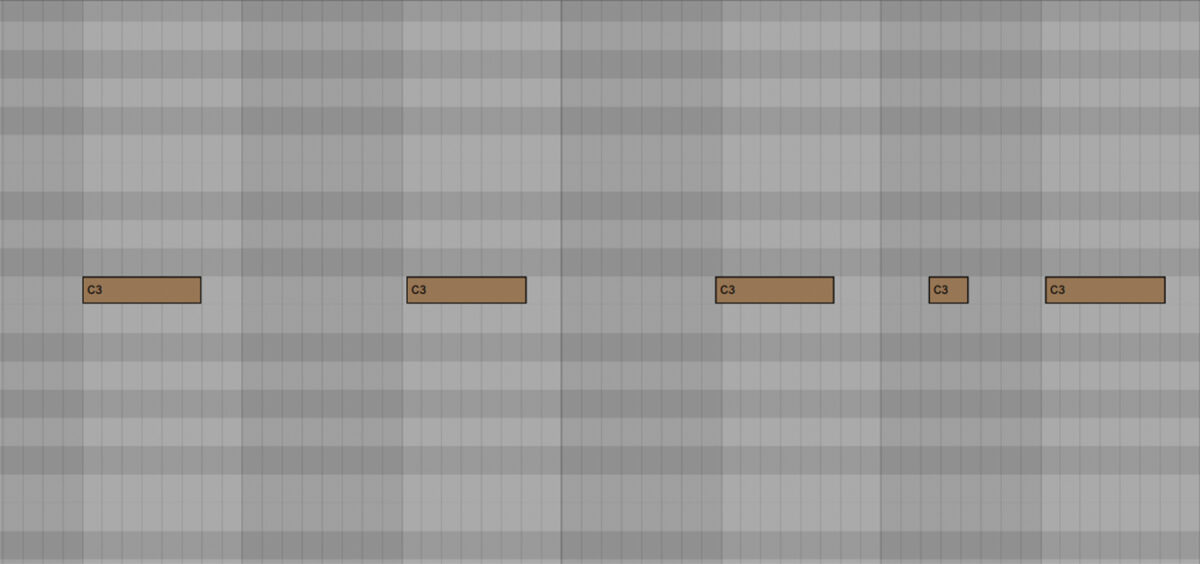
Open the MIDI clip for the clap part, select all of the notes, right-click and select “Quantize Settings” from the context menu.
First set the quantize resolution. This should take into account the shortest beat in the MIDI clip. There’s a little accent note in the clap loop that falls 1 16th note behind the beat. So the resolution should be set to 1/16 in order to preserve this rhythm.
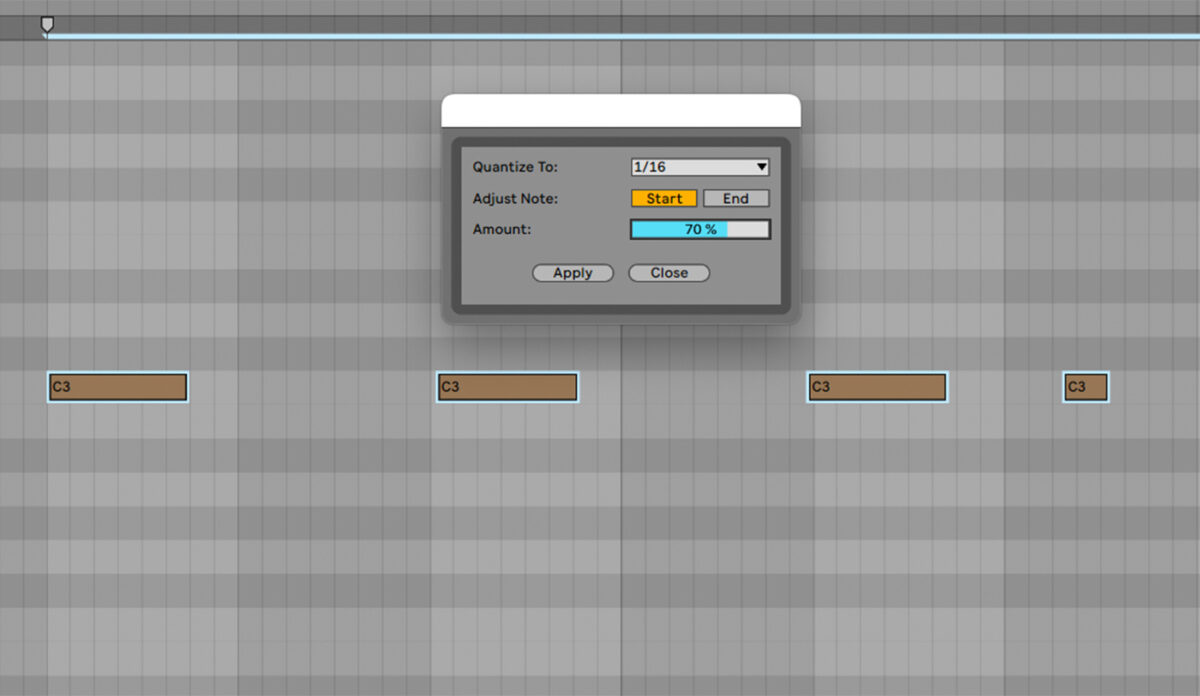
Now set the Amount. The clap should be pretty tightly quantized since it’s such a key element in the groove. At the same time, a bit of rhythmic variation will add a human feel. So let’s set Amount at 70%.
Hit apply, and the pattern is quantized. Here’s how it sounds before and after quantization.
2. Tidying up tails
The bass part also sounds unsteady on its feet. Let’s fix it using quantization.
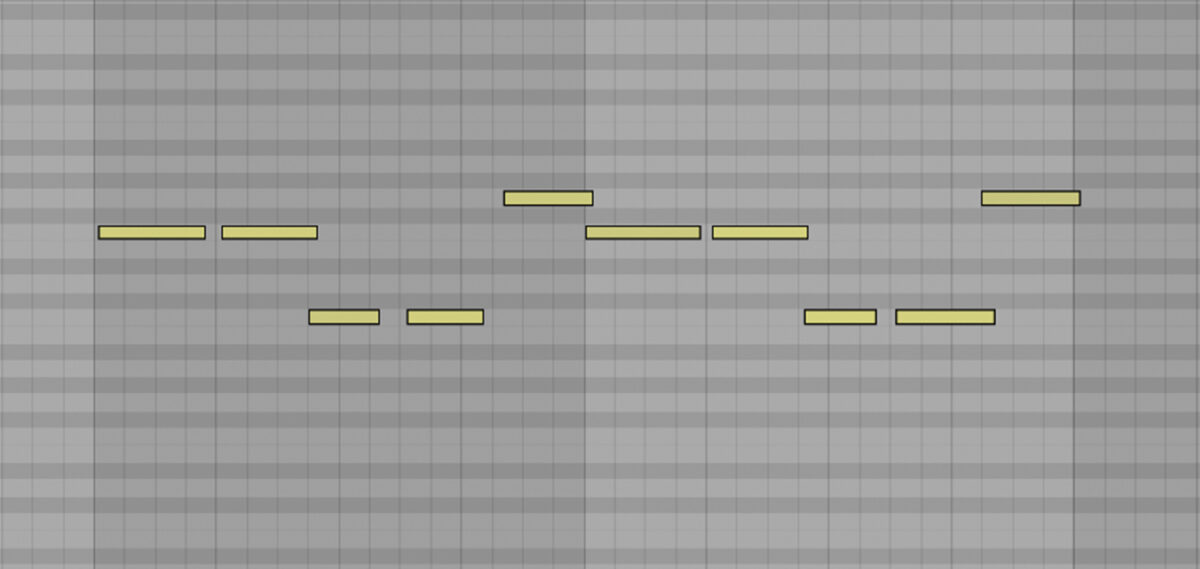
This time we’ll set Amount to 100%—again with a 16th note quantize resolution—to mesh the bass tightly with the kick drum.
There’s another issue here: some note tails are too long and overlap with the following notes in the bassline. You can see this issue on the piano roll, pictured above. This causes a subtle but audible smearing in the low-end. To fix this we can apply quantization to note end as well as note start.

Here’s how it sounds. Hear how the low end is tidier and more precise.
3. Adding swing to hi-hats
The hi-hats are in time, but they’re a little straight and robotic. House is all about that supple swing. In Ableton Live, we can add swing to the hats by applying a groove template to the MIDI clip.
A groove template is another way of quantizing. It applies a preset rhythmic feel to a MIDI or audio clip, quantizing the notes in the clip so that they match the new groove.
Open the Grooves menu and pick a template with a pleasing swing. We’ve gone for “Swing SP 1200 16ths 54.”
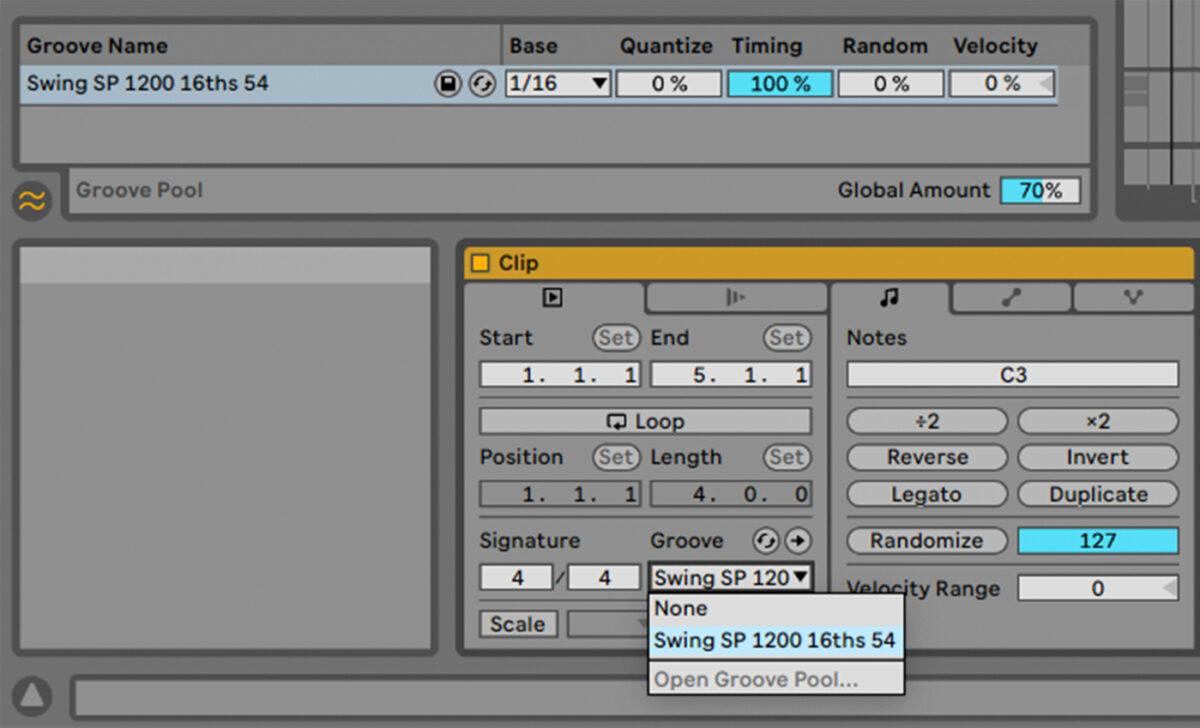
Drag and drop this Groove into the Groove pool, then apply it in the Groove dropdown menu in the MIDI clip editor for the hi-hat part.
Tweak the quantization Amount in the Groove Pool. Around 70% sounds good.
Here’s how it sounds before and after the swing is added.
Finally, here’s the whole loop with all the quantization applied. It sounds much tidier and groovier.
Start quantizing your music with a human touch
In this article we’ve looked in-depth at quantization, explaining this handy production tool and exploring the different quantization settings available in many DAWs. We also discussed how to use quantization sensitively and demonstrated some practical uses of quantization.
Now it’s time to start using quantization in your music. Featuring almost every production tool you could ever need, KOMPLETE 14 is a great place to start on your music-making journey.


