Every DJ wants to make their sets stand out with their own signature effects, and TRAKTOR PRO 2 offers a world of possibilities for this. Anyone who has ever DJ’ed knows it can be difficult to call up multiple effects with specific settings when playing live. That’s why Native Instruments will shed some light on how this can be automated by mapping commands using TRAKTOR’s Controller Manager in this tutorial. The goal? Learn how to select, configure, and trigger your effects with just one touch on the MIDI controller of your choice. Having several buttons close to each other with different effects assigned using mappings results in some incredible possibilities, for instance, multiple effects can be instantly triggered alternately, or even simultaneously, depending on button pressure. The best part is, creating the required commands in the Controller Manager is a one-time effort, which means that accessing your personal effects arsenal during a performance will be uncomplicated ever-afterwards.
In this tutorial will learn you how to create mappings using specific examples. Once you’ve understood the important principles, you can start mapping your own custom effects to your MIDI controller.
First example – one-touch beatmasher 2 effect
In this example, you’ll learn how to create mapping commands that control the Beatmasher 2 effect. To trigger this effect with specific settings, only one button is needed. The effect will remain triggered as long as the button is pressed. Of course, this mapping should always work, regardless of which effects and settings were previously used.
In order to do this, we’ll have to map some commands in the Controller Manager which is located in TRAKTOR PRO 2’s settings. Once in Controller Manager, a new MIDI mapping can be created by pressing the “Add…” button, and selecting “Generic MIDI”. We can then configure our MIDI controller via the In and Out ports. All the essential mapping commands we need can be accessed here by pressing the “Add In…” button and selecting the category “FX Unit”. Different commands can be assigned to your MIDI controller’s buttons by activating the “Learn” button and then pressing the desired button on the controller to select it.
Now we’re ready to add individual commands one by one. Since we’re assigning all commands to one button, in the Mapping Details section, set the “Type of Controller” to “Button” for all the commands below. Then set the “Assignment” to “FX Unit 1”. We will always assign the first FX Unit in this example.
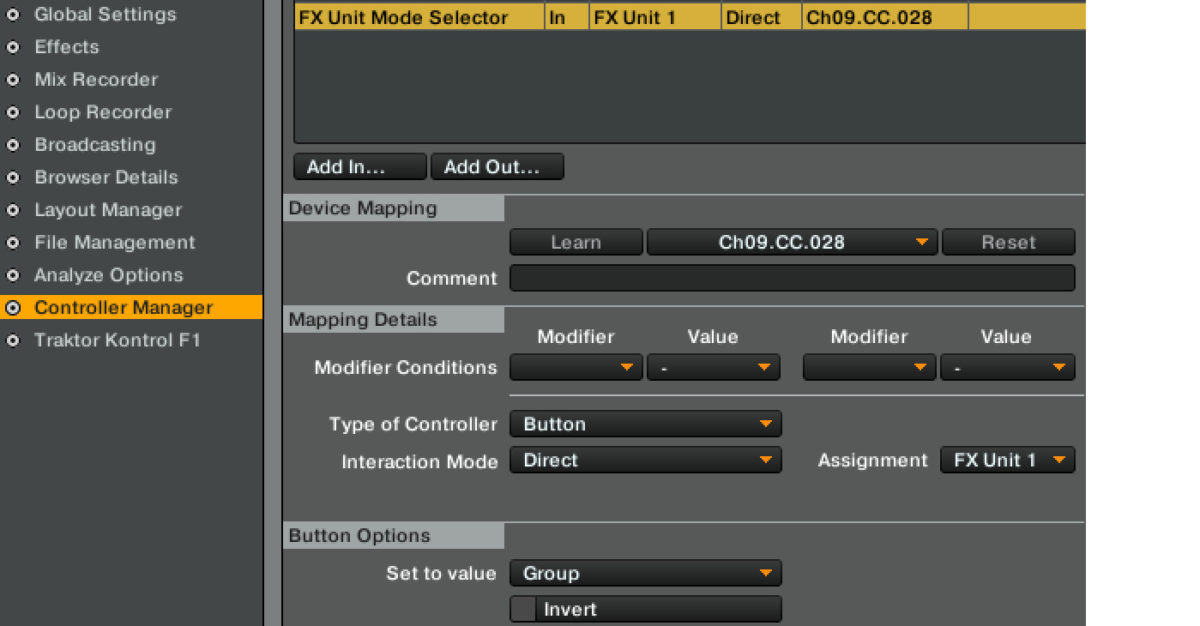
FX unit mode selector
This first command switches the FX Unit of our choice to either “Single” (one effect per unit) or “Group” (three effects per unit). Setting the “Interaction Mode” to “Direct” along with “Set to Value” to “Group” sets FX Unit 1 directly to “Group” mode when the button is pressed.
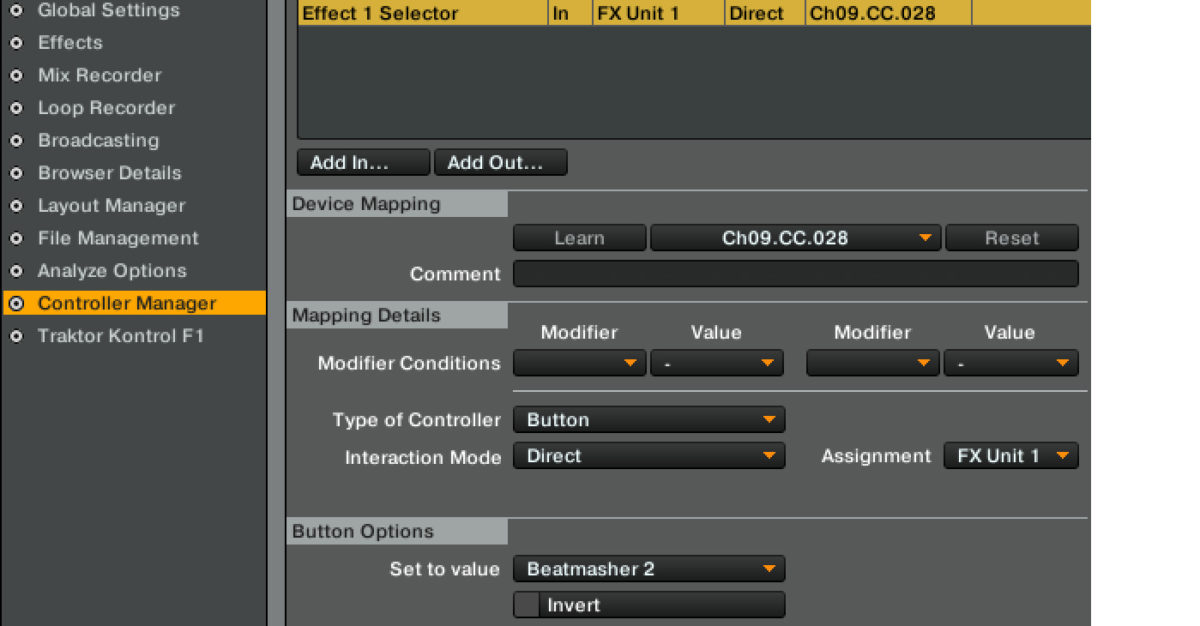
Effect 1, 2, or 3 selector
This command adds the desired effect into one of the three FX Unit slots. Set “Interaction Mode” to “Direct”, and “Set to Value” to “Beatmasher 2” to get the first effect in FX Unit 1 set directly to “Beatmasher 2” when a button is pressed:
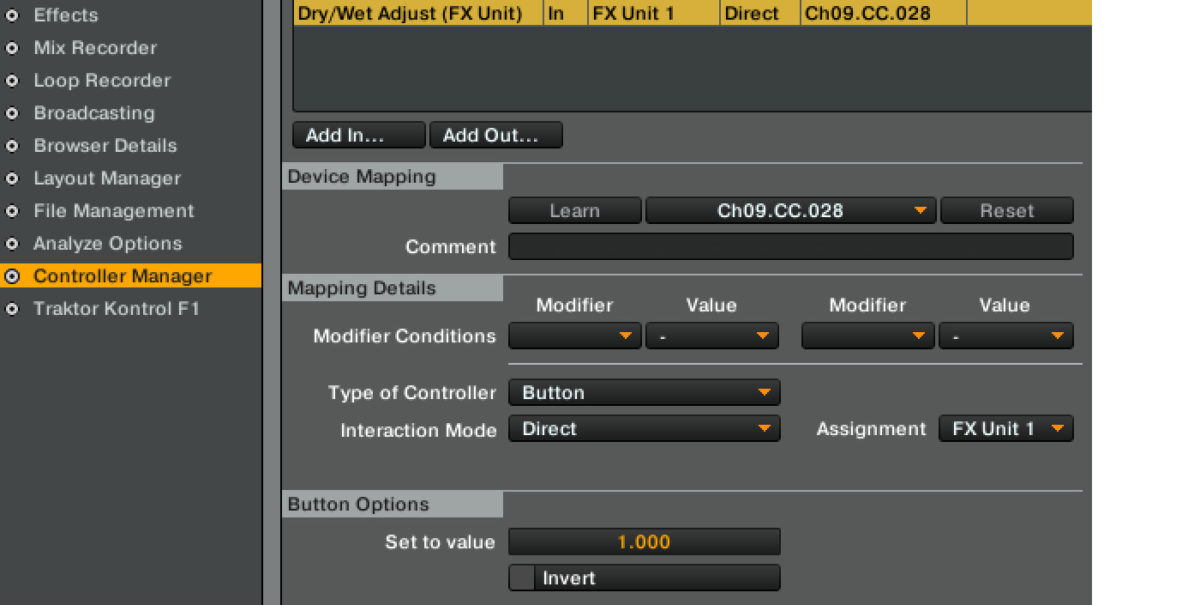
Dry/wet adjust
Sets the intensity of the FX Unit. With “Interaction Mode” set to “Direct” and “Set to Value” at “1.0” for FX Unit 1, the Dry/Wet ratio is set directly to 100% (Wet) when a button is pressed:
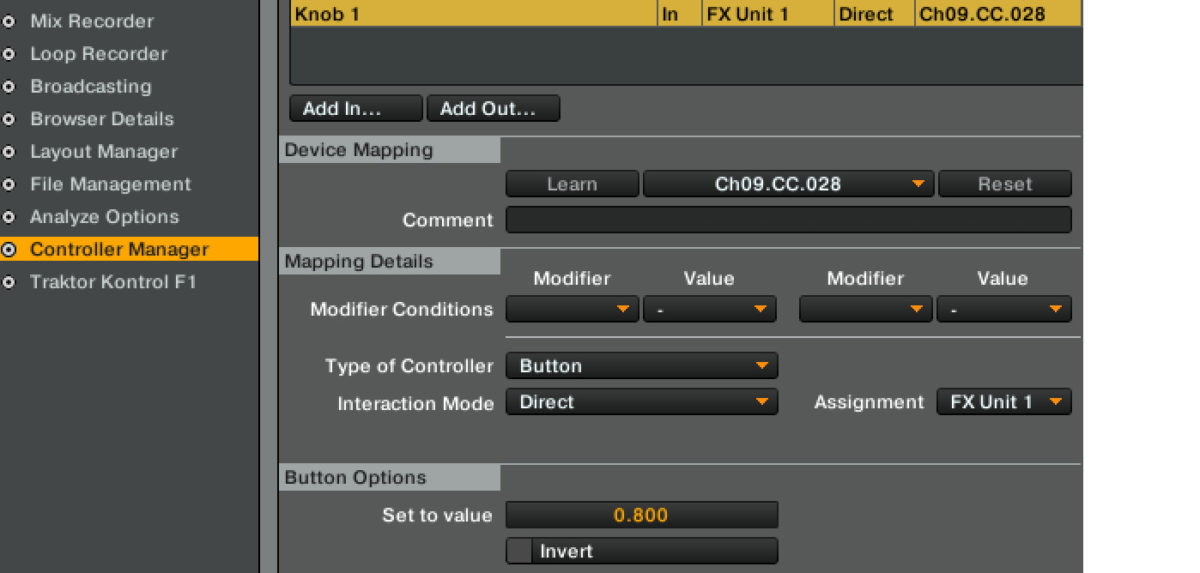
Knob 1, 2, or 3
Adjusts the effect parameter. Chose the same settings we just did for the previous command, except for “Set to Value” under “Button Options” which you’ll set to “0.8” for 80%.
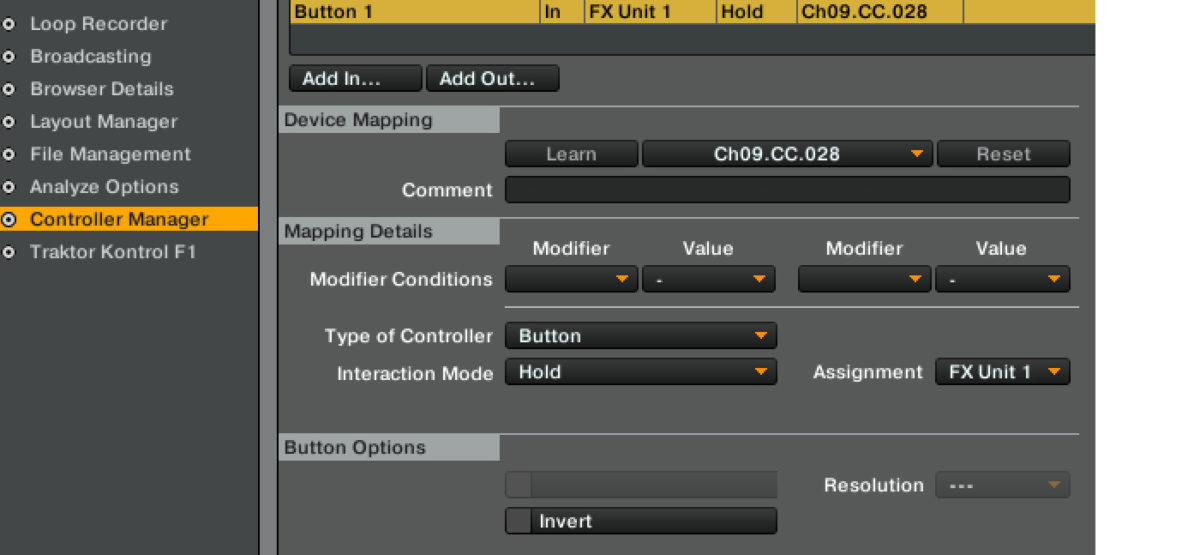
Button 1, 2, or 3 (for group mode), unit on (for single mode)
Activates effect 1, 2, or 3 in Group Mode. In Single mode, the command “Unit On” must be selected to activate the effect (the Button 1/2/3 command activates effect-dependent parameters in Single Mode). In this example, “Interaction Mode” is set to “Hold” to keep effect 1 of FX Unit 1 active for as long as the button is held.
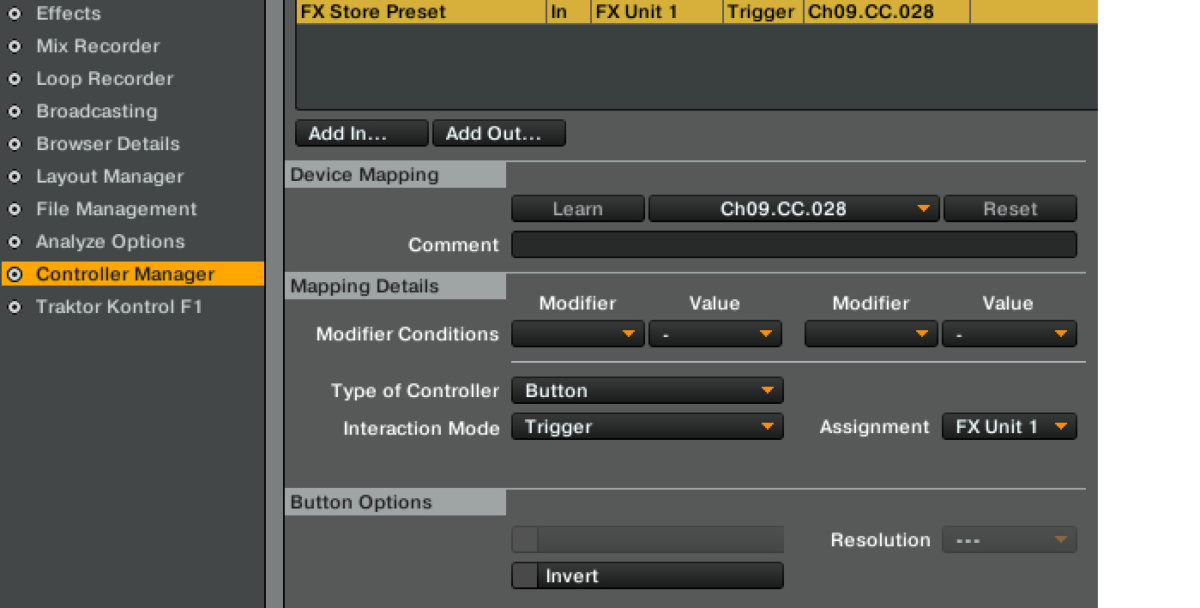
FX store preset
Saves the effect parameter. This command allows the effect to be triggered instantly, even if a different effect in the FX Unit was previously selected.
And now, our first mapped key should work perfectly!
One button, four clones
Now that we have mapped the first button with an effect parameter of 0.8, we can now map three more buttons, each using a different effect parameter (Knob 1). The easiest way to do this is to copy all our existing commands three times and just assign new buttons to each copy. Then, we’ll have to adjust the effect parameter for the three new Knob 1/2/3 commands in the Options button by changing “Set to Value” individually. For our four Beatmasher 2 keys, for example, the values 0.3, 0.5, 0.8 and 0.9 are recommended.
Before you can unleash the power of these four buttons, remember: If several buttons are pressed at the same time, the effect may be turned off as soon as a button is released – even if at least one is still held. A solution to this however, is available in the form of a “modifier”. In the next example, a modifier monitors how many of our four buttons are currently held. If no button is pressed, the modifier will have the value 0. The value is increased by one for each button pressed, and decreased by one for each button released. Later we will use a dependency on this modifier to control the effect’s on and off states.
Our first step is to map a modifier command (found under the button “Add In…” and then the category “Modifier”) with the following settings for each button:
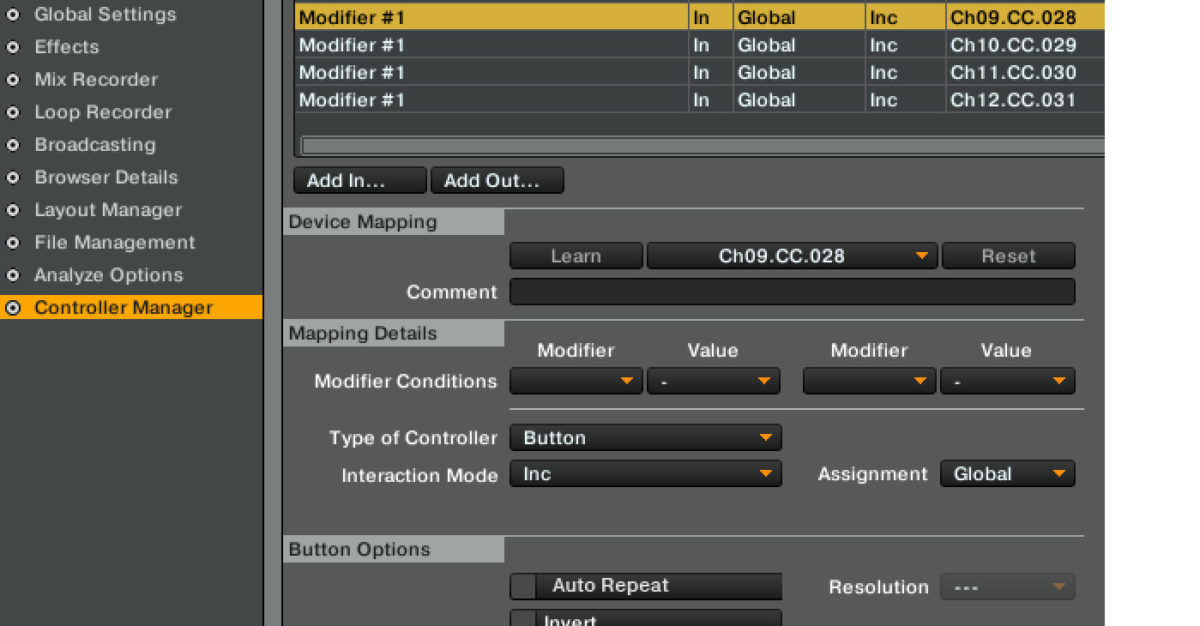
Set “Interaction Mode” to “Inc” to increase the value according to button pressure.
Then for each button, add the following “Interaction Mode” modifier command “Dec” to allow the value to be reduced:
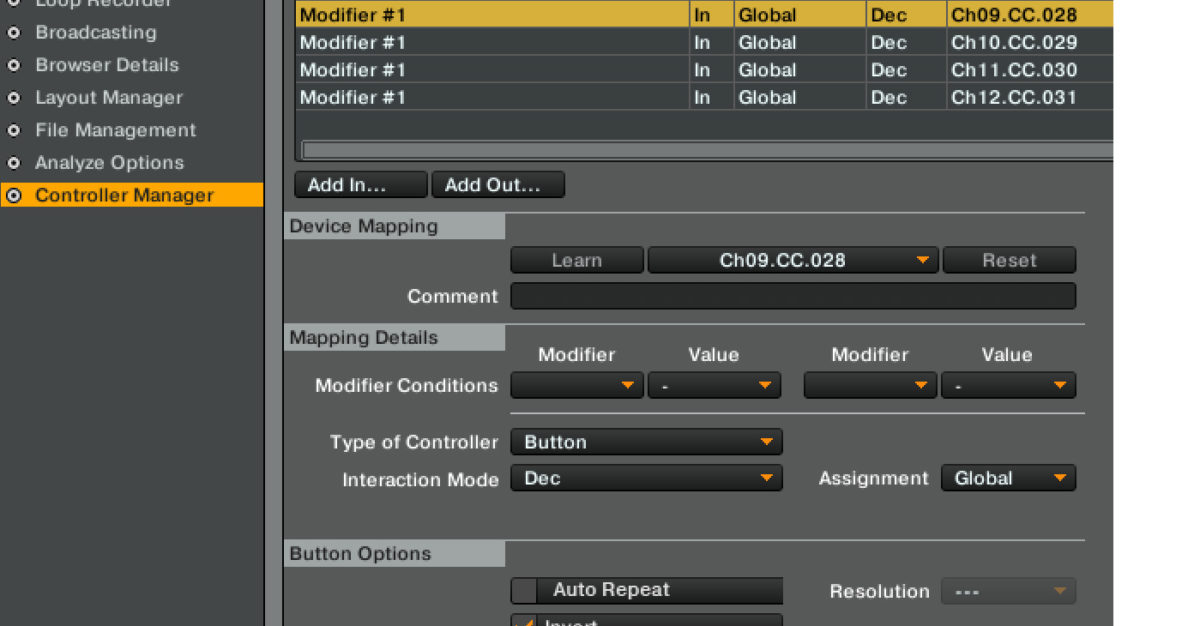
Check the “Invert” box under “Button Options” to ensure that the command is not executed until the button is released.
Now we’ll need to call up the four commands we created that launch the effect (Button 1) and add the Modifier Condition “M1=0” to each of them. This means the effect will only be triggered if none of our four buttons are currently pressed. Then make copies of the four commands and add the Modifier Condition “M1=1” to the copies. Now the effect will only stop when the last pressed button is released:
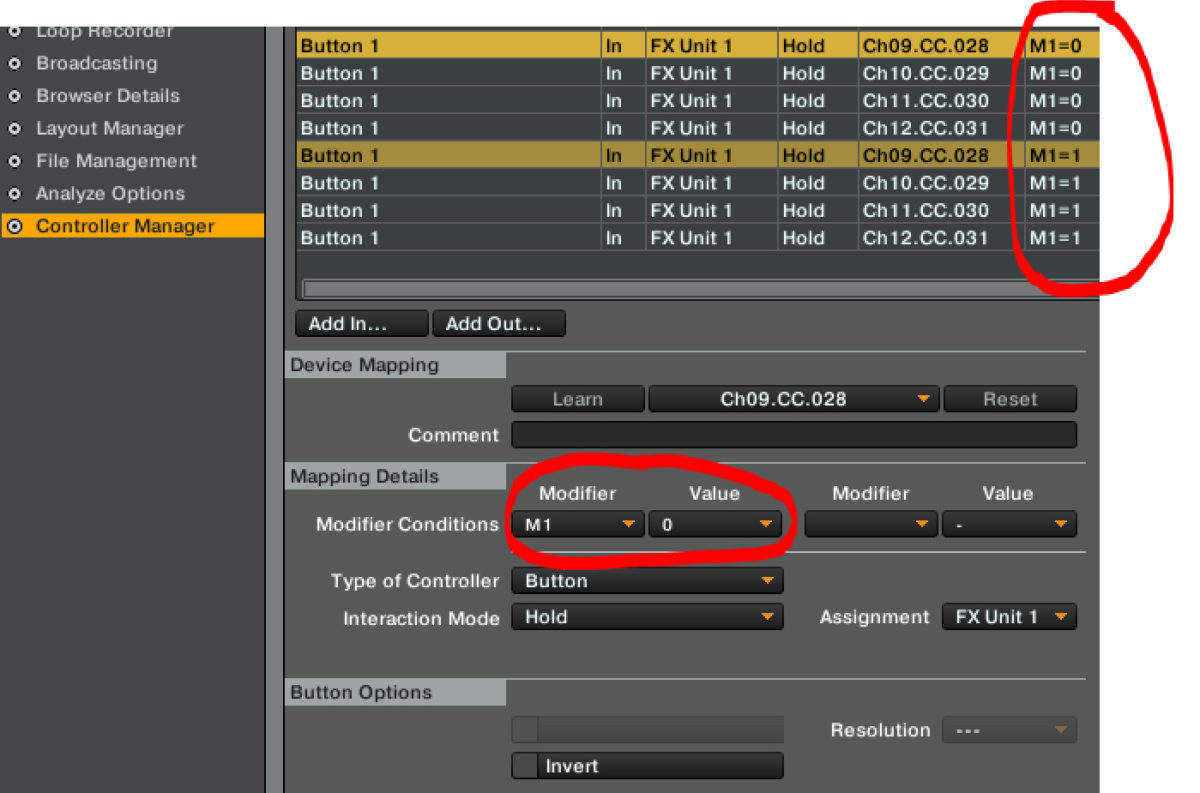
Now all four buttons are mapped and ready for some action!
Super combo
Now for an added bonus: Let’s assign the “Turntable FX” effect with the effect parameter 0.5, which will allow it to be triggered when all four keys are pressed simultaneously.
There can be many applications for this mapping. So in this example, if you press one of the four previously mapped Beatmasher 2 buttons and press another one additionally, the beat repeats itself faster and faster. As soon as you press all four keys simultaneously, the “Turntable FX” takes over and the music winds down until you release the buttons – killer as a build up before a drop!
To create this, first we need to map the command “Effect 2 Selector” with the Button Options “Set to Value” set to “Turntable FX”, and Modifier Conditions set to “M1=3” for each of the four buttons.
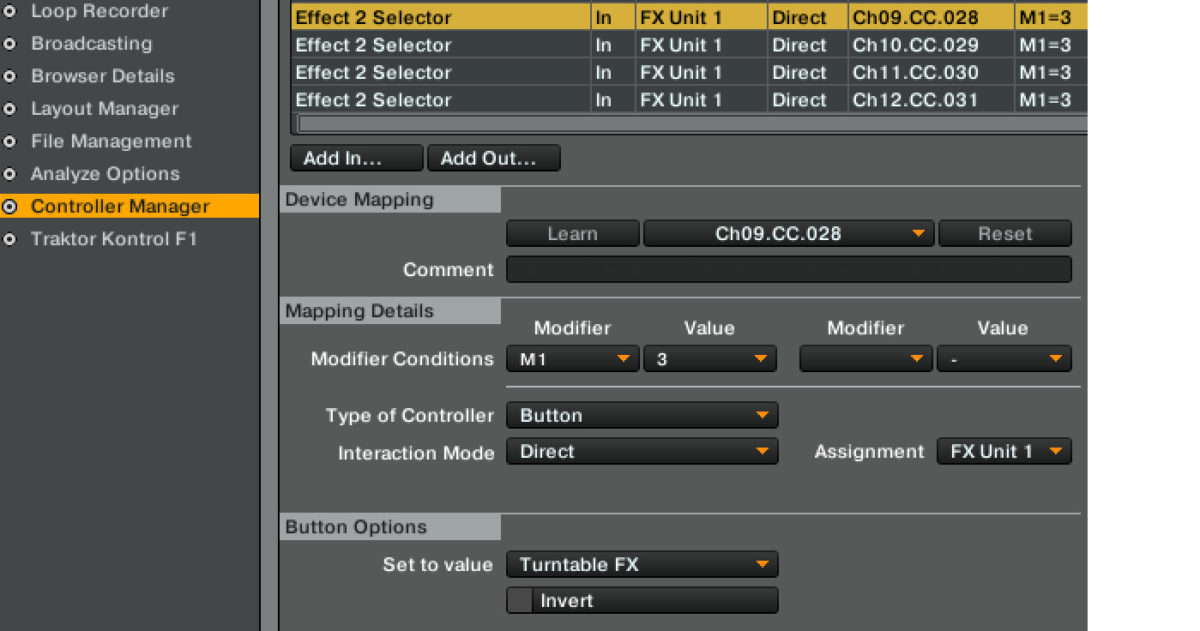
Then for each button, add the command “Knob 2” with the Button Options “Set to Value” set to “0.5”, and again “Modifier Conditions” to “M1=3”.
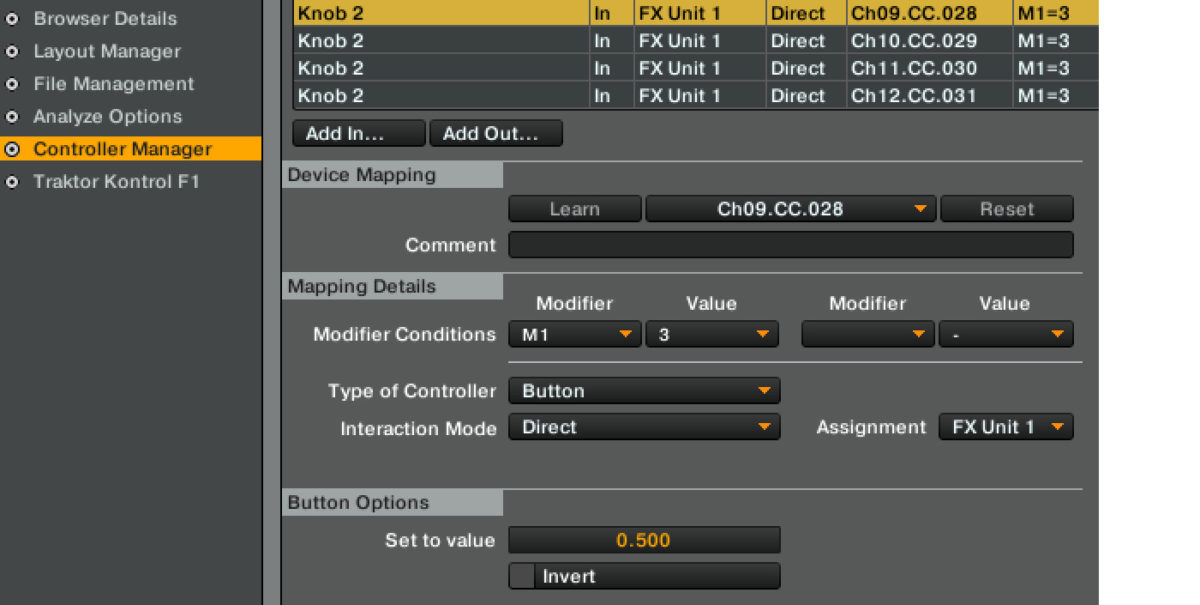
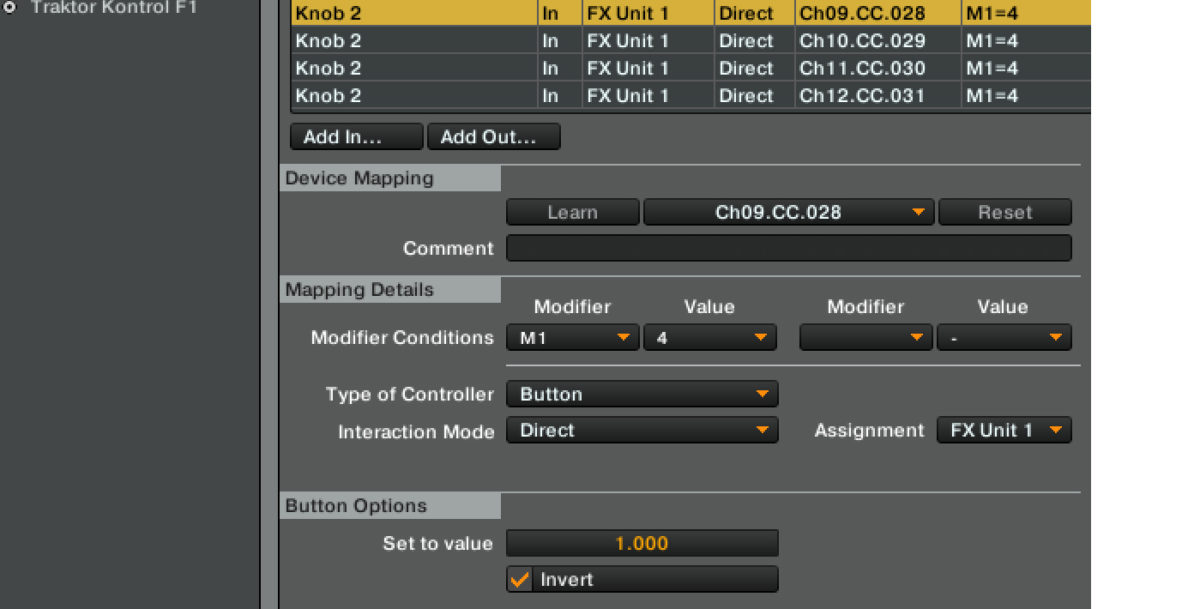
Now when the buttons are released, the effect parameter will increase to the value 1.0. To get this behavior we need one “Knob 2” command per button, this time with the “Modifier Condition” set to “M1=4” and with the “Invert” box checked.
Finally, configure the “Button 2” commands with the “Modifier Condition” set to “M1=3” to activate the effect, and set “Modifier Condition” to “M1=4” to deactivate it. Select “Hold” as the “Interaction Mode”.
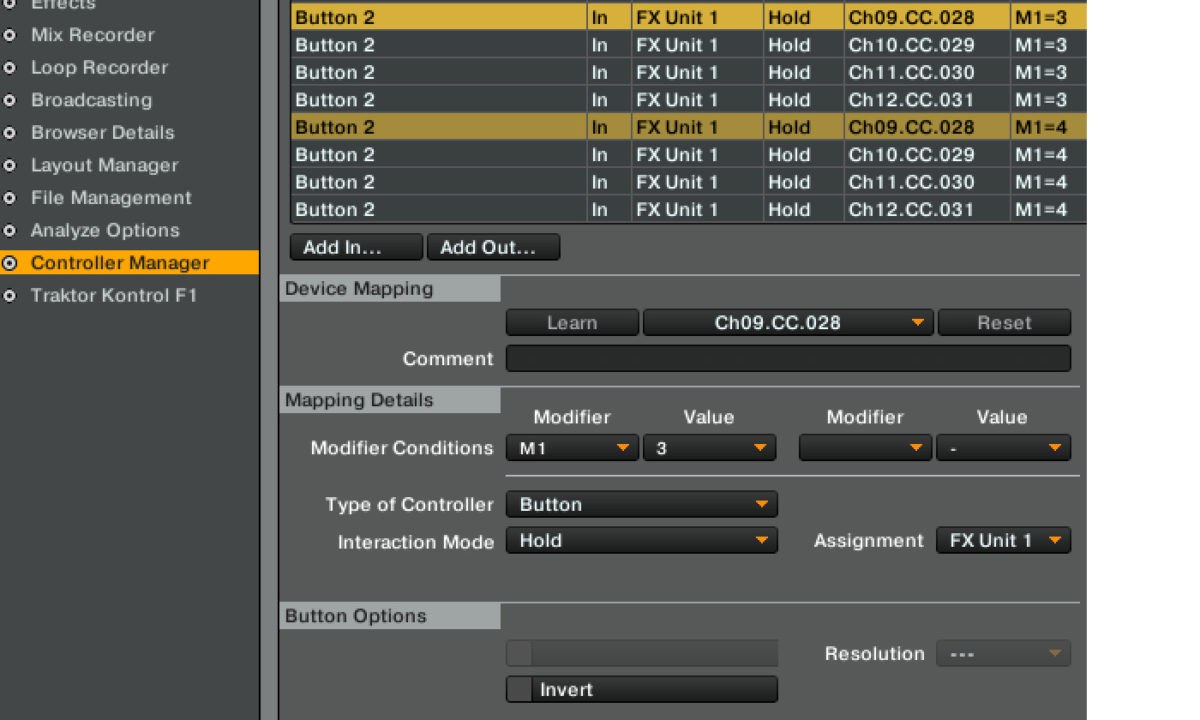
And now, our super combo effect should work!


