


Initially a guitarist for a hardcore punk band in Brighton, England, Breton Vivian’s love of composing took over in 2014. Following his acceptance to the USC’s School of Cinematic Arts’ film scoring programme, Vivian boarded a plane to LA to work as an assistant to revered film composer Bryan Tyler (Transformers: Prime, The Expendables trilogy, Iron Man 3, Avengers: Age of Ultron).
The duo co-composed the 2019 American romantic drama Five Feet Apart before combining their talents to score Taylor Sheridan’s neo-Western drama Yellowstone and the almost entirely symphonic soundtrack to its 2021 prequel, 1883.
With the show’s wild yet beautiful landscapes requiring a highly symphonic, cinematic sound to match its sweeping scenery and character-driven storylines, Vivian is perfectly placed to offer his in-depth film composition knowledge on how to program realistic strings to add authenticity to your orchestral and string-based recordings.
Follow along with your copy of KONTAKT.

1. Have a vision for your score
We began writing 1883 at the script stage before we’d actually seen any film, which was a really interesting way to approach the score, but to get me thinking in terms of where I want to go before I start writing on a project, I’ll typically listen to a ton of music and build playlists of stuff I really like. That will often be string-based classical music, but I wouldn’t normally add any film music to those playlists because I want to begin from a unique starting point and avoid sounding like other film composers.
I tend to think thematically and melodically, so I’ll try to come up with lots of different string themes and motivic ideas that might represent certain emotions, characters and story elements. On top of that, I’ll try to add textural ideas and push my ideas for a score into areas that feel as though they’re in the world of that story.
2. Start with a piano mock-up
A while ago a friend of mine suggested something that completely changed my approach to creating realistic strings mock-ups, and that was to start with a piano sketch so you can really get to know the full entirety of a piece and where it’s going to go. Doing that also means that if you’re going to make early changes you’re only changing piano notes rather than elements of a more complex orchestral arrangement.
The best thing for me to do is to just get the ideas out of my head and onto Logic. When I approach a string score in this way, I feel much more focused on the notes themselves and it makes it easier for me to conceptualize the piece and how it reacts to picture rather than going all-in on every little detail from the get go.
3. Prepare your string sample libraries
Before any project begins, I’ll build a big template just to start thinking about what sounds I want to use. Personally, I prefer to use Cinematic Studio Strings, but I might combine that with another library recorded at a different studio just to inject the sound of a different space into the music.
I spend a lot of time trying to program MIDI strings so it’s really important to find a library that you can quickly get realistic-sounding results with. One of the added benefits I’ve found using Cinematic Studio’s libraries is that you can copy a solo MIDI strings track onto a full string section and it’s scripted in a way that everything will play really well together. The samples also allow you to re-orchestrate very quickly without having to do too much to fix the strings.
The other thing I’ll think about when building a string template for a project is what kind of plugins I want to include and how I want everything to be routed within the buses. These decisions can be important when it comes to stemming as having a workflow figured out early on can make the laborious stemming process much more efficient.
4. Create your own string library in KONTAKT
I use KONTAKT to host my strings sample library and the software’s become a big part of my workflow. Before every project I’ll buy some instruments, mess around with them and record loads of different types of melodic ideas, chords, textures or percussive rhythms that might be great within the world of the movie or show I’m working on. I’ll basically sample these instruments, chop the sounds up and build new string sample patches to place into my library.
I’ll talk more about this later, but if you’re not musically proficient, you can always hire a musician for an hour or two and get them to record some random stuff. Sometimes, we’ll hire a violinist, manipulate the audio and put that in. The added benefit to creating your own samples is that when the time comes to write you can quickly call up a unique sound that no one else has. Everyone can buy the same sample libraries, but if you make your own it’s unique to you and creating your own KONTAKT strings library is not only an inspiring way to work but a great jumping off point for a cue.
5. Manipulate strings in your KONTAKT library
Your KONTAKT library can be used as a great way to manipulate audio and create new and interesting string sounds. I’ll sometimes take one of my string sample instruments and turn the ‘tune’ knob all the way down so that the sample is pitched an octave or two lower. You can also drag the sample in the mapping menu so that it’s mapped over many pitches. A sound I use a lot that was created using this method is of me playing a guitar with a slider. Re-pitching it in KONTAKT slows down the sound and really brings out the overtones of the original recording–then I’ll wash the sound out with loads of reverb and use it as a textural effect.
Another trick I like to do in KONTAKT with some of my instruments is to map out articulations to different velocities. For 1883, I created realistic strings from sample patches using violin and cello and recording many sets of long articulations, for example, sul tasto, harmonics, random tremolos and sul ponticello, setting each articulation to a different velocity. By doing this, the string sample patch will have a certain amount of controlled chaos. As I play a chord, each note will have a different velocity and therefore call up a different articulation and this can create a really interesting textural string sound that’s more unique than just a single articulation. If I don’t like the sound of one articulation for that section, I’ll just change the velocity of that specific note and a different articulation will play.

7. Use automation to smooth inconsistent transitions
Another issue I’ve found with legato samples is that some transition samples will be at a different dynamic level to the sustain notes. For example, you’ll have your modulation wheel at the dynamic of mezzo piano and when you hit the next note a legato transition sample that’s at forte will play before fading down to mezzo piano for the next sustain note. To me, this sound is equivalent to driving in a car at 30mph then slamming on the accelerator only to brake and slow down to 30mph again.
To correct this, you can use continuous controller (cc) automation. On all the transitions where the dynamic is too loud I will simply duck down the modulation cc and then draw it back up once the transition has faded back into the sustain note. Some patches will have the opposite issue where the transitions are too quiet, so it’s just a case of figuring out what’s happening with your chosen sample and compensating.
I’ll also use the expression cc to help have more control over the samples. I like to use expression more to balance the overall melodic line of the sample and use the modulation for correcting the dynamics of those legato transitions.
8. Use hardware to add personality to your string sounds
Sometimes, I’ll send audio out of the computer and into guitar pedals to get different sounds. I did a movie called Five Feet Apart where a lot of the music was created by sending string sounds through guitar pedals and screwing around with the audio that way rather than having the sounds stay within the computer.
I have a pedal that is a tape delay that I like to send audio into with the feedback set to self-oscillate because it creates this chaotic noise that works really well as a sound bed. I also like using outboard synths. For some reason an analogue synth can really help to glue strings samples together and make them sound more realistic. For example, if I have a synth pad underneath some solo strings, it’ll often all sit really nicely together. Using a synth in the low end can also really help fill out that part of the spectrum and give your sample more presence.
9. Use live musicians where possible
Having the ability to create realistic-sounding strings mock-ups allows you to be more flexible on low budget projects where hiring an orchestra is a luxury. However, I feel that hiring musicians or recording yourself on your scores is still incredibly important. Recording a soloist, for example, will not only add a human element to your score but lend legitimacy to the samples and help make your strings sound more realistic.
I also think that it’s very beneficial to be able to mix and blend live recordings with samples and for that purpose I like to use a convolution reverb on live instruments. This allows them to sound like they’ve been recorded in a room such as a scoring stage.
10. Control your samples using a tablet
There are some great software options that allow you to send and receive MIDI data on a tablet through an interface that you can design. I personally use TouchOSC with an old iPad but there’s other software and tablets you can use. I have my samples set up so that I can switch between different articulations using the tablet so I don’t need to use one track per articulation and I’m also not having to open up KONTAKT whenever I want to change the articulation. I also use it to input my cc data.
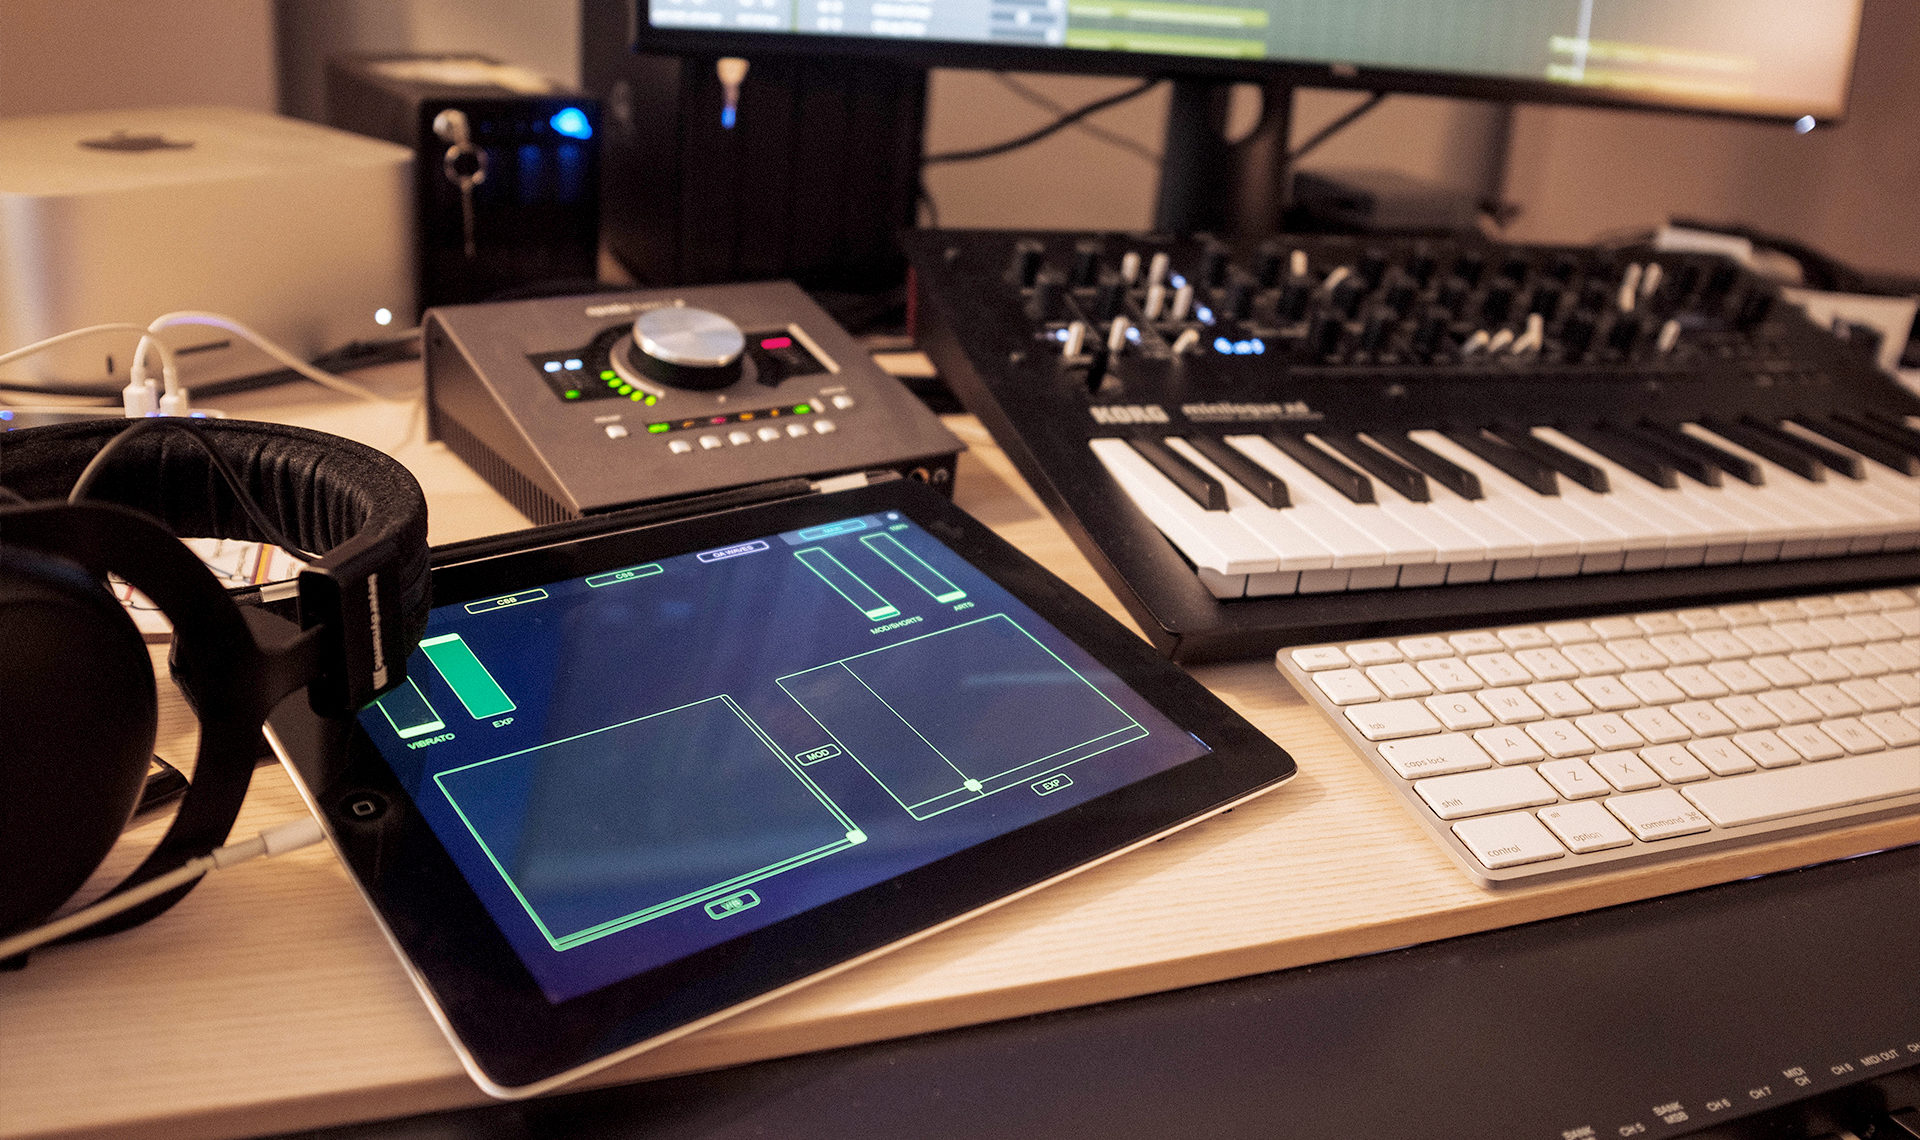
Some composers never get used to using a virtual fader rather than a physical fader box, but it doesn’t seem to bother me. I have an x-y fader grid so that I can input two cc data simultaneously such as modulation and expression, for example. I will also use TouchOSC to make some plugins more intuitive such as controlling a granular synth’s parameters in real-time and shaping the sound that way. Software like this can also be a huge time saver when it comes to using key commands or calling up plugins that I use frequently. In the end, it’s about finding ways to focus your time on writing and not diving through menus looking for a sound.
Start programming realistic strings
We hope this conversation with Breton Vivian will help you in your composition projects in creating lifelike strings in your arrangements.
For more on KONTAKT, from interviews with other composers to how-tos and free instrument downloads, check out the KONTAKT dedicated section here on the blog. You can keep up with Breton and his latest projects over on his website.
And make sure you’re using the latest version of KONTAKT. Find out what’s new in KONTAKT 7.
Related articles
-

Behind the synth: A. G. Cook on stacked sawtooths and the creation of Super*Saw
Explore the extremes of stacked sawtooth waves with Super*Saw, a new synthesizer co-created with A. G. Cook. Learn how to…
-

Inside the evolution of orchestral sampling: an interview with ProjectSAM
Discover how ProjectSAM’s Lineage Series uses NKS and smart features to change orchestral sampling. Plus, save on instruments in our…
-

How New Constellations turn emotion into sound with Massive X
Go inside the studio with New Constellations. Learn how they use Native Instruments gear, happy accidents, and lifelong friendship to…
-

Citizen Kain on building emotion and space with Replika
Citizen Kain explains how Replika helped shape the rhythm, tension, and emotion behind his debut Eversun Records single “Moments.”…
-

The organic precision behind Calcou’s Anjuna release featuring Reaktor
Calcou shares how Reaktor, Monark, and Super 8 shaped the creative balance and live energy behind their new duo EP,…
-

14 NKS instruments that will change the way you create music
Discover 14 NKS instruments to freshen up your workflow. From lo-fi tape synths to cinematic strings, shop the Native Instruments…
-

Parallelle on crafting living basslines with Reaktor and TRK-01
Parallelle share how Reaktor and TRK-01 shape the bass and warmth in 11th Avenue, balancing analog depth with modern control.
-

Where will your sound lead you? Explore the Native Instruments Summer Sale
Save 30% on instruments, effects, and sounds in our Summer Sale. Find the tools to keep your tracks moving and…