Dynamics are one of the defining features of a mix and something producers at every level are told to focus on if they want loud, punchy results. But with so much information out there – and so many different dynamics controllers, from compressors and limiters to transient shapers and maximizers – it’s hard to know which tool to use and how to get the most out of it.
Even once you figure that out, dialing in settings for a professional-quality mix is a whole other challenge.
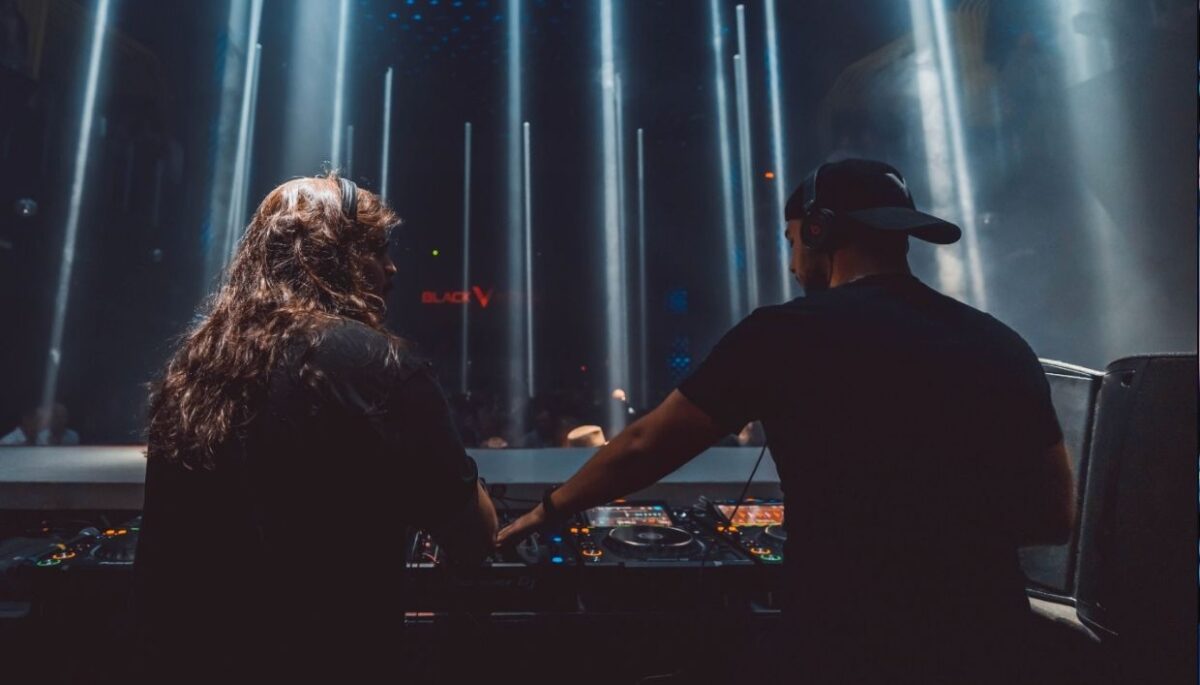
Nobody knows this better than Miami-based duo Black V Neck. Their warm, swing-heavy productions have earned them releases on Dirtybird Records and slots at massive festivals like Insomniac’s EDC.
Since first landing on Dirtybird’s Birdfeed in 2018 with “Stop ‘N Go,” they’ve built a strong relationship with the label, returning with releases like their Mouth Music EP in 2019, Bounce EP in 2020, and a track on the 2021 Campout Compilation.
See if Black V Neck is playing near you right here.
Jump to these sections:
- Maximizing vs. Compressing
- Does “loudness” actually mean “impact”?
- Hot takes on the loudness wars
- Polished mixes in today’s music scene
- How too many effects can cloud the end result
- Mistakes producers make when using maximizers
In this interview, they break down how they approach dynamics, using tools like iZotope’s Ozone bundle to shape their mixes for everything from small clubs to massive festival stages.
We cover the difference between maximizing and compressing, what loudness actually means in today’s scene, if the loudness wars are really over, and the biggest mistakes new producers make when handling dynamics.
What’s the key difference between maximizing and compressing when trying to achieve loudness in a mix?

For the sake of simplicity, I will refer to compression and limiting as one in the same process when compared to “maximizing” as presented by the following questions. A common misconception is that compression makes things louder. If you want “more loud” then I’d suggest reaching for some different tools. A compressor/limiter can do a multitude of things for you assuming it’s been dialed in appropriately, like decrease crest factor or even color the source material if you want it to.
When I start to think about a project from the mastering engineer’s perspective, I tend to keep compressors out of my tool box 99% of the time and that is specifically because of how I use them in a mix.
In reality, this goes beyond the idea of compression and into a ‘big picture’ mentality of how I set up my mixes in general. I’m not going to explain how compressors or limiters work here, but in my workflow they are specifically for changing the character of the transient information in relation to the ‘tail’ of the sound.
For me, they almost go hand in hand with transient shapers and are used as an effect to bring out characteristics in a sound that I like.
Gain matching is hugely important as you potentially pass your signal through different processors. This ensures you’re hitting the sweet spot on those plugins that depend on it, keeping your ears in check and not fooling them with gain spikes. This also makes it infinitely easier to hear what is actually being done to your signal as you process it. All of this workflow management lends itself to why this doesn’t really apply to maximizers in my use case, which I’ll touch on later.
When approaching mastering my own tracks, I aim to leave the qualities of my mix alone to the best of my abilities. I spend a lot of time dialing in my mix and getting it to sound the way I want, so naturally a transparent master chain is ideal.
When working on a client’s master, I am especially mindful in choosing the processes I apply in an effort to improve and finalize what was entrusted to me. Knowing this, maximizers are similar to limiters in terms of functionality with the exception that the threshold is linked to the output gain.
This allows the processor to boost the signal above the threshold to increase the perceived loudness of the source which makes it ideal for mastering.
Many plugins like Ozone’s Maximizer also include many useful limiting algorithms that allow for maximum transparency when mastering, as well as useful tools like gain matching and dithering. I exclusively use the Maximizer at the end of my chain because I don’t need to gain match AFTER this process.
This can be useful in a mix as well for really squashing sounds, but I would probably reach for a simpler limiter or stock clipper if all I was doing was controlling peak level as it still allows you to minimize CPU load and gain match your signal flow.
Do you think loudness always equals impact in a mix, or is it more nuanced than that?
Yes, absolutely gobs of nuance to trudge through here. So much time has been spent researching and explaining loudness that I struggle not to feel like a broken record, but essentially the human ear really likes loud sounds.
We perceive them as “better” in almost every comparison to the same but quieter source material.
That’s why turning up the volume usually evokes a dopamine rush for music enjoyers alike. As much as I’d like to type out a lengthy and super interesting explanation of the Fletcher Munson Curve or why the EBU developed LUFS, I’m going to point out two things to keep in mind instead; LUFS has become the standard when measuring perceived loudness for distribution, and the majority of listeners use streaming services to enjoy their music.
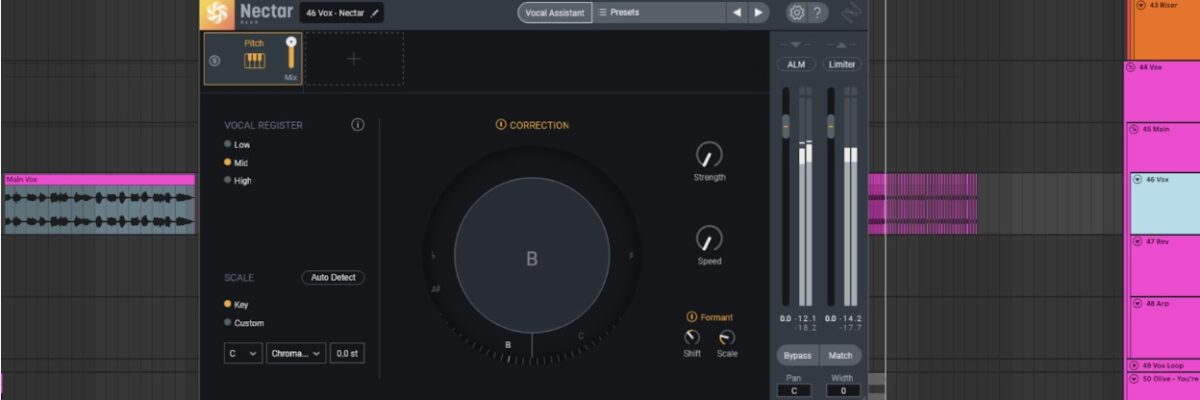
Many mastering engineers use tools like Insight or YouLean to measure in LUFS. This allows us to have a good idea of how our material fits in with our peers. However, this also allows end-user platforms like Spotify and Apple Music to give a loudness score to material on an average perceived loudness of the entire composition, better referred to as program loudness in LUFS. There is what’s commonly referred to as a “loudness penalty” implemented through streaming services which directly correlates to the score given.
This concept ensures the average program loudness is put to use so that when you’re shuffling through songs in your cursed “Liked” playlist, skipping from classical music to DnB doesn’t cause permanent hearing damage. Although some engineers are heavily concerned with program loudness, a more commonly referenced value is Short Term Loudness which is usually measured on a sliding 3 second scale instead of the entire source.
All of this matters because two tracks that measure the same can still sound drastically different in terms of perceived level. This is usually because LUFS measurements are heavily influenced by low end information which causes tracks to receive a higher loudness score, even if we don’t perceive them to be loud.
Adjectives like “impact” and “presence” are usually descriptors of lots of little steps, decisions, eq moves, whatever it might be, made throughout the mixing process to achieve a desired result.

A “balanced” mix will always be perceived louder than a mix where the bass is cranked way too loud and is completely out of touch with the rest of the elements in the arrangement (look into frequency masking, too).
Technology has allowed us to push the bounds of what we deem acceptable when considering dynamic range in our music, compared to how loud our music has become. So what are we to do about solving for a lack of dynamic range in a world where perceived loudness is so sought after? Perceived dynamic range is the largest difference a listener can hear between the loudest and quietest parts of a mix.
In my opinion, the “nuance” comes from understanding and implementing this concept while mixing.
You can increase the perception of having more dynamic range than you actually have at a given loudness by picking the right sounds, making sure your arrangement makes sense, and understanding what your processors are doing to your signal path and how you can use them to achieve the result you want, in that order.
Things like clipping before your limiter and automating your maximizers threshold throughout your arrangement can also help.
If you’re into winning the loudness wars and you’ve never heard of processes like “companding” or “ringmod sidechaining” I’d recommend looking into that if you want your mind blown.
What’s your take on the “Loudness Wars” in today’s production space, and how can tools like Ozone help producers navigate it?
I’m going to be honest, I will not hesitate to send tracks into the upper stratosphere of loudness just because I feel like it. If it sounds good, it’s going to stay loud.
That being said, it’s important to understand the music you’re making and your objective with the music you’re working on. Are you a mixing and/or mastering engineer? Chances are you are working on a wide variety of source material that requires a ton of different processors and processes to successfully deliver a track.
Are you a bedroom producer making the same or similar genres of music for your brand or alias?
Chances are you’re going to need to understand how creators in your space are presenting their work. Specifically, producer/DJs know that the genre they produce has unspoken rules for loudness. For example, just under the “house” genre umbrella alone you can find a minimal house track that averages -8 LUFS vs a tech house track that averages -6 LUFS.
What if you’re just doing it for fun? Then do whatever you want. No pro tips allowed, but if it isn’t fun then why do it?
Loudness always comes at a cost, usually dynamic range and distortion. I’m going to jump straight to the good bits here, but there are ways to circumvent the perceived loss of dynamics and distortion at closer-to-zero LUFS measurements. Saturation/waveshaping, companding, EQ, transient shaping, compression/limiting, and audio clipping are all great tools for getting the most out of your sounds.
All of these processes can be used in ways that increase perceived loudness and of your signal and perceived dynamic range of your arrangement, all while lowering peak level which decreases crest factor while circumventing unwanted distortion (if you know your stuff and dialed in your processors correctly).

Knowing what processors to use, the order of operation, and when to implement them are even more important. Ozone as a mastering suite helped me a lot at the beginning of my journey. Much in the same way you might reverse-engineer synth patches to learn sound design, presets were a great way for me to understand why engineers would use certain processors in certain orders in their workflow.
I really love to use Transient Mode on Maximizer with a longer release time to try and maintain perceived dynamic range. Adjectives like “punch” and “smooth” come to mind when using this algorithm if it’s not being pushed too hard. If you only have access to a stereo mix, tools like Low End Focus and Master Rebalance can be vital in achieving a loud and clean master.
How important is achieving a loud, polished mix for standing out in today’s streaming-focused music market?
Not as important as we’d like, but still very important. I often play the devil’s advocate and argue that the idea is more important than the mix, but I think we can all agree there are limitations to that argument.
Even the untrained music enjoyer can tell if something sounds objectively bad, why give them a reason to skip your track?
There IS such a thing as good enough (and knowing when to stop), but finding that line can be very difficult for a starting artist with so many variables at play; what sounds to use, how loud to make the bass relative to the kick, are the kick and bass in phase, why does my snare suck, does my arrangement make sense, is my EQ supposed to look like a fine-tooth comb (no, not usually)… it can be a lot to juggle.
I will always present the argument, do what you love. Do you love spending time figuring out why your mix doesn’t sound like your favorite artist? Then don’t do that. Do you love practicing for hours to perfect and understand your craft? Then do that.
Realizing that what you like to do versus what you have to do is important, and finding a balance between them will do wonders for your mental health and your creativity. It should never be looked down upon to use the tools available to you to make the best art you can.
There’s a reason people buy sample packs, spend money on engineers, and even AI. So if that’s what it takes to get your mix to the next level, even if it’s temporary, then do it. You’re only hurting yourself by beating your head against that hypothetical wall. Set your ego aside, your art is far more permanent than you are.
Take the time to study, watch youtube videos, and cross examine your research. Make sure you have multiple viewpoints on the same subject matter and don’t take anyone’s word at face value. Trial and error is your best friend because you can’t shortcut experience, even with mentorship. In my opinion, the only things that will make you stand out in an oversaturated market is a passion for your art, authenticity, and consistency.
Can using too many effects on individual tracks hurt the final results when maximizing? How do you find the right balance?
There is always a downside to slapping on another EQ, compressor/limiter, clipper, transient shaper, saturator, etc. There are arguments online that stress the importance of the idea that less is more. I’m an advocate of that nomenclature, but also understanding that there are always exceptions to the rule. Need an extra channel to slap a highpass filter on a sample you just downloaded? Totally fine.
Is that kick drum not fitting in your track correctly, so you want to put eight saturators, 28 EQs, and three reverbs on it?
Probably not a good idea.
Understanding how to pick the right sounds and arrange them comes from ear training and experience, a point I stressed earlier. Ear training simply means knowing what to listen for. A common question asked to beginners in this field is, “can you hear compression,” and that’s usually with good reason and intent.
Understanding how to train your brain to detect these differences makes your choices with the processors you use significantly more effective. Using a compressor but not knowing what to listen for is like cooking food but never taste testing your seasoning as you go. Eventually you learn from your mistakes… “too much salt, too little pepper.”
I went through this when I was starting out – always overdoing the effect in question – only to dial it back significantly at the end of a mix, or even a couple weeks later once I could hear it was too much. Although frustrating at times, the extremes of a plugin can be a great way to hear what they’re doing to your signal. As long as you remember to gain match so you’re not fooling your ears, you can gain a lot of information about what it is you’re doing that way.
The “right balance” comes from experience, knowing what it is you need from a sound or how to get it to fit in your mix. Sometimes, taking a step back or getting a second opinion can be invaluable to your progress. Support groups like discord communities or chats with your producer friends are great places to start.
What’s one mistake you see newer producers making with maximizers, and how would you suggest they fix it?

Organization is key, and understanding signal flow and why it’s important is crucial. For example, my master chain for Retail Records is relatively unchanged from our first release. I mix and master all the tracks we sign, as I believe it’s important for our brand to maintain consistency in our releases.
For simplicity, I’d recommend starting out with this signal flow: Saturation/Color, EQ, Loudness. Saturation can be anything from a subtle soft clipper, a compressor (if you’re into that sort of thing), or your favorite emulation of some magical piece of hardware. EQ is self explanatory, but a word of caution here.
If you plan on doing any sort of mid/side processing, ONLY use EQs in linear phase. Lastly, the fun part. Here’s a cool trick for nailing your clipping 90% of the time. Find a good clipper (preferably one with a delta button) and push it right up until you start to hear your kick or bass affected by its processing, then back it off half a dB or until you don’t hear your low end passing through delta.
This usually ensures you’re keeping it transparent and will set you up for success when you place your maximizer after it. Your maximizer shouldn’t be doing the heavy lifting, so we should set it as such. Make sure your release time isn’t set needlessly fast as that’s a sure way to introduce distortion into your material.
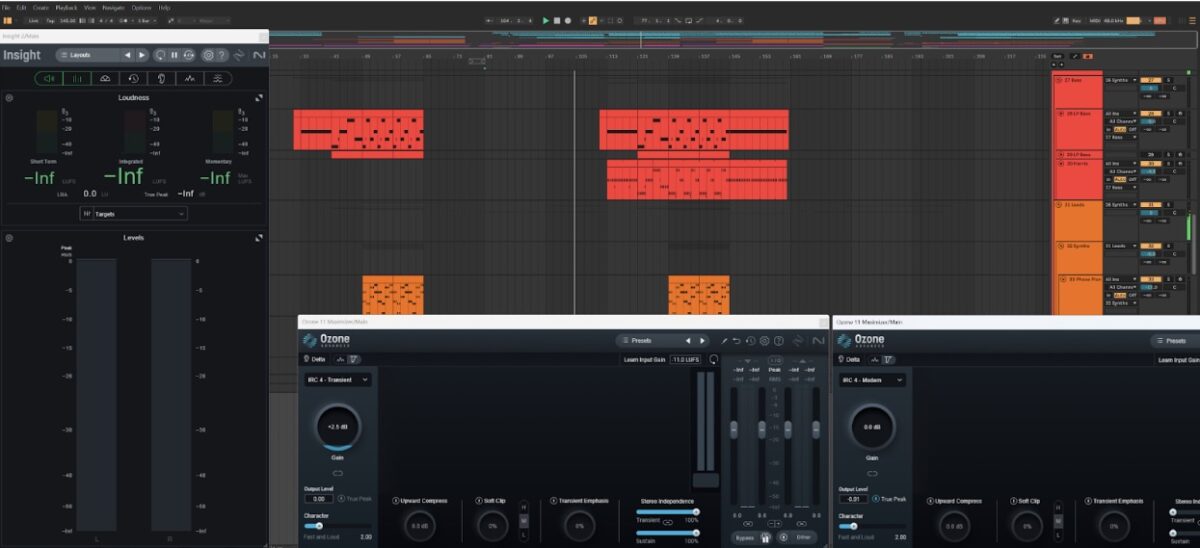
When using Ozone’s Maximizer, I usually pick the transient algorithm as it fits my mixing style the best and allows for an easy increase of perceived dynamic range. I also recommend experimenting with the maximizer’s stereo independence sliders. Assuming you’ve set up your mix correctly, it can bring back a lot of stereo width that you might have lost at closer to zero LUFS values. Lastly, I’d recommend using a second maximizer for your true peak processing and dithering.
Start mastering with Ozone
Big shout-out to Black V Neck for breaking down their approach to dynamics – covering everything from compressors and limiters to transient shapers and maximizers – to get that punchy, swing-driven clarity in their mixes.
The biggest takeaway?
There’s no single plugin that magically makes your track crisp and punchy. It’s all about how you chain them together.
Using transient shapers before compressors, compressors into limiters, and limiters into maximizers is where the real magic happens. The sum of those steps is what gives a track its energy and impact. And the best part? You can handle all of this entirely within iZotope Ozone. Keeping everything in one place not only streamlines your workflow but also gives you better results since you have all the readouts and tools working together.
If you’re curious about how Black V Neck dials in their sound, hit the link below to check out the iZotope Ozone mastering suite in Komplete.


