


Saturation is the sound of circuitry made audible in your music. It’s that mysterious X factor that gives your tracks warmth, grit, and analog flavor. Using audio saturation well enhances your music’s character and gives it a professional sheen. But it’s all too easy to saturate badly, either by using your saturation effect for the wrong tasks or by overapplying it. When misused, saturation can harm, rather than help, your audio.
So what does saturation do in music, and how should you use it in your productions? In this article, we’ll demystify the saturation effect. We’ll explain how it works technically, explore its roots in analog recording, and look closely at the way saturation changes a sound. Then we’ll demonstrate how to use audio saturation in your music to add warmth, create texture, emulate pleasing analog sounds, and create ear-catching sound design moments. Once we’re done, you’ll feel comfortable using various kinds of saturation to take your music to the next level.
Jump to these sections:
And just before you dive into this tutorial, you might want to take a look at one of our premier saturation tools – Supercharger GT.
What is saturation in music?
Saturation is the result of an audio signal being distorted as it passes through analog components, picking up color and character along the way. This effect occurs when analog audio components are overdriven, adding grit and character to the signal they are processing.
The saturation effect happens when a piece of analog audio gear is pushed beyond its functioning capacity, such as when you send it a signal that’s too loud. Common components that cause saturation include magnetic tape, vacuum tube amplifiers, and transistors found in much audio hardware. Each component has its own unique “flavor” when pushed hard.
In general, audio saturation gently compresses the signal, reducing the difference in loudness between the loudest and quietest parts, while adding flavorful extra harmonics to a sound. When applied in moderation, these changes can be pleasing enhancements. At more extreme settings, saturation can be used to “crush” and “crunch” sounds for unusual or lo-fi effects.
Using saturation in digital music production
Nowadays, many of us make music in the digital realm, where we don’t need to worry about temperamental electrical components altering the sound. However, digital music-makers use plugin effects to replicate the subtle effects of audio saturation. In this article, we’ll demonstrate how to use saturation plugins from Native Instruments to shape sounds, bringing the warmth, charm, and character of saturation to your productions.
What does saturation do to a waveform?
Saturation changes a waveform in a way comparable to both dynamic compression and clipping distortion. Like dynamic compression, saturation can “squash” a waveform, reducing the difference between the louder and quieter parts of the sound. Saturation can also slice off the peaks of a waveform, causing a sound’s timbre to become more like a square wave – as happens in clipping distortion. This adds additional harmonics, which we hear as extra flavor.
How to use saturation in music production
When used correctly, saturation is a powerful tool for enhancing your music. It can be used to add character, give an analog feel, and more. Let’s look at using saturation effects to improve a track we’ve been working on:
We can apply saturation to various elements in the track to give it more presence and personality. Here’s how.
1. Add warmth to a sound
Our bass sound is a simple sine wave. It sounds a little clinical. We can use saturation to add warmth to it.
We sometimes think that adding “warmth” is about removing high frequencies from a sound. But in this case, adding some upper harmonics to our bass sound is actually going to help it feel warm, thick, and inviting.
We can use saturation to do this. Tube saturation is ideal for this task, as it will add second order harmonics to our bass sound, making it sound fuller in the low-mids – the frequency zone that we experience as “warm.”
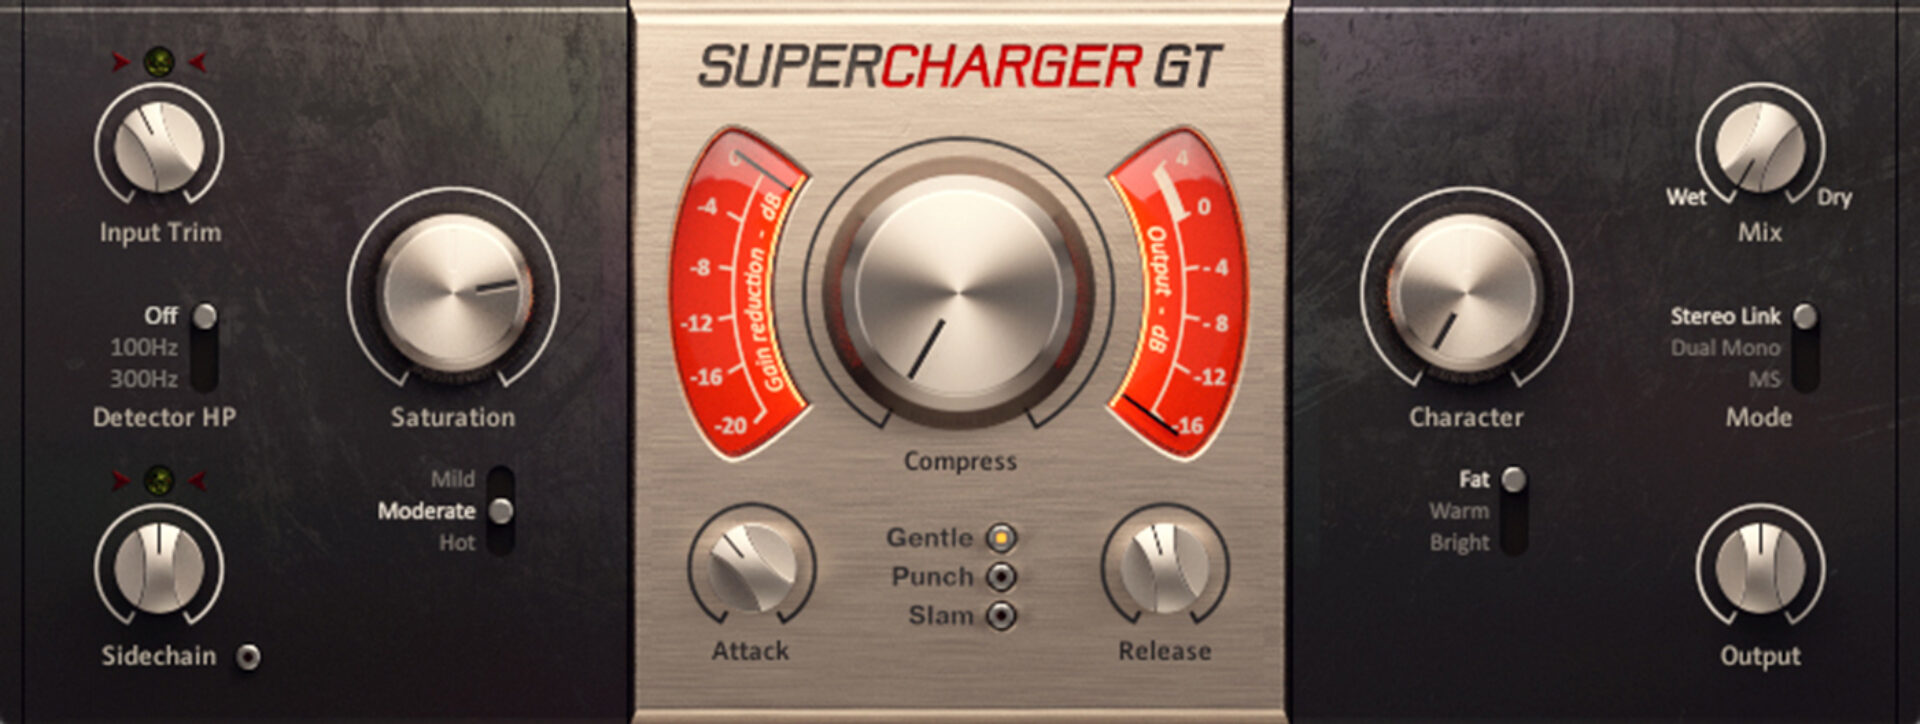
Let’s use Supercharger GT, a juicy modeled tube compressor with plenty of saturation options.
For now, we don’t want to touch the compression features of the plugin. We’re only focusing on the Saturation controls on the left hand side of the interface. For a more pronounced saturation effect, flick the saturation mode toggle from Mild to Moderate. Then simply boost the Saturation dial until the bass starts to sound thick and warm. A pretty significant boost will work well – we’ve set the dial at around three o’clock. Here’s how it sounds:
2. Create depth and texture
Saturation can be used to enliven sounds in subtle ways, making them feel more rich, textured, and interesting. To demonstrate, let’s have a listen to our drum bus:
Our drums are sounding OK, but they could do with being “glued together” a bit more. Some hits sit too far forward, and others sound weak in comparison. There are also some nice details that get lost behind the main hits. We can use saturation to fix these issues.
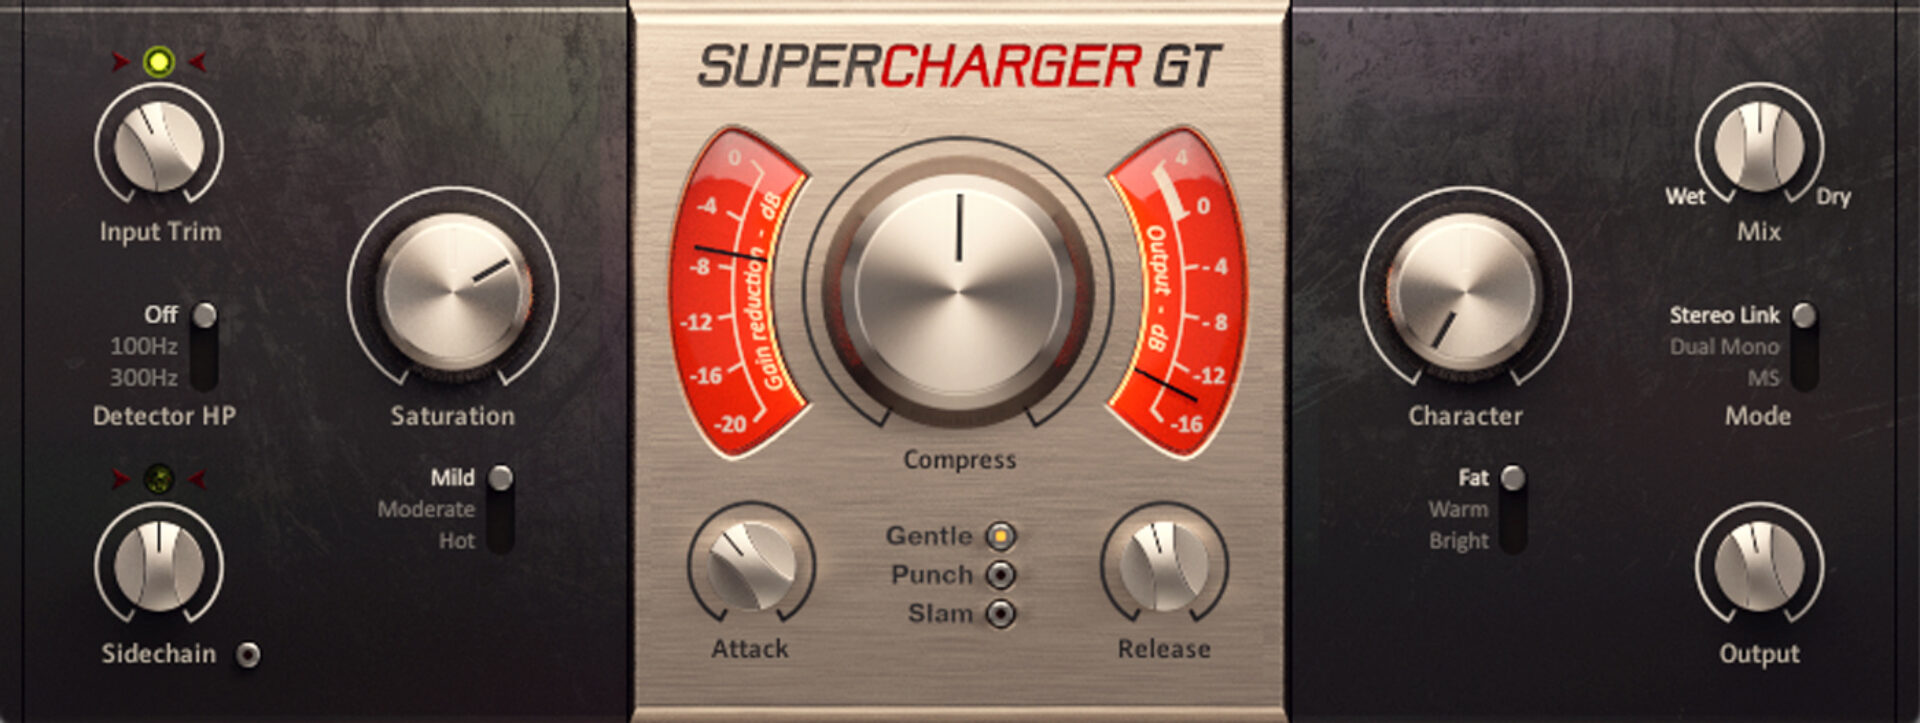
Again, let’s use Supercharger GT. This time we’ll use saturation in conjunction with the plugin’s compression features to nicely glue together our drum bus.
We’re going to saturate in parallel, meaning we’ll blend the saturated signal with the clean signal to get a balance of both.
First, let’s push the effect quite hard. Turn up the compression dial until you’re getting a substantial amount of gain reduction – as much as -8dB. Then boost the saturation dial until the drums are sounding nice and crunchy. Setting it at around three o’clock works well. Finally, blend the saturated signal with the clean signal using the Dry/Wet dial. Around 50/50 should do it.
Here’s how it sounds:
Hear how the drum bus sounds more cohesive now. There’s also a pleasing crunchiness – especially to the kick – thanks to the extra harmonics added by saturation. And those nice background details have been brought forward, making the whole loop more lively and vivid.
3. Emulate analog sounds
We made our synth pad using a simple software synth patch. It lacks character. We can use saturation to give it some convincing analog flavor.
This time, let’s use Dirt, an organic-sounding distortion plugin that’s great for subtle saturation as well as more extreme tone shaping. By being restrained with the settings, we can add rich harmonics to our synth sound, creating the impression that authentic analog circuitry is involved.
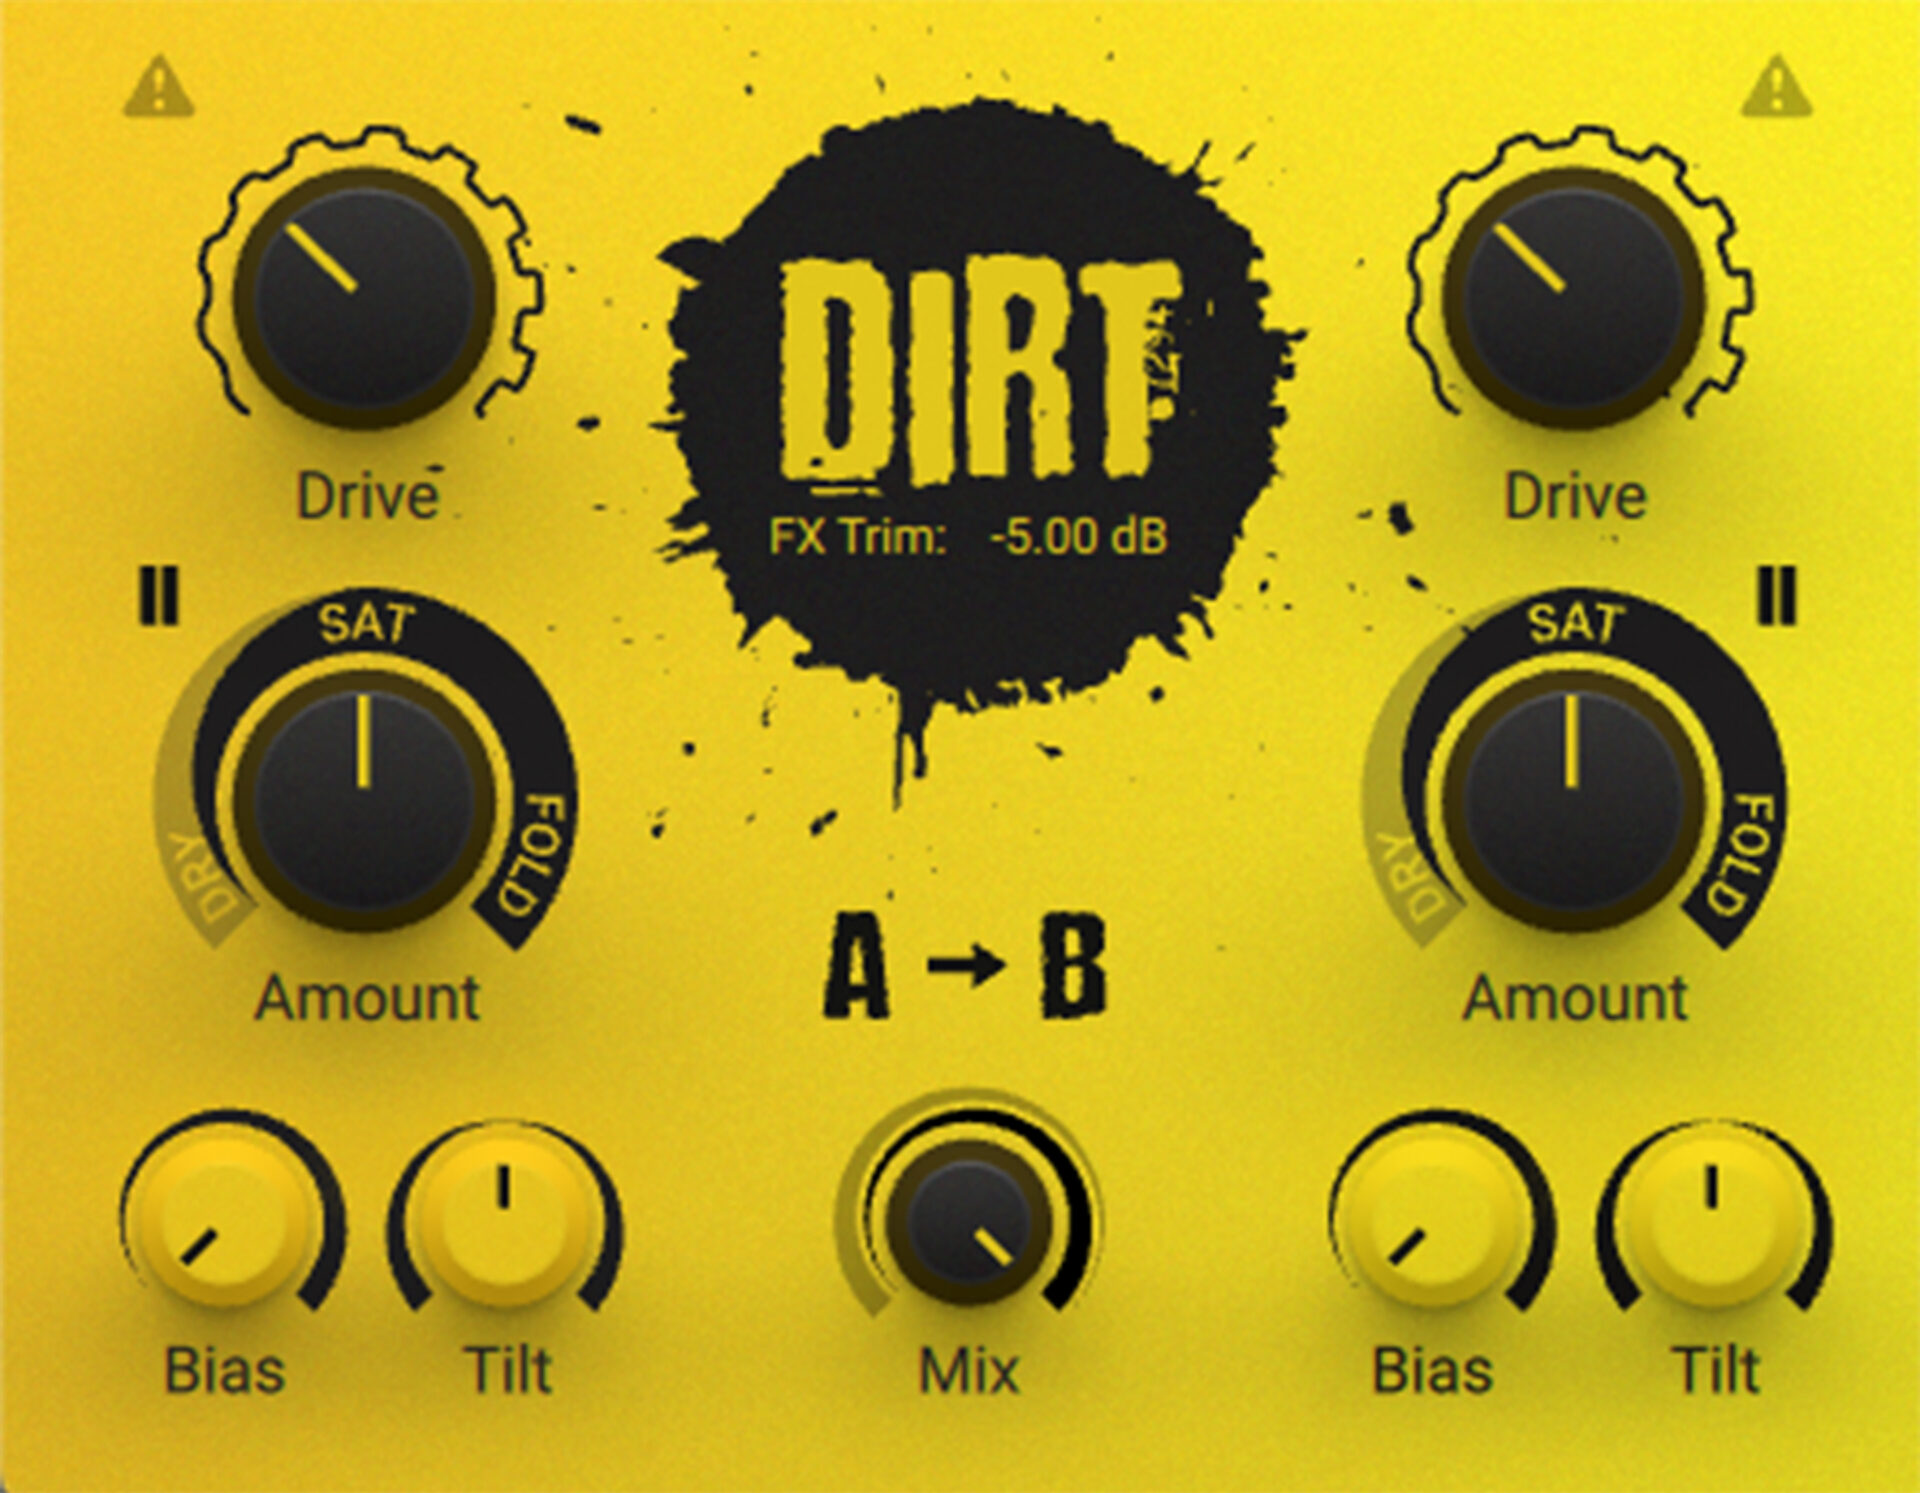
Dirt features two distortion stages. Let’s use both for a rich, flavorful saturation. The two Amount dials should be set at 50% for a full-bodied effect. Steadily boost the two Drive dials until the synth starts to sound too crunchy. From there, dial back the Drive a little to find the sweet spot. You may need to use the FX Trim control to prevent the synth from jumping up in volume when the effect is applied.
Here’s how it sounds. We’ve swapped digital clarity for a smokier, more characterful sound.
4. Sound design
We can use extreme saturation effects to create ear-catching sound design moments. Let’s add a drum fill intro to our beat.
This time, we’ll use Guitar Rig 7 to dial in some guitar amp saturation. This will add intense crunch and coloration to the sound – not ideal when a subtle touch is needed, but perfect for our task here.
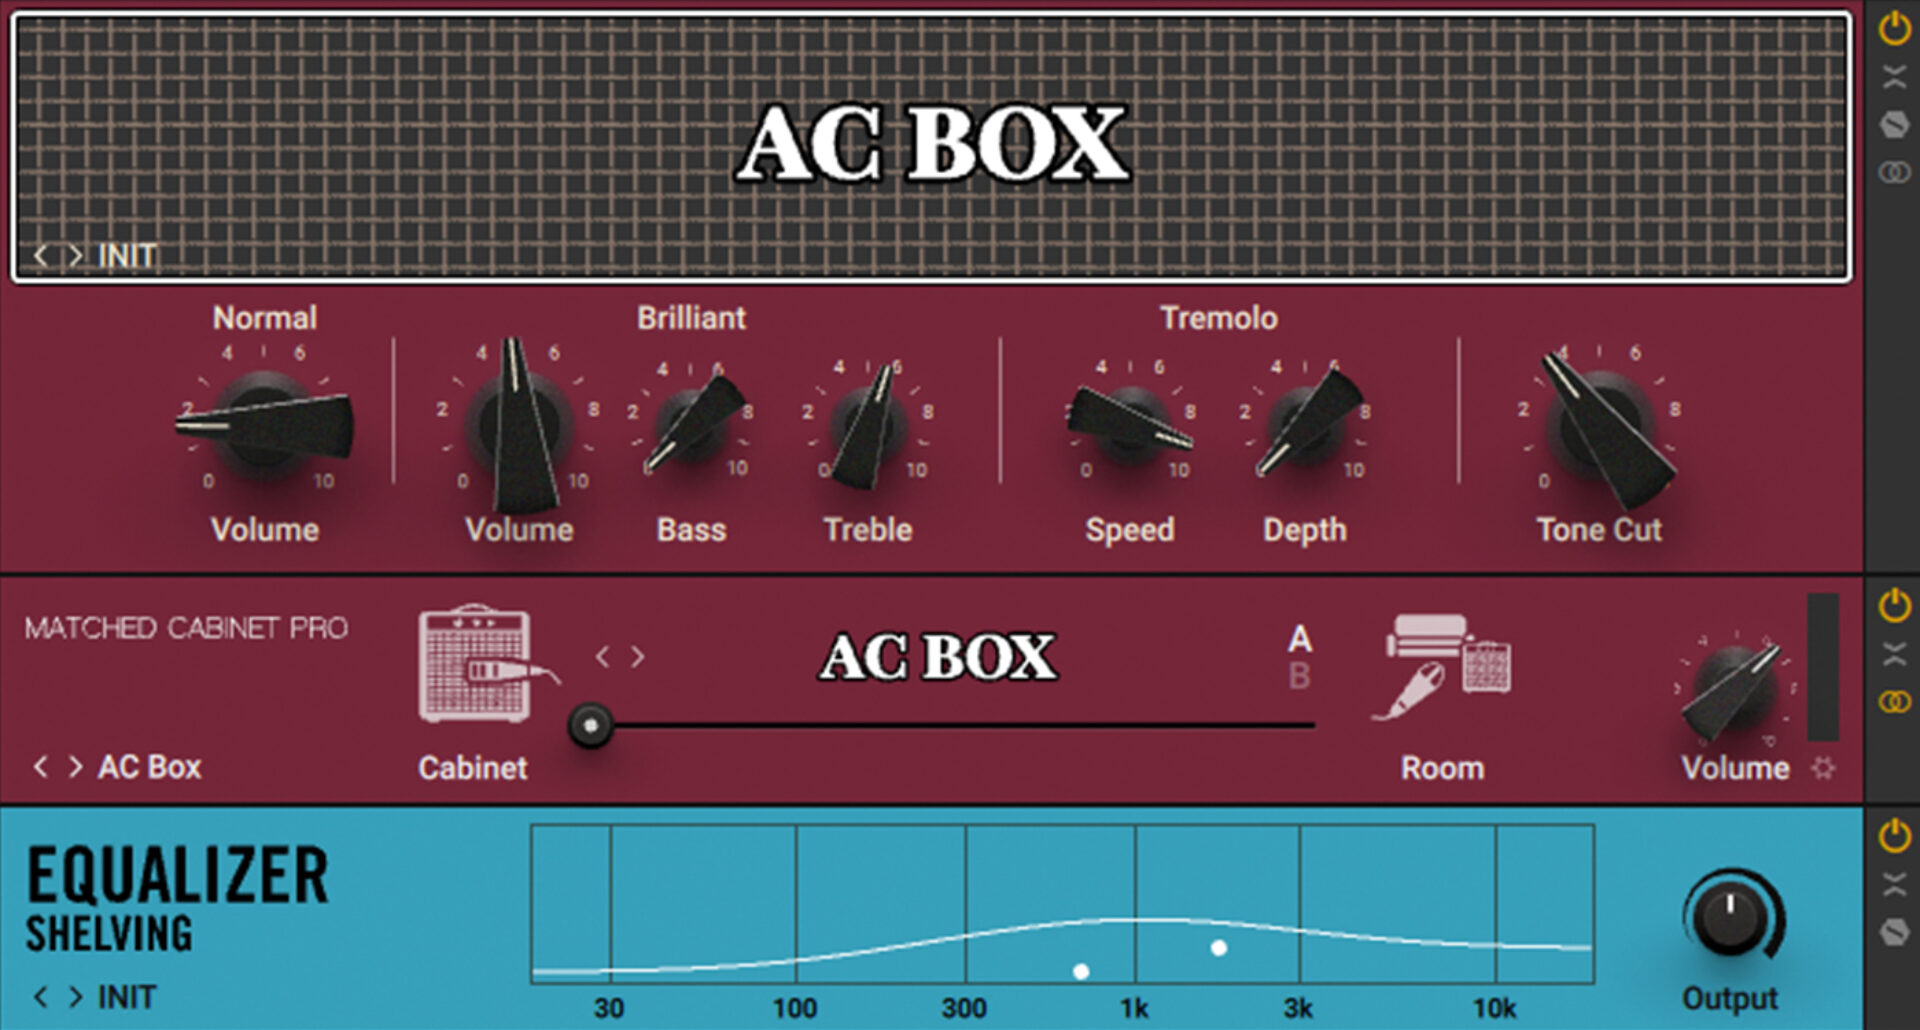
First, pick an amp. Guitar Rig features dozens of modeled amps, each with its own flavor. We went for AC Box, a beloved vintage tube amp with a rich sound. Tweak the Volume control until you’ve got a moderate level of gain – and therefore of saturation. You can also adjust the Bass and Treble controls to soften the frequency profile, since amp saturation can make drums sound quite sharp. Finally, add an EQ component after the amp in Guitar Rig 7 to tame the high and low frequencies. We also added a little panning (outside the plugin) to give movement to our drum fill.
Here’s how it sounds.
Finally, here’s our whole track with saturation effects added. It’s fuller, more vivid, and has a pleasing analog richness.
Start using saturation in your productions
In this article, we’ve looked closely at saturation in music. We defined this important audio effect, explored its roots in analog audio, and explained how saturation alters a sound. We then demonstrated how to use saturation to enhance and enrich your music.
Now it’s time to start using saturation in your own productions. Supercharger GT is the ideal plugin to start you on your saturation journey. This analog modeled effect places the juicy sound of tube saturation at your fingertips – and it’s a world-class compressor to boot.
Related articles
-

Behind the synth: A. G. Cook on stacked sawtooths and the creation of Super*Saw
Explore the extremes of stacked sawtooth waves with Super*Saw, a new synthesizer co-created with A. G. Cook. Learn how to…
-

Inside the evolution of orchestral sampling: an interview with ProjectSAM
Discover how ProjectSAM’s Lineage Series uses NKS and smart features to change orchestral sampling. Plus, save on instruments in our…
-

How New Constellations turn emotion into sound with Massive X
Go inside the studio with New Constellations. Learn how they use Native Instruments gear, happy accidents, and lifelong friendship to…
-

Citizen Kain on building emotion and space with Replika
Citizen Kain explains how Replika helped shape the rhythm, tension, and emotion behind his debut Eversun Records single “Moments.”…
-

The organic precision behind Calcou’s Anjuna release featuring Reaktor
Calcou shares how Reaktor, Monark, and Super 8 shaped the creative balance and live energy behind their new duo EP,…
-

14 NKS instruments that will change the way you create music
Discover 14 NKS instruments to freshen up your workflow. From lo-fi tape synths to cinematic strings, shop the Native Instruments…
-

Parallelle on crafting living basslines with Reaktor and TRK-01
Parallelle share how Reaktor and TRK-01 shape the bass and warmth in 11th Avenue, balancing analog depth with modern control.
-

Where will your sound lead you? Explore the Native Instruments Summer Sale
Save 30% on instruments, effects, and sounds in our Summer Sale. Find the tools to keep your tracks moving and…