


Additive synthesis is often poorly understood–especially compared to its better-known cousins in sound synthesis, subtractive and FM synthesis. But when used effectively, it can be a powerful tool for making bold, precisely-sculpted sounds that are difficult to create by other means. So what is additive synthesis exactly, and how does it work?
In this article, we’ll explore the theory and technology behind additive synthesis, and learn a little about its history and its use in modern production. We’ll then look at some simple uses of additive synthesis, showing how you can create ear-catching sounds in just a few simple steps using the additive synth from Native Instruments, RAZOR.
Jump to these sections:
- What is additive synthesis?
- The history of additive synthesis
- Additive synthesis in the software era
- How to use additive synthesis
Follow along with this tutorial using RAZOR.
What is additive synthesis?
To understand additive synthesis, let’s compare it to its more famous cousin, subtractive synthesis. A subtractive synth starts by generating a rich, full waveform, like a square or sawtooth wave. Envelopes, filters, and the like are then used to sculpt this sound, subtracting the bits we don’t want.
Additive synthesis works in the other direction. Rather than starting with a complex sound and sculpting it, we build our sound from scratch, one harmonic at a time.
Understanding harmonics
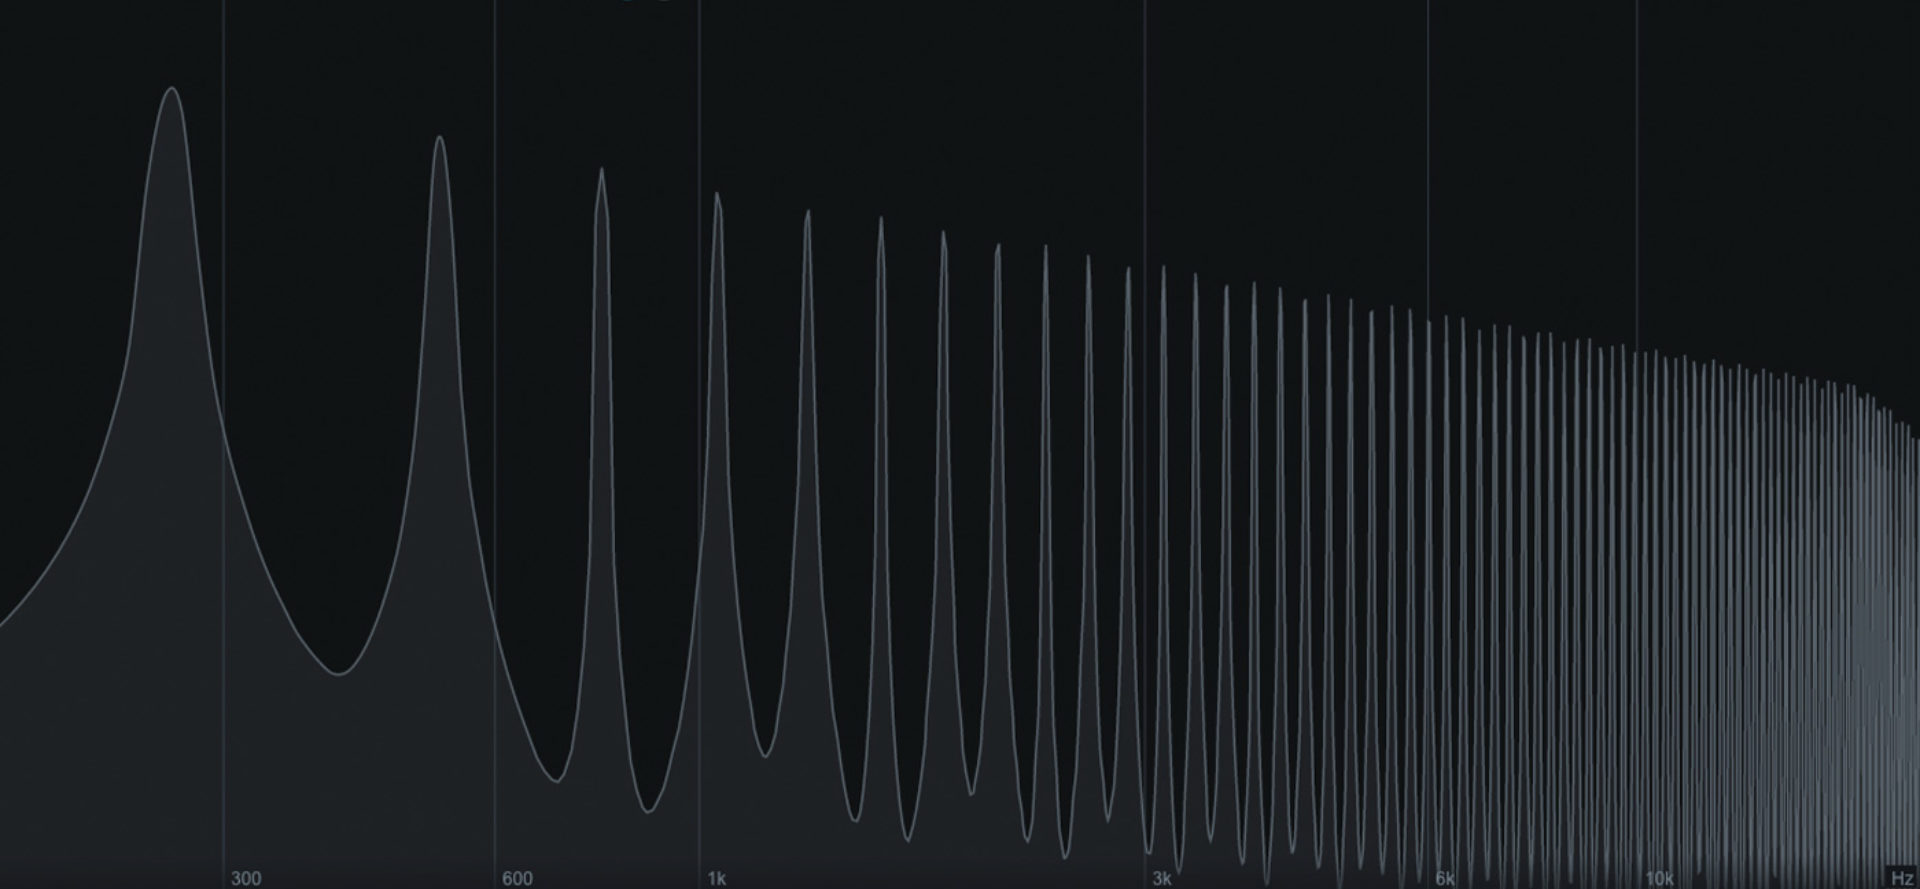
To understand how this works, we’ll need to get to grips with the idea of harmonics. A complex waveform can be broken down into a stack of sine waves at different frequencies and amplitudes (volumes).
A harmonic waveform, like a square or a sawtooth, contains a sine wave at the “fundamental frequency”: that’s the lowest frequency in the sound, and the one whose pitch we hear. It’s also called the first harmonic.
Above that is a stack of further sine waves, or harmonics, at whole-number multiples of that initial frequency. For example: A 100 Hz sawtooth wave will contain a fundamental frequency at 100 Hz, then further sine waves (or harmonics) at 200 Hz, 300 Hz, 400 Hz, and so on, getting quieter as we go up the series.
Which of these upper harmonics are present in a sound, and how loud they are, is what gives the sound its timbre, or character. A square wave, for example, features only harmonics that are odd-numbered multiples of the first harmonic: so, 300 Hz, 500 Hz, and so on.
How additive synthesis works
Additive synthesis makes use of this insight, constructing sounds from scratch by controlling the frequency and amplitude (volume) of their constituent harmonics.
Of course, this is a pretty roundabout way to make a square or a sawtooth wave: for that we can reach for our trusty subtractive synth. But by getting under the hood to control the individual harmonics of a sound, we can go far beyond these familiar timbres–and create sounds that are less accessible using other forms of synthesis.
By tweaking the relative amplitude of a sound’s harmonics over time, and by introducing inharmonic (out of tune) partials, we can create juicy, unusual sounds to precise specifications.
The history of additive synthesis
Additive synthesis might not be as widely used as its subtractive or FM cousins. But the principles underlying it echo back through the history of instrument design.
When you think about it, a church’s pipe organ is a kind of additive synth. The different ranks of pipes correspond to different harmonics: by pulling out the stops, an organist can combine these harmonics to create sounds of different timbres. This method was carried into the electronic age thanks to electromechanical organs like the Hammond. Here, each drawbar corresponds to a different harmonic. When heard in isolation, a single Hammond oscillator has a pure, almost sine wave-like tone. Combined with the other oscillators, the sound becomes rich, full, and somewhat malleable.

Of course, the tones produced by the Hammond’s oscillators aren’t mathematically pure sine waves. And the organ offers the user only limited control of these oscillators. The needs of true additive synthesis–dozens or hundreds of oscillators, each with their own envelopes–made it impractical in the analog era.
With the advent of consumer-price digital synths, the likes of the Kawai K5 (sporting 63 oscillators) brought additive synthesis to the wider public. Still, the modest number of oscillators and limited control led to a somewhat brittle sound (which, admittedly, has its vintage charms now).
Additive synthesis in the software era
Additive synthesis has flourished in the modern era. This is thanks to a simple fact: the more oscillators–and the finer the user’s control of them–the more your additive synth can do. In a software environment, where the only limit is your laptop’s CPU, the possibilities quickly multiply.
NI has created two additive software synths: LAZER BASS, which is available for free in KOMPLETE START, and RAZOR, which has had a defining influence on music production since its launch in 2011. Designed by Erik Wiegand (aka Errorsmith), RAZOR can run up to 320 independent oscillators, while its smart interface allows for complex alterations to every oscillator at the twist of a knob.
Beyond these “classic” additive features, Wiegand took the additive engine into new realms, using RAZOR’s oscillators to mimic the behavior of filters, reverb effects, and more. The result is a unique, super-precise sound, which offers exciting possibilities for both sound design and music production.
How to use additive synthesis
Now that you understand how additive synthesis works, how should you use it? With their distinctive approach to synthesis, additive synths excel at particular applications. Using Razor, here are some ideas for getting your synth to sing.
Bell tones
The ability to control the inharmonic partials of a sound makes additive synthesis ideal for creating detuned sounds, such as bell tones. RAZOR makes detuning easy: in its “dissonance effects” section, you’ll find a whole arsenal of effects to create wonky, inharmonic sounds.
Here’s how to dial in a simple, punchy bell tone in just a few steps.

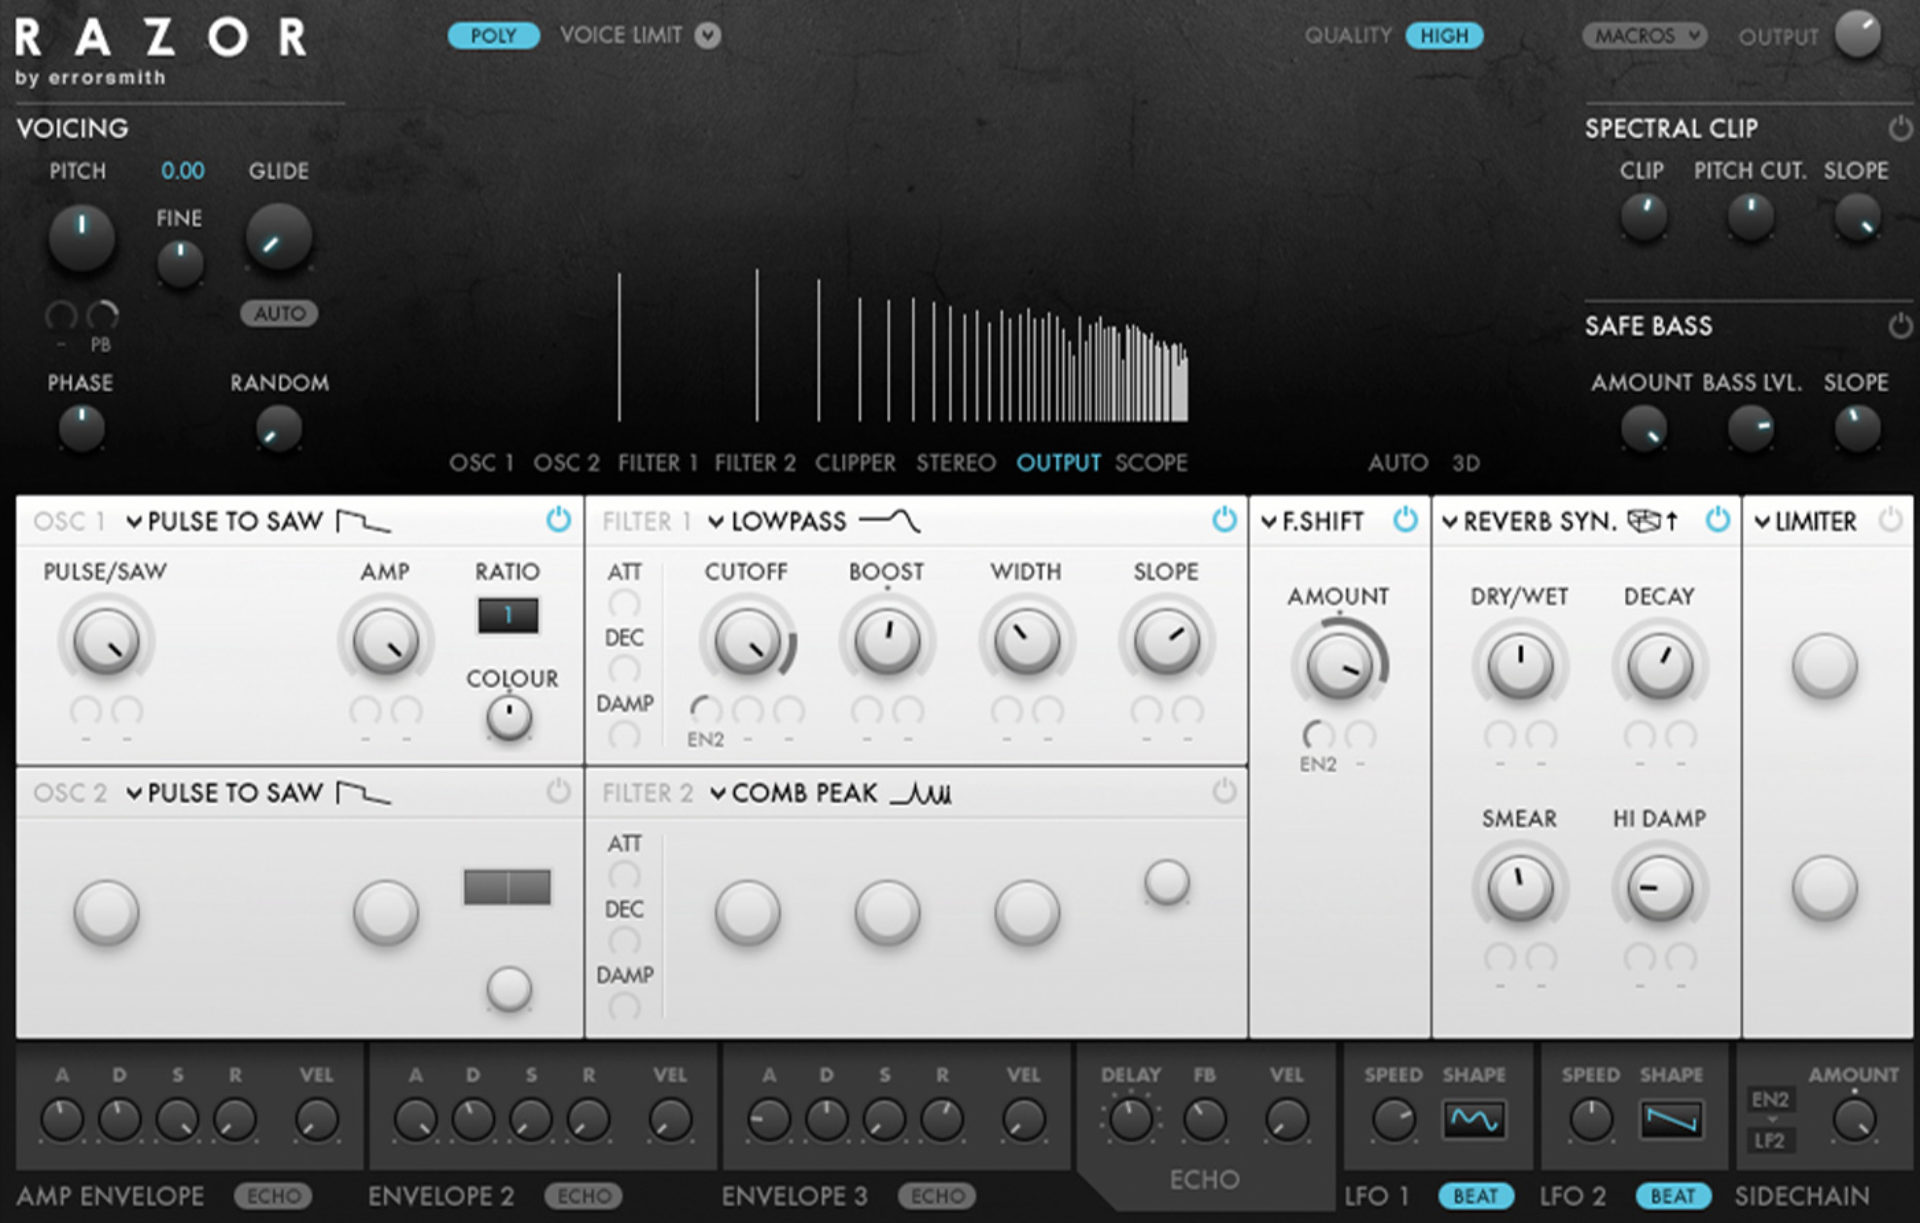
- Start by setting up a single oscillator, with a short attack, no sustain, and long-ish decay and release.
- Then pull up a dissonance effect: here we’ve gone for “stiff string.” Turning up the amount will shift the partials out of harmonic alignment with the fundamental frequency, creating as much juicy dissonance as we want.
- Bring in the second oscillator with a different waveform and increase the ratio, to create an even thicker detuned sound. Set the oscillator amplitude to be controlled by a second envelope, to give our bell tone a tight attack.
- As a final touch, add some reverb in the “stereo effects” section. (By the way: this isn’t actually a reverb in the usual sense. RAZOR’s reverbs are synthesized by the additive engine, giving them a unique sound and behavior.)
This is what the bell tone sounds like.
Wild sound design
The detuning possibilities of additive synthesis can be used for more than just subtle flavor.
By twisting and warping hundreds of oscillators at once, we can create mind bending sound design moments with a precision and sonic clarity that is difficult to achieve through other means.
Here’s how to create a swarming “spaceship landing” effect using RAZOR.
- Start with a simple waveform. A humble sawtooth will do.
- Apply a dissonance effect. This time we’re using “frequency shift,” which shifts the frequency of all of the partials in the sound by the same amount. This allows us to create a glissando effect quite unlike the sound achieved through conventional pitch-shifting algorithms. (And without the loss of fidelity often associated with extreme pitch-shifting.)
- Finally, create movement. Assign an envelope with a very slow attack to the shift “amount” and to the cutoff of a low-pass filter, to create a slow slide which gradually resolves into the played notes.
Here’s what the end result sounds like.
Unusual pads
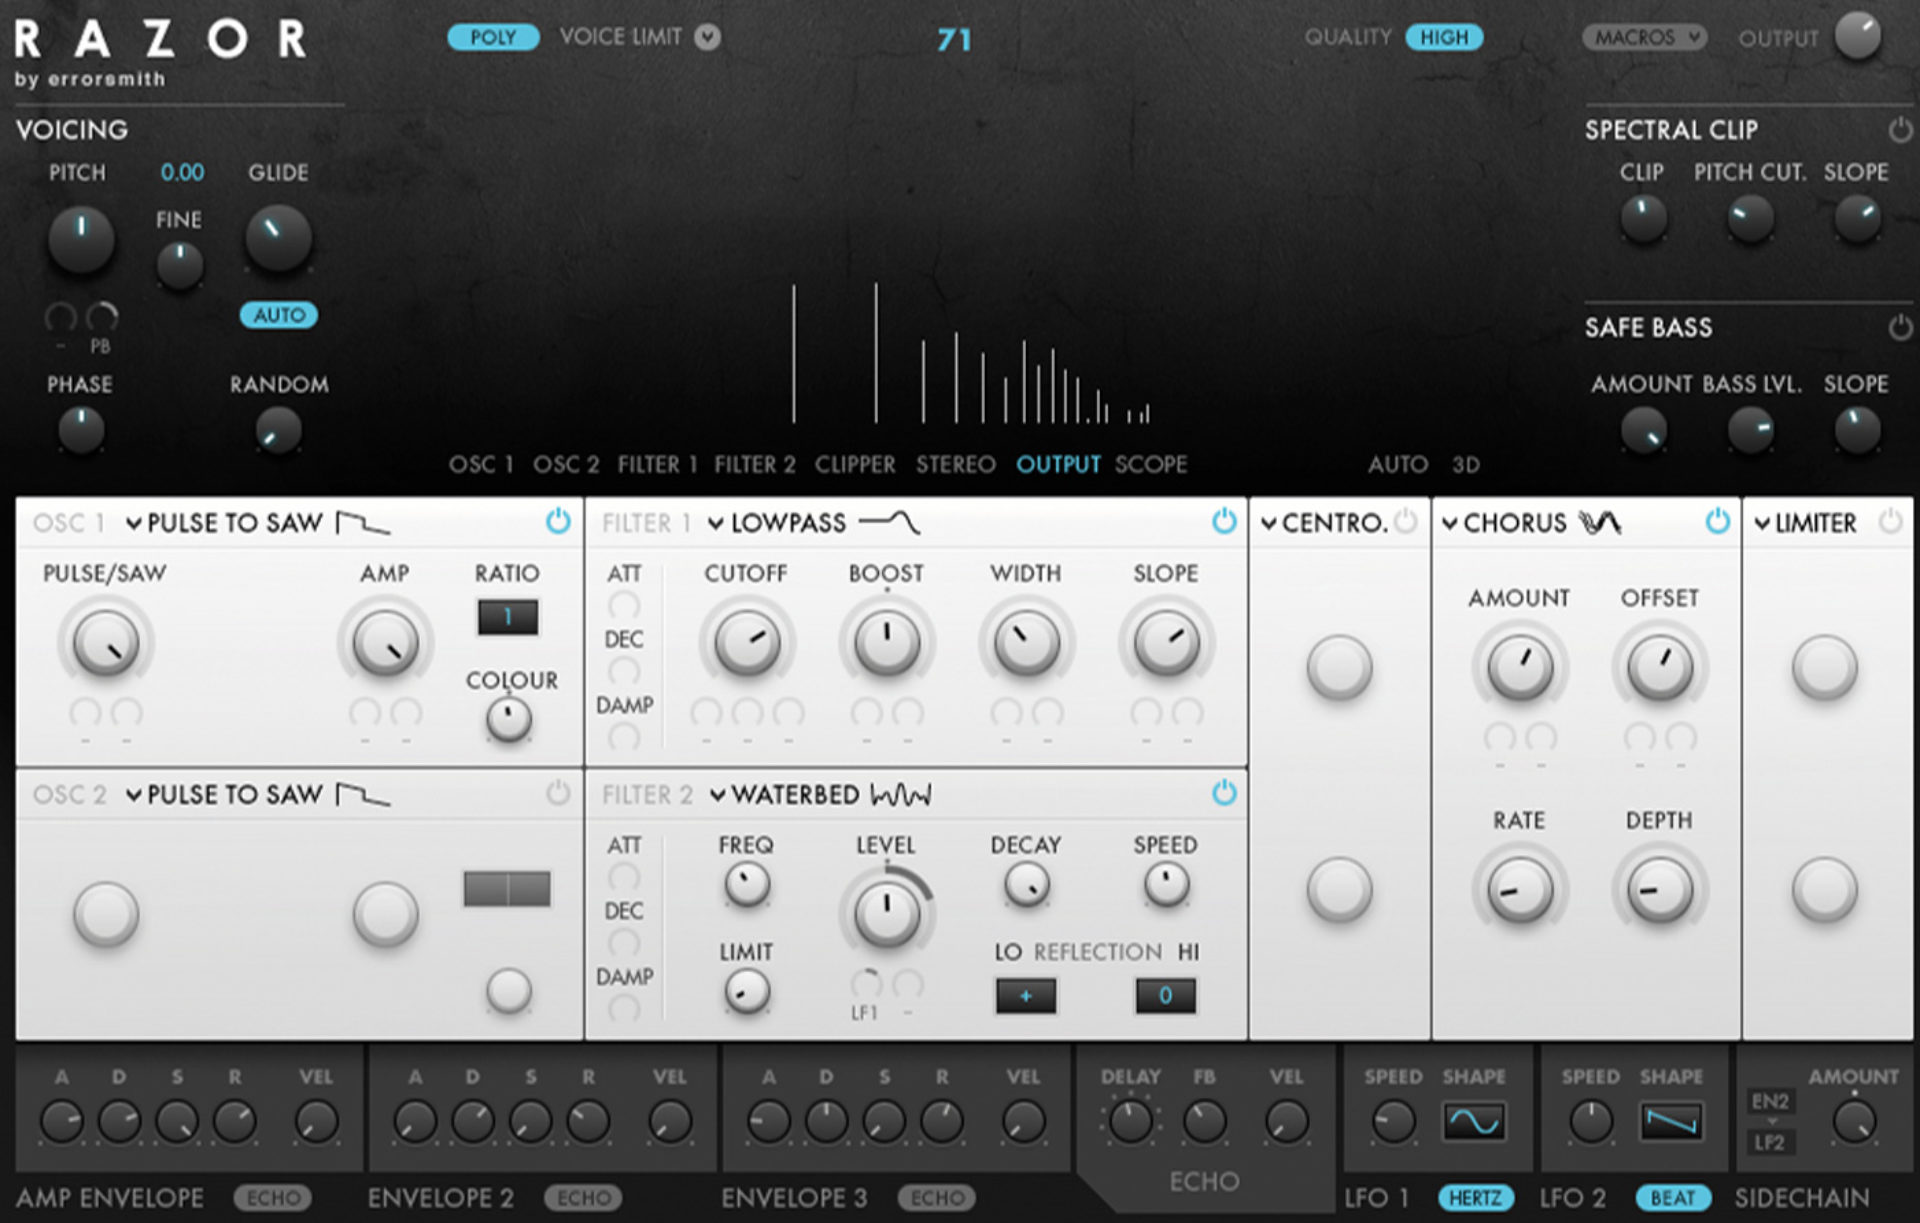
Additive synthesis lets us control the constituent parts of a sound over time, making it a powerful tool for creating rich, evolving pad sounds. Here, we can make use of one of RAZOR’s more unusual features: the waterbed filter, which mimics the behavior of rippling waves. Remember: this isn’t actually a filter, but RAZOR’s hundreds of oscillators changing amplitude to mimic the behavior of a filter, with unique results.
Here’s how to make a pad sound with an uncanny, rippling effect.
-
- Start with a waveform of your choice: again, a sawtooth will do.
- In the second filter section, choose “waterbed filter.”
- Connect the filter’s “level” control to a slow-moving LFO, and manually move the “freq” control while playing, to create an irregular, rippling effect.
- Finally, a touch of chorus from the “stereo effects” section adds richness to the sound.
Here’s what the pad sounds like.
Related articles
-

Behind the synth: A. G. Cook on stacked sawtooths and the creation of Super*Saw
Explore the extremes of stacked sawtooth waves with Super*Saw, a new synthesizer co-created with A. G. Cook. Learn how to…
-

Inside the evolution of orchestral sampling: an interview with ProjectSAM
Discover how ProjectSAM’s Lineage Series uses NKS and smart features to change orchestral sampling. Plus, save on instruments in our…
-

How New Constellations turn emotion into sound with Massive X
Go inside the studio with New Constellations. Learn how they use Native Instruments gear, happy accidents, and lifelong friendship to…
-

Citizen Kain on building emotion and space with Replika
Citizen Kain explains how Replika helped shape the rhythm, tension, and emotion behind his debut Eversun Records single “Moments.”…
-

The organic precision behind Calcou’s Anjuna release featuring Reaktor
Calcou shares how Reaktor, Monark, and Super 8 shaped the creative balance and live energy behind their new duo EP,…
-

14 NKS instruments that will change the way you create music
Discover 14 NKS instruments to freshen up your workflow. From lo-fi tape synths to cinematic strings, shop the Native Instruments…
-

Parallelle on crafting living basslines with Reaktor and TRK-01
Parallelle share how Reaktor and TRK-01 shape the bass and warmth in 11th Avenue, balancing analog depth with modern control.
-

Where will your sound lead you? Explore the Native Instruments Summer Sale
Save 30% on instruments, effects, and sounds in our Summer Sale. Find the tools to keep your tracks moving and…