


Dubstep is a bass-heavy form of dance music that first appeared in the UK in the early 2000s. The original dubstep sound focuses on garage-inspired beats with half-time kick and snare patterns, dubby influences, and huge subby bass lines. As the genre grew in popularity many variations of the sound developed, and in the ‘10s dubstep became ubiquitous in the mainstream for a brief period before returning to underground status.
In this beginner’s guide for how to make a dubstep song, we’ll show you how to make some classic dubstep beats, bass and synth sounds, and use them to create an atmospheric, hard-hitting arrangement that sounds like this:
Jump to these sections:
Follow along with this tutorial using MASSIVE, the go-to synth for bass music and electro producers.
What is dubstep?
Dubstep’s primary progenitor is UK garage, an uptempo style of dance music centered around skippy beats, big bass lines and soulful musical vibes.
In the early ‘00s soon-to-be dubstep innovators such as Horsepower Productions created garage tracks on the darker side of the genre.
As the genre began to form its own identity it began to move away from catchy hooks and focus more on atmospherics and more involved bass lines, while retaining garage-style beats.
An important step in dubsteps dissolution from garage was the move towards half-time snares, which began in the mid 2000s.
Despite the half-time snares dubstep could still feel uptempo, and dubstep was on its way to becoming one of the UK’s most popular forms of dance music.
As dubstep’s popularity grew a less minimal, more “tear-out” sound emerged.
Thanks to the development of this more accessible style, dubstep began to influence artists outside the UK. In 2010, US artist Skrillex released “Scary Monsters And Nice Sprites”, which signaled the genre’s crossover into the mainstream, not just in the UK, but worldwide.
Some dubstep producers embraced the genre’s newfound commercial potential, while maintaining the genre’s garage-inspired roots. Many dubstep acts that emerged during the sound’s commercial popularity took influences from other genres such as rock.
Other producers would plot a more underground trajectory, with this more traditional form of dubstep becoming known as “riddim.”
In this beginner’s guide to making dubstep we’ll show you how to make a dubstep track in the classic style featuring funky, flowing beats, big bass lines, and atmospheric soundscapes using BATTERY 4, MASSIVE, KOMPLETE KONTROL, the DROP SQUAD expansion, and iZotope Ozone 10.
How to make dubstep
1. Drums
Set your dubstep project tempo to 140 BPM.

Load up BATTERY 4 on an instrument track. We want some slinky urban drum sounds for our beat, so let’s find a suitable kit. In the Library select the Drums tag, then the Urban Drum Kit tag. Double-click The Trunk Kit to load it up.
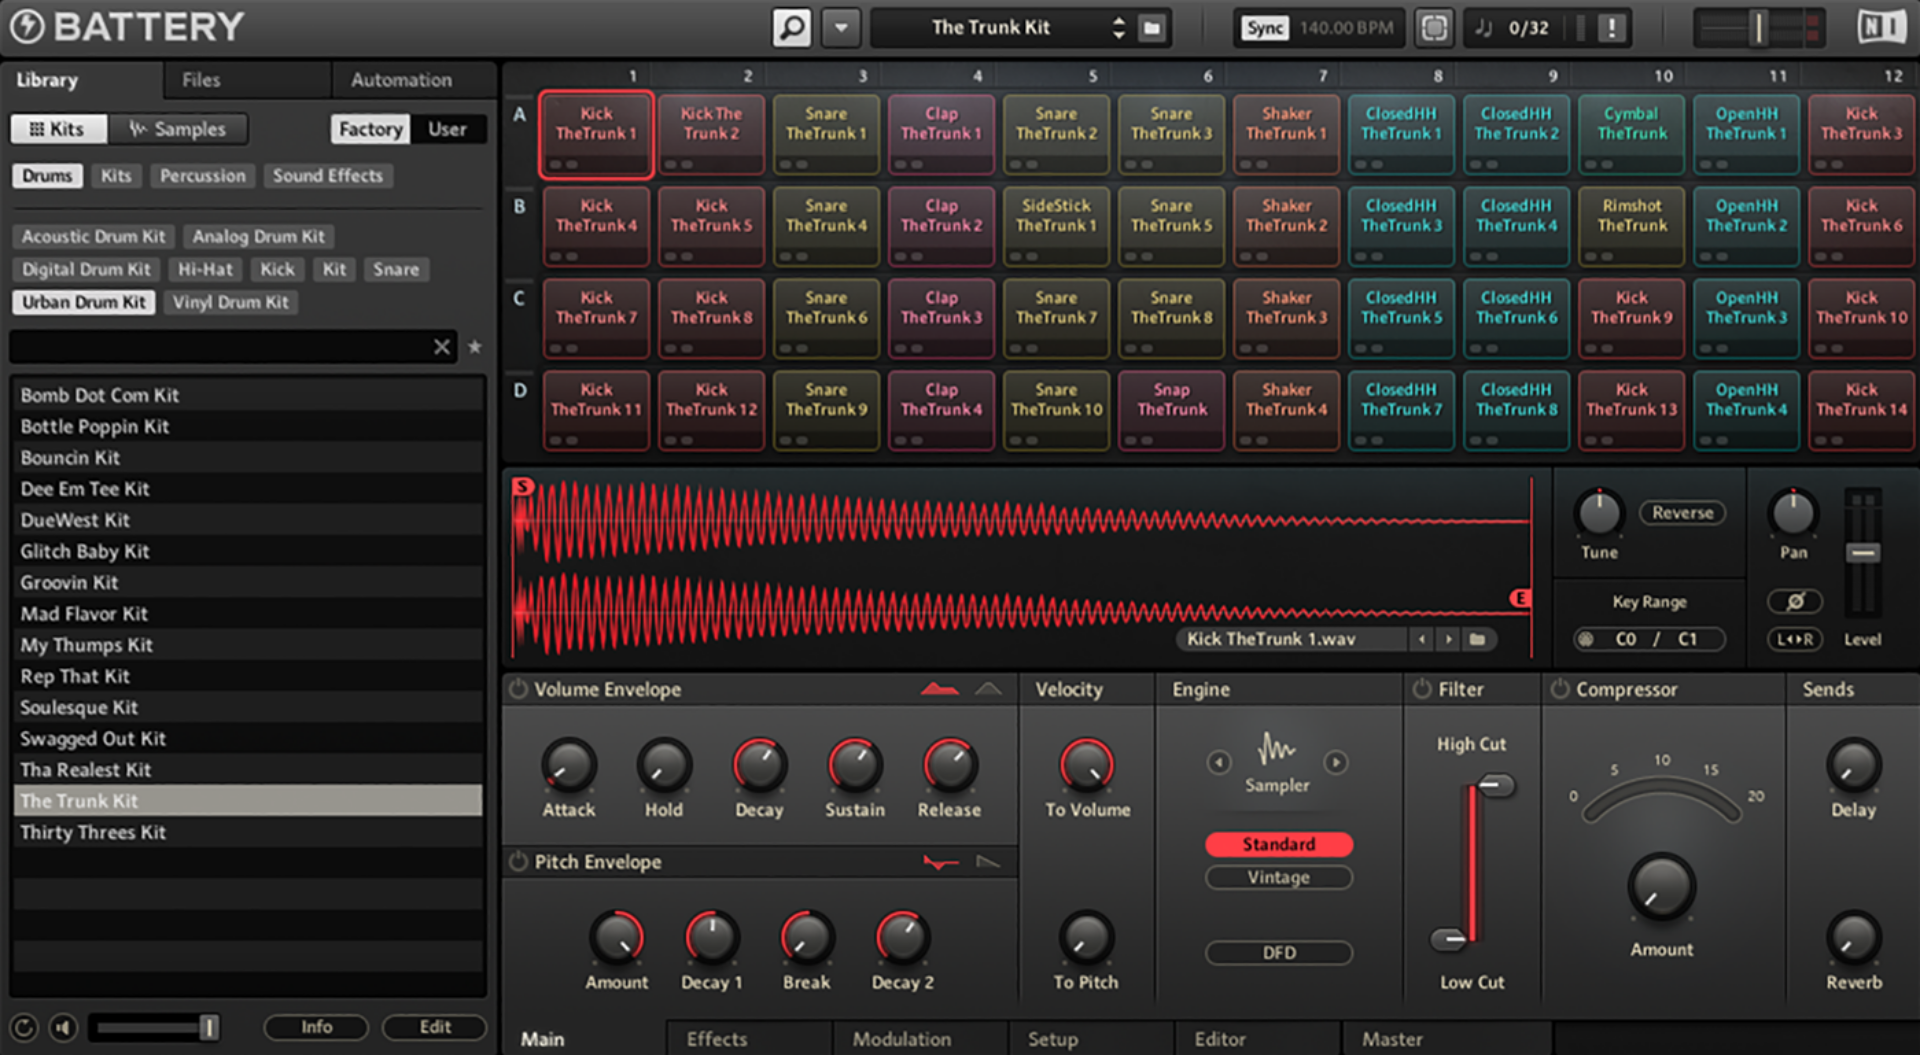
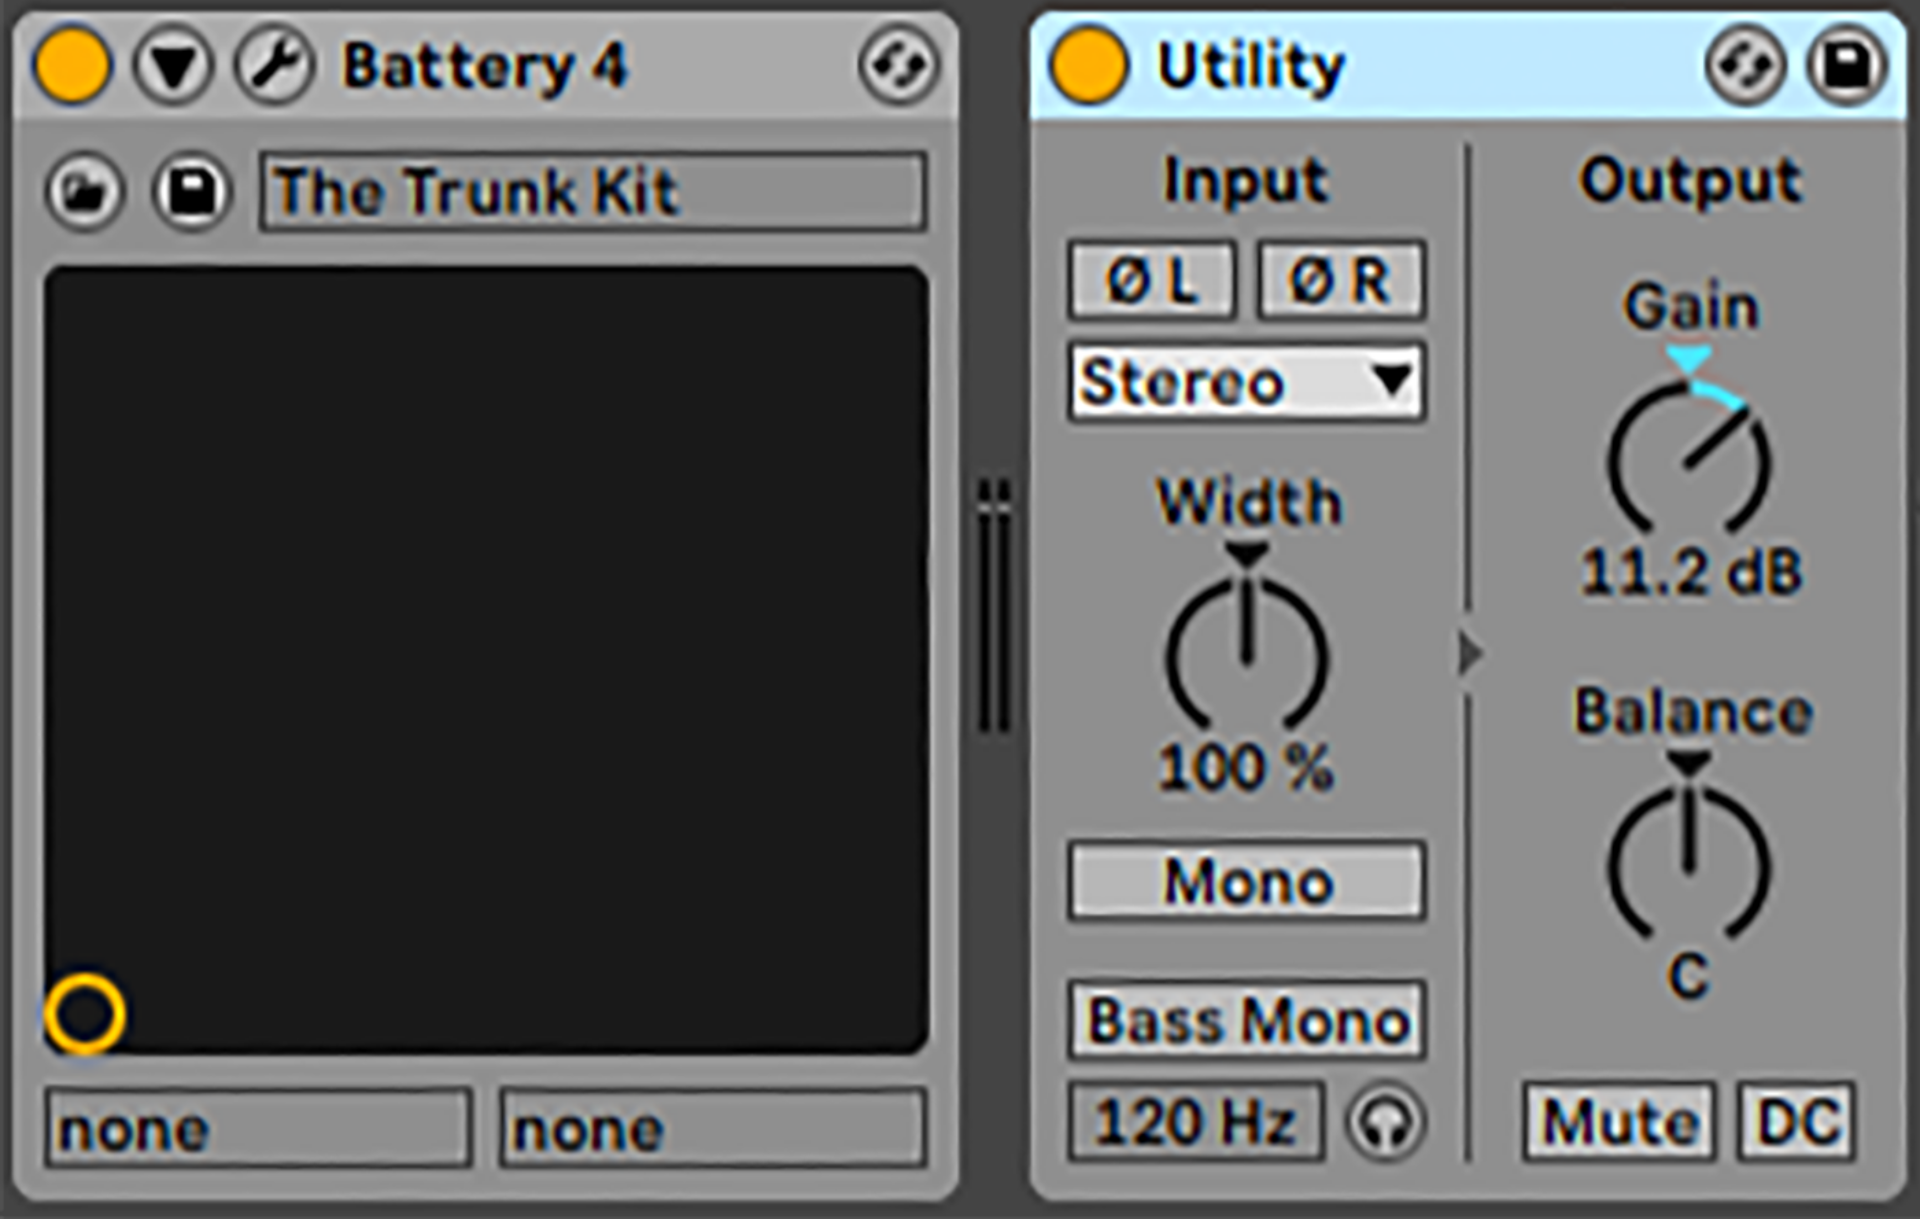
This patch is a little quiet, so let’s boost the channel’s gain. Here Ableton Live’s Utility plugin is boosting the signal by 11.2 dB, you can of course use your audio editor’s equivalent instead.
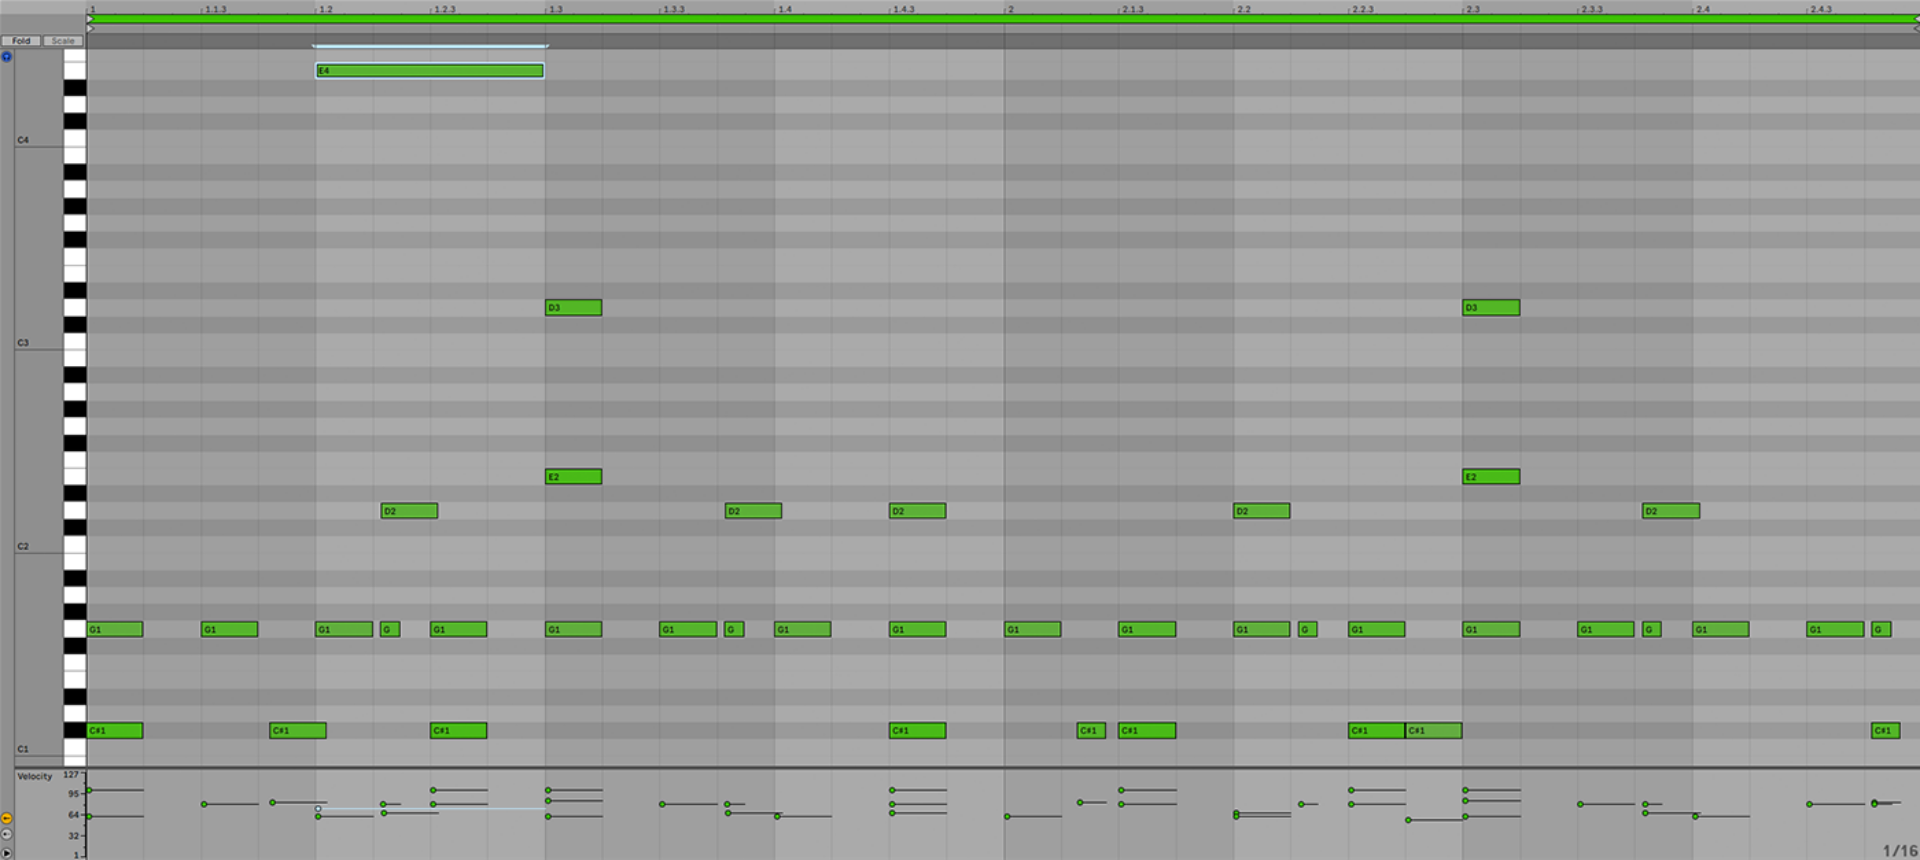
Let’s build up a two-bar dubstep drum beat element by element. We’ll start with the half-time snares. Place a D3 snare with a velocity of 85 on the third beat of each bar.

This snare sounds great, but let’s give it a touch of flavor. Add E2 sidesticks with Velocities of 101 on the snares.

Now let’s add some hats. Copy the G1 hat pattern we’ve used here, noting the slight lateness of the 16th note hats, which gives them a swung feel. The louder hats have a velocity of 79, the quieter ones are at 60.

The next element is a kick, and we’re going to use the one on C#1. Again the 16th notes play slightly late, and the velocity varies, this time between 101 and 83.

Let’s make things sound busier with some extra snares. These play on D2 with a velocity of 67, and once again the 16th notes play slightly late.

For the final element of the beat let’s funk things up with another quieter snare on the second beat. Let’s use the snare on E4, with a velocity of 72.
2. Chords
Now we have a drum beat, let’s add some musical elements to give ourselves a vibe to work off. Open KOMPLETE KONTROL on a new track, and navigate your way to the folder where the DROP SQUAD expansion is located.
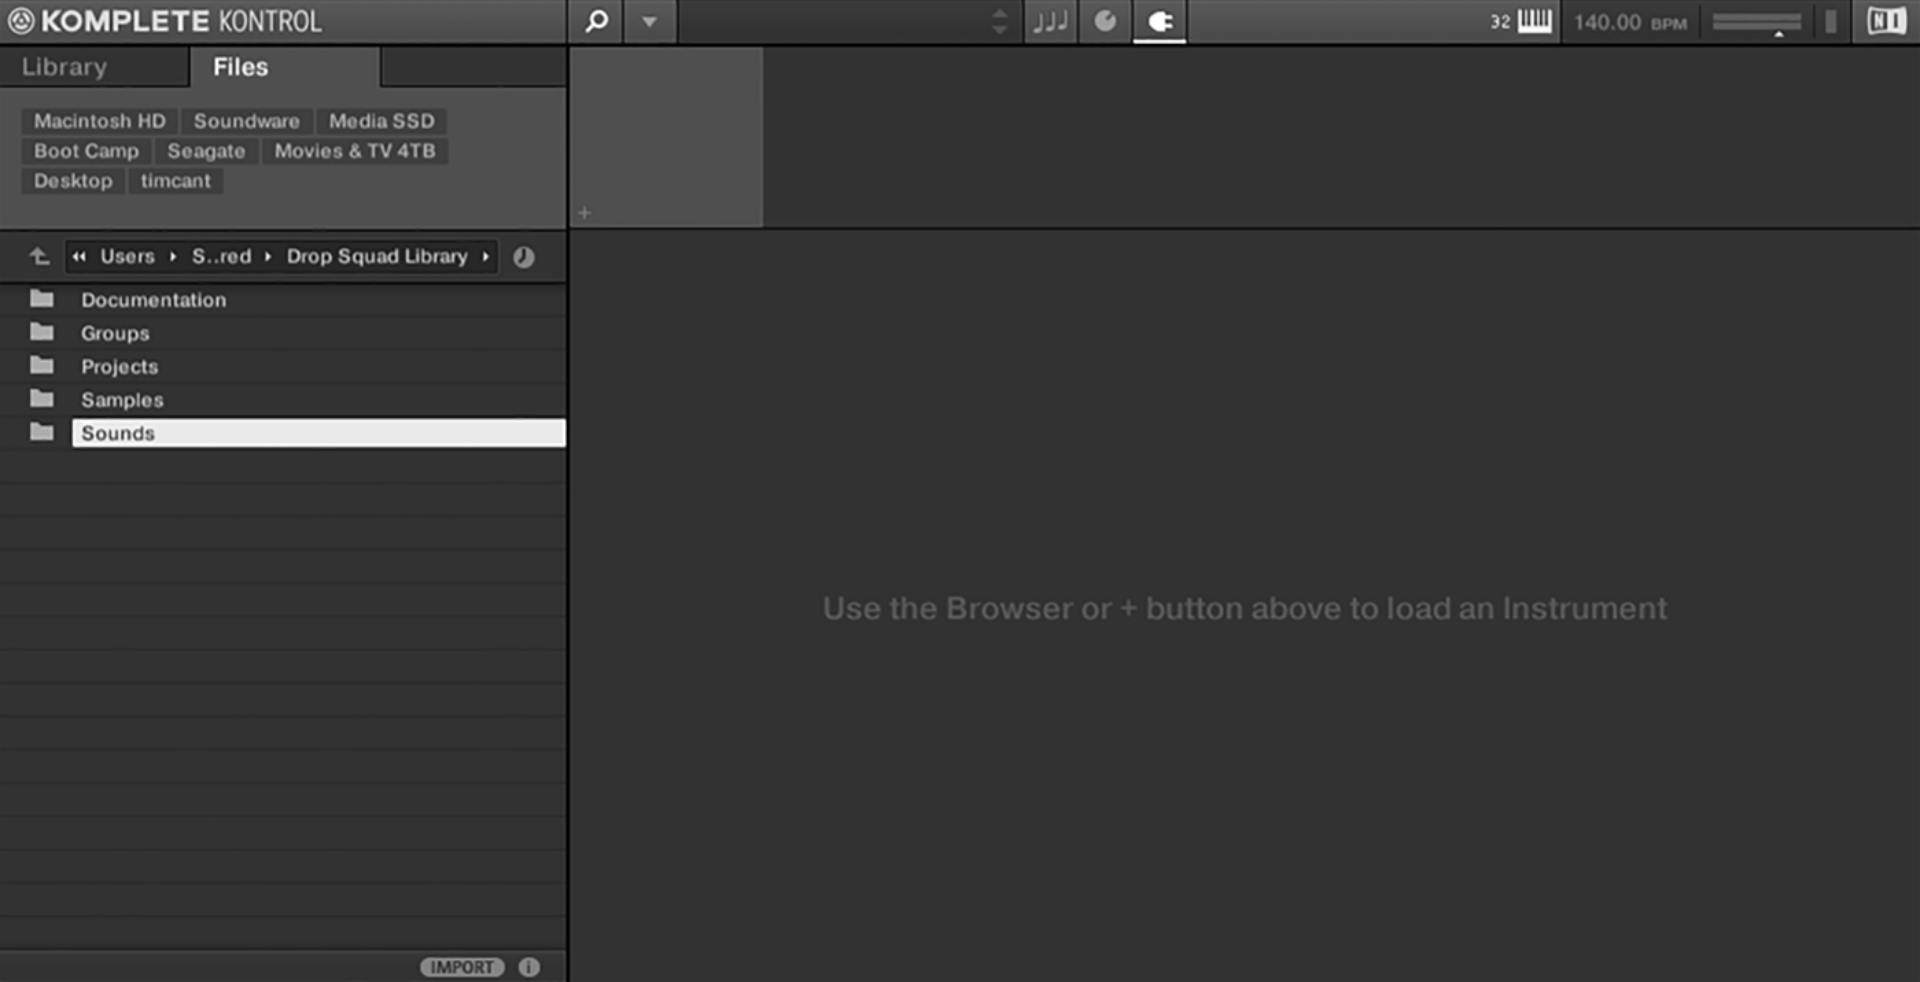
If you’re not sure where this is on your computer, you can open Native Access, open the Installed Products category, then select Drop Squad and click on the Installation Path tab.

Open the Samples > One Shots > Chord folder. Here you’ll find a selection of chord samples that you can audition by clicking on them. We can play these back as samples in the KOMPLETE KONTROL instrument, or we can drag them directly onto an audio track in our DAW. Drag Chord Synth Bm Mentalism MSV.wav onto an audio track. Loop the beat out for the whole of the sample’s four-bar duration.

Set the track to -5.5 dB.

Now we have a dubstep beat and a chord that sits nicely with that beat. These two elements will form the rhythmic and musical foundations of our track.
3. Atmospherics
Let’s add some more sounds from DROP SQUAD to really build up the vibe and atmosphere of our track. Chord Wino.wav has a cool vibe, so let’s use that too. Drag it onto an audio track, then delete everything after the first beat, and add a short fade so the same ends smoothly.

Set the track to -4.5 dB.

Add a delay effect set to three 16th notes. This makes the sample’s end less abrupt and gives us a touch of dubby flavor.

In KOMPLETE KONTROL navigate your way to the Samples > One Shots > Ambience folder. Drag Ambience Cellophane 2.wav onto an audio track. This is a long sample, but we only want to use the first four bars, so delete everything after that.

Now turn this track down to -9.1 dB.

This sample loops smoothly, so there’s no need to add any fades.
DROP SQUAD features instrument patches as well as samples. Open the Sounds > Massive Sounds folder, and double-click Paper.nmsv to load it up.

Set this track to -15.3 dB.

Sequence this patch to play A#2 with a velocity of 100 for the whole four-bar sequence.

4. Transitional FX
Now let’s find some FX that we can use for transitions when it comes to arrange the track. Open the Samples > One Shots > Sweep & Swell folder. Drag Rise Pinball.wav onto the last bar.

Set the level to -9 dB.

Mute the Rise Pinball track so that we can add another effect. This time drag Sweep Propeller.wav onto an audio track, again positioning it on the last bar.

Set its level to -10 dB.

5. Bass
In dubstep, bass lines tend to drive the track more than the melody does. So, before we add the melody let’s focus on the bass elements.
Let’s simplify things for the moment by muting everything but the beat and chord tracks.

We’re going to make a bass sound from scratch using MASSIVE. Load the synth up onto an instrument track. Select File > New Sound on MASSIVE’s interface to initialize the patch.

Turn the synth’s Master volume knob up to between 2 and 3 o’clock.

We’re going to make a throbbing mid-range sound first. To do this we’re going to use MASSIVE’s Phase modulation capability, which works very much like Frequency Modulation synthesis to give us a very harmonically rich tone.
Activate the Modulation Oscillator, and set the Phase routing to Oscillator 1.

Bring the Pitch of Oscillator 1 down to -12.00, offsetting it against the Modulating Oscillator. We now have a rich, dirty timbre that we can begin shaping into something more dynamic.

Now set Filter 1 to Lowpass 2 mode and turn the Resonance down. This dulls the sound.

We’re now going to modulate Filter 1’s Cutoff with an LFO. Drag the modulation handle from 5 LFO onto the first slot below the Cutoff, then drag up on the modulation slot so that the modulation amount on the Cutoff knob spans roughly 9 to 12 o’clock.

We now have a slow pulsing. We want a fast wobble. Click 5 LFO to bring up its parameters. Turn the XFade Curve up to maximum so that we’re using just the sine waveform as the modulation source.

Activate LFO Sync, and set the Ratio to 3/16.

We now have a classic dubstep wobble bass. Let’s sequence a bassline. Sequence a simple two-note bassline on E2 and G2, we’re using velocities of 100 here. This is essentially a two-bar groove, but the final note plays an eighth note earlier the second time around, creating a variation that keeps things rolling.

Let’s make this mid-range bass sound more in-keeping with the moody atmospherics. Add a Reverb with a relatively low Wet level. This subtle touch of reverb helps the mid-range bass sound more natural.

Next add a low-pass filter with a filter cutoff frequency of around 1 kHz. This smooths out the sound’s high-end.

Add a “bitcrusher” effect and set the sample rate to 6.21 kHz. This gives us a crispy sheen in the top-end, and many dubstep tracks use bitcrushers in this manner to give their basslines a crunchy feel.

For all this talk of bass, our track has a distinct lack of actual low-end. Let’s remedy this by creating a big sub bass patch, and layering it with the mid-range bass sound. Add MASSIVE on a new instrument track, and again select File > New Track.
Set Oscillator 1’s wavetable to Sin-Square.

Turn the Wavetable Position knob to its minimum level, giving us a smooth sine sound.

Duplicate the MIDI over from the mid-range bass track, and transpose it down two octaves so it’s playing on E0 and G0.

This fills the low-end out nicely, giving our track a weighty bass with an articulated mid-range that helps give the track its propulsive energy.
6. Lead
There’s already a lot of texture in this track, so our lead sound is going to be quite minimal and atmospheric to fit in. Add another instance of MASSIVE, select File > New Sound, and turn Oscillator 1’s Wt-position knob all the way down, giving us a square tone.

Set Filter 1 to Lowpass 4 mode, then set the Cutoff to just before 12 o’clock and the Resonance all the way down.

So, now we have a “blip” noise. Not much on its own, but let’s add some reverb. Set FX1 to Reverb, and turn the Size knob up to the maximum.

Now rather than a mere blip, we have a haunting, atmospheric blip that oozes urban alienation. Set the track to -5 dB.

Sequence this simple lead part that hits the root, minor third and major second, leaving plenty of room for that reverb to ring out.

7. Arrangement
We’ll start off the arrangement with the drums and Chord Synth for the first eight bars, adding the Chord Wino and Paper tracks for the next eight. The Rise Pinball sample leads into a breakdown.

The breakdown features the mid-range bass and lead playing over the Chord Synth track. The Sweep Propeller FX leads into the drop where the sub bass layer comes in.

On bar 33 the Chord Wino stab and Paper are reintroduced. On bar 41 we swap Paper out for Ambience Cellophane 2, and the lead stops playing.

We lose the mid-range bass on bar 49, but the sub keeps playing, and we swap from Ambience Cellophane 2 back to Paper. On bat 57 we swap out Paper for the lead synth. For the final eight bars Chord Synth and Chord Wino drop out, and we have a stripped-back beats and bass outro.

Here’s what the dubstep arrangement looks like and sounds like in full.

8. Mastering
Let’s give our track a big, loud sound with some quick mastering. Add Ozone 10 Maximizer to the master track and run the Master Assistant to get a pro-sounding master. Here’s what the dubstep track sounds like mastered with Ozone.

Start making dubstep
Here we’ve seen how you can make your own dubstep track from scratch. If you’d like to learn more check out our guide on music production 101, how to get started with electronic music, and how to make a beat.
For instruments, effects and expansions you might find useful, be sure to try out the trial versions of BATTERY 4 and MASSIVE, KOMPLETE KONTROL, DROP SQUAD and iZotope Ozone 10.
Related articles
-

Inside the evolution of orchestral sampling: an interview with ProjectSAM
Discover how ProjectSAM’s Lineage Series uses NKS and smart features to change orchestral sampling. Plus, save on instruments in our…
-

How New Constellations turn emotion into sound with Massive X
Go inside the studio with New Constellations. Learn how they use Native Instruments gear, happy accidents, and lifelong friendship to…
-

Citizen Kain on building emotion and space with Replika
Citizen Kain explains how Replika helped shape the rhythm, tension, and emotion behind his debut Eversun Records single “Moments.”…
-

The organic precision behind Calcou’s Anjuna release featuring Reaktor
Calcou shares how Reaktor, Monark, and Super 8 shaped the creative balance and live energy behind their new duo EP,…
-

14 NKS instruments that will change the way you create music
Discover 14 NKS instruments to freshen up your workflow. From lo-fi tape synths to cinematic strings, shop the Native Instruments…
-

Parallelle on crafting living basslines with Reaktor and TRK-01
Parallelle share how Reaktor and TRK-01 shape the bass and warmth in 11th Avenue, balancing analog depth with modern control.
-

Where will your sound lead you? Explore the Native Instruments Summer Sale
Save 30% on instruments, effects, and sounds in our Summer Sale. Find the tools to keep your tracks moving and…
-

How Mr. Bill builds sonic worlds in Massive X
Mr. Bill explains how Massive X and instinctive sound design shaped the storytelling process behind his new downtempo album, Mr.