


Looking to join the Twitch party with your own music or DJ sets? Been inspired by a live show on Facebook, YouTube, or Instagram? Getting started is not as hard as you might think. In this piece, we’ll cover what you need to consider technically as you jump into the growing world of livestreaming.
To start, you’ll need:
- Music that you can make at home (that’s pretty essential here)
- A Twitch account (free at Twitch)
- Broadcasting software, which you’ll use to connect to your platform of choice.
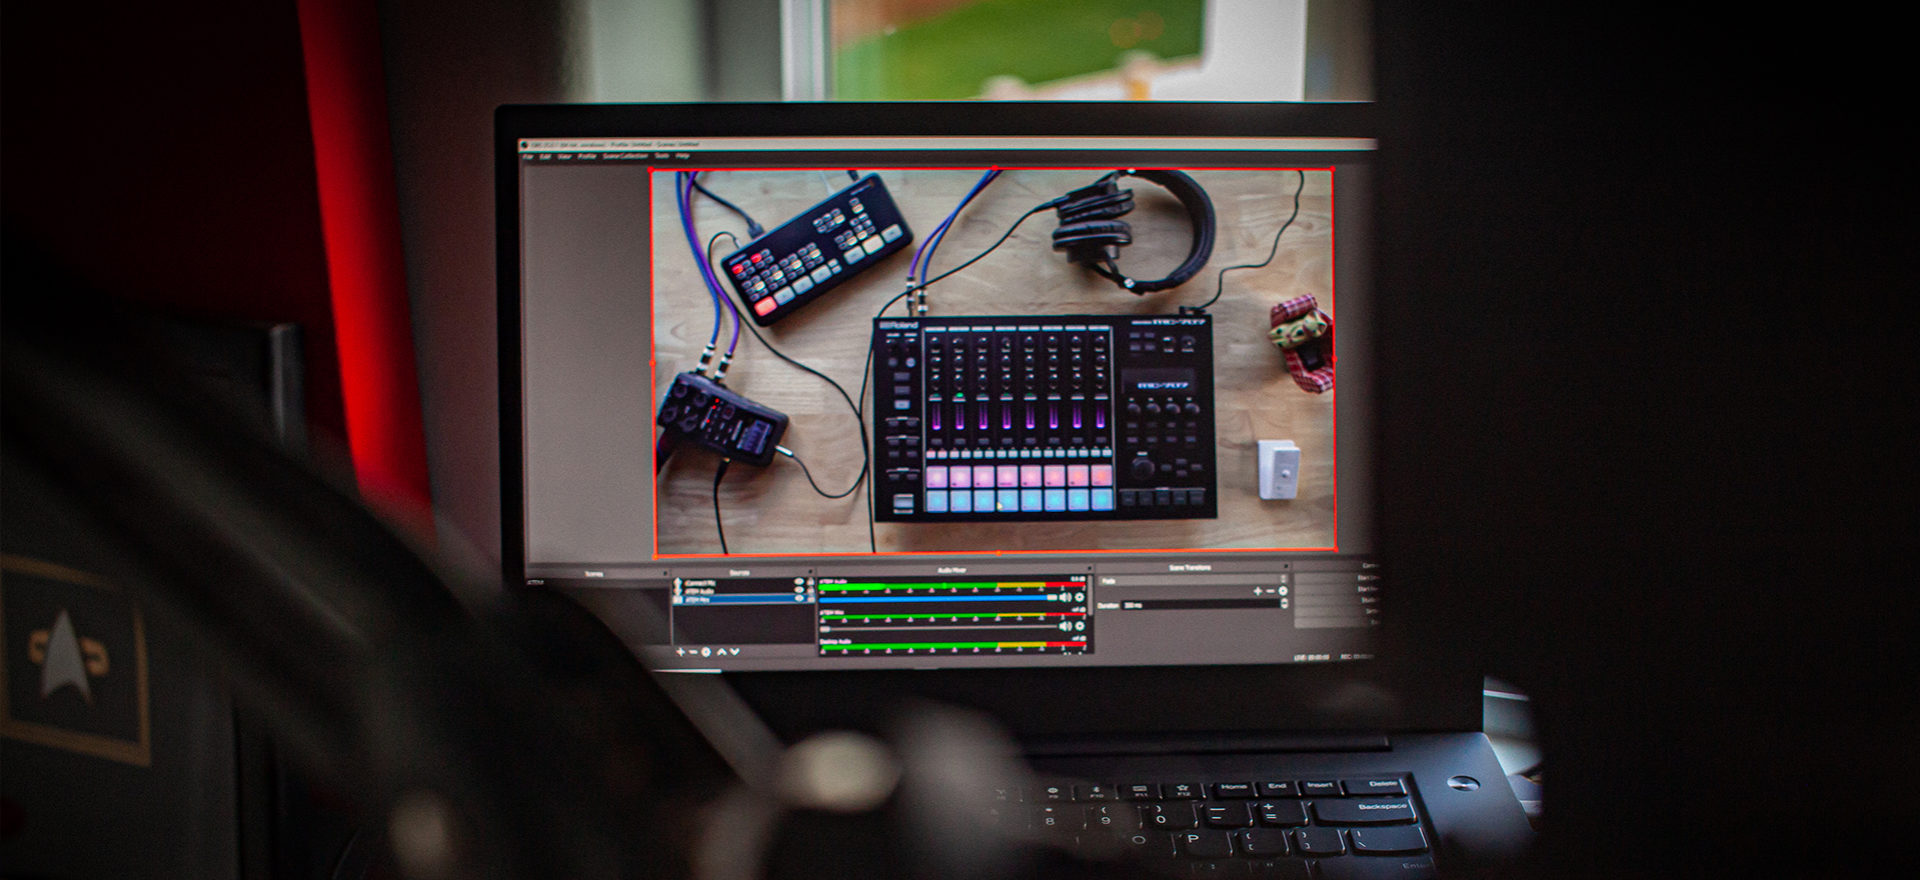
For broadcasting, the free app Open Broadcaster Software (OBS) Studio is an industry standard, available for Mac/Windows/Linux, and provides flexible options for incorporating multiple audio and video sources. Twitch also has their own Twitch Studio software, though it’s Windows-only and currently in beta. For a rundown of other broadcasting software, check out this list from Twitch. Make sure to test out your setup before going live. You’ll want to do a couple dry runs and record them – most broadcasting software can also record – to make sure that you’re getting good levels and avoiding feedback or other issues.
If you want to stream more than just your computer desktop, you’ll need some cameras. OBS can handle multiple video inputs, and a built-in webcam on your laptop or desktop is often a good first (and easy) place to start. As you progress in streaming, you may want to invest in more cameras to get different angles, and in hardware that will let you control live camera swapping.

Watch those levels
Streaming in general requires audio setup preparation – and it’s doubly important when your stream involves music. Whether you’re performing or DJing or even just talking, make sure you check your levels before starting a stream. If you’re using OBS, you can use the built-in digital VU meters to make sure that you’re staying out of the red. Remember that, while analog distortion might sound pleasing, digital clipping doesn’t.
If you’re working with a microphone, you’ll want to take some extra steps to get things set up properly. Look into investing in a wind screen – these are not usually expensive, will help you lower background noise and tame harsh sibilants (“shhh” and “chhh” sounds), and will help you avoid popping your “p” and “b” sounds. Spend some time getting comfortable with your microphone, and consider how far you are from it – the frequency response curve of a microphone can change drastically depending on your position, so try not to move too much when using one.
What Can You Stream?
Lastly, there’s the question on what you’re allowed to stream. While you can DJ with others’ music on most platforms, be aware that some tracks might end up muted in archival videos or worse, demonetized, or removed entirely. Most importantly, only stream video performances to which you have the rights. Go ahead and do a Traktor set, but don’t steal videos. Upon archival on Twitch in particular, videos with copyrighted audio (like DJ sets) will be available, but muted during the sections where Twitch’s algorithm detects copyrighted audio.
Getting an audience
If you want to build a streaming audience, you need to be consistent. Plan to go live regularly at certain times, and stick to it! If you’re just starting out, try to stream at least every two weeks. Decide what you’re going to stream in advance: will it be a performance? A DJ set? What genre? Who else is involved?
Promoting a stream on social media can feel like shouting into the void (especially now, when everyone is getting into streaming), which is where music forums come in handy. In particular, Discord is a good bet – a number of popular Twitch streamers have their own Discord servers, and most music-based Discord servers have dedicated channels for self-promotion. Additionally, check out appropriate places on Reddit, or direct forums like KVR Audio and Gearslutz. Remember to be transparent about what you’re promoting, and consistent in delivering – no one likes a spammer or someone who can’t deliver.

Engage
If you’re stuck on what to stream, two suggestions: 1) look at some of the fantastic streamers who are already sharing their music-making process, and 2) think about what would be most interesting for you to watch. The truth is that a lot of the creative process isn’t all that interesting to outsiders, so consider who you’re streaming for (professionals? People looking to get into music-making? Partiers?) and why they should care.
A few ideas for streams – feel free to snatch these:
- DJ Challenges – all the names start with “D”, all the same tempo, play the artists in alphabetical order.
- Real-time sound design – set out to design some new presets (e.g. “15 new presets for Massive X”), and show the real-time process of how you do it.
- Submissions party – once you’ve got more followers, ask them for music. Or, alternatively, if you’re feeling brave, try asking on Discord and Reddit for submissions. There are loads of musicians out there who want their music played. Whether you’re just DJing or offering feedback on tracks, it’s a great way to share and grow your own channel.
Now let’s take a look at a couple of different setups from two livestreaming veterans – we’ll let them explain in their own words.
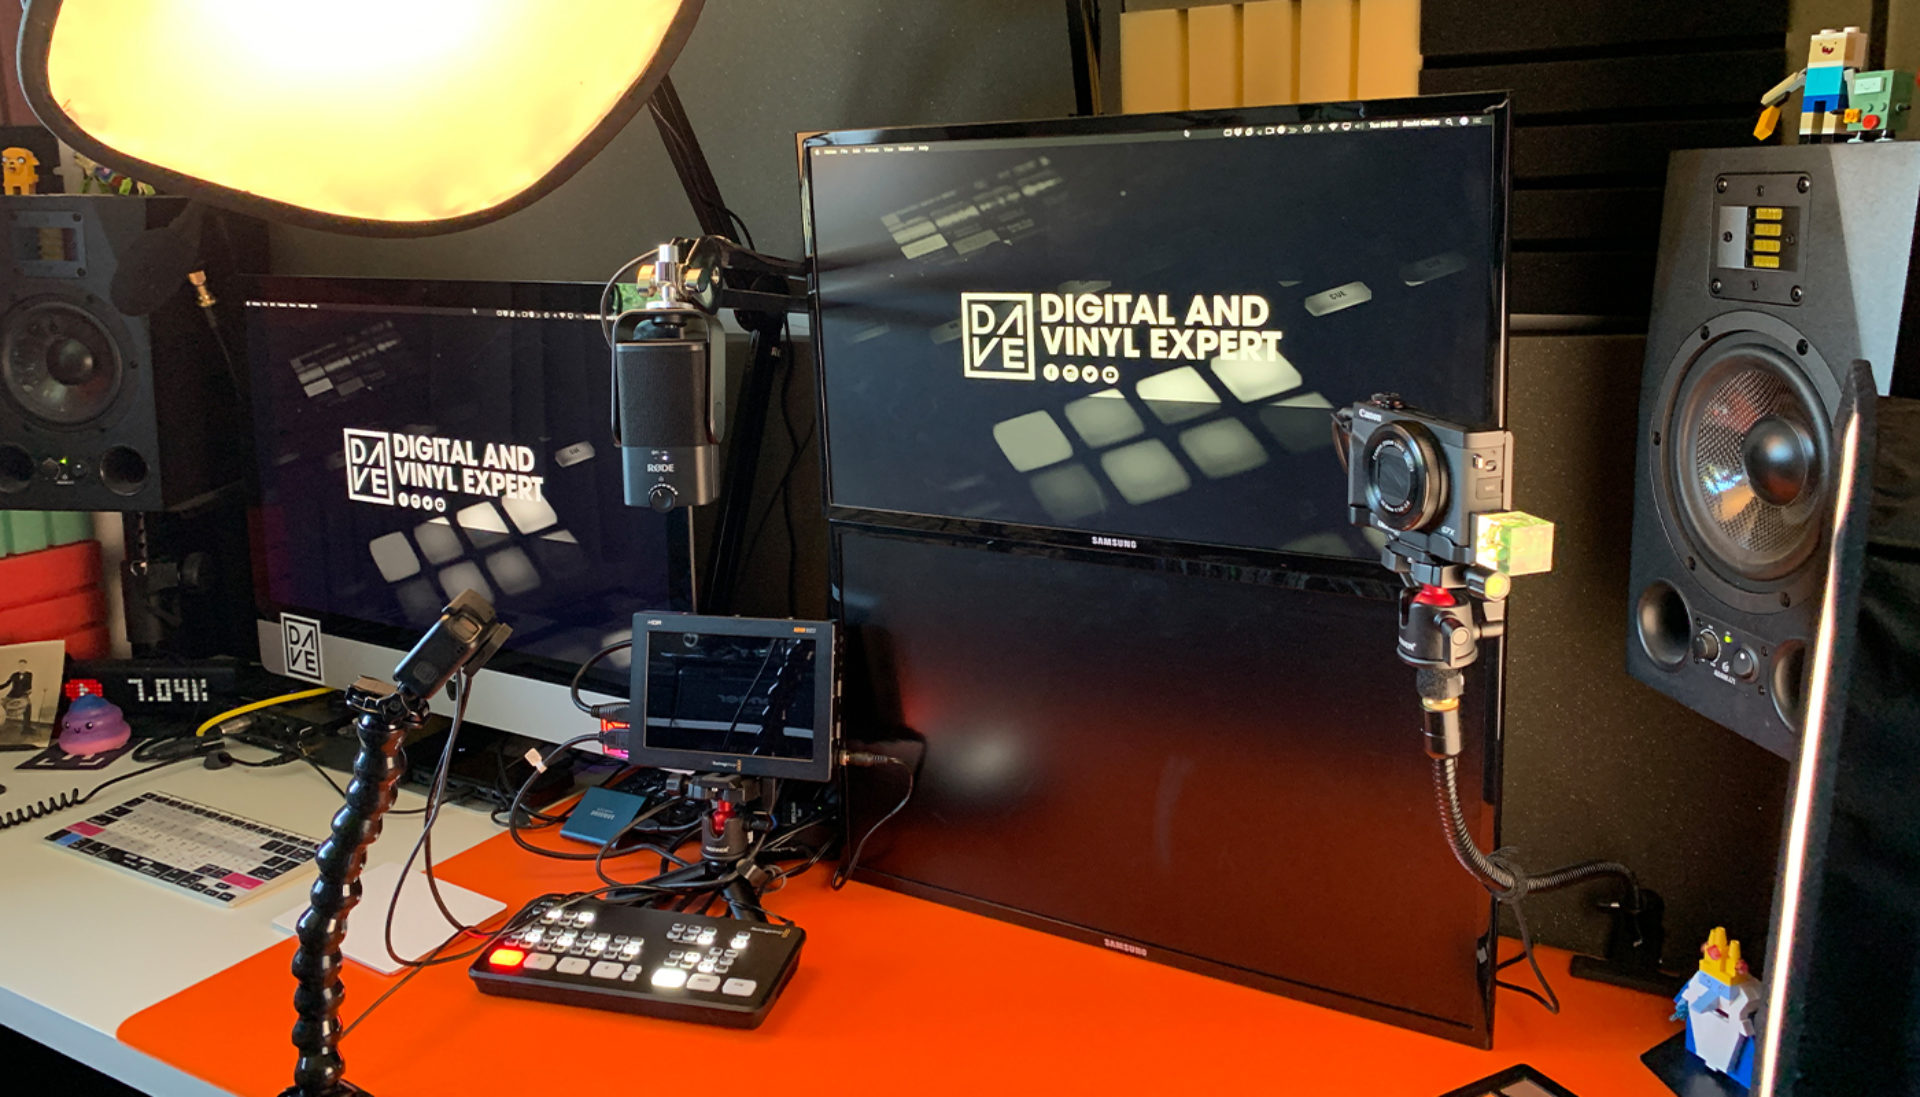
D.A.V.E. (Digital and Vinyl Expert)
My live streaming setup uses multiple angles for a more interesting and in-depth look, using PiP to help people see what I am doing. I have 2 canon G7X mk3 cameras. One for my presenting and one for overhead. I have a Gopro 7 black for my angle shot and my iMac for the desktop shot. I run these all through the BlackMagicDesign Atem mini for live camera swapping. This all gets sent into Studio OBS where I set up different scenes for transitions.
For audio, I run my mic (which changes depending on what I am doing) into the Komplete Audio 6 MK2. Everything internally goes into an aggregate on the Mac and it all monitors from the Komplete.
My advice for anyone starting out is to get a good audio feed. People can deal with a little less quality from the video if the audio is good. Use what you have and learn everything about it. It’s better to have one thing that you know really well and can forget about when streaming, instead of worrying about trying to work out tech whilst live and your content suffers.
Don’t worry about errors. So what if you mess up? use it, learn from it and laugh about it. Oh and have fun!
Stay up to date with D.A.V.E on his website, digitalandvinylexpert.com.
Jeremy Leaird-Koch of Red Means Recording
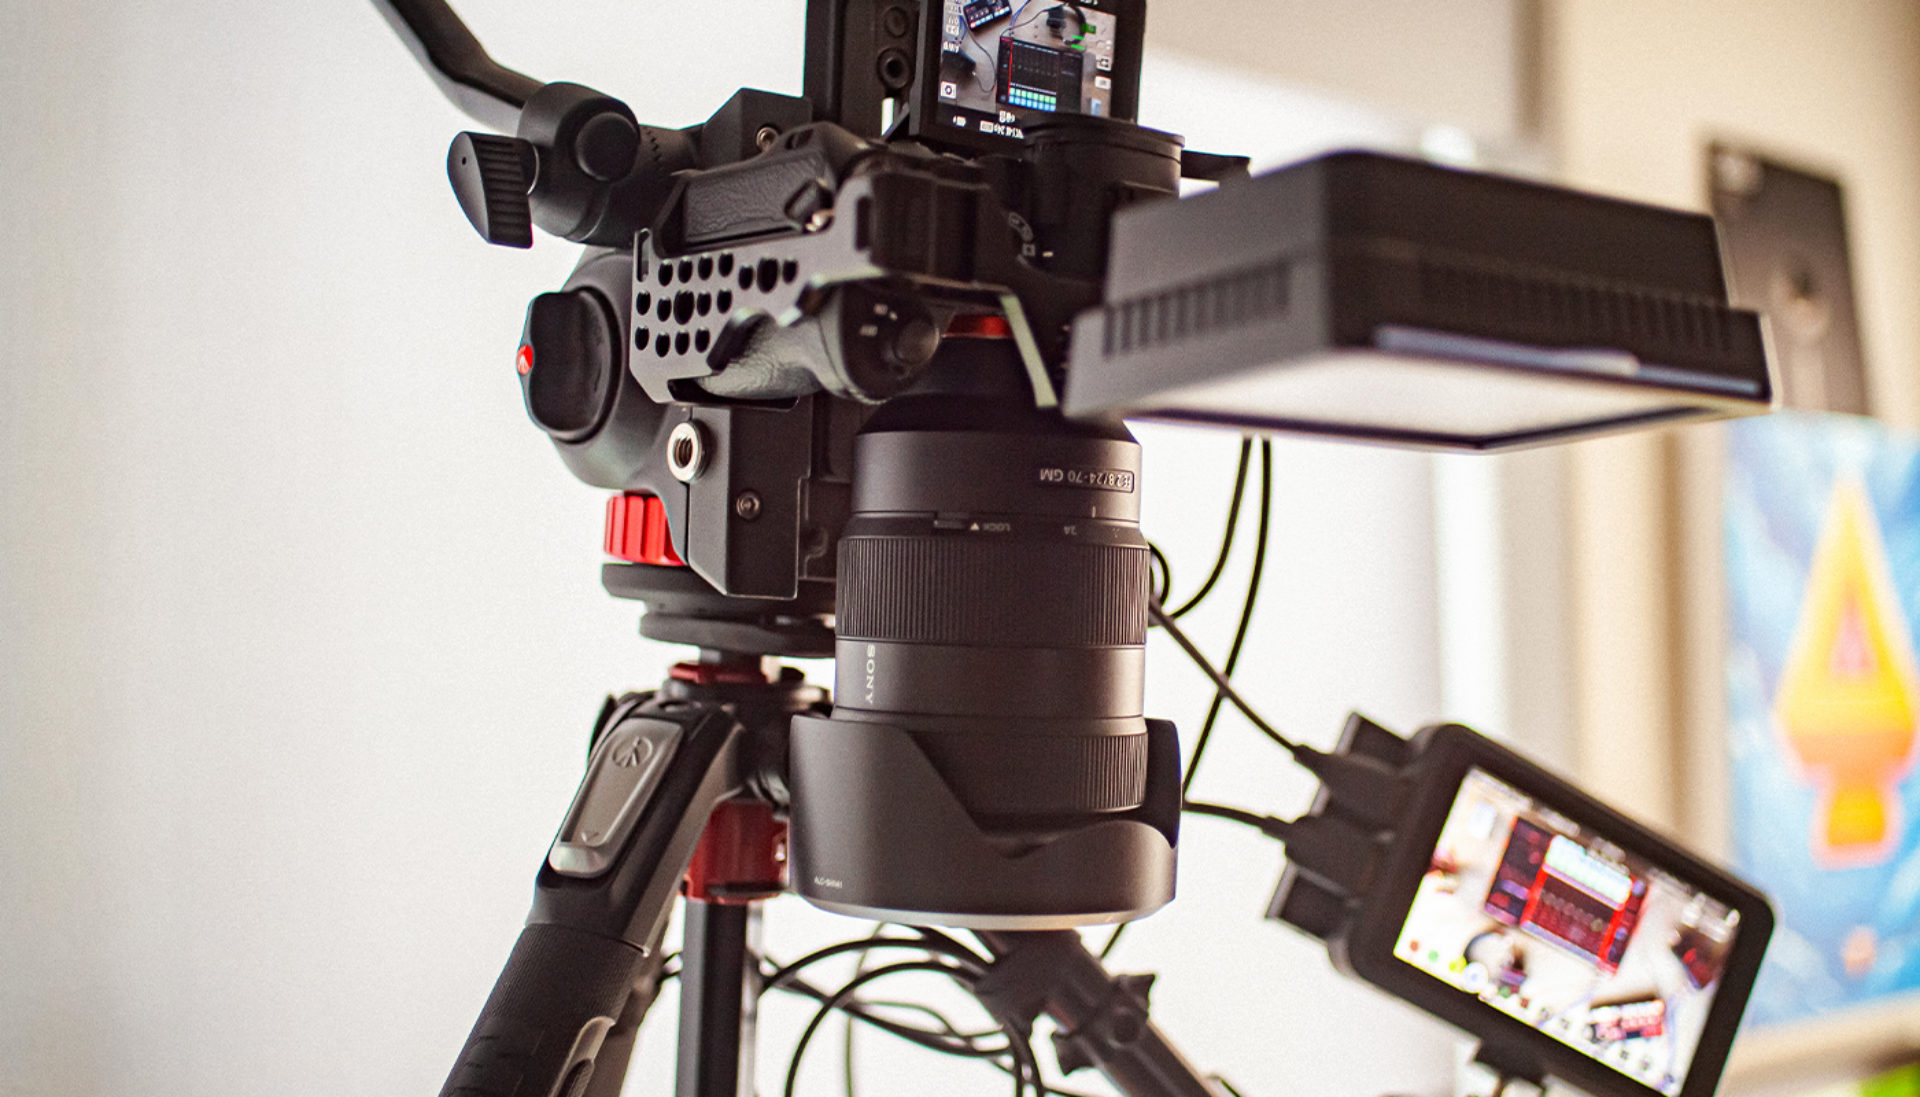
For video I use almost the same setup I do for my offline YouTube recordings: a Sony A7iii going into an Atomos Ninja V via HDMI. The Atomos records ProRes for archival and later edit of the stream.
The livestream differences start with an HDMI feed from the Atomos to a Blackmagic ATEM Mini. The ATEM Mini sends video out via USB to OBS, which is the software I use for streaming.
Audio goes out of whatever device I’m demoing in the livestream to a Zoom H6. The Zoom handles recording lossless multitrack of the hardware and my microphone, and outputs line-out via 1/8th-inch stereo to the input of the ATEM Mini, and from there to OBS.
Running everything for streaming into the ATEM means that I don’t have to worry about sync, and I can utilize the image quality of the A7iii instead of relying on a low IQ webcam.
I don’t use lights unless I’m purposefully going for a nighttime vibe. I use natural light from the window behind my setup and adjust the level of light coming in via the remote shades.
If I’m doing a nighttime stream I’ll use some YONGNUO YN360 RGB wands set to complimentary colors on each side of the setup.
You don’t need a lot to get started, just make sure you’re paying attention to the little things that make a big difference: line-in for and hardware you’re using as opposed to phone camera microphones. A decent microphone for your voice (I use an AT2035). If you are talking during the video, make sure there are no loud ambient noises in your room, like fans or AC units. Finally, try to keep your workspace clean and keep your sight-lights straight so people can focus on what you want them too.
For more of Jeremy, follow Red Means Recording on YouTube.
Monetizing your Twitch Stream
One last note, on monetizing your stream. First, to be blunt: don’t expect to make money from streaming on Twitch at the very beginning. You’re going to have to build an audience and build your name before you can expect to see viewers willing to pay to subscribe, or companies offering sponsorships.
Once you’ve built up your Twitch channel with regular streams, you may consider adding a subscription tier to your channel. Twitch makes this easy, but consider carefully what your case is for subscription. Dropping consistent free content and then putting up a subscription paywall is not a good strategy. Look at what you might continue to provide for free, and what you want to keep restricted to your subscribers. For example, you might provide streams of your own music-making techniques for free, while offering subscriber-only streams where you critique submitted music from the audience. You can also look at subscriber perks outside of the stream, such as music downloads, patch/preset/sample collections, or one-on-one sessions.
Keep us in the loop
If you’re streaming with Native Instruments software or hardware, we want to know! Hit us up on Twitter, Facebook, or Instagram, and don’t forget to tag us and use #NIStreams. We’ll be looking to amplify the best streamers out there, so don’t be silent!
Related articles
-

Behind the synth: A. G. Cook on stacked sawtooths and the creation of Super*Saw
Explore the extremes of stacked sawtooth waves with Super*Saw, a new synthesizer co-created with A. G. Cook. Learn how to…
-

Inside the evolution of orchestral sampling: an interview with ProjectSAM
Discover how ProjectSAM’s Lineage Series uses NKS and smart features to change orchestral sampling. Plus, save on instruments in our…
-

How New Constellations turn emotion into sound with Massive X
Go inside the studio with New Constellations. Learn how they use Native Instruments gear, happy accidents, and lifelong friendship to…
-

Citizen Kain on building emotion and space with Replika
Citizen Kain explains how Replika helped shape the rhythm, tension, and emotion behind his debut Eversun Records single “Moments.”…
-

The organic precision behind Calcou’s Anjuna release featuring Reaktor
Calcou shares how Reaktor, Monark, and Super 8 shaped the creative balance and live energy behind their new duo EP,…
-

14 NKS instruments that will change the way you create music
Discover 14 NKS instruments to freshen up your workflow. From lo-fi tape synths to cinematic strings, shop the Native Instruments…
-

Parallelle on crafting living basslines with Reaktor and TRK-01
Parallelle share how Reaktor and TRK-01 shape the bass and warmth in 11th Avenue, balancing analog depth with modern control.
-

Where will your sound lead you? Explore the Native Instruments Summer Sale
Save 30% on instruments, effects, and sounds in our Summer Sale. Find the tools to keep your tracks moving and…