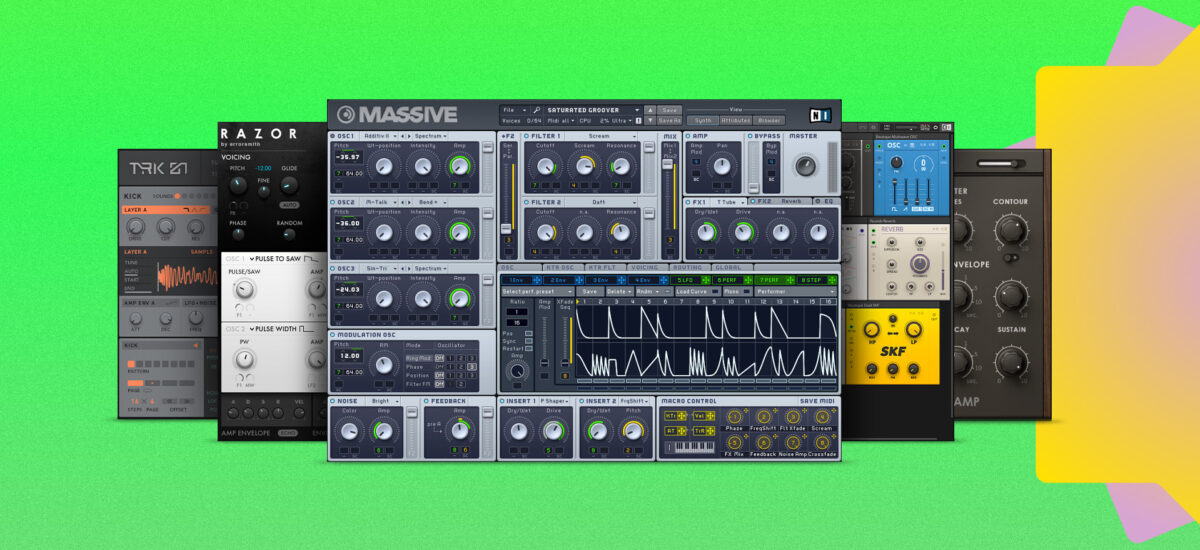
Synthesizers are used to create all kinds of sounds in popular music, and some of the most recognisable tones come from electronic synths, be they hardware or software-based.
In this guide on how to use iconic synths in music, we’ll show you how to make synth sounds for genres such as soul, house, dubstep and disco. We’ll also look at ways to process these synth sounds to get the most from them, and give examples of how to sequence them.
Ways to use iconic synths:
In this tutorial we’ll use Komplete Kontrol with Monark, Massive, FM8, Blocks Primes and Razor synths, Raum and Replika XT effects, plus Faded Reels, Drop Squad and Higher Place expansions.
How is a synthesizer used?
Synthesizers are typically keyboard-based instruments that can be played in real-time or sequenced. Synths come in both physical hardware and virtual software forms,and allow users to manipulate parameters such as pitch, volume, and timbre, creating a wide palette of sounds for music production, sound design, and performance.
Is it easy to use a synth?
Though some synths can be complicated, many synths are easy to use, especially if you’re working with pre-made ‘preset’ sounds. In this case you can load up a synth in your DAW, load a preset, then play and sequence it without having to do anything else.
Ways to use iconic synth sounds in your music
1. Smooth lead synth
Let’s make a smooth, analog-style synth lead that’s reminiscent of the earliest synth sounds heard on soul and jazz records. Monark is an emulation of early monosynths, and is ideal for creating this kind of sound.
First let’s get a suitable backing track. First set your project tempo to 130 BPM.
Now load up Komplete Kontrol on a MIDI track, and click the Loop button. Now click the Faded Reels expansion to open it, and double-click the Combo[65] Cm Cirkles 1 in the list of loops on the right.
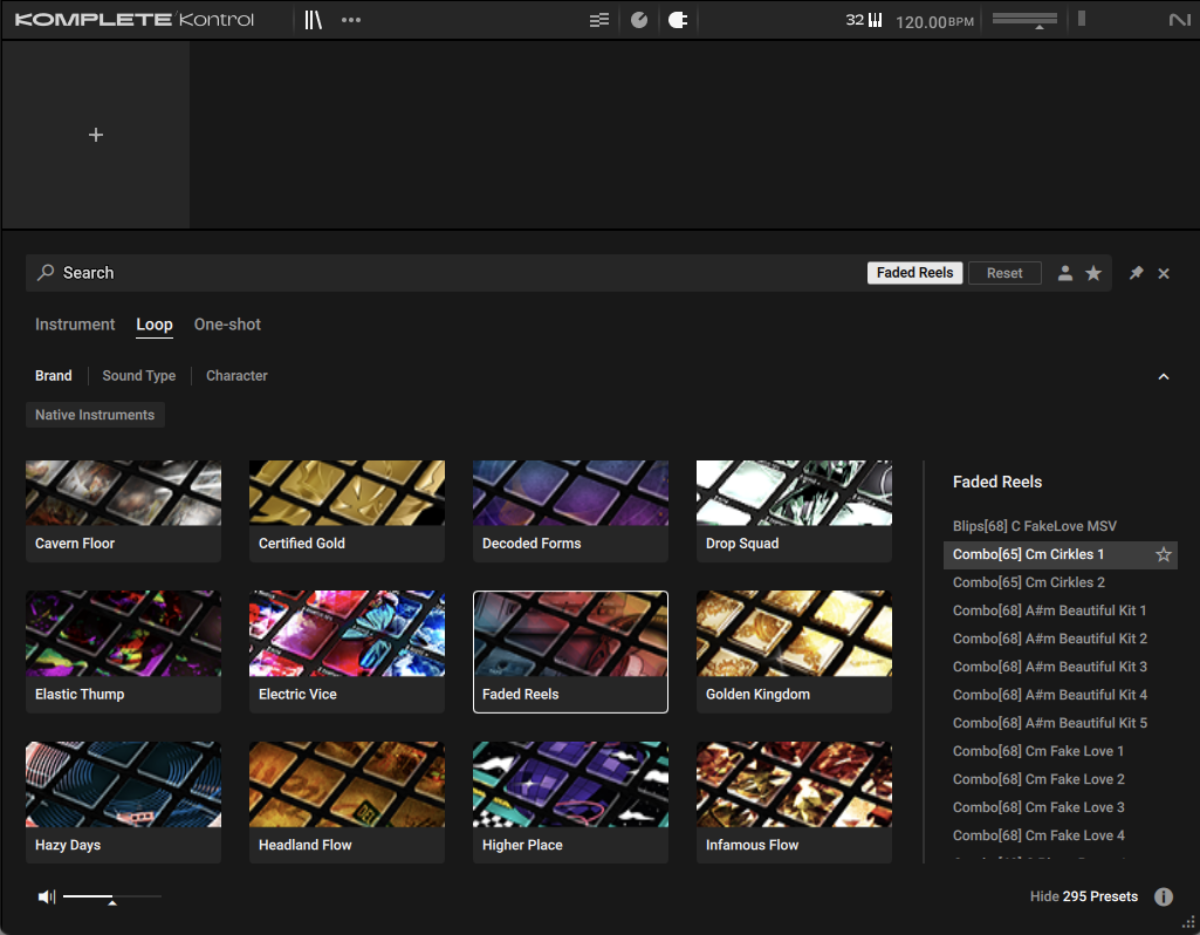
Sequence a C3 note to play for four bars. We’ll use velocity values of 100 for everything in this guide unless otherwise specified.

Turn the track down to -9 dB. Now you’ll hear the loop play back at an appropriate tempo, pitch and volume.
Now let’s add our synth sound. Load up another instance of Komplete Kontrol on a new MIDI track. Enter ‘tumpk’ into the text search field, and double-click the Tumpk preset to load it up.
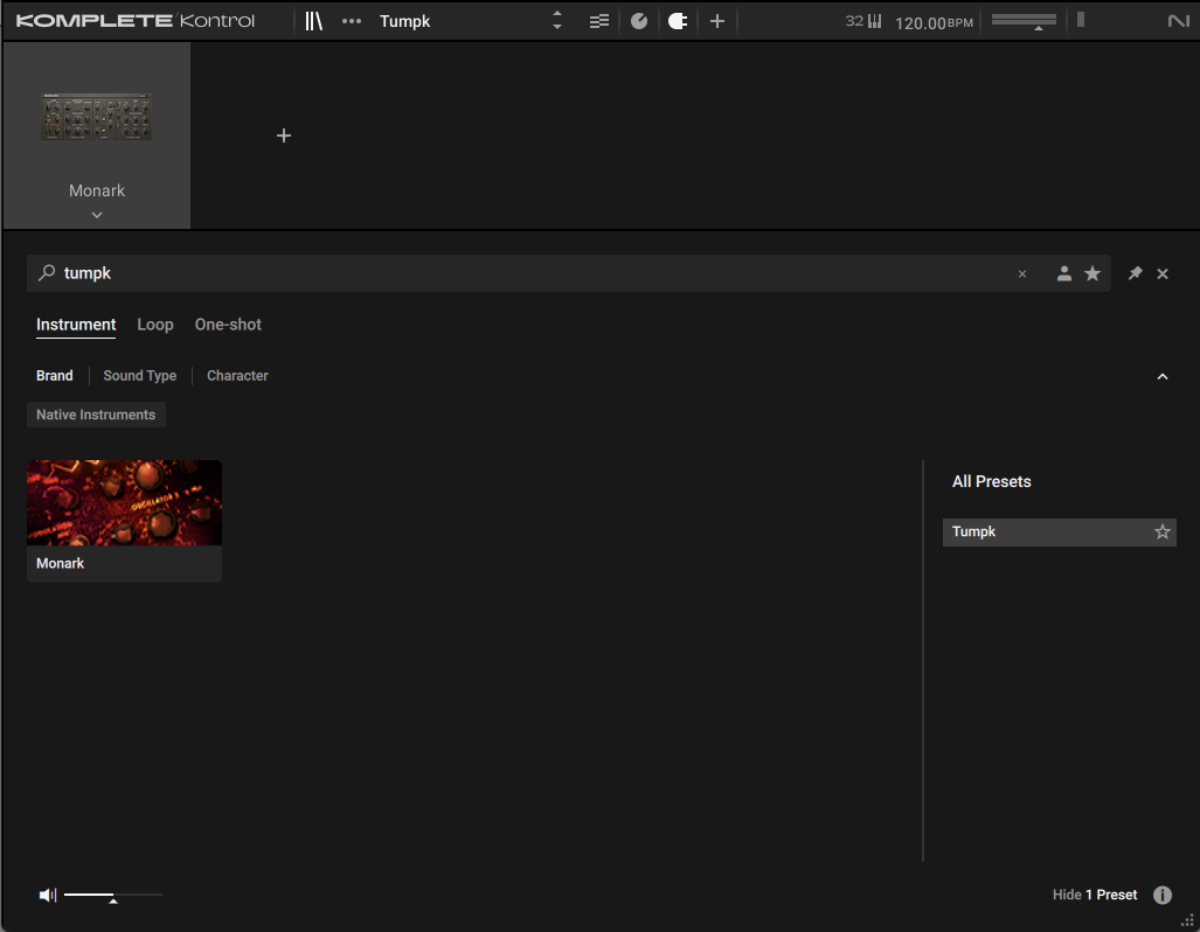
This loads the Tumpk preset in Monark. Set this track to -14.6 dB to balance it with the backing loop.
Then, sequence your own lead line to play over the top of the synth, or copy the one we’ve used here.

This sounds cool, but it’s a touch dry, so let’s add some delay and reverb.
First, add Replika XT, and load the Classics > Quarterinch preset.
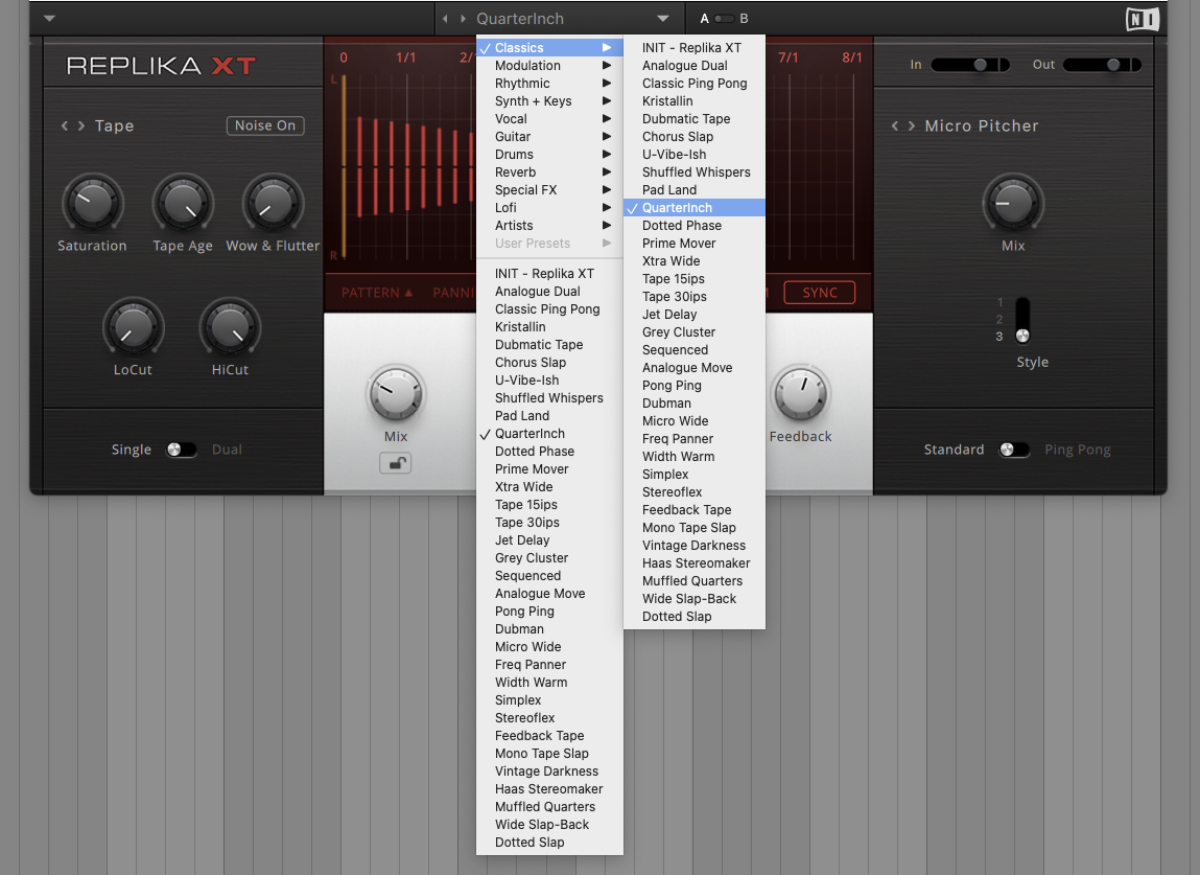
After that add Raum and select the Factory Presets > Large > Basic Synth hall preset.
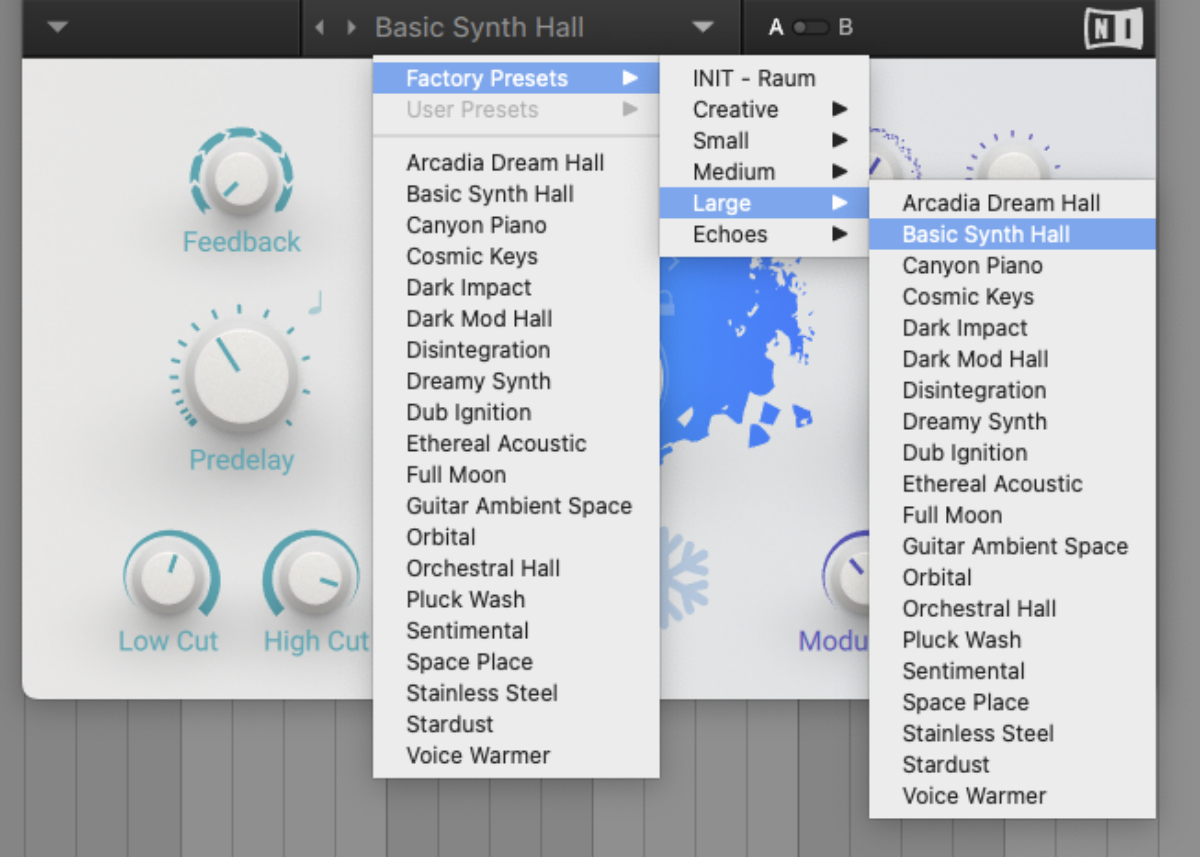
This gives us a lush, organic sound that brings out the expressive qualities of the synth.
2. Glossy FM keys
FM-based electric piano patches have a captivating blend of softness and clarity that makes them a real synth staple. Let’s use an FM8 preset in this style to create a chord progression.
Load up Komplete Kontrol, and enter ‘another ep’ into the text search field. Double-click Another EP in the preset list.
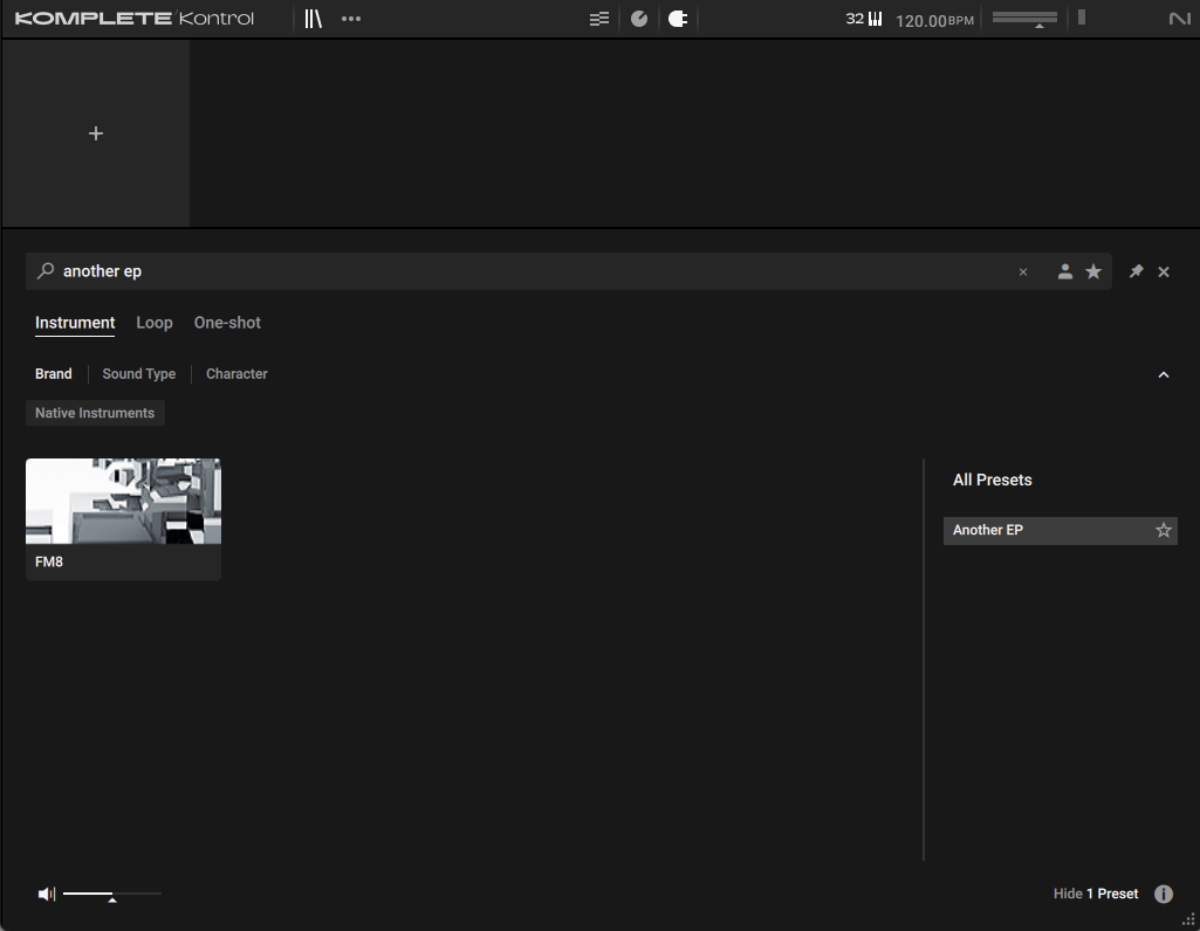
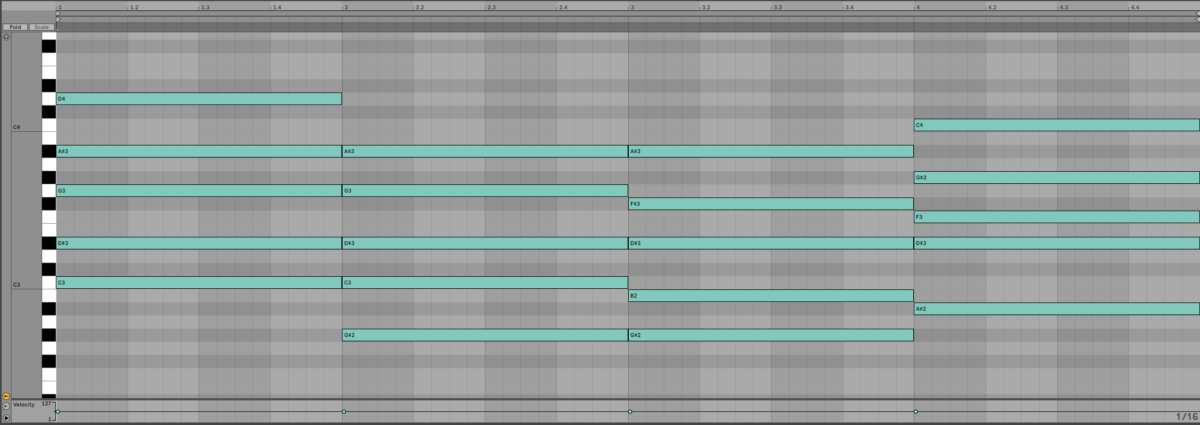
Now, sequence your own chord progression, or copy the one we’ve used here. This plays C min 9, Ab maj 9, Ab min 9, Bb 9 (sus 4). Use a velocity value of 60 to get a soft sound.
This has a very close, intimate sound, so let’s add some reverb and delay to move it away from the listener a little. Load up an instance of Raum and select the Factory Presets > Medium > Wooden Room preset.
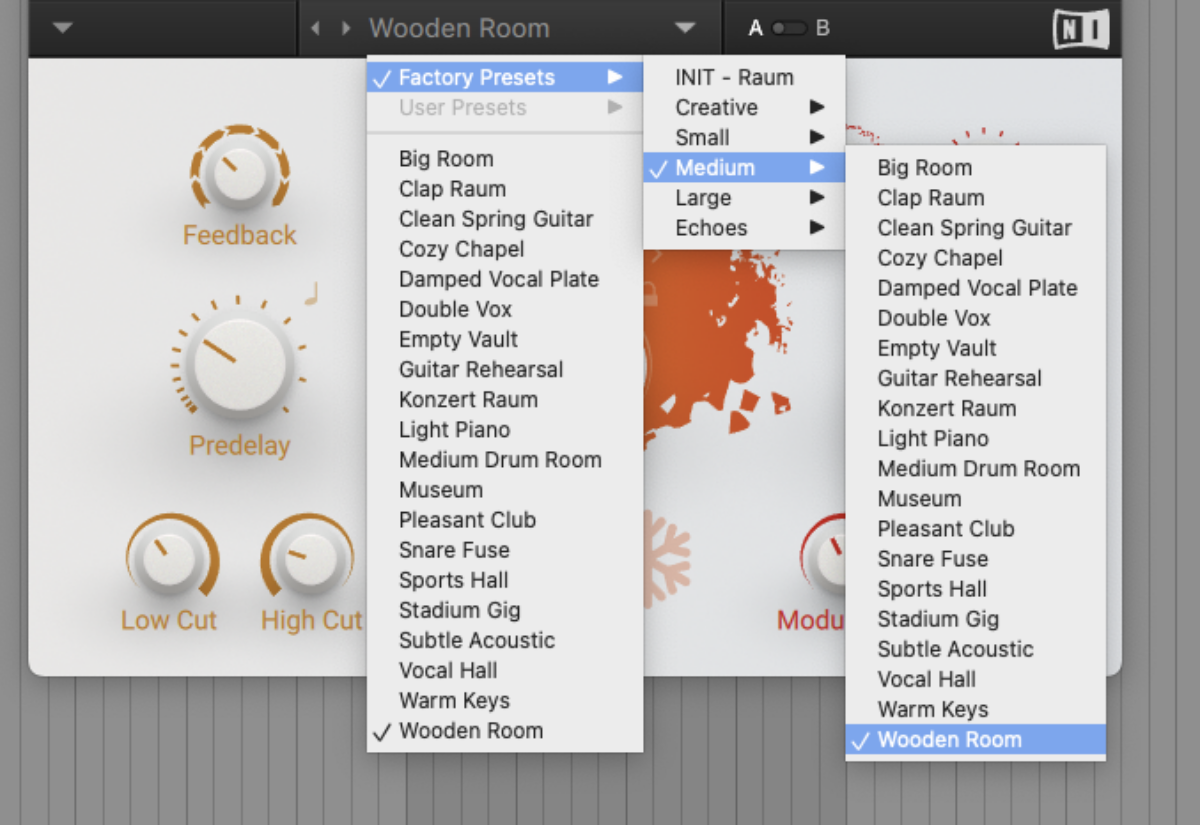
This gives us a more natural sound that makes the perfect jumping-off point for a composition.
3. Wavetable bass
The defining sound of dance music in the late aughts was the gnarly wavetable synthesis afforded by Native Instruments’ Massive. Let’s use Massive’s wavetable capabilities to make a nostalgic dubstep bass sound.
Start by setting your project to 140 BPM.
Now load up Komplete Kontrol, click the Loops button, open the Drop Squad expansion and double-click the Drums[140] Arcade loop.
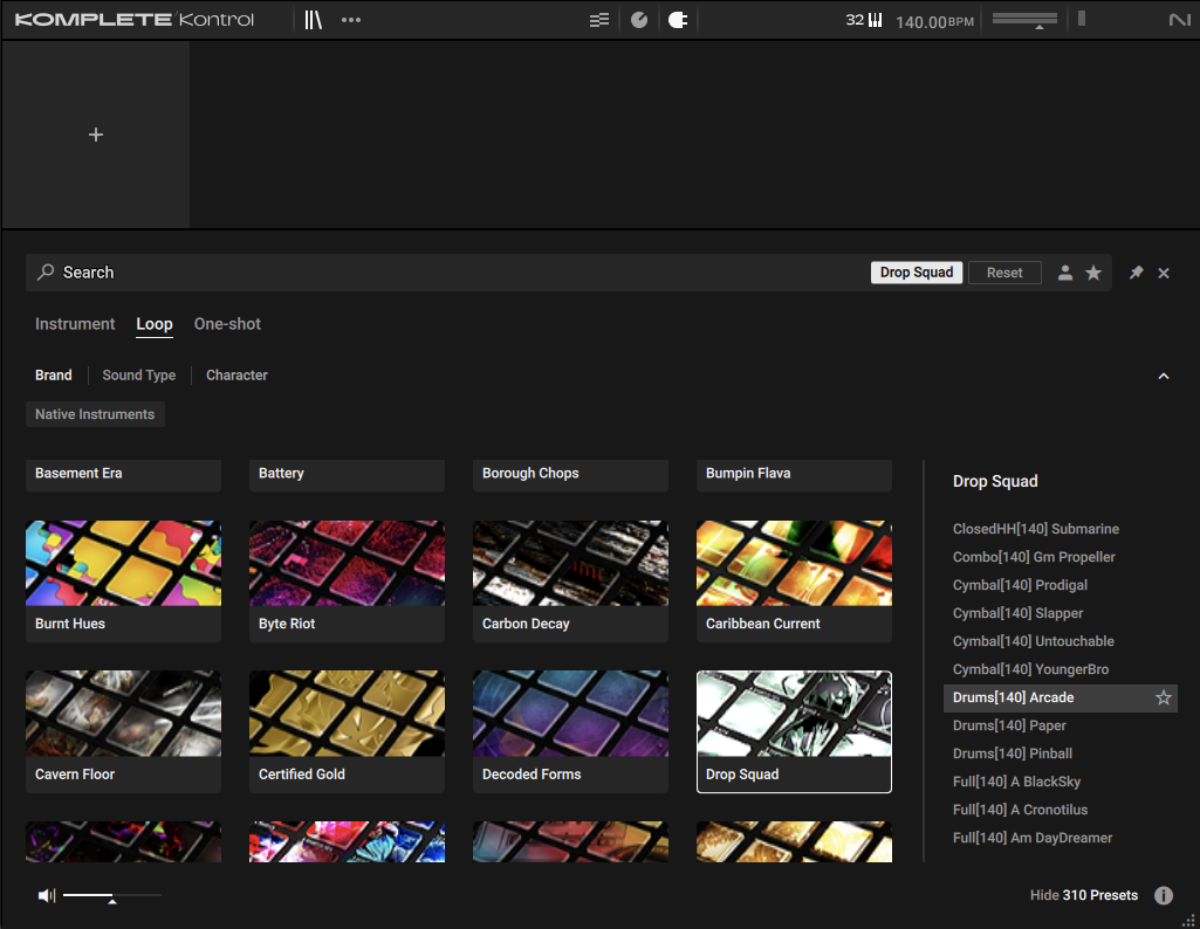
Sequence the loop to play for four bars on C.

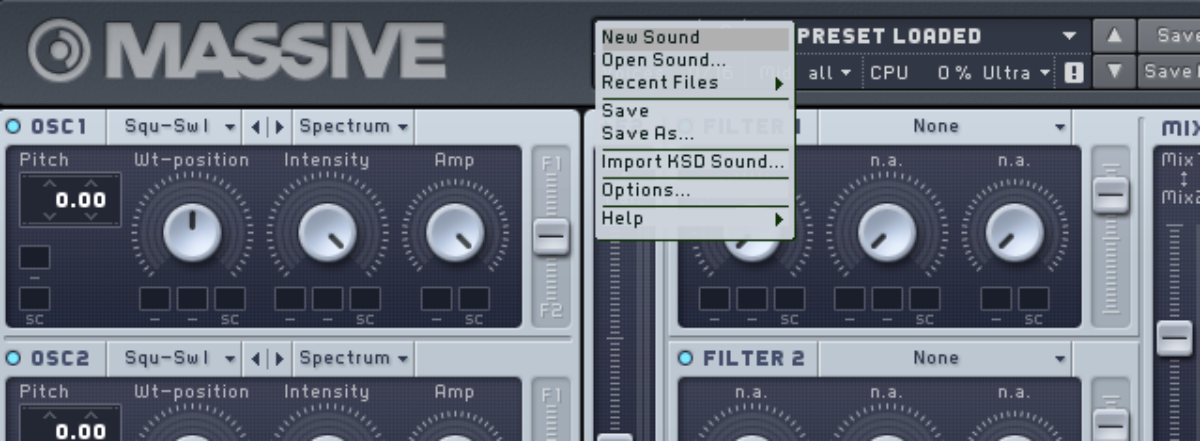
Now we have a suitable dubstep drum beat to work with, let’s make our wavetable patch. Load up Massive on a new MIDI track, and select File > New Sound from the instrument’s interface.
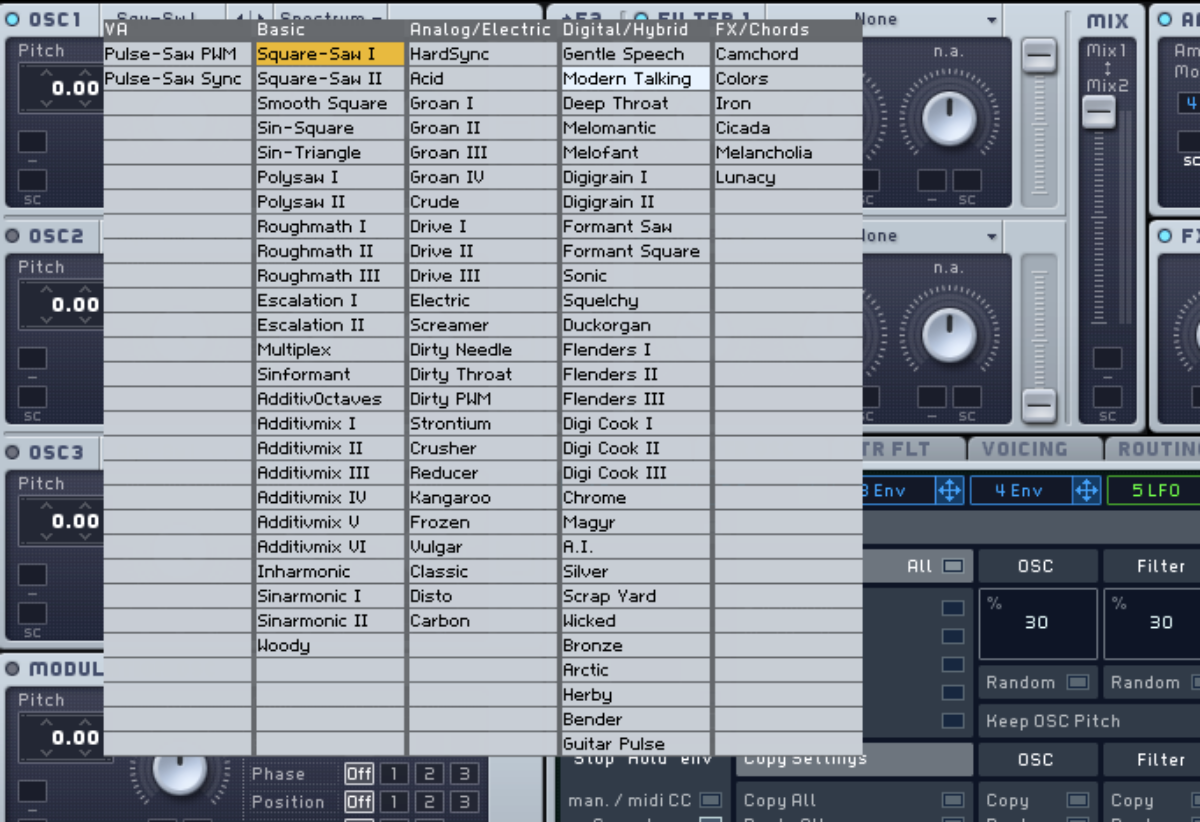
Click Oscillator 1’s wavetable name, and select Modern Talking from the list of wavetables that appears.
Move the Wt-position knob to 12 o’clock, then drag the modulation handle from 5 LFO into the first slot under that knob.
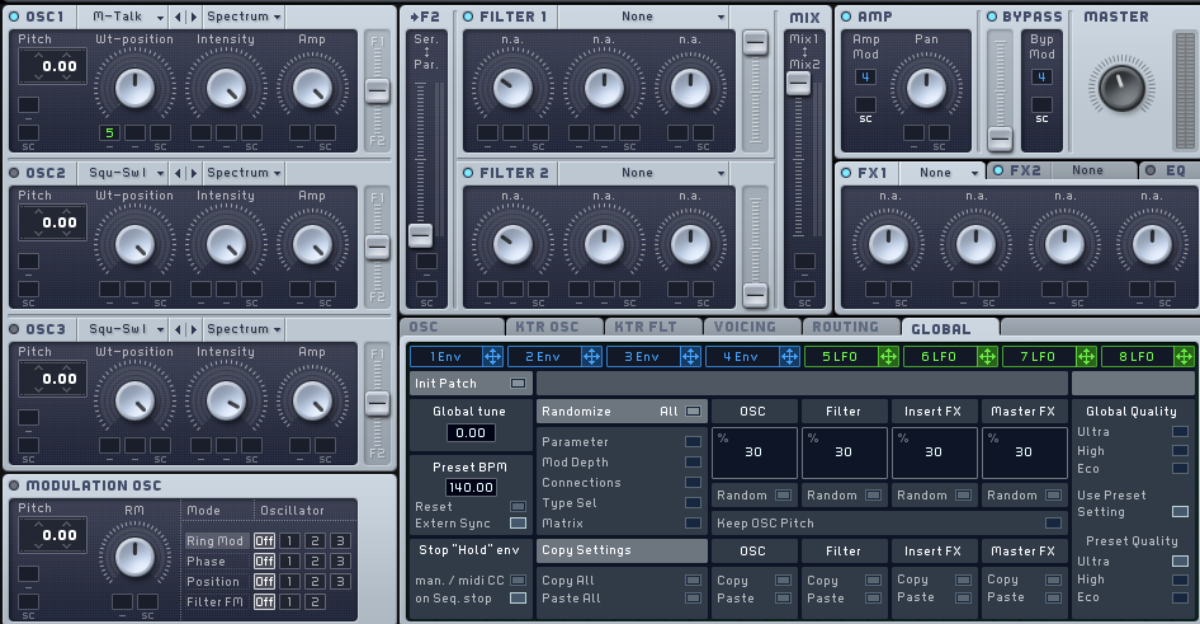
Now drag up on the slot to increase the modulation amount.
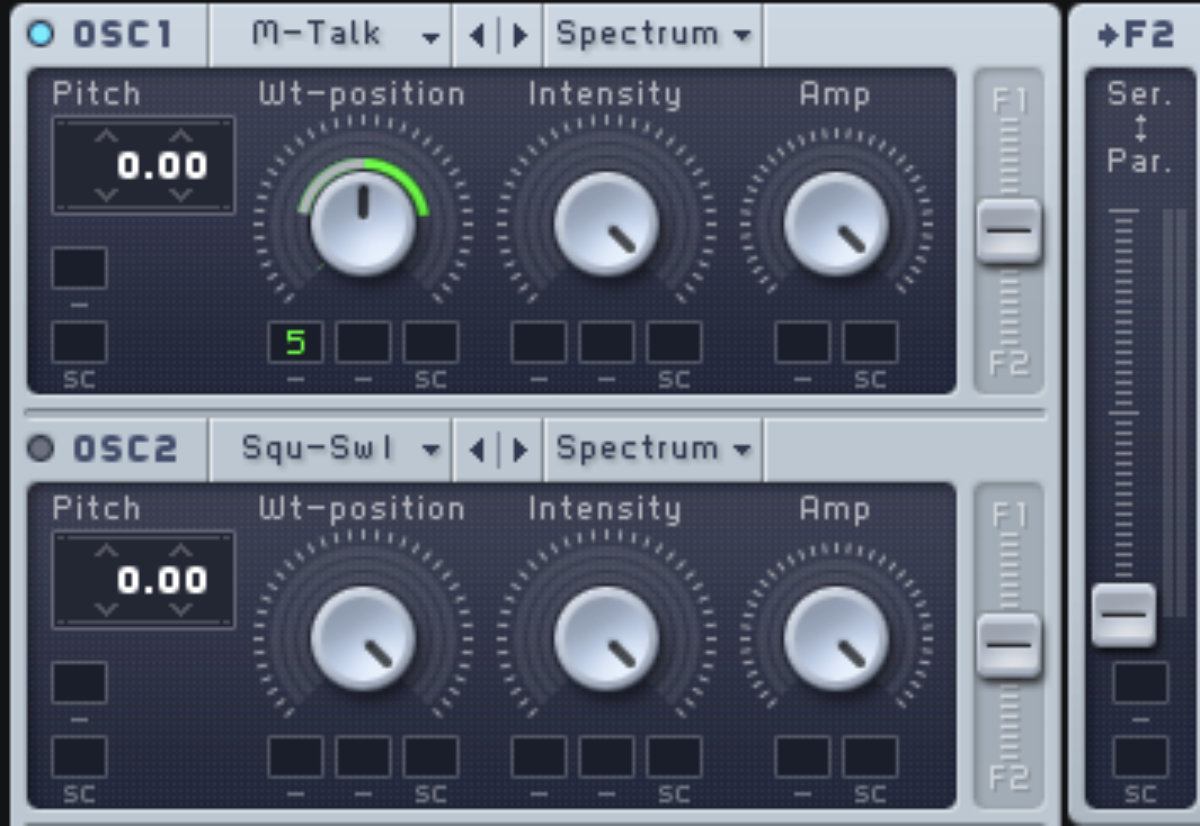
Now when you play the patch you’ll hear the modulation occur.
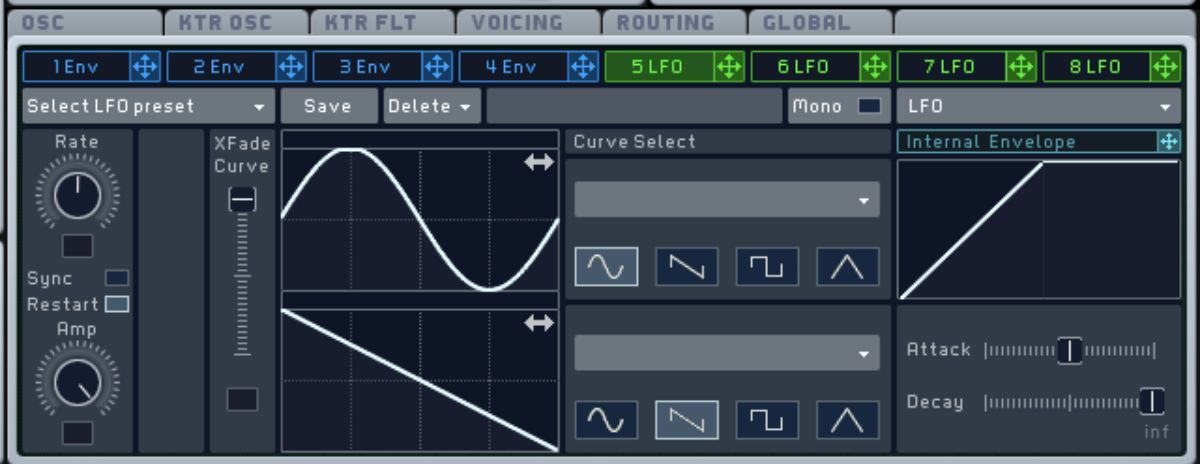
Click the 5 LFO tab to bring up its panel, and turn the vertical XFade Curve fader all the wave up to give us a pure sine waveform for the modulation source.
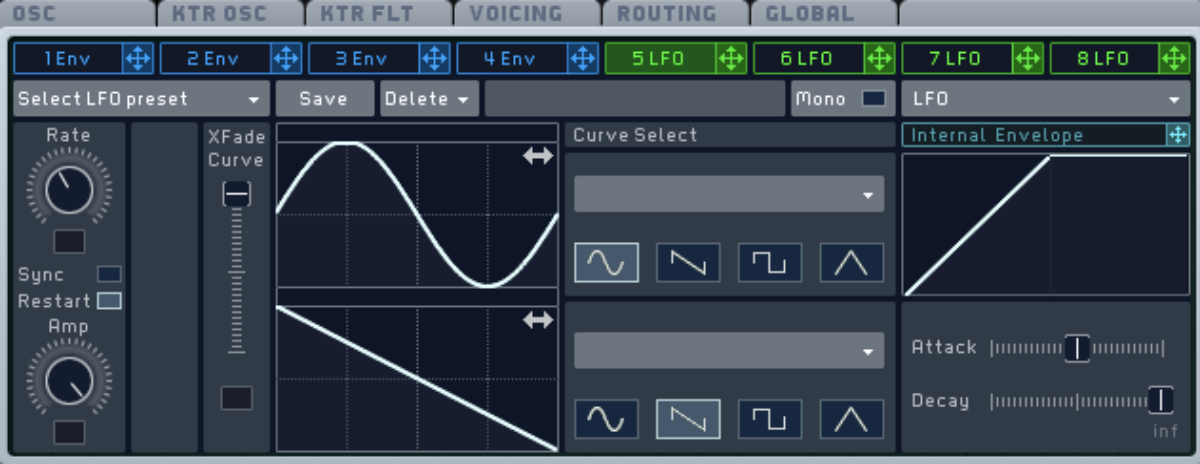
Now set the Rate knob to between 10 and 11 o’clock to get a slow modulation speed.
This sound has the character we’re looking for, but it doesn’t have much going on in the low-end. Let’s add a sine sub to beef our patch up. Activate Oscillator 2 by clicking the power button at the top left-hand corner of its panel, then set its wavetable shape to Sine-Square.
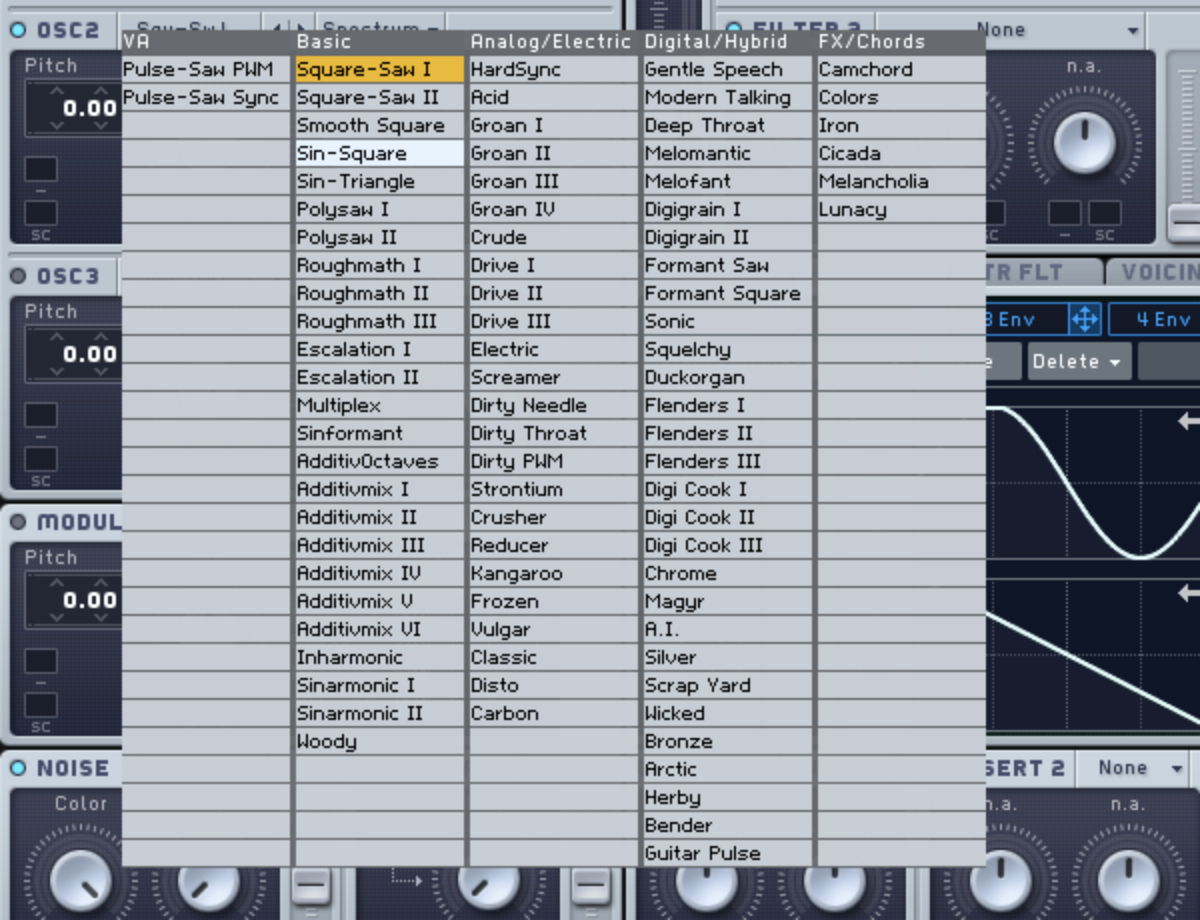
Now turn the Wt-position knob all the way down, and set the oscillator’s Pitch to -12.00. This means it will play a pure sine tone transposed down an octave from the Oscillator 1.
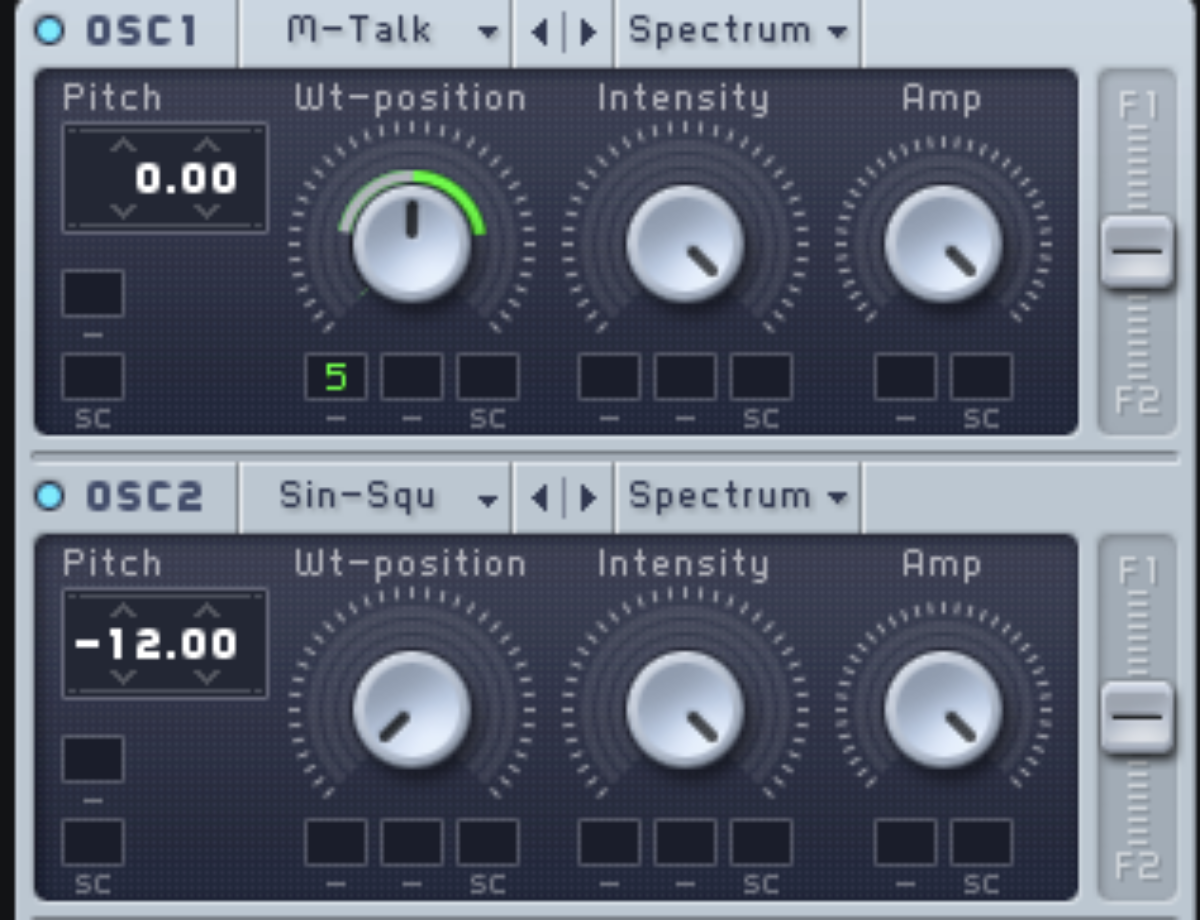
Now the patch has that big low-end we need.
Sequence your own bass line, or copy the one we’ve used here.

4. Electro stab
Chordal electro stabs are a quick way to get a house track going. Begging by adding Komplete Kontrol on a MIDI track. Click the Loops button, select the Higher Place expansion, and load the Drums[124] Brazen 1 loop.
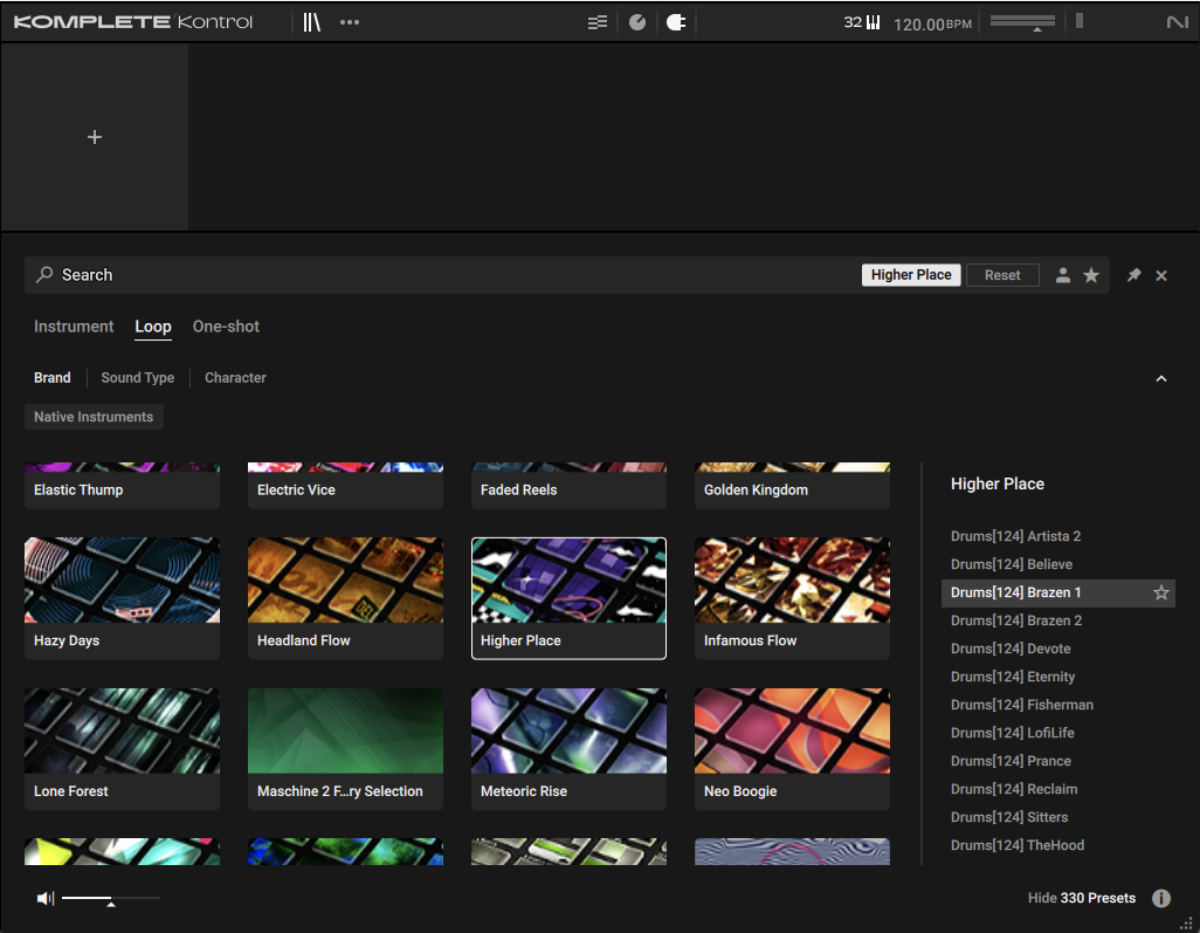
Set the track to -3 dB and sequence the loop to play for four bars on C3.

On a new MIDI track add another instance of Komplete Kontrol, and this time enter ‘fuzzy ducks’ into the search bar, and double-click the preset to load it.
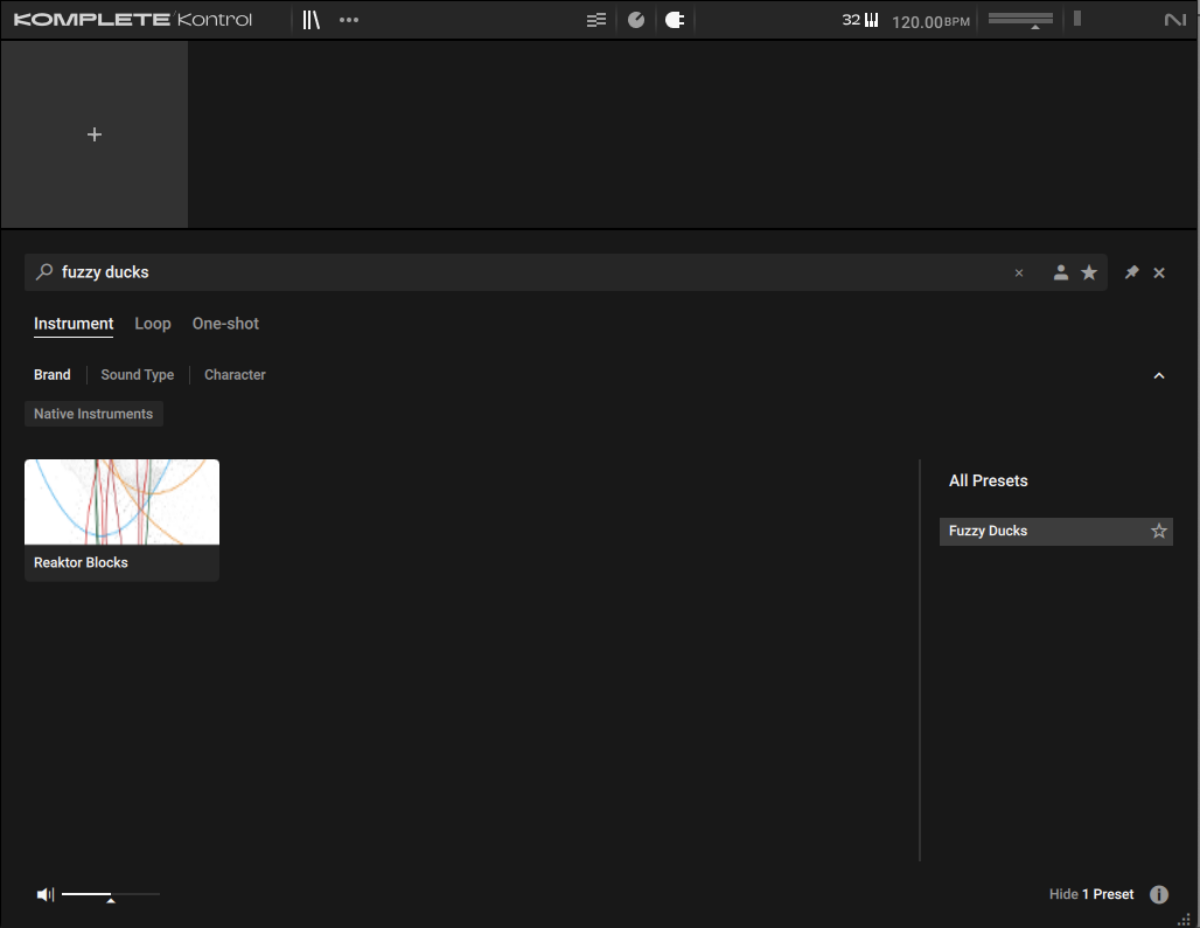
Set this track to -9 dB. Now copy the MIDI part we’ve used here, or write your own.

This sounds great, but let’s try replacing the synth’s built-in reverb with Raum. First, set the Rounds Reverb module’s Mix to 0%.
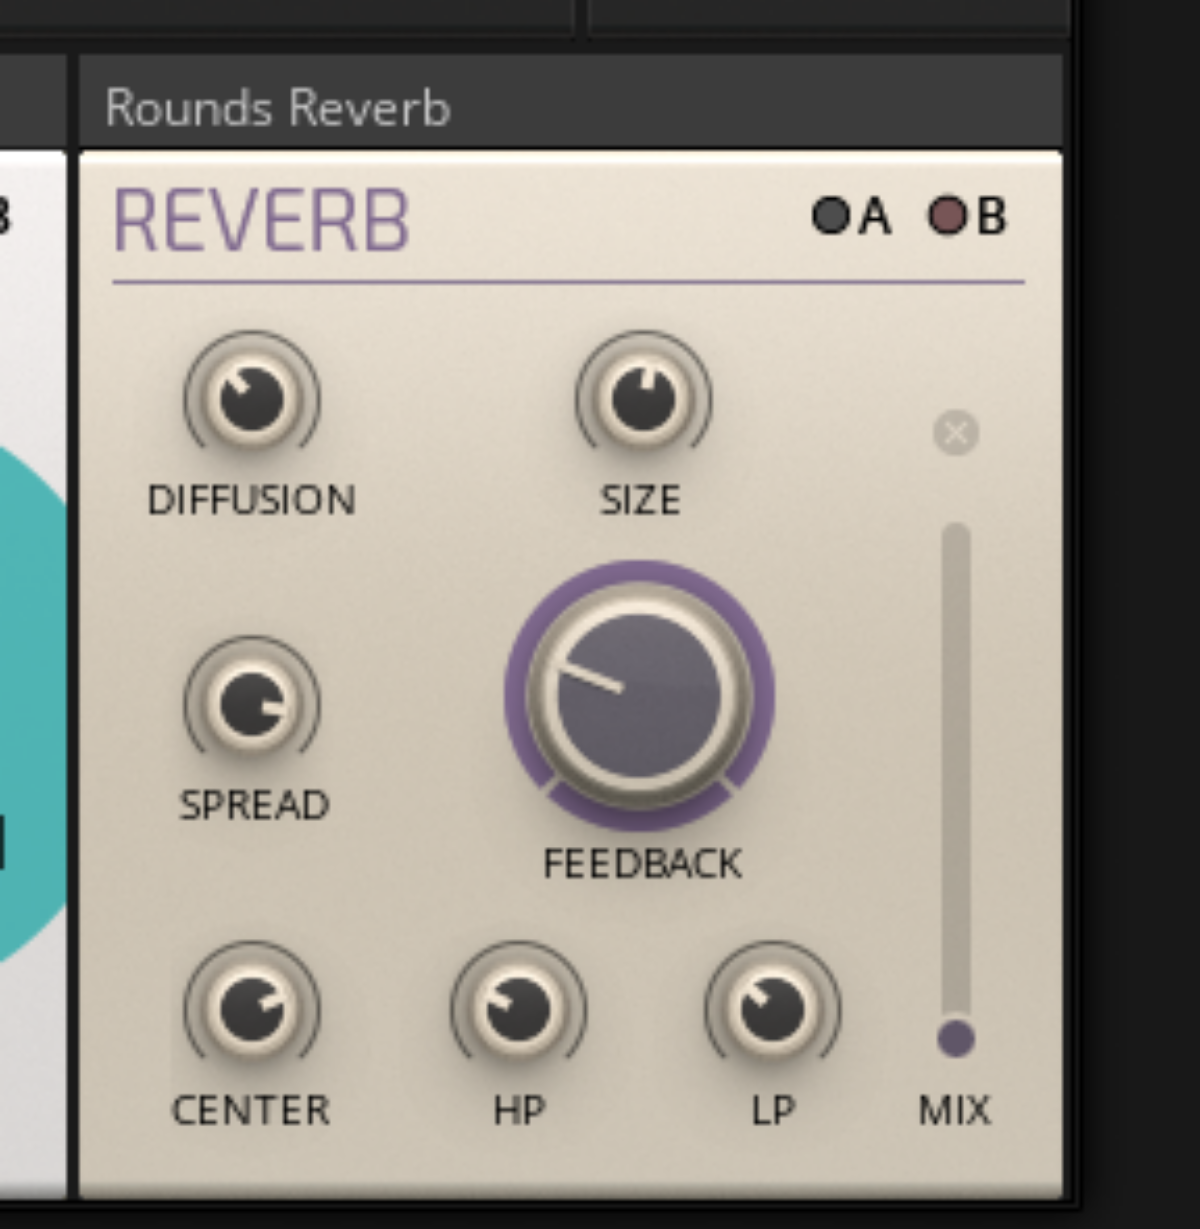
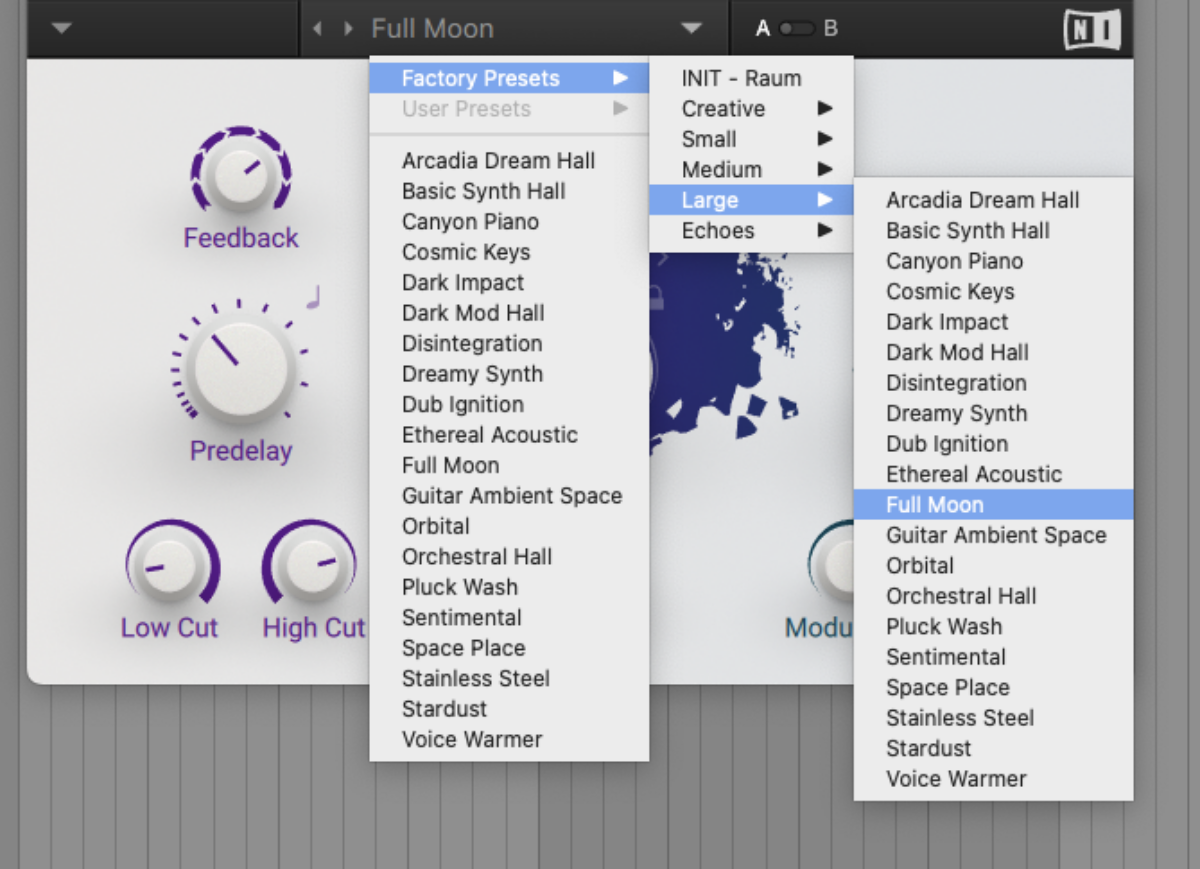
Now add an instance of Raum, and load up the Factory Presets > Large > Full Moon preset.
Turn down the Mix knob to 15%.
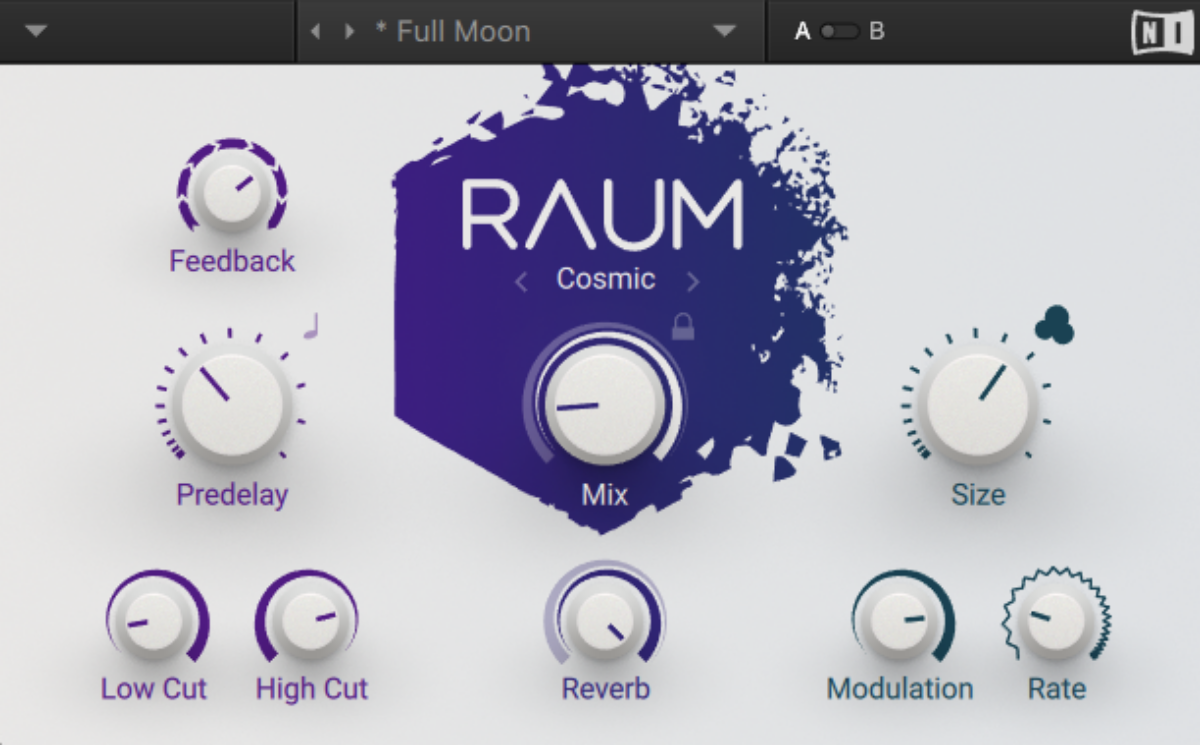
This gives us a more atmospheric reverb than the built-in reverb.
5. Disco bass
Adding effect processing to synths can radically change how they sound and feel. Let’s use Razor with a delay effect to create a disco bass line inspired by Giorgio Moroder’s production on “I Feel Love” by Donna Summer.
First we need a beat. Add an instance of Komplete Kontrol on a MIDI track, and again click the Loop button and the Higher Place expansion. This time, load the Drums[124] Prance loop.
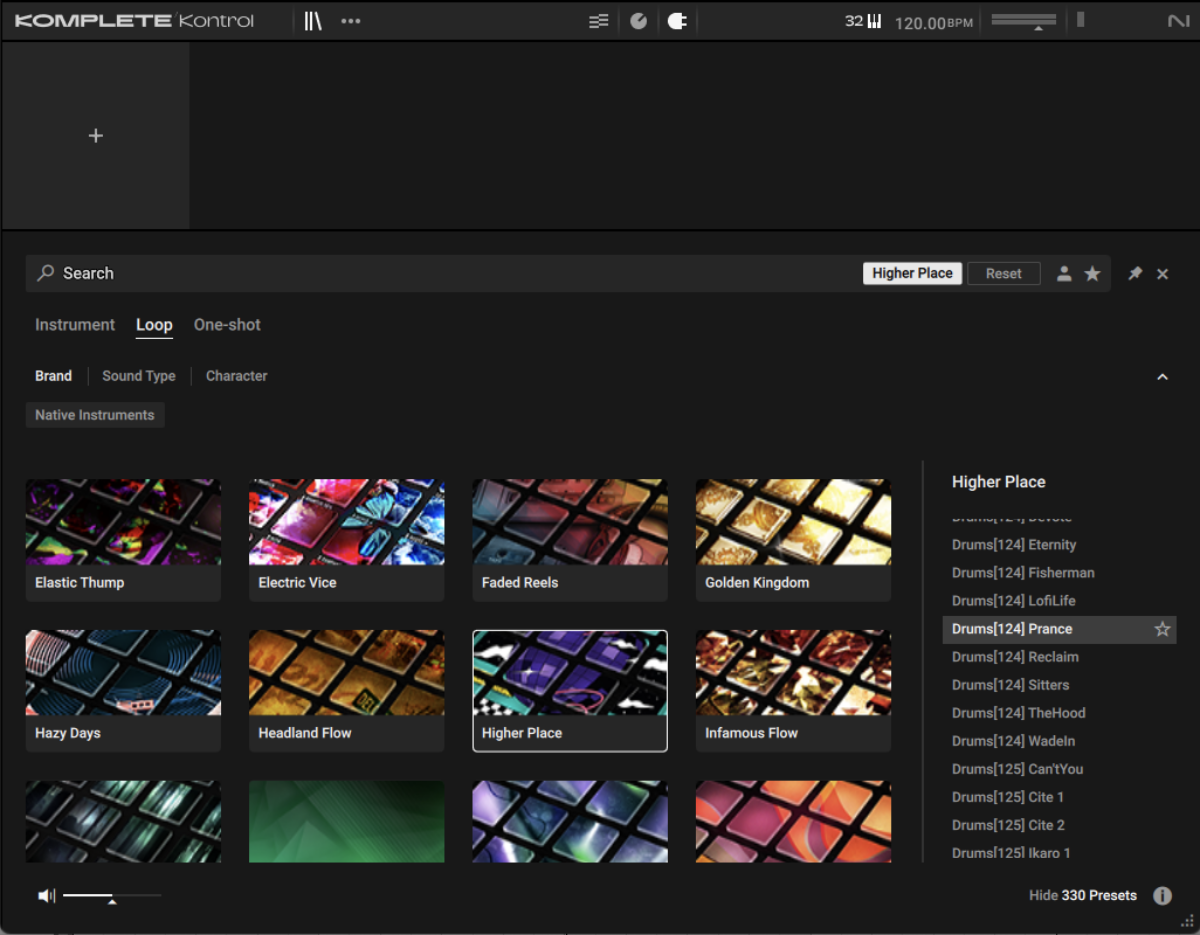
Set the track to -3 dB and sequence the loop to play on C3 for four bars.

Now we have a drum beat, let’s find a suitable bass sound. Load up another instance of Komplete Kontrol on a new MIDI track, and enter ‘octa bass’ into the text search field. Double-click the Razor Octa Bass preset to load it up.
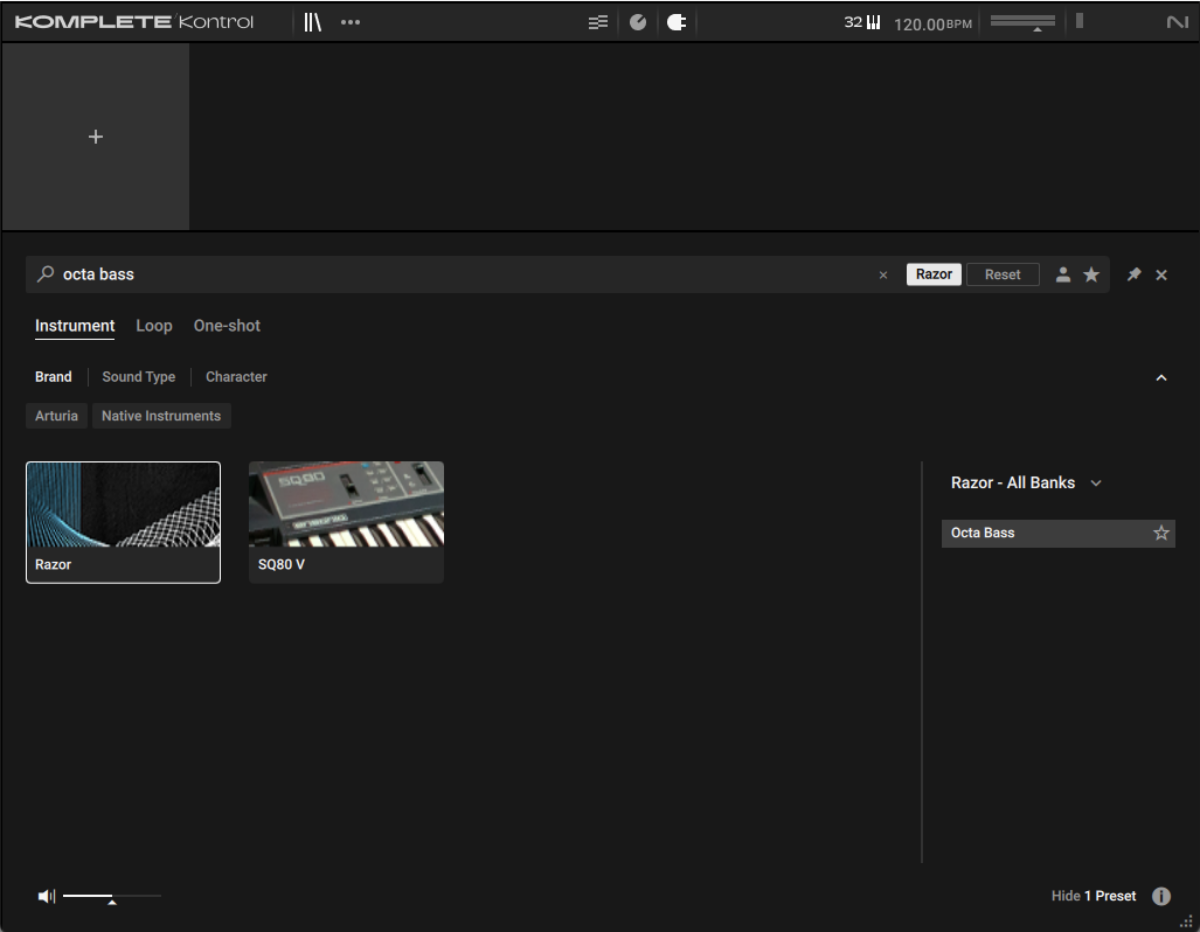
Set this track to -7 dB and sequence your own 8th note bass line, or copy the one we’ve used here.

In “I Feel Love,” Moroder uses the dry bass line signal on one channel, with a delayed version on the opposite channel. There many ways to achieve this depending on what audio software you’re using, we’ll use the simplest method that works with all DAWs.
Duplicate the bass line track. Pan one version hard left, the other hard right.
Now, add a delay effect with a feedback level of 0% and a Wet level of 100% to the track that’s panned to the right. Set the delay time to a 16th note.
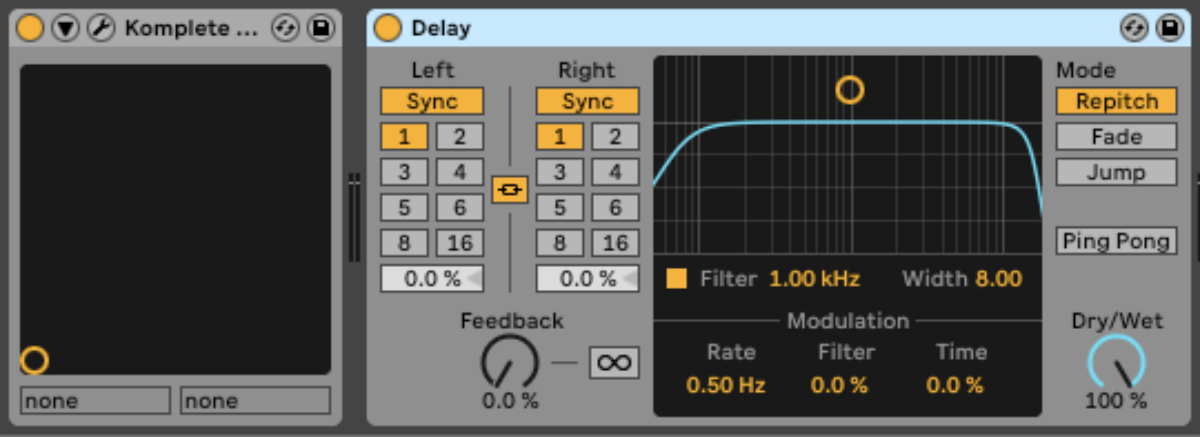
This gives us a bass line that moves between the left and right speakers rapidly, creating a wide stereo panorama. You can make the stereo effect less intense by adjusting the panning of the tracks.
Start using iconic synths in your music
Here we’ve seen how you can create five iconic synth sounds with Native Instruments synths and effects. By integrating these legendary synths into your workflow, you can elevate your productions to new heights, blending innovation with the timeless essence of classic synths.


