


Layering multiple synths and samples together to get a cohesive sound that’s greater than the sum of its parts isn’t so much a secret in music production, but it does seem like something that is hard to quantify. Because of this, most new producers spend years or trial and error throwing sounds together to get that massive, nuanced sound that their favorite artists easily pull off.
If only actionable advice and overarching workflows could make layering sound straightforward, right?
Luckily, Syence, a duo based out of southern California, has found the recipe for success when it comes to layering. Zach, one of the members, came to chat with us about how he layers libraries and sounds in Kontakt 8 to produce his unique take on modern music, one that has all the punchy and clarity of commercial dance music paired with the swagger and energy of the underground.
With a recent release on Anjunabeats and a nationwide tour on the horizon to support the release of this 2024 capstone release – their first album next to happiness – there is no better time to hear how they work their magic and how tools like Kontakt (and others) have shaped their sound and defined their career.
Jump to these sections:
- Making Kontakt feel modern
- Unique ways of blending synthetic and natural elements
- Balancing tone in Kontakt
- Plugins that give Kontakt a modern edge
- Using envelopes for more natural layering
- Advice to producers without access to physical hardware
So, if you’ve always known that layering sounds is the secret to giving your tracks that modern edge but always feel like you muddy your mix instead of fattening them up, this exclusive interview with Syence just might have everything that you need alongside pro tips and actionable advice to use in your next track.
How do you make layered Kontakt sounds feel more modern and unique? Are you adding effects, manipulating samples, or something else?
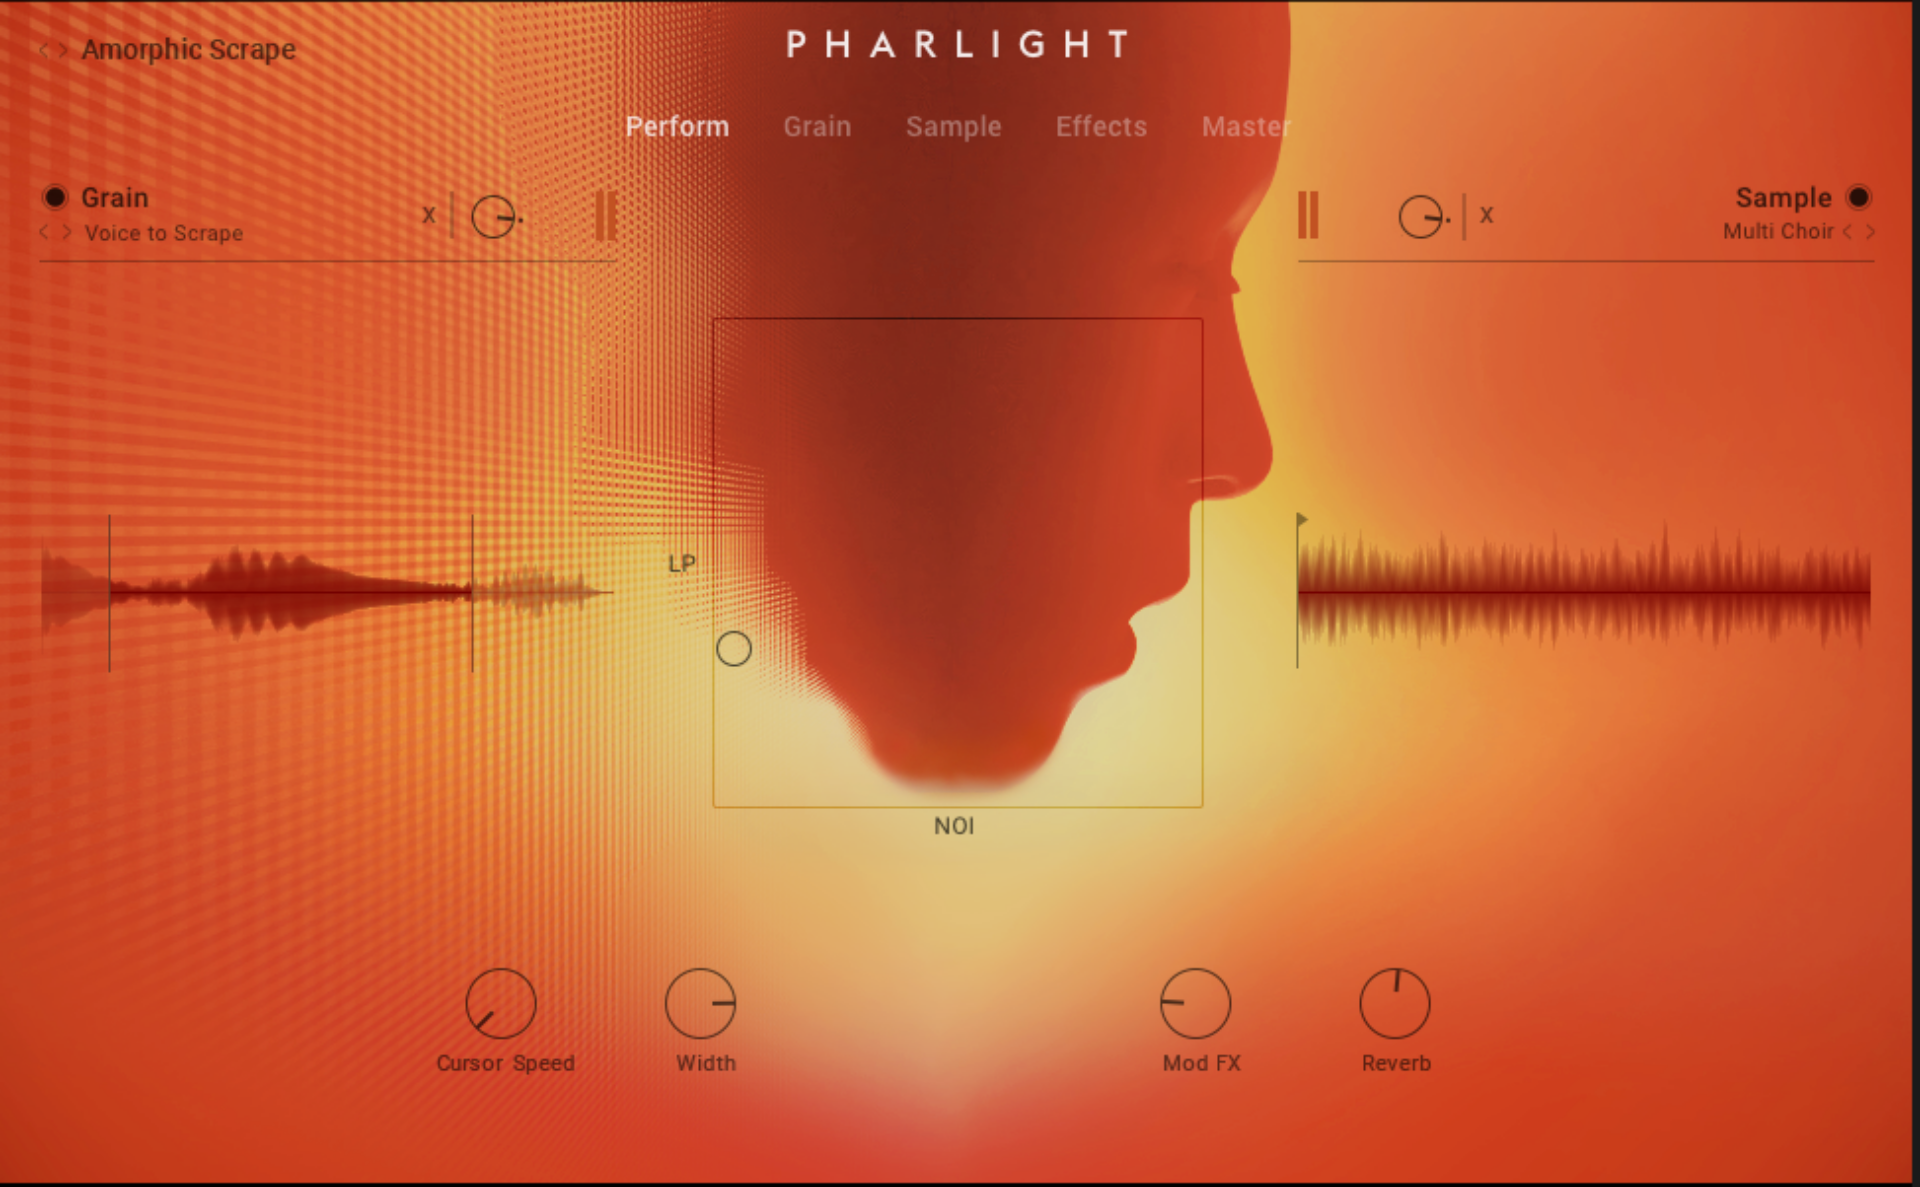
For me, making Kontakt layers feel modern and unique often comes down to manipulating the source samples and stacking them with intention. I rarely use sounds straight out of the box; instead, I’ll use effects like granular delays, spectral processors, or advanced reverb settings to give each layer its own space and texture. For example, in Kontakt’s Pharlight, I love resampling vocal-based tones and then using a plugin like Portal or ShaperBox to morph the sound into something entirely different.
Another big part of the process is experimenting with layering unconventional sounds. For instance, I might take a cinematic string patch from Straylight and layer it with a distorted, metallic sound from Folds.
Then, I’ll process the whole group with parallel saturation or multiband compression to make them gel. This approach gives the final sound a polished but experimental vibe, which works perfectly for the melodic house genre.
Have you found any unique ways to blend Kontakt’s natural-sounding instruments with digital synth layers for a modern sound?

Definitely!
A lot of my favorite Kontakt libraries, like LCO Strings or Teletone’s sounds, have such organic textures that they can act as the “human” element in a track. To modernize them, I’ll layer these libraries with digital synths like Massive X. For example, blending an Analog Dreams pad with a bright saw wave patch from Serum can create a lush soundscape that feels both organic and futuristic.
One key to blending these elements is using filters and EQ to sculpt the frequency balance of each layer. I’ll often roll off the low end of a digital synth and let the natural Kontakt instrument carry the warmth and body.
Then, I’ll automate modulation effects – like a phaser or tape delay – on the digital layer to add movement. This gives the combined sound more depth and keeps it interesting throughout the track.
How do you balance the tonal qualities of different Kontakt instruments – like a bright string patch with a darker pad – to avoid frequency clashes?

Balancing tonal qualities is all about carving out space for each element. I start by identifying what role each layer will play in the mix. For example, if I’m layering a bright string patch from Straylight with a darker pad from Analog Dreams, I’ll decide which one takes the lead and which one is more supportive.
From there, I’ll use EQ to reduce clashing frequencies.
For instance, I might cut some of the high mids on the pad to let the strings shine through, or vice versa depending on the mood I’m going for. Stereo imaging is another tool I lean on – I’ll pan the pad slightly wider and keep the strings more centered to avoid muddiness.
Finally, I’ll use transient shaping to enhance the attack of the brighter element and soften the supportive layer. This keeps the layers cohesive but prevents them from fighting for attention in the mix.
Are there any tools, effects, or plugins you lean on to give your layered sounds a modern edge?
Absolutely!
Kontakt’s built-in effects like the Replica XT delay and the Replika Shimmer are great starting points, but I usually bring in third-party plugins to push things further. I’m a big fan of Portal for creating glitchy, time-stretched textures, and Soundtoys Decapitator is a go-to for adding warmth and saturation.
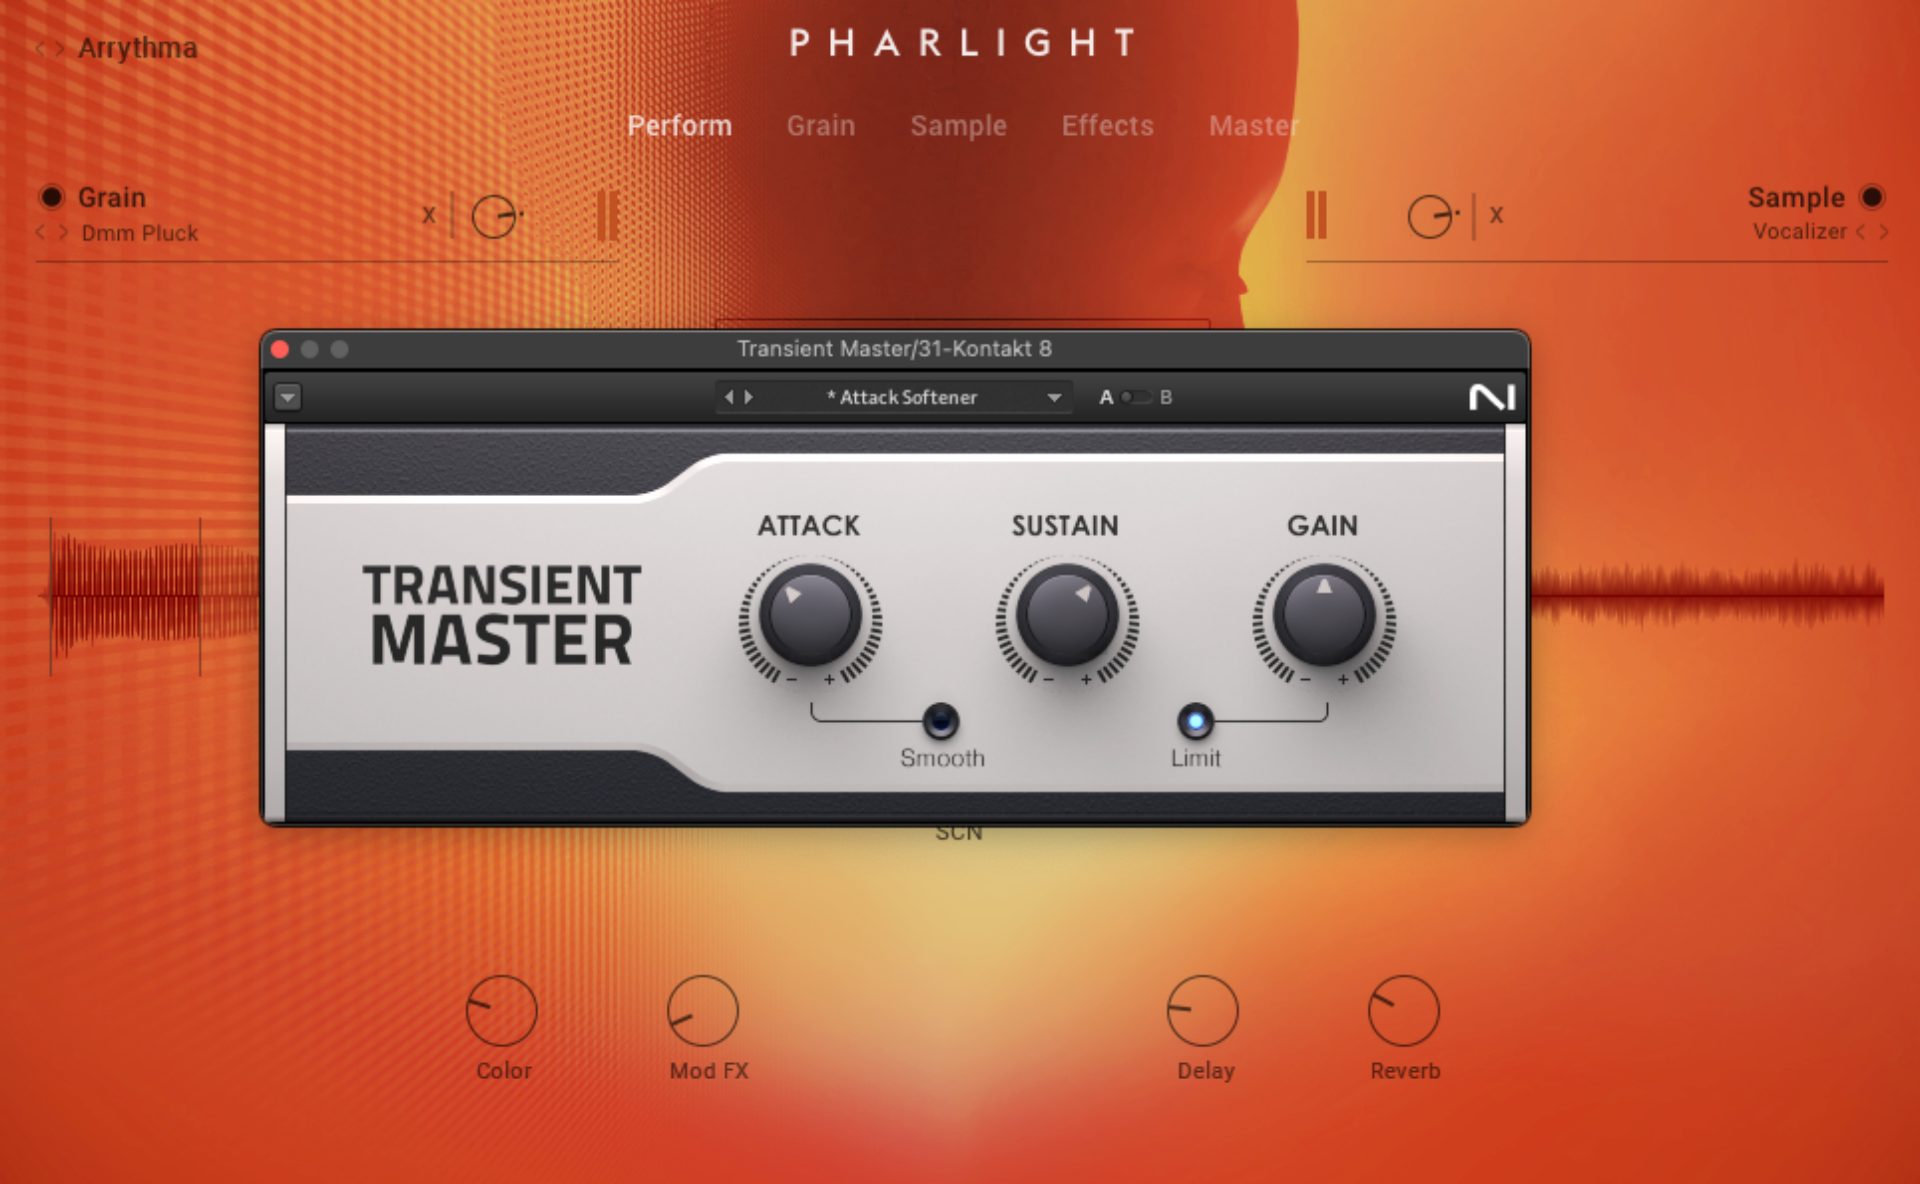
I also love using transient shapers, like Native Instruments’ Transient Master, to give percussive layers extra punch. For spatial effects, I have a couple other reverb plugins that are staples in my workflow too. And for a final polish, I’ll often run the layered sounds through Ozone for subtle harmonic excitation and stereo widening.
Do you ever tweak Kontakt instruments – like adjusting ADSR settings or key ranges – to get layers to blend more naturally?
All the time! Adjusting ADSR settings is one of the first things I do when layering Kontakt instruments. If a sound has too much attack, it can overwhelm the other layers, so I’ll often pull back on the attack or increase the release to create a smoother transition between layers.
Key range adjustments are also crucial.
If two instruments overlap too much in the same register, the mix can get muddy. I’ll split the key ranges – letting one instrument cover the low-to-mid range and the other handle the high end – to keep things clean and intentional.
I’ve also found that tweaking the velocity sensitivity of Kontakt instruments can help them feel more dynamic and alive. It’s a small detail, but it can make a big difference when layering multiple patches.
For producers who struggle to layer without it turning into a mess, what’s one workflow or mindset shift you’d recommend to get better results?
The biggest mindset shift is to think of layering as designing a single instrument, not just stacking sounds. Instead of adding layers for the sake of complexity, ask yourself what’s missing from the sound and only layer to fill that gap.
From a workflow perspective, start simple: pick one foundational layer that sets the tone, then add complementary layers one at a time. After each addition, take a step back and listen to how it interacts with the others. If something feels off, don’t be afraid to mute a layer or strip it back.
Another tip is to process your layers as a group.
By sending all your Kontakt layers to a single bus, you can apply effects like compression or saturation to glue them together and make them feel cohesive. This approach keeps the layers from feeling disconnected and helps you craft a more polished final sound.
Start using Kontakt to transform your sound
We wanted to give a massive shoutout to the guys in Syence, who are set to have a massive year in 2025. With the recent release of their album, a big tour on the horizon, and having recently joined the Anjuna family, it’s inspiring to hear how some of our most popular and widely used plugins played such a critical role in shaping their sound and work in the studio.
It all comes down to strategic layering that gets the sounds working together instead of fighting for the same space. Everything after that is icing on top of the cake, as tools like saturation and delay glue the sounds together to achieve a detailed, nuanced, and singular end result.
No matter if you’re creating ambient music, hip-hop, techno, orchestral, or something entirely unique like Syence’s sound, Kontakt 8 has the tools you need to do the job.
Related articles
-

Balancing analog character and modern clarity in The Midnight’s Syndicate
Tim McEwan of The Midnight breaks down how Plugin Alliance tools helped shape the cinematic power and warmth of Syndicate.
-

Building dialogue in electronic music with Kontakt, Monark, and David Mayer
David Mayer explains how Kontakt and Monark shaped the expressive tone, structure, and cultural energy of his new SONARA Records…
-

Find your sonic flavor: the best of Native Instruments Expansions
Build the perfect 5-Expansion bundle for any genre. Pro sounds, seamless DAW integration, and no hardware required for just $55.
-

Hardt Antoine explains his fast, tactile studio process with Maschine
Hardt Antoine breaks down how Maschine helped capture the rhythm, energy, and creative flow behind his Kompakt release “Let Me…
-

From Napoleon Dynamite to Cyberpunk 2077: How NI shaped Brian McNelis’s story
Brian McNelis discusses how Native Instruments tools shaped his workflow across decades of film, game, and soundtrack production.
-

How Darin Epsilon’s workflow with Massive X and Monark keeps Perspectives Digital moving forward
Darin Epsilon reflects on 15 years of Perspectives Digital, exploring how his production evolved with tools like Massive X and…
-

The 110 best free Kontakt instruments in 2026
Explore the ultimate list of the best free Kontakt instruments and libraries. Discover new sounds and add them to your…
-

Ryan Lott on the living sound of LCO Producer Strings
Son Lux’s Ryan Lott shares how he uses LCO Producer Strings to find the living gradients in his music and…