


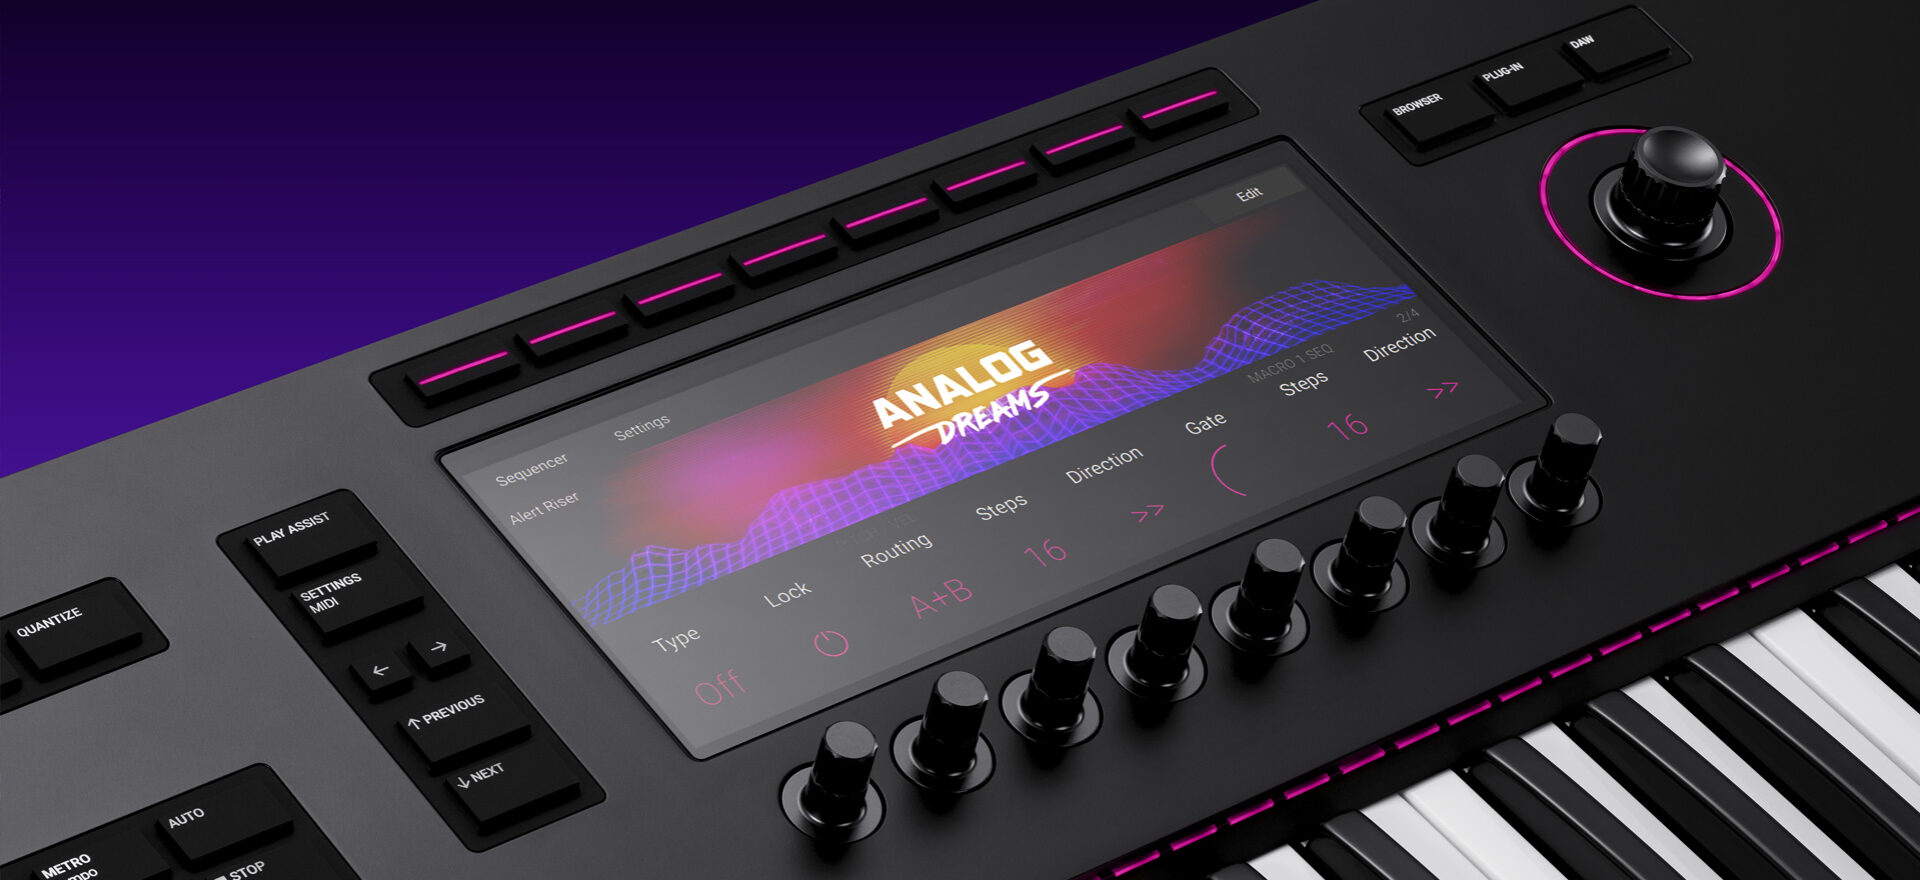
The Kontrol S-Series MK3 is an advanced MIDI keyboard controller that integrates with your DAW as well as top-notch software like Kontakt to enhance your workflow.
In this guide to using Kontrol S-Series MK3 keyboards we’ll show you how to use the keyboard’s direct integration features with the Kontakt sampler instrument to help you with seamless music creation.
Jump to these sections:
- What is direct Kontakt integration?
- How direct Kontakt integration in Kontrol S-Series can spark your creativity
What is direct Kontakt integration?
Kontrol S-Series Kontakt integration enables you to find sounds quickly with intuitive on-screen navigation. You can find sounds fast, then adjust and play them thanks to intelligent auto-mapping that understands the parameters.
This direct connection means no interruptions to your workflow with not just NI instruments but thousands of partner sounds, instruments, and effects.
Can you use Kontakt with Kontrol S-Series?
You can absolutely use Kontakt with the Kontrol S-Series MK3. The keyboard offers robust integration with the instrument that allows you to browse and edit presets directly from the hardware, with powerful search functionality that will help you find exactly the right sounds for your project.
You can adjust effect settings, make Multis and create a folder of favorite presets using the keyboard’s hands-on controls, making it ideal for those who enjoy using tactile music-making hardware.
How direct Kontakt integration in Kontrol S-Series can spark your creativity
Using the direct Kontakt integration features of the Kontrol S-Series you can spend more time hands-on with your controller, using its detailed screen and tactile interface to get the sounds you need efficiently. Let’s take a look at how to do it.
1. Prepare your setup
If you haven’t already set up your Kontrol S-Series MK3, please check out our Kontrol S-Series DAW integration guide first for a guide to setting up the hardware and using it with your DAW.
We’re going to use Ableton Live for this guide, and you can follow along using any version of Ableton Live 11, including Ableton Live 11 Lite which comes bundled with all Kontrol S-Series MK3 keyboards.
If you’d like to use another DAW you can find any operational differences detailed in the Kontrol S-Series MK3 manual.
Once your keyboard is set up, add Kontakt 7 on a MIDI track. Your Kontrol S-Series MK3 will automatically show your available Kontakt libraries on its display.
You’re now ready to use the Kontrol S-Series MK3’s Kontakt integration.
2. Explore Kontakt instruments with browsing
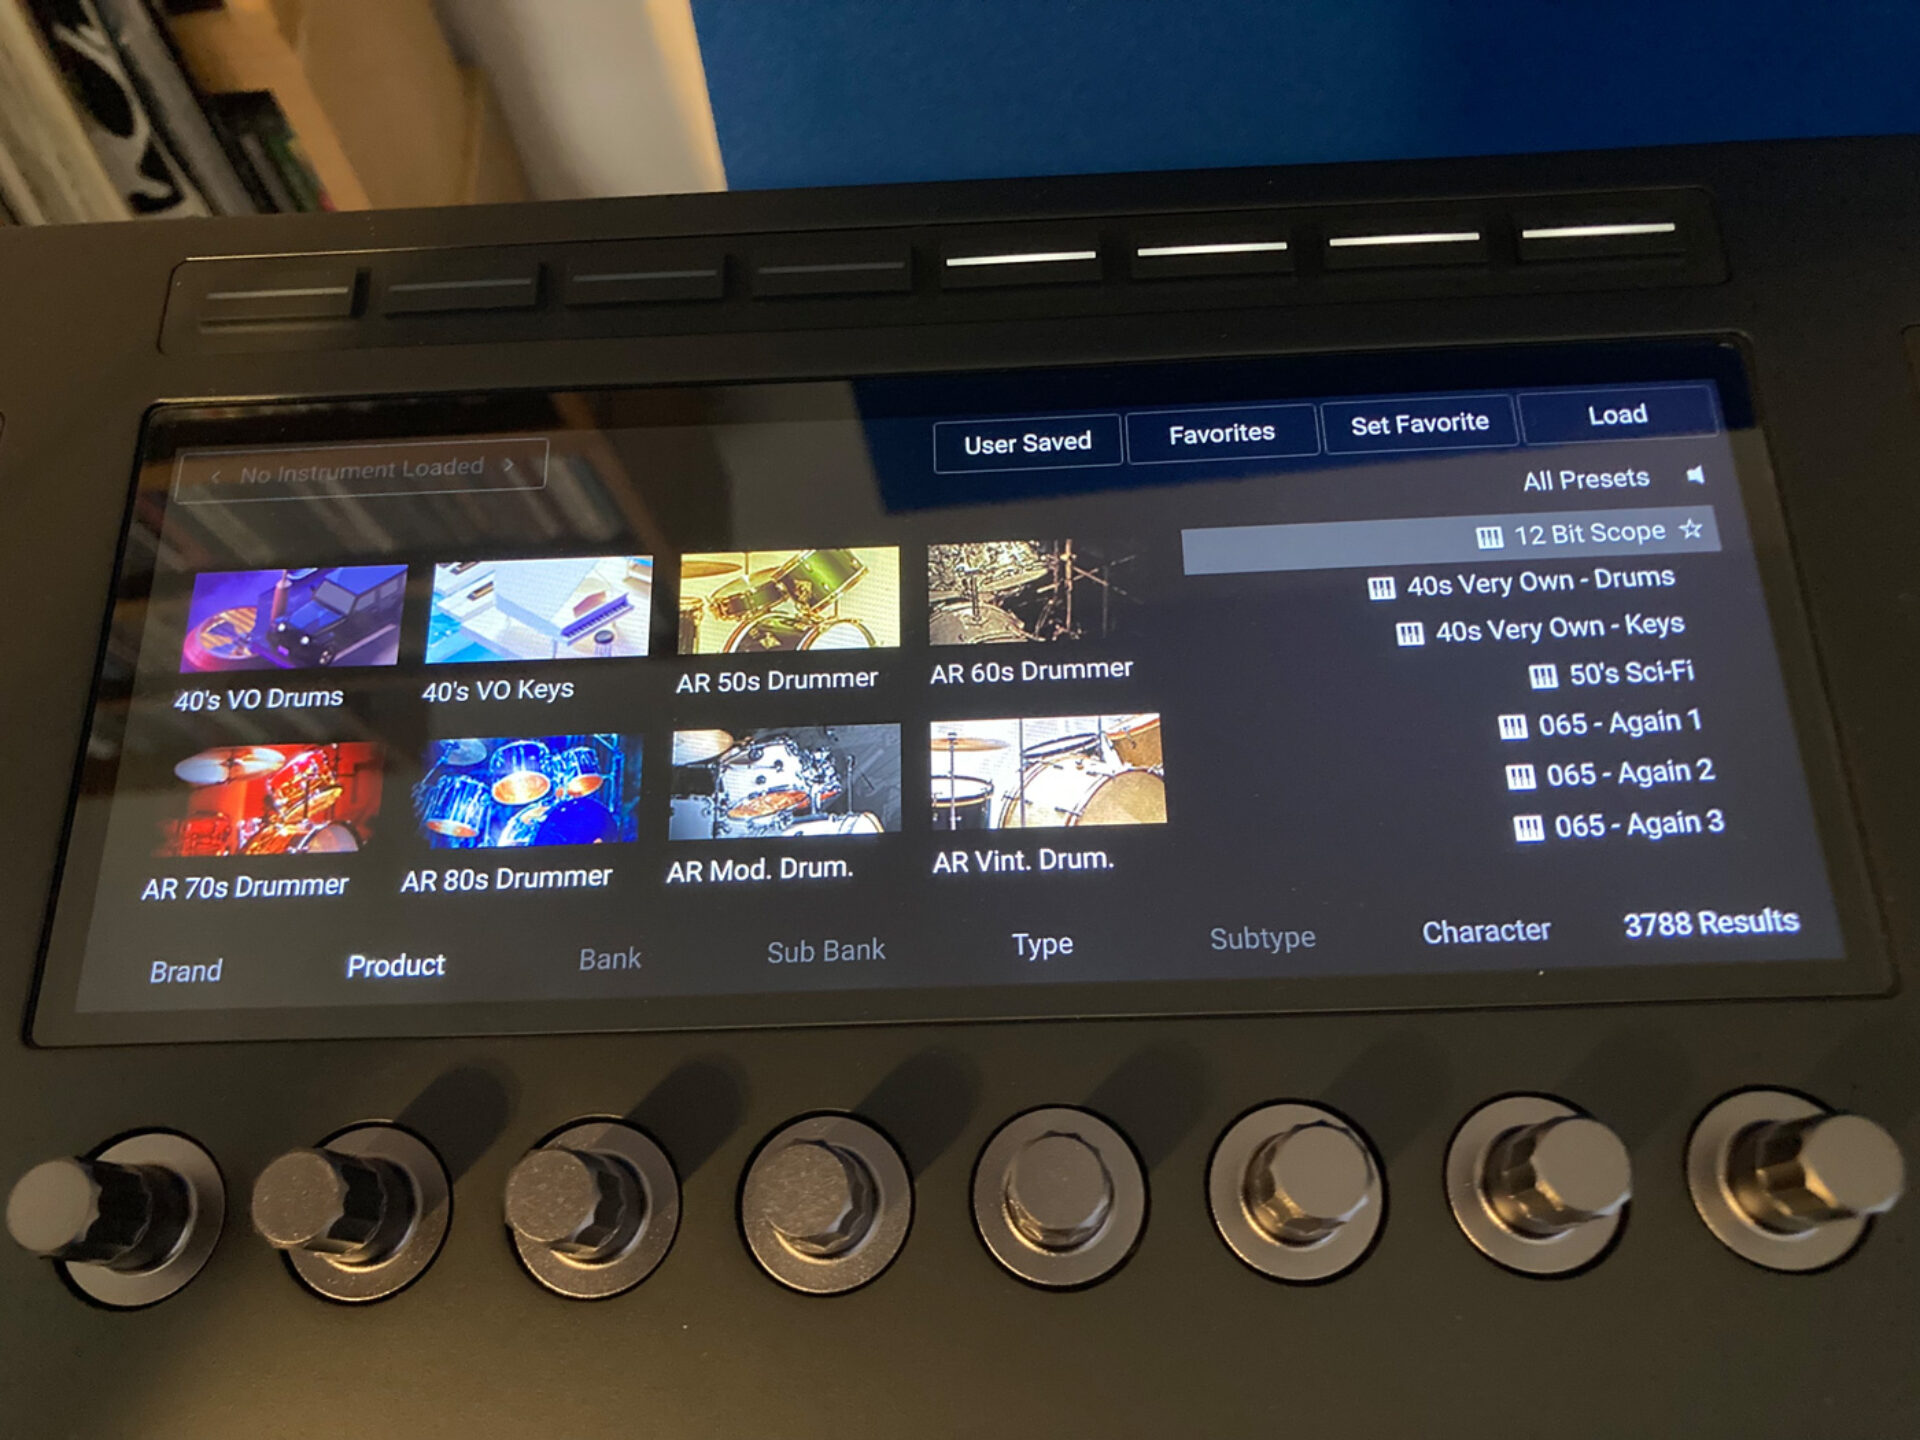
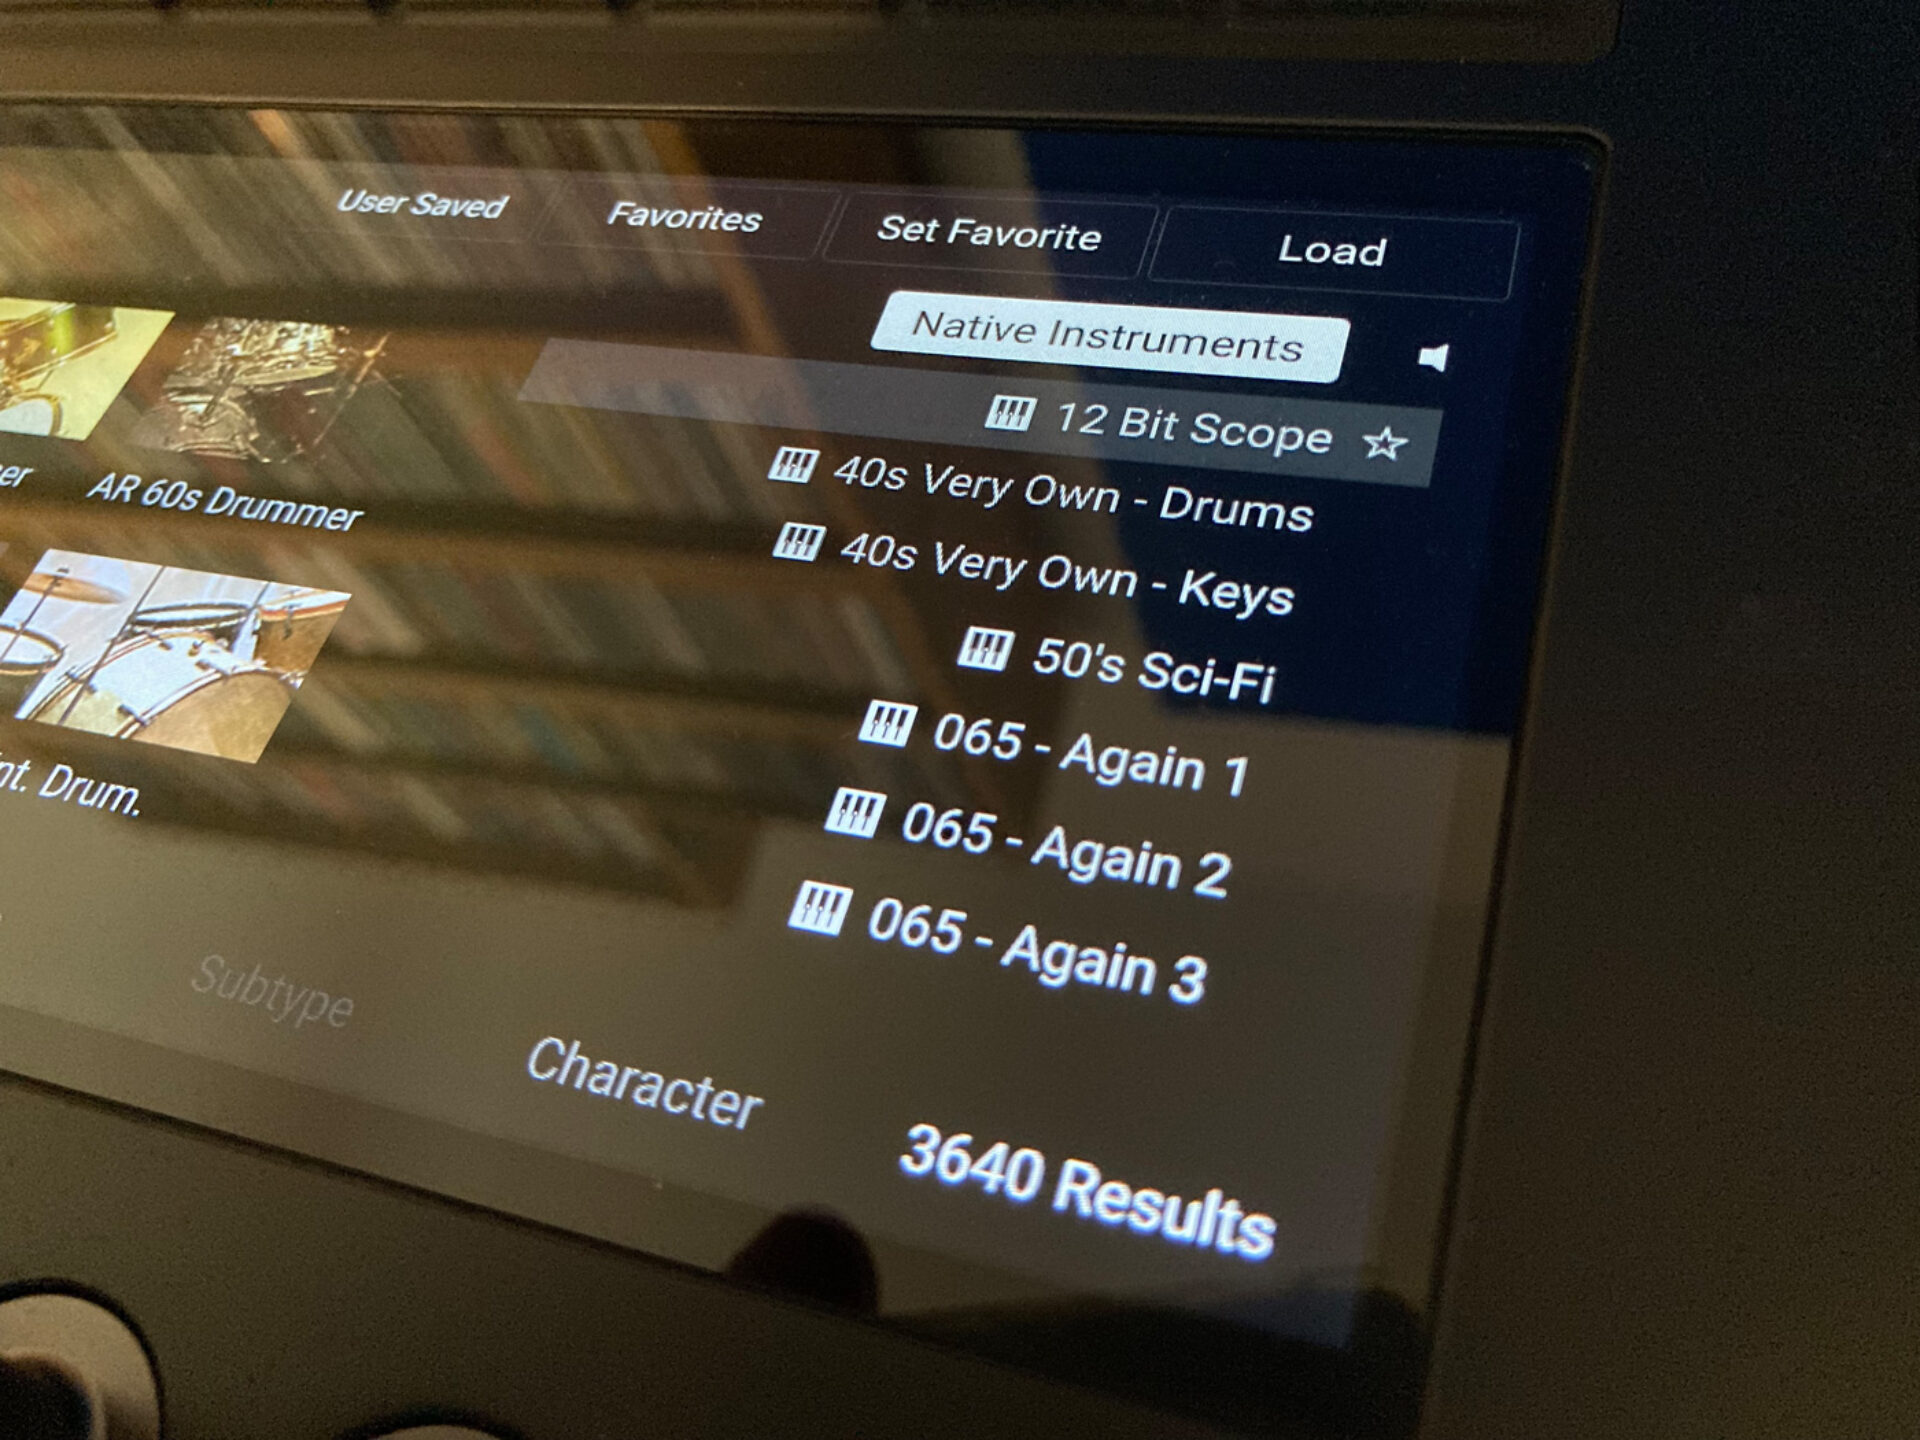
You can now filter your Kontakt instruments using the knobs below the screen. You’ll see each knob has a legend above it that shows which parameter it will filter. Let’s start by turning the leftmost knob, which is assigned to Brand. Turning this knob will display the creators of all the libraries currently installed on your system.

As we’ve selected Native Instruments, the browser will now only show instruments created by Native Instruments. We know that the search results are filtered because we can see the ‘Native Instruments’ search filter at the top right-hand corner of the display.
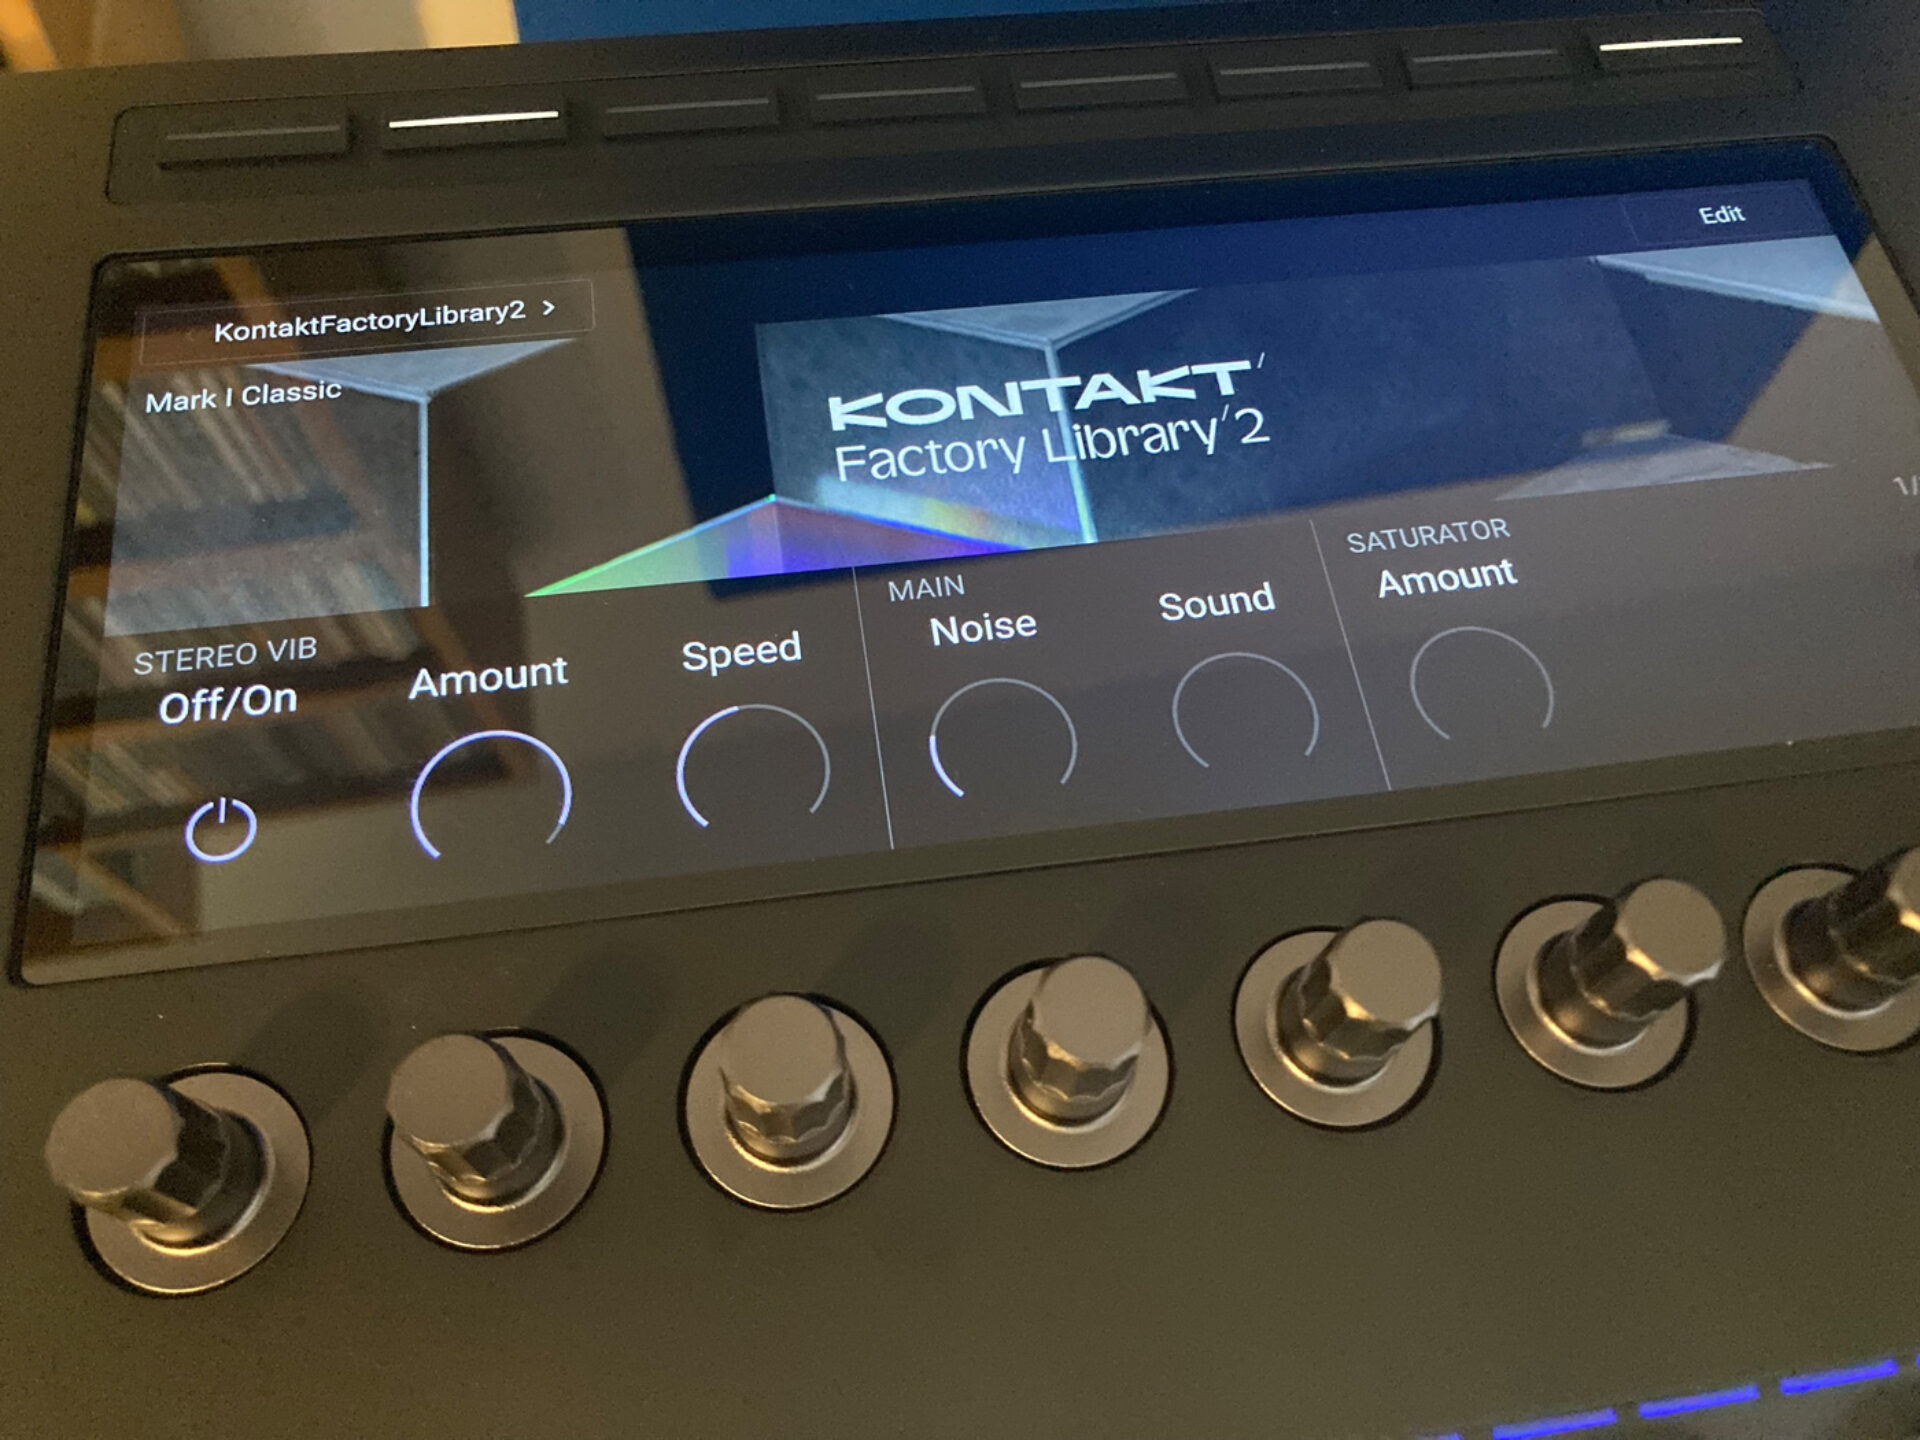
Let’s pick a sound from the Kontakt Factory Library, which you’ll likely have already installed if you’re a Kontakt user. Use the Product knob to select Kontakt.
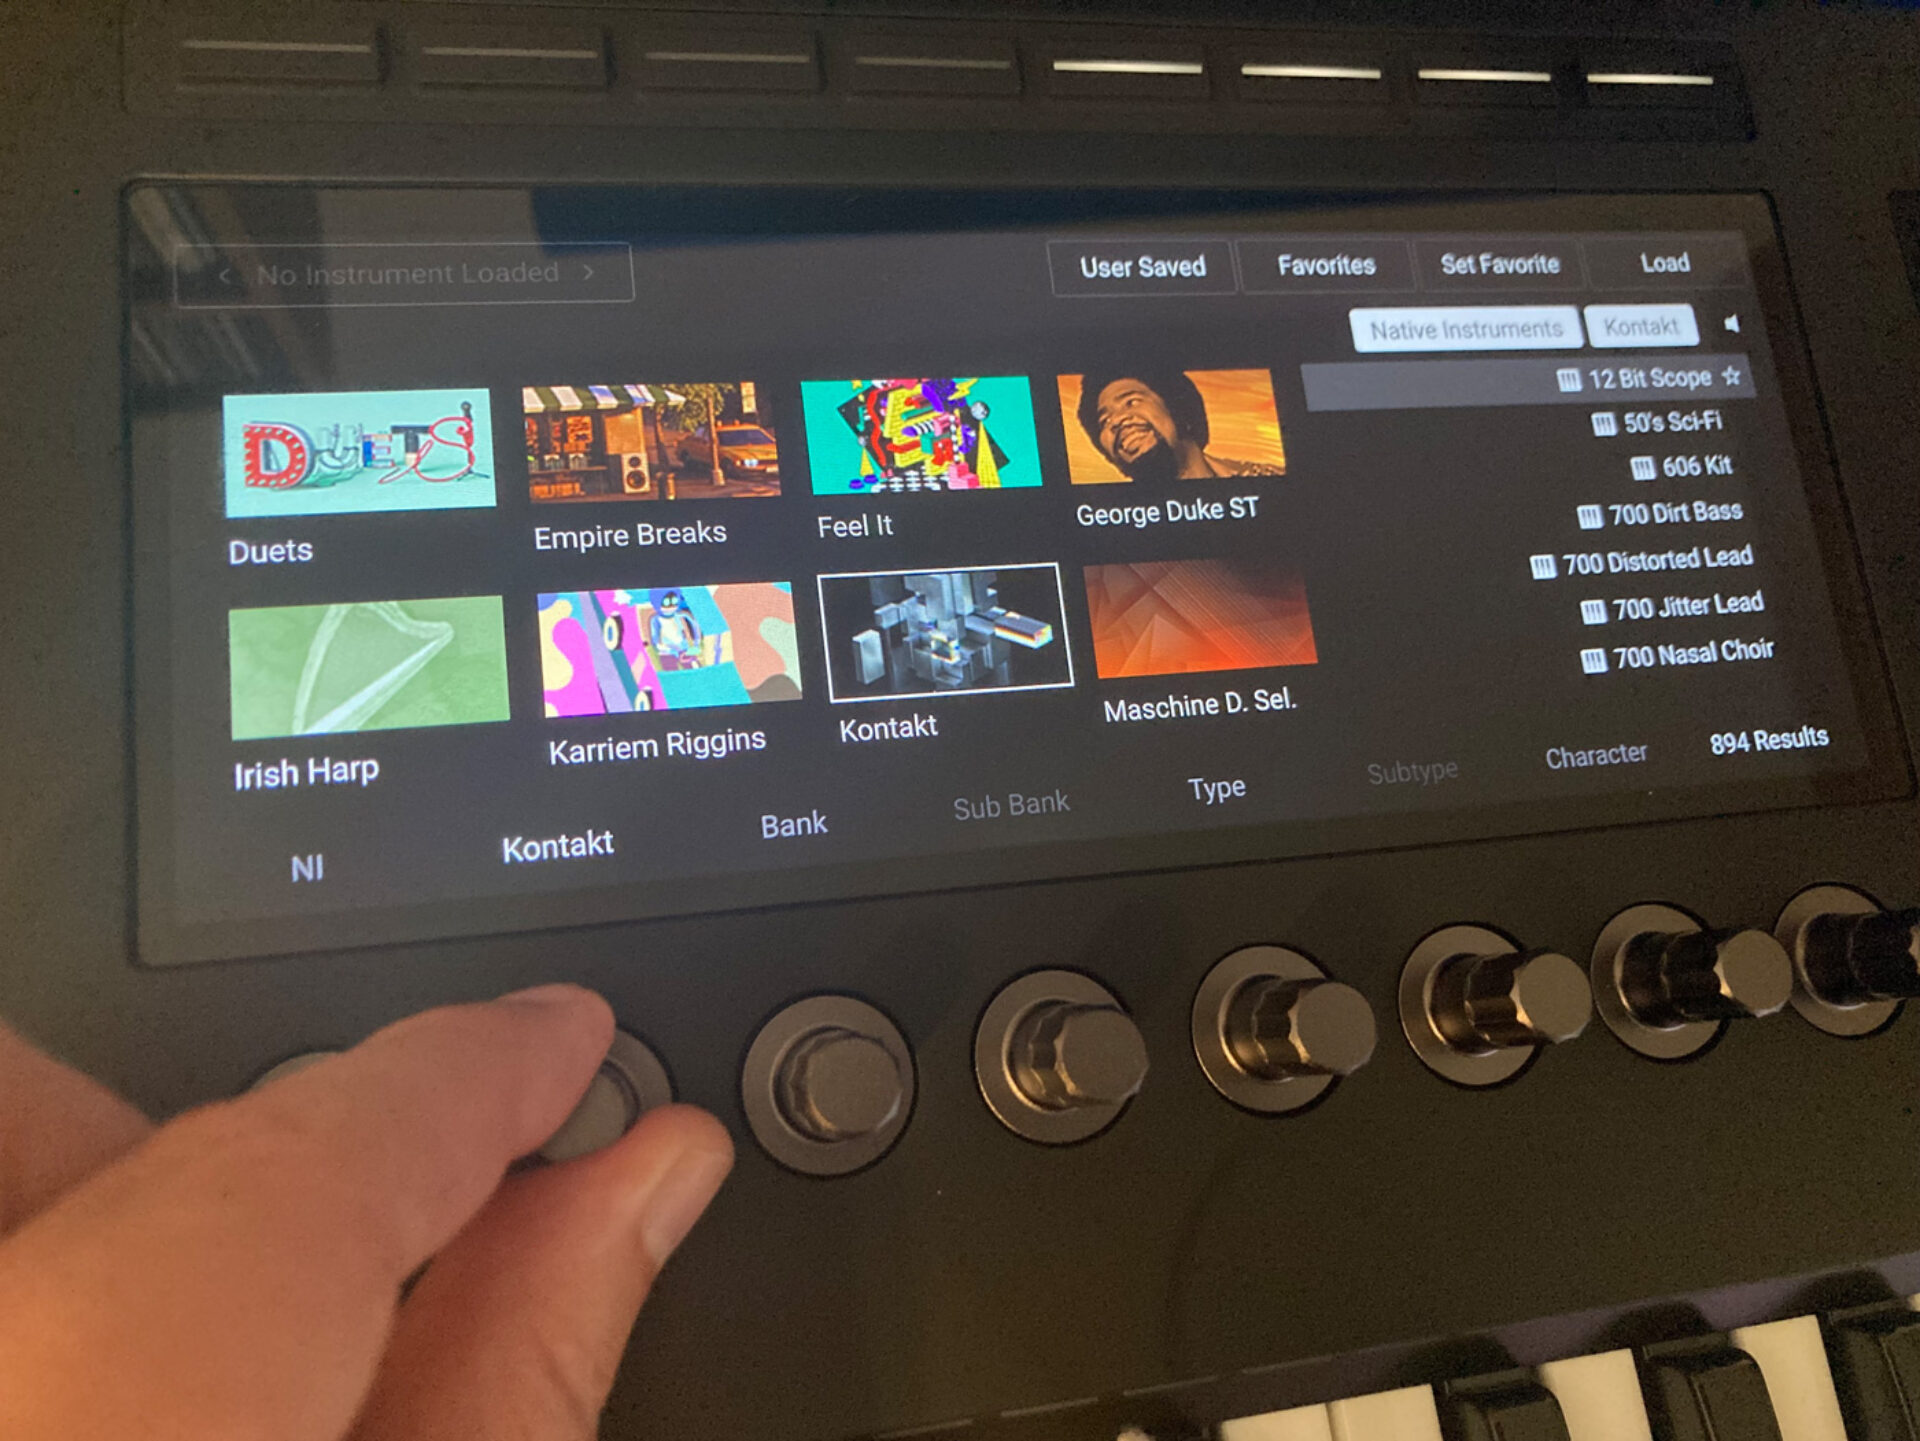
Now let’s use the Bank knob to select the Band category.

Now we’ve filtered down the number of search results to something manageable, let’s audition some sounds using the rightmost knob. The speaker icon at the top right-hand corner of the display shows us that preset auditioning is active, and we’ll hear audio previews of the presets as we scroll through the list.

You can tap the Load button at the top right-hand corner of the interface to load a preset, or the Set Favorite button to set it as a favorite. Let’s load up the Mark I Classic electric piano.

Loading a preset will bring up the parameters for that instrument, allowing you to adjust them directly with the keyboard’s knob.
3. Editing presets
Let’s play a smooth chord with this preset in its default state.
Now, let’s warm up the sound with some processing. Press the Edit button at the top right-hand corner of the display to bring up the next page of parameters.

Now let’s activate the Tape effect using the Off/On knob.

This warms up the sound subtly and makes it a touch louder.
Let’s make the effect less subtle by turning up the Gain.
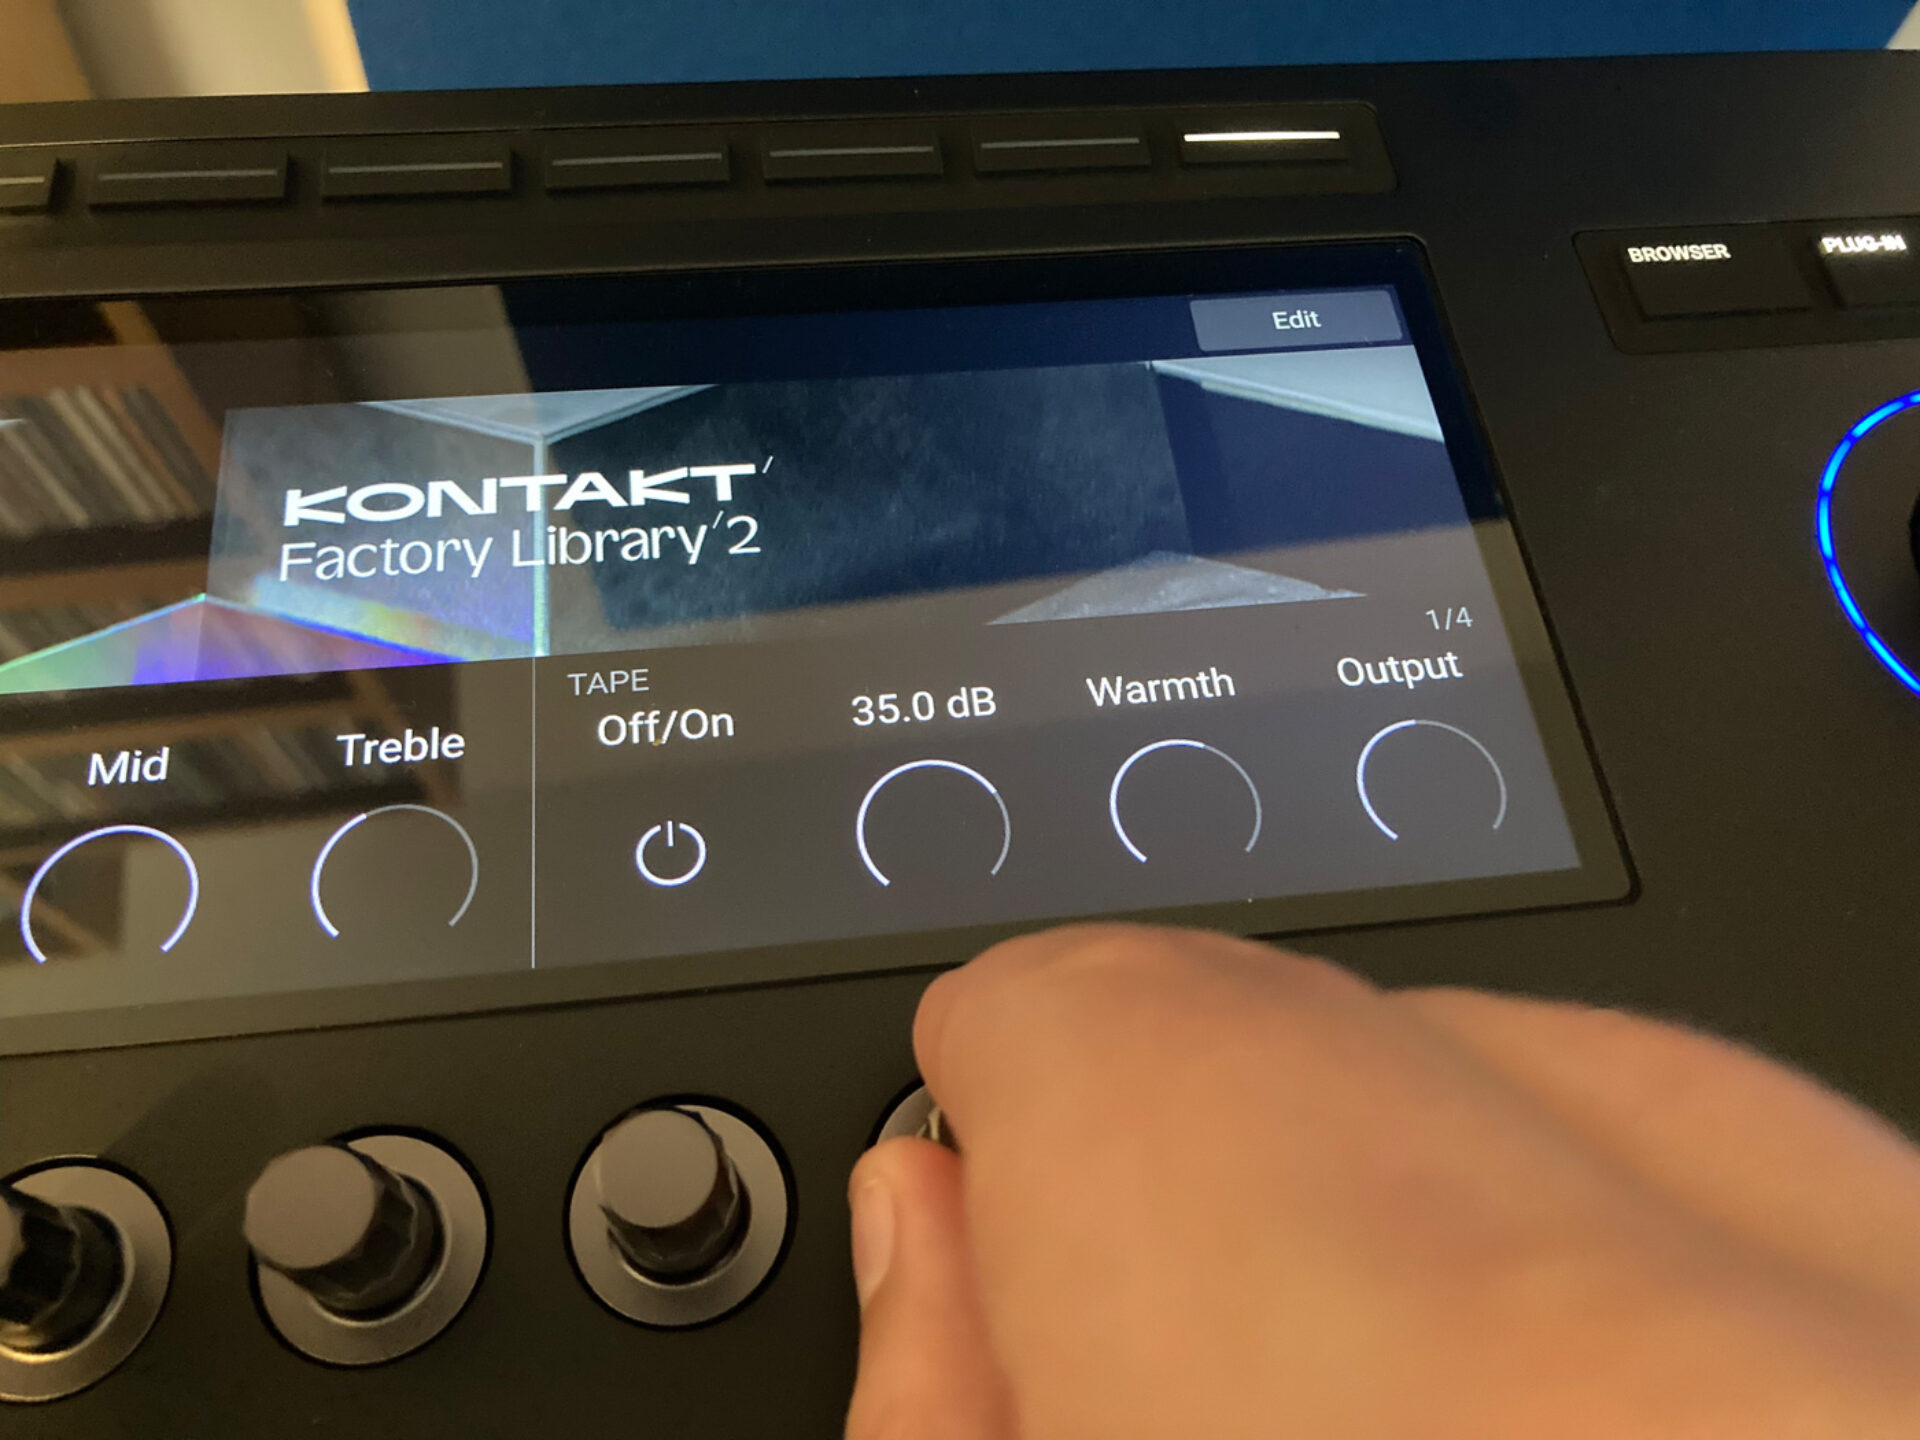
This makes the effect yet more obvious.
Let’s tweak the sound further. On the right-hand edge of the screen you can see the legend ‘1/4’ is displayed. This means we’re on the first of four edit pages. We can move between these using the arrow buttons on the left hand side of the display. Let’s head for page 4/4.

Now let’s turn up the Rev Mix to maximum.

This increases the amount of reverb on the sound.
4. Saving and loading patches
Let’s save our edited version of the sound. To do this, click the disc icon in the snapshot section of Kontakt’s interface in your DAW.

You’ll be prompted to enter a name. Let’s call this patch “Reverb EP.”

Once you click the Save button, the patch will be saved to your library.
Let’s return to the browser. Press the Browser button on your keyboard.

Now press the User Saved button.

You will now see your saved patch.

You can load this patch up using the previous mentioned Load button, and it’s also possible to scroll through patches by turning the rotary encoder, and pressing it in to load the selected patch.

5. Further functionality
Let’s take a look at some other convenient Kontrol S-Series MK3 functions.
If you want to clear any applied search filters, hold the Shift button, and use the Reset Filters button at the top right-hand corner of the display.


You can also see the Prehear On button here. Turning this Prehear off prevents presets being auditioned when you cycle through them.
Holding Shift and turning the rotary encoder cycles through pages of presets rather than individual presets.
You can assign a preset to your Favorites with the Set Favorite button.

Pressing the Favourites button will display your saved Favorites.

You can create your own Multi directly from the keyboard by loading a preset, then pressing the right arrow button next to the patch name using the button at the top left-hand corner of the display.

The display will inform you that you need to use the Browser to load an instrument or effect. So, let’s do just that.

Press the Browser button, and load another preset.

Now when you play the keyboard, both presets will play. You can save your Multi using the ‘Save multi as…’ option in Kontakt’s software interface.

You can delete parts of the Multi directly from the keyboard by holding the Shift button and pressing the Remove button.

Some presets make use of the light guide to give you information about how certain keys are used. For example, this drum kit preset uses different color lights to differentiate between different types of drum sounds.

This strummed guitar patch uses the light guide to illustrate key switches and articulations.

Start using Kontakt instruments easily in Kontrol S-Series
Here we’ve covered how to use the Kontrol S-Series MK3’s direct Kontakt integration, including how to Filter, browse and audition presets, edit presets, save favorite presets and make your own Multis. For more information on the Kontrol S-Series keyboards, explore our guide on how to use everything in Kontrol S-Series MK3 as well as our official Kontrol S-Series manual.
Related articles
-

Behind the synth: A. G. Cook on stacked sawtooths and the creation of Super*Saw
Explore the extremes of stacked sawtooth waves with Super*Saw, a new synthesizer co-created with A. G. Cook. Learn how to…
-

Inside the evolution of orchestral sampling: an interview with ProjectSAM
Discover how ProjectSAM’s Lineage Series uses NKS and smart features to change orchestral sampling. Plus, save on instruments in our…
-

How New Constellations turn emotion into sound with Massive X
Go inside the studio with New Constellations. Learn how they use Native Instruments gear, happy accidents, and lifelong friendship to…
-

Citizen Kain on building emotion and space with Replika
Citizen Kain explains how Replika helped shape the rhythm, tension, and emotion behind his debut Eversun Records single “Moments.”…
-

The organic precision behind Calcou’s Anjuna release featuring Reaktor
Calcou shares how Reaktor, Monark, and Super 8 shaped the creative balance and live energy behind their new duo EP,…
-

14 NKS instruments that will change the way you create music
Discover 14 NKS instruments to freshen up your workflow. From lo-fi tape synths to cinematic strings, shop the Native Instruments…
-

Parallelle on crafting living basslines with Reaktor and TRK-01
Parallelle share how Reaktor and TRK-01 shape the bass and warmth in 11th Avenue, balancing analog depth with modern control.
-

Where will your sound lead you? Explore the Native Instruments Summer Sale
Save 30% on instruments, effects, and sounds in our Summer Sale. Find the tools to keep your tracks moving and…