


It’s the holy grail of music production: a clear, crisp mix with every element picked out in high definition. How do you get there? The answer isn’t simple. Every track is a unique mixture of sounds, meaning every mix throws up its own challenges. And often, your creative goals – more instruments, bolder arrangements, crazier sounds – can make that high definition mix even harder to achieve.
Don’t worry, though: there are some basic strategies you can learn to improve track definition and clarity using mixing effects. These strategies will help you to think about your mix in its key dimensions such as frequency, width, and depth; to identify the issues that are harming clarity; and to solve them using simple techniques. We’ll run through them below. When we’re done, you’ll be much closer to the hi-def mix of your dreams.
Jump to these sections:
- What effects add definition to music?
- How can I make individual instruments stand out in my mix?
- How to add definition to your tracks with effects
- Start getting clearer mixes today
All of the effects used in this tutorial are available in the 360 Essentials subscription. Get clearer, more impactful mixes with all of the tools you need.
What effects add definition to music?
You can add definition to your music by applying audio effects such as EQ, saturation (or distortion), stereo processing, and transient shaping. Which effect will help in your case depends on the situation at hand – check the examples below for some common situations you’re likely to face.
When trying to improve track definition, it’s all too easy to get bogged down with messy FX chains. To avoid this, try to be intentional about your mixing goal. Start by identifying the problem: perhaps a part lacks high frequencies, or its transients are too loud. Then decide which effect to use to tackle the problem.
Keep in mind that, sometimes, the best way to boost definition is to remove an effect rather than adding a new one. This is often the case with excessive, soupy reverb, for example.
How can I make individual instruments stand out in my mix?
To make an individual instrument stand out, consider what makes it unique in your mix. Is it a keyboard part with a twinkly high end? Or perhaps a snare drum with a sharp attack? Use mixing effects such as EQ, saturation, and transient shaping to bring out these “unique” aspects of the sound. At the same time, apply the opposite processing to other elements in your mix, in order to give your sound plenty of space to shine.
Bear in mind that, the more busy your mix, the harder it will be to make each instrument stand out. You might not even want to: sometimes it sounds good when instruments blend together into a whole.
How to add definition to your tracks with effects
Here’s a track we’re working on. The mix is lacking definition, which makes it hard for the musical idea to shine.
Below, we’ll outline how we improved track definition and clarity using five mixing effects: EQ, saturation, stereo width, transient shaping, and reverb. We’ll tackle each in turn.
1. Use EQ to give each part space
EQ is a fundamental mixing tool and probably the single most effective way to improve definition in a mix. It can be used to give each instrument its own space; to remove unwanted frequencies that are distracting to the ear; and to boost certain frequency zones that the human ear perceives as improving clarity.
A couple of instruments in our track are sorely in need of EQing. First, the guitar.
There are unwanted low frequencies in the part that are conflicting with the kickdrum and bass. It’s also sounding dull in the high mids, which is the zone where it ought to be shining brightest.

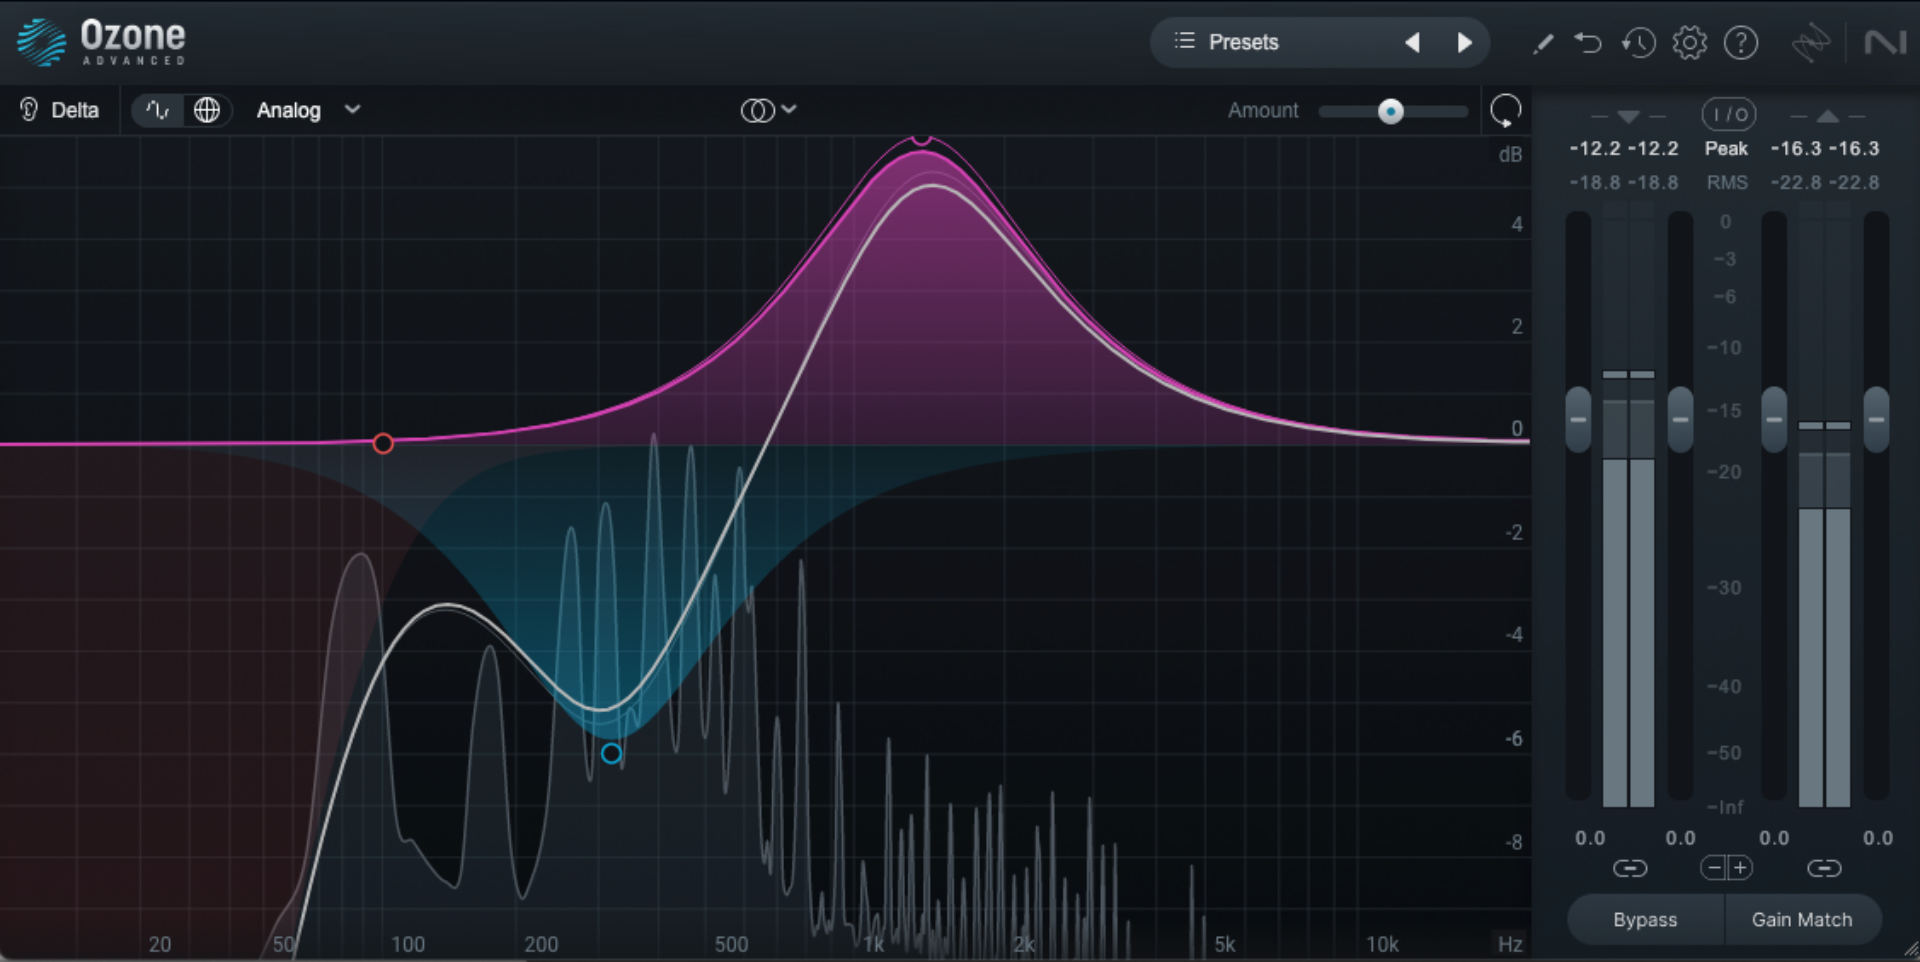
We can tackle both issues with zone 11 Equalizer, which is available in the 360 Essentials subscription. We applied a high pass filter to cut unwanted frequencies below 100Hz, and a low shelf to tame frequencies from 100Hz to 350Hz.
We then used a bell filter to add a big boost around 3.5kHz. This helps the guitar to sit in a certain frequency pocket not occupied by other instruments in the mix.
Here’s how the guitar sounds with the EQ applied.
Next let’s look at the organ pads. These are also sounding dull and lifeless.
Using Ozone 11 Equalizer, we applied a similar low cut and high boost. Only this time, the boost was lower down than for the guitar – at around 1.3kHz – to give the organs their own place in the sun.
2. Boost brightness with saturation
Saturation is one of the most versatile tools in a mixer’s toolkit. It can be used to add authentic charm to a part, boost loudness, or ramp up aggression. Since saturation excites the upper harmonics in a part, it can also be used to add brightness.
In this use case, think of it as an alternative to EQ. Different approaches work better in different contexts – try both out to see which works for you.
Careful, though: when it’s over- or misused, saturation can easily harm definition, leading to blown out, distorted mixes. So try to use it in moderation and clear intention.
We can use saturation to add definition to our bass part, which is sounding muffled and struggling to cut through the mix.
We want to bring out some higher frequencies, but the part is so muffled that we probably won’t get very far with EQ. Instead, we’ve used Dirt, an authentic-sounding saturation plug-in that’s part of the 360 Essentials subscription.

When using saturation to boost high frequencies, you should apply it in parallel – meaning you should combine the saturated signal with the original, clean signal. We adjusted Dirt’s Mix knob to 60%.
We also turned up the Tilt control, which applies a filter that boosts the high frequencies.
We can use the same trick to get even more high frequencies out of the organ that we EQed in the previous step. Some authentic analog-style saturation will work beautifully on this vintage-style organ pad.
This time we used a modelled vintage guitar amp in Guitar Rig 7 LE. This gives a crunchy, old-time sound that’s perfect for the instrument we’re processing.

The saturation kicks in halfway through this clip. Hear how it brings out all the juicy dissonance in the upper range.
3. Widen out your mix
So far we’ve improved definition by focussing on the frequency spectrum. What about the stereo field?
You can improve separation in your mix – and so boost overall definition – by varying how parts are placed on a spectrum from left to right.
You might think this means panning individual instruments to one side or the other, as if we’re listening to a band spread out on stage in front of us. This approach can work sometimes, but it’s rarely the chosen approach in modern electronic production. That’s because it can unbalance the stereo field, making for lopsided mixes that may be harder to get loud and punchy.
Instead, try thinking in terms of width. Important elements should sit right in the middle of your mix (that is, in mono or nearly), while supporting parts can be wider – meaning they behave differently in the left vs. the right channels, creating a feeling of expansiveness.
In our track, some important elements are too wide, while some supporting parts sit right in the center. We can use a couple of simple tricks to adjust their width and improve overall track definition.

First, our drum loop. It’s way too wide for such a key part, and it leans weirdly towards the left. This detracts from its impact and makes the whole mix feel washy. To make the part punchier, we can simply make it mono. We did this with Relay, a utility plug-in in the 360 Essentials subscription that offers handy stereo controls.
The mono effect kicks in halfway through this clip.
Our organ pads have the opposite problem. This is a supporting part, so it doesn’t need to be the central focus. But right now it’s in mono, sitting right in the middle of the mix.
Pushing the organ to the sides will help it slot into a supporting role. It will also create space in the center for important elements to shine – and boost definition in the mix overall.
You can add stereo content to a mono sound by applying a stereo modulation effect such as chorus. We did this using Choral, a powerful chorus plug-in that’s also in the 360 Essentials subscription.
We made sure to turn the Width control up to maximum, but kept the mix knob low – around 50% – to blend the modulated signal with the original, clean signal.

That helps a little, but we want the part to be wider. Now that the organ has some stereo content, we can boost the volume of it using Relay’s handy width control.

Here’s how the organ sounds with stereo processing applied. The effect kicks in halfway through the clip. Hear how the pads get pushed out to the sides.

4. Adjust foreground and background with transient shaping
There’s another dimension that will help us to bring definition to our mix. As well as being centered or wide, and higher or lower in frequency, sounds can also be in the foreground or background. Foreground elements are upfront and punchy; background parts feel more distant.
How do we achieve this audio illusion? One way is through using transient shaping to adjust the sharpness of certain sounds.
A transient is the sharp attack at the beginning of a sound – particularly a percussive sound like a drum. Sounds with sharp transients tend to sound closer to the listener, while sounds with a slow, smooth attack can sound further away.
We can use this technique to enhance the definition of our mix, starting with the drum loop. It lacks punch, particularly in the snare, which it feel weak and unclear.
To fix this we applied Transient Master, a simple but powerful dynamics plug-in that you’ll find alongside dozens of other audio effects in the 360 Essentials subscription.
The transient effect kicks in halfway through this clip. Hear how the snare pops out and the whole loop feels tighter.
Transient Master has just three main controls. We boosted the attack by 20% to bring out the sharp snap of the snare. We also turned down Sustain a few percent to make the “body” of the sound quieter. This tames the roominess of the drum loop, creating space for other elements in the mix – thereby improving definition.
Our picked guitar part needs the opposite treatment. The click of the plectrum is creating loud transients that push the part into the foreground and make the whole mix feel more crowded.
So this time we turned down the attack, and boosted the sustain to bring out the body of the guitar chords.
The transient shaping is applied halfway through this clip. Now the part sits much more comfortably in the background.
5. Get your reverb right to enhance definition
Reverb can be a powerful way to add depth and dimension to your track, but it can also cause problems. The reverb in our track is way too intense, clogging up the mix and harming clarity.
kWhy does the reverb sound so overwhelming? For one thing, we added individual reverb plug-ins to every part in the track, without thinking about whether they really needed it. We also didn’t do much to control what the reverb is doing, instead letting it clash with other parts (and all the other reverbs).
The lesson here? The best way to get good track definition is often to use less reverb, and to use it with intention.
Here’s how we reworked the reverb to improve the track’s overall definition.
We started by deleting all those individual reverbs, and instead adding just one reverb to a Return in our DAW. We can now send as many (or as few) instruments as we like to this reverb, and control how much reverb is applied to each one.
When doing this, make sure that the reverb plug-in you add to the Return is set at 100% Wet.
Next, we chose milder reverb settings than we were using before. We did this with Raum, a versatile reverb that’s part of the 360 Essentials subscription.
Using Raum’s Grounded mode, we chose a short decay of 0.6 seconds, and turned the size right down to 14%.

We also applied some EQ after the reverb effect, to remove unwanted low and high frequencies that could clash with other elements such as bass and hi hats.

Finally, we adjusted how much reverb to apply to each element in the track. Elements with more reverb – in our case, the guitar and organ – will sound more distant, while elements with less (like the drums) will sound more upfront. And remember – some elements are fine without any reverb at all.
The reverb is added halfway through this clip. It’s a very subtle effect that adds depth and dimension to the mix without sacrificing definition.
Finally, hear how all the changes we’ve made have improved the overall track definition. The first half of this clip is how it sounded when we started; the second half is the final version.
Each element is clearer, and the mix as a whole feels more balanced and controlled. In other words, the definition has been improved.
Start getting clearer mixes today
In this article, we’ve looked at five ways to enhance definition in your music, using EQ, saturation, stereo processing, transient shaping, and reverb. All of the audio effects used in this tutorial are available in the 360 Essentials subscription. That means you can get everything you need to make clearer mixes – today.
Related articles
-

Inside the evolution of orchestral sampling: an interview with ProjectSAM
Discover how ProjectSAM’s Lineage Series uses NKS and smart features to change orchestral sampling. Plus, save on instruments in our…
-

How New Constellations turn emotion into sound with Massive X
Go inside the studio with New Constellations. Learn how they use Native Instruments gear, happy accidents, and lifelong friendship to…
-

Citizen Kain on building emotion and space with Replika
Citizen Kain explains how Replika helped shape the rhythm, tension, and emotion behind his debut Eversun Records single “Moments.”…
-

The organic precision behind Calcou’s Anjuna release featuring Reaktor
Calcou shares how Reaktor, Monark, and Super 8 shaped the creative balance and live energy behind their new duo EP,…
-

14 NKS instruments that will change the way you create music
Discover 14 NKS instruments to freshen up your workflow. From lo-fi tape synths to cinematic strings, shop the Native Instruments…
-

Parallelle on crafting living basslines with Reaktor and TRK-01
Parallelle share how Reaktor and TRK-01 shape the bass and warmth in 11th Avenue, balancing analog depth with modern control.
-

Where will your sound lead you? Explore the Native Instruments Summer Sale
Save 30% on instruments, effects, and sounds in our Summer Sale. Find the tools to keep your tracks moving and…
-

How Mr. Bill builds sonic worlds in Massive X
Mr. Bill explains how Massive X and instinctive sound design shaped the storytelling process behind his new downtempo album, Mr.