Bitcrusher effects are commonly used in many popular musical styles, and they have a wide variety of applications from giving sounds a vintage feel to changing their character dramatically. In this guide to bitcrusher effects we’ll explain how they work, and walk you through several useful effects that you can achieve with them using Native Instruments Bite and Massive X.
Jump to these sections:
- What is a bitcrusher effect?
- Examples of bitcrushing in popular music
- How to use a bitcrusher in your music
Follow along with this tutorial using Bite bitcrusher VST in the Crushpack Effects Series, Massive X and the Neo Boogie expansion.
What is a bitcrusher effect?
Bitcrusher effects can offer a variety of capabilities, but all of them feature two main functions: sample rate reduction, and bit depth reduction.
Sample rate reduction reduces how much information an audio signal has over time. For example, if your project uses a common sample rate of 44.1 kHz, that’s 44,100 amplitude level values (or ‘samples’) for each second of audio.
This gives us a very clear sound, and the 44.1kHz value is commonly used because it’s just over twice the limit of human hearing (around 20kHz), and a sample rate of twice the maximum frequency present in a signal is necessary to capture that signal accurately. This is known as the Nyquist frequency.
Reducing the sample rate introduces what are known as aliasing errors, which distort the higher frequencies present in the signal. While this distortion is usually undesirable, it can be useful for certain creative effects.
Bit depth reduction reduces the amount of data used to describe the amplitude level of a sample. A bit can be either a 0 or a 1. So, if you have a 24-bit audio signal, each sample can be one of 16,777,216 possible values, enough fidelity to be very convincing to the human ear.
However, if you were to reduce the bit depth to, say, 4-bit, that’s only 16 different possible values. This is nowhere near as convincing to the human ear, and gives us a much noisier signal. You can read more about the relationship between bit depth and noise.
So, we can think of sample rate reduction as reducing the ‘resolution’ of an audio signal over time, and bit depth reduction as reducing the ‘resolution’ of an audio signal’s amplitude. These effects give us different-sounding results, and can be used independently or together to achieve creative effects.
Examples of bitcrushing in popular music
Often bitcrushing effects will be used relatively subtly, but there are examples of overt bitcrusher usage in several popular songs. A particularly obvious example is the outro to Daft Punk’s ‘Short Circuit.”
From 2:13 onwards, you can hear gradually reducing sample rate on the beats and chords, transforming the chilled feel of the track into something much rawer-sounding.
A similar, but more subtle effect is used on the beats in the intro of Linkin Park’s “Don’t Stay.”
Here sample rate reduction is used to give the intro beat a lo-fi feel that helps it contrast with the main beat that drops at 0:13.
Bitcrushing can also be used as an element of synth-based sound design, and is a popular technique in tearout dubstep music. One of the tracks that pioneered this technique is Doctor P’s “Sweet Shop.”
At 0:27 the ‘yoy’ bass sound is created using sample rate reduction on a bass sound with a resonant low-pass filter sweep on it.
How to use a bitcrusher in your tracks
1. Give your beats a crusty feel
Let’s start off with a simple technique, reducing the sample rate and bit depth of a signal to give it a lo-fi feel. Start by adding any drum loop to an audio track in your DAW, here we’re going to use Drums[120] Mello.wav from the Neo Boogie expansion, but you can use any loop you like.

Here’s how this loop sounds unprocessed.
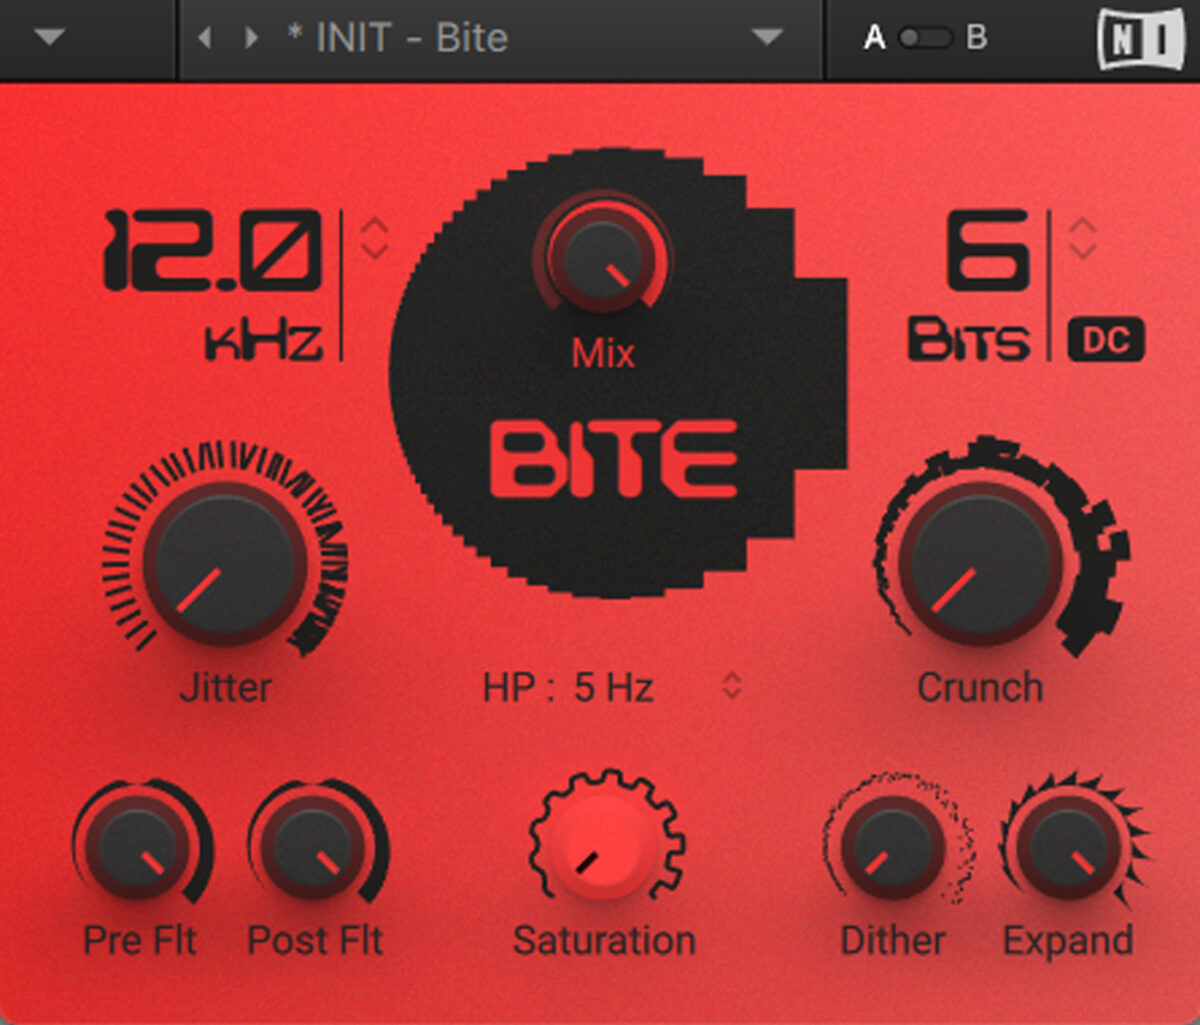
Now let’s add Native Instruments Bite bitcrusher effect to the audio track. Turn up the Pre Flt and Post Flt to 22.1 kHz, and reduce the sample rate from 44.1 kHz to 12 kHz.

Because we’ve opened the filters and reduced the sample rate, we can hear that crusty aliasing in full, giving us a cool lo-fi sound reminiscent of an old school hardware sampler.
We can get a yet more lo-fi effect by reducing the bit depth. Turn it down to 6 and you’ll hear the signal become much noisier and dirtier-sounding.
2. Add a lo-fi sheen to keys
Let’s use a similar but more dramatic effect to add crunchy, high-end harmonics to some keys. You can use any key loop you like, we’re going to use Keys[120] B Mello MSV.wav from the Neo Boogie expansion.

Here’s how the loop sounds unprocessed.
Now add Bite, and turn the sample rate down to 3 kHz.
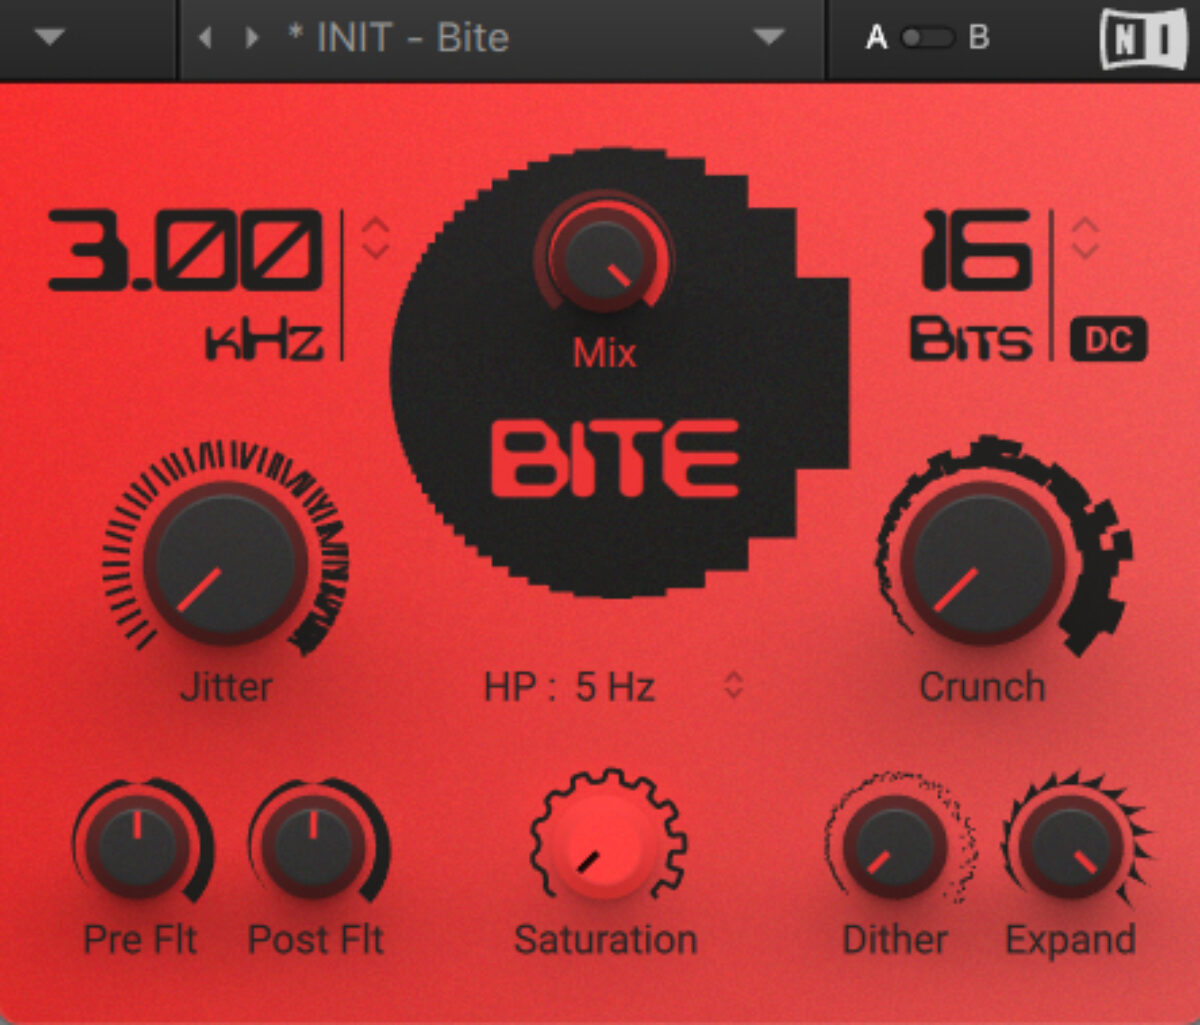
Because we haven’t opened up the filters, this gives us a muffled sound that doesn’t have that crunchy aliasing.
Now, open up the Pre Flt and Post Flt to their fullest.

Opening the filters allows us to hear the aliasing, giving us a radically different lo-fi digital feel in the high-end.
3. Create a degrading sweep effect
We can create a progressive, Daft Punk-style lo-fi effect by automating Bite’s Sample Rate. This time, let’s run a drum loop and a key loop through a bus together so that we can process them as one signal. Again, we’re going to use Drums[120] Mello.wav and Keys[120] B Mello MSV.wav from the Neo Boogie expansion, but you can use whatever audio you like.

Now, add Bite to the bus track, and open up the Pre Flt and Post Flt.

Now, automate the Sample Rate value over the course of the loops so that it drops from 44.1 kHz to 300 Hz.
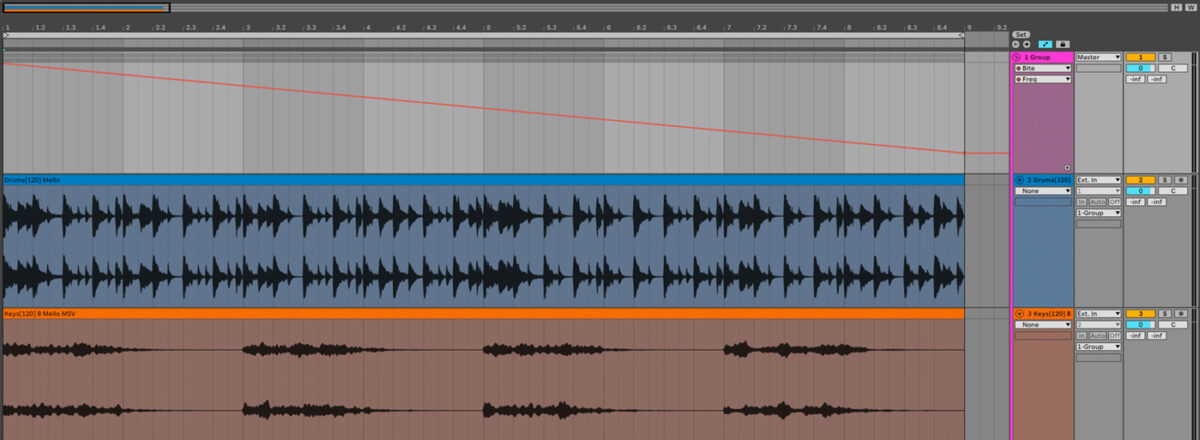
This gives us a very obvious effect that you can use to transition between parts of a track, or as Daft Punk-style outro.
4. Make dirty bass sounds
Now let’s look at how we can make a couple of dirty bass sounds with synthesis and bitcrushing effects. Add Massive X to a MIDI track in your DAW, and turn the filter Frequency down to around 100 Hz.
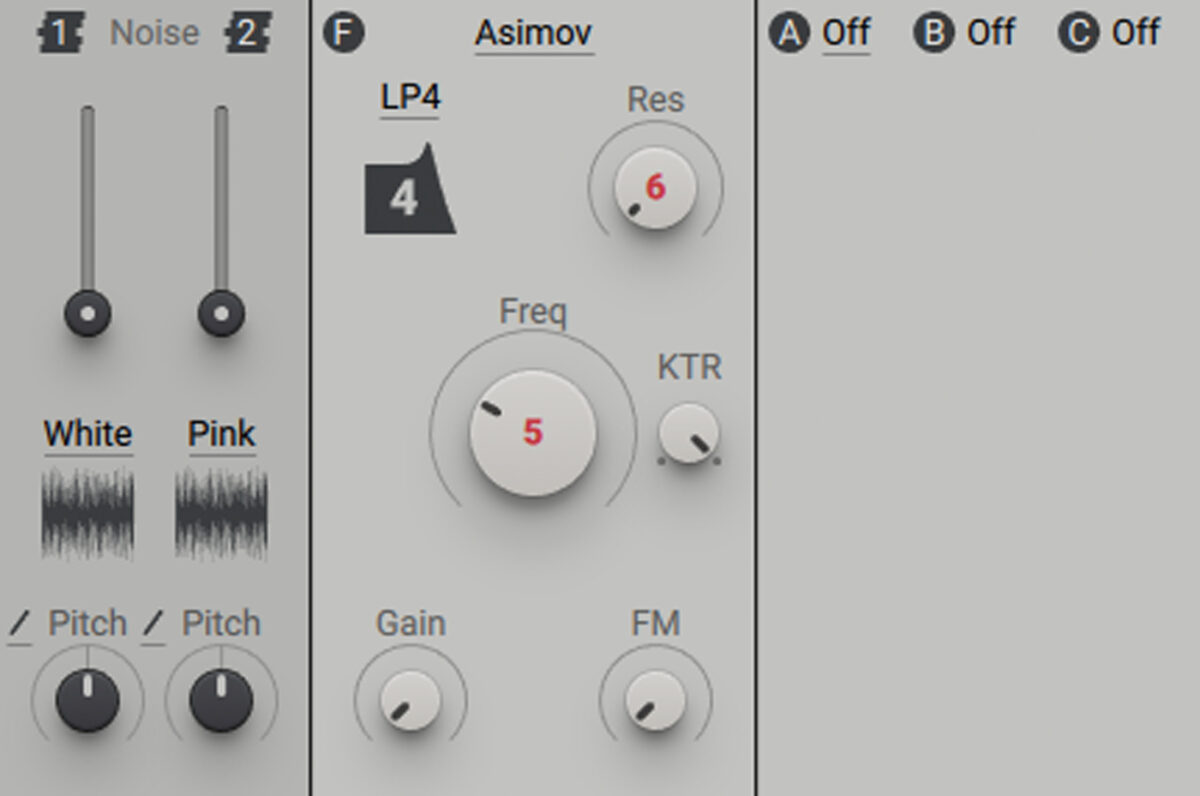
Now, drag the E2 modulation handle onto the first box below the filter Frequency knob. This box will now display E2. Drag up on the E2 box to set the E2 modulation amount to around 1 o’clock.
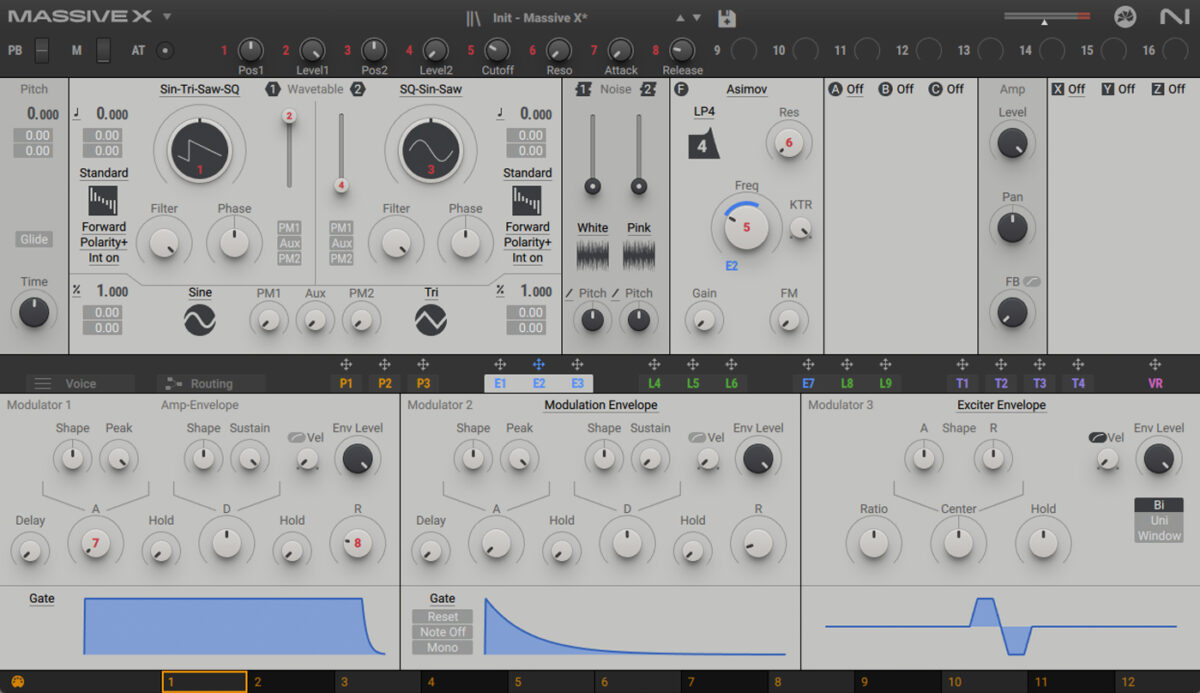
Now when you play a note, you’ll hear the modulation envelope modulates the filter cutoff frequency.
We want the filter to gradually open, so turn up the Modulator 2 modulation envelope’s attack to around 200 ms.
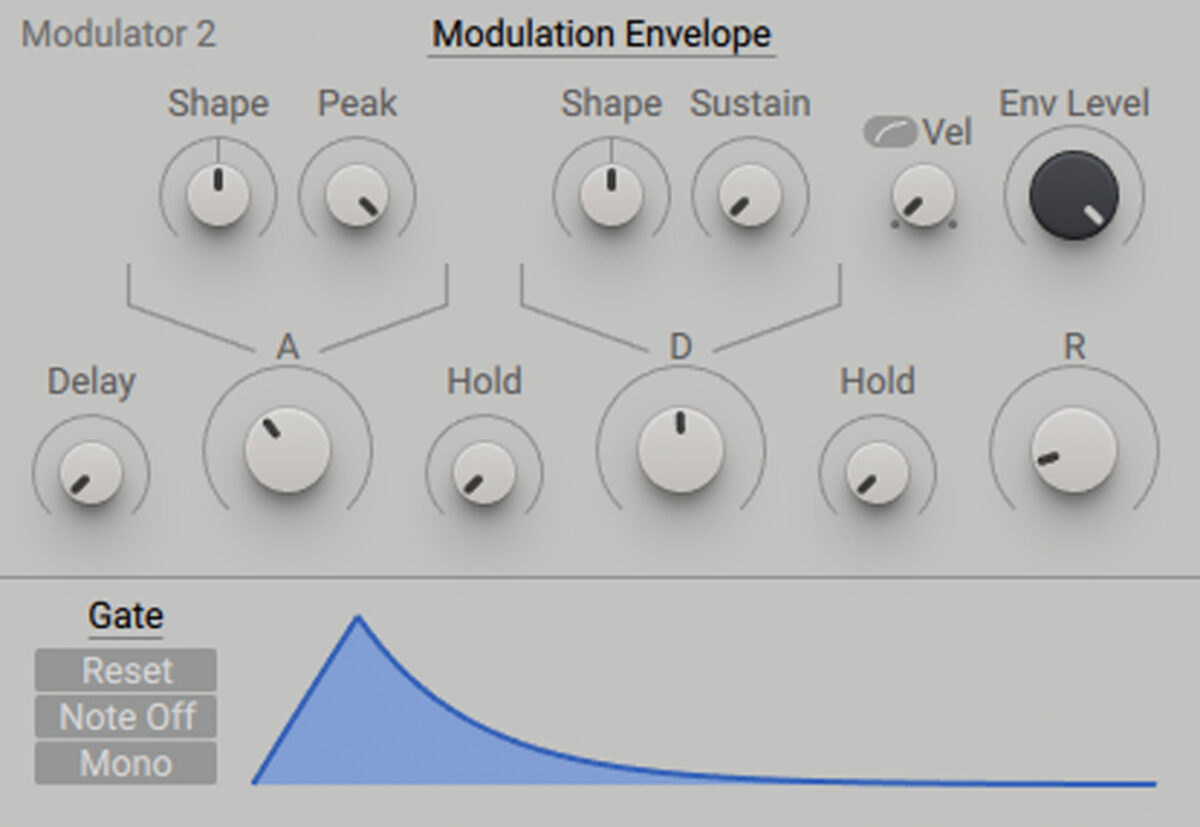
This gives us a smooth bass sound. Let’s give it some grit with Massive X’s built-in Bit Crusher effect. Set the first Insert Effect slot to Bit Crusher, then set its Mix to 100% and the Crush to around 40%.
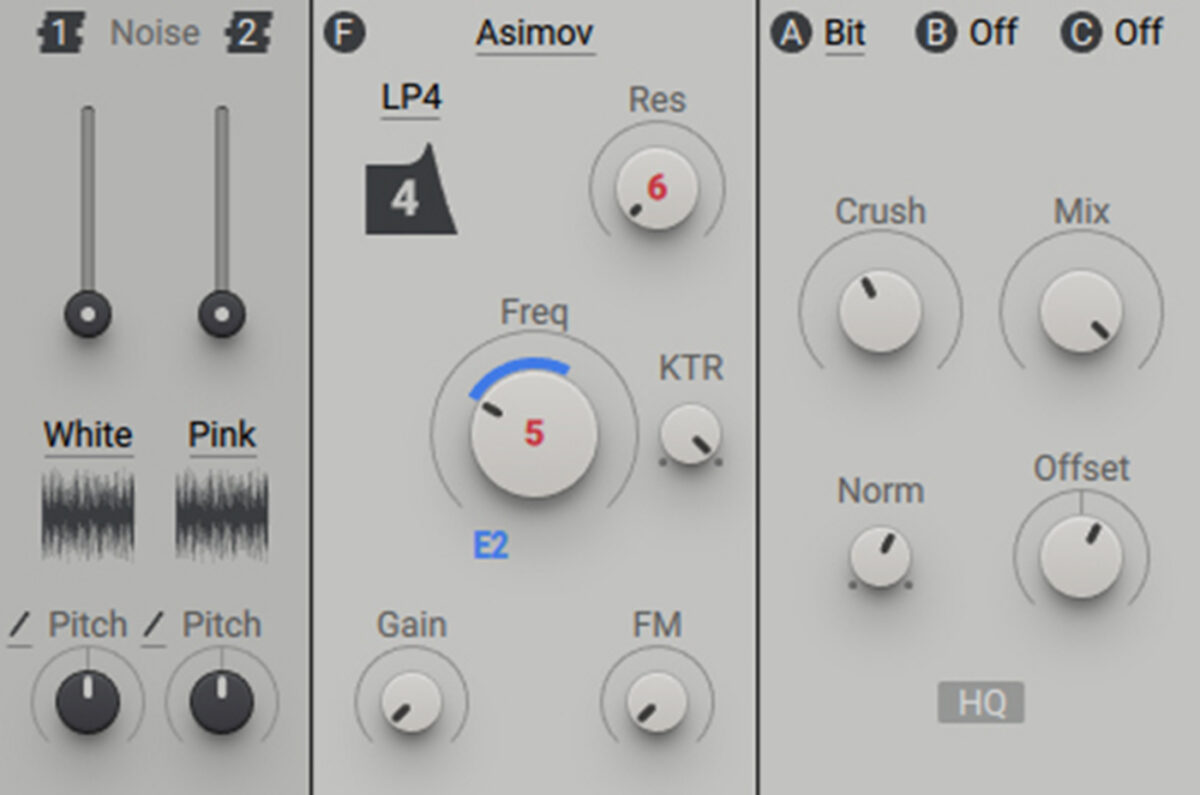
This will give the sound a slightly rougher edge, while retaining its overall smooth feel.
We can add more definition to the sound by turning up the filter’s Resonance. Set it to around 80%.
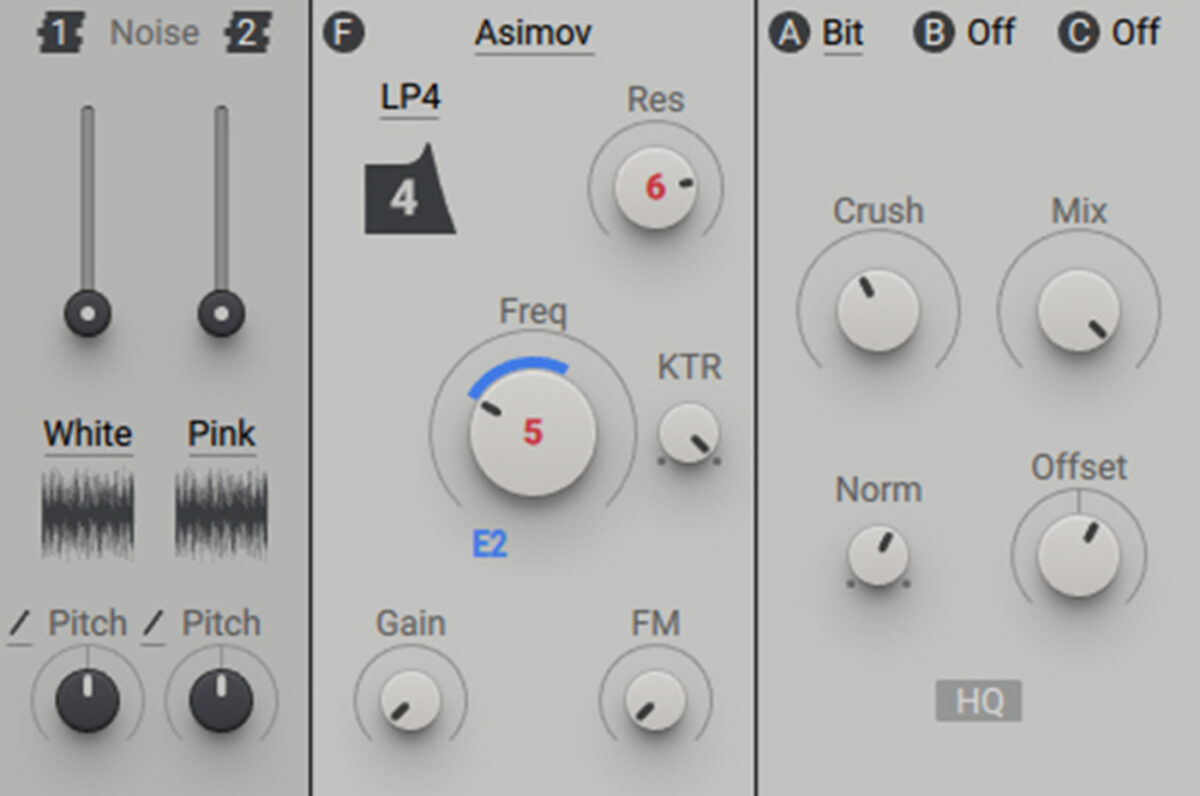
This kind of bass sound works well in musical styles like UK garage.
Now let’s turn this sound into something more dramatic. Set the Insert Effect to Off to remove the Bit Crusher effect, then add a Bite effect on the Massive X channel. Open up the Pre Flt and Post Flt filters, and set the sample rate to 1.47 kHz.
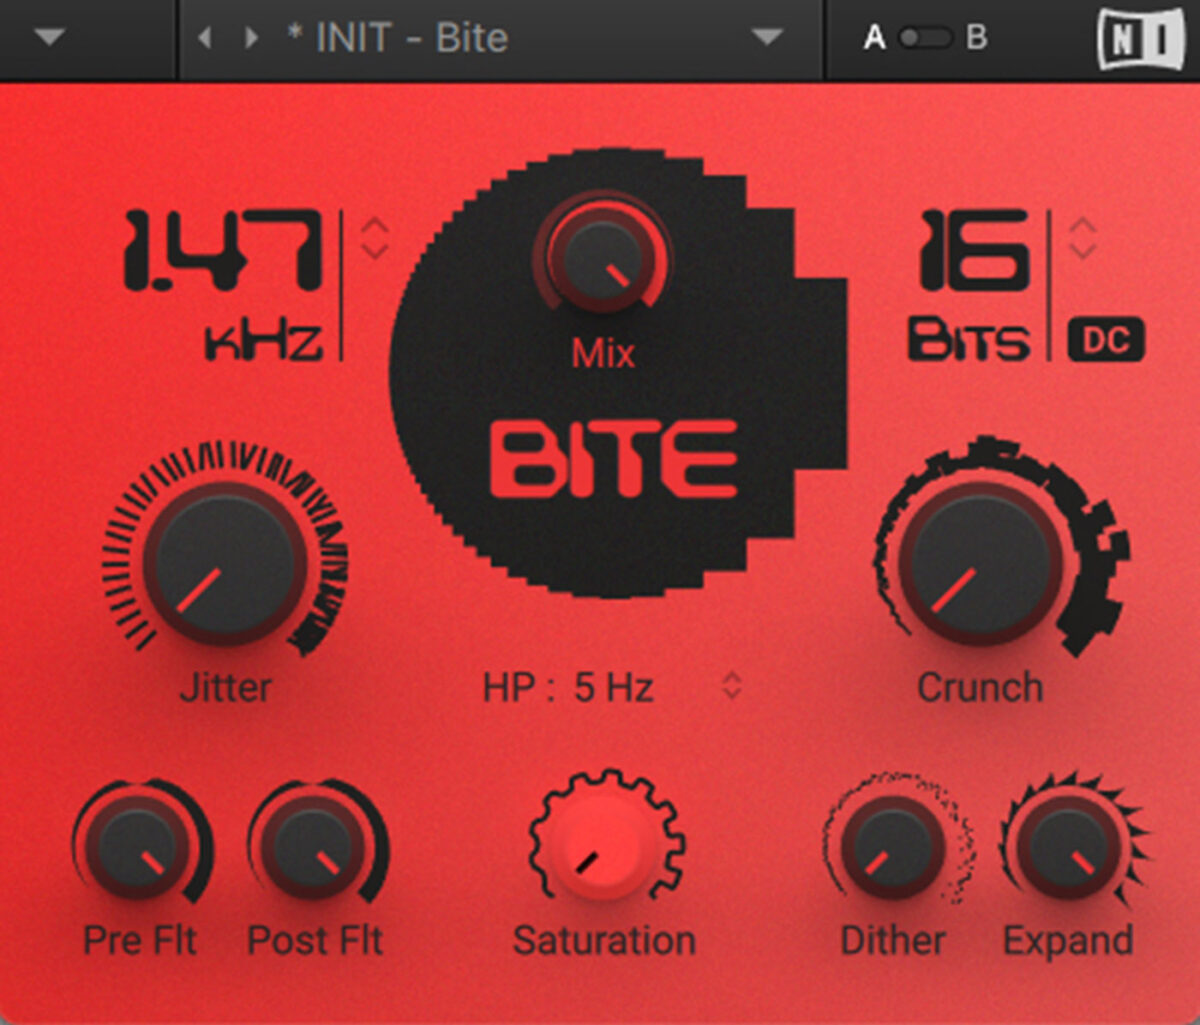
This gives us that classic dubstep ‘yoy’ vocal-style bass sound.
Start using bitcrushers in your music
Here we’ve seen how you can add lo-fi effects, sweeps and dirty bass sounds to your music using bitcrushing effects.
If you’d like to learn more about effects and music production, check out our guides on music production, sound design, and distortion.


