


Starting out as an underground hip-hop subgenre in the southern US, trap has become the dominating form of hip-hop worldwide, with practitioners including Drake, Nicki Minaj and Bad Bunny. Trap has a militant, synthetic feel that gives it a vibe all of its own, so what are trap beats, and how can you make them yourself?
In this beginner’s guide to making trap beats, we’ll examine the common elements of trap music, find some instruments that will give you the right sounds to make a trap beat, then show you how to compose and process these instruments to make a bass-heavy trap loop with beat making software.
Jump to these sections:
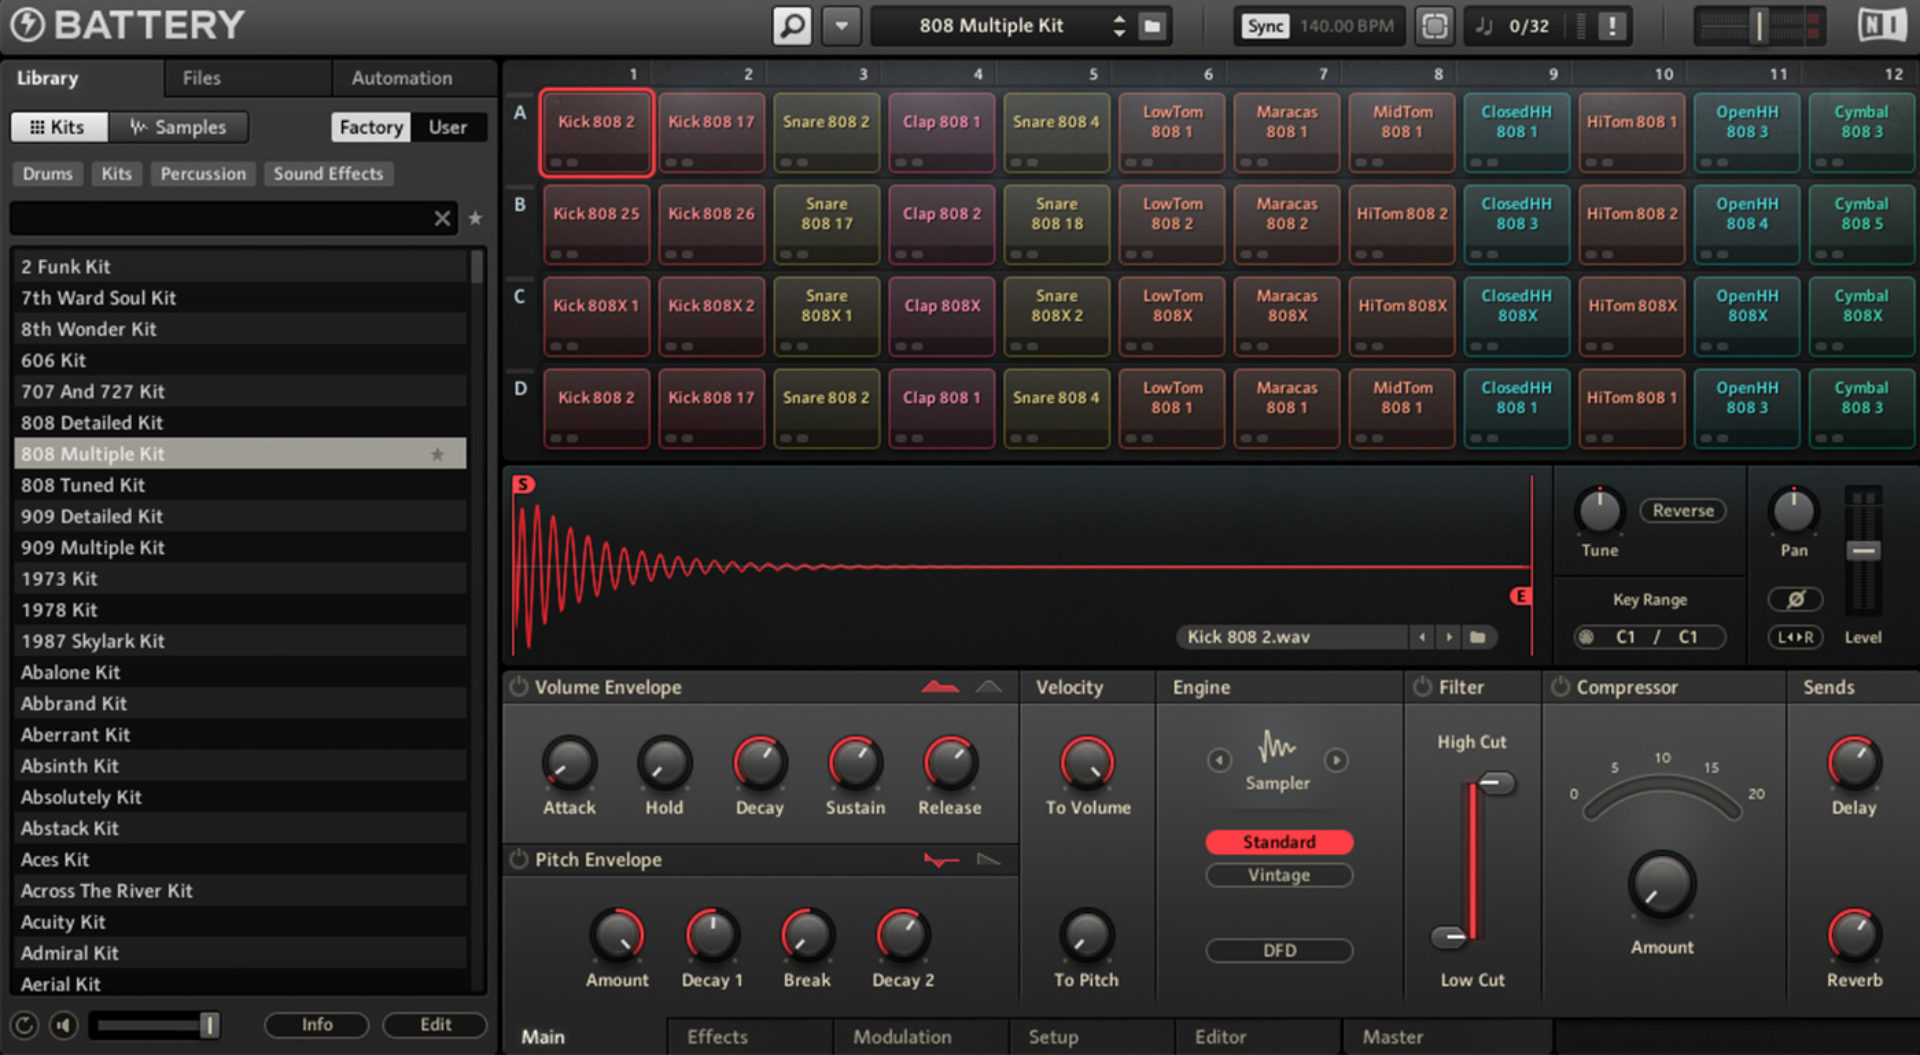
Follow along with this tutorial using a free demo of BATTERY 4, a cutting-edge drum sampler.
What is a trap beat?
The common elements of a trap beat include a half-time drum pattern, a deep 808 bass, hi-hat rolls and triplets, and tempos ranging from 130 to 200 BPM. Musically, trap features minimal accompaniment to the drums and bass with one or two melodies providing the musical backbone. The fewer elements on the track, the louder each element will sound in the mix. Aside from vocals, the musical elements in trap music tend to be synthetic and melodic with a vibe that sounds chill, aggressive, or psychedelic.
Let’s listen to common trap beat structure in popular tracks from the last few years.
Listen to the drum elements first. All of these trap music beat examples use Roland TR-808 drum sounds, an instrument that’s practically ubiquitous in the genre. They feature fast high-hat patterns, often with hat rolls, plus snappy claps and snares, and big, harmonically rich pitched bass drums for their bass lines. If you’re familiar with trap music, you’ll no doubt recognize these elements and have heard them many times.
In terms of tempo, a pretty wide range is used, with the kicks, snares and bass line playing slowly relative to the fast-paced hats. Unlike “golden age” hip-hop, these beats tend to be sequences straight, without swing.
The trap beat genre tends to feature relatively sparse accompaniment to the drums and bass. The relative scarcity of elements and elegance of programming helps trap sound big and punchy on everything from phone speakers to club systems.
Aside from vocals, the musical elements in these tracks tend to be synthetic. Trap is often created “in-the-box,” i.e. entirely with software on a computer. The vibe in these tracks varies from chilled to sinister and psychedelic, but in the case of these tracks at least, it’s generally with a smoothed-out feel.
Instruments used in trap music
The main instruments common in all trap music are the 808 drum kit and bass. For chords and melody, producers typically use pads, piano, and synths but also experiment with sounds from other genres like the electric guitar, winded instruments, and more.
When it comes to selecting your virtual instruments, having something that already sounds polished and inspiring will help us get a vibe going all the more quickly. Many trap producers like to work as quickly as possible, so let’s use 40’S VERY OWN KEYS for sounds that are already tailor-made for our purposes. This works with KONTAKT 7 and the free KONTAKT PLAYER.
Clearly, 808 drum sounds are de rigueur, and BATTERY 4 has these covered with its 808 Multiple Kit.
For a big, booming pitched 808 bass drum MASSIVE X is a great choice, and its Essential Eight preset is ideal for our needs.
We’re not going to use many sounds in this beat, but each one has to sound enticing. So let’s make sure we use effects that bring out the best in these sounds. CRUSH PACK, MOD PACK and RAUM will help take our sounds to the next level when used judiciously.
To make a quick master of our beat, we can use the Maximizer module from iZotope Ozone 10.
How to make a trap beat
1. Create a trap drum pattern
As we said earlier, a good tempo for a trap beat ranges from 130 to 200 BPM. Set your tempo to 140 BPM, then add BATTERY 4 on a MIDI track and load up the 808 Multiple Kit from the library on the left of the instrument’s interface.
We’re going to start by making a two-bar drum pattern. Start by adding closed hats on 8th notes on G#2 for two bars.

Then add D#2 claps on the third beat of both bars.
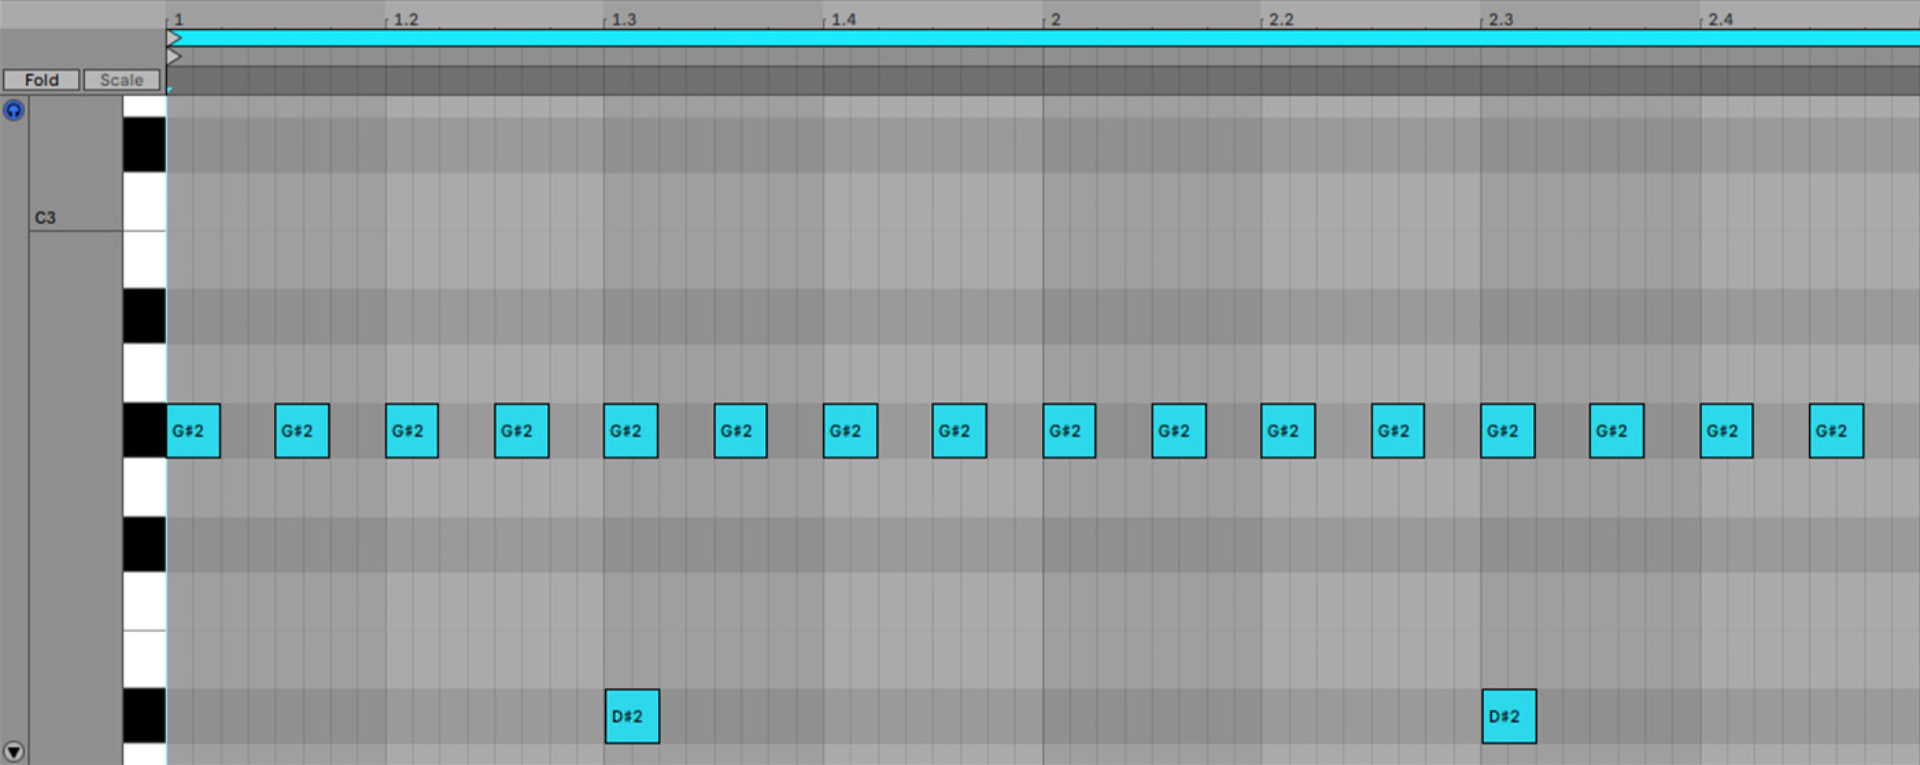
Now add kicks on the first, eighth and tenth 8th notes.
Here’s what the beat sounds like so far.
This gives us a basic trap beat to base the track off. However, it needs a few tweaks before it’s really ready to shine.
First of all, make sure your claps and snares are short and snappy. In BATTERY, click the Clap 808 2 pad to select the clap sound we’re using, then in the Volume Envelope panel turn the Sustain all the way down, and set the Decay to around 280ms. This gives us a snappier sound that sounds better with the other elements.

This drum part could also do with some 32nd note hat rolls. Set your DAW’s grid to 32nd notes, and make the last two closed hats into rolls of three 32nd notes.

To make these flow more smoothly, turn down the velocity on the middle notes to taste.

Now let’s turn our two-bar sequence into a four-bar sequence. Duplicate out the MIDI used so far, and replace the hat rolls at the end with straight 8th notes again. Add E2 snares on these notes, giving us a minimal little snare fill at the end of the four bars.

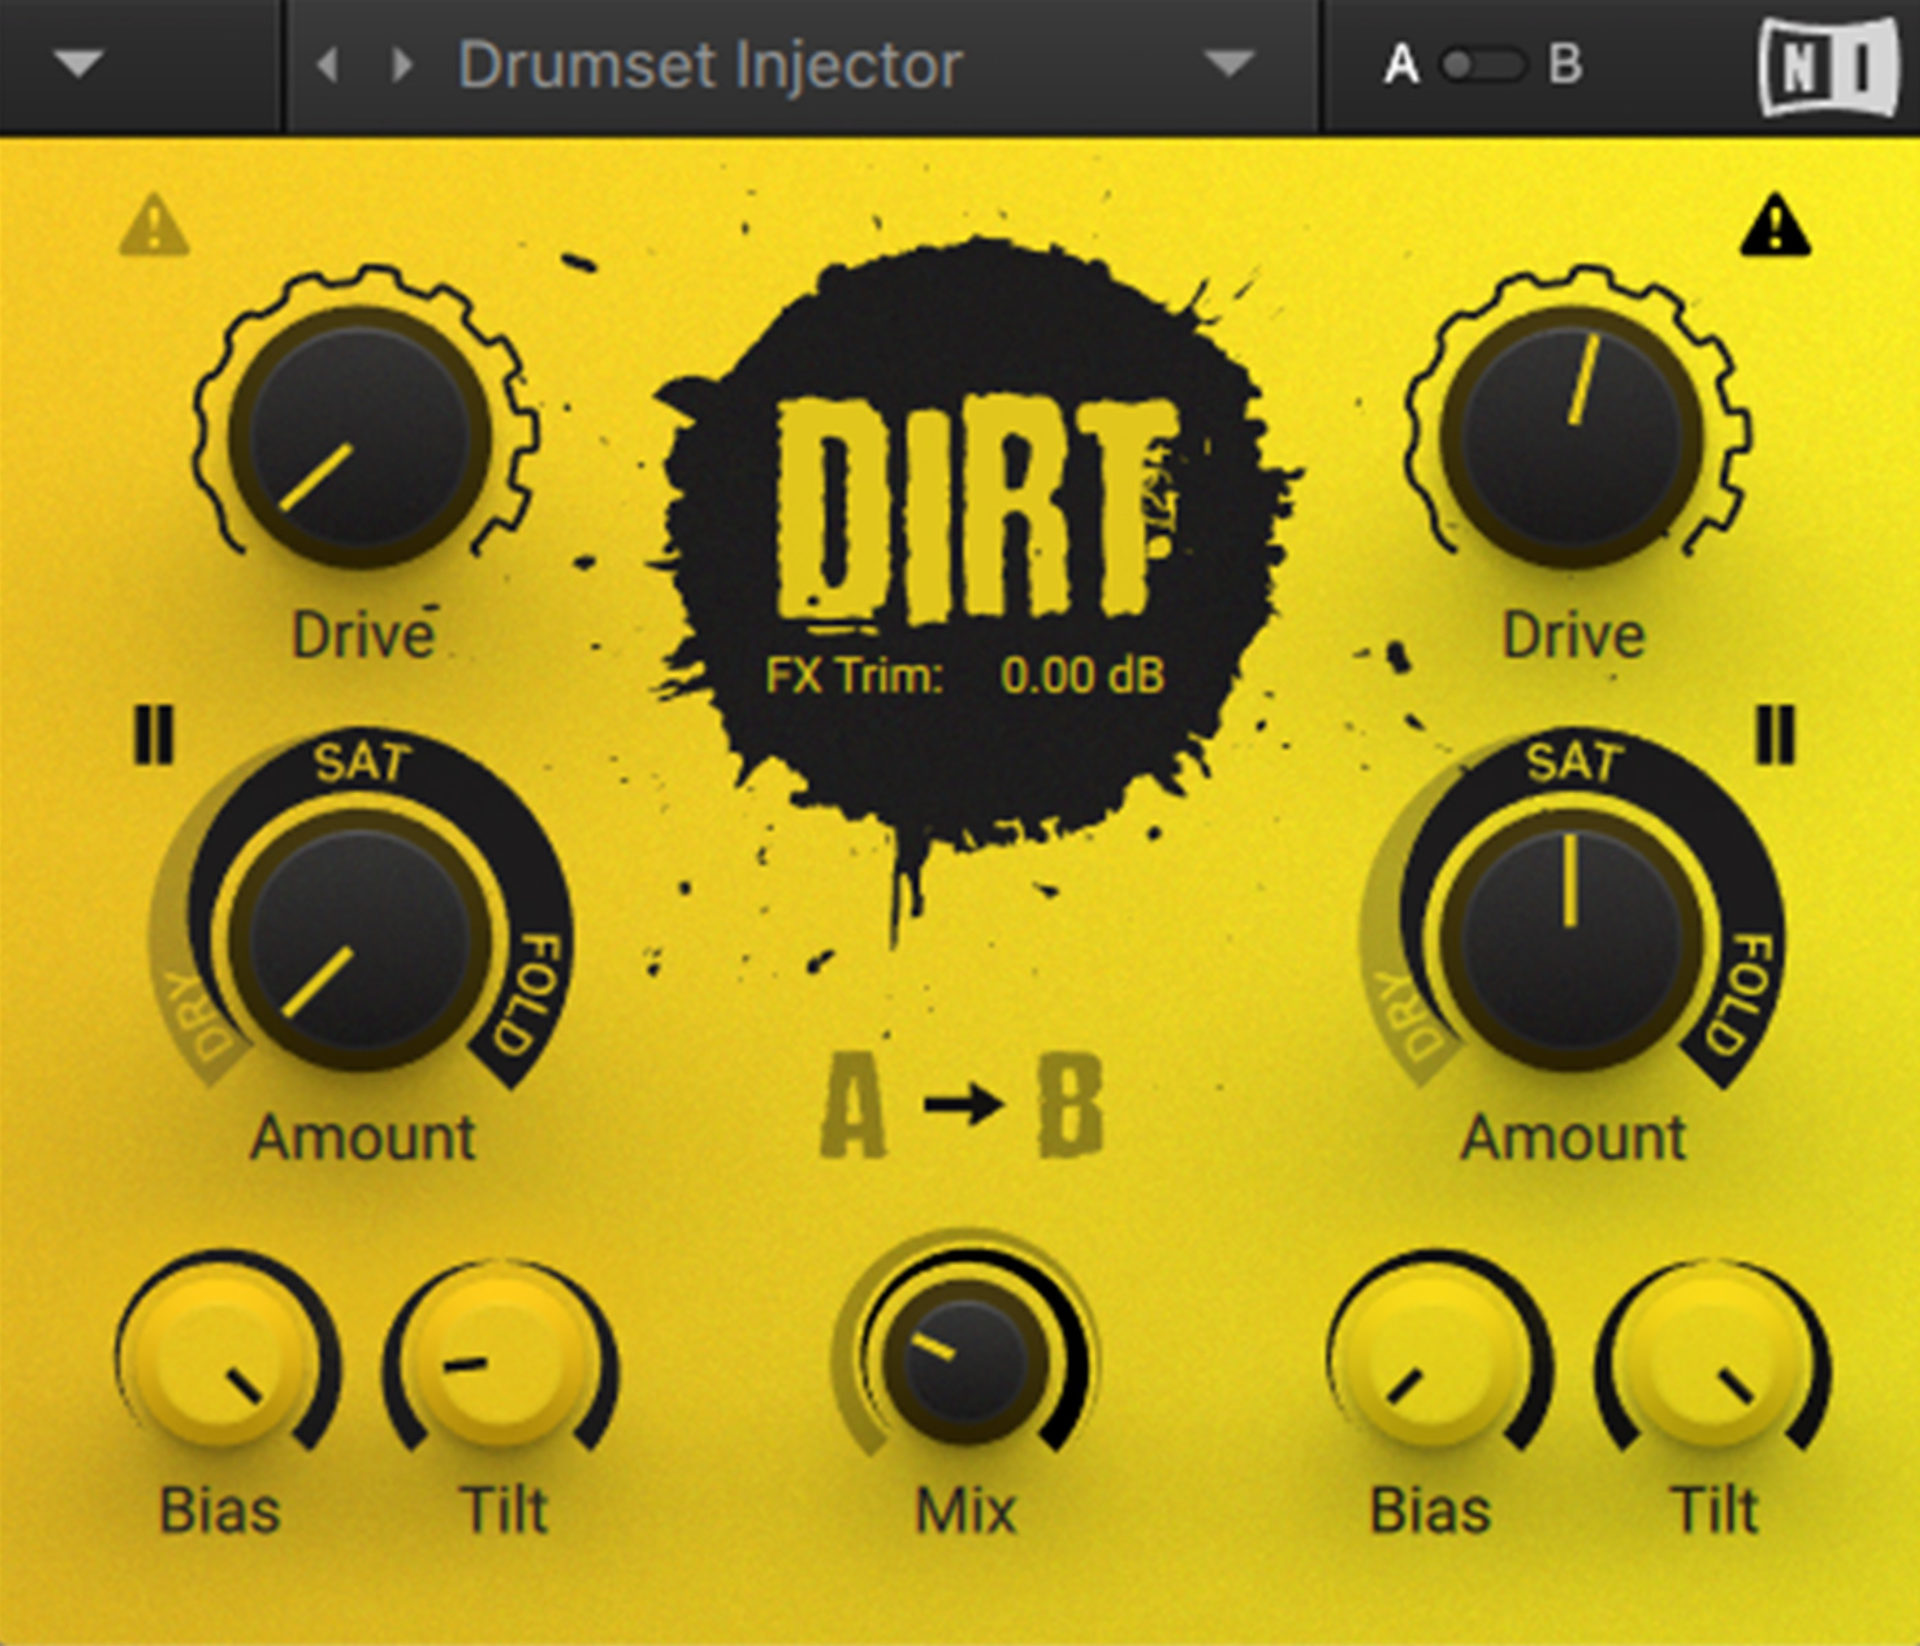
Let’s beef up the sound with a touch of saturation. Add DIRT from the CRUSH PACK as an insert effect on the BATTERY 4 track, and load up the Drums > Drumset Injector preset.
Now we have a drum part that’s sounding full and snappy, we can start adding musical elements.
2. Add melodic elements
Now we’re going to add our first musical element, which will set the vibe for the rest of the track. 40’S VERY OWN KEYS is a great choice for this, so let’s select it in KONTAKT 7 or the free KONTAKT PLAYER, and load up the initial 40s VERY OWN KEYS patch.

By clicking the down arrow next to the patch name we can see the patches organized by category. The Sequence category is a good place to start, as this features patches that already contain musical sequences. This will help us get a musical idea down quickly and easily. Load up the Fry Skulls Seq preset.

Play this preset on C2 for the whole four-bar sequence.

This sound has some delay and filtering on it. Let’s reduce those so we can hear it more clearly. Turn the Delay and 40 macros at the bottom of the interface all the way down.

This sounds more upfront and it’s instantly giving us a musical base to work around. However, it’s a touch too loud relative to the beat, so turn its channel down to -4.5 dB.

Let’s add a modulation effect to give the sound an extra dimension of movement. Add a FLAIR effect from the MOD PACK, and load up the Flanger > All You Need preset. This gives the sequence a silky smooth stereo sound.

3. Add an 808 bass
Now we’ve got a musical idea going, let’s add the real meat of the track: the booming 808 bass line. Load up MASSIVE X onto a track then open the preset browser, select the Bass tag, and load the Essential Eight preset.

This is a huge pitched 808 that’s ready to go right away, the only issue is that it’s a little loud. Set the MASSIVE X track to -4.5 dB.

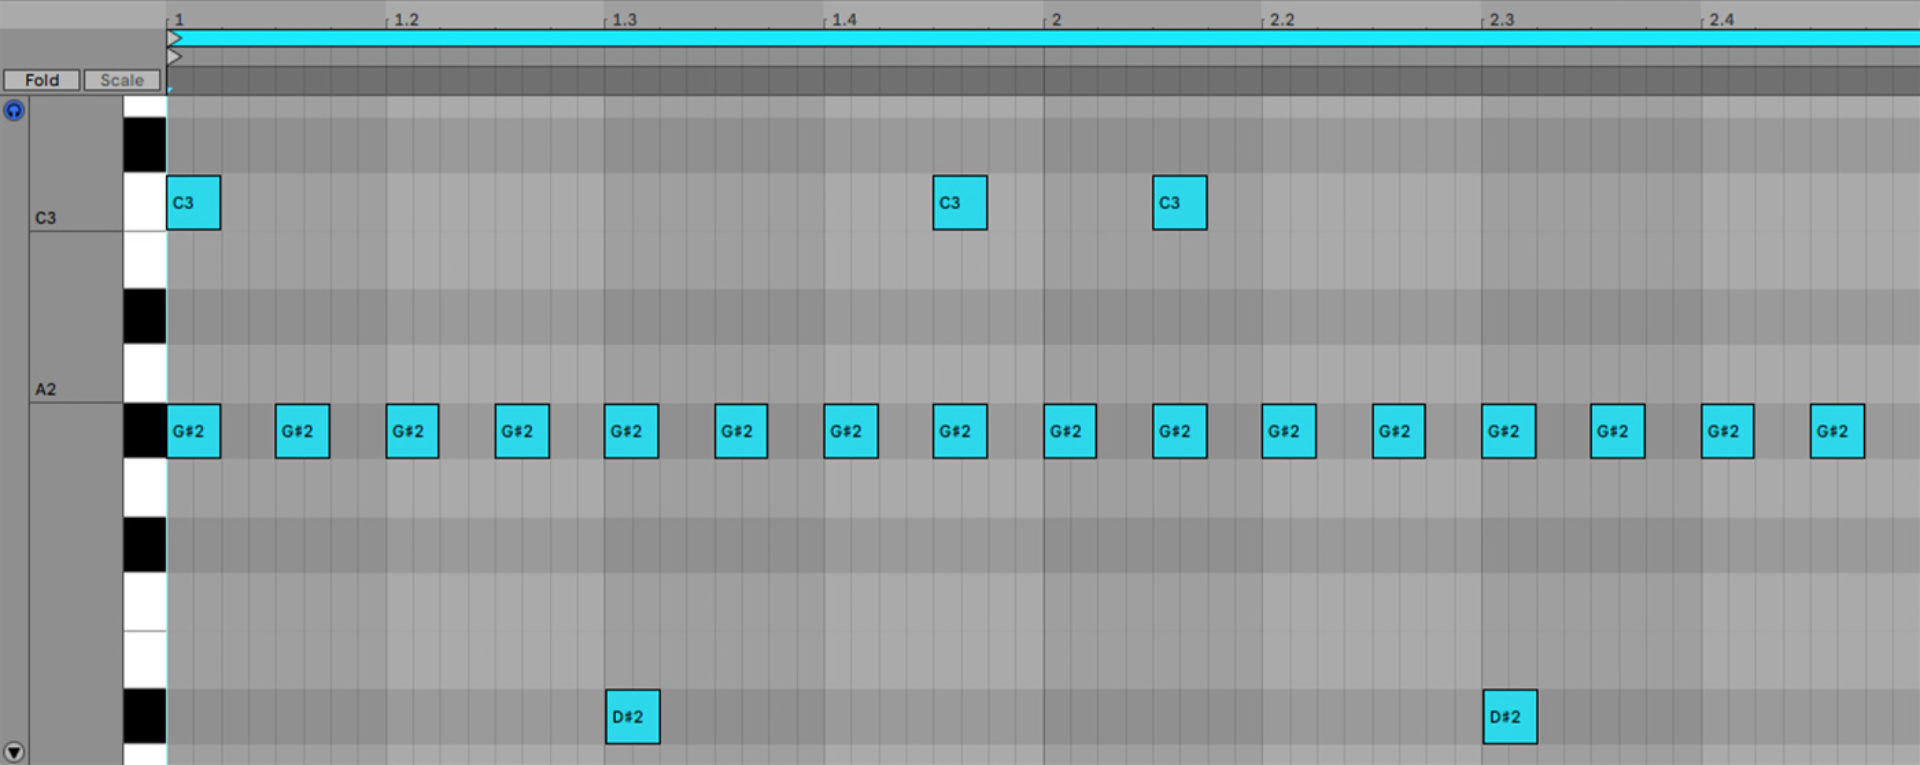
Sequence a simple bass line that plays C2 and G2 notes.

Keeping the bass line simple and focusing on how it interacts with the drum part helps keep it propulsive, which is what we’re looking for.
4. Create a counter melody
The Fry Skulls Seq preset is giving us our main melody, but there’s still plenty of room left on the mix for a counter melody to give our beat a bit more depth. Load up another instance of 40’s VERY OWN KEYS on a new track, and this time select the Pad > 80 Echo’s preset.

Sequence a part that plays the root note and the octave, plus the fifth and minor seventh.

This sound has a delay effect set to 1/8 dotted, which sounds a little busy with the sequence we’ve composed. Select the FX panel, and change the Replika effect’s Time to 1/4 notes instead. This sounds cleaner, and gives us an interesting interplay between the processed and unprocessed notes.

As we’re not using too many elements, we have some room to add some character to this sound with reverb. Add RAUM to the 80 Echo’s track, and select the Creative > Guitar Reverse preset. This gives the sound an ethereal tail that adds a mysterious touch to the proceedings.

To balance this track with the other elements, set it to -4 dB.

5. Master your beat
We now have a four-bar loop that sounds polished, is punchy and weighty, and has plenty of vibe and atmosphere. We want it to sound loud too, so before we call it a day let’s apply some quick mastering. Add Ozone 10 Maximizer to your master channel, and select the Fast and Edgy preset.

Now pull down the Threshold until you’ve got a loud sound that’s not audibly distorted. A Threshold of -6 dB will give you a decent volume level.

And here is what our mastered beat sounds like.
Start making trap beats today
Here we’ve analyzed the common elements of trap beats, looked at how you can get a collection of suitable instruments and effects together, and ultimately make, mix and master your own beat.
If you’d like to learn more about this subject check out our master guide on how to make a beat.
We’ve also worked with Lex Luger to build a cinematic trap beat.
And if you would like to dive even deeper, we have some free KONTAKT libraries for your beats.
For instruments and effects you might find useful, be sure to take a look at BATTERY 4, MASSIVE X, 40’S VERY OWN KEYS, KONTAKT 7, CRUSH PACK, MOD PACK, RAUM and iZotope Ozone 10.
Related articles
-

Behind the synth: A. G. Cook on stacked sawtooths and the creation of Super*Saw
Explore the extremes of stacked sawtooth waves with Super*Saw, a new synthesizer co-created with A. G. Cook. Learn how to…
-

Inside the evolution of orchestral sampling: an interview with ProjectSAM
Discover how ProjectSAM’s Lineage Series uses NKS and smart features to change orchestral sampling. Plus, save on instruments in our…
-

How New Constellations turn emotion into sound with Massive X
Go inside the studio with New Constellations. Learn how they use Native Instruments gear, happy accidents, and lifelong friendship to…
-

Citizen Kain on building emotion and space with Replika
Citizen Kain explains how Replika helped shape the rhythm, tension, and emotion behind his debut Eversun Records single “Moments.”…
-

The organic precision behind Calcou’s Anjuna release featuring Reaktor
Calcou shares how Reaktor, Monark, and Super 8 shaped the creative balance and live energy behind their new duo EP,…
-

14 NKS instruments that will change the way you create music
Discover 14 NKS instruments to freshen up your workflow. From lo-fi tape synths to cinematic strings, shop the Native Instruments…
-

Parallelle on crafting living basslines with Reaktor and TRK-01
Parallelle share how Reaktor and TRK-01 shape the bass and warmth in 11th Avenue, balancing analog depth with modern control.
-

Where will your sound lead you? Explore the Native Instruments Summer Sale
Save 30% on instruments, effects, and sounds in our Summer Sale. Find the tools to keep your tracks moving and…