


Jersey club is an uptempo fusion of house and hip-hop that has much in common with regional underground styles of US dance music such as ghetto tech and booty house including big beats, stuttered vocal samples, and a preponderance of bass.
In this tutorial, we’ll be exploring the origins of Jersey club music, what makes it so unique with its bouncy beats and call-and-response elements, and how to make Jersey club music yourself using Komplete Kontrol, Kontakt, Massive X, Rudiments and Higher Place Expansions, as well as iZotope Ozone that sounds like this:
Jump to these sections:
NEW: Get the sound of Jersey club music with Jersey Ride, an Expansion featuring 50 Maschine kits, 59 Battery kits, 32 Massive presets, 656 loops, and 214 one-shots.
What is Jersey club music?
Jersey club takes heavy inspiration from Baltimore club music, and you can hear the roots of Jersey club in tracks by ‘90s artists such as Tapp. It is characterized by its upbeat and energetic tempo, typically around 130-140 BPM (beats per minute), and distinctive rhythmic patterns.
Jersey club tracks are overwhelmingly based on one particular Baltimore club-inspired rhythm. This signature kick drum pattern consists of two quarter note kicks, followed by two dotted eighth note kicks and finally an eighth note. You can hear this kick pattern in DJ Frosty’s Jersey club anthem “Ride That Wave.”
Many Jersey club tracks are reworks of popular songs in adjacent genres such as RnB, hip hop, and house music.
More recently, Jersey club has become an influence on more mainstream genres such as trap and drill music.
Jersey club has deep roots in dance culture, with dance battles being a prominent aspect of its scene. Dancers showcase their skills to the music’s rhythmic patterns, contributing to the genre’s visual appeal.
The genre has gained a dedicated following in the East Coast of the United States. It continues to evolve and adapt, incorporating influences from various music genres while maintaining its distinct characteristics.
What does Jersey club mean?
Jersey club is a regional style of US dance music originating in Newark, New Jersey. It’s an uptempo blend of house and hip-hop with pounding kick drums and catchy vocal samples. Originally an underground style pioneered by the likes of the Brick Bandits’ DJ Tameil, more recently it has become an inspiration for popular trap and drill artists.
How to make Jersey club music
1. Create a drum beat
Start by setting your audio editing software’s project tempo to 142 BPM.

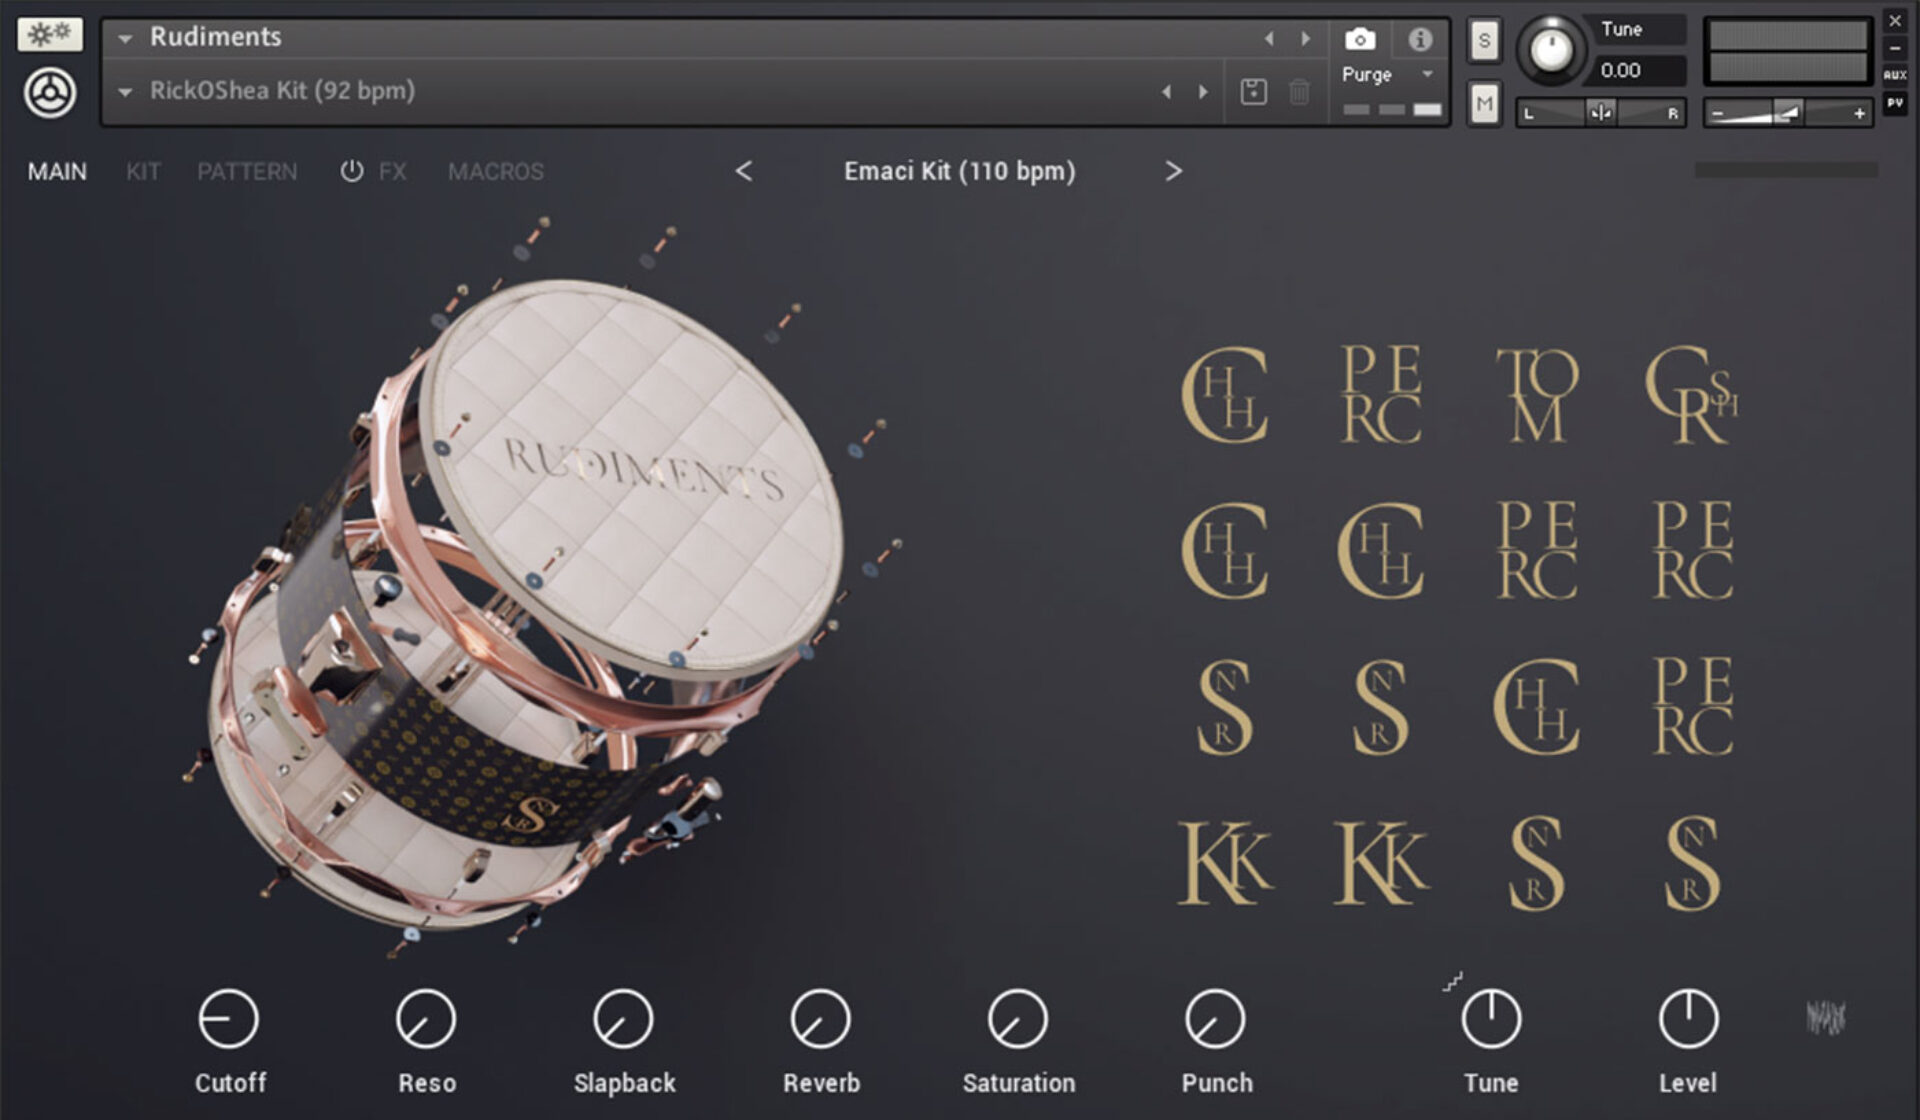
Make a MIDI track with Kontakt or Kontakt Player on it. Click the Rudiments library to open it, and double-click the Emaci Kit (110 BPM) to load it up.
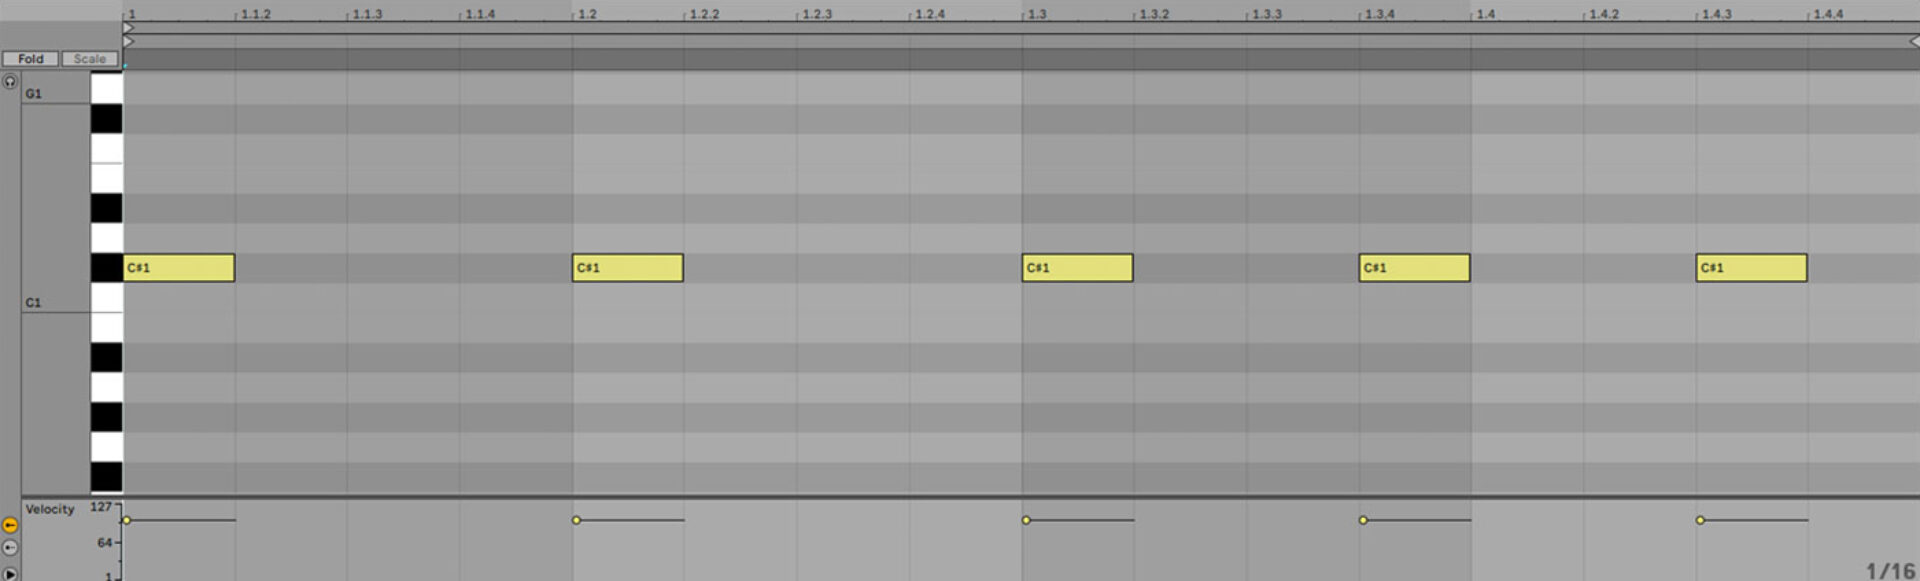
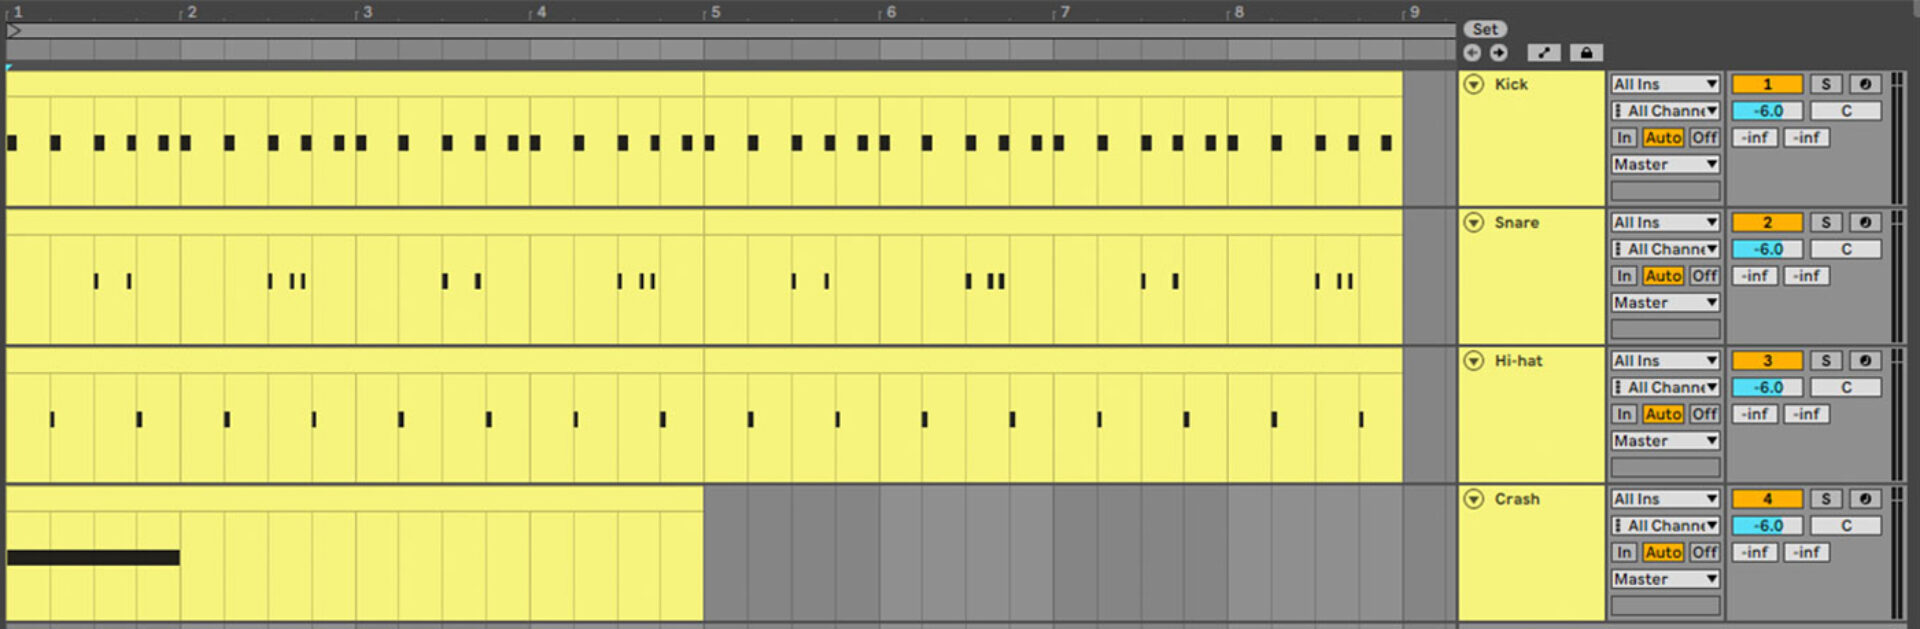
Sequence the C#1 kick drum to play on the first, fifth, ninth, twelfth and fifteenth 16th notes. We’re going to use a velocity value of 100 for all these notes, and everything else in this tutorial unless otherwise specified.
The kick drum sound we’re using is quite 808-like and has a lot of low end. We’re going to use a separately pitched 808 bass in this project, so let’s take out some of the kick’s low-end to make room for it. Set the kit’s Cutoff parameter to 16.6%. This high-pass filters the kit’s output, thinning out the sound slightly and making room for a big 808 bass.
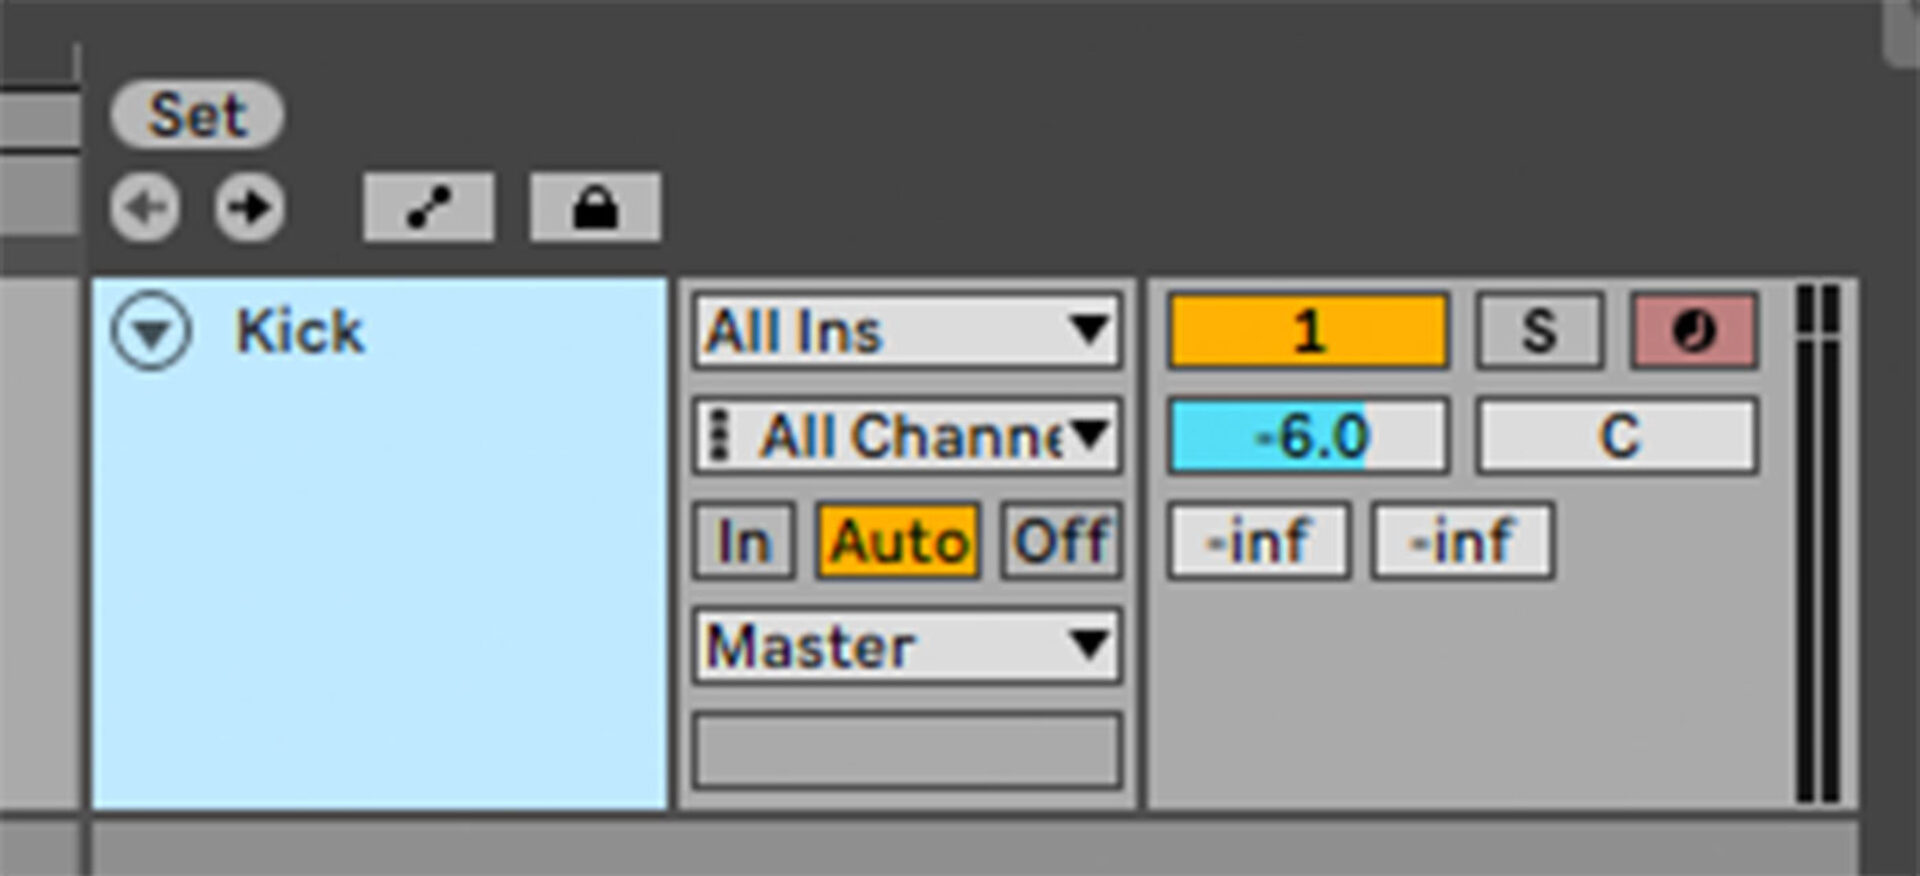
We’re going to add further drum sounds on separate tracks, which makes it easier when it comes to creating an arrangement. First, turn the MIDI track’s Volume down to -6dB to give us more headroom to add other elements to the mix.
Duplicate the MIDI out so that it plays for four bars.

Now duplicate the kick track, and replace the MIDI on the new track with this pattern, which plays E1 snares on the ninth and twelfth 16th notes of the first and third bar, and the ninth, eleventh and twelfth 16th notes of the second and fourth bars. The notes on the eleventh 16th use a velocity of 84 to make them a little quieter.
Make another duplicate of the track, and this time replace the MIDI with C2 closed hi-hats on the second and fourth beat of each bar.

Duplicate the track once more, and this time just play a D#2 crash cymbals on the first beat of the first bar.

Now we have a solid rhythmic foundation to build the rest of our track on.
2. Make a bass line
Many Jersey club tracks just use an 808 kick played at a single pitch to provide their low-end, whereas others use pitched 808 to create a bass line. In this tutorial we’re going to use a pitched 808-style sound to create a bass line.
First, duplicate out the kick, snare and hi-hat MIDI to make a sequence that’s eight bars long.
Now create a new MIDI track, and load Massive X up on it. Open the instrument’s browser, click the Bass tag to select it, then double-click the Essential Eight preset to load it up.

Set this track to -8.5 dB to balance it with the other elements.

Copy the bass line pattern we’ve used here, which uses the same rhythm as the kick drum pattern, but playing F2 notes instead. The pitch switches to G#2 for bar five and G2 for bar six.

3. Add a lead synth
Let’s complement this bass line with a simple lead line. Add another MIDI track with Massive X on it, and this time select the Synth Pad tag and double-click the Beta Breath preset to load it up.

This preset has a cool vocal quality to it, but it’s quite loose and has a lot of reverb on it. In the Amp Envelope panel, turn the A (Attack) and R (Release) knobs down to their minimum level.

Now in Massive X’s effects panel select the Y Verb effect, and set the Mix parameter to 20%.

This gives us a much tighter sound, which is more suitable for playing a lead line with.
Set this track to -8.7 dB.

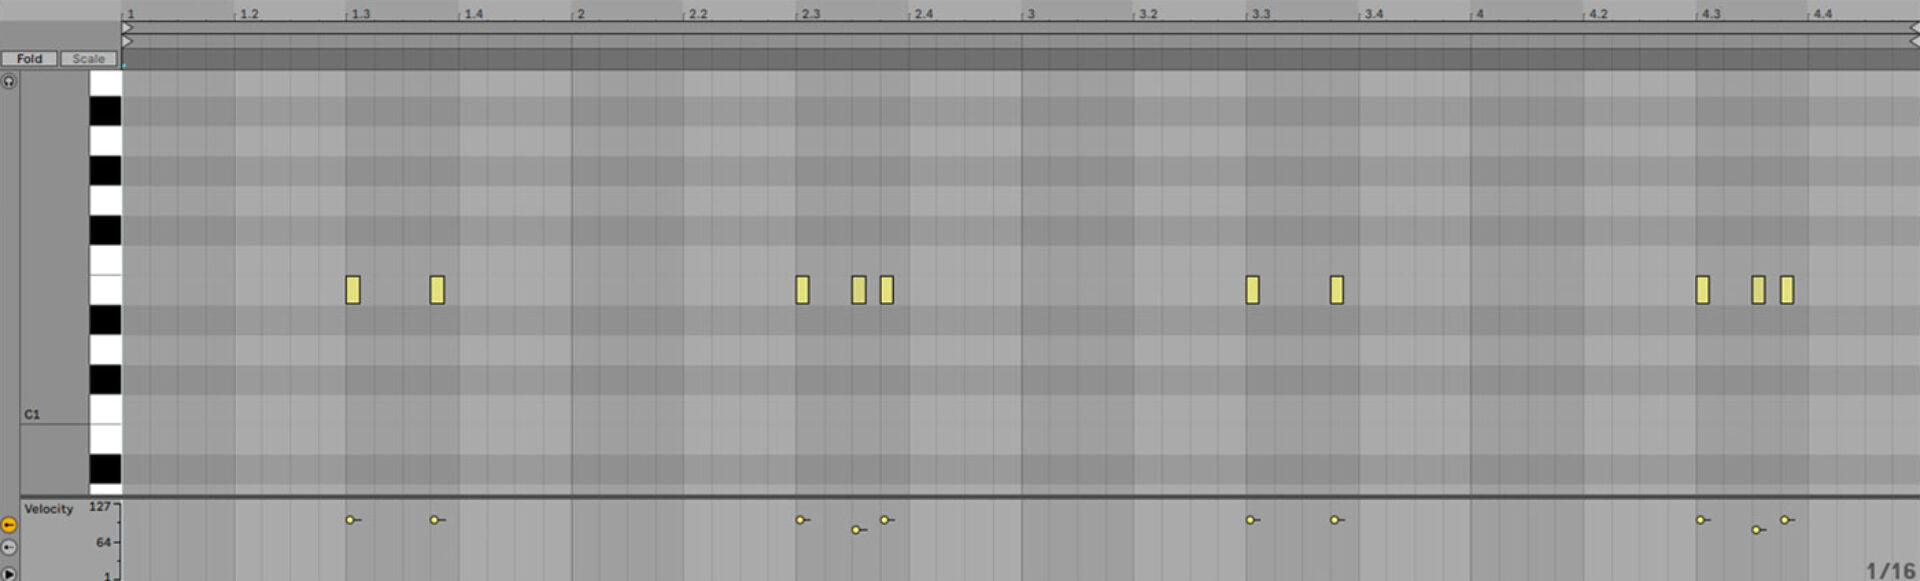
Now copy the lead line we’ve used here, which follows the rhythm of the kick drum minus the last note of each bar. This plays on F3 and F4.

4. Sprinkle ear candy
We now have the main elements of our track, but let’s add some extra “ear candy” sounds that will help us create a more compelling arrangement.
Add a new MIDI track, and this time load up Komplete Kontrol. Click the One-shots button.

In the text search field, enter “voc gardens.” Double-click the Voc Gardens one-shot to load it up.

Set this track to -5 dB.

Copy the two-bar pattern we’ve used here, and loop it out for eight bars. This pattern comprises C3 notes on the third and seventh 16th notes on the first bar, and the third, fourth and seventh 16th notes on the second bar. The fourth 16th on the second bar has a velocity of 68, which makes it play more quietly.

Add another Massive X track, and this time select the Sound Effects tag, and load up the Counting Comets preset.

Set this track to -8.5 dB.

Sequence this to play F2 on the last bar.

Add one final Massive X track, and this time select the Multitrack tag, and double-click the Mystic Vision preset to load it up.

Set this track to -11.5 dB.

Sequence this preset to play F3 for four bars, followed by F2 for four bars.

Now we have all the elements we need for our jersey club track, let’s make an arrangement.
5. Arrange your track
Here’s the arrangement we’ve used for this project, which is very straightforward.

Elements are added every eight bars to keep things interesting, with the vocal and lead tracks dropping out on bar 41 to provide some variation. They are swapped back in for the sequence track on bar 49, and after that elements are removed every eight bars to help the track wind down.
6. Master your track
Add iZotope Ozone to the master track, and click the Assistant View button.

Ozone will ask you to play back the loudest part of the track. Play back from bar 33, and the plugin will create a custom mastering chain for your project. Change the Target to EDM for a bassier result that works well with a Jersey club track.

Here’s what the Jersey club track sounds like mastered.
Start making Jersey club music
Here we’ve seen how you can make your own Jersey club track from scratch. As you continue to hone your skills and explore the potential of this genre, don’t forget to keep the dancefloor in mind, for Jersey Club music is all about making people move and groove to the beat. If you’d like to read more check out Behind the beats – top tips for producing drums and 7 drum patterns every producer should know.
Related articles
-

Inside the evolution of orchestral sampling: an interview with ProjectSAM
Discover how ProjectSAM’s Lineage Series uses NKS and smart features to change orchestral sampling. Plus, save on instruments in our…
-

How New Constellations turn emotion into sound with Massive X
Go inside the studio with New Constellations. Learn how they use Native Instruments gear, happy accidents, and lifelong friendship to…
-

Citizen Kain on building emotion and space with Replika
Citizen Kain explains how Replika helped shape the rhythm, tension, and emotion behind his debut Eversun Records single “Moments.”…
-

The organic precision behind Calcou’s Anjuna release featuring Reaktor
Calcou shares how Reaktor, Monark, and Super 8 shaped the creative balance and live energy behind their new duo EP,…
-

14 NKS instruments that will change the way you create music
Discover 14 NKS instruments to freshen up your workflow. From lo-fi tape synths to cinematic strings, shop the Native Instruments…
-

Parallelle on crafting living basslines with Reaktor and TRK-01
Parallelle share how Reaktor and TRK-01 shape the bass and warmth in 11th Avenue, balancing analog depth with modern control.
-

Where will your sound lead you? Explore the Native Instruments Summer Sale
Save 30% on instruments, effects, and sounds in our Summer Sale. Find the tools to keep your tracks moving and…
-

How Mr. Bill builds sonic worlds in Massive X
Mr. Bill explains how Massive X and instinctive sound design shaped the storytelling process behind his new downtempo album, Mr.