


If you’re new to music-making and are looking for free music software, Komplete Start is a great place to begin. All you need is a DAW, and Native Instruments Komplete Start will provide you with all the beats, loops, instrument sounds, and effects necessary for you to create awesome music.
In this guide, we’ll show you how to make music for free with NI Komplete Start software, including the new Massive X Player and Kontakt’s new Leap, Chords, and Patterns Tools.
This tutorial will focus on creating an emotional ambient jungle track, which is an ideal way to show off Massive X Player’s immaculate synth tones and Kontakt’s wide variety of drum beats and instrument presets.
Jump to these sections:
- Is Komplete Start completely free?
- What is included in Komplete Start?
- Making a song with Komplete Start
- Start making songs for free with Komplete Start
To follow this walkthrough, you’ll need Massive X Player, Kontakt 8 Player, Leap Acoustic Drums, Kontakt Factory Selection 2, Hypha, Ethereal Earth, Analog Dreams, Raum, and iZotope Ozone EQ, all of which are included with Komplete Start.
Is Komplete Start completely free?
Komplete Start is completely free to use. It’s designed to serve as an introduction to Native Instruments’ range of industry-leading virtual instruments and effects, and offers a broad array of sounds and processing tools to get you started.
What is included in Komplete Start?
Komplete Start includes a wealth of instrument plugins: Massive X Player with the Bass Music Essentials expansion, Kontakt 8 Player with Lo-fi Vibes and Acoustic Drums Leap expansions, plus Analog Dreams, Hypha, Ethereal Earth, Jacob Collier Audience Choir, Irish Harp, Yangqin, and Factory Select 2 instruments.
Its effects include Raum, Guitar Rig 7 Player, iZotope Trash Lite, Supercharger, and Replika, plus iZotope Vinyl, Ozone Imager, and Ozone EQ.
Making a song with Komplete Start
Let’s show off how to make music for free with Komplete Start.
1. Beginning with a drum beat
Let’s start by setting our project tempo to 160 BPM.

Setting the project tempo to 160 BPM
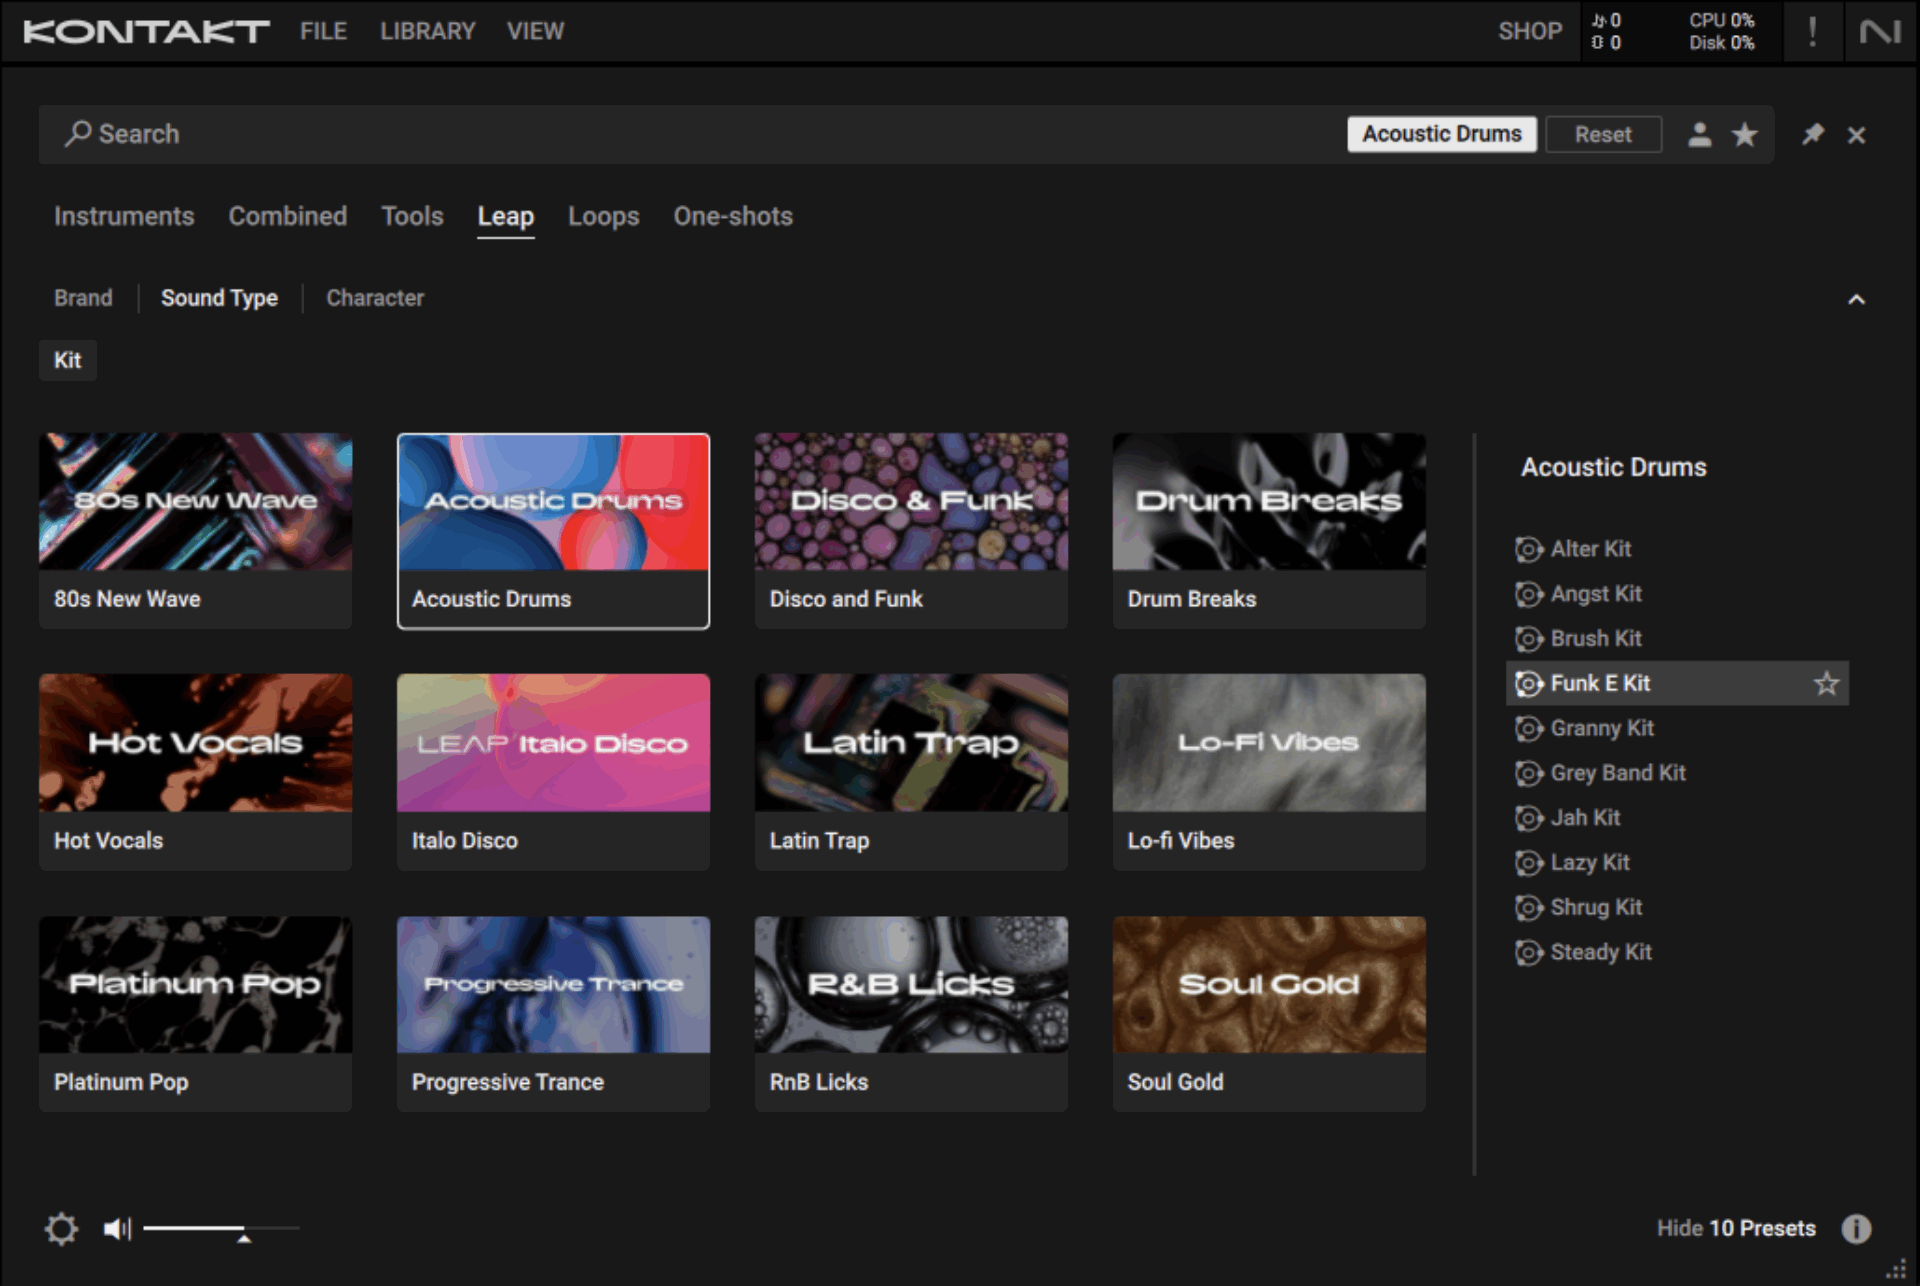
We’ll begin by making a drum beat that we can use as a foundation for our track. Load up Kontakt on a MIDI track, then click Leap and select Acoustic Drums. Leap is a live sample-based performance tool designed for real-time jamming in Kontakt.
Double-click Funk E Kit in the list of Leap presets on the right to load it up.
This kit gives us a selection of drum loops. Let’s sequence D4 to play on every bar for four bars. We’ll use velocity values of 100 for everything in this tutorial unless otherwise specified.

Let’s develop this drum beat with another layer. Add another MIDI track, and this time load up the Angst Kit from the Acoustic Drums Leap expansion.

This time, sequence three bars of G3 followed by a bar of A3.

Our beats are clashing a bit in the low-end, so let’s use an equalizer to help us out. Add iZotope Ozone EQ to the Angst Kit track. Put your cursor over the EQ curve and click the + icon at around 2 kHz.

Click the EQ band’s information panel where it says Bell, and select the High-Pass > Flat shape instead.

Now double-click the Slope parameter and set it to 6 dB.

Taking out the Angst Kit’s low-end gives us a cleaner sound.
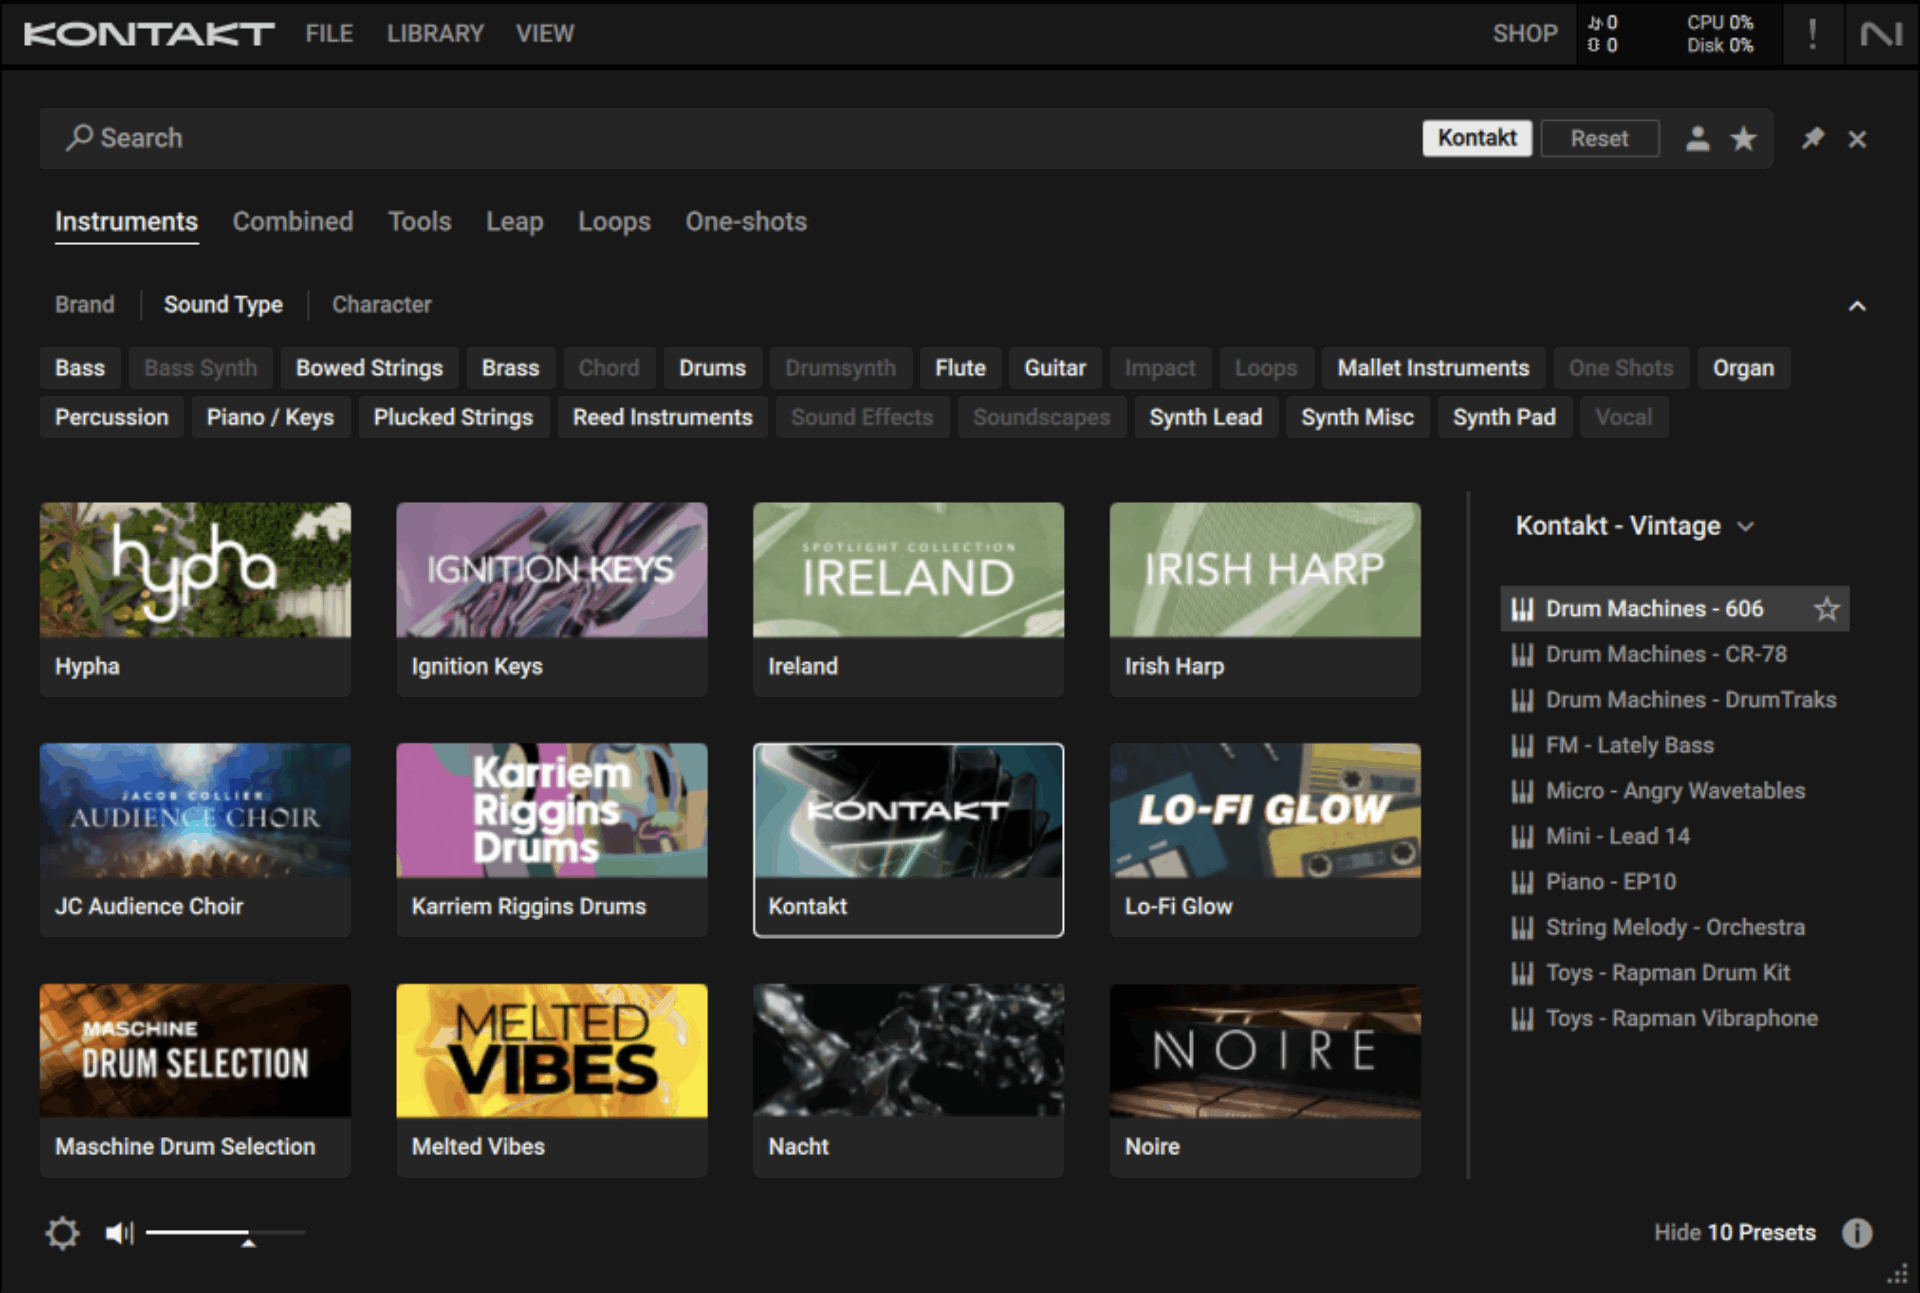
Next, we’ll add a snare sound to beef up our beat a little before we move on. On a new track, load up Kontakt. This time, select the Kontakt library, and set the Bank to Vintage. Double-click the Drum Machines – 606 preset to load it up.
The 606’s snare is on D2. Sequence this to play on the second and fourth beat of each bar.

This adds a little weight to the snare, and we’ve got a rolling beat that’s ready for some music.
2. Creating chords
Let’s use Kontakt’s Chords Tool to create a chord progression.
Kontakt’s Chords and Phrases are beginner-friendly tools designed to help you create chord progressions and instrument parts more quickly and easily.
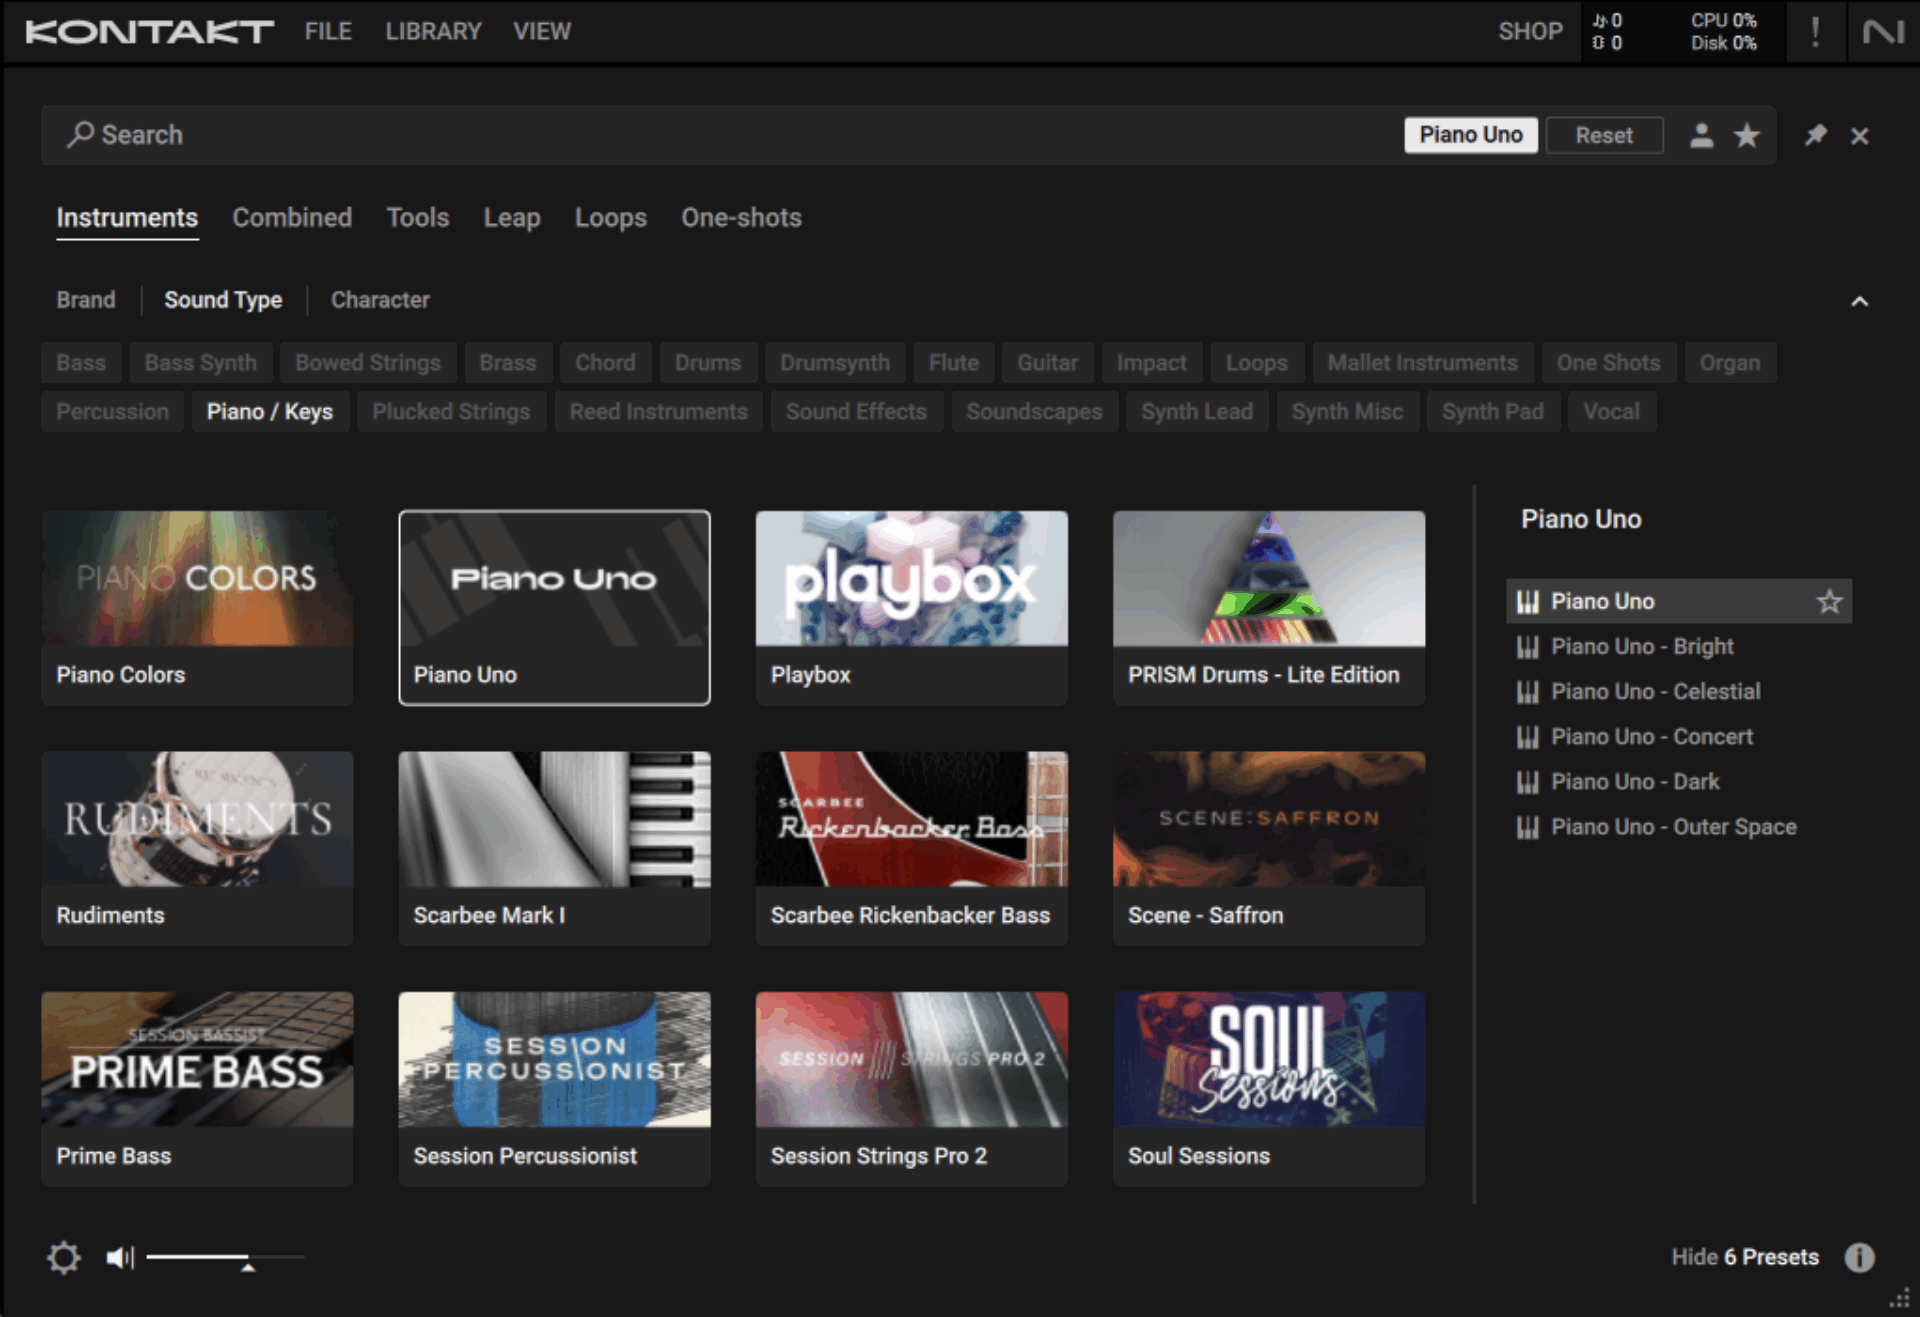
Load up Kontakt on a new MIDI track, and this time select the Piano Uno instrument. Double-click the Piano Uno preset to load it up.
Now, in the panel on the left, select Tools, and select the Chords Tool. Double-click the Chill preset to load it up.

This gives us a set of seven predefined chords to play with. We can play them with MIDI notes C-B, so let’s sequence a soulful eight-bar chord progression.

Let’s duplicate our four-bar beat so that it lasts for the full eight-bar chord progression.

Duplicating the beat
Here’s how they sound together.
That sounds cool, but it would be great if we could use a Massive X Player synth sound instead of the simple Piano Uno preset. Thankfully, we can!
The Chords Tool allows you to drag and drop each chord onto a MIDI track, so we’ll use that feature to create a MIDI clip we can use to play any instrument. Drag out the first pad onto a new MIDI track, and it’ll make a new MIDI clip.

Now drag the fifth, third, and fourth chords out to create the first part of the chord progression.

Now drag and drop the first, fifth, seventh, and sixth chords to complete the chord progression.

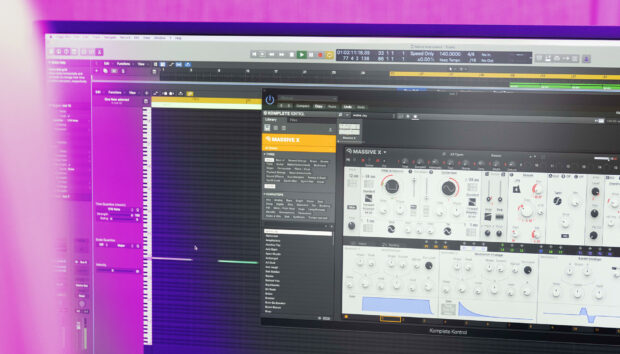
Onto this MIDI track, add an instance of Massive X Player, and double-click the Gaelic Chimes preset to load it up.

This gives us a more ethereal chord progression, which is a great fit for our track.
That’s worked out great, so let’s delete the Piano Uno and Chords Tool track as its job is done.

Let’s hear the beat and Gaelic Chimes chord progression together.
The chord progression is overwhelming the beat in the mix, so let’s turn it down to -9 dB.

Now that we have a chord progression, let’s write a bass line.
3. Making a bass line
Add another MIDI track with an instance of Massive X Player, and this time load the Rounded Boy preset.

Set this track to -10.3 dB.

Copy the four-bar bass line we’ve used here, and loop it out so that it plays for the full eight-bar chord progression.

Simple, but effective. Let’s move on to making a lead line now.
4. Composing a lead line
Let’s use a different instrument to make our lead line. On a new MIDI track, load up Kontakt, and select the Hypha instrument. Double-click the Applied Chemistry preset.

Copy this lead line, which plays over eight bars.

This preset has its own built-in reverb, but as we have the powerful Raum reverb in our toolkit, let’s take that for a spin. First, in Kontakt, click the FX button to bring up Hypha’s FX page.

Now click the Convolution effect’s power button to turn it off.

Now the preset will sound drier.
Now add the Raum reverb after Kontakt, selecting the Large > Disintegration preset.

This gives the Applied Chemistry preset a huge, rich reverb tail.
Set this track to -5.3 dB.

Let’s listen to everything together.
Now that we have a lead line, let’s make a counter melody.
5. Creating a counter melody
Add a new MIDI track with an instance of Kontakt, this time selecting the Ethereal Earth instrument and the Airy Bells preset.

Copy the four-bar pattern we’ve used here, using velocities of 100 for the high G#5 notes, and 62 for the other notes. Loop this part up so that it plays for the whole eight bars.

Turn down the Airy Bells’ Echo knob to 0.

Now add Raum, selecting the Large > Dreamy Synth preset.

This helps the Airy Bells preset sound much more atmospheric.
Set this track to -18.3 dB.

Now let’s hear everything in context.
We’ve got a great complement of elements here, but to give us more material for our track arrangement, let’s add a few more sounds.
6. Making a rhythm synth
Add another MIDI track with Kontakt, and this time select the Analog Dreams instrument. Double-click the Grass Brain preset to load it up.

We’re going to use Kontakt’s Patterns Tool to play this sound, which will automatically make it rhythmic. Click the Tools button in the menu on the left, and select the Patterns Tool.

Double-click the Pillars preset to load it.

Sequence an F# minor chord to play for the whole eight bars.

The Patterns tool preset plays the sound rhythmically.
Add Raum to the track, selecting the Medium > Guitar Rehearsal preset. This adds an element of space to our sound design.

Now set this track to -11.8 dB.

Let’s hear this sound with the other elements.
7. Adding a stab
Add a MIDI track, and this time load up Massive X Player. Load Beyond The Corner from the list of presets.

Let’s sequence this to play F#2 stabs at the start of the first and fifth bars, with an A2 and B2 at the end of the clip.

If you keep up the instrument’s interface when you play this part back, you’ll see that the Animator modulation source controls all of the macros at the bottom of the screen.

Let’s tweak this modulation a little. First, click the centre-leftmost modulation shape to change the movement of the modulation source.

This gives us a simpler movement, resulting in a less busy sound. Let’s also turn off the Reverb level modulation by clicking the orange button above the macro, and turning the macro all the way down.

Let’s add some custom reverb via Raum. Add Raum to the track and select the Large > Cosmic Keys preset.

Now set the track to -6 dB to balance it with the other elements.

Here’s how this part sounds in context.
Now that we have an abundance of elements, let’s arrange our track.
8. Making an arrangement
Copy the arrangement we’ve used here.

This starts with the rhythmic synth, and gradually adds elements until the main drums and bass drop on bar 25.
Just before this, the beats drop out, and we have a little teaser of the stab to help segue into the drop.

The arrangement continues to add or remove elements every eight bars to keep things interesting.
Start making songs for free with Komplete Start
In this tutorial, we’ve shown you how it’s possible to use just a few of Komplete Start’s powerful instruments and effects to make your own music for free.
Related articles
-

Behind the bounce of Millennium Hip Hop: a conversation with Snipe Young
Get production tips from GRAMMY-winner Snipe Young. Discover how to capture the legendary Virginia Beach sound with the new Millennium…
-

Marco Polo on crafting the ultimate boom bap drum instrument
Legendary producer Marco Polo discusses the creation of his new Play Series instrument, translating three decades of hip hop into…
-

How to write moving, emotional melodies in 5 steps
Learn to write moving melodies in 5 steps. From motifs to sound design with NI 360 Essentials, master evocative songwriting…
-
Afro house production 101
Learn how to make Afro house with groovy drums, evolving basslines, and Afro house production tips using Massive X and…
-

The best lo-fi plugins for making beats
Discover the best lo-fi plugins for making beats, from free emulation tools to pro sounds. Explore top lo-fi effects, synths,…
-
Statement from Nick Williams, CEO of Native Instruments
Native Instruments provides an update on its recent restructuring process.
-

How Massive helped Johnny Gorillas shape two creative worlds
Johnny Gorillas shares how mastering Native Instruments Massive shaped his solo work and his work with mono sky, creating consistency…
-
The best sound design plugins from Native Instruments
Discover the best sound design plugins for music, film, and games, including top synths, effects, and creative tools from Native…