


When we think of our favorite game, we might think first of its graphics or gameplay. But sound is just as crucial to a powerful gaming experience. And it’s not just the score: from power-up sounds to gunshots, whistling wind to convincing dialogue, sound design is crucial to turning a video game into an immersive world. These sounds are all created by a video game sound designer.
In this article we’ll learn more about the fascinating art and craft of video game sound design. We’ll learn what a video game audio engineer does and the skills they need to do it. We’ll look at some examples of effective video game sound design. And we’ll show you how to design sounds for video games, with the help of pro sound designer Marshall McGee.
Jump to these sections:
If you’re interested in video game sound design, we’ve put together a free sound design plug-in bundle to get you started. KOMPLETE START has over 2,000 studio-quality sounds you can download for free. It comes with 16 pro-grade synths, sampled instruments, plus effects, loops, and samples to start designing sound.
What is sound design?
Sound design is the art of creating and shaping sounds for a particular purpose. Sound designers play a crucial role in modern media. Sound design gives films their immersive effect, from the biggest explosion down to the subtlest footstep. It’s also a key part of modern music-making, and important in UX design for everything from apps to cars.
Read our Sound Design 101 for more detail on the nuts and bolts of sound design.
Sound design in video games
Sound designers are equally important in the world of video games. Put simply, they’re responsible for every sound in a game–aside from the musical score, which is made by a composer (though in small indie games, the composer and sound designer might be the same person). Sound design for video games covers everything from gunshot and spell casting sounds to dialogue, subtle underscoring, and the bleeps and clicks of menu navigation. A video game sound designer tends to be a jack of all trades.
They are also faced with some unique challenges. As pro sound designer Kat Wenske told us, “Games are a strange beast. Unlike your traditional forms of media, the user, or player, can interact and affect the overall audio experience. Every player’s sonic experience of a game is slightly different. They are in control of what and how long they might focus on an experience.”
This interactive quality means that video games can present unusual difficulties for sound designers–and inspire creative solutions. Let’s look at some examples of successful sound design in video games.
Setting the mood
Sound design is central to creating a game’s atmosphere, as Wenske continues:
“In a 3D, first-person horror game, a curious player might walk slowly in corridors, spend time investigating objects, or stay further away from combat-prone zones. The little shuffling of cockroaches, the creaking of a building’s foundation, distant echoes of impending combat–this is where the subtleties of sound design and music really shine and help set the tone and mood.”
Silent Hill 2, a classic of the survival horror genre, is renowned for its use of simple but highly emotive sound design. Small touches, such as the static of a handheld radio, build suspense and dread. Sound designer and composer Akira Yamaoka was also acclaimed for his powerful use of underscoring. His ominous ambient textures blend with the in-game sound world, making for a powerful, unsettling experience.
Creating realism
To become fully immersed in a game, you have to believe in its world. Video game sound design is crucial in fostering this belief. In racing games, this hinges on one sound: the engine. An effective engine sound should convey speed, power, and the adrenaline rush of the race. It needs to be detailed and lifelike, responding convincingly to player actions and reflecting the world in which the game is set.
Loïc Couthier, supervising sound designer at Playstation Europe, walked us through how he used Native Instruments’ MASSIVE synth to make the engine sounds for the Omega Collection, a remaster of the classic WipEout games. He explained each step in the process, from selecting pitch and oscillator type to modulation and effects–ending up with a convincing, adrenaline-boosting result.
Shaping iconic moments
Sound design can be complex, but it can also be dead simple.
Players of the Zelda games hold a special place in their heart for the “puzzle solved” sound effect: an eight-note figure that rings out when you complete one of the game’s challenges.
This delicate chiming refrain signals some of the Zelda games’ most rewarding moments, and captures the franchise’s sense of wonder and playfulness. It’s a great example of how effective sound design can become entwined with a game’s cultural impact. It also shows that sound design needn’t be rocket science. Sometimes, a few well-chosen notes will do.
How to design your own video game sounds
So, you want to start designing your own video game sounds?
Marshall McGee can show you how. In a video for Native Instruments, this YouTuber and top game sound designer walks through the process of creating a convincing magical fireball.
As Marshall says, you don’t need sophisticated video game sound design software. All you need are some basic tools, which includes some free samples, a few basic plugins, and a DAW.
Let’s get started.
1. Plan your sound
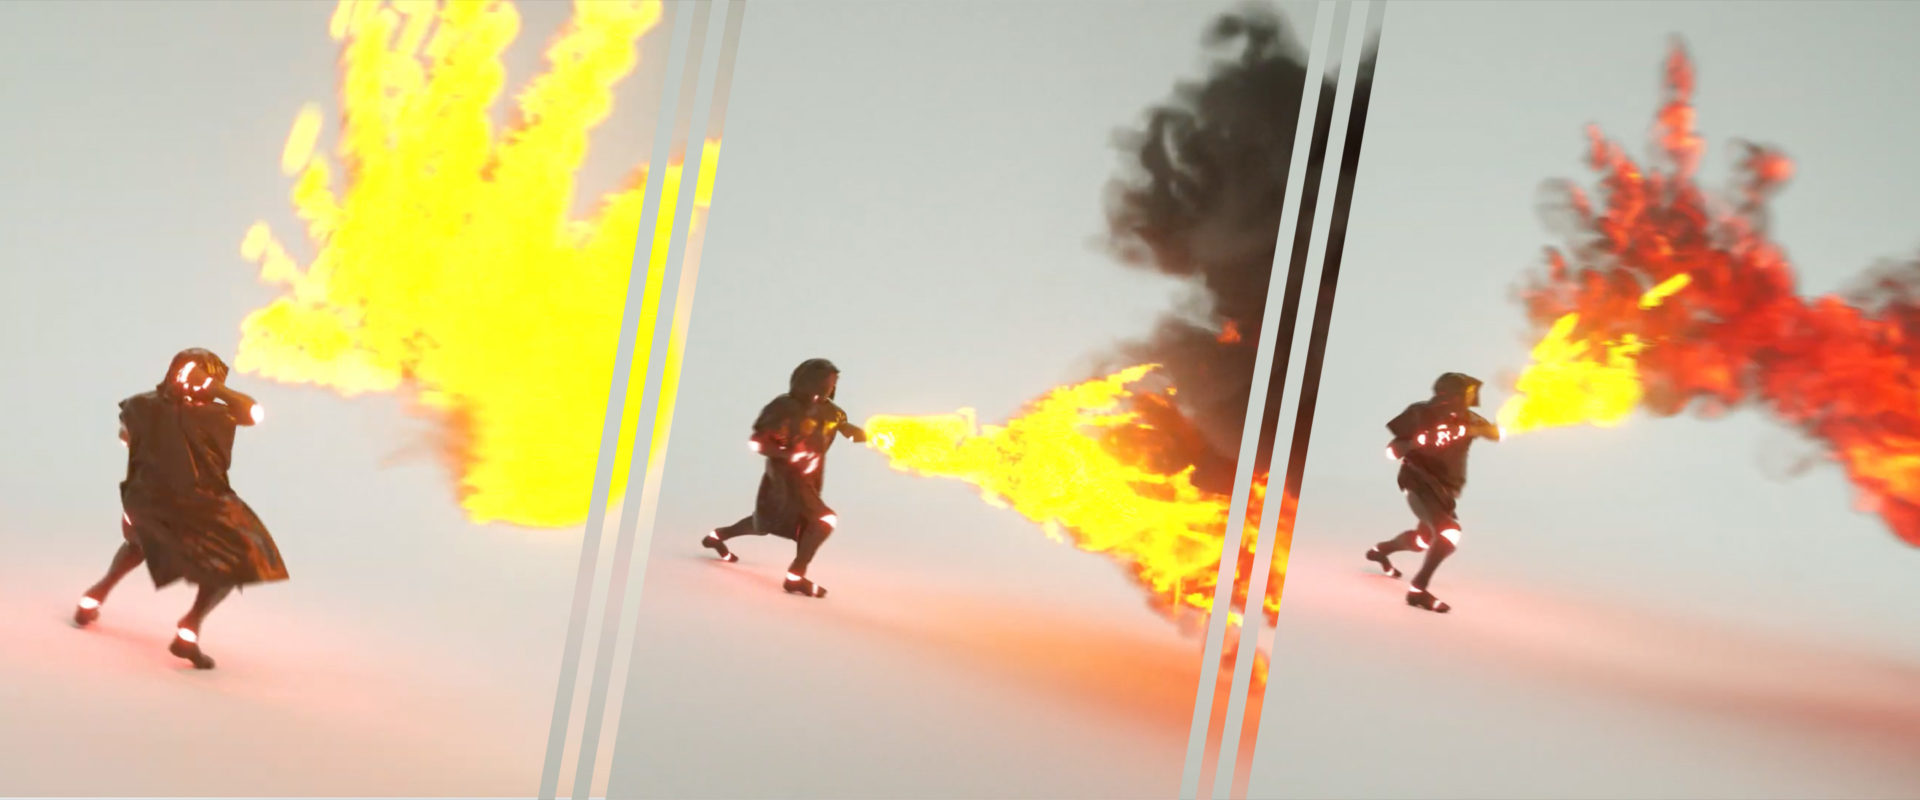
First, let’s take a look at the animation we’re working with: a short clip of a spellcaster launching dramatic fireballs.
We should start by itemizing the sounds the clip needs. These fall into two main groups: the fireball itself, and “foley” sounds such as footsteps and clothing movements.
We can break these sounds down further. The animation features several distinct explosions, with a series of rapidfire shots in between. Each of these events will need their own sound. And each of these sounds might consist of several sonic components, such as: a sharp, impactful attack; a rumbling explosion-like sound; some sizzling hi-end; and so on.
Our foley group could be broken down too, into individual footsteps, punching movements, etc. Make a list of all of these components, to get an idea of all of the sounds needed.
2. Gather your materials
Now we have our list of sounds, it’s time to find some sound sources.
Sound design draws on a range of tools, from self-made recordings and commercial sample libraries to from-scratch synthesis. There is no right or wrong tool: the most important thing is that you use it creatively.
In this case, we’re going to use samples sourced from sample libraries for most of our fireball sounds, as well as our foley sounds. If you don’t have a big sample library, you can start by sourcing royalty-free sounds from the internet, or recording your own sounds at home or with a portable recorder. We’ll then supplement these samples with KONTAKT instruments.
In this case we’re using KINETIC METAL to give our fireball a magical edge.
We’re also using ACTION STRIKES for some powerful impact sounds; and the Fire Swoosh preset in RISE & HIT for a further layer of fiery effects.
3. Capture your audio
Now that we have our sound sources ready, let’s capture some audio.
First we’ll browse through our sample library, dropping any relevant sounds into the DAW timeline (their positioning doesn’t matter yet).
The aim is to collect different but complementary sounds, keeping in mind our “ingredients list” above. For example, when looking for fire sounds, we might look for sharp attacks, rumbling explosions, sizzling high end, and so on. This diverse palette of sounds will give us plenty of design options later.
When working with the KONTAKT instruments, simply play around until you’ve found something nice, then render it to audio so it can be quickly manipulated later.
4. Arrange your audio
Now that we have a store of captured sounds, it’s time to start laying them out on the timeline.
With the video clip loaded in the DAW, begin arranging the sounds to match the visuals.

Start with the simplest part: the footstep and cloth sounds which accompany our spellcaster’s movements.
Then move on to the more complex task: the fireball itself.
We have plenty of material to choose from here. Rather than getting overwhelmed by how it all might fit together, simply go through each sound in turn, laying it on the timeline and trying to make it work on its own. We’ll worry about the complete picture later.
When selecting and placing your video game sounds, consider these parameters:
- Timing. When does each sound hit in relation to the fireball animation, and for how long? Should we adjust audio clip fade-ins or fade-outs to match the fireball’s behavior? Which part of the sound do we want to use? Perhaps just the sharp attack, or the hissing decay?
- Pitch. Try pitching sounds up to speed up and shorten a clip. Try pitching it down to stretch it out. Adjusting the pitch of a clip can help adjust timing. In our case, pitching up our fire sound gives them a shorter, sharper feel. This works well with the rapid fireballs in the middle of the clip.
- Volume. If you want a sound to be in the foreground, boost its volume. To push a sound into the background–for instance a longer, sizzling texture that supports our shorter explosions–turn it down.
- EQ. Remove any unwanted frequencies from the sound with equalization (EQ), focusing only on those that serve a purpose in relation to the clip. For instance, our sizzling texture probably doesn’t need any low end, so let’s remove that.
5. Look at the bigger picture
Having worked on each sound individually, now it’s time to take a step back.
Let’s go through the material again, listening to all of the sounds together and gauging their effect. How do the sounds make us feel? Do they match the behavior, mood, and intensity of the visuals?
We’ll probably need to make further tweaks at this point to create a convincing overall effect. We might further adjust individual sounds, or even swap some of them out.
We might also make some changes to our sounds as a group. For instance, is the overall frequency balance right? We could use EQ to scoop out some muddy midrange, or catch some harsh higher frequencies.
6. Add some polish
Let’s finish up by applying some master processing to our sound design.
A little reverb will help spatialize the whole clip, giving it lifelike depth. Using Native Instruments’ RC 48 reverb, a bathroom-style setting suits the material, giving it a close, intense feel.

(Note: try to avoid adding reverb to your sub bass content. To keep things clean, place your audio clips with sub bass in a different channel and process them separately.)
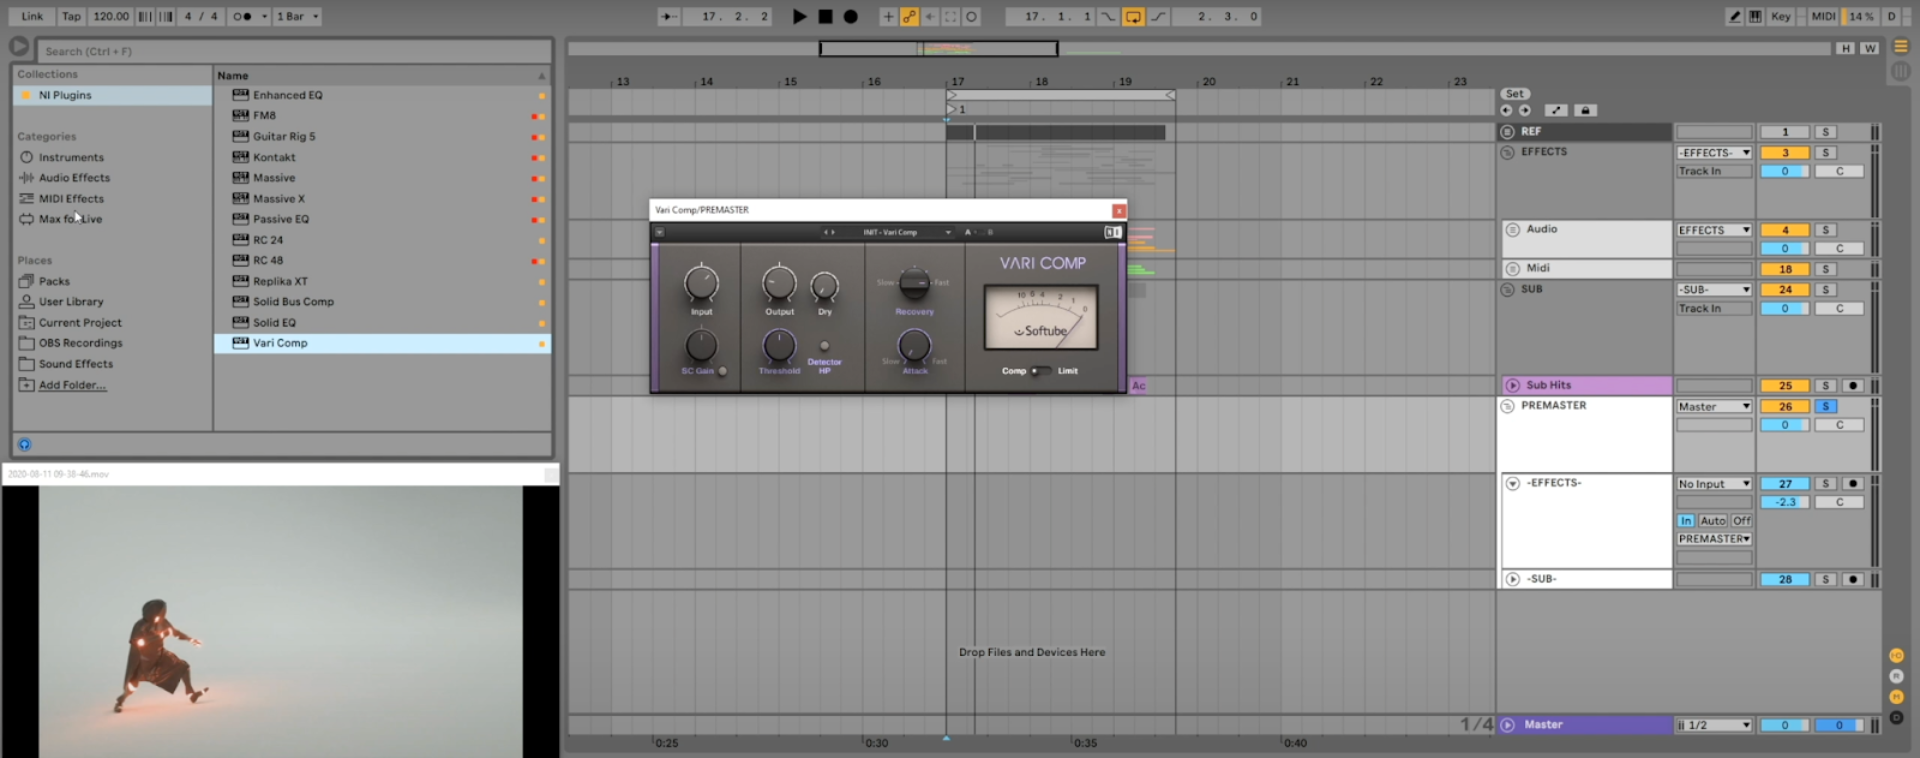
Some light compression using VARI COMP two-channel compressor will help glue the sound together, while a little limiting will boost the overall loudness.
Start designing your own video game sounds
In this article we’ve explored the fascinating world of video game sound design. We’ve learned what a video game sound designer does and looked at some examples of effective sound design. Now it’s time to start your own sound design journey.
We’ve put together a free sound design plug-in bundle to get you started. KOMPLETE START is free to download, and features over 2,000 studio-quality sounds, 16 pro-grade synths, plus sampled instruments, effects, and loops, to get you designing sound in no time.
Related articles
-

Behind the synth: A. G. Cook on stacked sawtooths and the creation of Super*Saw
Explore the extremes of stacked sawtooth waves with Super*Saw, a new synthesizer co-created with A. G. Cook. Learn how to…
-

Inside the evolution of orchestral sampling: an interview with ProjectSAM
Discover how ProjectSAM’s Lineage Series uses NKS and smart features to change orchestral sampling. Plus, save on instruments in our…
-

How New Constellations turn emotion into sound with Massive X
Go inside the studio with New Constellations. Learn how they use Native Instruments gear, happy accidents, and lifelong friendship to…
-

Citizen Kain on building emotion and space with Replika
Citizen Kain explains how Replika helped shape the rhythm, tension, and emotion behind his debut Eversun Records single “Moments.”…
-

The organic precision behind Calcou’s Anjuna release featuring Reaktor
Calcou shares how Reaktor, Monark, and Super 8 shaped the creative balance and live energy behind their new duo EP,…
-

14 NKS instruments that will change the way you create music
Discover 14 NKS instruments to freshen up your workflow. From lo-fi tape synths to cinematic strings, shop the Native Instruments…
-

Parallelle on crafting living basslines with Reaktor and TRK-01
Parallelle share how Reaktor and TRK-01 shape the bass and warmth in 11th Avenue, balancing analog depth with modern control.
-

Where will your sound lead you? Explore the Native Instruments Summer Sale
Save 30% on instruments, effects, and sounds in our Summer Sale. Find the tools to keep your tracks moving and…