


Slap House is a sub-genre of house music that originated in the early 2010s, characterized by its bouncy basslines, rhythmic claps, and stripped-back beats. It’s full of big, frequency-filling basslines, house beats and catchy hooks. In this beginner’s guide we’ll show you how to make slap house music from scratch including slap house beat programming, basslines, arrangement and mixing to create a track like this:
What is slap house music?
Slap house is a subgenre of house music originating in the 2010s. The slap house genre is characterized by big bass with a strong mid-range presence that punches through the mix, and uses relatively pared-back drum parts that allow the high-end of the kick and bass to pop. Slap house has a commercial sensibility, and often features big hooks for an accessible feel.
Slap house tracks are often remixes or reworkings of popular songs.
In this beginner’s guide to making slap house, we’ll show you how to make a slap house track from scratch, covering slap house beats, bass and chord progressions using BATTERY 4 and MASSIVE X with mixing help from iZotope Ozone 10 and iZotope Neutron 4.
How to make slap house
1. Make a beat
When it comes to making a beat, slap house is based around relatively minimal four-on-the-floor beats. Set your DAW to an appropriate slap house BPM. 125 BPM is a typical tempo for slap house: it’s energetic, but still gives our track enough room to breathe and swing.

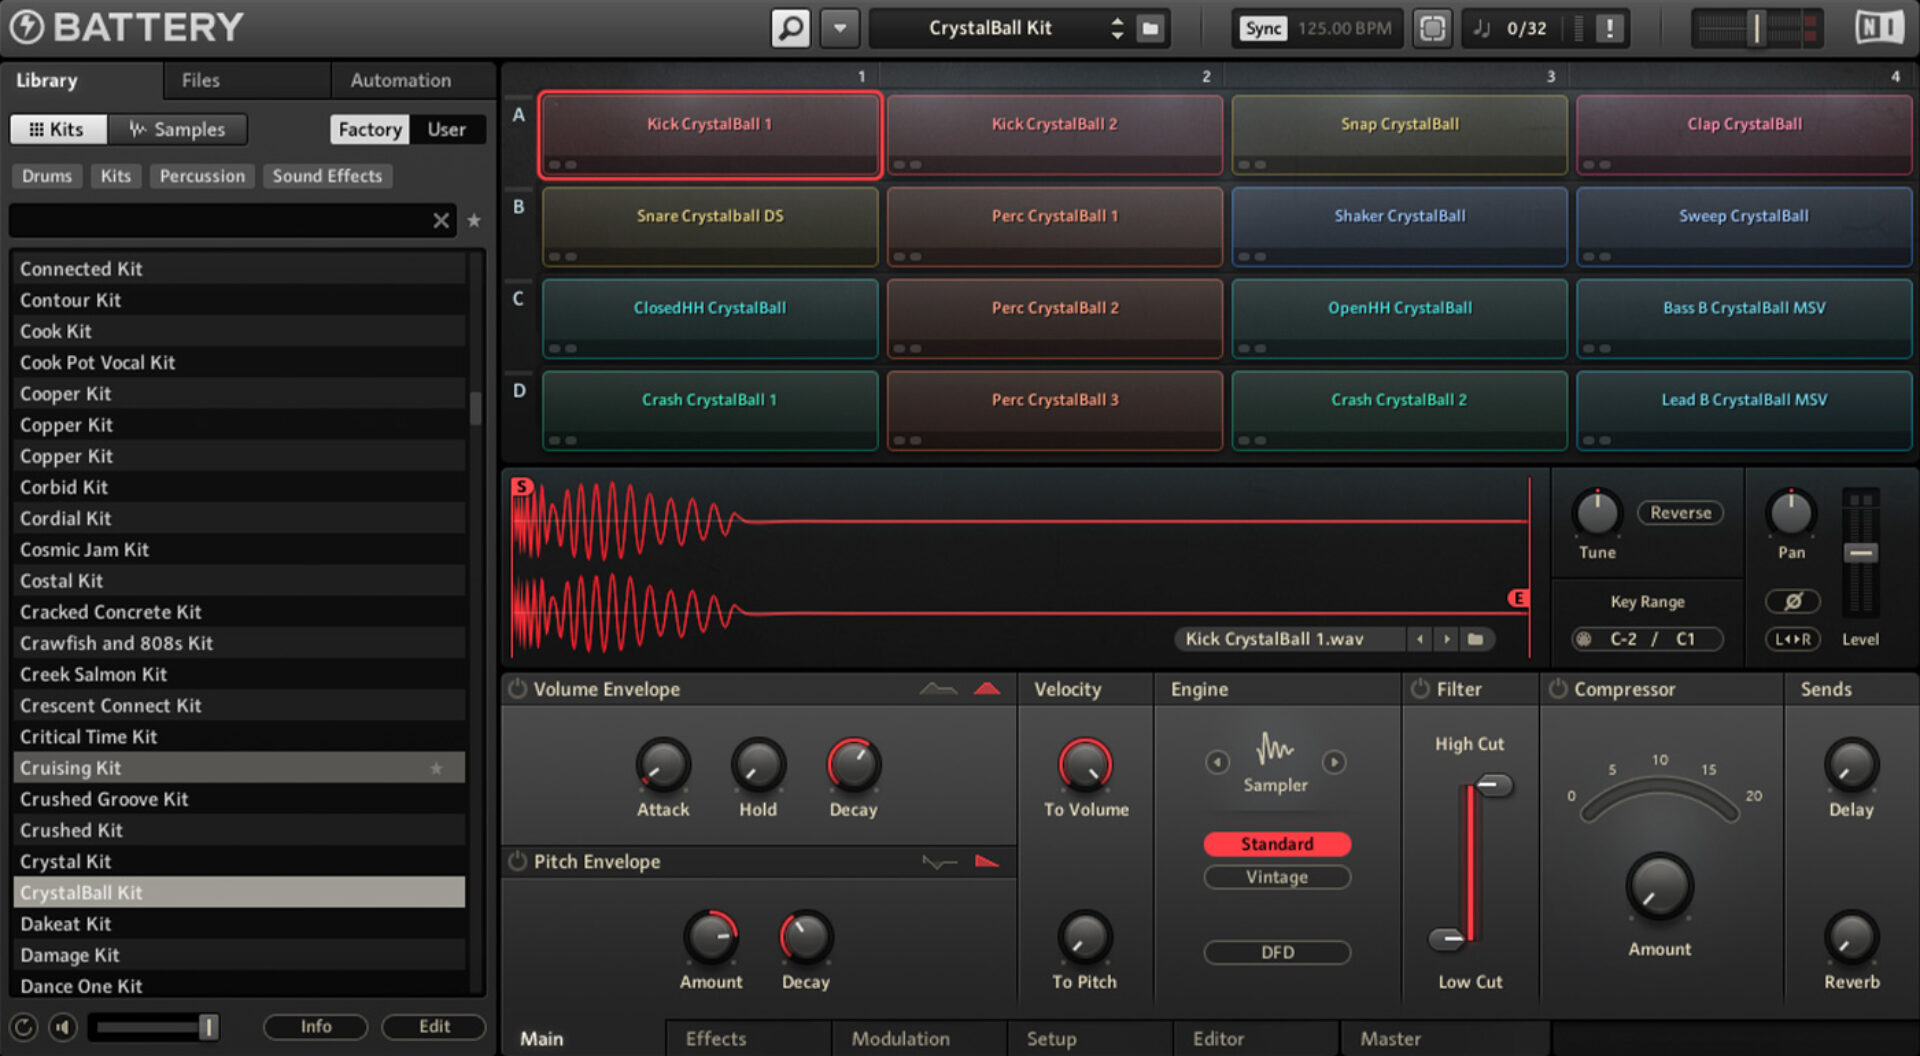
Getting the right kick drum sound is essential. We’re going to use Kick CrystalBall 1 from BATTERY 4’s CrystalBall Kit. This kick has a very solid low-end, and also a smooth yet punchy transient that makes it ideal for a slap house track. Load up the CrystalBall Kit in BATTERY 4
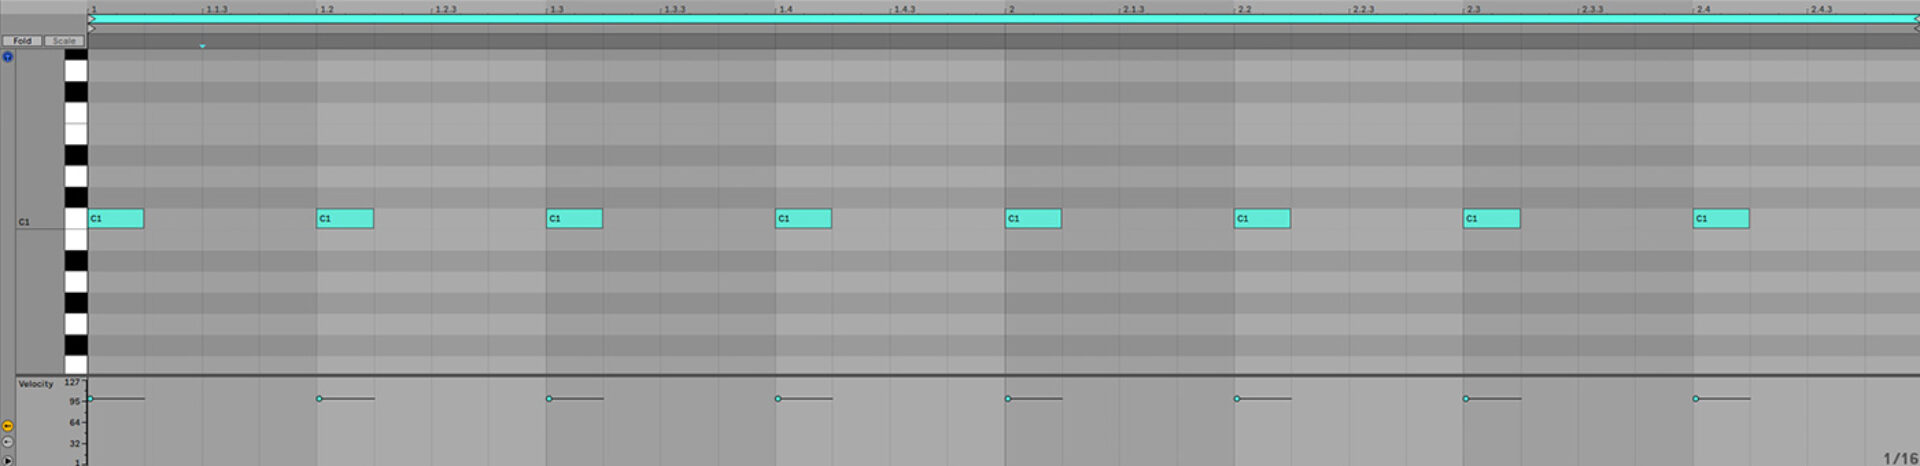
Trigger C1 notes with a velocity of 100 on every beat for two bars, and loop it out for four bars.
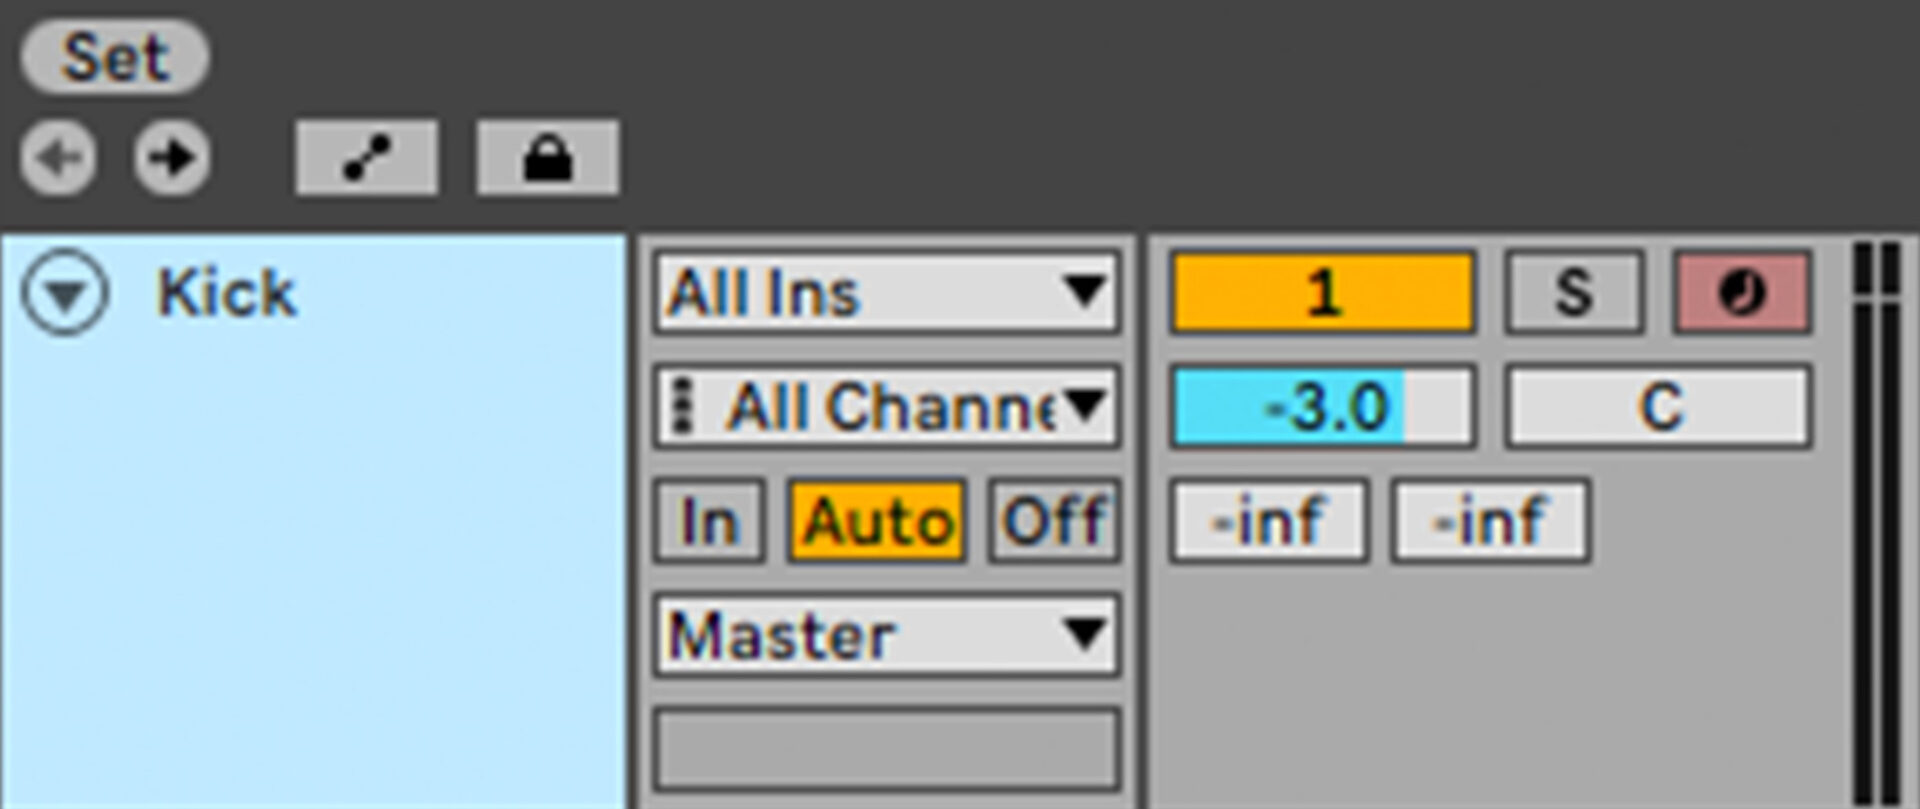
Set this track to -3 dB so that we have headroom to add other elements to the mix.
Next create an instance of BATTERY 4 on a new track, and turn it down to -3 dB as well.

This time select the Chomp Kit.

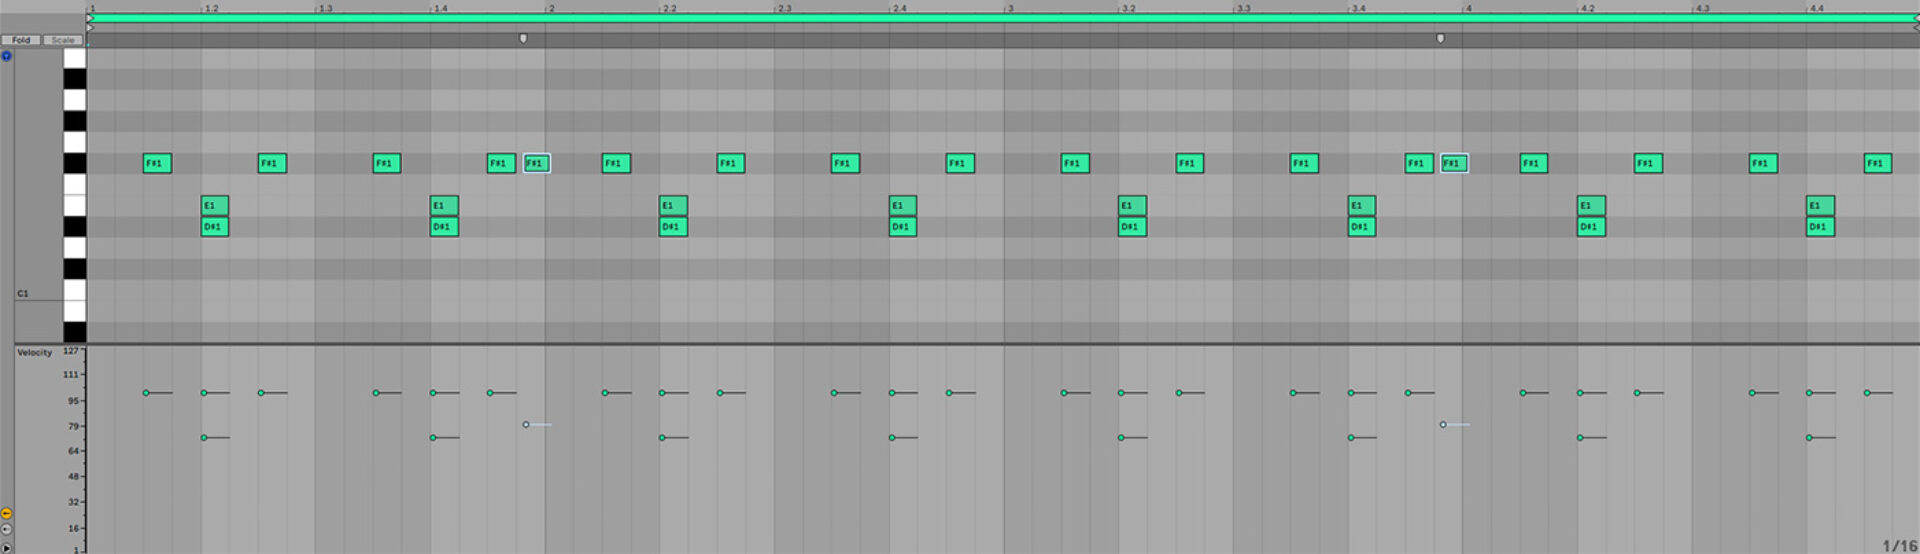
We’re going to use this to make our beat’s tops. Sequence D#1 claps on every other beat, layered with an E1 snare that has a velocity of 71. This makes it relatively quieter than to the other drums .
Add F#1 shakers halfway through each beat, with an extra swung sixteenth note at the end of the first bar. This swung note is also quieter, with a velocity value of 76. This sixteenth note swing gives the beat its housey groove.
Our clap has too much tail for the snappy sound we’re after. Select Clap Chomp in BATTERY 4 and move the sample end marker to the left to make the clap tighter.

2. Compose a chord progression
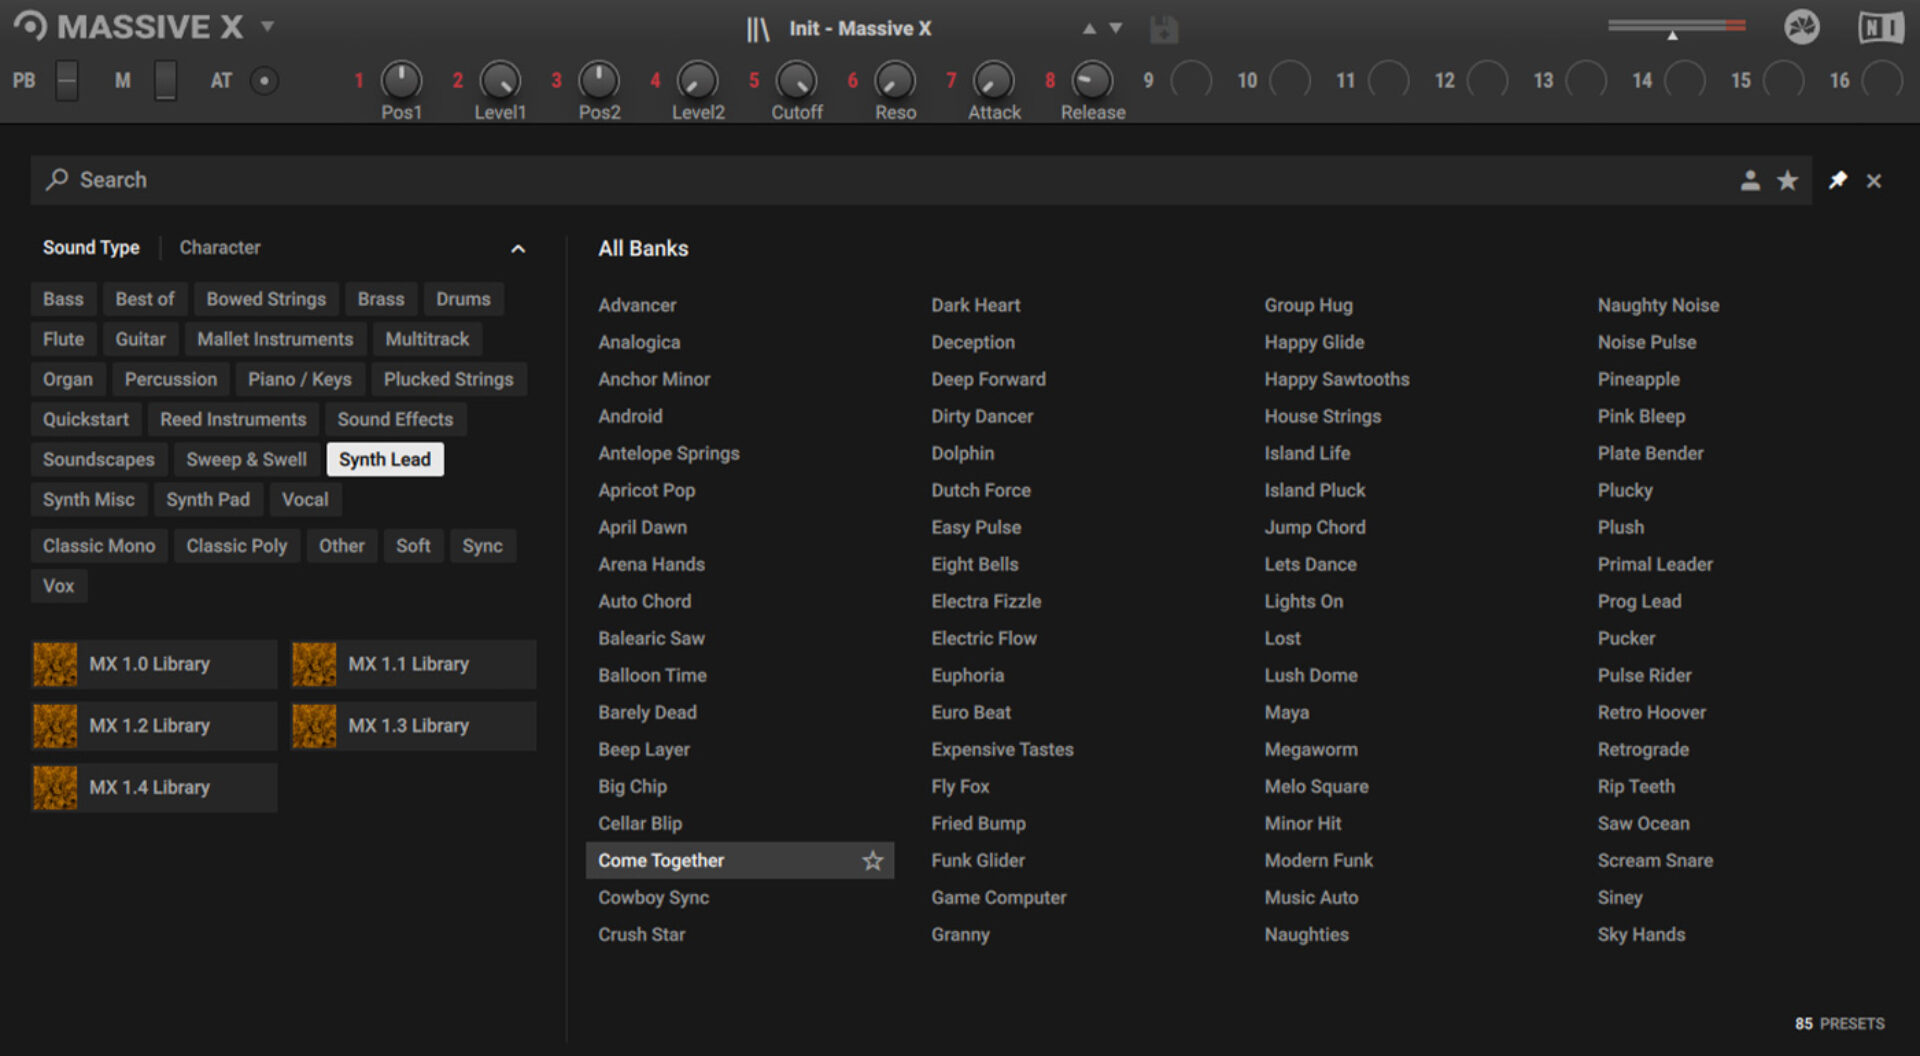
Let’s create our slap house chord progression. To find a suitable sound, add MASSIVE X to a new track, load up the patch browser, then select the Synth Lead tag and load the Come Together preset. This is a rich, sawtooth-based patch, ideal for making a big chord progression.
Add a compressor to the chord track, with the sidechain input set to the kick drum track. This causes the track to “duck” when the kick plays. This helps the kick sound louder in the mix, and if you use low Threshold and Release values you can achieve the energetic “pumping” compression feel prevalent in “big room” house styles. Set this track to -1dB to balance it with the other elements.

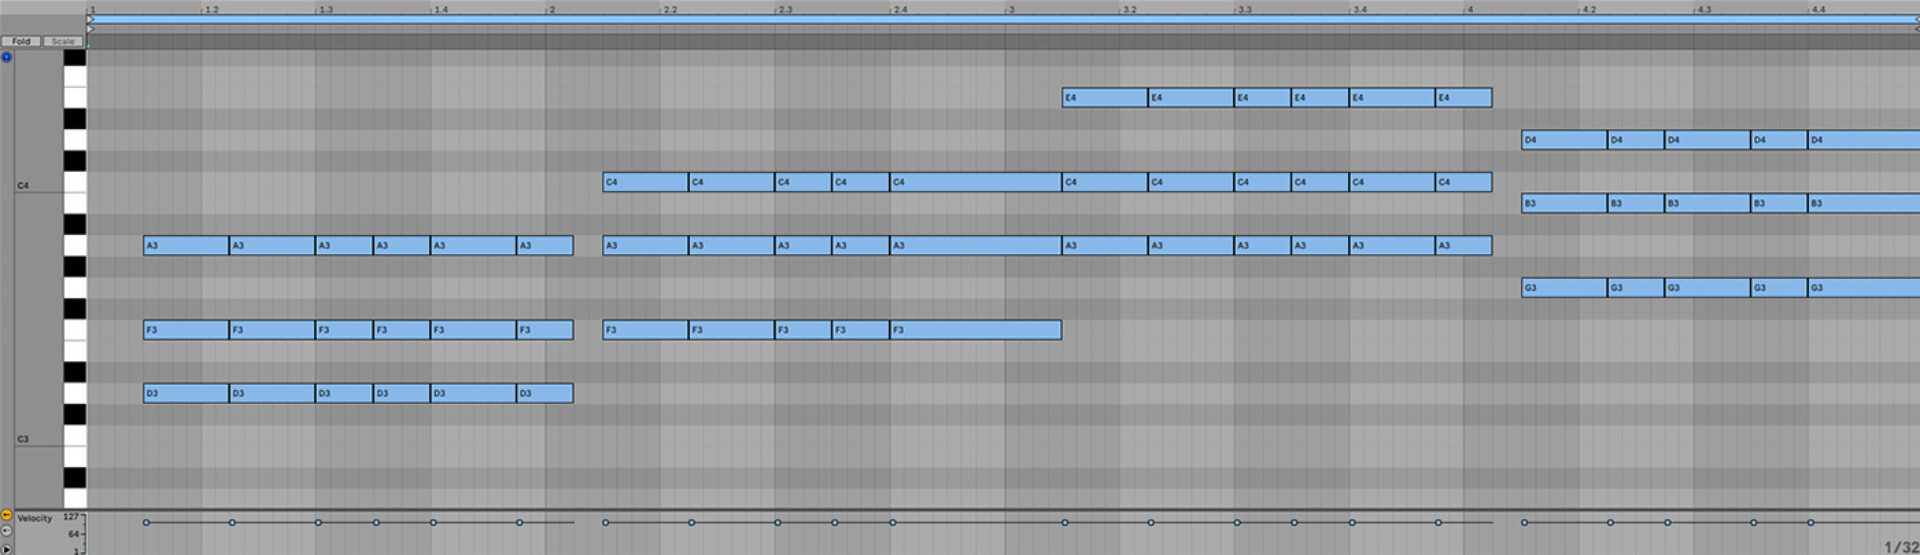
Sequence a rhythmic chord sequence that plays D minor, F major, A minor, and G major. This is an uplifting progression with a subtle bittersweet feel, and it will provide us with ample inspiration for that all-important bassline.

3. Make a bassline
For our bass sound we want something heavy, punchy, and expressive. Load up MASSIVE X onto a new track. Open the patch browser, select the Bass tag, and load the Kali preset.

Set this track to -2.5 dB

This big bass sound is fat with an assertive mid-range punch. It doesn’t have the crispy highs that you’d associate with a slap house bass, but this is something that we’ll bring out with some processing shortly.
Sequence a bassline that follows the chord progression with some octave skips to provide interest.

This is musically on-point, but it doesn’t have that slap house feel just yet. We need to apply some processing to bring out the bassline’s flavor.
4. Mix the beat, bass, and chords
Some styles of music benefit from at least a degree of mixing during the compositional stage, and our track isn’t really going to feel like slap house without the bass sounding right. So, let’s work on that now.
As with the chords track, the first thing we do is add sidechain compression, with the sidechain input triggered from the kick drum track.

Next, let’s make sure the bass’ low-end is mono using a mulitband stereo width control. You can use whatever stereo imaging software you like for this. Here we’ll use the Imager in iZotope Ozone 10 to add a band split at 300 Hz, and set the sub-300 Hz band’s width to -100.
This makes everything in the low-end mono, but allows the frequencies above 300 Hz to remain stereo. This gives us the best of both worlds—a solid mono low end with mids and highs that fill the stereo panorama.

For slap house it’s essential to get your bass line filling the full frequency range, so let’s get those mids and highs sounding more present with some multiband dynamics processing. Here we’ll use Ozone 10 Dynamics, but you can use whatever dynamics processor you like.
First we create bands at 120 Hz and 2500 Hz. We tell the sub-120 Hz band we don’t want it to perform any adjustments to the dynamics by setting its Ratio value to 1:1.

Set the mid band’s Ratio to a negative value, specifically (2.3):1. Negative Ratio values tell the compressor to increase the volume of the signal when it falls below the threshold. This will make the mid band louder, and we can control how snappy this sounds with the Attack parameter. Set this to 11ms.

Now set the high band’s Ratio to (1.3):1, again with an Attack of 11ms.

This gives the bass a crispy mid and top that sound really present in the mix. We now have a solid slap house feel, but there are some really aggressive transients going on. Let’s tame them with iZotope Neutron 4 Transient Shaper. Add it to the track, select Precise mode and turn the Attack parameter down to -11.

Let’s give our bass a subtle touch of texture with another layer. Add MASSIVE X to a new track and this time select the Plucked String tag in the browser. Load the Wooden String preset.

Duplicate the MIDI over from the original bass track, and set the track to 4.7 dB.

Again, add a compressor with the sidechain input set to the kick track. This also has its Threshold and Release time turned down.

Cut the low-end of the track to make as much space as possible with a high-pass filter at 200 Hz.

This layer is a very subtle touch, but one that adds depth to the track and makes it feel less synthetic.
While we’re high-passing things, let’s high-pass the chords too, freeing up more headroom for beats and bass.

5. Compose a melody
Now our bass is sounding right, let’s add a lead. Add MASSIVE X to a new instrument track, and this time select the Synth Misc tag. Load the Festival Island preset. Set the track to 4.7 dB.

The melody we’re using here is a simple two-bar riff that plays a different note the second time around.

Again, we sidechain compress this sound heavily, as always using the kick track as the trigger.

This track gets the high-pass filter treatment too.

6. Add fills and FX
We now have the musical elements of the track, so now it’s time to make some fills and FX that will aid us in creating a compelling arrangement.
First let’s make a drum fill, which will help keep the beats rolling. In BATTERY 4 load up The Stereotypes All Toms Kit.

Here’s a straightforward fill that will play at the end of every eight bars. Note the reduced velocity of 76 on the second A#0 note.

Now let’s find a riser. In MASSIVE X select the Sweep & Swell tag and load the Super Swell preset.

Set this track to -3 dB.

Sequence a D3 note to play for two bars at the end of the eight-bar sequence.

Let’s also sidechain compress the riser.

This sound has quite a loud tail. We can control the volume level of the tail more easily if we bounce it to audio. In Ableton Live this is achieved by using the Freeze Track and Flatten Track functions.


The tail is automatically made into its own clip. Select this, and turn its Gain down to -6 dB.

To mark the start of each section we’re going to use a cymbal crash. In BATTERY 4 load up the Certified Gold All Cymbals Kit.

Set the track to -1 dB.

Sequence an F#1 note at the start of the eight-bars.

Add a touch of delay, here we’re using a dotted eighth note delay in Live’s Delay effect with reduced Feedback and Dry/Wet levels to make the effect more subtle.

Let’s try some sidechain compression on this too.

That sounds much improved.
7.Arrangement and automation
During the intro we want the kick high-passed. Add a filter that high-passes the signal at 30 Hz. We’ll turn this off when the track drops to bring in the sub-300 Hz weight.

For the arrangement let’s start out with the kicks, tops and chords playing. The clap and snare are taken out for the first eight bars.

The snare, but not the clap comes in on bar 9. The bass starts playing here.
High-pass this too, automating the filter cutoff frequency down from approximately 2.5 kHz.

On the drop the kick filter is automated to turn off so that the full kick is heard.

Also on the drop the bass texture layer is added, and the chords are removed. The riser and crash keep things feeling smooth. The clap and snare are removed for the first eight bars after the drop, and their reintroduction allows things to ‘step-up’ later in the arrangement.

Let’s listen to that drop section in full.
The drum fill leads into the next eight-bar section, where snare and clap return, and the lead is added. In this next eight bar section this swaps to the chords. Then, the lead and chords play together. This switching between combinations of elements keeps the arrangement sounding fresh.

For the final part of the track, the chords and leads both drop out, and we have a beats and bass-only outro.
Here’s the arrangement in its entirety.

8. Master your track
Let’s perform a quick mastering job on this track to make it sound good and loud. Add Ozone 10 Maximizer to the master, and bring the Threshold down to -5 dB. Set the Character to 0.00, and change the mode to IRC IV.

Start making slap house today
Here we’ve seen how you can make your own slap house track from scratch. If you’d like to learn more check out our guide for how to make house music and the best MASSIVE presets for deep house.
For instruments, effects and expansions you might find useful, be sure to try out the trial versions of BATTERY 4 and Massive X plus iZotope Ozone 10 and Neutron 4.
Related articles
-

Behind the synth: A. G. Cook on stacked sawtooths and the creation of Super*Saw
Explore the extremes of stacked sawtooth waves with Super*Saw, a new synthesizer co-created with A. G. Cook. Learn how to…
-

Inside the evolution of orchestral sampling: an interview with ProjectSAM
Discover how ProjectSAM’s Lineage Series uses NKS and smart features to change orchestral sampling. Plus, save on instruments in our…
-

How New Constellations turn emotion into sound with Massive X
Go inside the studio with New Constellations. Learn how they use Native Instruments gear, happy accidents, and lifelong friendship to…
-

Citizen Kain on building emotion and space with Replika
Citizen Kain explains how Replika helped shape the rhythm, tension, and emotion behind his debut Eversun Records single “Moments.”…
-

The organic precision behind Calcou’s Anjuna release featuring Reaktor
Calcou shares how Reaktor, Monark, and Super 8 shaped the creative balance and live energy behind their new duo EP,…
-

14 NKS instruments that will change the way you create music
Discover 14 NKS instruments to freshen up your workflow. From lo-fi tape synths to cinematic strings, shop the Native Instruments…
-

Parallelle on crafting living basslines with Reaktor and TRK-01
Parallelle share how Reaktor and TRK-01 shape the bass and warmth in 11th Avenue, balancing analog depth with modern control.
-

Where will your sound lead you? Explore the Native Instruments Summer Sale
Save 30% on instruments, effects, and sounds in our Summer Sale. Find the tools to keep your tracks moving and…