


EQ might be the most mundane production tool, and also one of the most important. Almost every sound in a production will be processed with EQ, and effective EQing can make the difference between a confused, muddy track and a polished, compelling one. This means it’s important to have an EQ plug-in that is easy to use, versatile, and sounds great.
That’s why we’ve decided to make Ozone EQ free as part of the refreshed Komplete Start bundle. This powerful EQ plug-in was devised as part of iZotope’s legendary Ozone mastering suite. But it can be used for much more than just mastering. Intuitive and transparent, Ozone EQ excels at both basic EQ tasks and more sophisticated sound sculpting. It also sports some innovative features that make EQing easier.
In this article, we’ll look at some of the basics of EQing. We’ll also explore what Ozone EQ can do, and demonstrate how to EQ your song using this free plug-in.
Jump to these sections:
What is EQ?
Equalization, or EQ, is a music production task that involves changing the volume of specific frequencies in an audio signal.
Humans hear sound across a broad spectrum of frequencies, from low frequencies – think the rumble of a bassline or the boom of a kickdrum – to high frequencies, such as the hiss of a hi-hat or the sibilant “s” and “t”s in singing.
Most sounds feature a combination of frequencies across this frequency spectrum. For example, alongside its “booming” low frequency content below 100 Hz, a kick drum might also feature a midrange “thud” at around 150-200 Hz, and a “clicky” attack much higher up, perhaps at around 3000 Hz.
When we’re producing music, we might want to change the relative loudness of these different frequencies in a sound. This is what EQ is for.
An EQ plug-in such as Ozone EQ allows the user to shape the frequency content of a sound using a range of filters with different shapes. A bell filter will boost or cut a particular band of frequencies, while a high pass filter will cut all frequencies below a given frequency, and so on. Modern EQ plug-ins such as Ozone EQ allow the user to adjust the number, combination, position, and strength of these filters in many ways, to get the perfect EQ curve for any situation.
EQ has many uses. It can remove problematic frequencies in a sound (such as harsh resonances) or adjust the overall tonal balance of a sound to help it sit better in a track. It can also be used to manage the relationship between sounds by addressing frequency masking (when one sound conceals another). EQ can even be used for creative sound design.
What type of EQ is Ozone?
Ozone EQ is a versatile EQ that can be used for almost any EQ task – and it’s completely free in the Komplete Start bundle. This EQ was designed as part of iZotope’s cutting-edge mastering suite, Ozone 11, but it’s just as effective at mixing and production tasks, from workaday tone shaping through to subtle problem-solving and imaginative sound design.
The Ozone EQ interface is intuitive and quick to use, and a series of smart features make the EQing process painless. Gain Match automatically balances the loudness of your signal as you work, while a smart Amount slider allows you to tweak settings quickly with a single control. Ozone EQ also allows you to split your audio signal into Mid/Side, Left/Right, or Transient/Sustain, for even more precise sound-shaping.
Not sure where to start with all these features? Let’s look at some concrete examples of how to EQ your song using Ozone EQ.
How to use the free Ozone EQ in your productions
We’re going to use the free Ozone EQ to polish up a beat we’re working on. Here’s how the beat sounds with no EQ:
We can solve a number of issues in the mix using Ozone EQ. We’ll look at adjusting the tonal balance of a sound, fixing problematic frequencies, reducing frequency masking, and using EQ for creative sound design.
By the way: This beat was made entirely using instruments in the free Komplete Start bundle. We used drums from Kontakt Factory Selection 2, vintage-style pads and bass from the Analog Dreams synthesizer instrument, and the mystical sounds of an Irish Harp. You can get all of these instruments for free alongside Ozone EQ by downloading Komplete Start.
1.Tonal balance adjustments
EQ can be used to shape the character of a sound by changing its tonal balance: the relative presence of different frequencies. This might be used to bring a sound in line with your musical vision, or to match it with other sounds in a track.
Let’s look at an example. Here we have a squelchy bass line made using the Analog Dreams instrument.
We want a smooth, soft bass sound to match our mellow lo-fi beat. There’s a bit too much upper frequency sharpness in this sound. It also lacks subbass.
We can use Ozone EQ to fix these issues by adjusting the tonal balance.

First, let’s remove some high frequencies. For this we can use a low-pass filter, which only allows through frequencies below a certain point in the frequency spectrum.
We inserted a filter node and chose a low pass filter from the menu. We then pulled it across the frequency spectrum until we got the right amount of mellowness: at around 2 kHz.
Filter slope is also important here: a steeper slope will roll off more high frequencies. By dragging the tags on either side of the filter node, we chose a slightly steeper 12 dB-per-octave slope.
Now let’s boost the subbass. Clicking near the far left of the EQ display will automatically create a low shelf filter. This filter type boosts or cuts all frequencies below a certain point, in a flat “shelf” shape. We located the node at around 100 Hz and dragged it upwards for a sub-bass boost of +2 dB.
Now it’s time to compare our changes with the unprocessed version of the bass to see if we’ve improved things. Click the Bypass button in the bottom right of the Ozone EQ display to compare before and after.
Be careful though: EQing can change the loudness of a sound as well as its frequency content, and we tend to hear louder sounds as “better.” This means that your ears might trick you into hearing a volume difference as an improvement in frequency balance.
We can use the Gain Match feature to avoid this. With Gain Match turned on, Ozone EQ will automatically match the loudness of the processed audio to its previous (unprocessed) level.
Here’s how our bass sounds after EQ has been applied.
2. Fix problematic frequencies
Many sounds have qualities that aren’t so pleasant on the ear: harsh treble, for instance, or sharp resonant frequencies that poke out of the mix. We can use EQ like a scalpel to carve out these unwanted frequencies.
Here’s an arpeggio we made using the Irish Harp instrument available in Komplete Start.
It’s very bright, with some unpleasant sharpness in the high frequencies. The start of each note – known as the attack or transient – is particularly aggressive.
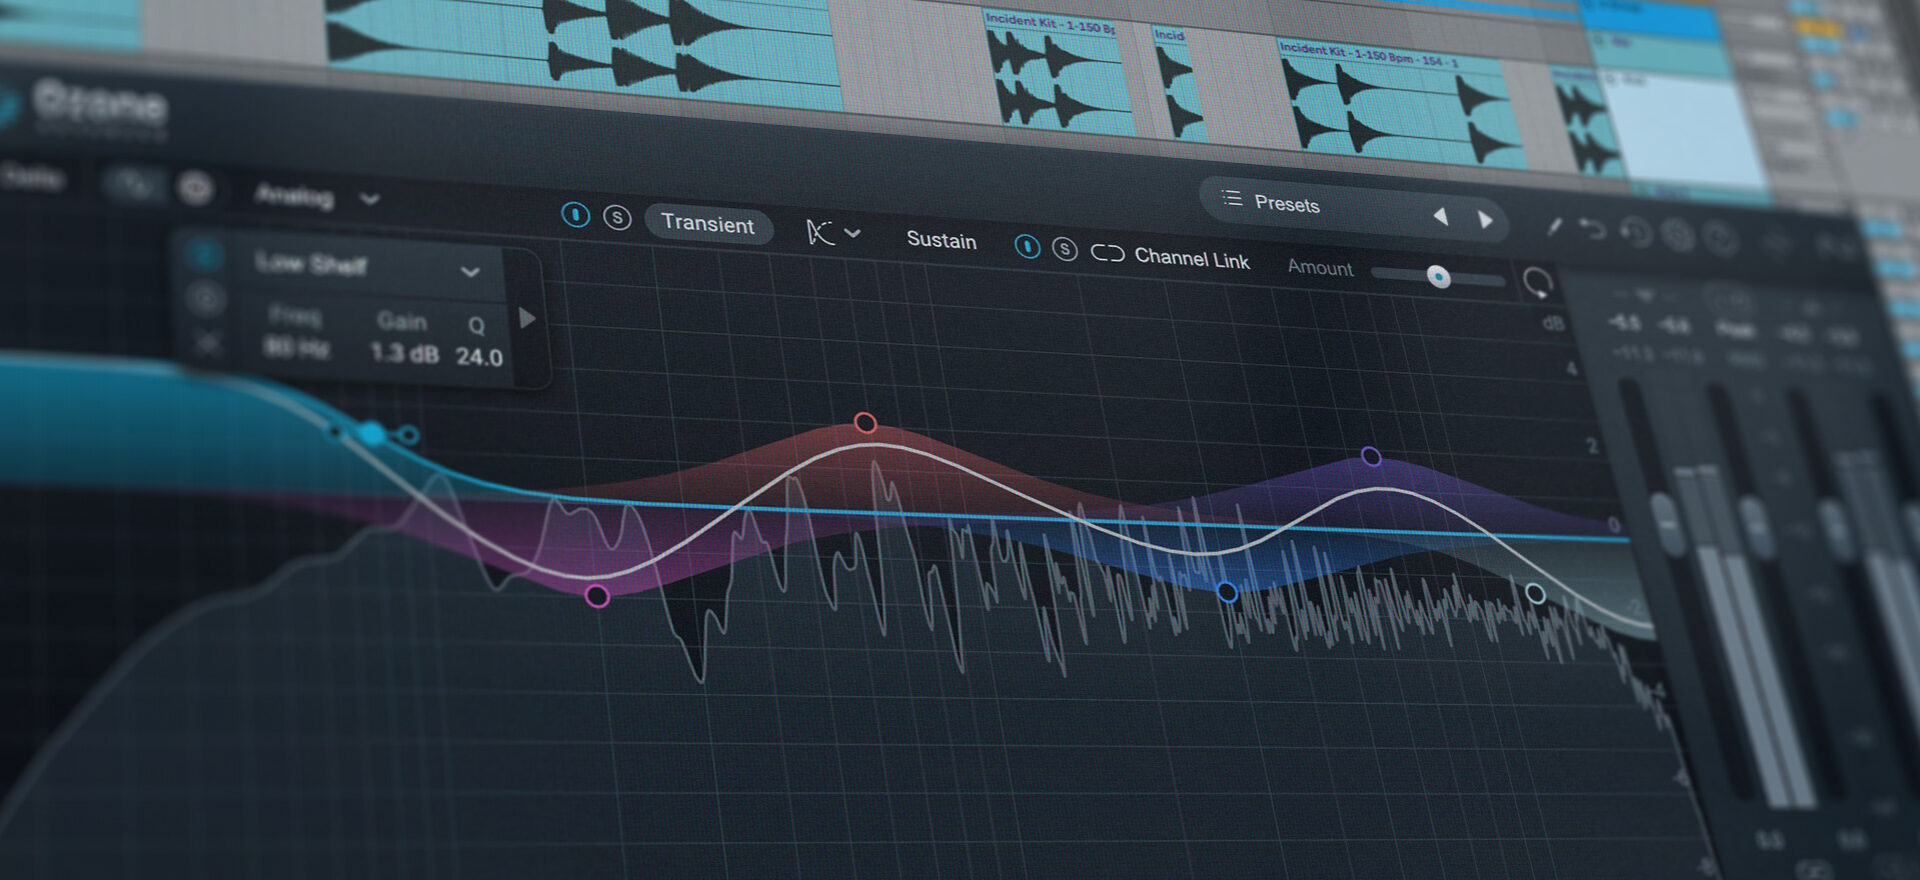
Ozone EQ’s Transient/Sustain mode comes in handy here. We can use it to split the signal into two parts, and apply different EQ settings to each part in order to tame those sharp attacks. Let’s look at how this works.

First, we selected the twin circle “stereo” symbol at the top of the EQ display to open a drop down menu. Here, we can split the signal in a few different ways: Mid/Side, Left/Right, or Transient/Sustain. We selected Transient/Sustain.
By selecting the Transient button at the top of the display, we can apply EQ to those sharp attacks without altering the rest of the sound. We applied a high shelf, positioning the filter node at 1800 Hz and dragging it downwards for an attenuation of -5 dB.
This has tamed the harp’s attack while leaving the sound’s shimmering sustain untouched. To hear more precisely what’s been changed, click the solo (“S”) button next to Transient to hear only the “attack” part of the sound.
Our harp still sounds a little bright, so we’ve EQed the “sustain” part of the sound too – but with a lighter touch. After clicking on the Sustain button, we applied a gentle bell curve attenuation of -3 dB at around 4 kHz.
Now our harp sounds much smoother.
3.Frequency separation
Having EQ’d our harp part, we listened to it in the context of the whole track and realized that it clashes with another part. Fizzy high-end frequencies in the synth pad occupy the same frequency zone as the top end of the harp, leading to frequency masking: a phenomenon where one sound conceals another. Here are the two parts together.
We can use EQ to create separation between these sounds. Our goal is to tame the high frequencies in the pad so that the harp can shine through.

A small change should make a big difference here. We used a high shelf filter again, to reduce frequencies above 9000 Hz by about -2 dB.
While we’re here, let’s also boost the low frequencies of the pad to give it a warmer profile. As with our bass part, a low shelf filter should do the trick. We applied a boost of +4.5 dB at around 500 Hz.
After we’d finished applying our EQ, we decided we were a bit too cautious with our settings. We could go back and redo it all, but this might take a while. Alternatively, Ozone EQ’s handy Amount slider makes it possible to quickly change the overall strength of the EQ processing. We simply dragged the slider slightly to the right to heighten the EQ effect.
Here’s how the two parts sound together with EQing applied to the pad.
4. Sound design
EQing is often considered a problem-solving tool, but it can also be used creatively, to shape sounds in imaginative ways and add interest to your productions.
Let’s use Ozone EQ, in combination with a tape-style wind-down effect, to create a compelling intro to our beat.

We want to create the impression that we’re hearing the beat on a low quality media player, like an old cassette deck. To do this, let’s use EQ to isolate a narrow bandwidth of the sound, cutting out lower and higher frequencies.
This effect should apply to all of our parts at once, so we added an instance of Ozone EQ to the master channel in our DAW.
We then used a high-pass filter to cut out all low frequencies, and a low-pass filter to cut out higher frequencies. The nodes are positioned to isolate a narrow band of the frequency spectrum, between about 700 Hz and 5000 Hz. Steeper slopes will create a more extreme effect: we went for a 24 dB-per-octave slope.
We added a tape wind-down effect to complete the intro. Here’s how it sounds:
Finally, here’s our beat with all of the EQing applied. It’s clearer, more balanced, and with some extra stylish touches: all thanks to Ozone EQ.
Start shaping your sound with Ozone EQ
In this article, we’ve explored the fundamentals of EQ and explained how Ozone EQ works. We’ve also demonstrated how to EQ your song using this free EQ plugin, covering tasks such as tone shaping, sound separation, and sound design.
Now you know what it’s capable of, it’s time to start using Ozone EQ in your own productions. This fully-featured EQ is completely free as part of the refreshed Komplete Start bundle from Native Instruments. The bundle also includes a powerful toolkit of instruments and a huge collection of sounds, giving you everything you need to get inspired.
And if you’re looking for even more tools for music production, check out our list of free VST plugins.
Related articles
-

Behind the synth: A. G. Cook on stacked sawtooths and the creation of Super*Saw
Explore the extremes of stacked sawtooth waves with Super*Saw, a new synthesizer co-created with A. G. Cook. Learn how to…
-

Inside the evolution of orchestral sampling: an interview with ProjectSAM
Discover how ProjectSAM’s Lineage Series uses NKS and smart features to change orchestral sampling. Plus, save on instruments in our…
-

How New Constellations turn emotion into sound with Massive X
Go inside the studio with New Constellations. Learn how they use Native Instruments gear, happy accidents, and lifelong friendship to…
-

Citizen Kain on building emotion and space with Replika
Citizen Kain explains how Replika helped shape the rhythm, tension, and emotion behind his debut Eversun Records single “Moments.”…
-

The organic precision behind Calcou’s Anjuna release featuring Reaktor
Calcou shares how Reaktor, Monark, and Super 8 shaped the creative balance and live energy behind their new duo EP,…
-

14 NKS instruments that will change the way you create music
Discover 14 NKS instruments to freshen up your workflow. From lo-fi tape synths to cinematic strings, shop the Native Instruments…
-

Parallelle on crafting living basslines with Reaktor and TRK-01
Parallelle share how Reaktor and TRK-01 shape the bass and warmth in 11th Avenue, balancing analog depth with modern control.
-

Where will your sound lead you? Explore the Native Instruments Summer Sale
Save 30% on instruments, effects, and sounds in our Summer Sale. Find the tools to keep your tracks moving and…