


Reverse reverb effect is one of my favorites to play with. This technique is highly versatile and can be used in just about any genre you can think of. Whether you want to build tension, create a “dreamlike” quality, or simply add some interesting sonic character to your music, using reverse reverb can really bring a bit of otherworldly texture to your productions.
In this piece, explore what reverse reverb is and how it’s been creatively shaping music across genres and decades. Then, learn how to craft this effect yourself step-by-step. Whether you’re just starting out, or you’re an experienced producer, you’ll find that reverse reverb can bring a unique and intriguing dimension to your tracks.
Jump to these sections:
- What is reverse reverb?
- What does reverse reverb do?
- What songs use reverse reverb?
- How to use reverse reverb in music production
Follow along with Raum, a creative, flexible, and versatile reverb plug-in included in Komplete Start for free.
What is reverse reverb?
Reverse reverb is an audio effect where the reverb, typically heard after a sound, is inverted and placed before it. This creates a unique, swelling sound that builds up to the original note, chord, or drum hit – giving an impression of the sound emerging from a distant or ethereal space. Originally achieved by reversing tape recordings, this effect can add a dramatic and almost supernatural quality to your music.
What does reverse reverb do?
Reversing reverb is a creative way to add more atmosphere to your tracks. It’s most commonly used to enhance vocals, synths, and other instruments to create ambient backdrops and textures. But, honestly, this effect can be used on any sound you’d like.
Reversing a reverb tail and placing it before the original audio can create a sweeping, anticipatory build-up that leads into the main sound, so you can use this trick to build interesting “uprisers” that lead into a new section of your track. This is particularly effective for creating dramatic intros, atmospheric breaks, or simply adding a unique twist to vocals and instruments.
In short, by manipulating time and space in sound, reverse reverb doesn’t just alter the audio – it reshapes the emotional landscape of a track, inviting listeners into a surreal auditory experience.
What songs use reverse reverb?
Reverse reverb has been spicing up tracks for ages, spanning across all sorts of genres. It’s not just a flash in the pan – this technique has roots back in the psychedelic 60s and keeps going strong in many of today’s hits, from rock to electronic. Let’s take a look at a few examples that will show you just how versatile and timeless the reverse reverb effect truly is.
Tame Impala: “Let It Happen”
Tame Impala is well known for their psychedelic sound, and often use reverse reverb in their productions. In “Let It Happen,” Tame Impala employs the effect to add an expansive, dream-like quality to the song, particularly in the synth and vocal sections.
Billie Eilish: “when the party’s over”
Billie Eilish’s music often features innovative production techniques and “when the party’s over” is no exception. In this track, reverse reverb is used to create a haunting, atmospheric backdrop to her dreamy vocals.
Kendrick Lamar: “PRIDE.”
Kendrick Lamar’s “PRIDE.” uses reverse reverb subtly in the background, contributing to the song’s introspective and dreamy atmosphere. It’s not the main focus of the track, but it does add an important layer to the overall sound.
Deadmau5: “Ghosts ’n’ Stuff”
Deadmau5’s skillful use of reverse reverb in “Ghosts ‘n’ Stuff” is a great example of how electronic music producers can use this effect to enhance the dynamics and emotional impact of their music. In this iconic EDM track, the reverse reverb effect is used most notably on the synth elements to create a sense of build-up and anticipation.
The Beatles: “Come Together”
Remember how I mentioned this trick’s been here awhile? The Beatles were pioneers in using studio effects creatively, and in “Come Together,” reverse reverb is used on the drums, giving the song a unique rhythmic texture.
As you can hear, reverse reverb is quite the versatile and timeless technique. Now, let’s look at how to put this reverb trick into practice so you can start using it in your own productions!
How to use reverse reverb in music production
To demonstrate this concept, I’ll walk you through how I like to set up reverse reverb in my own tracks, step-by-step.
1. Choose your sound
First, you’ll need to create the sound that you want to apply the reverse reverb effect to. Since I typically apply this technique to vocals, I’m going to use the Glaze Kontakt instrument for this demo.
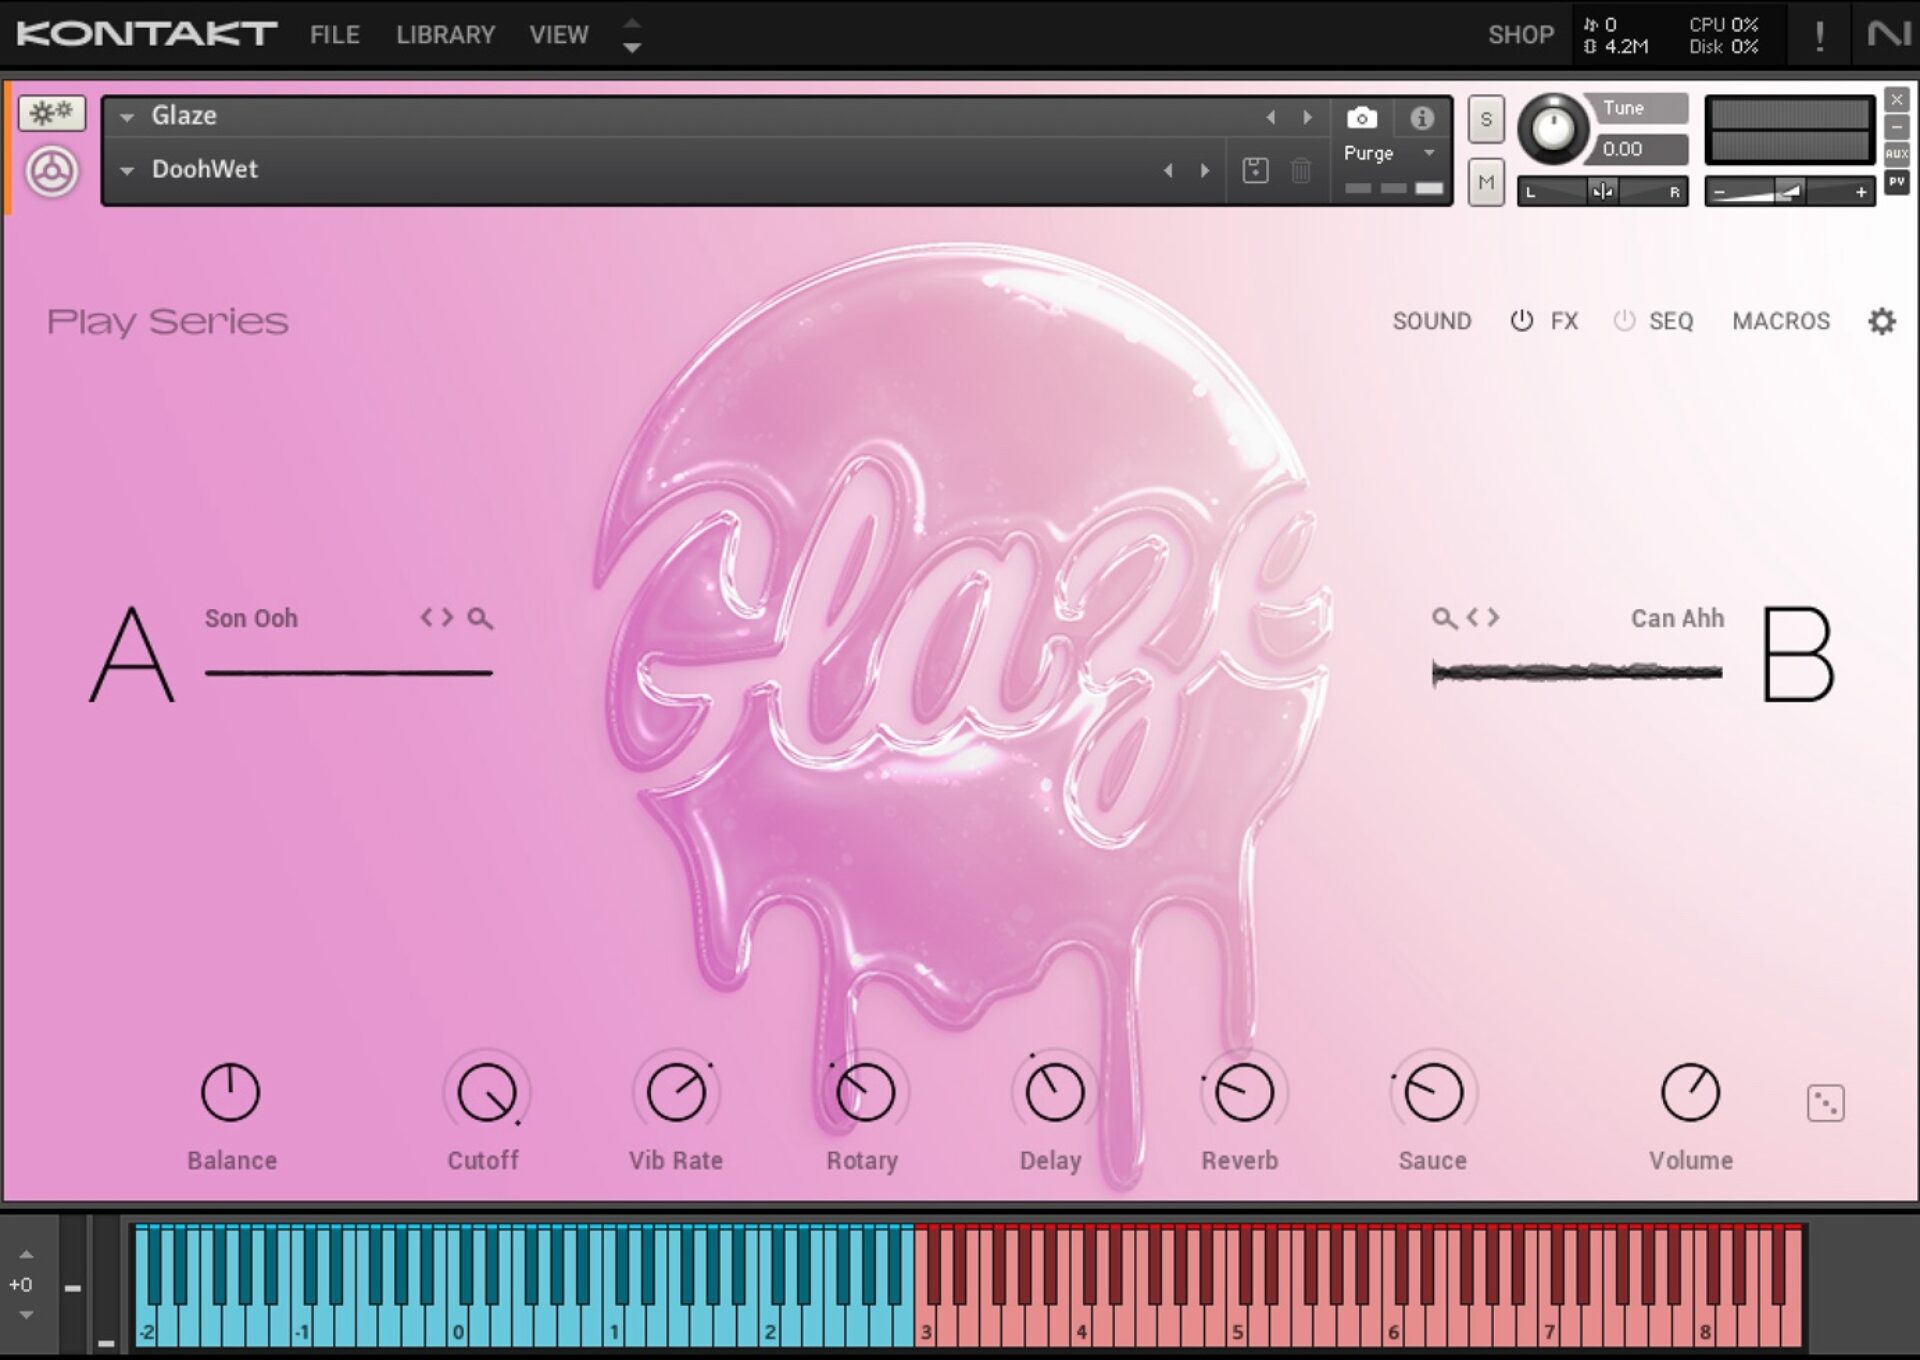
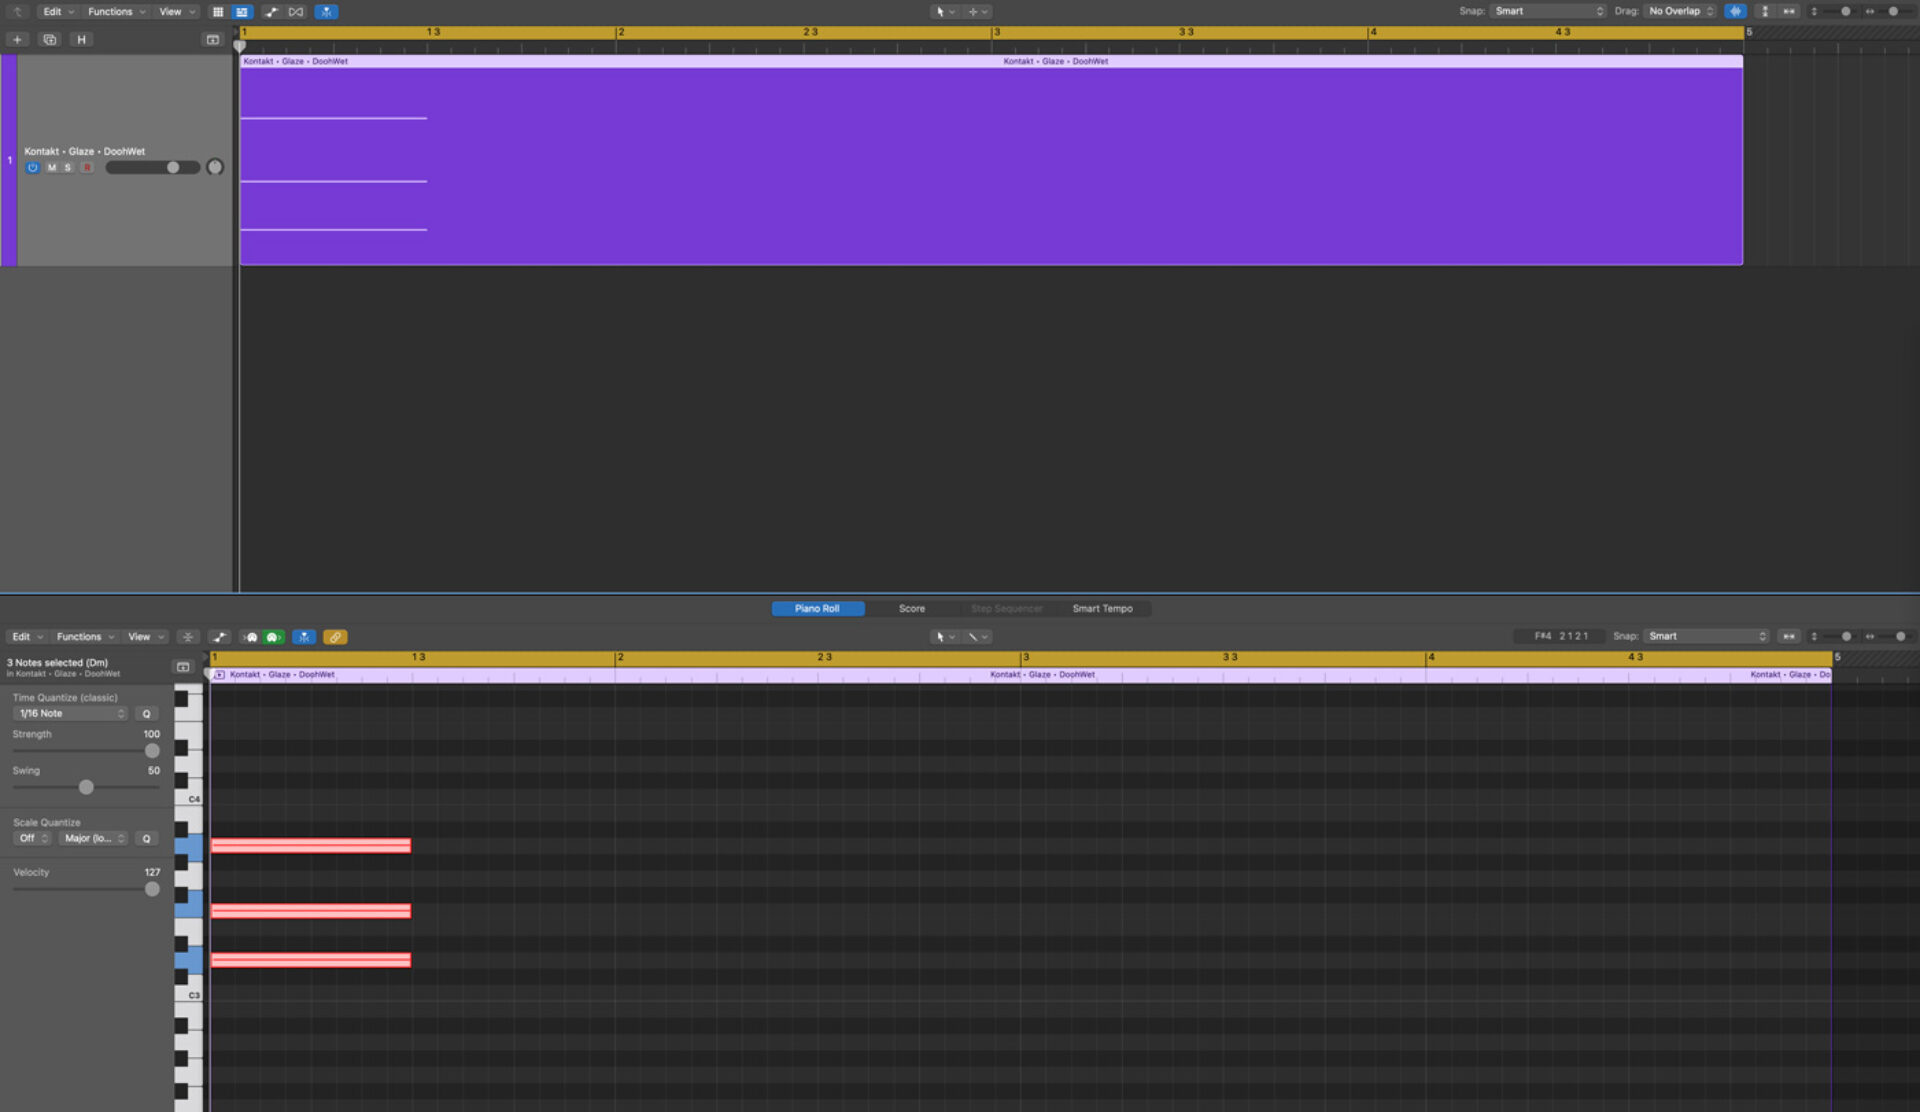
Glaze is packed full of versatile vocal chops, runs, and stacked chords – but, to demonstrate the reverse reverb effect, I’ll be using one of the included pluck presets called “DoohWet”. I’ll simply record a chord (D minor) using MIDI so it looks something like this:
Here is the sound we will be starting with.
2. Add reverb
Now that we have our source sound, let’s give it some reverb. My personal favorite reverb plugin for achieving the reverse reverb effect is Raum because it allows you to create everything from subtle room ambience to massive (almost physically impossible) cosmic spaces.

For my demo, I’ll keep the initial preset that Raum loads with (also known as the “INIT” preset). But, it’s important to note that you’ll want to crank up the amount on whichever reverb plugin you’re using to 100%.
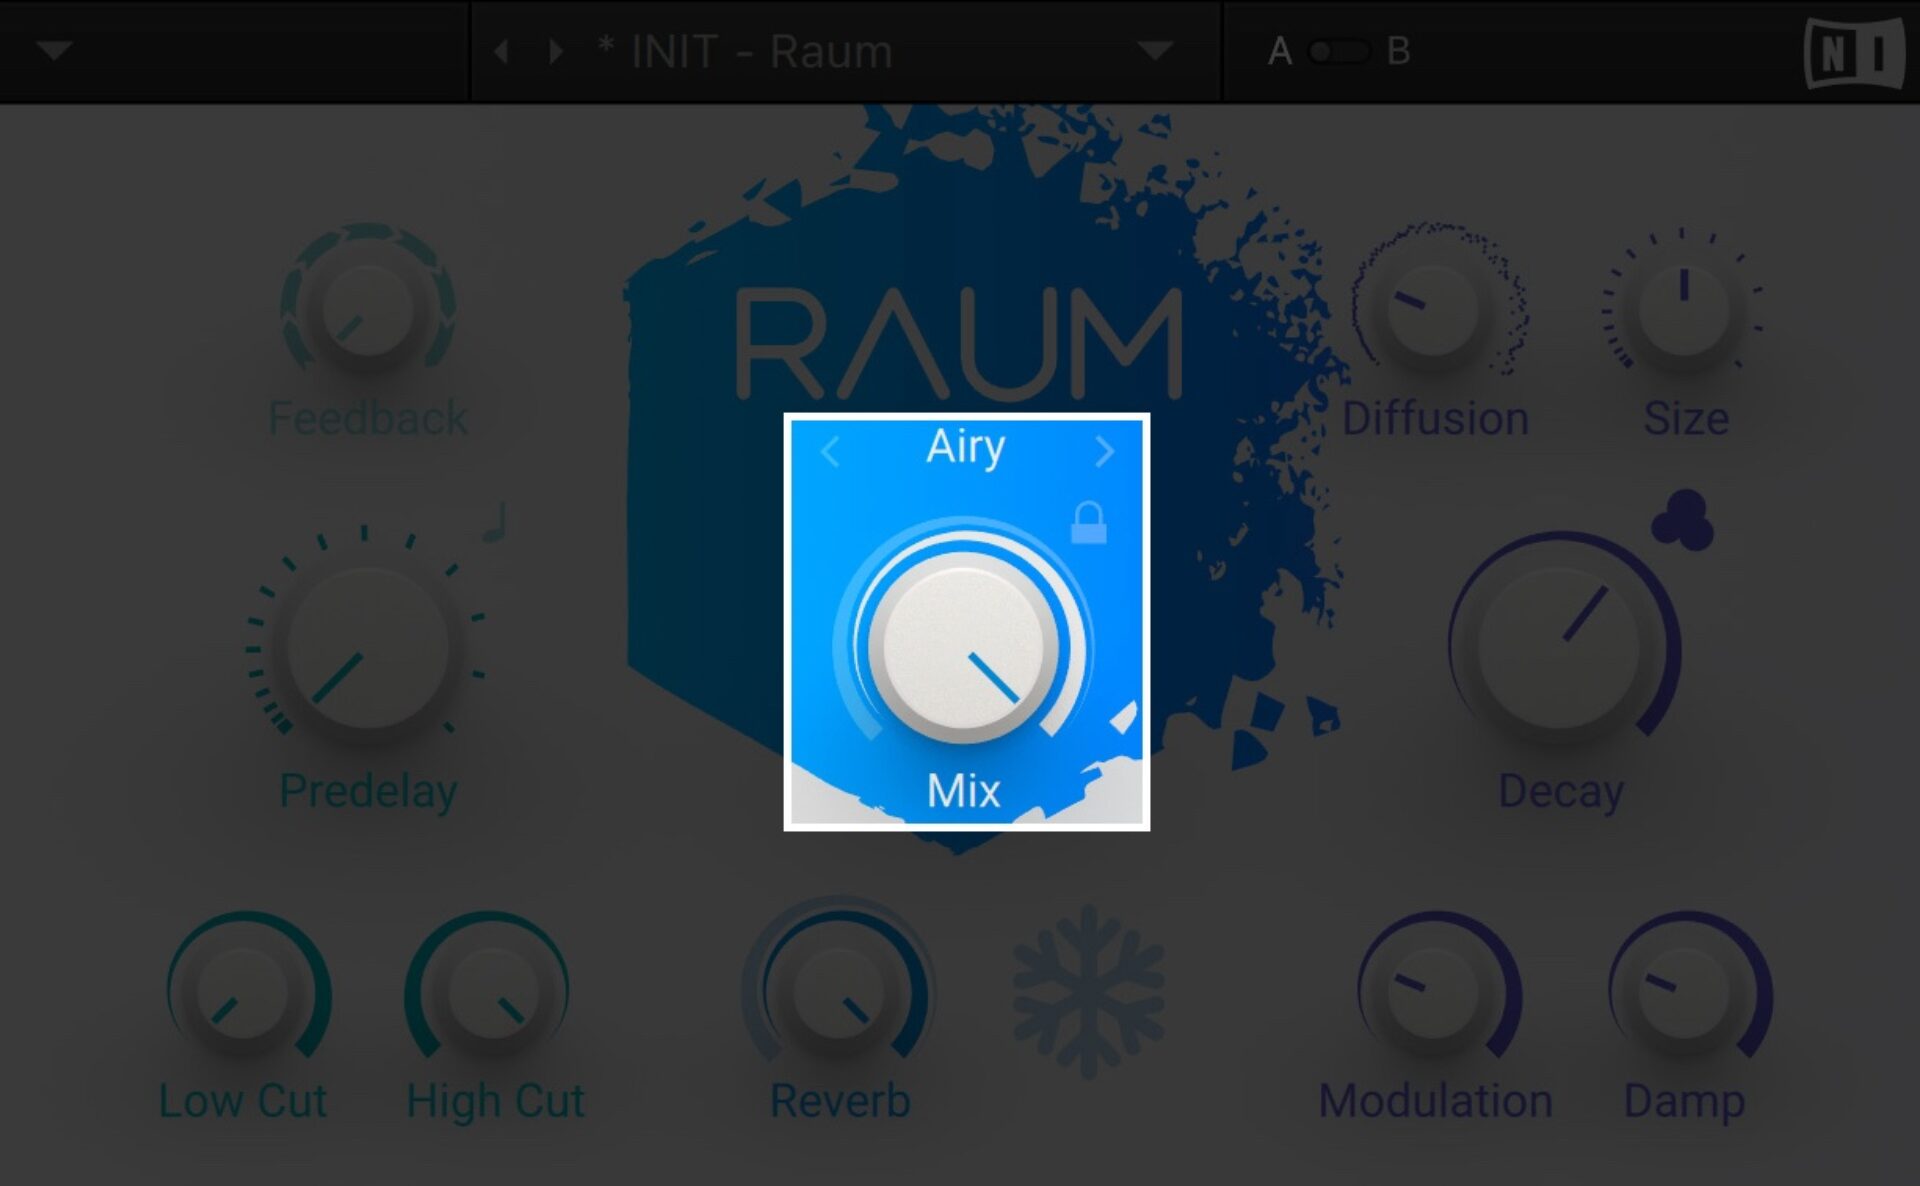
Now, give our sound a listen with the Raum Mix dial turned all the way up.
3. Export reverb
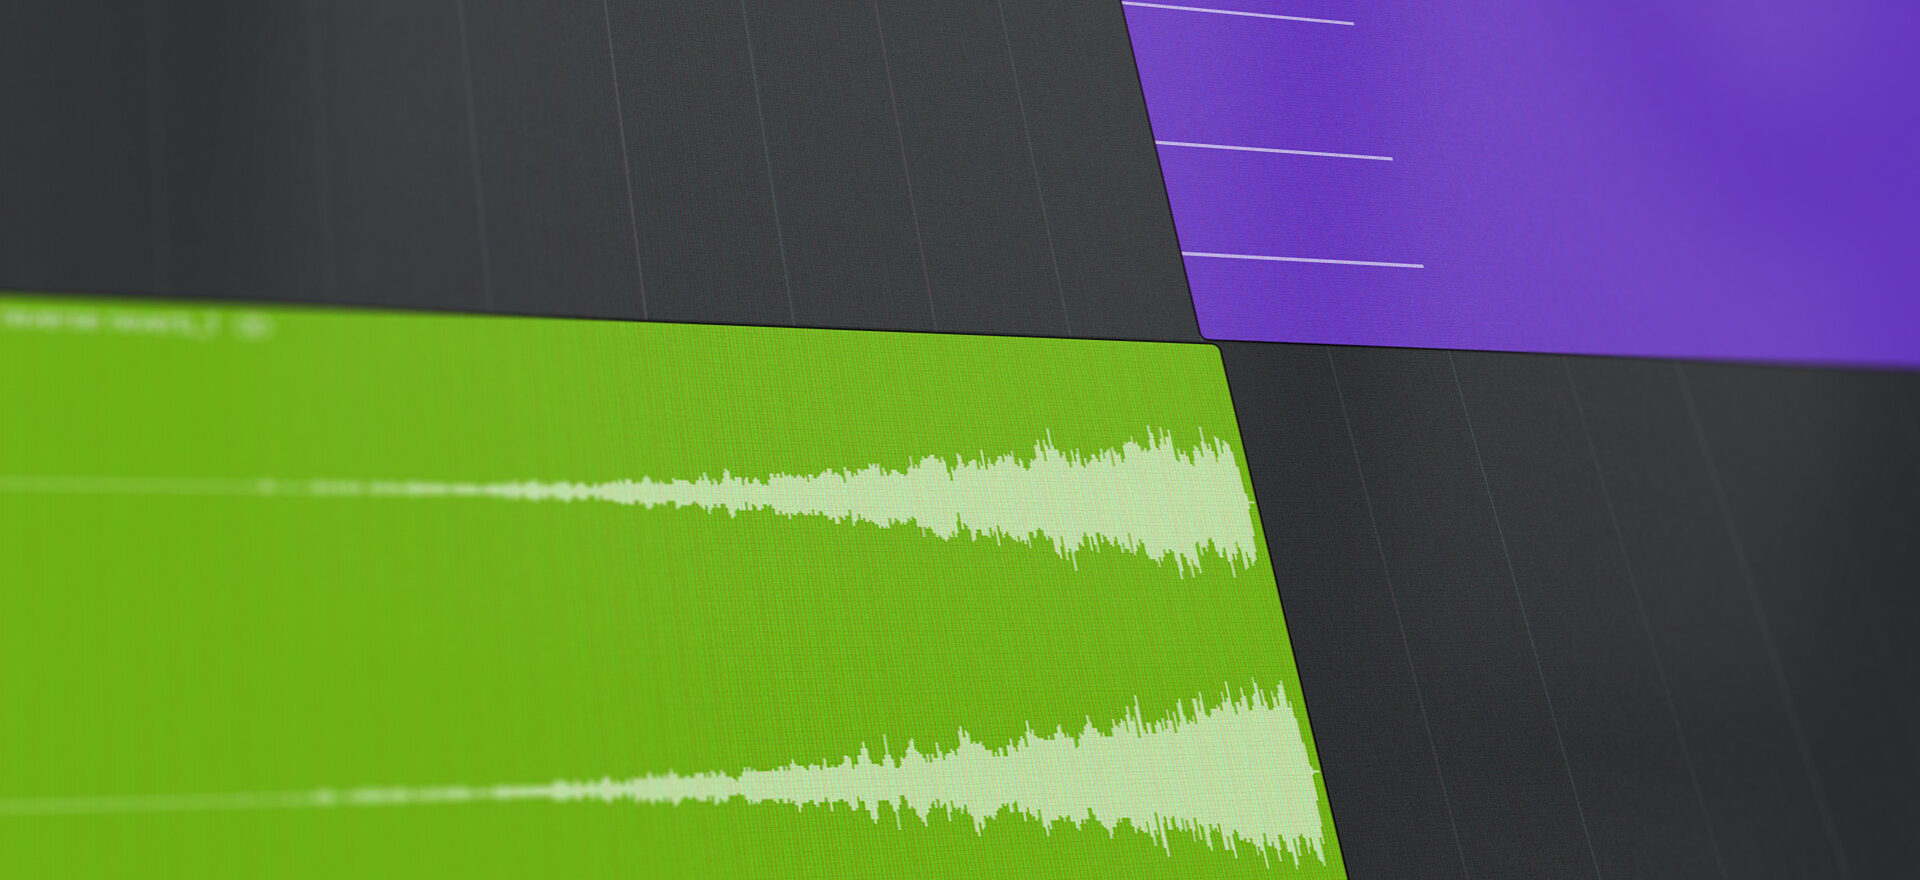
Next, you’ll want to export (or “bounce”) your audio as a WAV file to a new track. How to do this varies from DAW to DAW, so you may need to find specific instructions if you don’t already know how. But, once you’re done, it should look something like this in your session file:
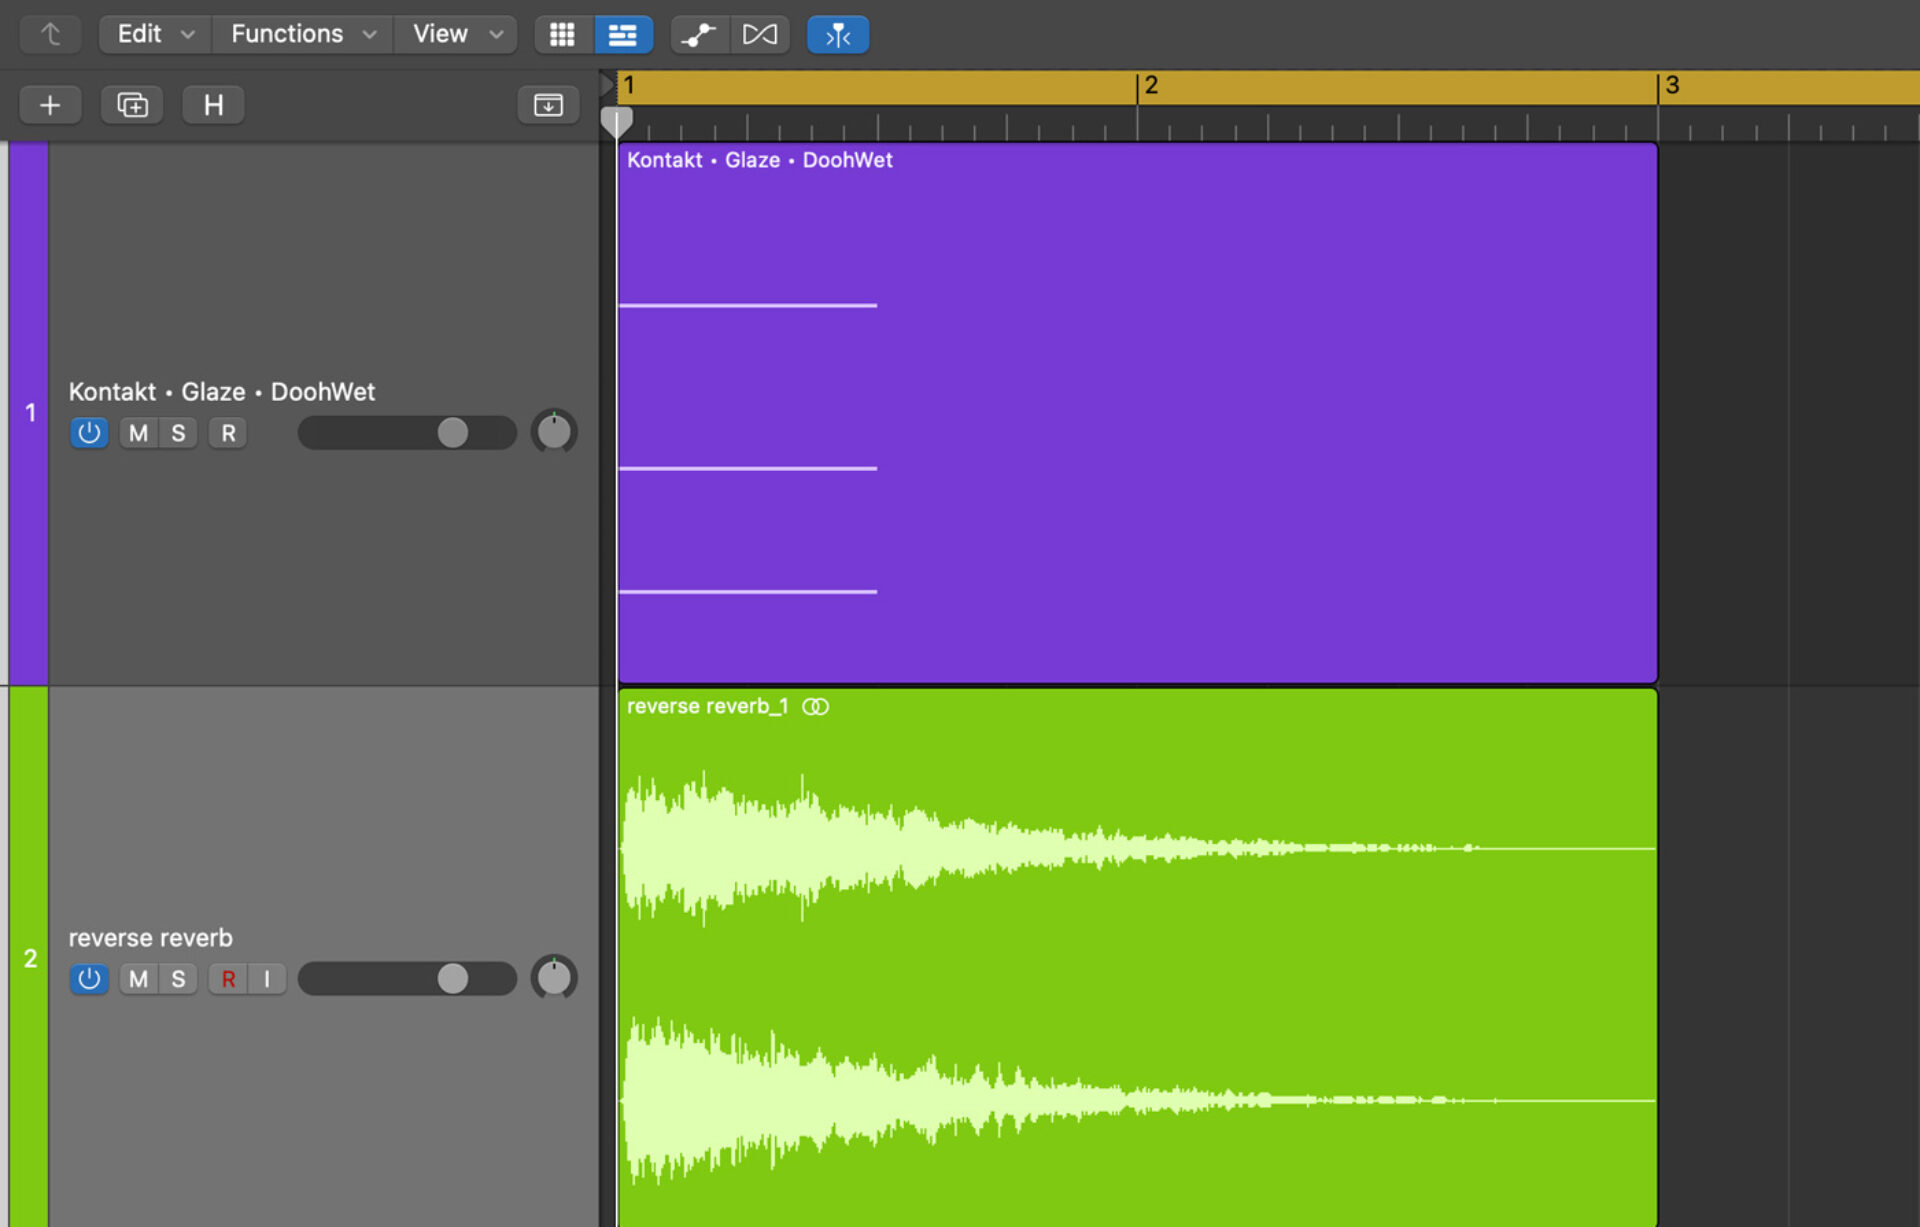
5. Reposition the reverb
Now, simply reposition your reverb audio file so that it comes before your original audio. It should end up looking like this in your project file:

Then, turn off the reverb on your original audio track, and if you’ve lined everything up properly, it should sound like the audio below – with the reverb swelling up and leading into the original sound.
6. Play with the reverse reverb
Once you’ve got everything in place, go ahead and play with it! Try adding different panning effects to your reverb track (like the flanger, chorus, or phaser included in the Effect Series – Mod Pack). Or, add some distortion with the plugins found in the Effect Series – Crush Pack. The possibilities from here are limitless, so feel free to go wild and put your own creative spin on the reverse reverb effect!
Start using reverse reverb
It should be clear by now how reversing reverb can elevate your music production to new heights. Even though this trick has been around for many decades, it still is capable of creating a unique and captivating sound that can be used to enhance your productions. If you’re excited to experiment with reverse reverb, I highly recommend getting Raum in the free Komplete Start bundle.
Related articles
-

Behind the synth: A. G. Cook on stacked sawtooths and the creation of Super*Saw
Explore the extremes of stacked sawtooth waves with Super*Saw, a new synthesizer co-created with A. G. Cook. Learn how to…
-

Inside the evolution of orchestral sampling: an interview with ProjectSAM
Discover how ProjectSAM’s Lineage Series uses NKS and smart features to change orchestral sampling. Plus, save on instruments in our…
-

How New Constellations turn emotion into sound with Massive X
Go inside the studio with New Constellations. Learn how they use Native Instruments gear, happy accidents, and lifelong friendship to…
-

Citizen Kain on building emotion and space with Replika
Citizen Kain explains how Replika helped shape the rhythm, tension, and emotion behind his debut Eversun Records single “Moments.”…
-

The organic precision behind Calcou’s Anjuna release featuring Reaktor
Calcou shares how Reaktor, Monark, and Super 8 shaped the creative balance and live energy behind their new duo EP,…
-

14 NKS instruments that will change the way you create music
Discover 14 NKS instruments to freshen up your workflow. From lo-fi tape synths to cinematic strings, shop the Native Instruments…
-

Parallelle on crafting living basslines with Reaktor and TRK-01
Parallelle share how Reaktor and TRK-01 shape the bass and warmth in 11th Avenue, balancing analog depth with modern control.
-

Where will your sound lead you? Explore the Native Instruments Summer Sale
Save 30% on instruments, effects, and sounds in our Summer Sale. Find the tools to keep your tracks moving and…