


Layering synths and leads can completely transform a basic preset or patch into something that really grabs attention, at least when done well. But there’s a fine line between layering effectively and adding too much, which can quickly clutter your mix and ruin its punch.
Keeping it simple and intentional is the key – more doesn’t always mean better.
In this article, we’ll focus on practical techniques and strategies for layering that enhance your tracks rather than overwhelming them. We’ll be using tools like Kontakt and others found in Komplete to achieve a clean sound, but these strategies can be applied almost universally regardless of plugin or synth. The goal is to make your layers feel cohesive and purposeful.
Jump to these sections:
- The essential layering mindset
- Be mindful of frequencies
- Create contrast in the stereo field
- Shape layers with ADSR envelopes
- Digital vs. analog layers
- Acoustic vs. synthetic layers
- Be intentional with transients
Let’s dive in and turn those lead synths into something that demands attention in the mix and is greater than the sum of its layers. You can follow along with these tips using tools in Komplete Start, a free bundle of plugins and instruments for producers and songwriters.
1. The essential layering mindset
The mindset behind layering is as crucial to achieving a polished and cohesive result as is the layers themselves and is something that applies not only to lead synths but to almost everything else in production; be it drums, vocals, harmonies, or anything else.
Successful layering is all about contrast – avoiding redundancy by ensuring each layer complements the others rather than replicating them.
Many issues arise when producers stack elements that sound too similar, creating clutter instead of clarity. Instead of approaching layering like stacking dominoes, think of it like assembling a puzzle: each piece has its own role and fits into the spaces left by the others. This approach ensures that the final result is richer and more complete.
When layering sounds together, identify what you like about the first (primary) sound and what it lacks. Use all the supporting sounds to fill in those gaps. For example, if a synth patch has a strong low-end presence but lacks texture in the midrange, look for a complementary layer to add that missing bit. The same applies to drum loops, vocals, or harmonic elements, but let’s save that for another article entirely.
For now, know that contrast is king, no matter the tool – be it a synthesizer or a sampler like Kontakt.
2. Be mindful of frequencies
When layering sounds, one of the most fundamental yet often overlooked steps is using EQ effectively to ensure each layer has its own space in the mix. Muddy mixes happen when two layers occupy overlapping frequencies, making it hard to distinguish individual elements. EQ is your best tool to address this issue and give every layer clarity.
The mistake many producers make is EQing each layer in isolation.
While it might make sense on paper, this approach often leads to overlapping frequencies when the layers are combined. For instance, you might leave the high frequencies in your primary layer to preserve its brightness, then do the same with a supporting layer because you like the sheen that layer also brings to the table. When played together, though, the result is overly bright, sterile, and harsh, detracting from the mix’s balance and warmth.
The key is to listen to all layers together while EQing. Focus on carving out space for each sound to let the layers complement, rather than compete with, one another. Cut frequencies from one layer where another already dominates, and let each sound occupy its unique place in the frequency spectrum. This approach ensures a cohesive and polished result where the combined layers sound balanced and impactful.
Pro tip: If a supporting layer in your lead needs heavy EQing to fit the mix, try shifting the patch up or down by 12 semitones. This naturally moves it in the frequency spectrum, reducing the need for aggressive EQ while keeping its best qualities intact.

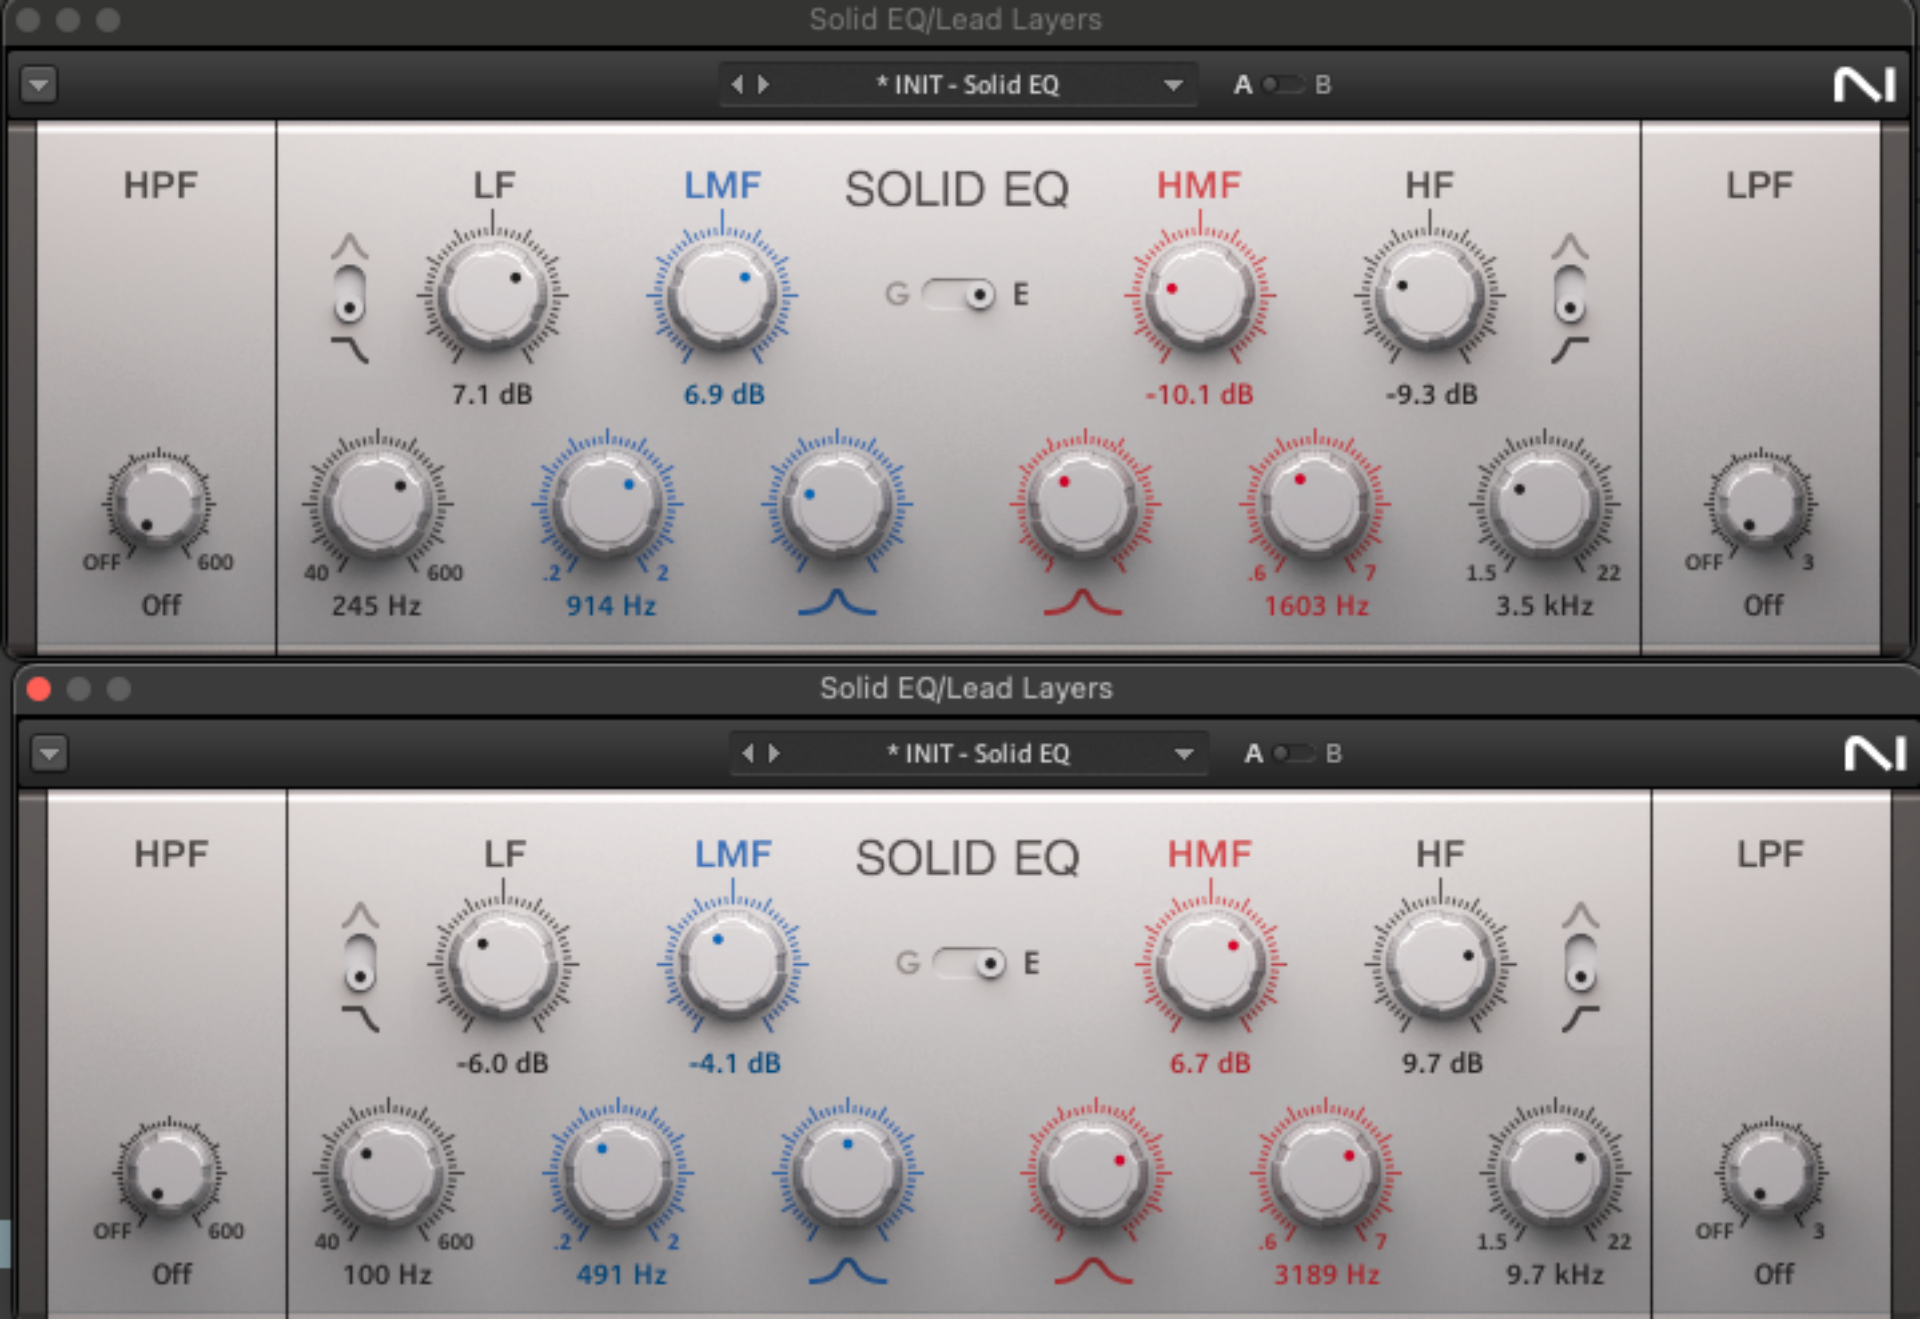
Pro tip: Analog emulation EQs like Solid EQ are great for sectioning off frequency bands of each layer as their gentler slopes help multiple layers of synths mesh and gel together fluidly.
3. Create contrast in the stereo field
Creating contrast in the stereo field is another highly effective way to make your lead synth feel sharp and focused, like its position at the center stage of the mix, while still feeling 3D and larger-than-life.
Start by summing the primary lead synth layer to mono using a stereo imaging tool. This locks it directly in the center of the mix, giving it a clear, commanding presence. Without contrast in the sides, though, a centered lead can feel flat or undefined, which is where supporting layers come in.
To heighten the lead’s impact here, introduce a supporting layer or two to fill the far edges of the stereo field. Apply effects like reverb, delay, or aggressive stereo imaging to make these layers as wide as possible, creating a clear distinction between the mono lead and the stereo extremes of the supporting layers. This contrast sharpens the perception of the center lead, making it feel more prominent without overpowering the mix.
Panned hard left and right, the two supporting layers will make the mono lead down the middle feel even more in focus by comparison.
For even more depth, create two slightly different supporting layers.
Adjust small parameters like ADSR envelopes, delay settings, or modulation, and pan one layer hard left and the other hard right. These subtle variations add movement and detail, enhancing the overall width via the supporting layers while keeping the primary lead, in mono, firmly in focus. It’s almost like replicating the effects of ‘double tracking’ in a recording studio but with synthetic and VST-based layers in your DAW!
Pro tip: Use a mid/side EQ to remove any frequency content in the center of the mix in the supporting layers so that it doesn’t interfere with the synth’s main layer.
4. Shape layers with ADSR envelopes
Using ADSR envelopes to shape how individual layers evolve is the best way to control how those multiple layers interact. Lead synths often have a faster attack with medium to long decay and sustain, which works great for the primary layer.
However, when selecting supporting layers, it’s crucial to consider how they can complement and contrast the movement of the primary layer. For example, if the primary lead has a quick attack and a medium decay, a supporting layer with a slower attack and longer release can create a natural interplay.

The goal is to ensure that each layer moves without overlap, both in time and in frequency. ADSR envelopes, most commonly applied to amplitude or filter settings, allow you to stagger the motion of your layers. This prevents the common issue of two layers occupying the same space at the same time, which can lead to a muddy mix. Instead, as the lead fades out, the supporting layer can fade in, creating a dynamic interaction that feels more intentional and polished.
This approach reduces potential mix problems and adds a sense of depth and fluidity. By carefully tailoring the envelopes of each layer, you can create a sound perceived as one cohesive source, even if it’s built from multiple synths.
5. Digital vs. analog layers
With the basics covered, it’s time to explore more creative ways to layer sounds and use contrast to build patches that feel complete and modern. When it comes to sound design, there are really two primary “buckets” of sound: analog and digital. Analog (or analog emulation) is often associated with qualities like warmth, grit, and texture, while digital sounds tend to lean toward precision, brightness, and clarity. By combining these two types of layers, you can create something that’s both rich and contemporary.
For example, if you’re going for that warm, organic analog vibe, start with an analog emulation synth – something with the depth and soul that analog is known for. Then, to round out the sound, add a digital layer underneath that brings in brightness and precision, filling in the gaps where the analog layer might lack definition. Wavetable synths like Massive X work great for this. Use EQ to carve out space for each element so they fit together like puzzle pieces, creating a cohesive sound that draws on the best of both worlds.
This hybrid approach is especially effective for producers working entirely in-the-box, as it delivers a modern, punchy, and full-bodied sound while retaining the analog character that so many producers strive for these days. It’s a balance of grit and polish, giving you a sound that feels both soulful and current – perfect for today’s production standards.
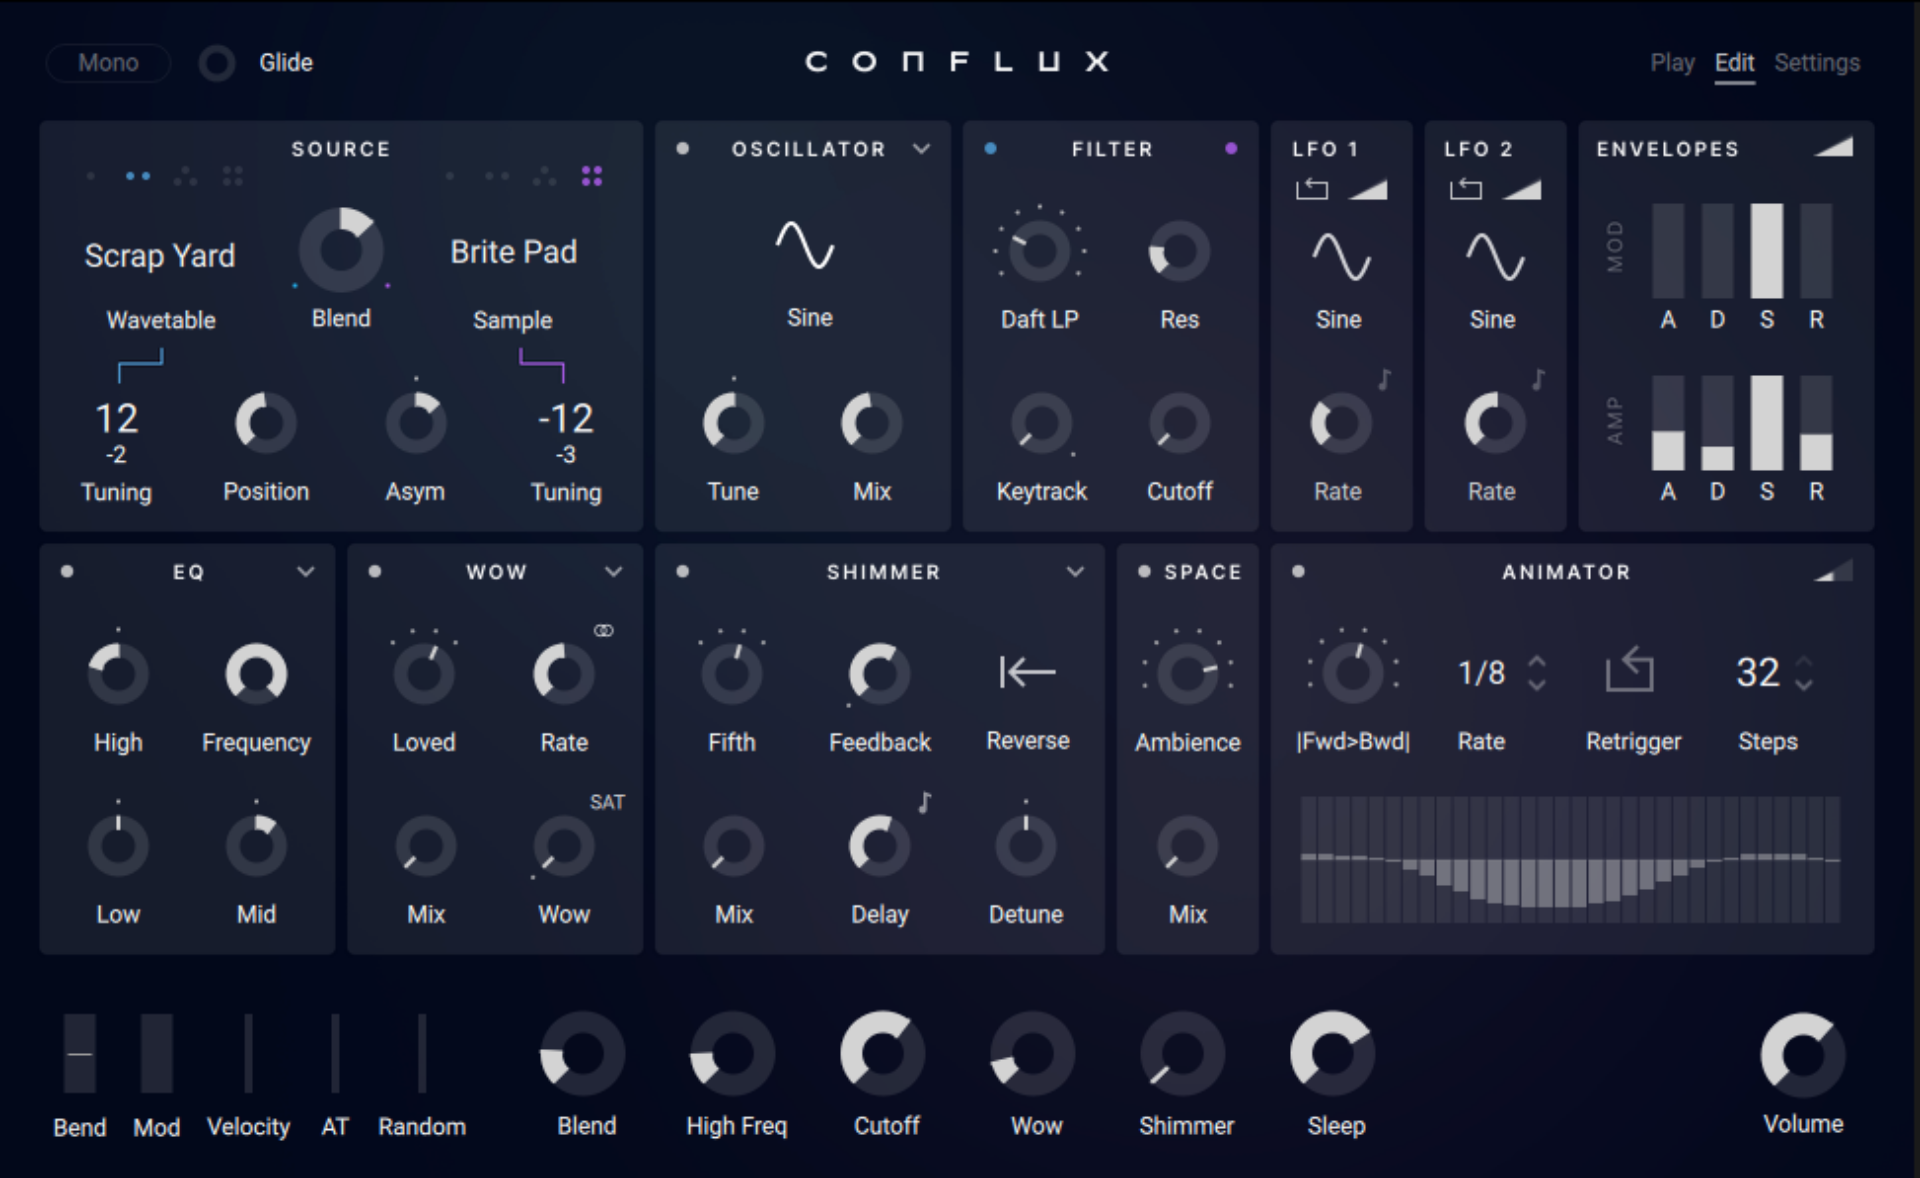
Layering two sound sources to get an evolving and nuanced end result, exactly like what we’re talking about here, is the entire basis around Conflux, which melds and morphs different vibes into a sound that “makes sense” even when two completely different timbres are mixed.
6. Acoustic vs. synthetic layers
Building on this concept, layering synthetic leads with acoustic-driven elements can add a completely new dimension to your sound design. For instance, a classic synth pluck from your favorite hardware emulation or wavetable VST can take on a whole new character when paired with an acoustic counterpart.
Adding something like a guitar pluck or even a subtle human vocalization from Jacob Collier’s Audience Choir library underneath the synthetic layer creates a fresh yet familiar blend, bridging the gap between modern production and that timeless, humanized vibe.
Let’s take a listen to this in action. This softer triangle wave synth is cool but isn’t anything to write home about on its own.
But with a touch of vocals layered in, it adds a light and other-worldly relatability to the lead stack.

Humans have spent thousands of years adapting to the sound of acoustic instruments like harps, guitars, and voices. Even a subtle addition of these elements can make a synthetic sound feel more relatable and grounded. For example, layering a faint acoustic pluck under a sharp synth stab can add warmth and depth, turning a sterile patch into something more engaging and emotionally resonant.
The key here is subtlety.
Often, just a small acoustic layer is enough to make a sound feel complete and unique without overpowering the synthetic lead. By combining these contrasting elements, you can create patches that not only feel well-rounded but also stand out as something entirely its own.
7. Be intentional with transients
If the ADSR envelope shapes the macroevolution of your layers, transients operate on a micro-scale, controlling how each sound’s initial impact to the listener. Being intentional about your transients is crucial for creating clean, crisp mixes. Let’s break it down into two main points.
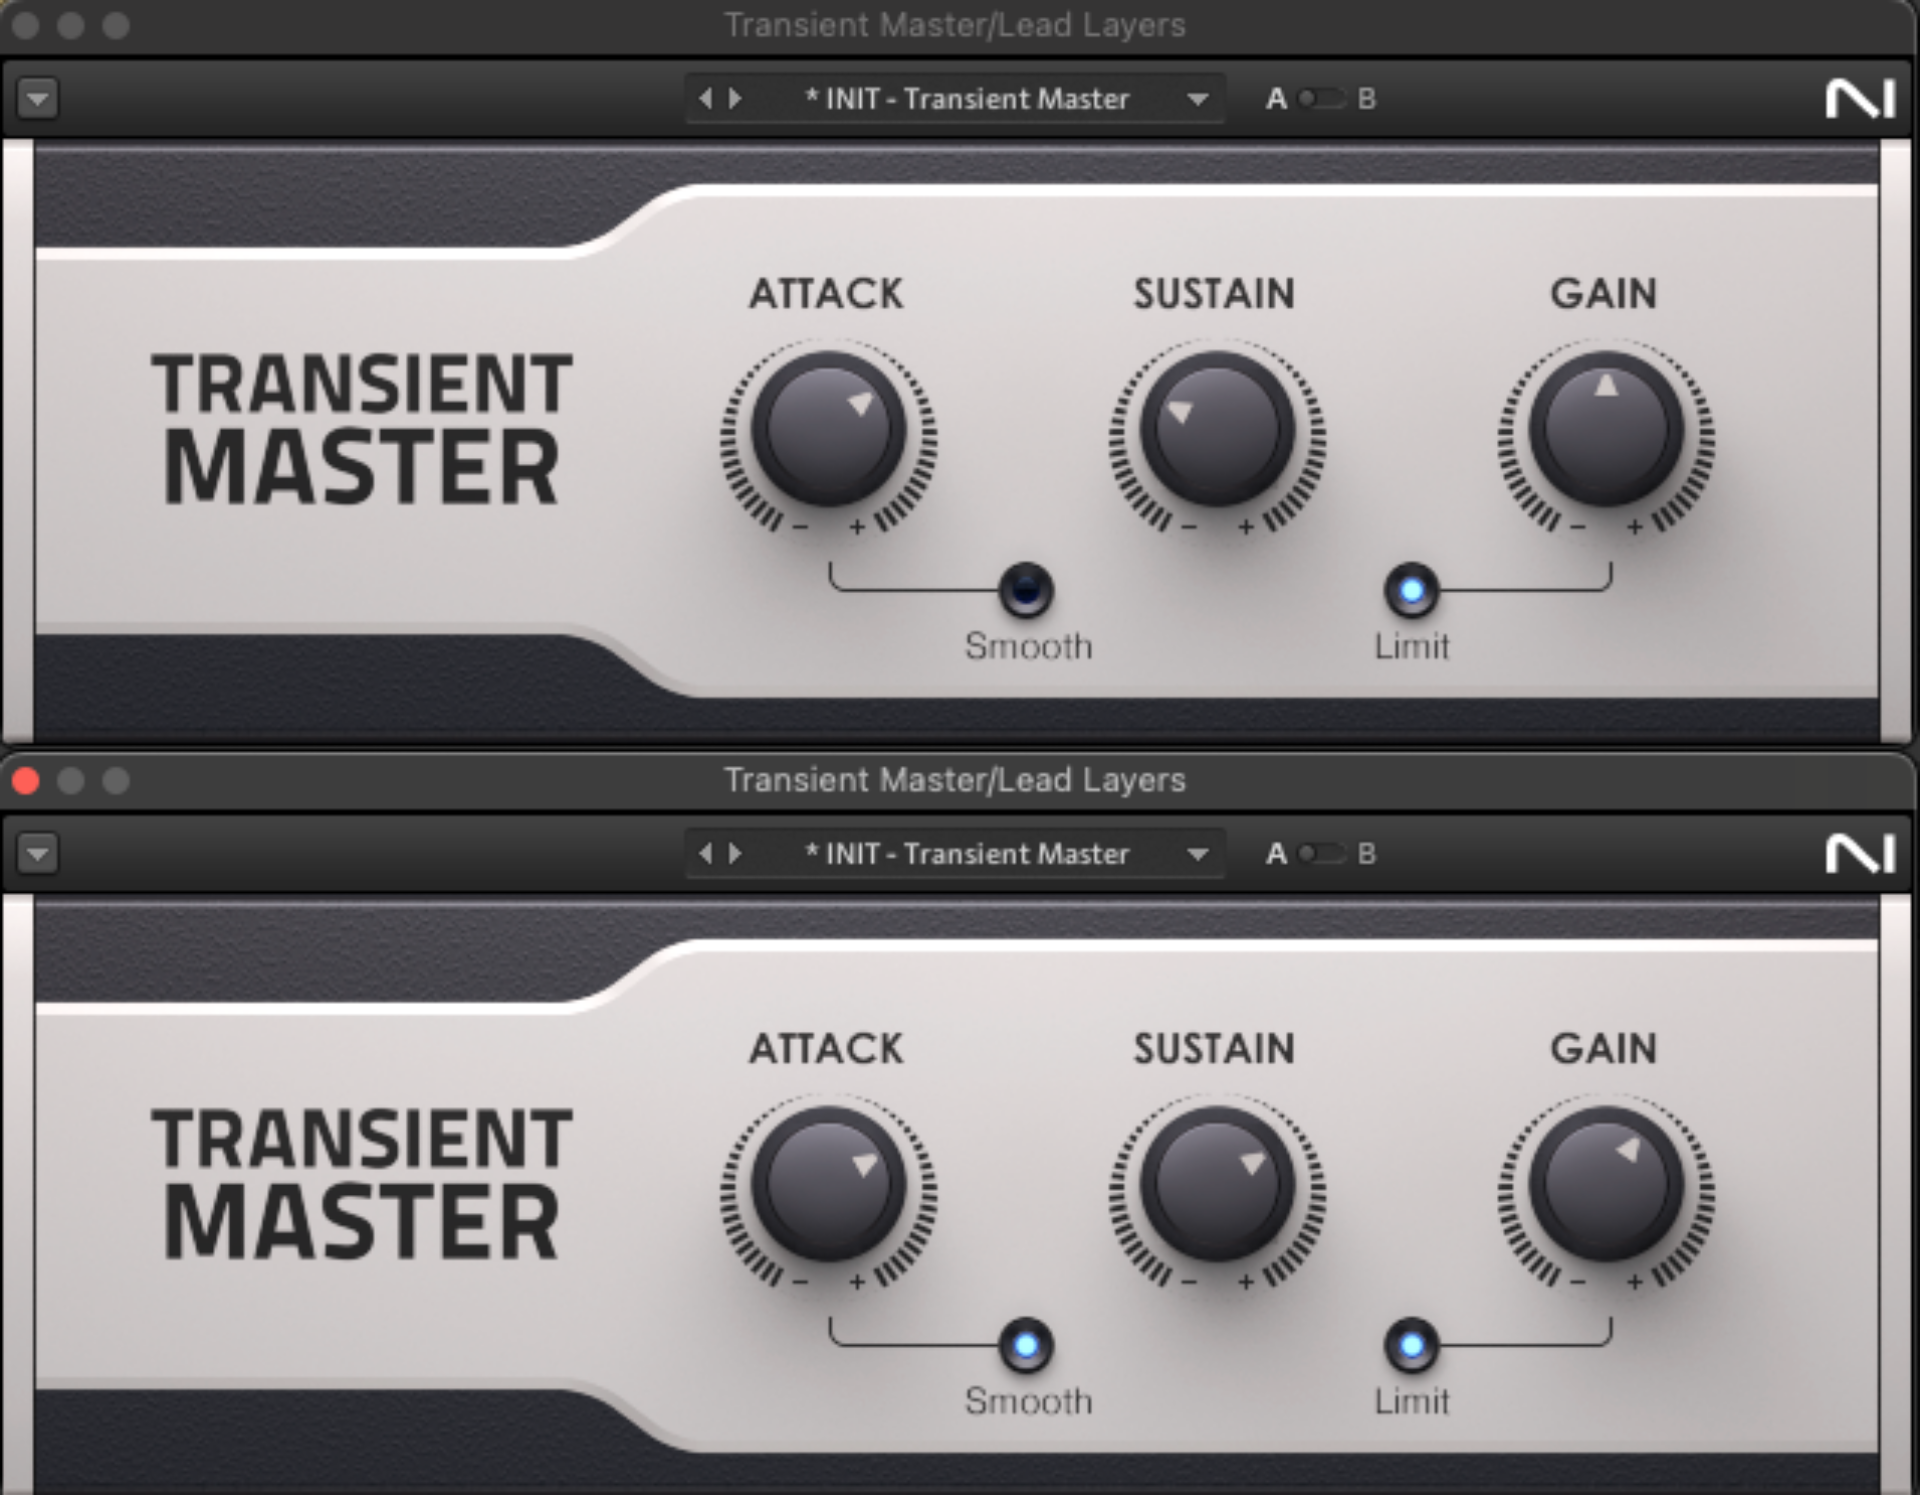
First, contrasting transients help avoid overlapping volume spikes. If two layers in your lead have identical plucky transients hitting at the same time, you’ll create a sudden volume bump that eats into your headroom – a critical resource for later mixing stages. Tools like Transient Master in Kontakt or Komplete can give you precise control here.
For instance, if your primary layer has a sharp, punchy attack, lean into it by boosting that transient and then, on your supporting layers, soften the attack to avoid conflict, ensuring the primary layer dominates those first milliseconds of the sound.
Second, transients affect the perceived depth of your mix. Humans associate sharper, more detailed transients with closer sounds, while softer attacks naturally feel farther away. Think of it like snapping your fingers: up close, you hear every detail, but from across the room, it’s much fainter and less detailed.
Transient shaping tools can help create this sense of depth.
The audio example below shows just that. Drawing out the transients of the plucky layer helps the softer layer underneath have its own room to breath.
Boost the transients of your primary lead layer to bring it closer to the listener, making it feel more immediate. Meanwhile, the attack on supporting layers should be reduced to push them slightly back into the mix. This subtle adjustment not only creates a cleaner soundstage but also allows your layers to interact dynamically, creating a mix that feels cohesive and engaging without overcrowding those critical initial milliseconds of the sound.
Start layering leads with a clear, clean sound
Everything we’ve covered comes back to one idea: intentionality. And while using every single approach on every single lead you do may be overkill, applying one or two choice approaches per track or mix might make all the difference. Whether it’s shaping ADSR envelopes for movement, tweaking transients for clarity and depth, or using contrast to make layers complement each other, these techniques are about creating balance and focus in your mix.
The real takeaway here is how small decisions can turn an ordinary patch into something that feels alive. These aren’t flashy tricks but foundational practices that let your mix develop dynamically rather than competing for space and attention. When done right, it actually makes the actual mixing stage way easier since you have less things competing for the same space as each layer moves and dances around each other to create singular sounds that are greater than the sum of their layers.
Next time you’re layering a lead, stop just stacking sounds together and instead think about how each layer moves, interacts, and contributes to the bigger picture. These little shifts in your process can make a huge difference, helping you craft sounds that feel professional, deliberate, and unique to your vision.
You’ll start to notice the change as soon as you put these ideas into action.
Related articles
-

The organic precision behind Calcou’s Anjuna release featuring Reaktor
Calcou shares how Reaktor, Monark, and Super 8 shaped the creative balance and live energy behind their new duo EP,…
-

14 NKS instruments that will change the way you create music
Discover 14 NKS instruments to freshen up your workflow. From lo-fi tape synths to cinematic strings, shop the Native Instruments…
-

Parallelle on crafting living basslines with Reaktor and TRK-01
Parallelle share how Reaktor and TRK-01 shape the bass and warmth in 11th Avenue, balancing analog depth with modern control.
-

Where will your sound lead you? Explore the Native Instruments Summer Sale
Save 30% on instruments, effects, and sounds in our Summer Sale. Find the tools to keep your tracks moving and…
-

How Mr. Bill builds sonic worlds in Massive X
Mr. Bill explains how Massive X and instinctive sound design shaped the storytelling process behind his new downtempo album, Mr.
-

How Father Funk builds low-end energy with Kontakt instruments
Father Funk breaks down how bass instruments in Kontakt power the low-end muscle and live feel behind his new record,…
-

Nick Hook and Sascha Bühren on the art of the professional workflow
Discover how industry veterans Nick Hook and Sascha Bühren master the art of organized chaos using Komplete 26.
-

St. Mary on translating emotion into production with Kontakt and Guitar Rig
St. Mary breaks down the production of her debut EP Amen, using Kontakt and Guitar Rig to balance chaos, emotion,…