


Did you know that women are significantly underrepresented in the music industry? Native Instruments has put together a bundle of instruments and effects plugins called the Music Essentials Bundle. A portion of the proceeds will benefit Beats By Girlz, a global nonprofit organization whose mission helps empower women and gender-expansive people in music technology.
The Music Essentials Bundle includes the inspirational PLAYBOX and DUETS instruments (which you can use with KONTAKT 7 or the free KONTAKT 7 PLAYER), plus creative delay effect REPLIKA XT, next generation reverb Neoverb, AI-powered mastering tool Ozone 10 Elements, and authentic analogue console emulation Brainworx bx_console N.
In this tutorial we’re going to use the Music Essentials Bundle to make a beat from scratch. We’re going to use Ableton Live as our audio editing software for this tutorial (a free trial version is available), but you can use whatever DAW you like to follow along and make a track that sounds like this:
Jump to these sections:
- Make a drum beat
- Program chords
- Add a bass line
- Compose a melody
- Create a counter melody
- Arrange your track
- Master your track
Follow along using the Music Essentials Bundle for $49 (save over 90%!)
1. Make a drum beat
Let’s start our track by making a drum beat, which we will serve as the foundation for our beat. Start by setting your project tempo to 80 BPM.

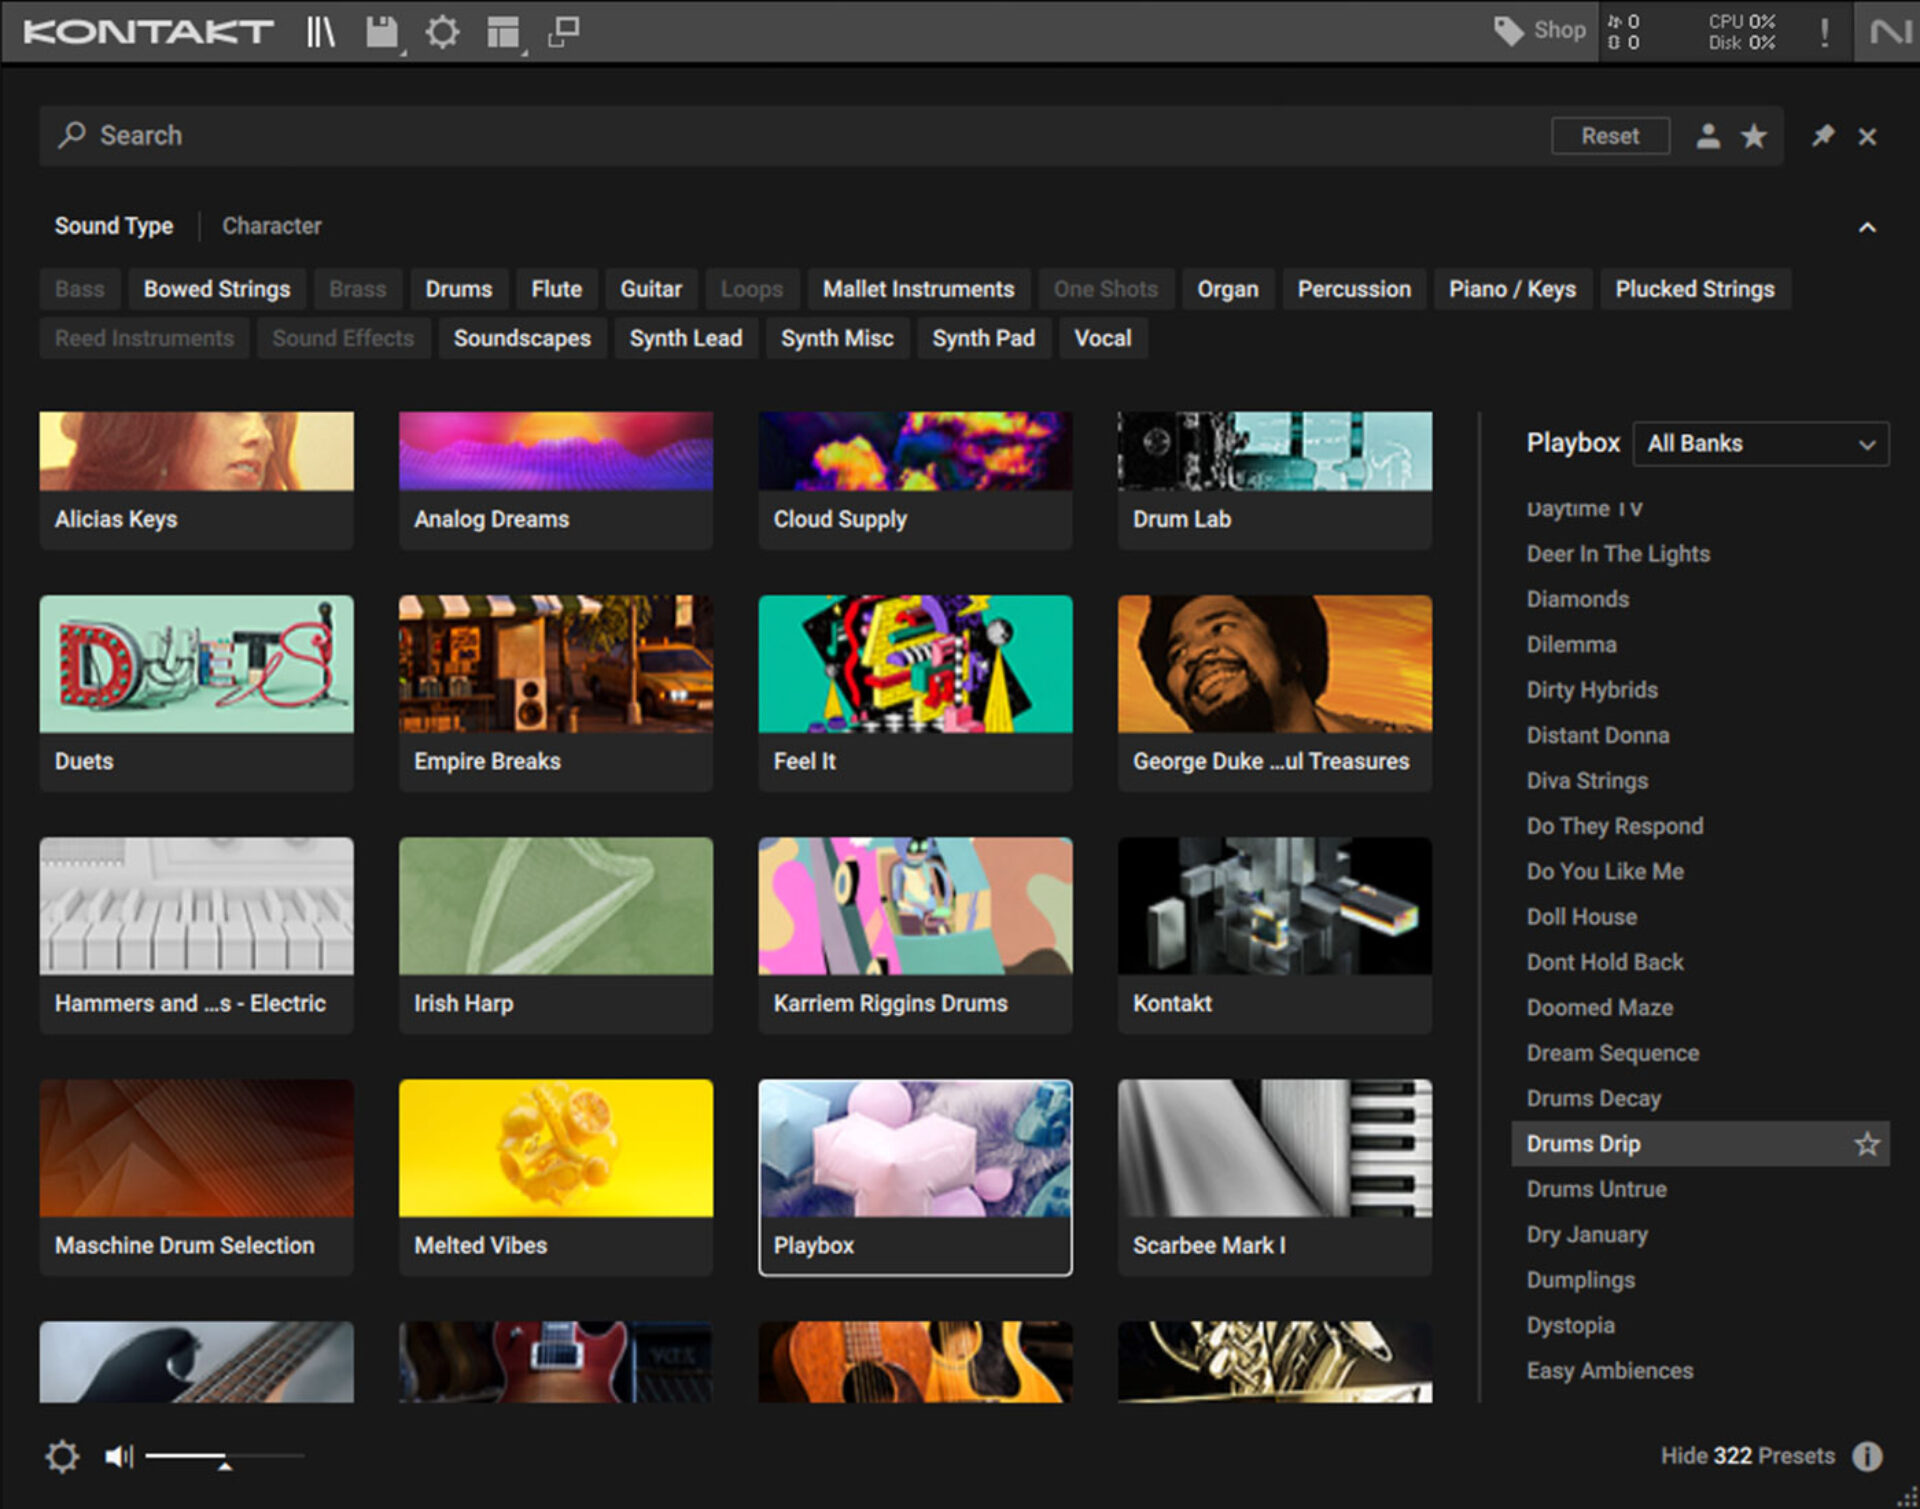
Now add KONTAKT 7 to a MIDI track, and in the browser click the PLAYBOX instrument, then double-click Drums Drip in the preset list to load it up.
In your audio editor software’s MIDI grid editor, add E3 hats on eight notes, with a C3 kick on the first beat, and an A3 snare on the third beat. We’ll use velocity values of 100 for everything in this tutorial.
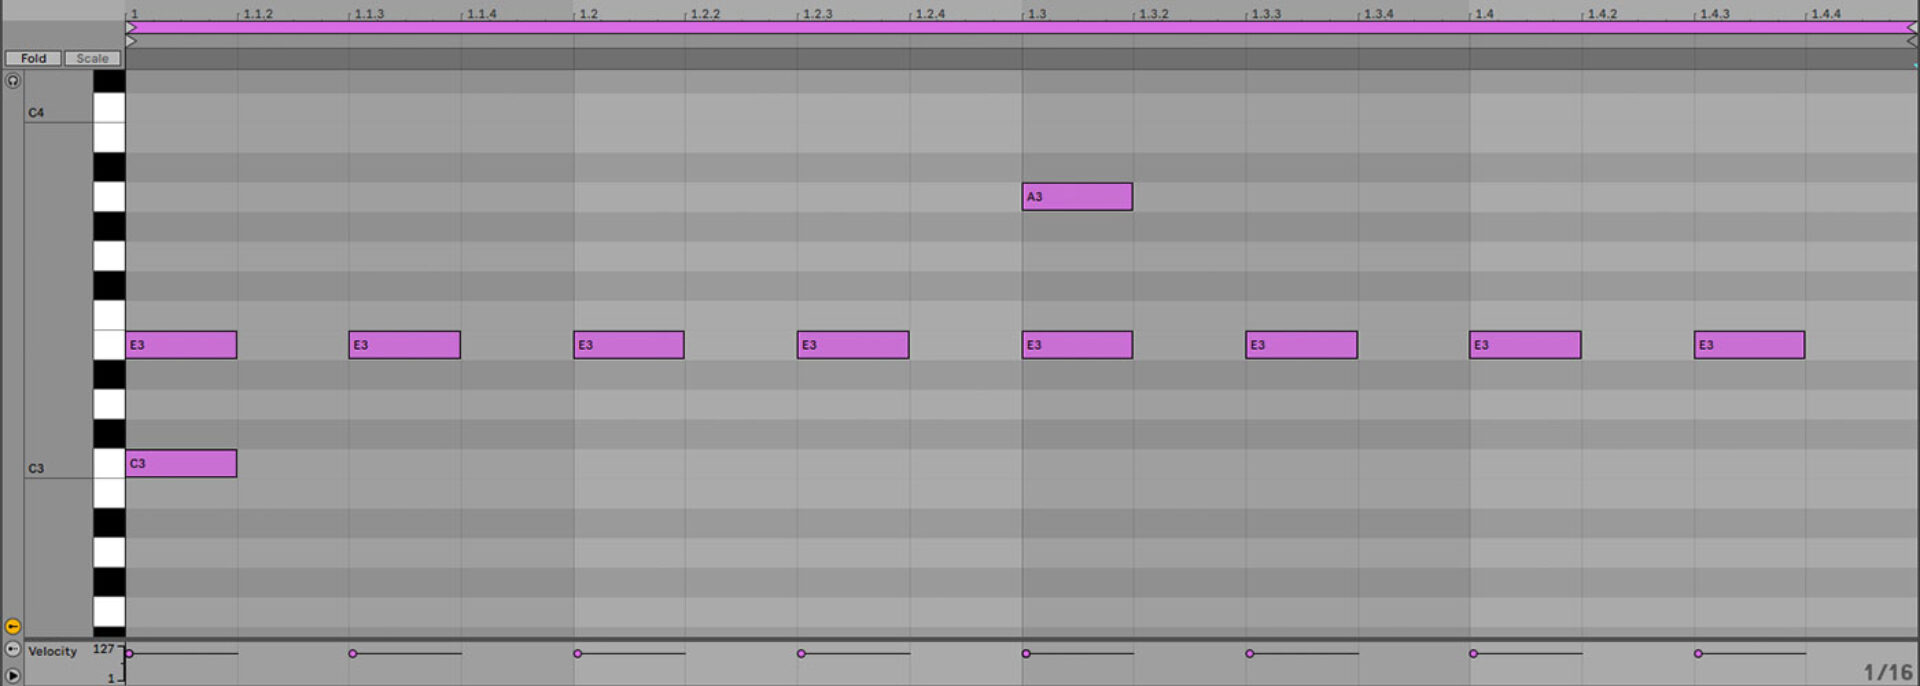
Loop this MIDI clip out for two bars.
2. Program chords
Now we’ve got a drum part, let’s create come chords to base our music around.
Add another MIDI track, and again load up KONTAKT 7 and select the PLAYBOX instrument. This time, load up the Pandoras Box preset.

You’ll notice that this preset works a little differently to most instruments: each note you play will trigger a chord rather than an individual note.
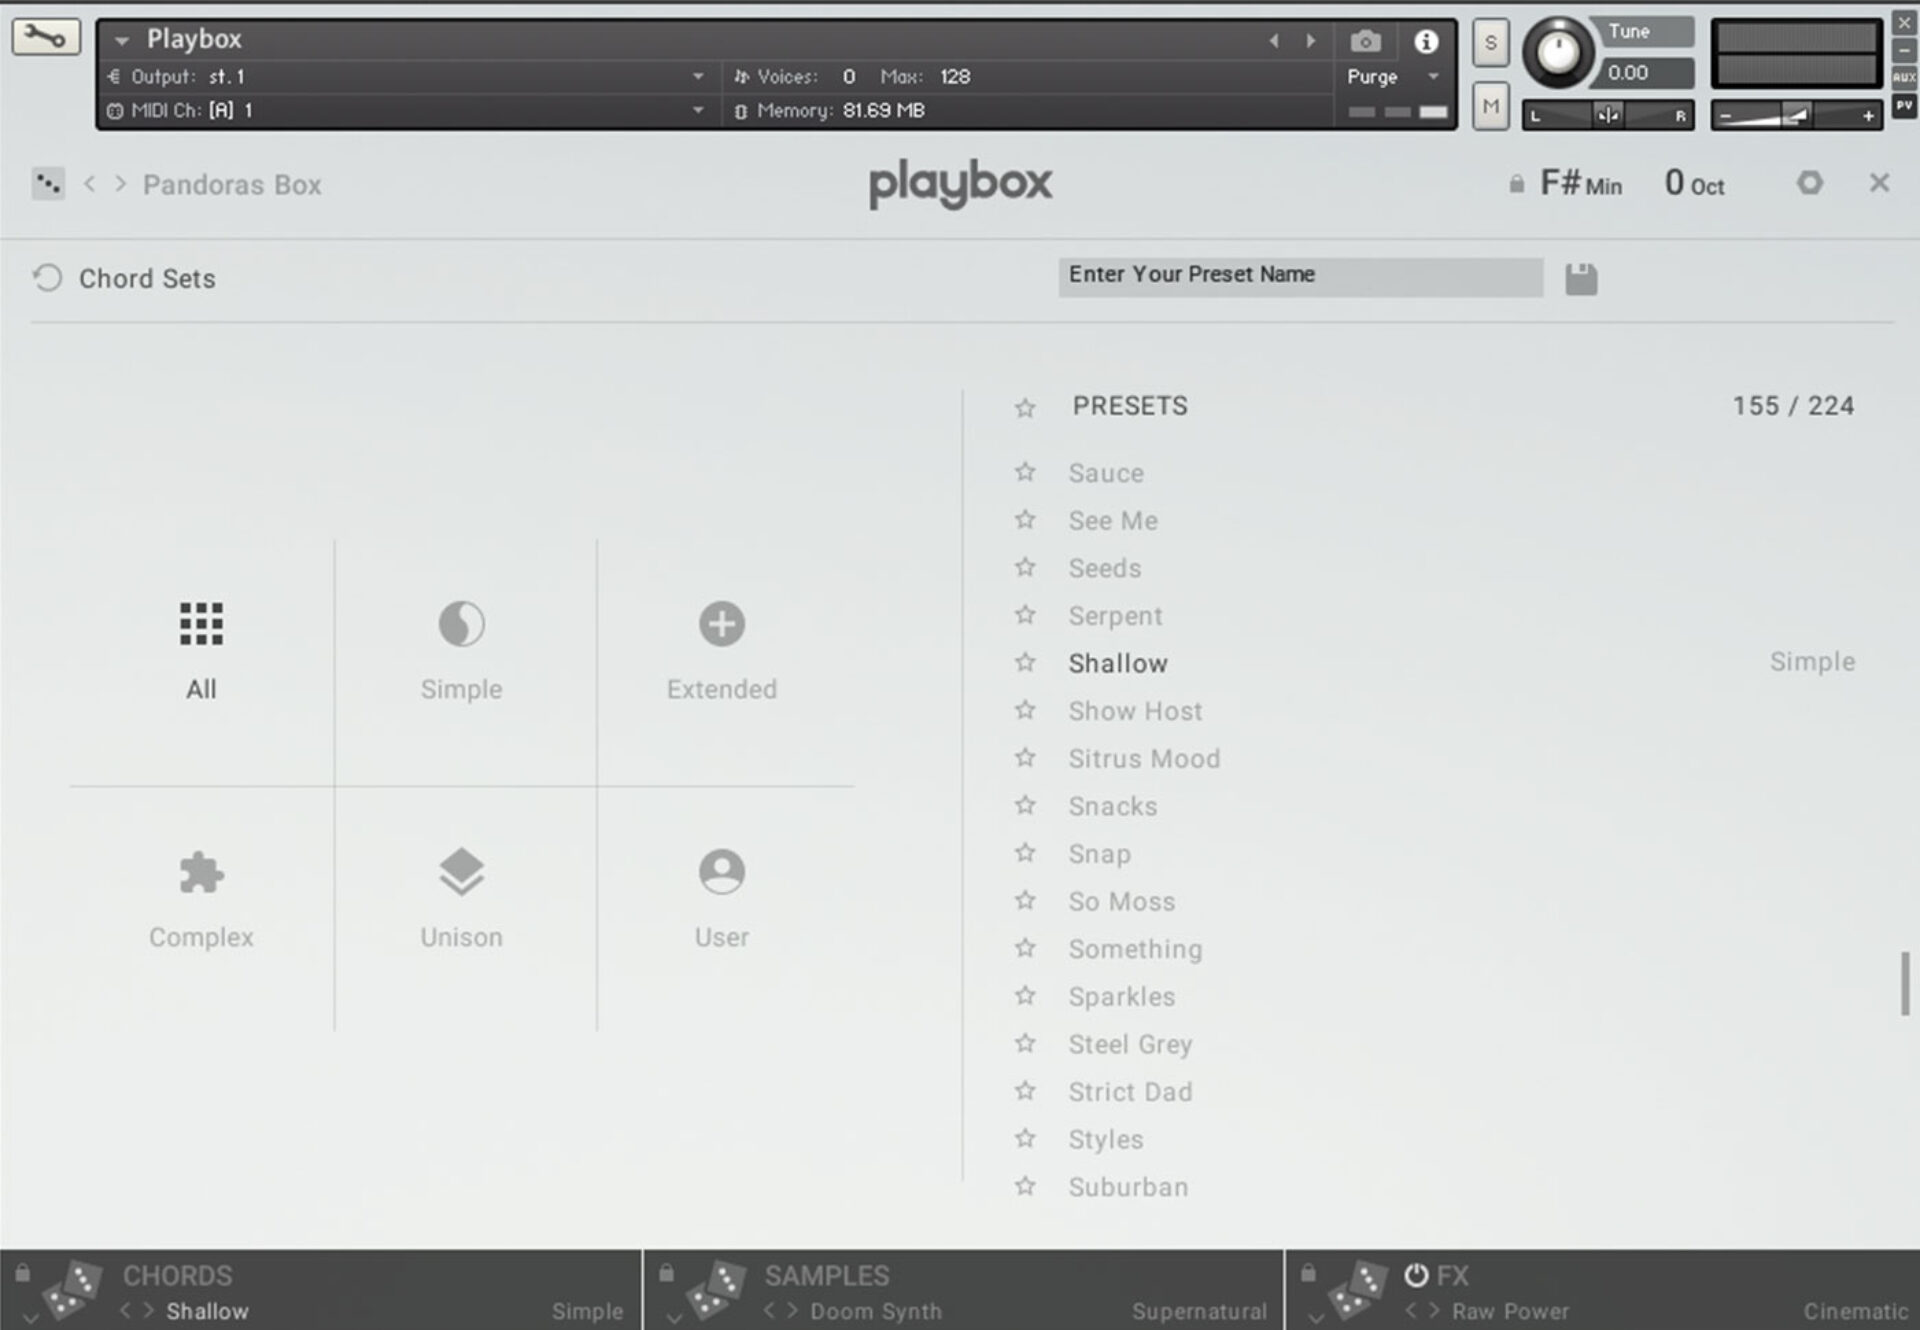
Let’s customize this preset to make it more individual. We can change the chords used, and the sound we’re playing them back with using the Chords and Samples panels at the bottom of the interface. In the Chords panel click where it says See Me, and change the chord preset to Shallow.
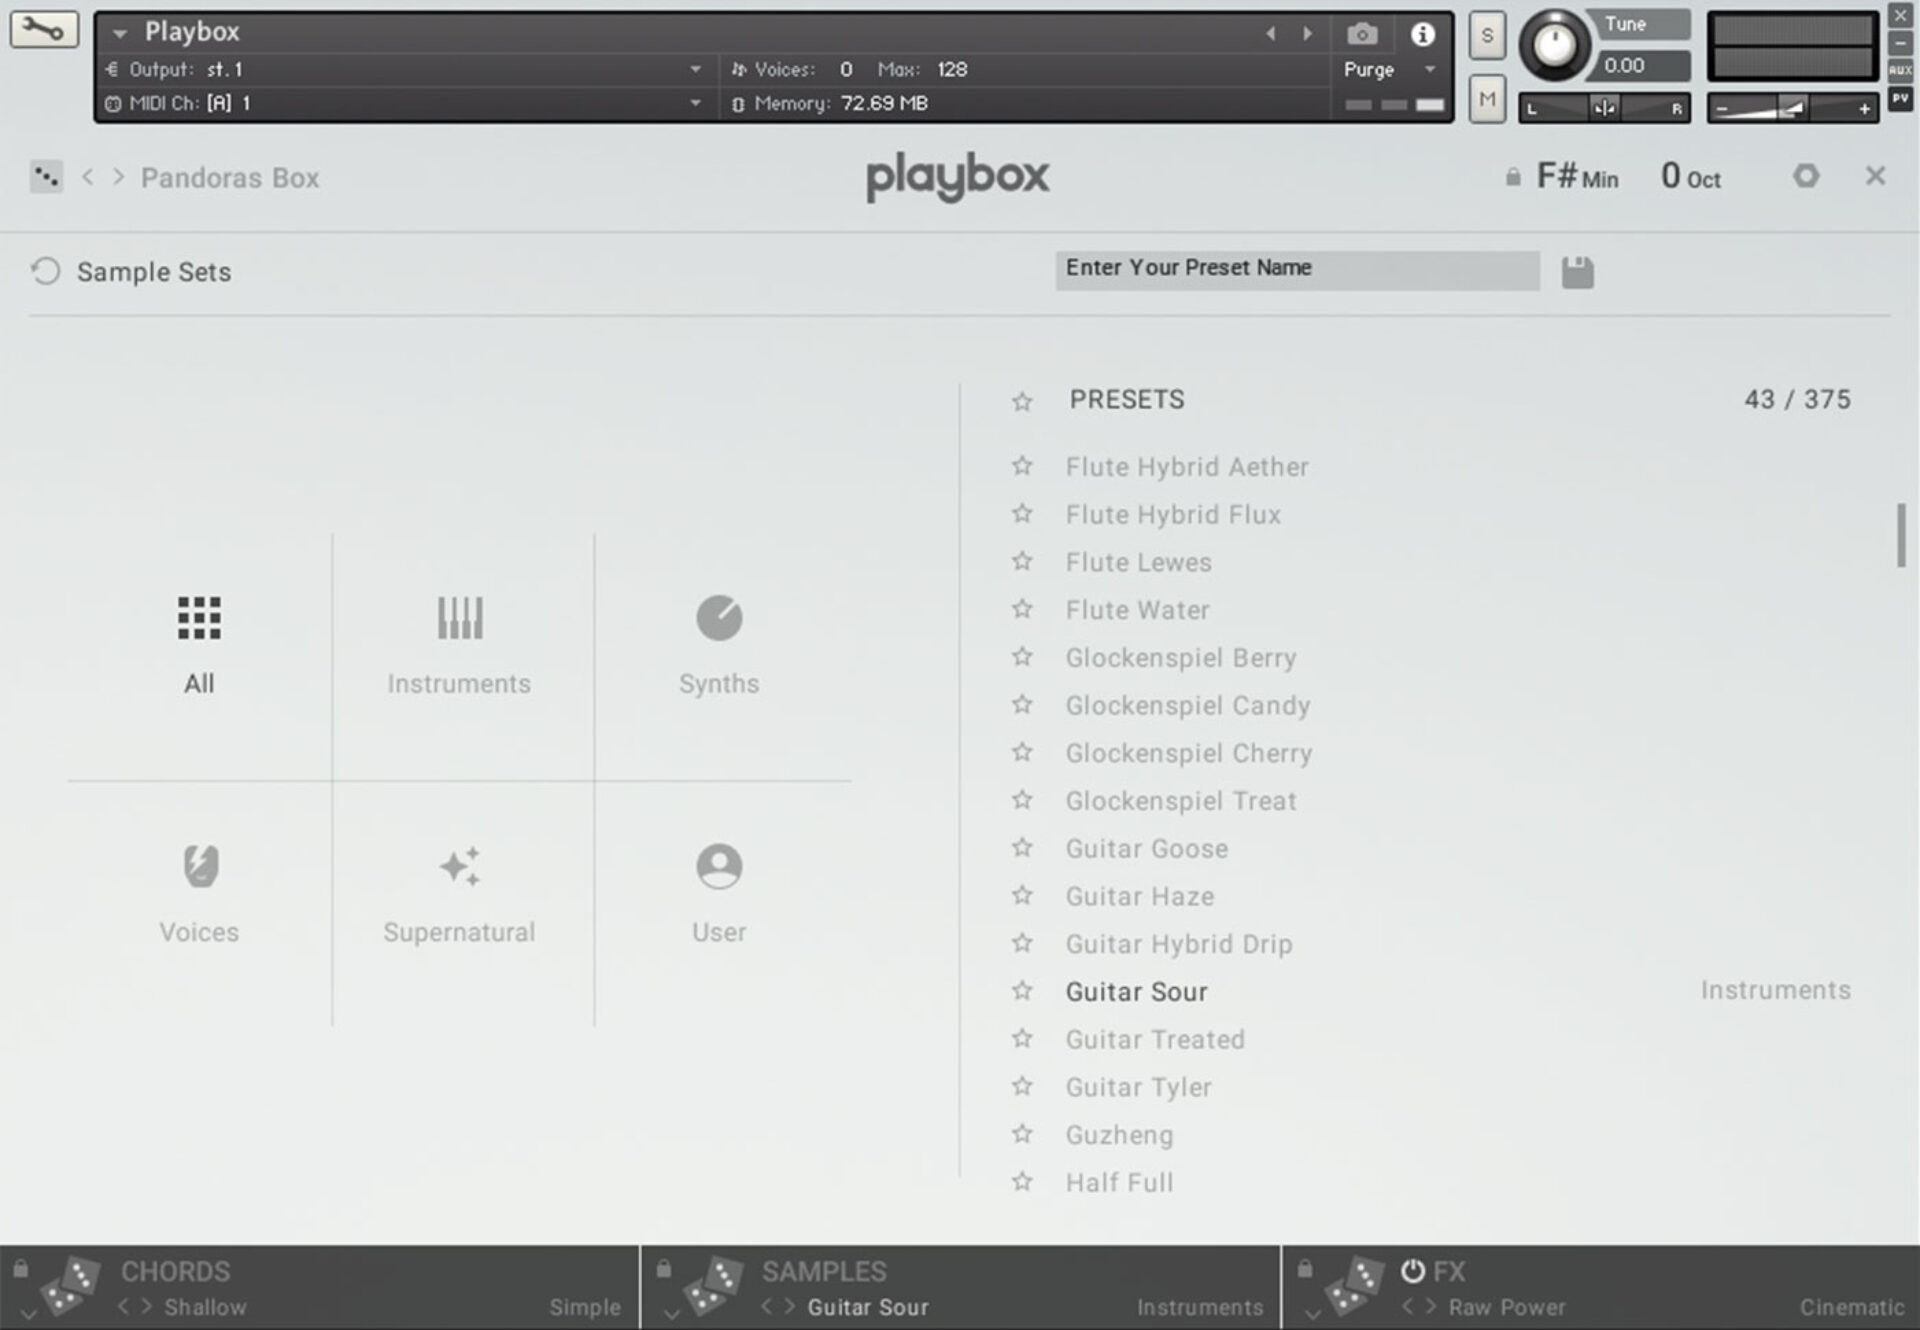
Now in the Samples panel click where it says Doom Synth and change it to Guitar Sour.
Now we’ve made a new patch, let’s create a chord progression. Program a sequence that plays C3, G3, F3, and A3.

This sounds cool, and it was certainly easy to create. But what chords are we actually playing? We can see the notes that are actually being played if we click where it says Chords in the Chords panel. When we play the sequence back, PLAYBOX highlights which notes are being played.

We can see from the Chord Matrix that our chord progression is playing F# minor, E5/B, Asus2/B. Dmaj7(no3).
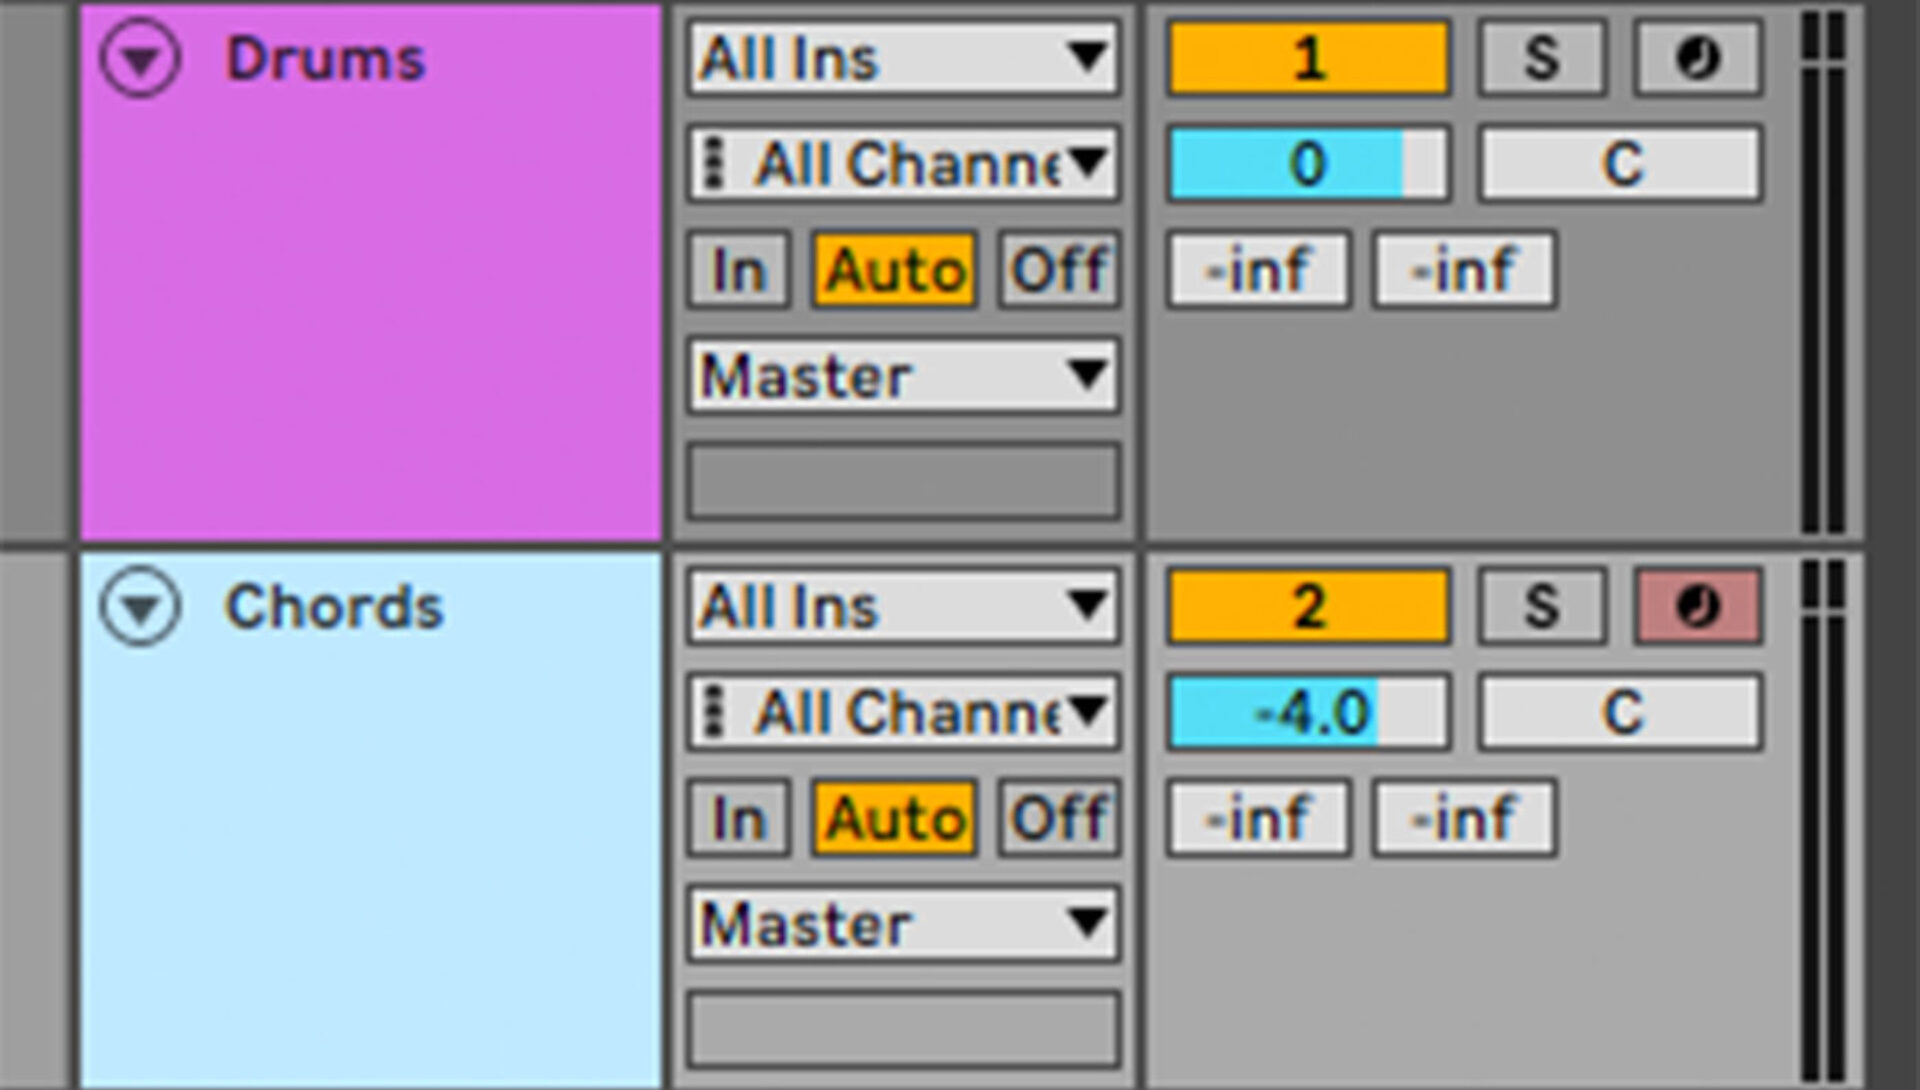
To balance this chord progression with our drum part, set this track to -4 dB.
3. Add a bass line
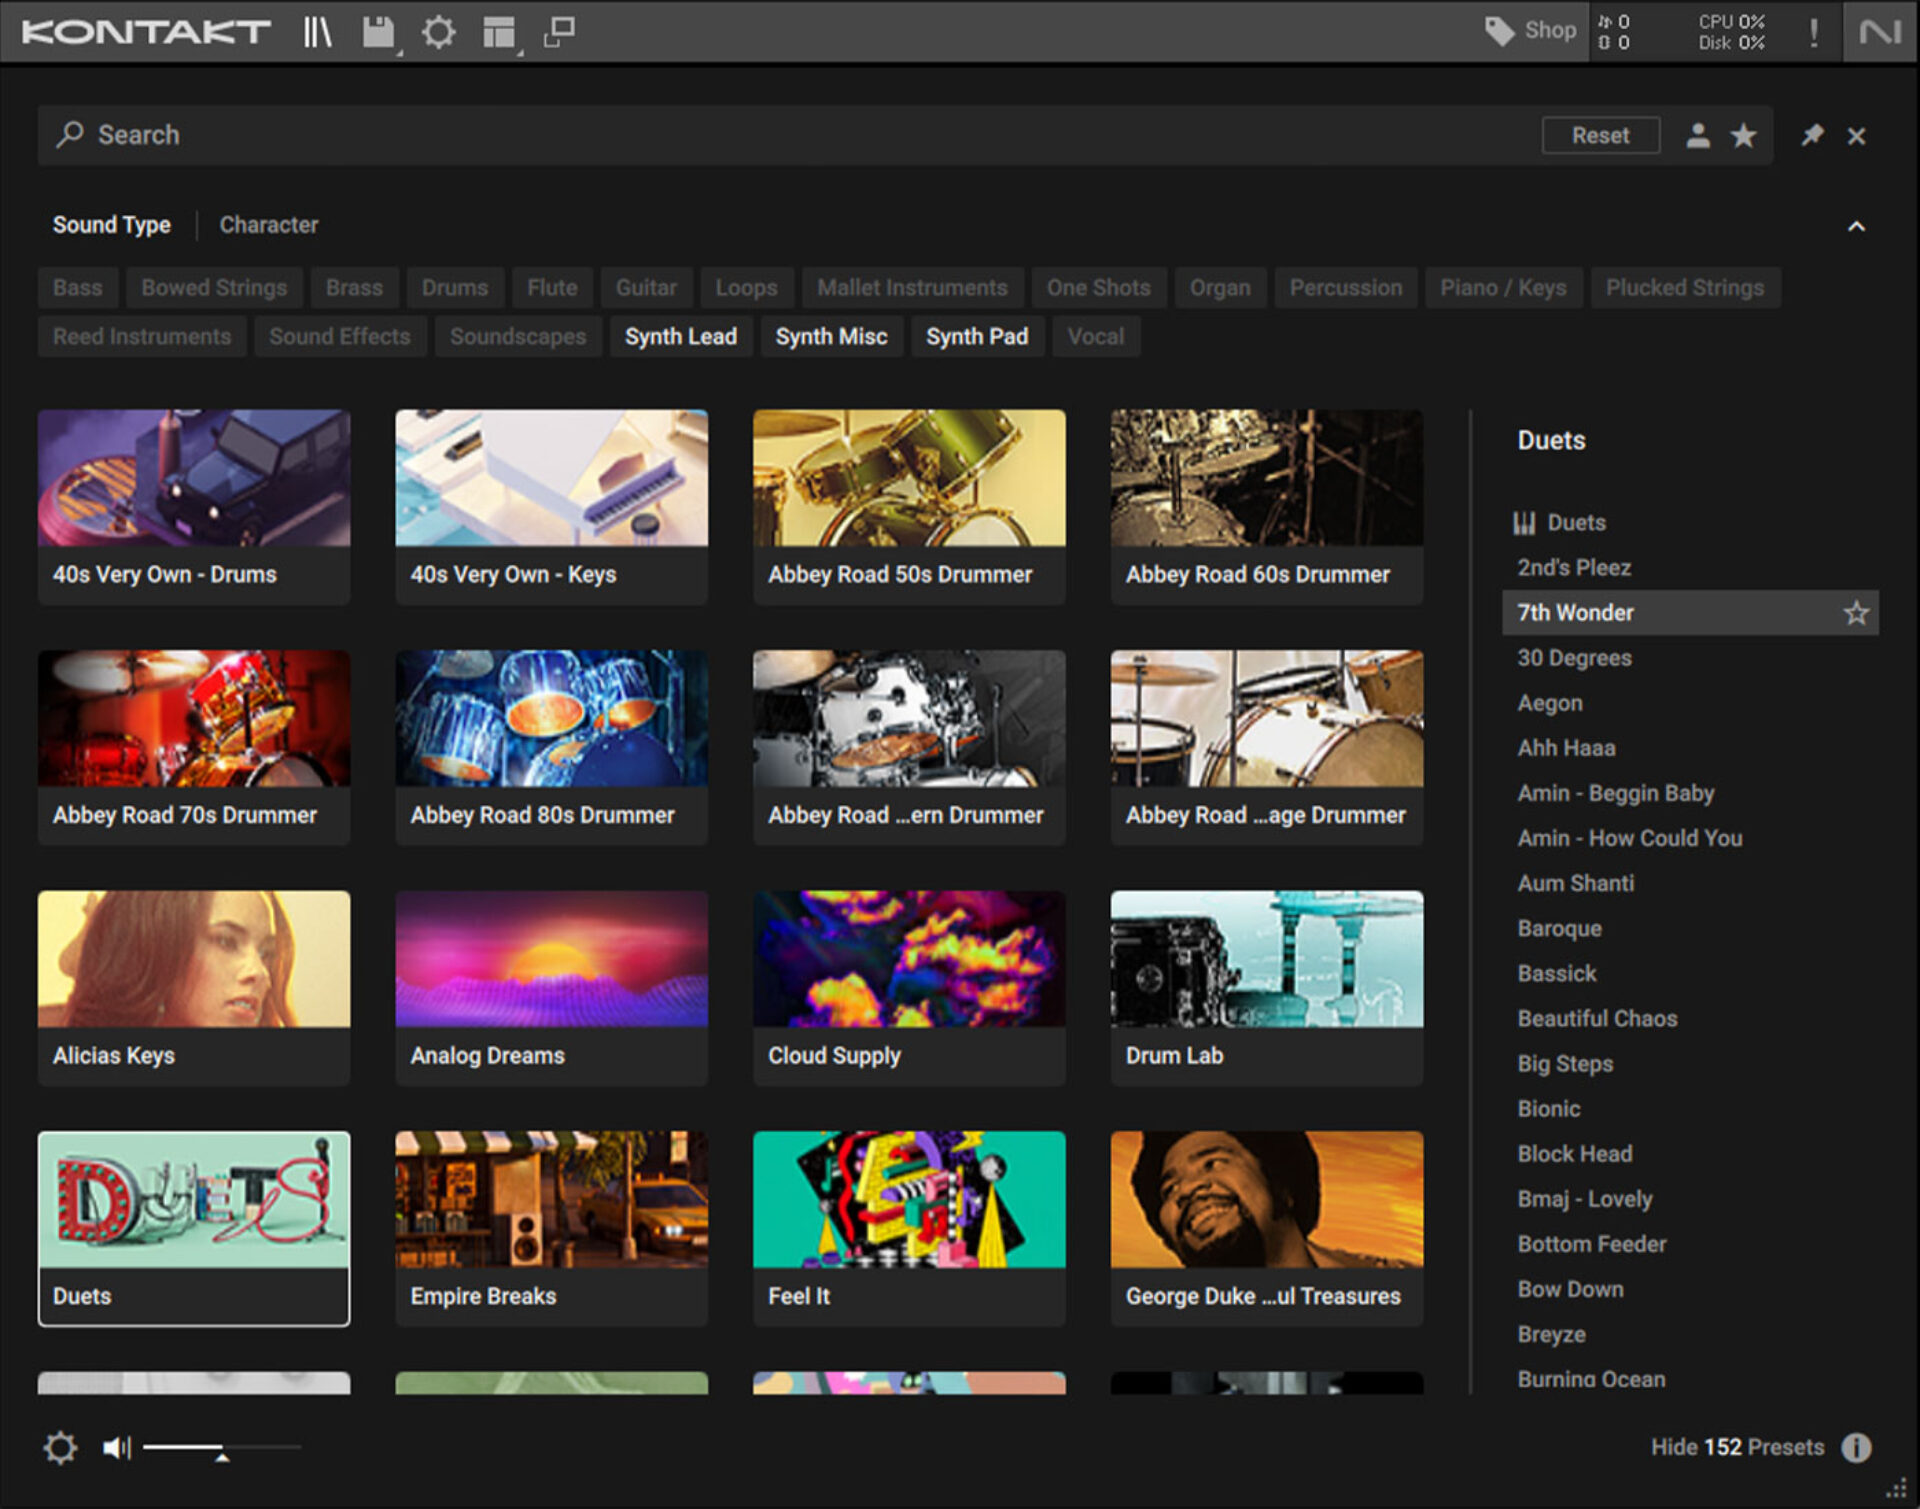
Next we’ll add a bass line to help drive our beat. Add another MIDI track with KONTAKT 7 on it, and this time select the DUETS instrument, and load the 7th Wonder preset.
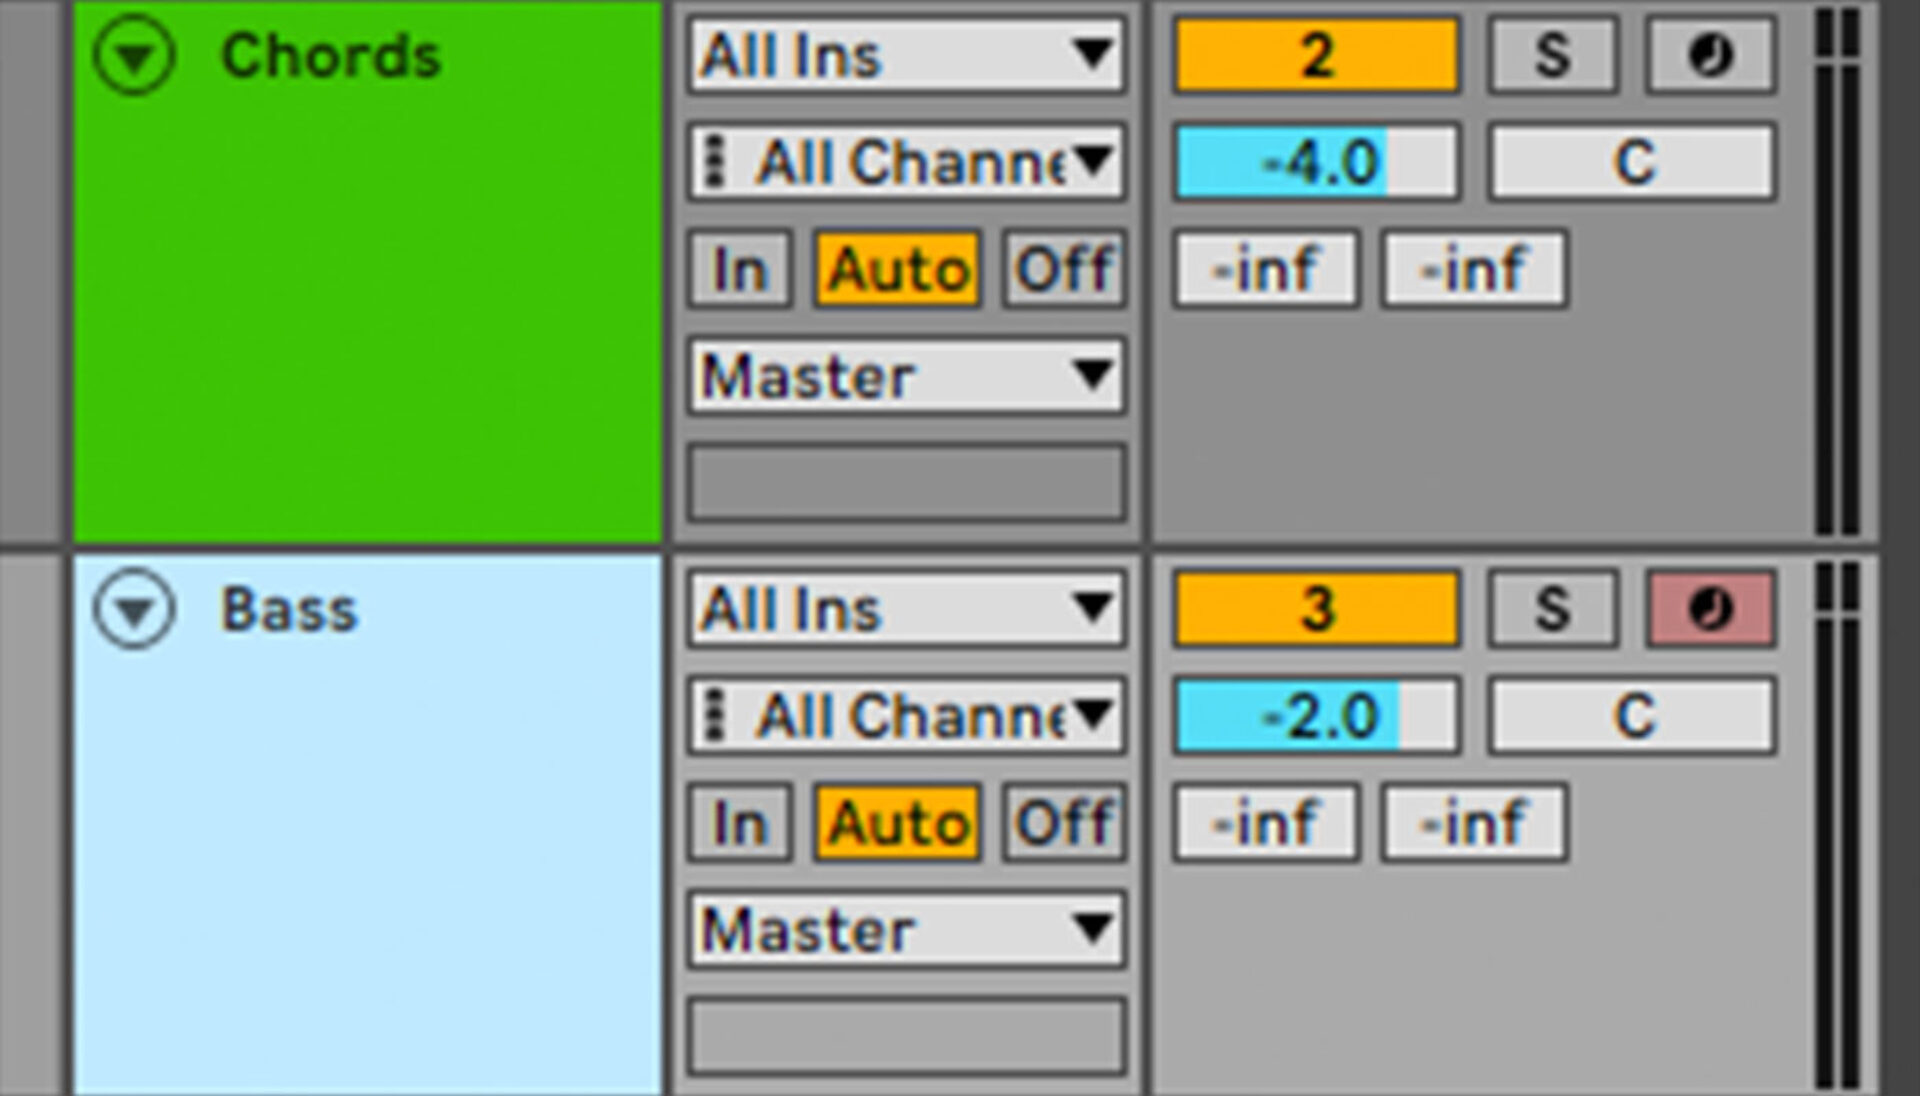
Set this track to -2 dB to balance it with the other elements.
Sequence a bass line that plays F#1, E1 and D1 on 16th notes, missing out the first and third beat of each bar to allow the kicks and snares to pop through the mix.

4. Compose a melody
Add another KONTAKT 7 track, and this time select Duets and load up the Time Warp preset.

Copy the melody we’ve used here.

Let’s layer this synth with another preset to get a fuller sound. First, turn the synth’s track down to -7.5 dB.

Also, let’s turn the synth’s Delay and Reverb down too, so we can add our own effects without the sound becoming too messy.

Now, duplicate the synth track.

Set the new track’s preset to Keys > Time Out.

Now turn the Time Out preset’s Reverb and Delay down.

We now have two identical MIDI tracks playing different presets, giving us a more involved sound. These sounds are reverb and delay free, giving us a blank canvas to add our own effect.
Group these two MIDI tracks together. This allows us to add an effect to the group that will affect both of them.

Now, add REPLIKA XT to the group, and set it to the Classics > Pad Land preset.

As you can hear, this has a transformative effect on the sound.
5. Create a counter melody
Now let’s add a counter-melody to give us another element to help flesh out the arrangement.
Add a new MIDI track, and this time select DUETS and the Hair Pluck preset.

Copy the pattern we’ve used here.

Turn the Reverb and Delay down.

Now duplicate this track, and select the Lead > 30 Degrees preset on the new track.

Turn the preset’s Reverb and Delay down.

Again, we now have a pair of presets playing the same MIDI, without reverb or delay, allowing us to add our own effect. Group these tracks together.

Now add Neoverb to the group, and select the Experimental > Airy Hall + Chamber preset.

Again, adding this effect really brings a new dimension to the sound.
6. Arrange your track
Here’s an example arrangement for this beat.

It starts with just drums, adding the chords on bar 5, the melody on bar 9, the bass on bar 13 and the counter melody on bar 17.
At this point all the elements have been added, so from here we swap out elements to keep things interesting.
On bar 21 the melody drops out. On bar 25 the counter-melody and chord drop out, and the melody returns. On bar 29 the counter-mellody reappears. On bar 33 both the melody and counter-melody drop out, and the chords return. On bar 37 the drums drop out, and we have a chord and bass outro.
7. Master your track
We can easily get a great-sounding master using Ozone 10 Elements. Simply put the plugin on the master bus, and it will prompt you to play back the loudest part of the track.

In the case of this project, the loudest part of the arrangement will be bar 17 onwards, where all the elements are playing. So, play this part of the project back. Ozone 10 Elements will analyze the input, and use its AI-powered technology to create bespoke settings to enhance your track. Select the Hip-hop/Rap target, and Ozone 10 Elements will tailor its settings to that genre.

Bonus: Getting an analogue-style mix with bx_console N
There’s one part of the Music Essentials Bundle we haven’t used in this tutorial: Brainworx bx_console N. This advanced plugin is ideal for producers who want to get an authentic, analogue-style sound, as it simulates 72 unique channels of a hardware Neve VXS console. The channel strip includes comprehensive dynamics and EQ sections, and if you’re a more experienced producer you’ll find it’s well worth taking the time to familiarize yourself with it. You can read more about how to use bx_console N with a direct link to its manual.

Start using the Music Essentials Bundle to make music for a good cause
Here we’ve seen how you can make your own beat from scratch with the Music Essentials Bundle. If you’d like to learn more check out our guides on music production, how to make a beat, mixing music, and how to master music.
Related articles
-

Behind the synth: A. G. Cook on stacked sawtooths and the creation of Super*Saw
Explore the extremes of stacked sawtooth waves with Super*Saw, a new synthesizer co-created with A. G. Cook. Learn how to…
-

Inside the evolution of orchestral sampling: an interview with ProjectSAM
Discover how ProjectSAM’s Lineage Series uses NKS and smart features to change orchestral sampling. Plus, save on instruments in our…
-

How New Constellations turn emotion into sound with Massive X
Go inside the studio with New Constellations. Learn how they use Native Instruments gear, happy accidents, and lifelong friendship to…
-

Citizen Kain on building emotion and space with Replika
Citizen Kain explains how Replika helped shape the rhythm, tension, and emotion behind his debut Eversun Records single “Moments.”…
-

The organic precision behind Calcou’s Anjuna release featuring Reaktor
Calcou shares how Reaktor, Monark, and Super 8 shaped the creative balance and live energy behind their new duo EP,…
-

14 NKS instruments that will change the way you create music
Discover 14 NKS instruments to freshen up your workflow. From lo-fi tape synths to cinematic strings, shop the Native Instruments…
-

Parallelle on crafting living basslines with Reaktor and TRK-01
Parallelle share how Reaktor and TRK-01 shape the bass and warmth in 11th Avenue, balancing analog depth with modern control.
-

Where will your sound lead you? Explore the Native Instruments Summer Sale
Save 30% on instruments, effects, and sounds in our Summer Sale. Find the tools to keep your tracks moving and…